6/30/23 Stand Out Creation and Top 5 at Scrapping4fun Challenges!
7/4/23 Winner at Jan’s Digi Stamps Challenges!
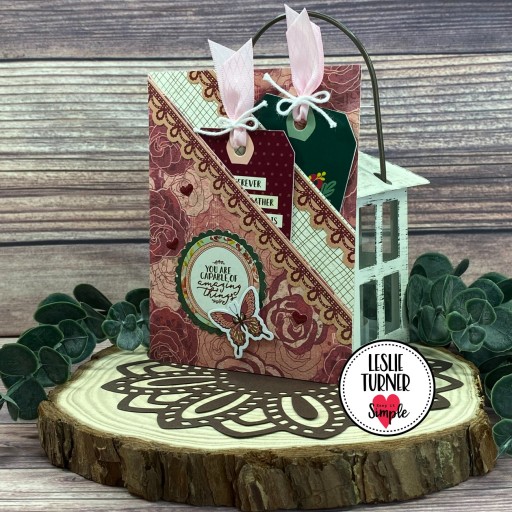
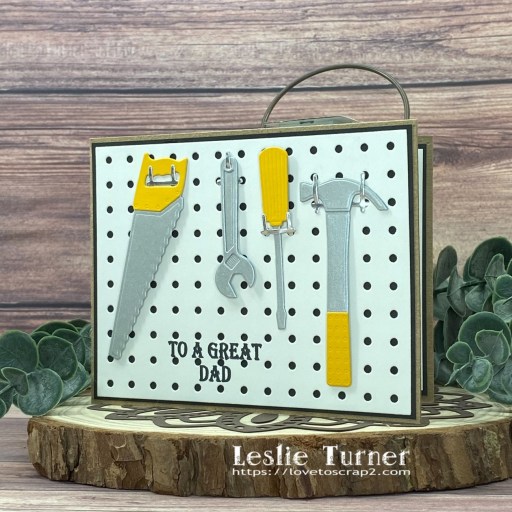
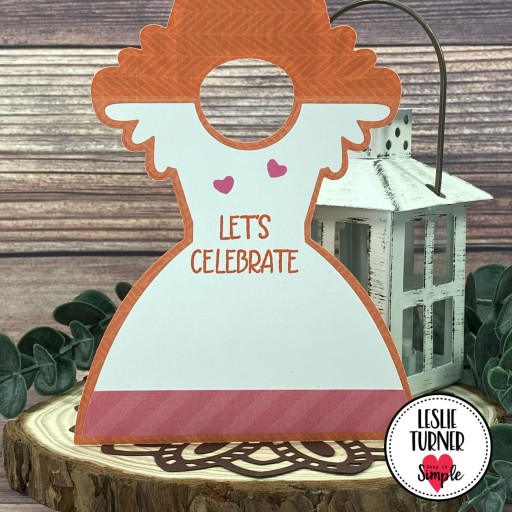
Hey everybody! Happy Hump Day – the weeks are FLYING by and here we are headed toward another weekend! But that’s not a bad thing, right?! I’m stoked to be back with another Keep It Simple DT inspiration project to share created with the amazing new Vintage Truck dies! I can’t get enough of this die set! I created a shaped card that can be for Father’s Day or a Dad’s birthday – or just because!
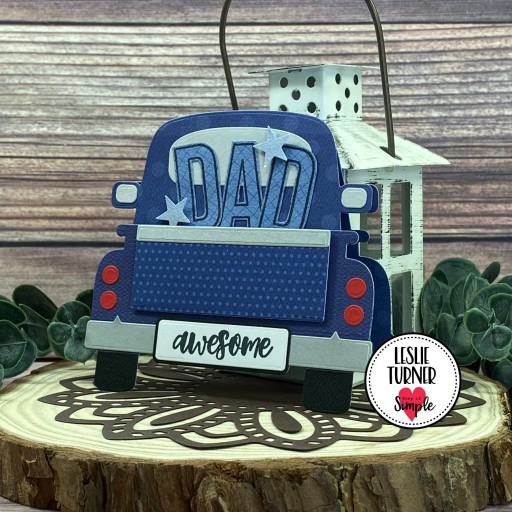
I die cut all the pieces from coordinating papers in the Royal 12×12 Collection Pack along with CutCardStock Pop Tone Black Licorice, Pop Tone Red Hot, Stardream Metallic Silver, Dolphin Gray, and Cougar Smooth 80# White cardstsock. Using the Belle Outline Alphabet stamp set, I stamped DAD in Memento Tuxedo Black ink and fussy cut the letters. I used the Stampin’ Up Itty Bitty Star Punch in my stash to punch a couple stars to go with the DAD letters. I stamped a sentiment from the Congratulations sentiment stamp set in black ink on the license plate which completed the card front.

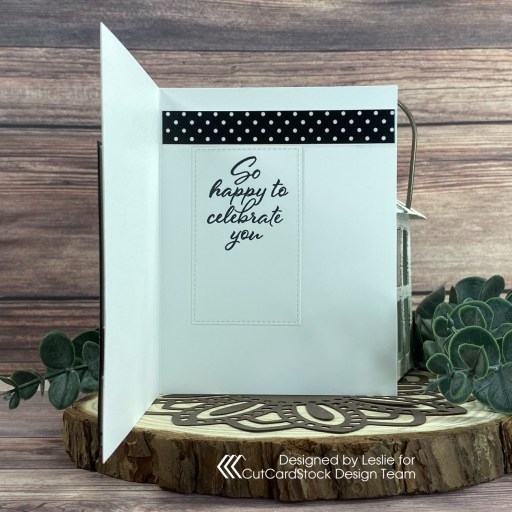
I die cut the inside panel using a My Favorite Things Stitched Square STAX and stamped a sentiment from the Birthday sentiment stamp set in Tuxedo Black ink. The finishing touch was stamping the small heart from the Get Well sentiment stamp set in Catherine Pooler Suede Shoes ink.

Sharing in the following challenges:
1. 613 Avenue Create: June 2023 – Anything Goes w/ optional Good Old Summertime (no twist)
2. A Perfect Time To Craft: June #6-2023 – Anything Goes
3. A Place To Start: June 2023 – Anything Goes
4. Classic Design Challenge: June #6 – Anything Goes
5. Crafting Happiness Challenges: #143 – Anything Goes
6. Creative Moments: #246 – Boys and Men
7. Cupcake Inspirations: #571 – Father’s Day/For Someone Special Masculine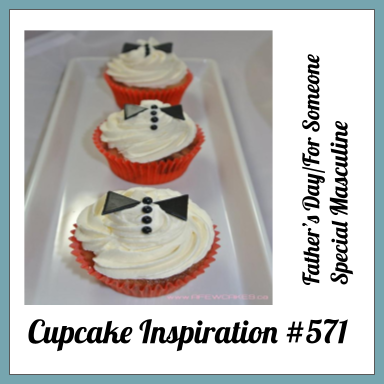
8. Jan’s Digi Stamp Challenges: June Anything Goes
9. My Time To Craft: #509 – Masculine
10. Scrapping4fun Challenges: #224 – Men/Boys
11. Shopping Our Stash: SOS498 – Let’s Hear It For The Boys
Keep It Simple products used:
Royal 12×12 Collection Pack
Vintage Truck Dies
Belle Outline Alphabet stamp set
Congratulations sentiment stamp set
Birthday sentiment stamp set
Get Well sentiment stamp set
Affiliate links are used in this post at no cost to you – I really appreciate your support!
Other products used:
Cardstock/Paper: CutCardStock Pop Tone Black Licorice, Pop Tone Red Hot, Stardream Metallic Silver, Dolphin Gray, and Cougar Smooth 80# White cardstsock
Ink: Memento Tuxedo Black ink, Catherine Pooler Suede Shoes ink
Dies/Punches: Stampin’ Up Itty Bitty Star Punch, My Favorite Things Stitched Square STAX
Accessories: Tonic Studios 12″ Guillotine Paper Trimmer, CutCardStock Plus High Capacity adhesive, Art Glitter Dries Clear adhesive, MISTI stamping tool, Big Shot, 1″ double-sided foam strip, Stampin’ Up mini dimensionals
I hope you’ve loved seeing this project as much as I loved creating it, and you’re inspired to get crafty! Be sure to check out ALL the fun goodies in the Keep It Simple store such as paper, stamps, die cuts, ephemera, washi tape and enamel dots to name just a few! You’ll go cray-cray! Be sure to Follow us on Facebook, Instagram, and Pinterest for lots of crafty inspiration! Thanks so much for stopping by today – we’ll see you next time!
Scrappy hugs,