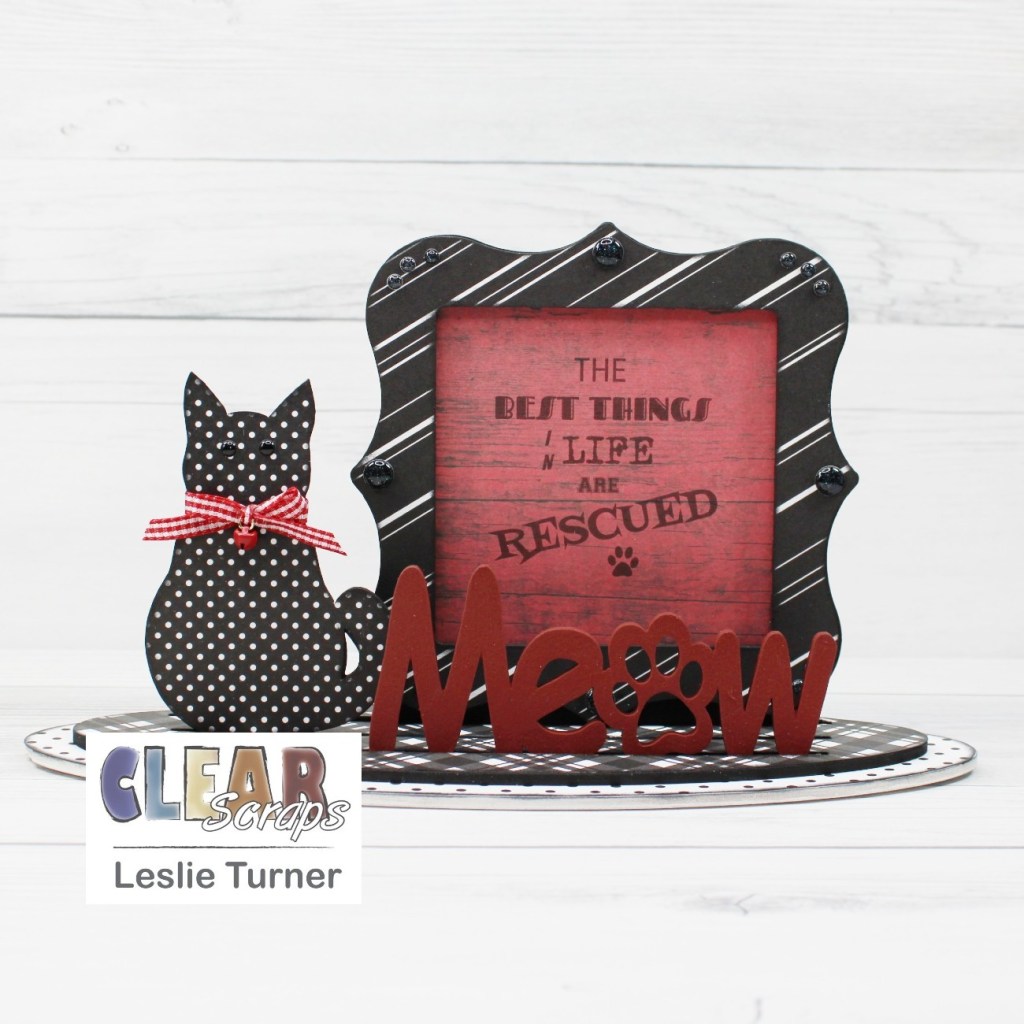
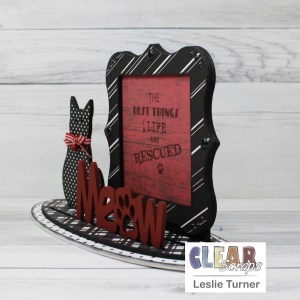
Hey, everybody! Hope you’re having a wonderful week and you’re not working too hard! I’m thrilled to be back on the Clear Scraps blog today with another awesome DT inspiration project! I had some 3-D Frameables fun with the Deco Frame and Meow-Cat Word n Shape and used a B&W + Red color combo which is one of my favorites! The 3-D Frameables are new in the store – you pick your frame and then you choose your theme. There are two base pieces (which attach to each other) which have long slots that the frame, word and shape fit into. This project is really close to my heart because my husband and I are ‘crazy cat people’ and we rescue. We have ten indoor fur babies with a catio and nine more outside (feral and semi-feral) with another catio in our fenced back yard!
I started by painting the smaller oval base, cat and frame with black chalk paint; the larger oval base with white chalk paint; and the Meow word with red chalk paint. I used four coordinating black and white patterned papers to cover the two oval bases, the cat and the front of the frame, and inked the edges of all the pieces with black soot distress ink.
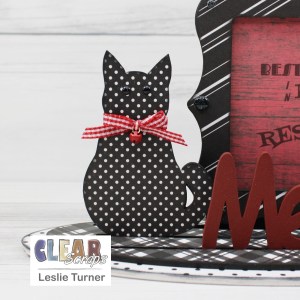
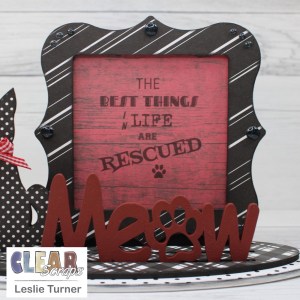
I added small black enamel dots to the cat for her eyes and tied a red and white gingham ribbon around her neck with a tiny red bell. I designed the sentiment on my laptop and printed it on red wood-look patterned paper, trimmed it, and sandwiched it between the frame pieces. Finally, I added glitter enamel dots to the corners of the frame to complete the project.
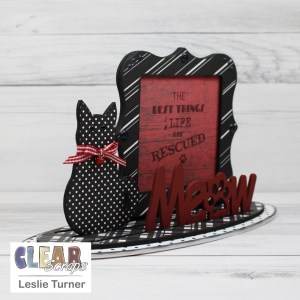
Here are couple more shots from different angles. I’m really loving how this turned out! These 3-D Frameables are so much fun, and the sky is the limit with regard to interchangeable frames, shapes and words!
Other products used: Cardstock/Paper: The Paper Cut Plaid, Diagonal Stripe, Black Mini Dots and Reverse Mini Dots patterned paper; Simple Stories Wood & Gingham Basics paper pad Ink: Ranger black soot distress ink Accessories: Folkart Rich Black, Adirondack White and Tuscan Red chalk paint; Bearly Art precision craft glue, brayer, Eyelet Outlet Black Enamel Dots and Black Glitter Enamel Dots, Studios Blackbird 1/4″ red and white gingham ribbon, Stampin’ Up Mini Jingle Bell
I hope you’ve enjoyed today’s project and you’re inspired to get those craft supplies out to play! Be sure to check out all the amazing acrylic, wood and chipboard goodies at Clear Scraps… OMGoodness, you won’t be disappointed! And head on over to the Clear Scraps Facebook Page for lots of inspiration! And while you’re at it, join the Clear Scraps FacebookCreative Group to connect with other Clear Scraps fans! Thanks so much for stopping by today – we’ll see you next time!
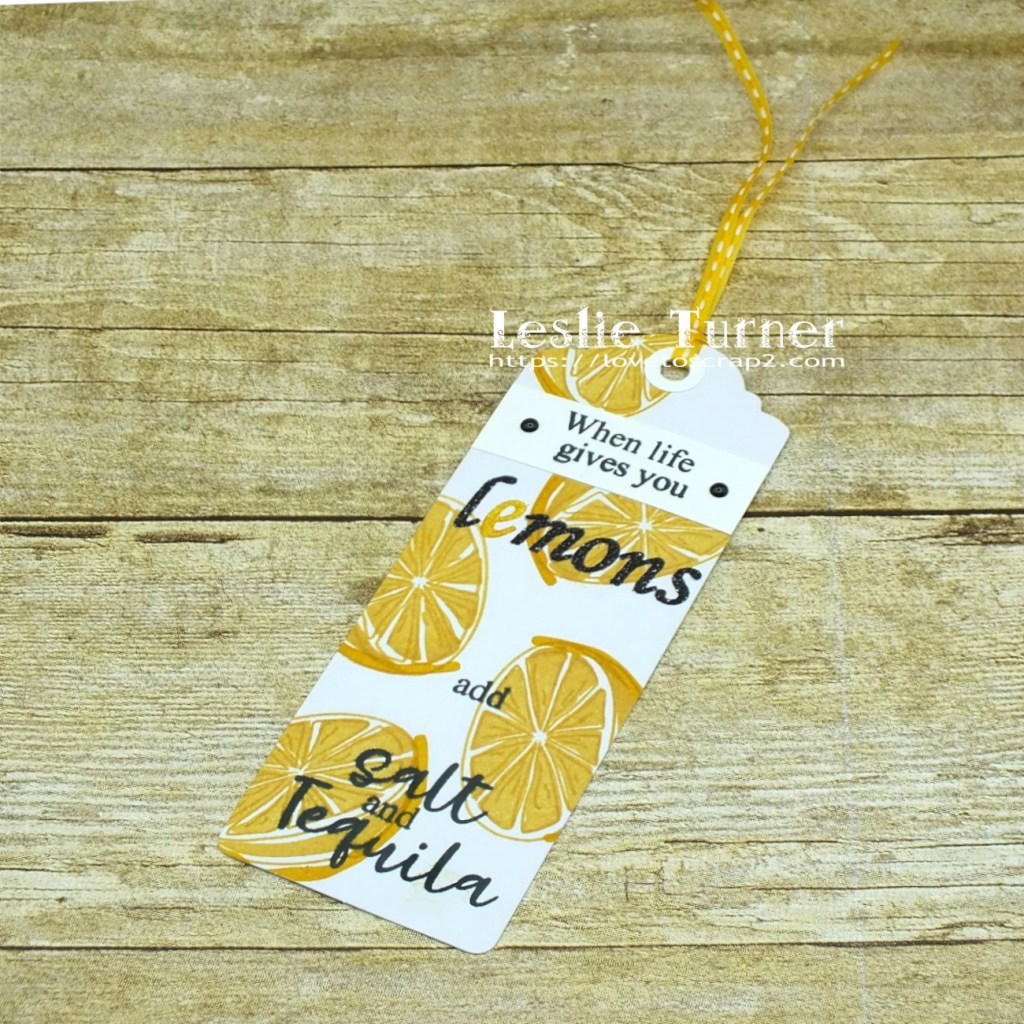
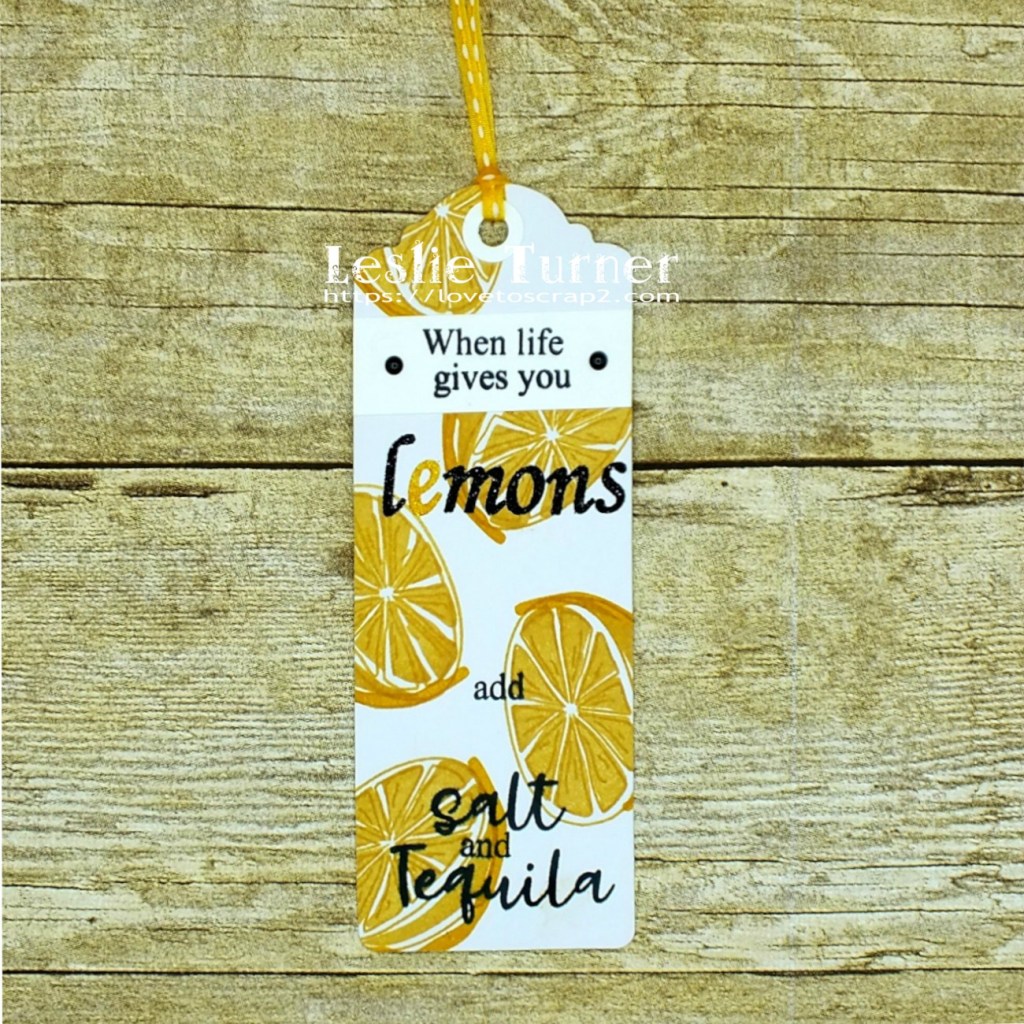
Hi everyone! Happy Friday – I can’t believe it’s the first day of October already! Where is the time going?! Our new challenge has launched over at Love To Scrap Challenge Blog and I’m thrilled to share my DT inspiration project for LTSCB #150 – Anything But A Card! We want to see anything you want to make for this challenge as long as it’s not a card! I created a fun bookmark using STAMPlorations Layered Citrus stamp set which is one of my favorites!
Using a plain white bookmark from my stash, I stamped the whimsical lemons randomly all over it. I stamped the first portion of the sentiment on a scrap piece of Neenah Classic Crest Solar White cardstock, trimmed it and adhered it to the top of the bookmark. I used glitter alpha letters for the word ‘lemons’ (all black letters except one which I colored yellow) and then stamped the rest of the sentiment from the stamp set in black ink. I made a hole reinforcement for the top with two circle punches and a scrap of white cardstock and added some narrow yellow ribbon. The final touch was the addition of a couple black enamel dots.
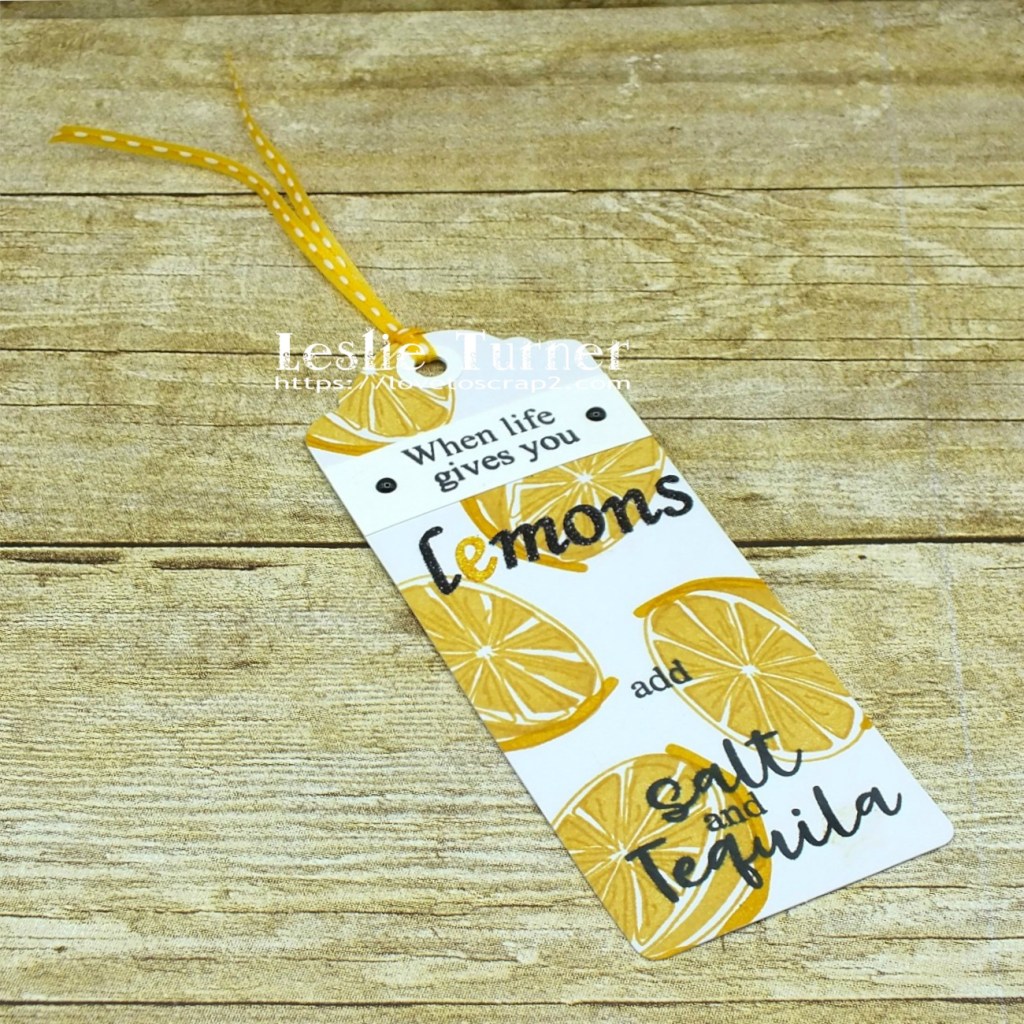
And one more look… such a fun project that is actually practical! ;)
Products used: Cardstock/Paper: Darice white bookmark, Neenah Classic Crest Solar White cardstock scrap Stamps: STAMPlorations Layered Citrus stamp set Ink: Stampin’ Up So Saffron, Daffodil Delight and Crushed Curry ink; Memento Tuxedo Black ink; Nuvo alcohol markers- 404, 405 Dies/Punches: Stampin’ Up 1/4″ and 1/2″ circle punches Accessories: Tim Holtz 8.5″ Guillotine Paper Trimmer, Bearly Art precision craft glue, MISTI stamp tool, Darice black and white glitter alpha stickers, Eyelet Outlet Black Enamel Dots, yellow ribbon scrap
I hope you’ve enjoyed today’s project and will link up a project with us this month that’s not a card! We’d love to see what you create! Thanks so much for stopping by today – we’ll see you again soon! ;)
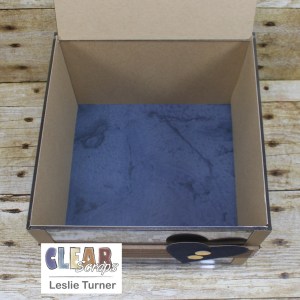
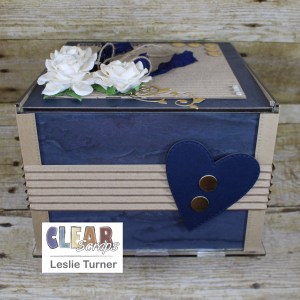
Hey, everybody! A super Happy Thursday and last day of September to you! We are barreling right into October! My ring light came in and I used it with my Ott lights for these photos, and I love how they turned out. I’m super stoked to have finally found the happy medium! I’m thrilled to be back on the Clear Scraps blog today with another awesome DT inspiration project! I created a pretty shabby chic keepsakes box using the Acrylic Keepsake Box with a variety of texture papers and corrugated cardstock, dies and punches, paper flowers and pearls, and ribbon and twine! This was SO much fun! The sky is the limit with the fun you can have with these! ;)
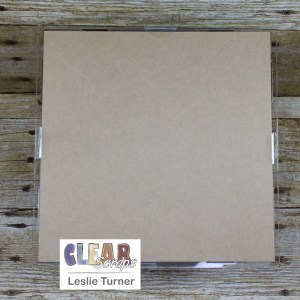
Prior to assembly, I layered blue texture paper onto kraft cardstock for the four side panels which I adhered to the inside of each panel so the paper can be seen through the acrylic. The texture looks like cement on some of the pieces and peeling cardboard on the others. :) I also adhered kraft cardstock to the inside of the lid and blue texture paper to the inside bottom for a more finished look to the inside once it was assembled. I adhered vertical strips on the outside edges where the sides connect, and used a stitched border die on both sides of each strip for a little interest. Then I embellished each side with a horizontal strip of larger channel corrugated cardstock and then adhered die cut hearts embellished with punched gold foil circles, keeping the sides fairly simple with emphasis on the shabby papers. I adhered kraft cardstock to the outside bottom of the box, again for a more finished look.
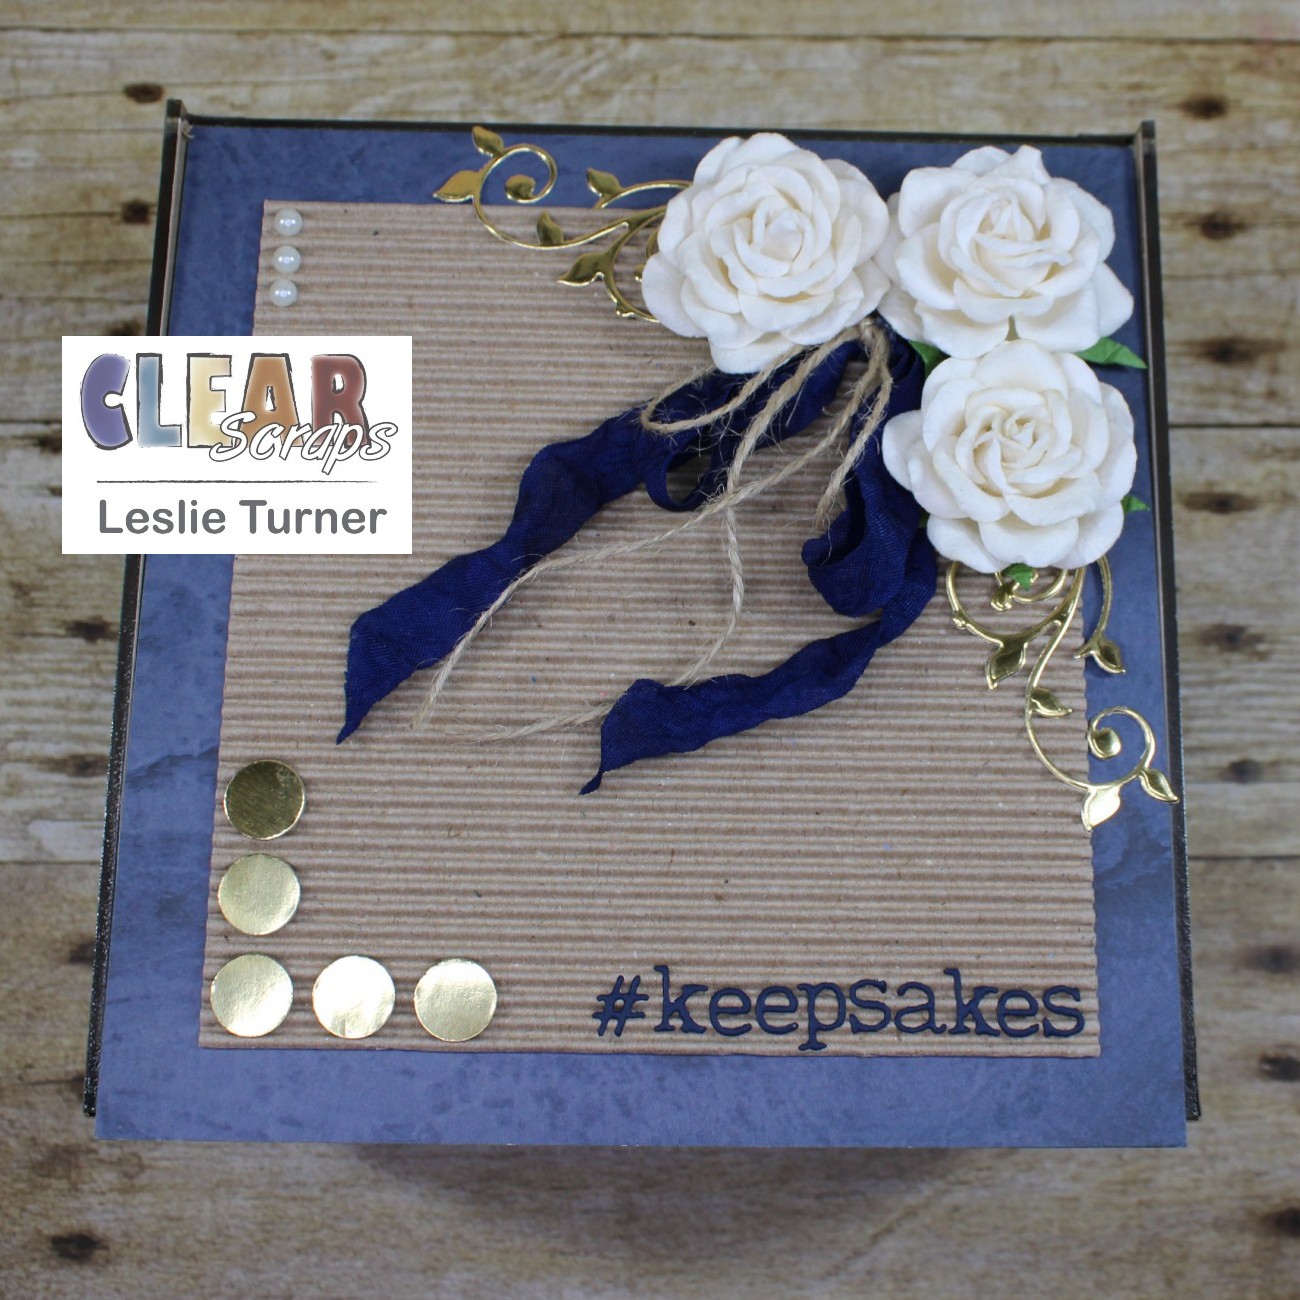
I used smaller channel corrugated cardstock for the square on the lid which I embellished with punched gold foil circles, gold die cut flourishes, large paper flowers, pearls, and simple ribbon and twine bows for the chic part of the design. I dyed white seam binding to get just the right color blue I needed for the ribbon. This was messy inky fun and I actually remembered to put on gloves, lol! The finishing touch was adding #keepsakes die cuts in the lower right corner.
Other products used: Cardstock/Paper: CutCardStock Basis 80# Navy cardstock, CutCardStock 80# Twine cardstock, corrugated cardstock, Hygloss gold foil cardstock, Paper Accents 120# kraft cardstock, The Paper Studio Entirely Textures 2 paper pad Ink: Ranger Denim Adirondack Color Wash Dies/Punches: Memory Box Stitched Heart Layers, Stampin’ Up 1/2″ circle punch, Lawn Fawn Stitched Borders, JustRite Stitched Oval and Vine dies, Sizzix Alphanumeric tiny Type Lower Thinlits Accessories: Tonic Studios 12″ Guillotine Paper Trimmer, Bearly Art precision craft glue, Big Shot, Ranger Distress Collage Medium, Wild Orchid Crafts paper flowers, Hug Snug chalk white seam binding, Canvas Corp Jute Cord, Darice flat back pearls
I hope you’ve enjoyed today’s project and you’re inspired to get those craft supplies out to play! Be sure to check out all the amazing acrylic, wood and chipboard goodies at Clear Scraps… OMGoodness, you won’t be disappointed! And head on over to the Clear Scraps Facebook Page for lots of inspiration! And while you’re at it, join the Clear Scraps FacebookCreative Group to connect with other Clear Scraps fans! Thanks so much for stopping by today – we’ll see you next time!
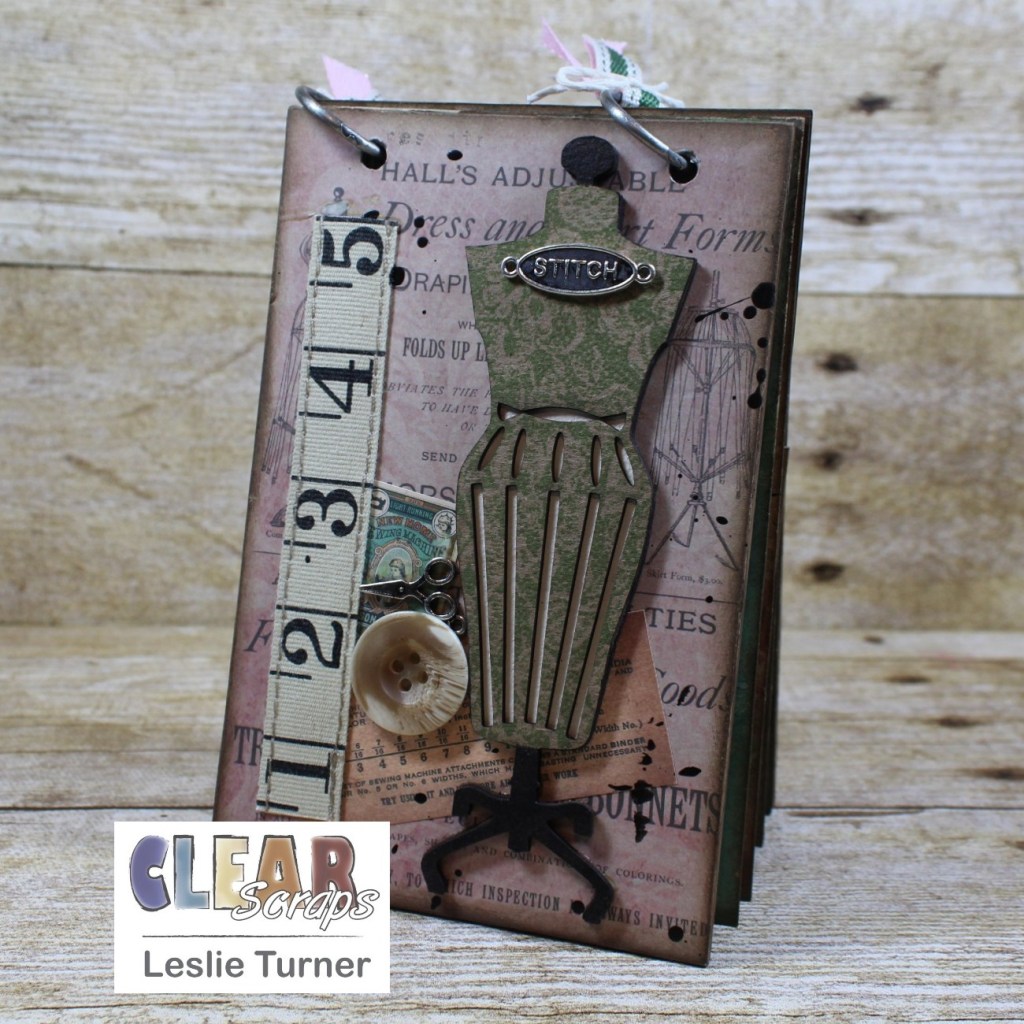
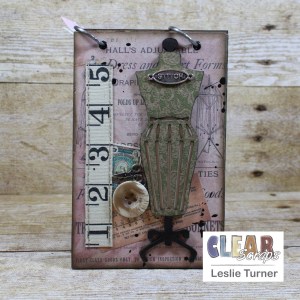
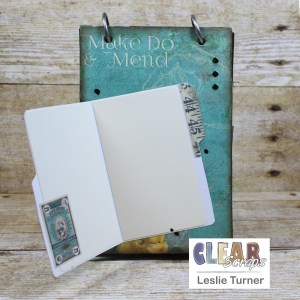
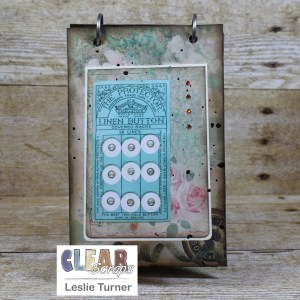
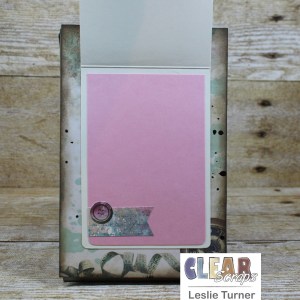
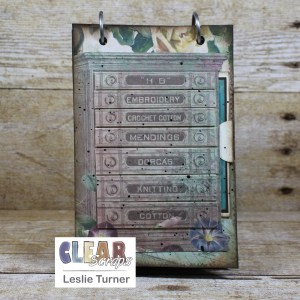
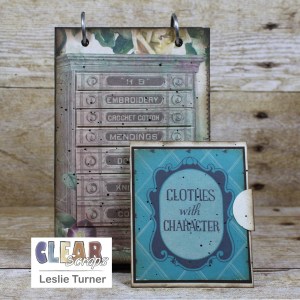
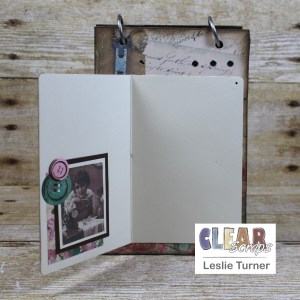
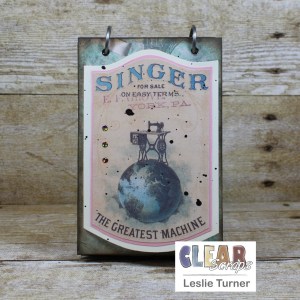
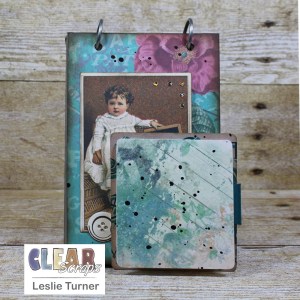
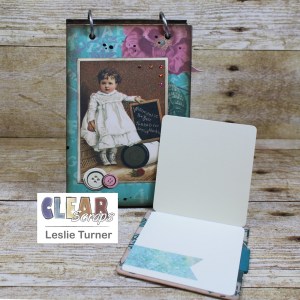
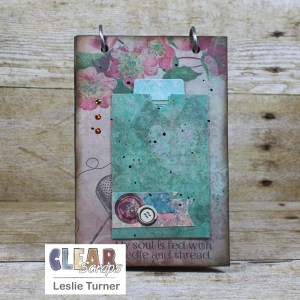
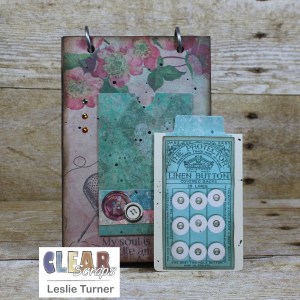
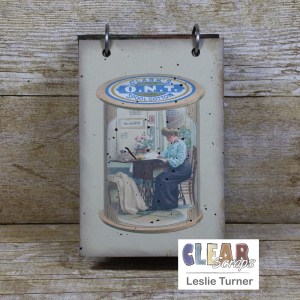
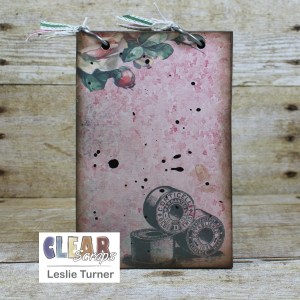
Hey, everybody! Another Happy Hump Day to you – SO hard to believe we’ve already seen the first week of September! I’m thrilled to be back on the Clear Scraps blog today with another awesome DT inspiration project! I created a very cool vintage sewing album using the Blank Wood Card with Dress Form Chipboard Embellishments! This was such a fun project! I layered the two dress forms together to make one embellishment with some really good dimension as the focal on the front of the album. I cut four pages for the inside and embellished the front and back of each page.
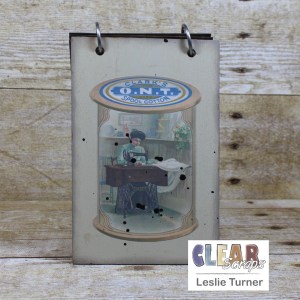
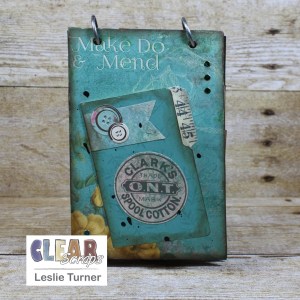
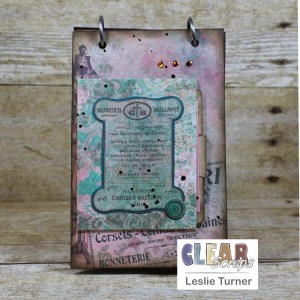
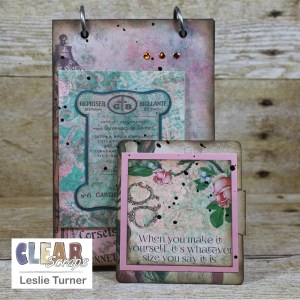
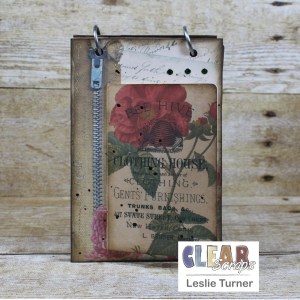
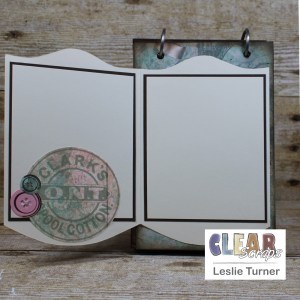
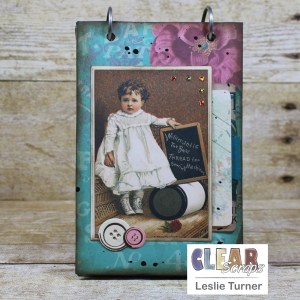
The front and back covers of the album were created with Blank Wood Card. In addition to the stamped and painted Dress Form Chipboard Embellishments on the front, I used a vintage button, charms, ruler ribbon, and elements from the digital accessories. I used Ephemoire’s Til The Bobbin Runs Out digital journal pages and accessories on the covers and all the pages. The edges of the covers and pages are inked with distress ink. The inside of the front and back covers are painted with chalk paint and each has a spool element from the digital accessories. All four of the pages on the inside are embellished with digital journal pages. They also have folders that open, flaps that open up and out, and pull-outs – all embellished with elements from the digital accessories along with stamped and die cut buttons, and all with plenty of room for journaling and/or photos. I did a little ink splattering with a fan brush on each page, trying not to over-do it because I love ink splatters, lol! And finally, I tied two ribbons on the binding rings with crafter’s cord. Here are shots of the front and inside cover, front and back all pages, and the inside and back cover.
Other products used: Cardstock/Paper: CutCardStock Basis Teal cardstock, CutCardStock Basis Brown cardstock, CutCardStock Baronial Ivory cardstock, CutCardStock Pop-Tone Bubblegum cardstock, CutCardStock Sandcastle cardstock Stamps: Great Impressions Lace background stamp, Ephemoire Til The Bobbin Runs Out digital journal pages and accessories, Sunny Studio Cute As A Button stamp set Ink: Memento Bamboo Leaves ink, Ranger Walnut Stain distress ink Dies/Punches: Stampin’ Up 1-3/4″ circle punch, Stampin’ Up 1″ circle punch, Fiskars 2-1/2″ circle punch, Kadomaru Pro corner rounder, Sunny Studio Cute As A Button die set Accessories: Folkart Java, Oatmeal and Sheepskin chalk paint; MISTI stamp tool, 7 Gypsies binding rings, Tim Holtz idea-ology Ruler Ribbon, 3 Girl JAM vintage button, Blue Moon charms from stash, Ranger distress collage medium, Big Shot, fan brush, Really Reasonable Ribbon pink twill and olive canvas ribbon, Hemptique Bamboo crafting cord, Stampendous green and pink Dot Sparklers
I hope you’ve enjoyed today’s project and you’re inspired to get those craft supplies out to play! Be sure to check out all the amazing acrylic, wood and chipboard goodies at Clear Scraps… OMGoodness, you won’t be disappointed! And head on over to the Clear Scraps Facebook Page for lots of inspiration! And while you’re at it, join the Clear Scraps FacebookCreative Group to connect with other Clear Scraps fans! Thanks so much for stopping by today – we’ll see you next time!
Hi everybody! I hope you’re having a fabulous weekend and doing something fun! I’m a little late with this post but I’m thrilled to be showcasing three more projects created with the Paper Goods over at STAMPlorations! As is the norm when playing with STAMPlorations goodies, I’m having a blast! Affiliate links are used in this post at no cost to you. I really appreciate your support! These projects were shown on the STAMPlorations blog on August 23rd which was the day after I got home from the hospital after suffering a heart attack. I had what they call a widow-maker’s heart attack with 100% blockage in my left anterior descending. I spent four days in the hospital and came home with a ton of medications that I’ll be on for the rest of my life, along with lots of diet changes and an exercise regimen. I’ve lost ten pounds but I certainly don’t recommend having a heart attack to do it, lol! ;)
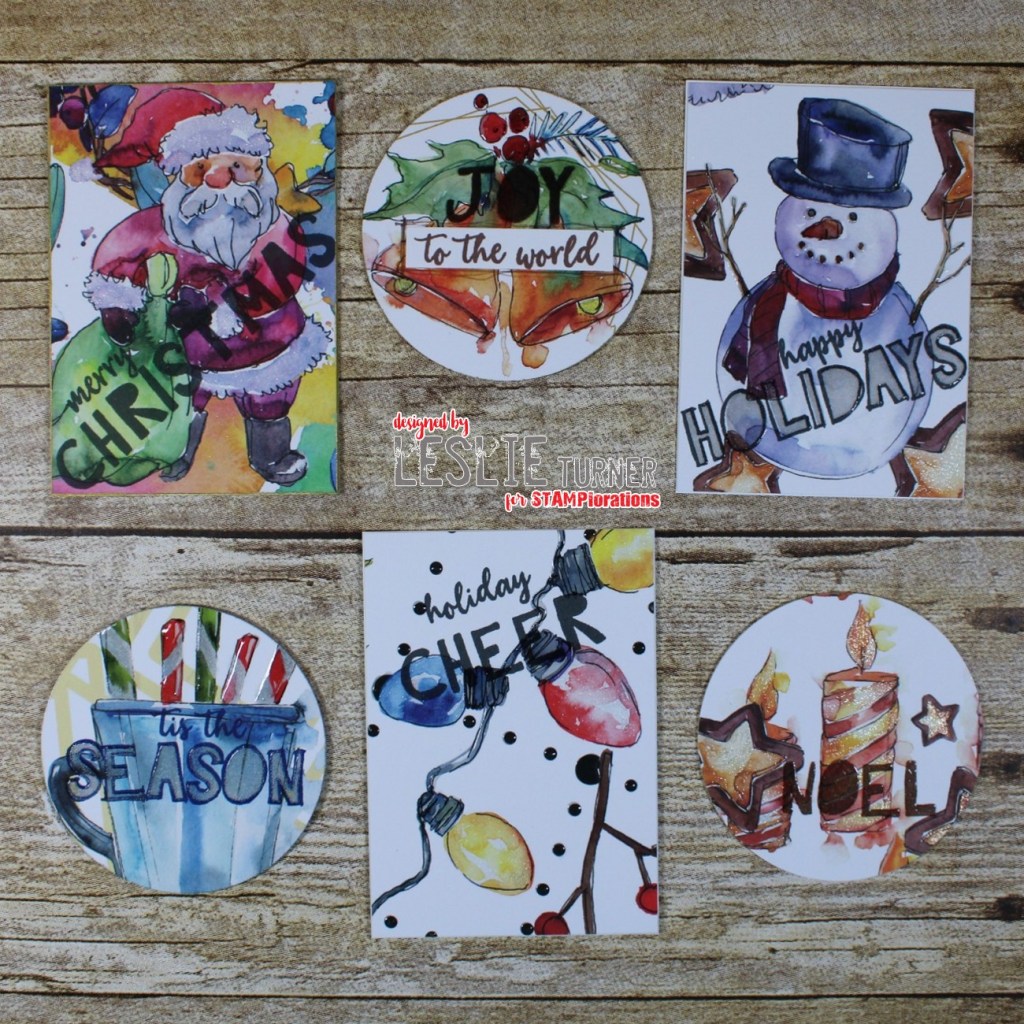
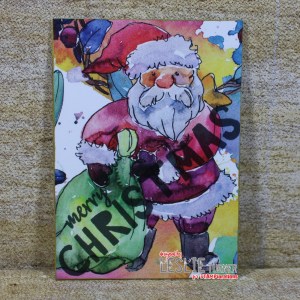
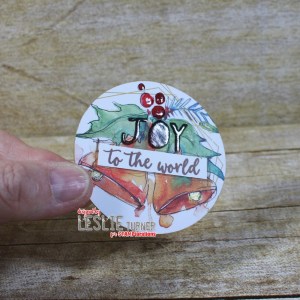
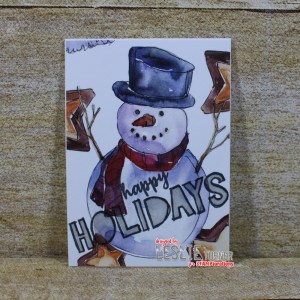
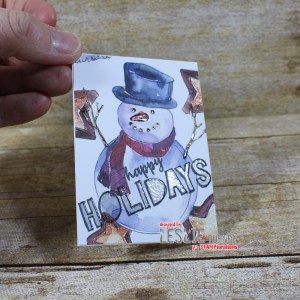
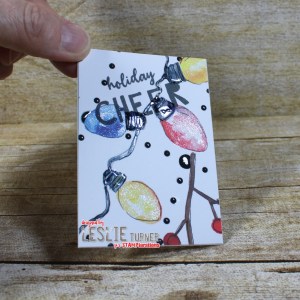
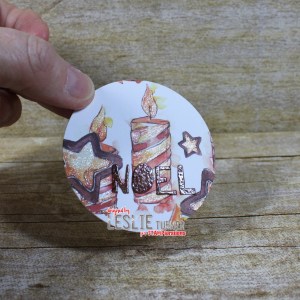
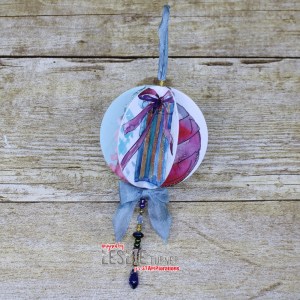
So the posts you’ve seen in my blog over the past two weeks were scheduled in way in advance, and this post is the first fresh post I’ve written since I’ve been home from the hospital. Now, for the fun stuff… for this STAMPlorations feature I have created three fun Christmas projects using the Christmas Backgrounds ATC #1 Ephemera, available in the Paper Goods section of the store. These ATC Backgrounds are so awesome and can be used to create not only artist trading cards, but tags and ornaments as you’ll see here shortly! My first project is a set of six ATCs, cards and coins, featuring the Christmas Backgrounds ATC #1 Ephemera with stamped sentiments from the Joy clear stamp set. All have heat embossing and/or glossy or shimmer overlay. These all have some nice shine going on!
I cut and punched the ATC bases from Neenah Classic Crest 80# Solar White cardstock and adhered them to the back of the individual card and coin panels trimmed and punched from the Christmas Backgrounds ATC #1 Ephemera. I stamped sentiments on each one from the Joy clear stamp set in black, brown, blue, silver and gold ink, and added clear embossing, Glossy Accents, Clear Star Gelly Roll pen, and Crystal Clear Sparkle Overlay marker to embellish each one. I ran gold and silver paint pens around the edge of each ATC to finish them off. Here is a straight and hand-held angle shot of each one (pardon my thumb, lol):
Other products used: Cardstock/Paper: Neenah Classic Crest 80# Solar White cardstock Ink: Catherine Pooler Suede Shoes, Black Jack and Over Coffee ink; Delicata Golden Glitz and Silvery Shimmer ink; Versamark, Sakura Clear Star Gelly Roll pen, Spectrum Noir Crystal Clear Sparkle Overlay marker, Memento Rich Cocoa marker, Posca Gold and Silver pens Dies/Punches: Fiskars 2-1/2″ circle punch Accessories: Tonic Studios 12″ Guillotine Paper Trimmer, Bearly Art precision craft glue, MISTI stamp tool, Hero Arts clear embossing powder, Glossy Accents
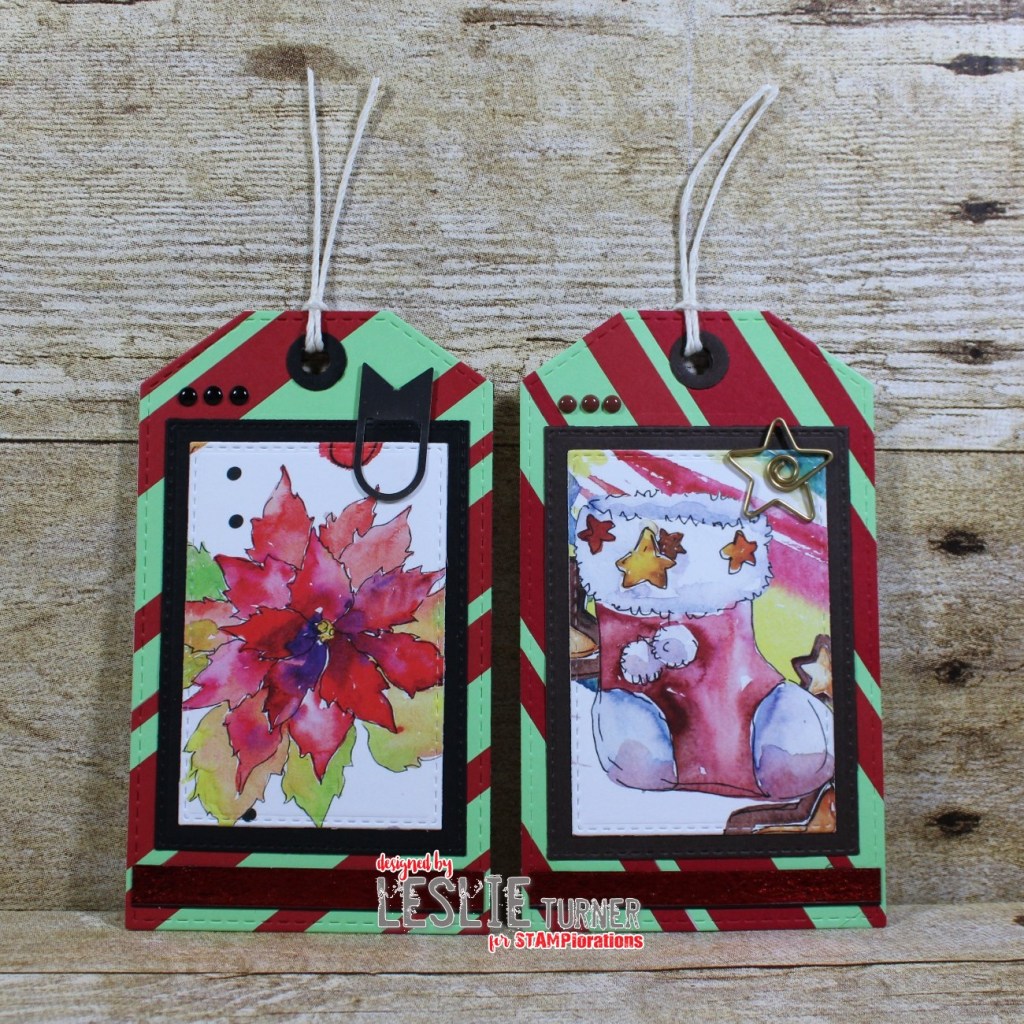
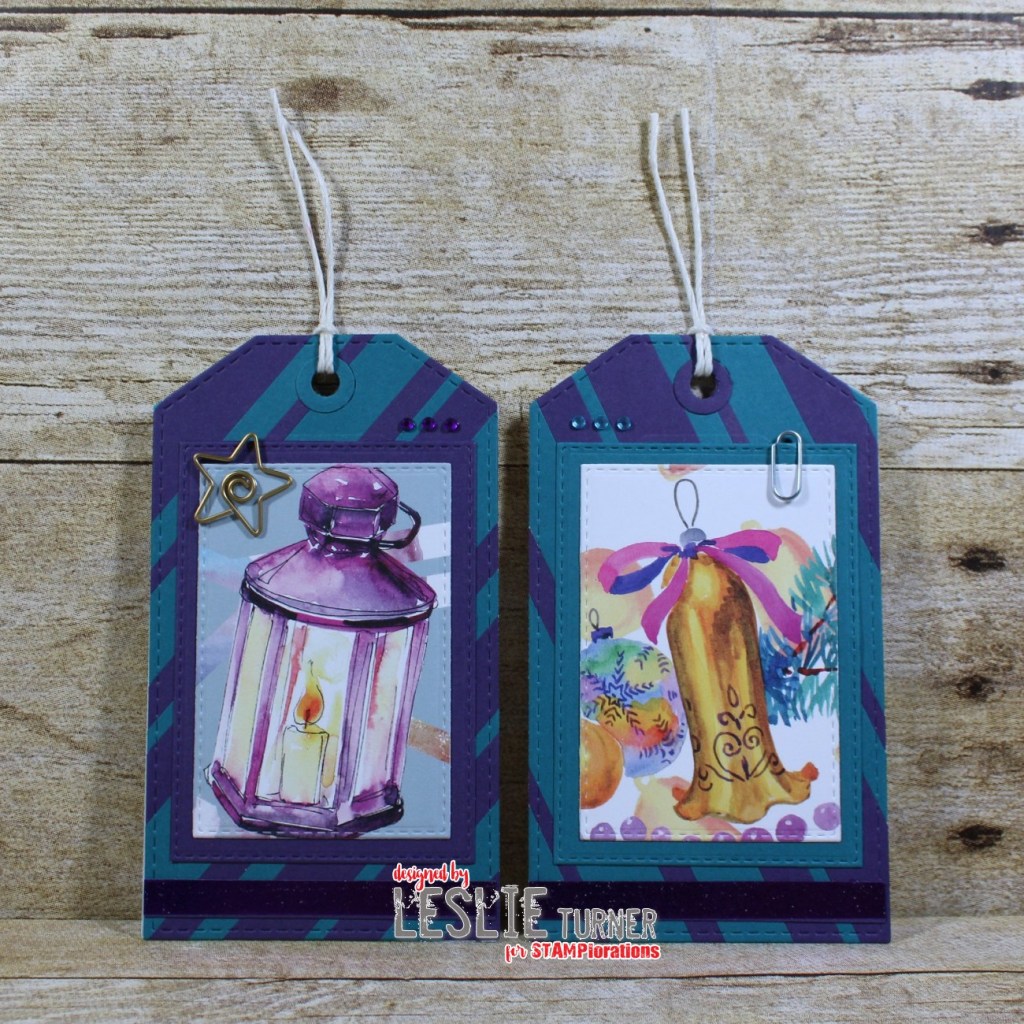
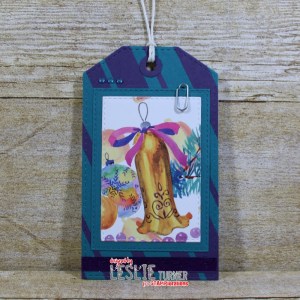
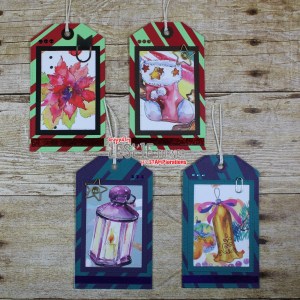
My second project is a set of four Christmas tags also featuring the Christmas Backgrounds ATC #1 Ephemera. I created two of these tags in the traditional colors of red and green, and the other two in non-traditional colors of teal and purple.
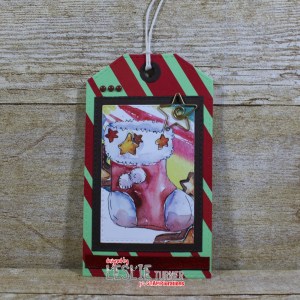
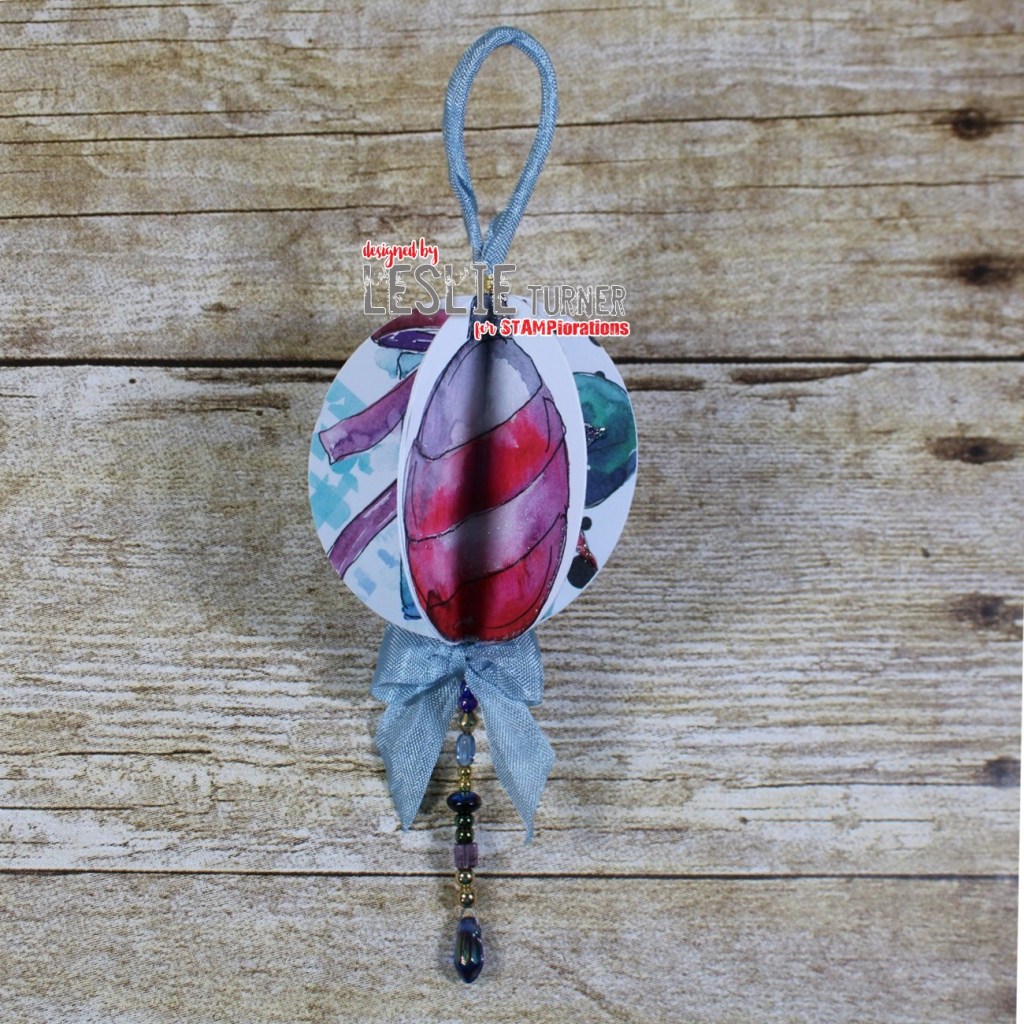
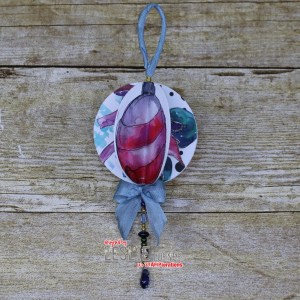
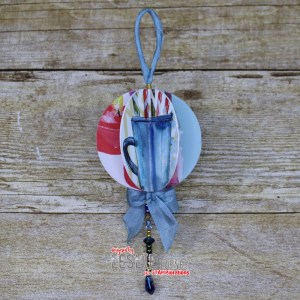
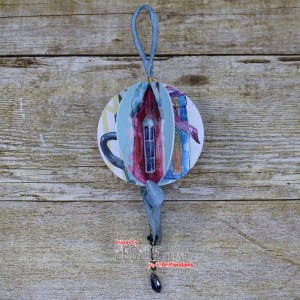
Ornaments are super easy to make. First, I created a beaded tail and loop for the top. I punched circles from six of the images from the Christmas Backgrounds ATC #1 Ephemera, scored them down the middle, and adhered each side to the next, trapping the beading wire and ribbon in the center, with a simple bow adhered at the bottom.
I hope you’ve enjoyed these projects and you’re inspired to get crafty! Be sure to check out all the amazing paper goods, stamps, dies, stencils, digis and other crafty goodies at the STAMPlorations main, outlet and digital stores! Use code STAMPGIRLLESLIE for a 20% discount on your orders in the store (with unlimited uses)! And there is A LOT going on over at the STAMPlorations blog – tons of creative inspiration, tutorials, promotions and giveaways – all month long! If you’ve never visited, you are definitely in for a good time! When you do visit, be sure to leave comments on the posts! Every month Shery draws seven random winners from all the posts published during the month, so the more posts you comment on, the more chances you have to win! And be sure to Follow STAMPlorations on Facebook, Instagram and Pinterest for more creative inspiration! Thanks so much for stopping by today – we’ll see you next time! ;)
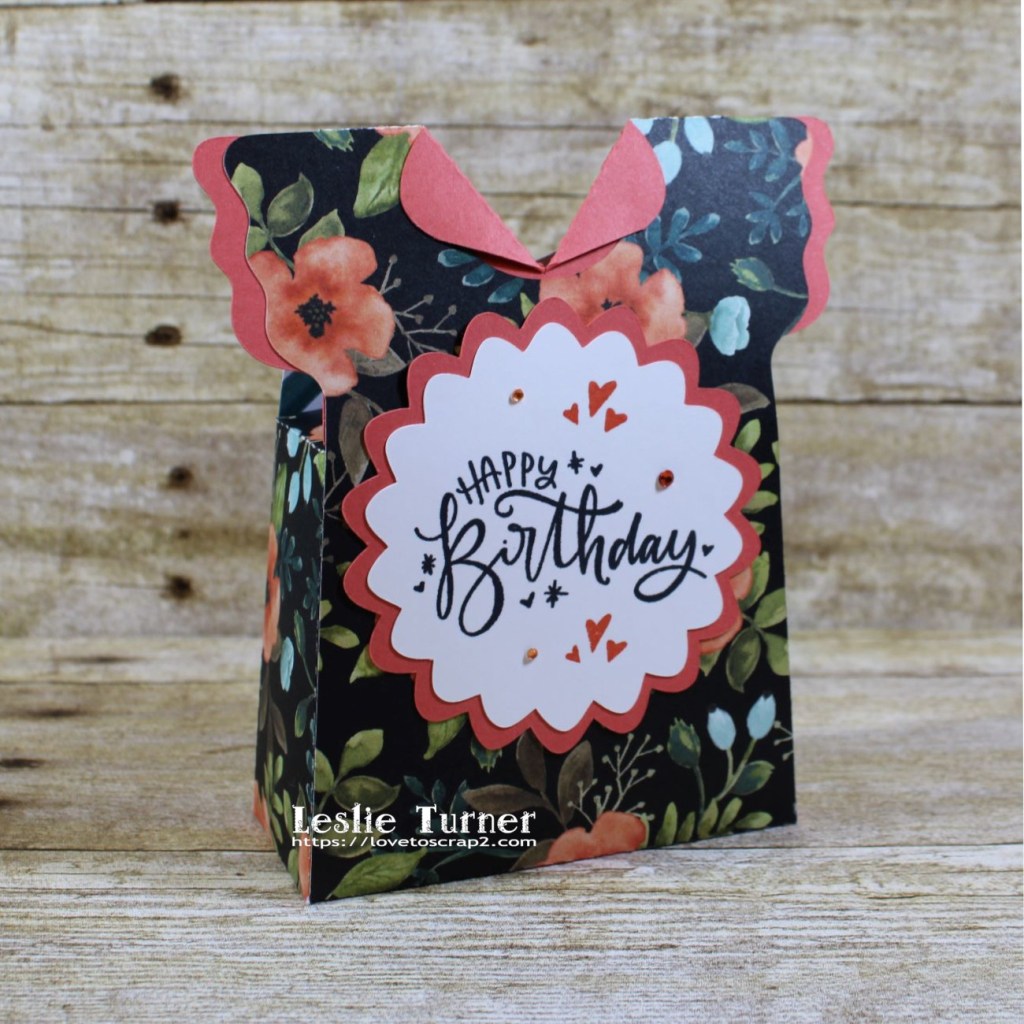
Hi friends, Happy Monday! Sure seems like Mondays are rolling around mighty fast these days, then in the blink of an eye, it’s Friday! I need more hours in a day, lol! How about you?! Affiliate links are used in this post at no cost to you. I really appreciate your support! I have an adorable birthday gift bag to share this morning that I’m entering into The Outlawz Festive Fridays Challenge where the themes to choose from are Birthday, Get Well, Christmas and Anything Goes! I actually created this (using a SNC Canvas cut file) for an earlier challenge and missed uploading it, so I waited for the Birthday theme to roll around again, and here we are! ;)
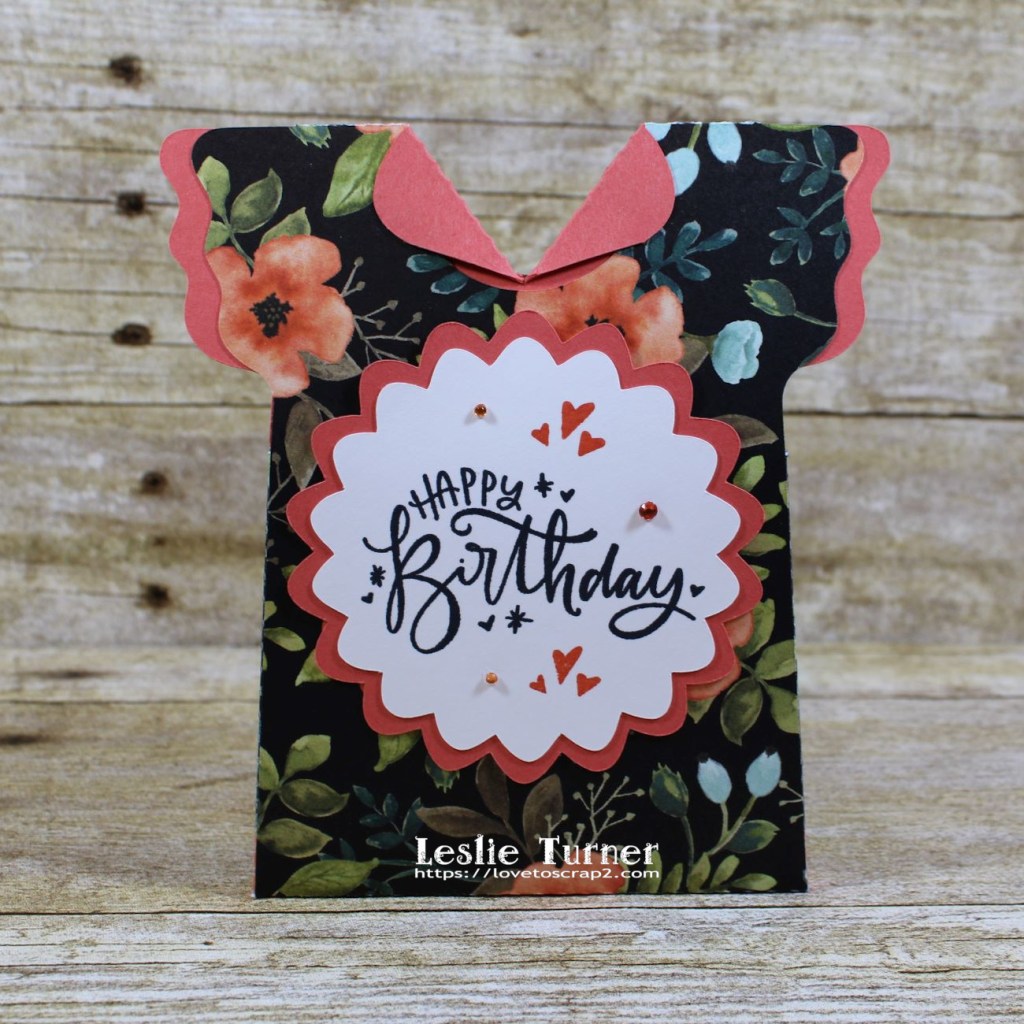
I cut the pieces for the dress from Stampin’ Up Calypso Coral cardstock and Stampin’ Up Whole Lot of Lovely DSP, and the sentiment panels from Stampin’ Up Calypso Coral cardstock and Neenah Classic Crest 80# Solar White cardstock, then assembled it. I stamped the Brutus Monroe sentiment and little hearts in Memento Tuxedo Black ink and Catherine Pooler Mandarin Spice ink, and then added some orange gemstones. I added some tiny magnets for closure to complete the project.
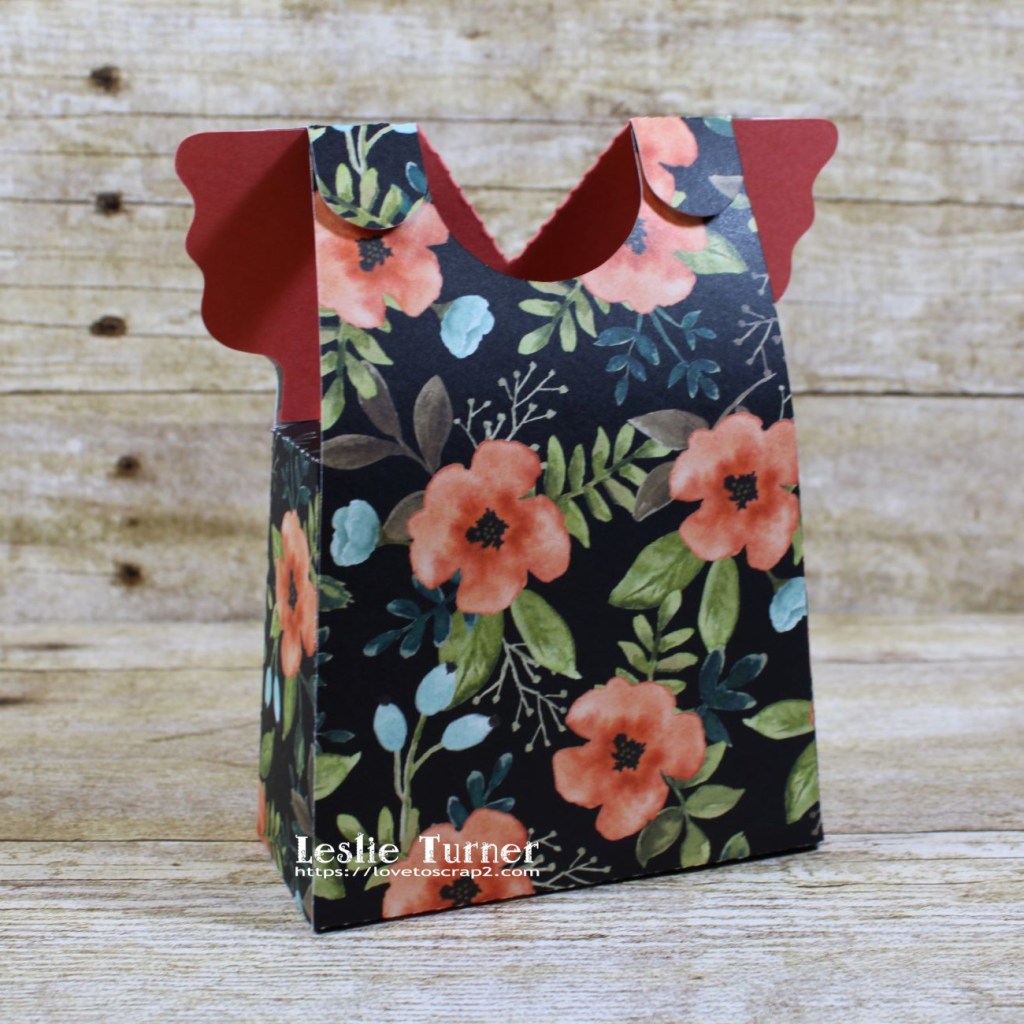
Here’s a view from the back.
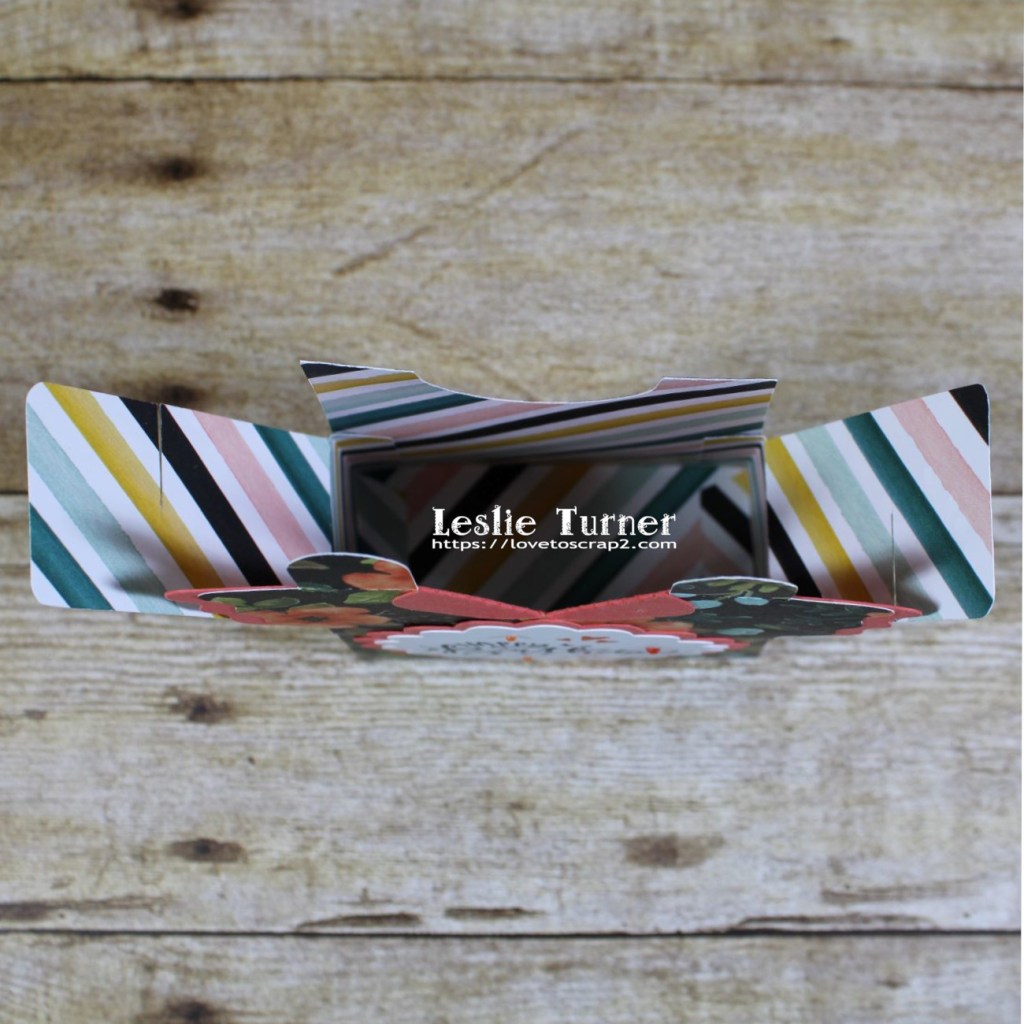
And here’s a peek of the inside. So adorable! This was an easy one and could be used for lots of different occasions!
Products used: Cardstock/Paper: Stampin’ Up Calypso Coral cardstock, Neenah Classic Crest 80# Solar White cardstock, Stampin’ Up Whole Lot of Lovely DSP Stamps: Brutus Monroe Super Sentimental stamp set Ink: Memento Tuxedo Black ink, Catherine Pooler Mandarin Spice ink Dies/Punches: SNC Canvas Dress Gift Box cut file Accessories: Brother Scan N Cut, Bearly Art precision craft glue, Brutus Monroe Mini Disc Magnets, Tim Holtz Distress Collage Medium, Darice orange gemstones
I hope you’ve enjoyed this project and will come over and join in all the fun at The Outlawz Challenges! Lots of fun going on! Thanks so much for stopping by today – we’ll see you next time! ;)
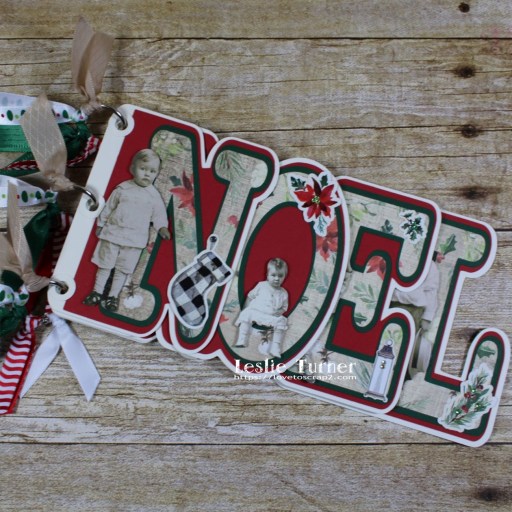
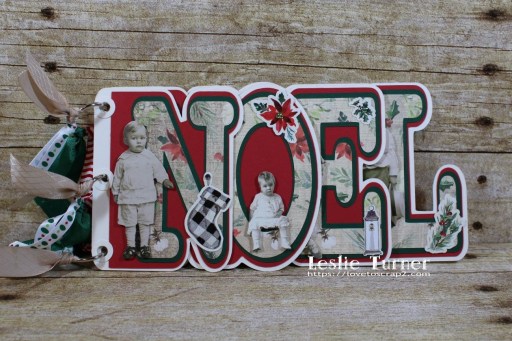
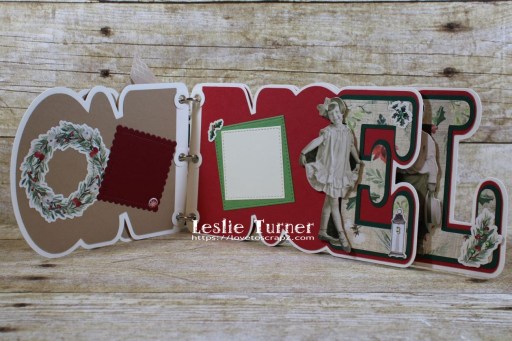
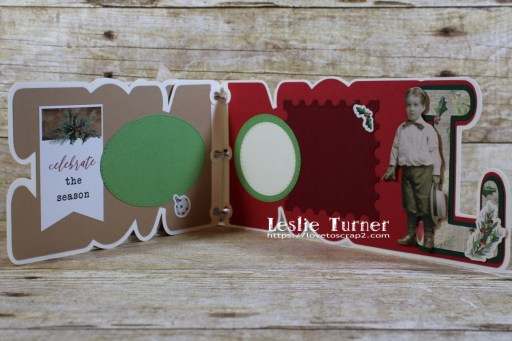
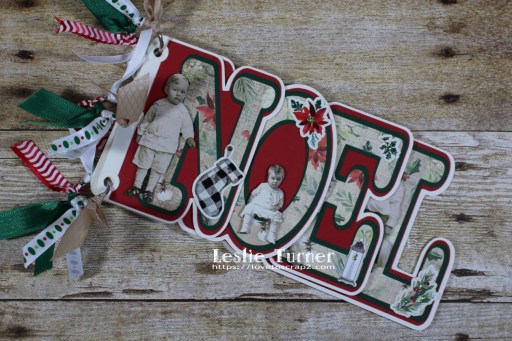
Hey everybody! I’m back with another project for The Outlawz Challenges, and this was truly a fun one to create! My Scan N Cut doesn’t get used nearly enough since I stepped down from the Simply Crafty SVGs DT last year, and I sure enjoy myself every single time I crank her up! Affiliate links are used in this post at no cost to you. I really appreciate your support! This adorable Noel word book is for The Outlawz Twisted Thursday Challenge where the challenges are always Anything Goes with a twist (as the name suggests), and the twist this time is Christmas in July! I used Carta Bella Christmas papers and elements, Tim’s Paper Dolls, and an assortment of die cuts for photos and journaling.
And one more peek… love how this turned out! Without being ‘over-done’ there’s lots of room to document the Christmas holiday!
Add a title
Products used: Cardstock/Paper: CutCardStock Basis 110# Natural cardstock, CutCardStock Basis Green cardstock, CutCardStock Basis Red cardstock, CutCardStock Basis Light Brown cardstock, Neenah Classic Crest Baronial Ivory cardstock, CutCardStock Pop-Tone Gumdrop Green, CutCardStock Basis Dark Red cardstock, Carta Bella Christmas Collection Kit Ink: Nuvo alcohol marker collections- Sunshine Yellow, Woodland Greens, Fair Skin Tones Dies/Punches: My Scrap Chick Noel Word Book cut file, Stampin’ Up 1/2″ and 1/4″ Circle Punches, Memory Box Stitched Oval Layers, Memory Box Stitched Circle Layers, Memory Box Stitched Rectangle Layers, My Favorite Things Stitched Square STAX Die-namics, My Favorite Things Stitched Rectangle STAX Die-namics, My Favorite Things Stitched Mini Scallop Square STAX Die-namics, My Favorite Things Stitched Mini Scallop Oval STAX Die-namics, My Favorite Things Stitched Mini Scallop Circle STAX Die-namics, Spellbinders Postage Stamps dies Accessories: Brother Scan N Cut, Bearly Art precision craft glue, Tim Holtz Paper Dolls, Darice tiny iridescent gemstones, Really Reasonable Ribbon Christmas Celebrations and Diamond Satin Vintage Ribbon Assortments
I hope you’ve enjoyed this project and will come over and join in all the fun at The Outlawz Challenges! Lots of fun going on! Thanks so much for stopping by today – we’ll see you next time! ;)
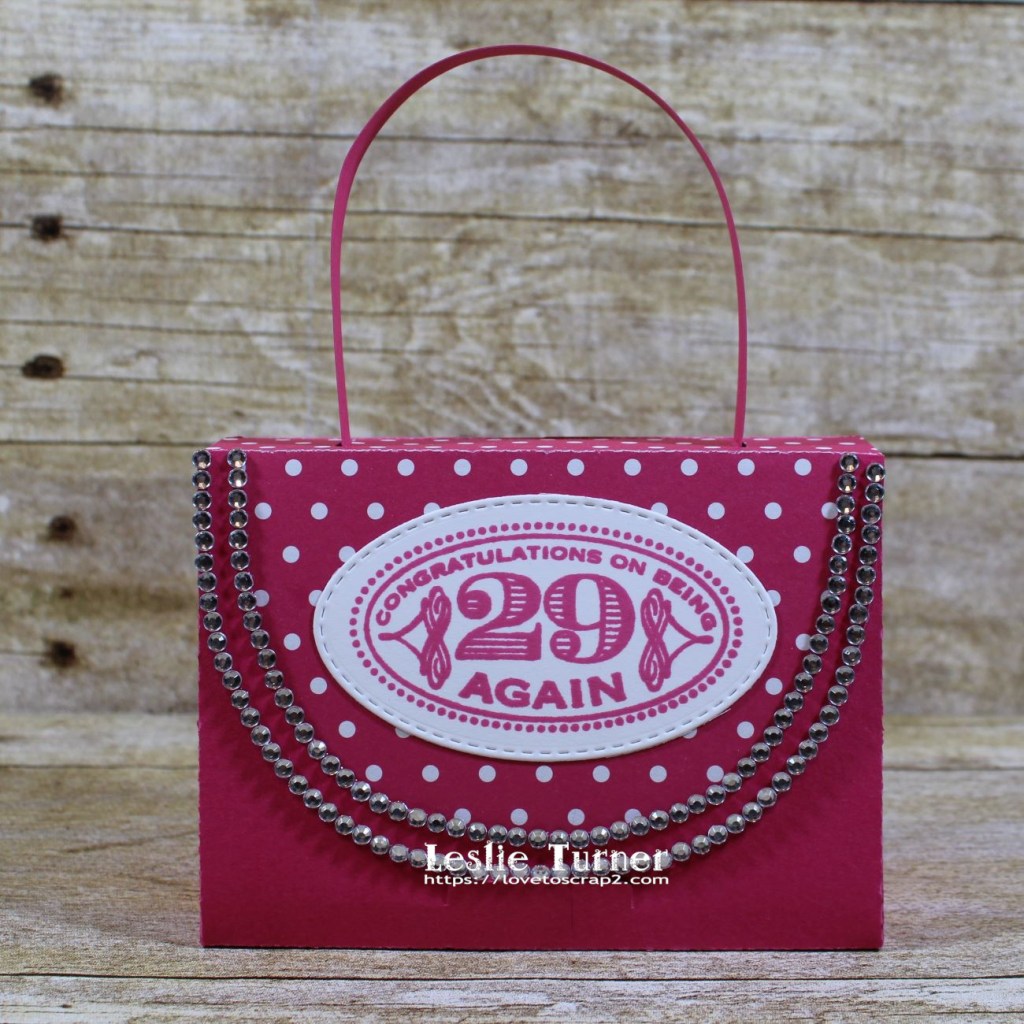
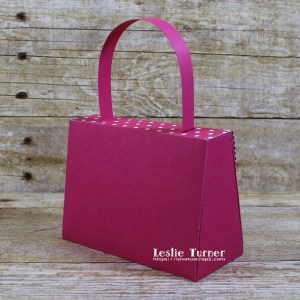
Hello again, everybody! I’ve popped back in once more today to share a project for The Outlawz Festive Fridays Challenge! I’ve been intermittently playing with my Scan N Cut over the past several weeks creating some pretty fun projects! Affiliate links are used in this post at no cost to you. I really appreciate your support! I mentioned in my last post that we’ve been busy this week and I’ve had a rough time remembering what day it is, and actually created this handbag gift box for the last Festive Fridays Challenge (Special Birthday theme) which I thought had already ended, lol! So a new challenge really did actually start today and the themes to choose from this time are Christmas, Wedding, Girly Birthday, Anniversary or Father’s Day, and this super adorable gift box fits the Girly Birthday theme!
I cut the gift box base and handle from American Crafts Taffy cardstock, and panels for the top and front flap from Colorbok Seeing Dots (pink) cardstock. I stamped that massively fun sentiment on a scrap of Neenah Classic Crest 110# Solar White cardstock in pink ink, cut it with a stitched oval die and adhered it to the front of the gift box. The final touch was adding a double row of clear jewel bling strips around the front flap.
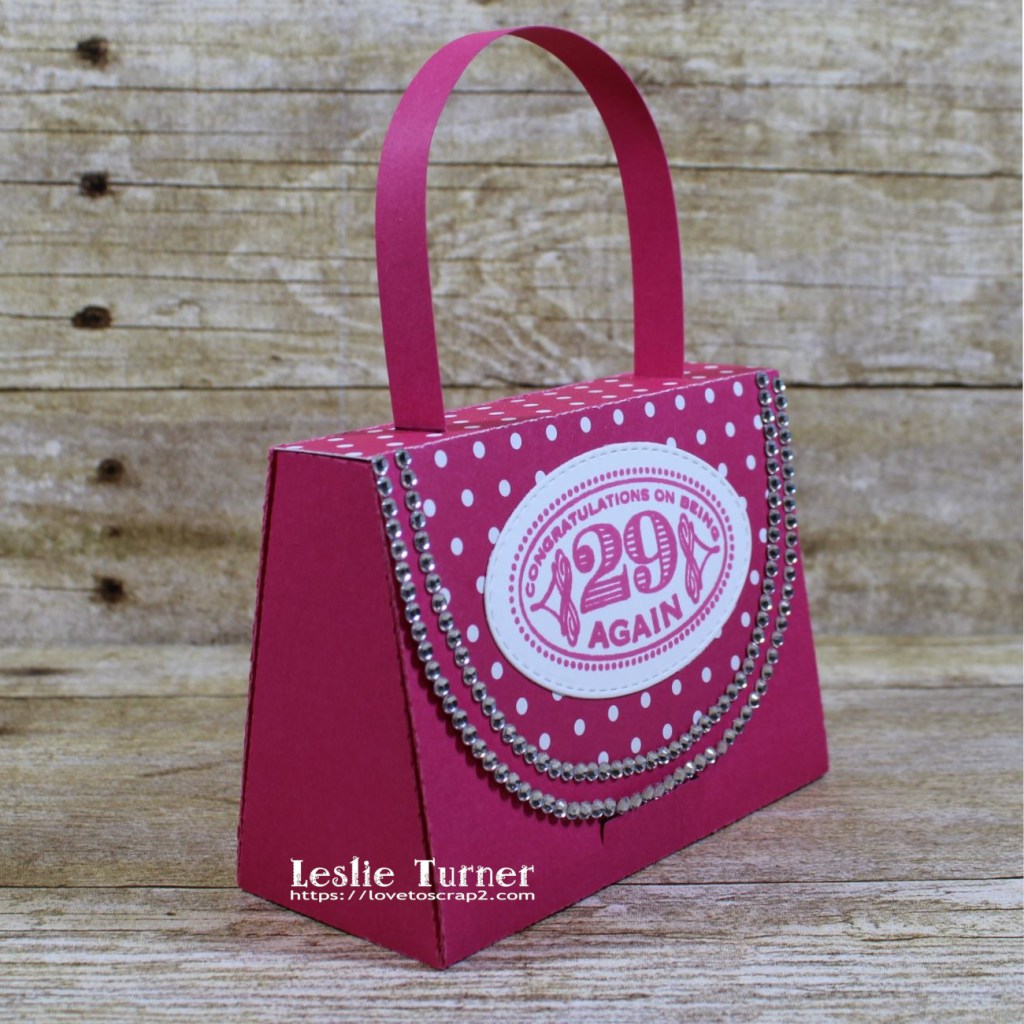
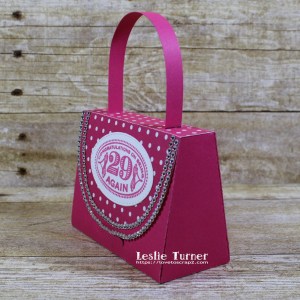
Here are a couple more angled shots.
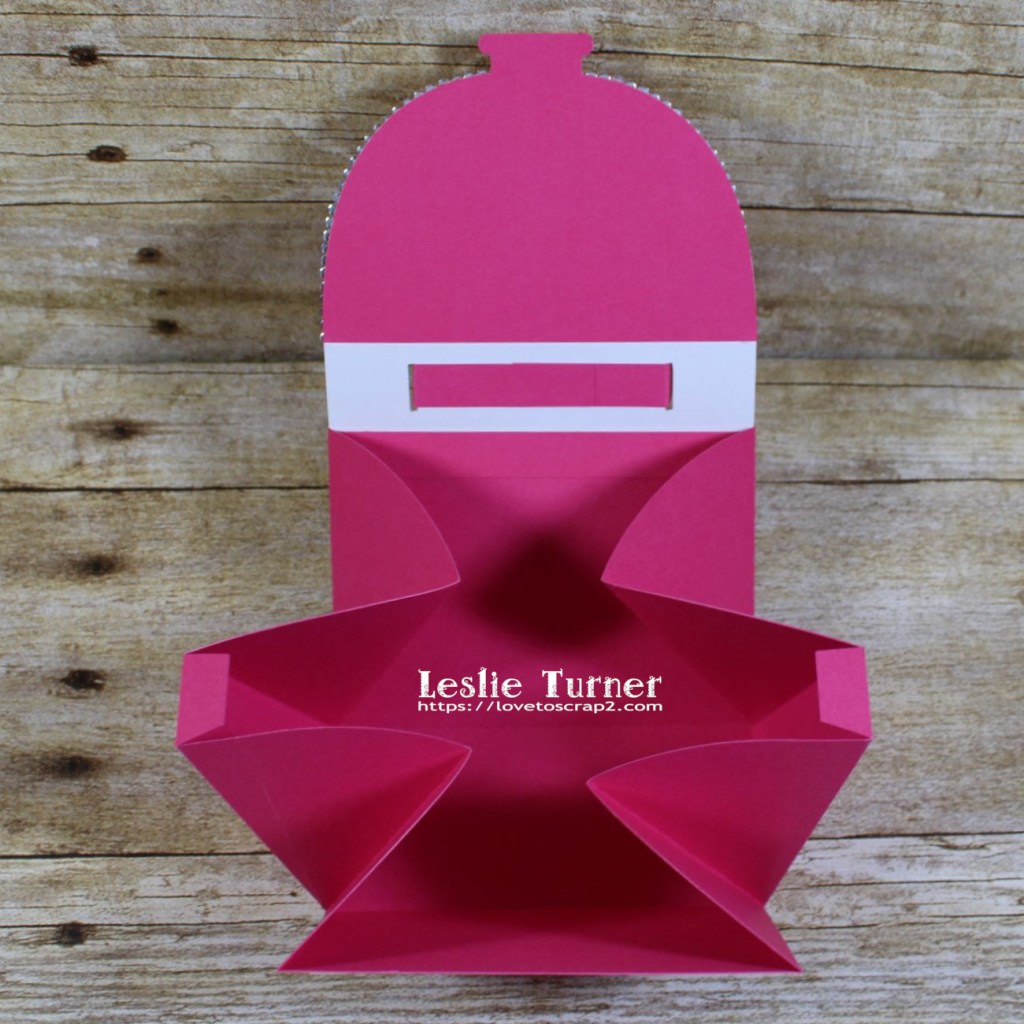
And one more look at the gift box opened up. This was so much fun and I totally enjoyed creating it! ;)
Products used: Cardstock/Paper: American Crafts Taffy cardstock, Neenah Classic Crest 80# Solar White cardstock, Colorbok Seeing Dots cardstock Stamps: The Cat’s Pajamas Sassy Birthday stamp set Ink: Memento Rose Bud ink Dies/Punches: Brother CanvasWorkspace Handbag Gift Box cut file, Memory Box Stitched Oval Layers die Accessories: Tonic Studios 12″ Guillotine Paper Trimmer, Bearly Art precision craft glue, Eyelet Outlet Clear Jewel Bling Strips
I hope you’ve enjoyed this project and will come join us in The Outlawz Challenges! Lots of fun going on! Thanks so much for stopping by – we’ll see you next time!
5/8/21 Top Rocker at 613 Avenue Create! 5/15/21 Top 5 at QKR Stampede!
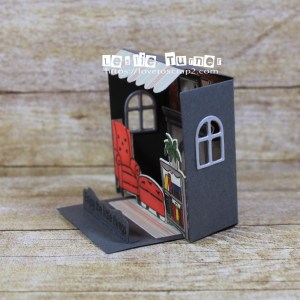
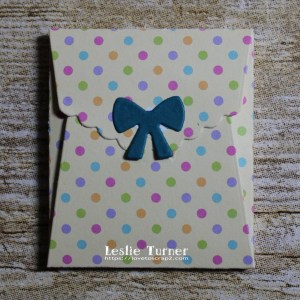
Hi everybody! Hope you’re having a great day! We’ve had medical appointments yesterday and today, out of town both days, so I finally have a spare few minutes this evening to post my newest matchbook! Affiliate links are used in this post at no cost to you. I really appreciate your support! I believe I mentioned how addictive these little matchbooks are, lol! They are so fun! I’ve mailed the first two out and have someone in mind for this one so thought I might better get my post done. And I didn’t forget to include the itty bitty envelope with this one! ;)
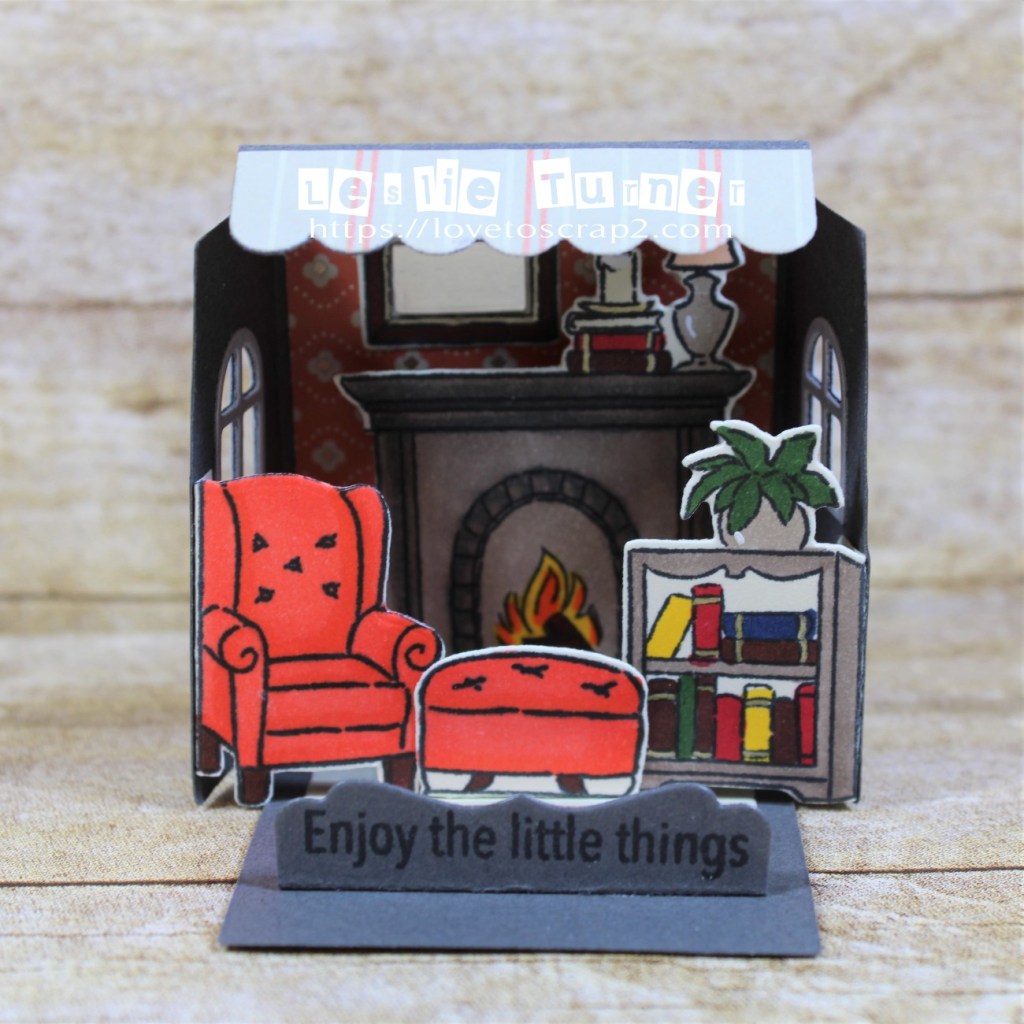
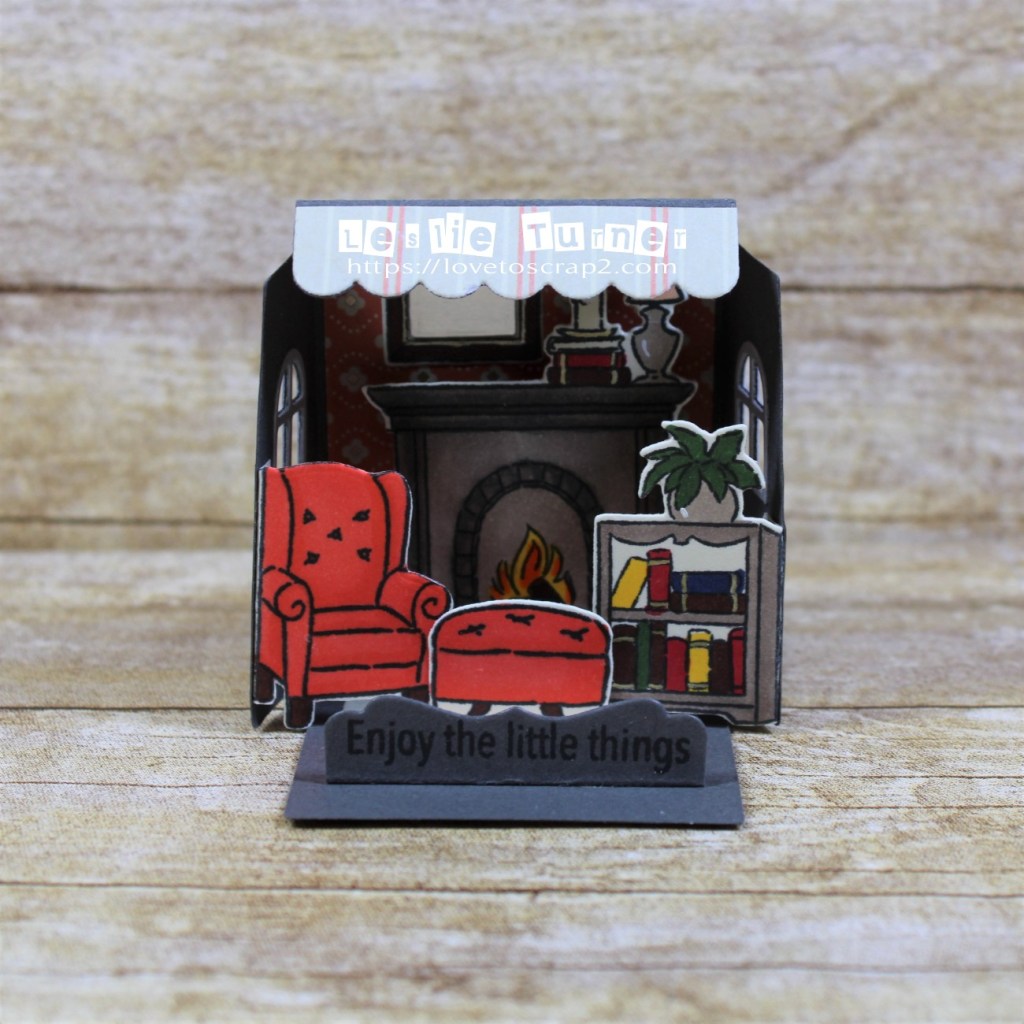
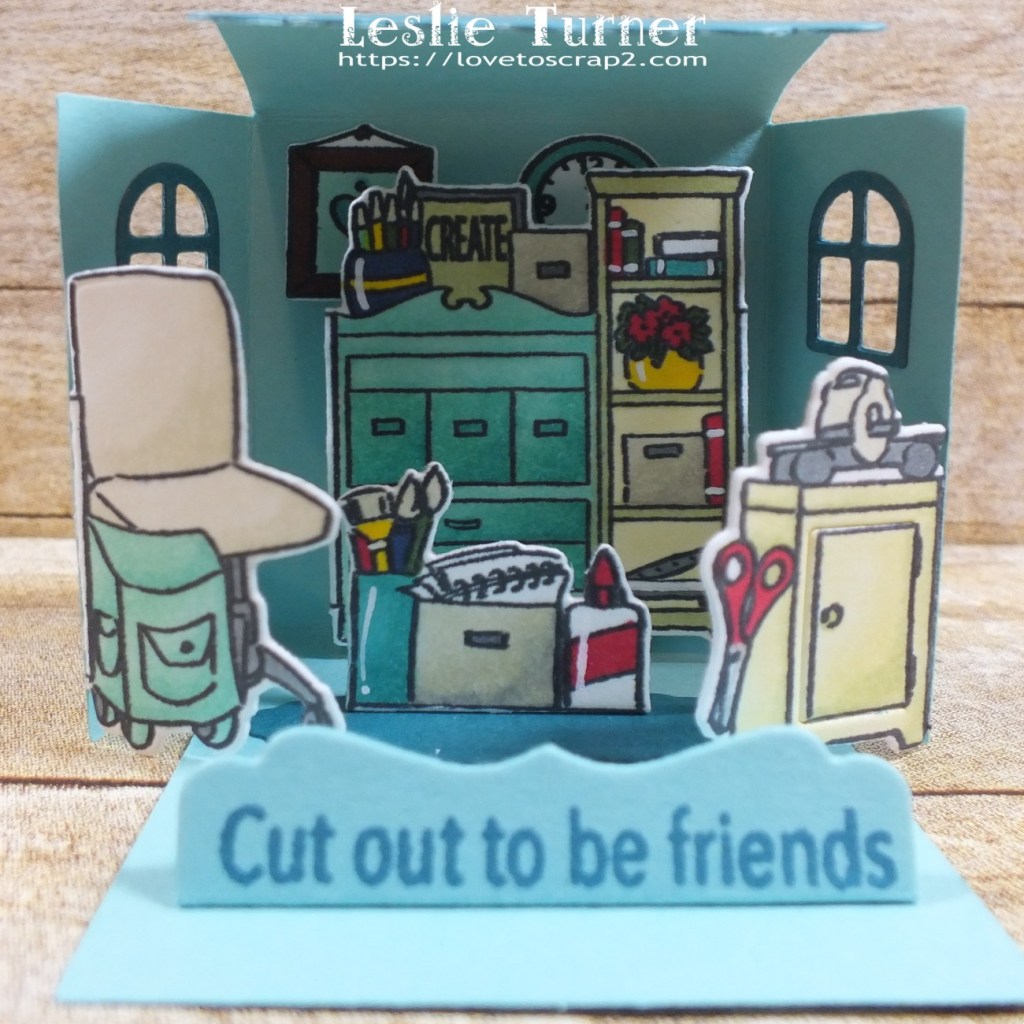
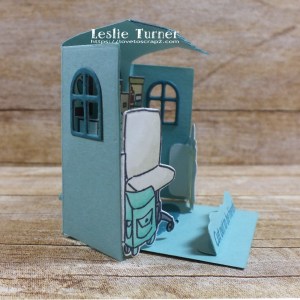
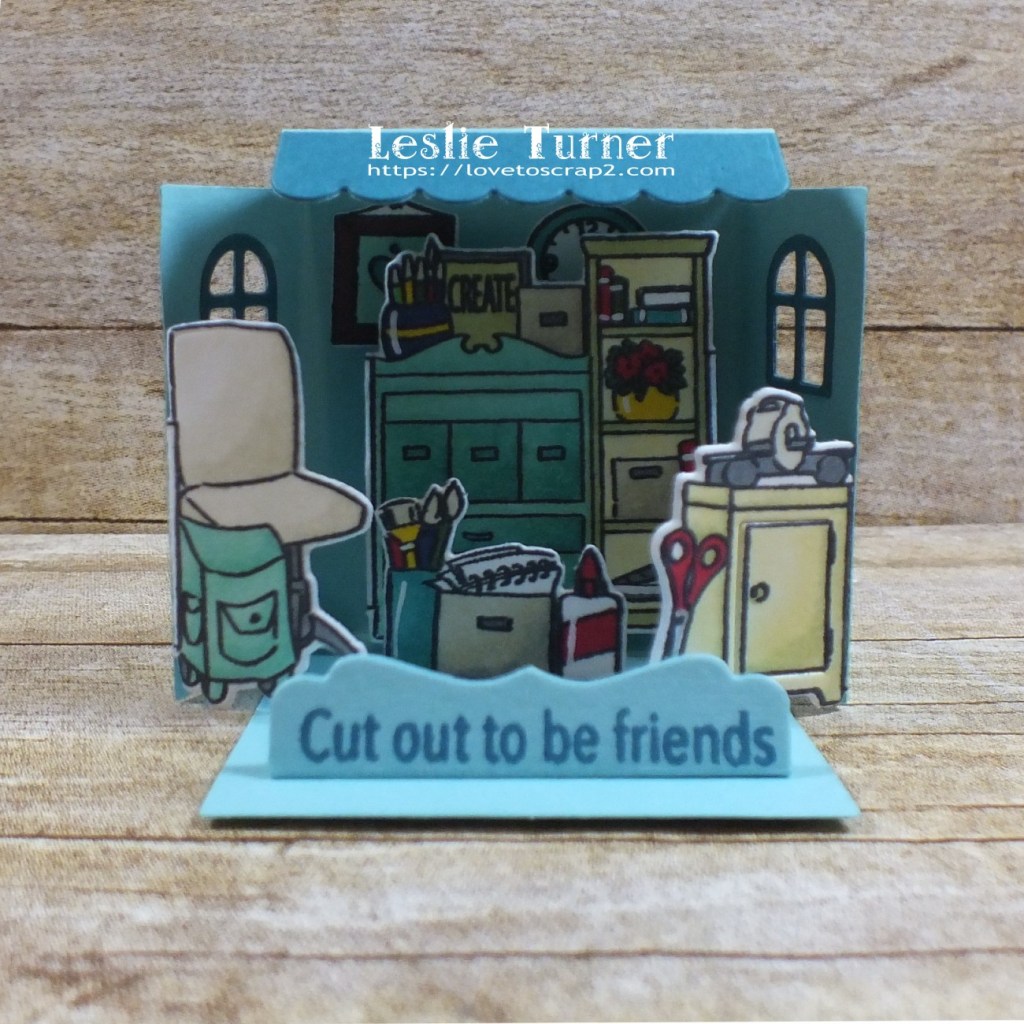
I cut the base from CutCardStock Basis Gray cardstock and used Stardream Metallic Silver cardstock for the window trim on both sides. I used coordinating patterned papers from Polly’s Paper Studio for the wallpaper and rug. I stamped all the elements on Neenah Classic Crest Baronial Ivory cardstock, colored them with alcohol markers and cut them with the coordinating dies. There’s even a mirror on the wall above the fireplace that has a silver foil cardstock ‘mirror.’
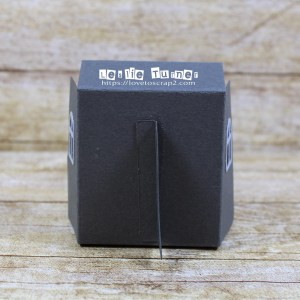
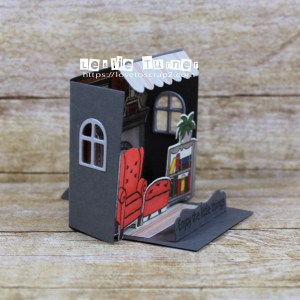
Here are shots going around the outside.
And one more peek… these matchbooks are so stinkin’ cute I can’t stand it! I have one more to play with, the Kitchen Set, so stay tuned! I’ve only seen four sets and I bought all four, so if Bonnie Krebs designs any more of them for Ai, I’ll definitely add them to my collection! She’s one talented gal!
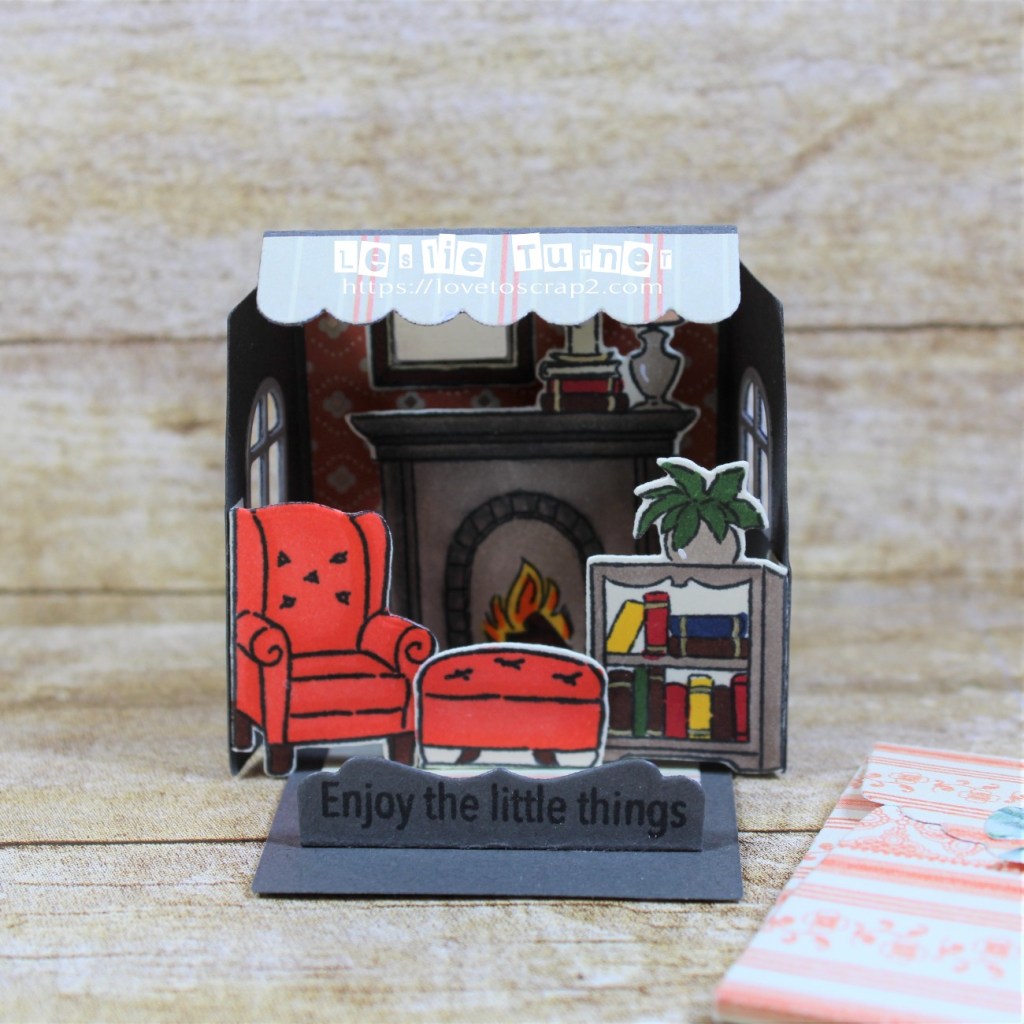
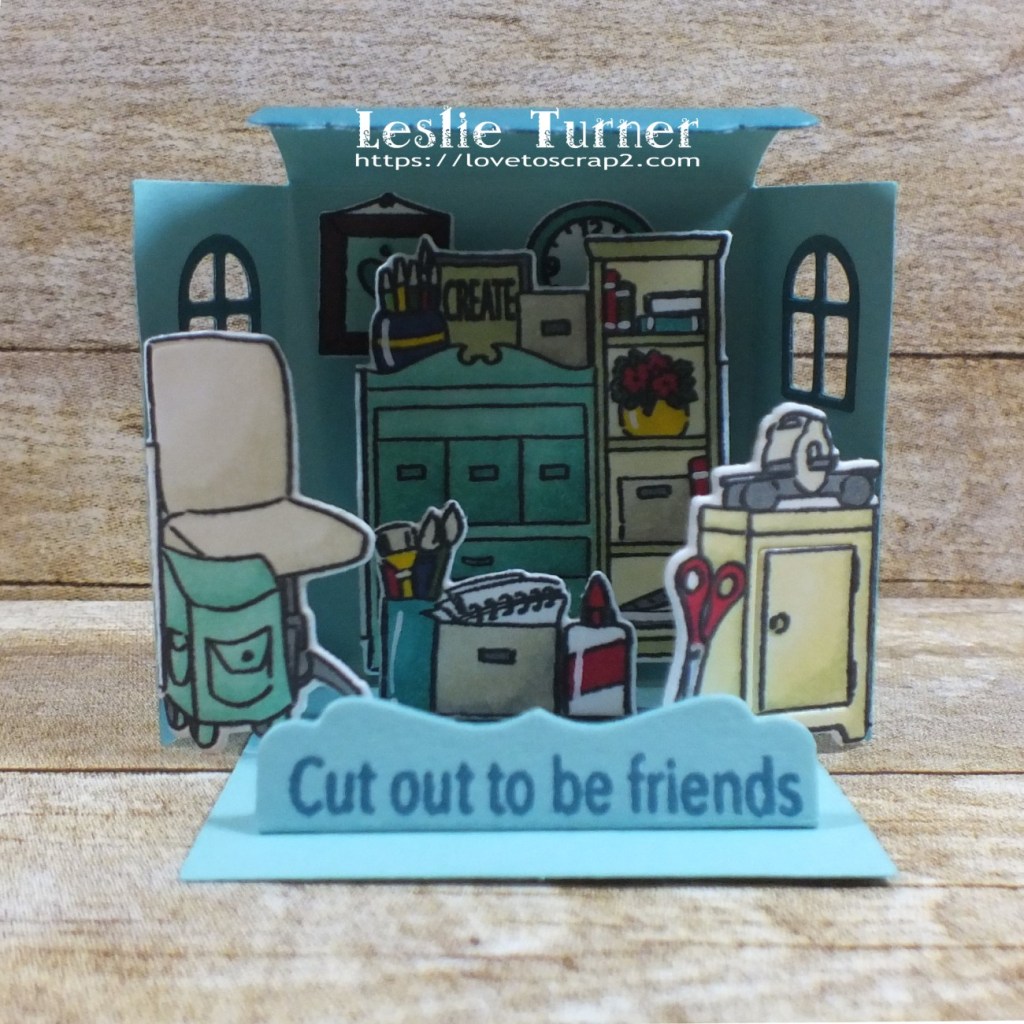
Hi everybody! I hope you are having a fantastic week! Man, they are flying by! Affiliate links are used in this post at no cost to you. I really appreciate your support! I’ve popped in this morning with another fun little matchbook – I used the Craft Room set this time! So fun! When I finished the 20 commissioned Mother’s Day cards (I still have several to share, by the way), I moved on to nine samples for Prickley Pear Stamps which I finished yesterday and photographed with my new Canon Rebel T7. You’ll see those a little later on. I’ve had the Canon for a little over a week and finally got brave enough to try it out… and wow, talk about A LOT for this old brain to comprehend!
This matchbook was probably the last project destined to be photographed with the old DSLR camera that I was totally comfortable with and knew like the back of my hand. I’m sad it has to be replaced but life goes on. I’m actually looking forward to making a few changes going forward – I’m still using the tripod but have discontinued the lightbox. I typically shoot four pics of each card and I’m cutting down to three. And I’m considering cutting down the narratives on my projects as well, with the goal of shorter posts since I seem to have less time these days. I work way ahead so you’ll still be seeing some longer posts with more photos that have been scheduled for a while. Okay, back to the matchbook!
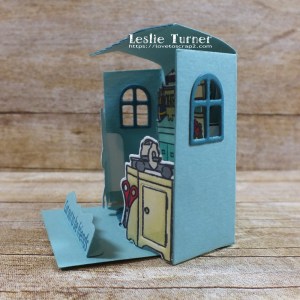
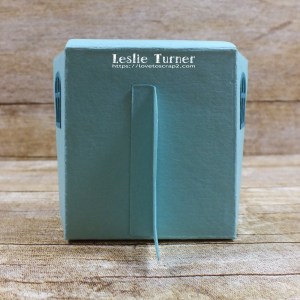
Here are shots going around the outside and a shot of the itty bitty envelope. ;)
binary comment
And one more look… I can’t get over the detail on these – loving the die cut machine on the cabinet and the paper cutter on the bottom shelf, lol! On to the Den Set next, so stay tuned! ;)