Coffee Gift Tote

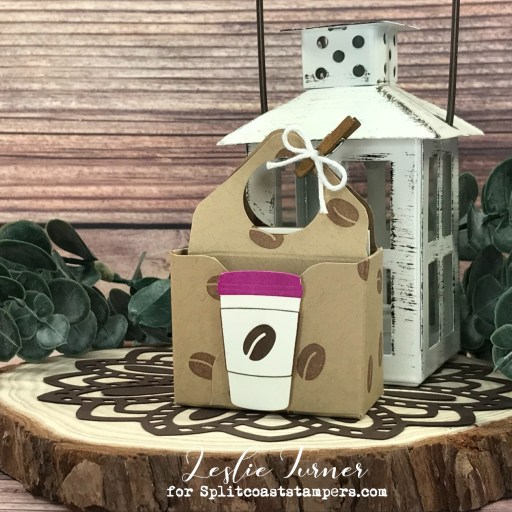
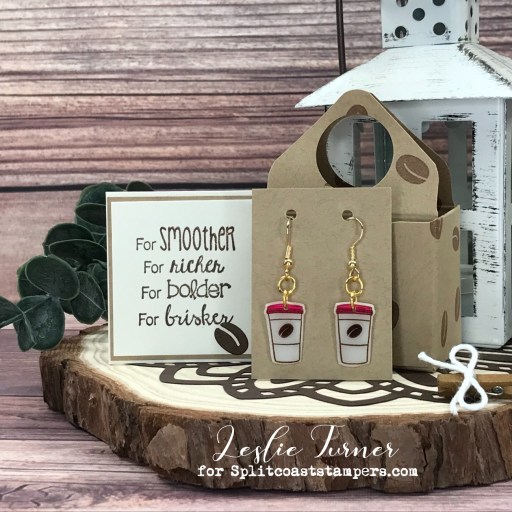
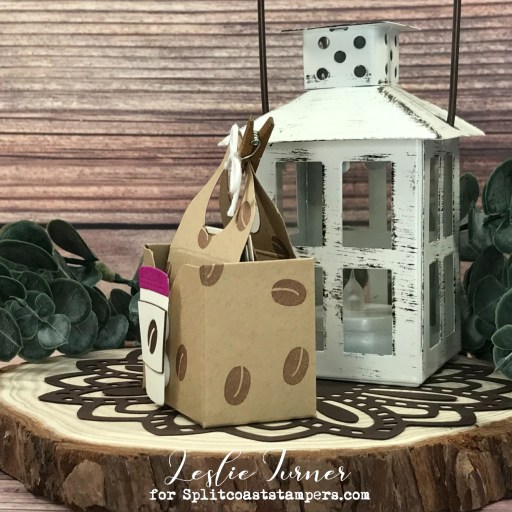
Hey everybody! Happy Thursday to you – I hope you’re having a great week with some beautiful weather! I’m back this morning with another Splitcoast Stampers Dirty Dozen DT inspiration project! This Coffee Gift Tote was seriously fun; I made my own patterned paper for the tote and I made the earrings!

I stamped a coffee bean from the Taylored Expressions Joe To-Go stamp set in Catherine Pooler Over Coffee ink randomly over a square piece of CutCardStock Twine cardstock. I used my We R Memory Keepers Envelope Punch Board and Stampin’ Up! 1″ circle punch to create the gift tote which I embellished with a coffee cup popped up on 3D foam circles. I created a card to go in the tote with a sentiment stamped in Memento Rich Cocoa ink on Neenah Classic Crest Baronial Ivory cardstock, layered on Twine and another Baronial Ivory cardstock panel. To make the earrings, I stamped the coffee cup and coffee bean twice in Ranger ground espresso archival ink on Grafix Shrink Film and colored the lids with an ultra fine pink Sharpie marker. I punched holes with my Stampin’ Up 1/16″ circle punch and cut them with the coordinating TE die. I used my Milwaukee heat tool to shrink them, and added earring wires and rings and TE rubber earring backs.

Here are a couple additional shots of the gift tote. I created a closure with a Funkie Junkie Boutique tiny clothespin embellished with a bow fashioned from Doodlebug Design Lily White Doodle Twine.

Sharing in the following challenges:
1. Crafting Happiness Challenges: #143 – Anything Goes

Affiliate links are used in this post at no cost to you – I really appreciate your support! 

Products used:
CARDSTOCK/PAPER: CutCardStock Twine cardstock, Neenah Classic Crest Baronial Ivory cardstock
STAMPS: Taylored Expressions Joe To-Go stamp set
INK: Catherine Pooler Over Coffee ink, Memento Rich Cocoa ink, Ranger ground espresso archival ink; Arteza alcohol markers- RP01, BR52; Sharpie Ultra Fine Point pink marker
DIES/PUNCHES: Stampin’ Up 1″ and 1/16″ circle punches, Taylored Expressions Joe To-Go die set
ACCESSORIES: Tonic Studios 12″ Guillotine Paper Trimmer, We R Memory Keepers Envelope Punch Board, Art Glitter Dries Clear adhesive, MISTI stamp tool, Big Shot, EK Tools 3D Dots, Grafix Shrink Film, Milwaukee heat tool, eeBeads earring wires and rings, Taylored Expressions rubber earring backs, Funkie Junkie Boutique tiny clothespin, Doodlebug Designs Lily White Doodle Twine

I hope you’ve enjoyed seeing this project and will consider joining the Splitcoast Stampers Fan Club which costs less than $25 for an entire year! There are tons of member perks (like seeing all the Dirty Dozen DT’s inspiration projects each month) in addition to access to all the other free content on the Splitcoast Stampers website. Be sure to check it out! The subscription is seriously awesome! Thanks for stopping by today – we’ll see you again soon!

Scrappy hugs,

Grand Adventure Tea Bag Dispenser

Hey everybody! Happy Monday! The weekend sure did fly by, didn’t it?! I’ve popped in this morning to share another Splitcoast Stampers Dirty Dozen DT inspiration project. My inspiration for making this awesome little tea bag dispenser came from the Splitcoast Stampers tutorial HERE. This is a really easy project that packs a great punch – and what a great gift idea for the tea drinkers in your life! ;)

I cut the box and the lid from CutCardStock Basis 80# White 12×12 cardstock along with layering panels from coordinating papers in the Simple Stories Simple Vintage Cottage Fields 6×8 paper pad. I’m a butterfly fanatic so I made sure to include one on the front panel. I fussy cut a second one and adhered it over the patterned paper for a little dimension. I used my Stampin’ Up 1″ circle punch to create a semi-circle at the bottom of the front panel for ease in removing the tea bags. I added a Tim Holtz Idea-ology Metallic Quotations Sticker along with a few Darice small clear gemstones, which completed the project.

Here’s a shot of the box with the lid removed. I really love how this turned out!

Sharing in the following challenges:
1. Wednesday’s Creative Inspirations Challenge Blog: June Challenge – Something for the Girls

Affiliate links are used in this post at no cost to you – I really appreciate your support! 

Products used:
CARDSTOCK/PAPER: CutCardStock Basis 80# White 12×12 cardstock, Simple Stories Simple Vintage Cottage Fields 6×8 paper pad
DIES/PUNCHES: Stampin’ Up 1″ circle punch
ACCESSORIES: Tonic Studios 12″ Guillotine Paper Trimmer, Art Glitter Dries Clear adhesive, Tim Holtz Idea-ology Metallic Quotations Stickers, Darice small clear gemstones

I hope you’ve enjoyed seeing this project and will consider joining the Splitcoast Stampers Fan Club which costs less than $25 for an entire year! There are tons of member perks (like seeing all the Dirty Dozen DT’s inspiration projects each month) in addition to access to all the other free content on the Splitcoast Stampers website. Be sure to check it out! The subscription is seriously awesome! Thanks for stopping by today – we’ll see you again soon!

Scrappy hugs,

Backpack Summer Memories Mini Album

Howdy peeps! I hope your week is winding down nicely and you’re looking forward to a fabulous weekend! I’m absolutely delighted to be back with another Keep It Simple DT inspiration project to share created with the super awesome Lumberjack Collection that was released back in October of last year! This is such a fun collection with loads of gorgeous papers, stamps and die cuts, and I thought a backpack mini album was in order! I’ve made a few of these over the years and they are really quite fun! The original design came from an old Technique Junkies CD that I’ve had in my stash for probably ten years but I ended up reconfiguring the measurements several years ago because my laptop doesn’t have a CD-ROM. It’s a simple design, though, that’s easily replicated.

I cut the base, inside pages and journaling card from CutCardStock Desert Storm cardstock. The front pocket and panels were cut from a variety of patterns in the Lumberjack 6×6 Paper Pack. I embellished the journaling card and every other page in the album with a variety of Die Cut Pieces, Cards & Ephemera and Scene Building die cuts.

I die cut a variety of square, circle, rectangle and oval shapes from the Desert Storm cardstock using CottageCutz Double-Stitched Rectangle dies and Double-Stitched Oval dies along with My Favorite Things Stitched Square STAX, Stitched Rectangle STAX, Double-Stitched Square STAX, Wonky Stitched Circle STAX and Wonky Stitched Square STAX. I used these to embellish the alternating pages, so there is plenty of room throughout the album for photos and journaling.

I used an Eyelet Outlet gold rim yellow jewel brad with a small disc magnet closure on the front flap, a tiny disc magnet closure on the pocket flap, and Really Reasonable Ribbon brown gold-edge ribbon for the straps.

Sharing in the following challenges:
1. Penny’s Paper-Crafty Challenge Blog: #549 – Anything Goes with Paper

Keep It Simple products used:
Lumberjack 6×6 Paper Pack
Lumberjack Die Cut Pieces
Lumberjack Die Cut Pieces – Cards & Ephemera
Lumberjack Die Cut Pieces – Scene Building

Affiliate links are used in this post at no cost to you – I really appreciate your support!

Other products used:
Cardstock/Paper: CutCardStock Desert Storm cardstock
Dies/Punches: Kadomaru Pro Corner Rounder, Stampin’ Up 1″ Circle Punch; CottageCutz Double-Stitched Rectangle dies and Double-Stitched Oval dies; My Favorite Things Stitched Square STAX, Stitched Rectangle STAX, Double-Stitched Square STAX, Wonky Stitched Circle STAX and Wonky Stitched Square STAX
Accessories: Tonic Studios 12″ Guillotine Paper Trimmer, CutCardStock Plus High Capacity adhesive, Art Glitter Dries Clear adhesive, Big Shot, gray eyelets from stash, Crop-A-Dile, Eyelet Outlet gold rim yellow jewel brad, Really Reasonable Ribbon brown gold-edge ribbon, small and tiny disc magnets

I hope you’ve loved seeing this project as much as I loved creating it, and you’re inspired to get crafty! Be sure to check out ALL the fun goodies in the Keep It Simple store such as paper, stamps, die cuts, ephemera, washi tape and enamel dots to name just a few! Be sure to Follow us on Facebook, Instagram, and Pinterest for lots of crafty inspiration! Thanks so much for stopping by today – we’ll see you next time!

Scrappy hugs,

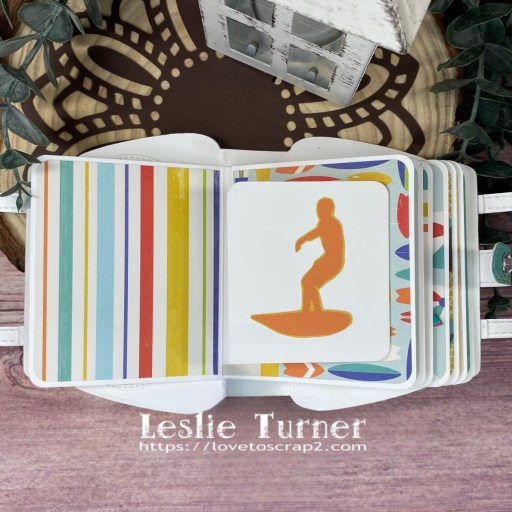
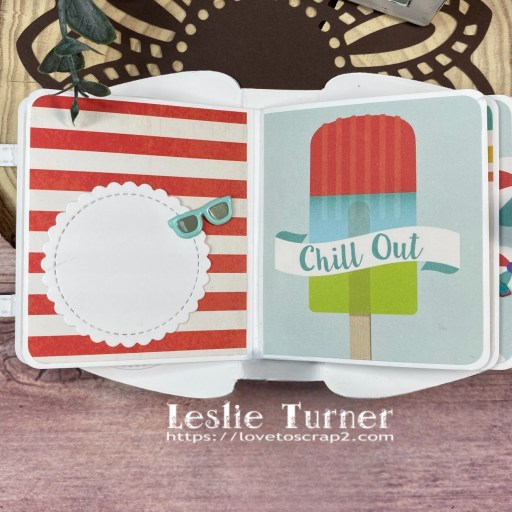
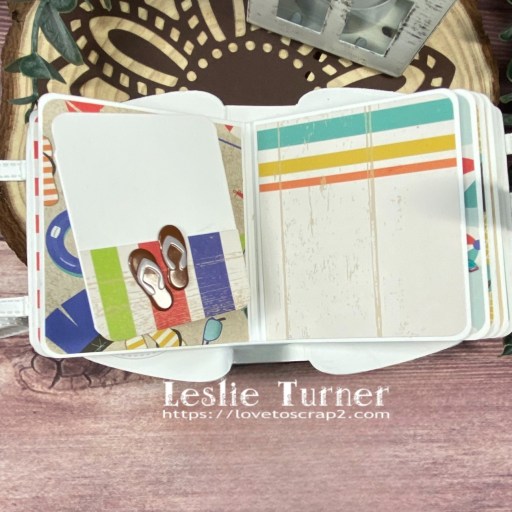
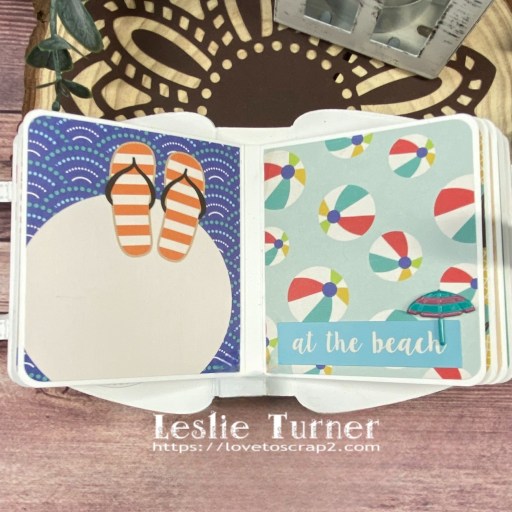
Hello Summer tag album

6/16/23 Top Cut at Cut It Up Challenge Blog!
6/17/23 Top Rocker at 613 Avenue Create!

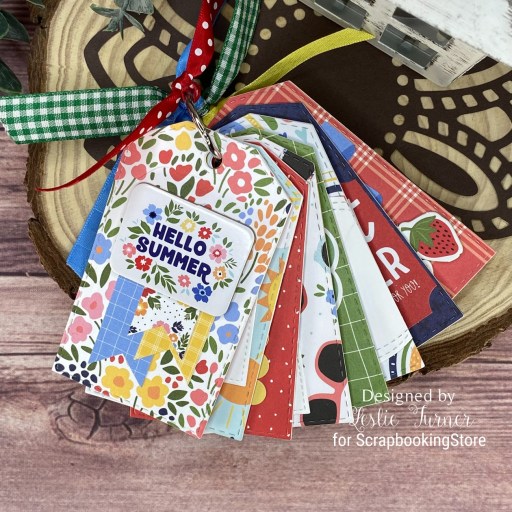
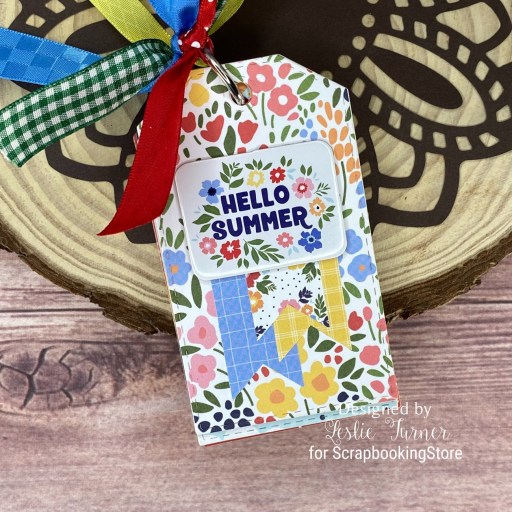
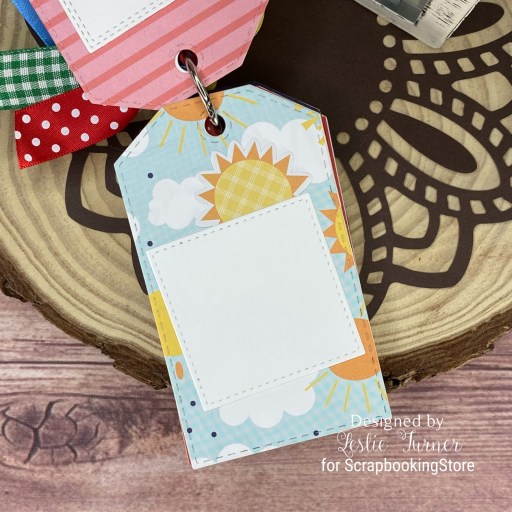
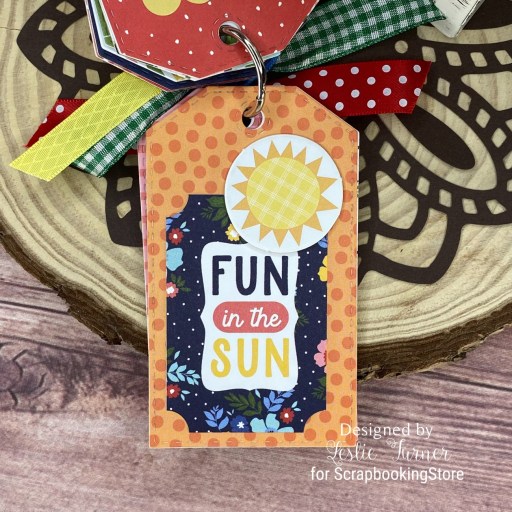
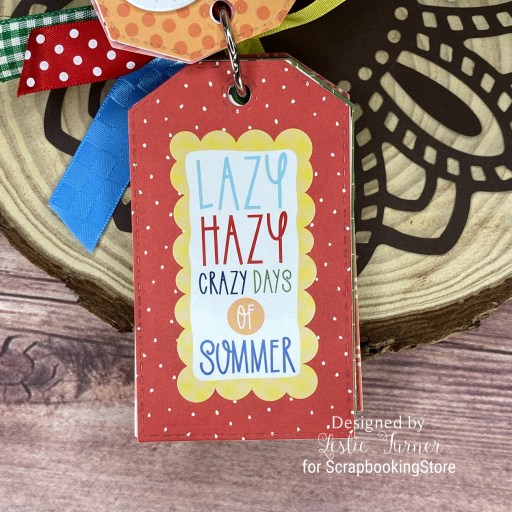
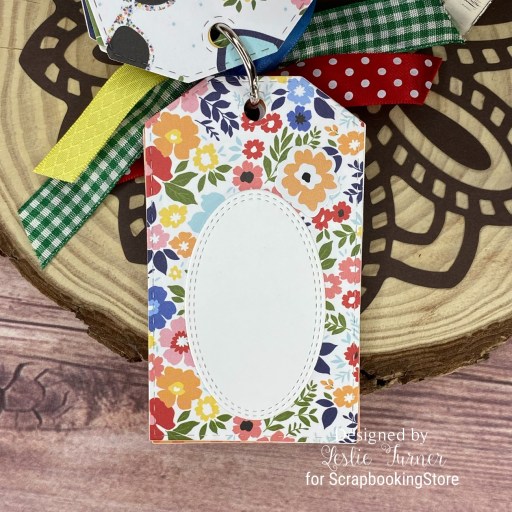
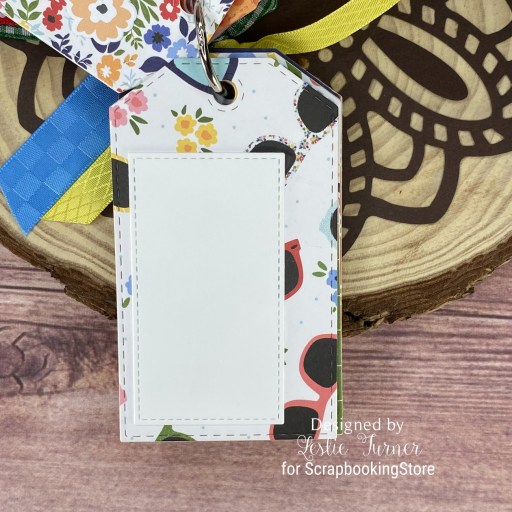
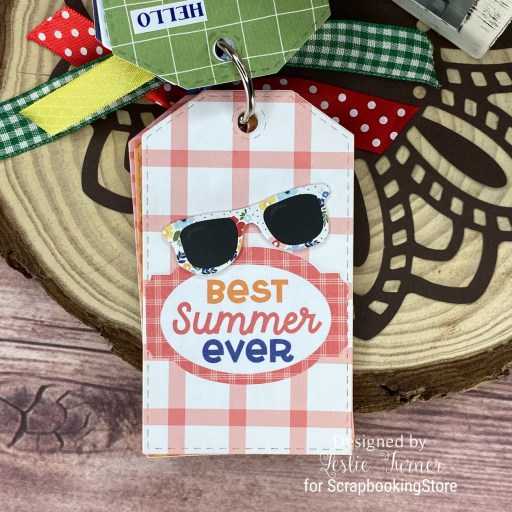
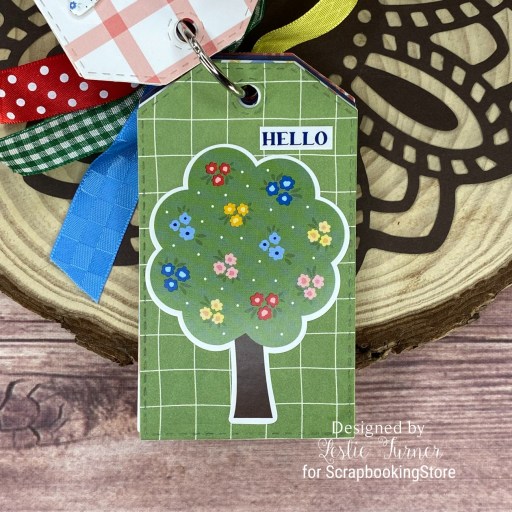
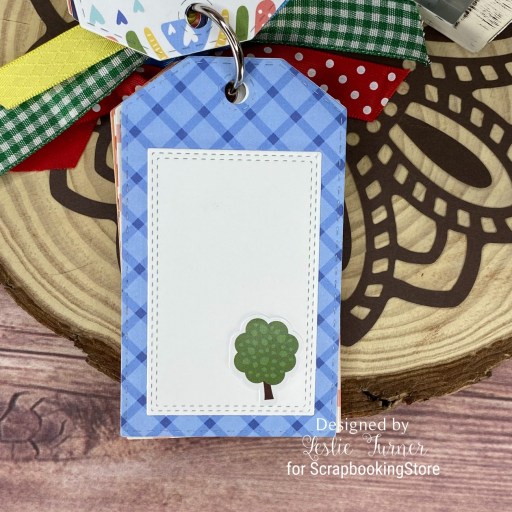
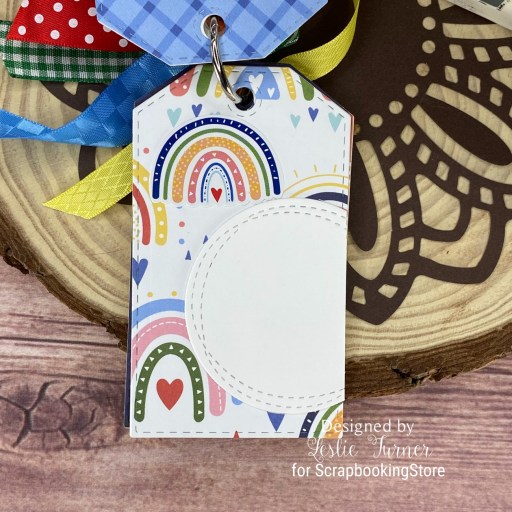
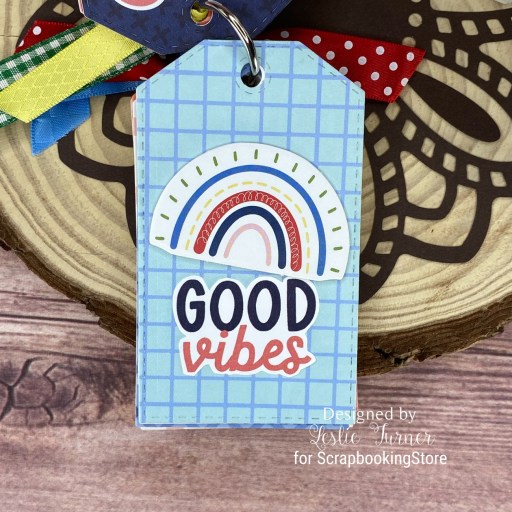
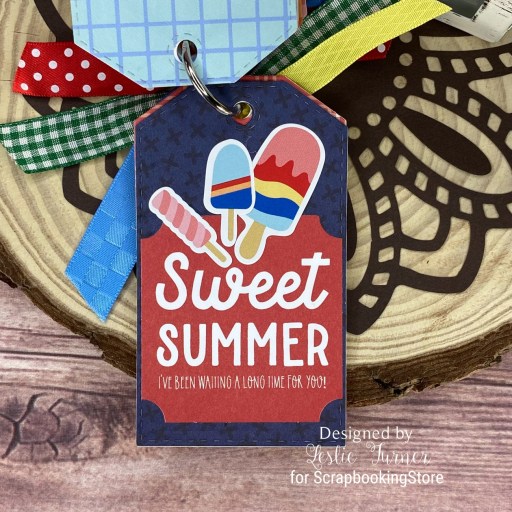
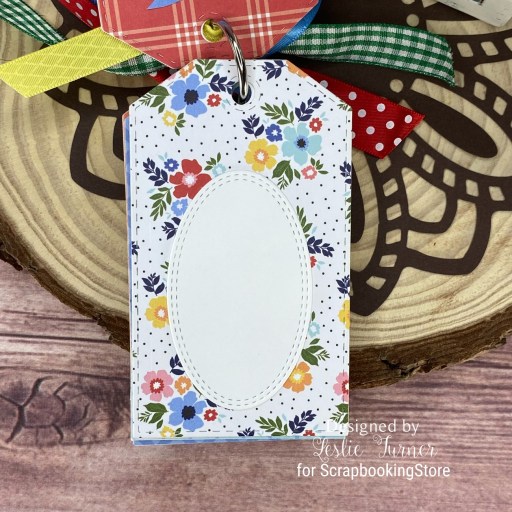
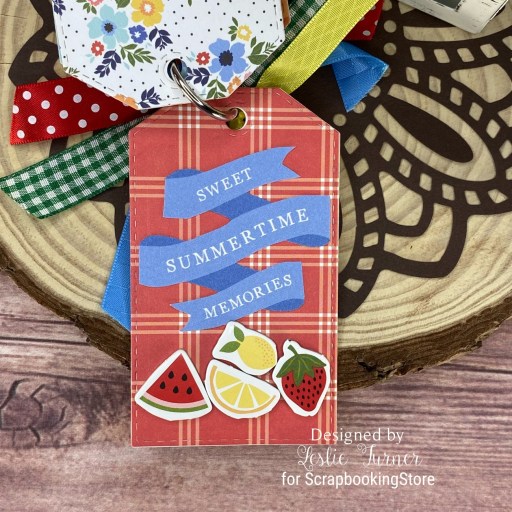
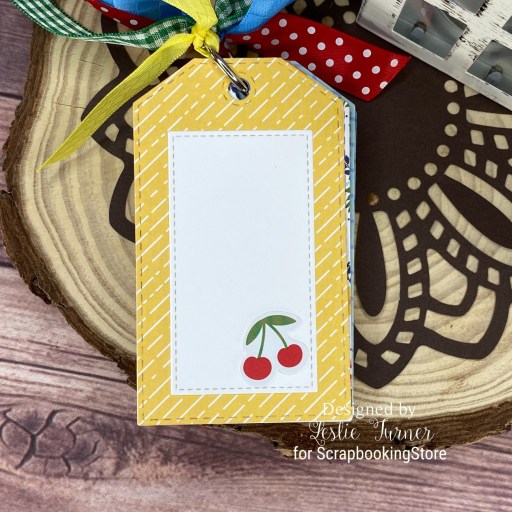
Hi everyone! Can you believe we’re headed straight into the middle of June already?! The year is almost half over… where are these months going?! I’m delighted to share a ScrapbookingStore DT inspiration project with you today created with the amazing June 2023 Scrapbook Kit with Upgrades! Next to fun folds, you know much I love making mini albums, and this tag album is a super simple project that is both adorable and useful! I used papers and stickers as well as chipboard, ephemera and adhesive brads from the upgrades!

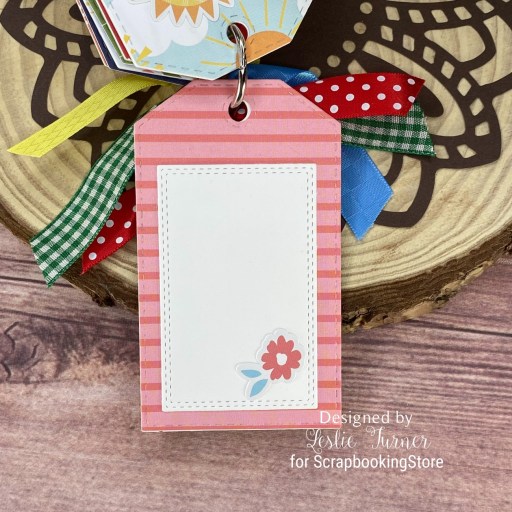
I die cut eight tags from Neenah Classic Crest 110# Solar White cardstock using a tag die from the STAMPlorations Stitched Tags Nesting Dies which became the pages of the album. I die cut two additional tags from patterned papers in the collection to cover the front and back of each page.

I embellished the pages with stickers from the sticker sheet as well as chipboard elements, ephemera and adhesive brads from the upgrades. I also used rectangle, square and circle die cuts using My Favorite Things Stitched Square STAX, Stitched Rectangle STAX and Wonky Stitched Circle STAX, and CottageCutz Double-Stitched Rectangles and Double-Stitched Ovals, all cut from Neenah Classic Crest 110# Solar White cardstock. I bound the album pages with a book ring and tied an assortment of ribbon pieces to the ring.

Sharing in the following challenges:
1. 613 Avenue Create: June 2023 – Anything Goes w/ optional Good Old Summertime (playing twist)
2. A Perfect Time To Craft: June #6-2023 – Anything Goes
3. A Place To Start: June 2023 – Anything Goes
4. Classic Design Challenge: June #6 – Anything Goes
5. Crafting Happiness Challenges: #143 – Anything Goes
6. Crafts Galore Encore Challenge Blog: #112 – Anything Goes
7. Crafty Calendar Challenge: June Challenge – Summertime
8. Cut It Up: #279 – Tag You’re It – Make A Tag
9. Jan’s Digi Stamp Challenges: June Anything Goes
10. Make My Monday: #202 – Summer Theme
11. Penny’s Paper-Crafty Challenge Blog: #548 – Anything Goes with Paper
12. Wednesday’s Creative Inspirations Challenge Blog: June Challenge – Something For the Girls

Affiliate links are used in this post at no cost to you – I really appreciate your support!

ScrapbookingStore products used:
June 2023 Scrapbook Kit with Upgrades

Other products used:
CARDSTOCK/PAPER: Neenah Classic Crest 110# Solar White cardstock
DIES/PUNCHES: STAMPlorations Stitched Tags Nesting Dies; My Favorite Things Stitched Square STAX, Stitched Rectangle STAX and Wonky Stitched Circle STAX; CottageCutz Double-Stitched Rectangles and Double-Stitched Ovals
ACCESSORIES: Tonic Studios 12″ Guillotine Paper Trimmer, CutCardStock Plus High Capacity adhesive, Art Glitter Dries Clear adhesive, MISTI stamping tool, Big Shot, book ring, ribbon assortment from Really Reasonable Ribbon

I hope you’ve enjoyed today’s project and you’re thinking about all the fun you could have with this month’s kit… you really ought to think about joining the Subscription Club! Be sure to Follow us on Facebook, Instagram, Pinterest and YouTube for lots of crafty inspiration! And if you do decide to join the Subscription Club, join our ScrapbookingStore Club Member Group on Facebook for more inspiration and to share your projects! Thanks so much for stopping by today – we’ll see you next time!

Scrappy hugs,

‘Read More’ note cards in a box

Hey everybody! Happy Monday! Sure seems like this weekend went by in a big POOF! I’ve popped in this morning to share a Syncopation Design inspiration project created with papers and elements in the new Let’s Get Lit bundle! Just in case you aren’t familiar with the terminology, it has to do with literacy – not getting intoxicated, lol! I know several people who are bookworms and thought this kit was perfect to create a set of 3-1/2″ x 5″ note cards in a box! Such a fun project!

I printed the solid and patterned papers from the collection on HP 32# copy paper and the elements on CutCardStock Basis 80# White cardstock. I created the card box and ten 3-1/2″ x 5″ card bases from Neenah Classic Crest 110# Solar White cardstock. The card box sports patterned paper panels and fussy-cut elements, as well as an Eyelet Outlet silver washi tape strip and Darice gemstones from my stash, and has a velcro closure. The simple card design is basically the same for all ten cards, featuring solid and patterned paper panels and fussy-cut captions/sentiments (popped up on foam strips) along with a silver washi tape strip and gemstone.

Sharing in the following challenges:
1. 613 Avenue Create: May 2023 – Anything Goes w/ optional Say It With Flowers (no twist)
2. A Perfect Time To Craft Open Challenge: May #4-2023 – Anything Goes
3. Classic Design Challenge: May #5 – Anything Goes
4. Inkspirational: #289 – Word Prompt Mini (mini 3-1/2″ x 5″ cards)

Syncopation Design products used:
Let’s Get Lit bundle

Affiliate links are used in this post at no cost to you – I really appreciate your support!

Other products used:
Cardstock/Paper: Neenah Classic Crest 110# Solar White cardstock, CutCardStock Basis 80# White cardstock, HP 32# copy paper
Accessories: Tonic Studios 12″ Guillotine Paper Trimmer, Tombow Mono permanent adhesive, Art Glitter Dries Clear adhesive, InkyStamper papercrafting velcro, Eyelet Outlet skinny silver washi tape, Darice iridescent gemstones, 1/4″ double-sided foam strips

I hope you’ve enjoyed this project and are inspired to get crafty! Be sure to check out all the fun digital papers, pocket cards, elements, cut files, bundles and scrap kits, as well as clear stamps in the Syncopation Design Etsy store! And be sure to Follow on Instagram and Facebook for crafty inspiration! Thanks so much for stopping by today – we’ll see you next time!

Scrappy hugs,

Holly Jolly Gift Box

Hi everybody! Happy Monday – I hope you had a great weekend! Our new challenge is live this morning over at Merry Little Christmas Challenge Blog and I’m happy to share my DT inspiration project for MLCCB #50 – Anything Christmas Goes! You know how I love making little gift bags and boxes, and always forget that I have this set of dies from Stampin’ Up that I’ve had for years. I ran across them while looking for something else (that’s always the way it happens!) and I believe this is only the second or possibly third time I’ve used them. The box is the perfect size for jewelry or treats.

I used the Stampin’ Up Baker’s Box Thinlits to die cut the bag pieces from a holly print in the Echo Park A Perfect Christmas double-sided paper pack. These are great papers to use because they are heavier than regular double-sided paper but not quite as heavy as cardstock. I stamped an oval die cut for the tag (using the Keep It Simple Santa & Friends stamp set) and embellished it with some Eyelet Outlet red bling. The final step was threading some Michael’s green and white dotted ribbon through the holes and tying a bow. Easy peasy!

And here’s a shot of the back. This was a super easy project that would be great to mass produce for placing around the holiday table or gifting treats to co-workers! Can also be used for birthday, anniversary, graduation, etc. by using different papers! ;)

Sharing in the following challenges:
1. A Perfect Time To Craft Open Challenge: May #4-2023 – Anything Goes
2. A Place To Start: May 2023 – Anything Goes w/ optional And Another Thing
3. Classic Design Challenge: May #5 – Anything Goes

Affiliate links are used in this post at no cost to you – I really appreciate your support! 

Products used:
Cardstock/Paper: Echo Park A Perfect Christmas double-sided paper
Stamps: Keep It Simple Santa & Friends stamp set
Ink: Catherine Pooler Sage ink
Dies/Punches: Stampin’ Up Baker’s Box Thinlits, Spellbinders Classic Ovals Small die
Accessories: Tonic Studios 12″ Guillotine Paper Trimmer, Bearly Art precision craft glue, MISTI stamp tool, Big Shot, Michael’s green/white dotted ribbon, Eyelet Outlet red jewel bling

I hope you’ve enjoyed seeing this project and will link up with us this time! We love looking at your Christmas projects! Thanks so much for stopping by today – we’ll see you next time! ;)

Scrappy hugs,

Spring Memory Album

Hi everyone! I hope you’re having a good Wednesday! I’m delighted to be back with another post today to share a ScrapbookingStore DT inspiration project which I’ve shared on social media but was unable to blog until our internet was restored. This Spring-themed memory album was created with items in the March 2023 Scrapbook Kit with Upgrades, and I had THE best time making it! You know how I love me some mini albums! And yes, spring makes me HAPPY! ;) The coordinating papers and stickers in the March kit are pretty amazing!

I cut the album base from Neenah Classic Crest 110# Solar White cardstock and covered the front and back with a pretty floral paper from the kit. I then cut each page from 80# Solar White cardstock and embellished them with coordinating papers. I used stickers from the sticker sheet and die cut ovals (using Cottage Cutz Double-Stitched Oval dies) from CutCardStock Flamingo and Mantis Green cardstock.

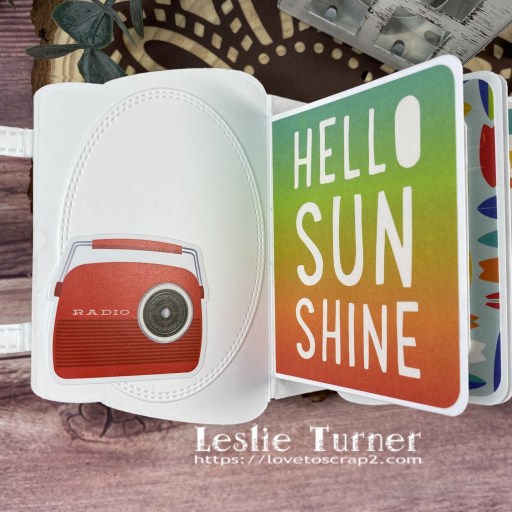
I created pull-outs and pull-ups on several of the pages, leaving plenty of room for photos and journaling. I embellished the front with a sentiment from the sticker sheet, added a Velcro circle for the closure and embellished the closure strap with an enamel dot from the upgrades. The final touch was adding a tassel and charm (created with dies from the set) attached with a tiny ball chain and clasp from my stash.

Affiliate links are used in this post at no cost to you – I really appreciate your support!

ScrapbookingStore products used:
March 2023 Scrapbook Kit with Upgrades

Other products used:
Cardstock/Paper: Neenah Classic Crest 110# and 80# Solar White cardstock; CutCardStock Bright Gold Foil, Flamingo and Mantis Green cardstock
Dies/Punches: Concord & 9th Everyday Purse dies, Cottage Cutz Double-Stitched Ovals
Accessories: Tonic Studios 12” Guillotine Paper Trimmer, Art Glitter Dries Clear adhesive, Big Shot, 1/2″ double-sided foam strips, InkyStamper Papercrafting Velcro, tiny ball chain with clasp from stash

I hope you’ve enjoyed today’s project and you’re thinking about all the fun you could have with this kit… you really ought to think about joining the Subscription Club! Be sure to Follow us on Facebook, Instagram, Pinterest and YouTube for lots of crafty inspiration! And if you do decide to join the Subscription Club, join our ScrapbookingStore Club Member Group on Facebook for more inspiration and to share your projects! Thanks so much for stopping by today – we’ll see you next time!

Scrappy hugs,
‘To someone sew nice’ Matchbook

5/7/23 Art Impressions Fan Feature!

Hey everybody! A very Happy Saturday to you all! I hope you have something fun planned this weekend! I’m stoked to share that I’m once again guest designing for the lovely Rachelle over at Scrapping4fun Challenges! One of my projects scored a Shout Out Creation honor a few weeks back, so here I am with a GD project for Challenge #222 – Ladies/Girls + Add Layers! I’m so in love with the Art Impressions Matchbook line (and several other Ai lines to be truthful!) and really enjoyed creating this sewing-themed Matchbook! It fits the theme perfectly!

Using the Art Impressions Matchbook Template Die, I cut the base from a double-sided piece of patterned paper from Polly’s Paper Studio. I stamped all the layers from the Art Impressions Sewing Room Stamps on CutCardStock Basis 80# White cardstock, colored them with alcohol markers, and cut them with the coordinating dies.

Then came the fun of assembling this adorable little Matchbook. Next I created the tiny little envelope using the Art Impressions Matchbook Envelope Dies and another double-sided patterned paper from Polly’s Paper Studio. ;)

Here are a couple more angled shots. So stinkin’ cute I can’t stand it!

Affiliate links are used in this post at no cost to you – I really appreciate your support! 

Products used:
Cardstock/Paper: Polly’s Paper Studio patterned papers, CutCardStock Basis 80# White cardstock
Stamps: Art Impressions Sewing Room Stamps
Ink: Memento Tuxedo Black ink; Arteza alcohol markers- CG06/08, Y24/27, PB09, G09/34/36, B29, RP09/23/26, YG06/07, R14/15/21, BG05/07, BR62/63
Dies/Punches: Art Impressions Matchbook Template Die, Matchbook Sewing Room Dies and Matchbook Envelope Dies
Accessories: Tonic Studios 12″ Guillotine Paper Trimmer, Bearly Art precision craft glue, MISTI stamp tool, Big Shot

I hope you’ve enjoyed seeing this adorable sewing-themed Matchbook and will link up a ladies/girls project with layers! Thanks so much for stopping by today – we’ll see you next time! ;)

Scrappy hugs,

Vintage Treasure Box

3/10/23 Top Pick at The Outlawz Paper a la mode Challenge!
3/15/23 Site-wide Winner at The Outlawz Challenges!
3/31/23 Best Technique Winner at Classic Design Challenge Blog!

Hey everybody! I hope you’re enjoying some decent weather on this fine first day of March! Our new challenge is live this morning over at Mix It Up Challenge Blog and I’m delighted to share my DT inspiration project for MIUCB #64 – Anything Goes + optional Distressing! If you choose to play the optional twist, the distressing can be done with ink or tool. It has been ages since I’ve done any distressing with a tool, so I dug out my Tim Holtz Paper Distresser to use on the focal element and panels on my vintage treasure box. Tool distressing does warp the edges of cardstock and I think that’s why I don’t do it very often, but all in all I’m happy with how this project turned out!

I created the box from CutCardStock Re-Entry Red cardstock. I cut the panels for all four sides and the top from Neenah Classic Crest Baronial Ivory cardstock and My Mind’s Eye Tangerine 6×6 designer paper pad. I distressed the edges of all ten pieces and adhered them together and then to the box. Using the Stampin’ Up From My Heart stamp set, I stamped the focal image and cut it with a Spellbinders Standard Circles die. I die cut one additional circle from the Re-Entry Red cardstock, distressed the edges of both circles, and adhered them together and then to the top of the box.

Here’s a shot of the box opening up to reveal the three hidden trays inside. This would definitely be a fun way to gift multiple items to a friend – jewelry, trinkets, candies/chocolates or whatever! If you’re interested, this box is similar to a taller treasure box with hidden trays inside that I made several years ago HERE.

Sharing in the following challenges:
1. A Perfect Time To Craft Open Challenge Blog: March #3-2023 – Anything Goes
2. Classic Design Challenge: March 2023 #3 – Anything Goes
3. Outlawz Paper a la mode Challenge: February Challenge – I Love … (Friendships!)
4. QKR Stampede: #462 – Anything Goes

Affiliate links are used in this post at no cost to you – I really appreciate your support! 

Products used:
Cardstock/Paper: CutCardStock Astrobrights Re-Entry Red cardstock, Neenah Classic Crest Baronial Ivory cardstock, My Mind’s Eye Tangerine 6×6 designer paper pad
Stamps: Stampin’ Up From My Heart stamp set
Ink: Memento Lady Bug ink
Dies/Punches: Spellbinders Standard Circles Small and Large dies
Accessories: Tonic Studios 12″ Guillotine Paper Trimmer, Bearly Art precision craft glue, Tim Holtz Paper Distresser, Tape Runner, MISTI stamp tool, Big Shot, Studio Katia Sparkling Crystals Mix

I hope you’ve enjoyed seeing this project and will link up with us this time! Just remember – the technique twist is always optional and not required to play! Thanks so much for stopping by today – we’ll see you next time! ;)

Scrappy hugs,

Pizza-Themed Envelope Mini Album

Hey everybody! Well, another Hump Day is upon us and we’re getting more snow here in southwestern Colorado! We’ve had a couple feet of the sparkly stuff on the ground for weeks now and it’s so pretty! We’re hoping all this moisture will keep the fires away this summer. I’ve popped in this morning to share my debut inspiration project for Syncopation Design using the new Pizza Forever Bundle! Pizza is one of my all-time favorite foods (and has been for a lot of years) so this was right up my alley! I created an envelope mini album featuring papers and elements from the collection and love how it turned out!

I created the mini album base from six American Crafts A2 size dark kraft envelopes which I embellished with patterned papers printed on 32# HP copy paper and elements printed on CutCardStock Basis 80# White cardstock. There is a tri-fold element, a pull-up , a pull-out, and side and top pockets, with lots of room for journaling and photos. I added Eyelet Outlet green and brown pearls along with some Canvas Corp jute rope cord.

Sharing in the following challenges:
1. A Place To Start: February 2023 – Anything Goes w/ optional Pick a Palette (no twist)
2. Classic Design Challenge: February 2023 #2 – Anything Goes
3. Little Red Wagon: #693 – Die Cuts
4. Outlawz Paper a la mode Challenge: February Challenge – I Love … (PIZZA!)

Syncopation Design products used:
Pizza Forever Bundle

Affiliate links are used in this post at no cost to you – I really appreciate your support!

Other products used:
Cardstock/Paper: American Crafts Dark Kraft A2 Envelopes, 32# HP copy paper, CutCardStock Basis 80# White cardstock
Dies/Punches: My Favorite Things Stitched Square STAX, Stitched Mini Scallop Circle STAX and Wonky Stitched Rectangle STAX; Cottage Cutz Double-Stitched Rectangles and Double-Stitched Ovals
Accessories: Tonic Studios 12″ Guillotine Paper Trimmer, Tombow Mono permanent adhesive, Art Glitter Dries Clear adhesive, Canvas Corp jute rope cord, Eyelet Outlet green and brown pearls

I hope you’ve enjoyed this project and are inspired to get crafty! Be sure to check out all the fun digital papers, pocket cards, elements, cut files, bundles and scrap kits, as well as clear stamps in the Syncopation Design Etsy store! And be sure to Follow on Instagram and Facebook for crafty inspiration! Thanks so much for stopping by today – we’ll see you next time!

Scrappy hugs,