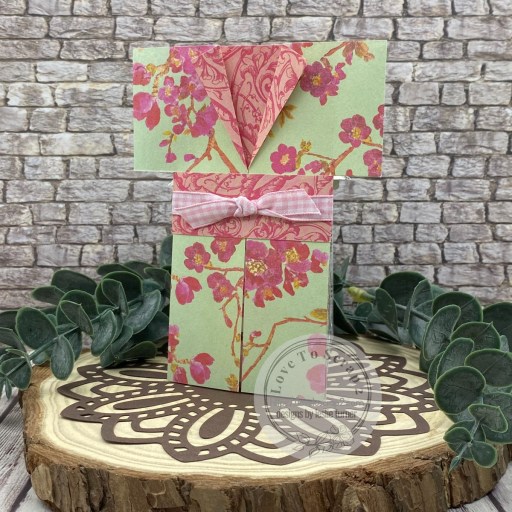
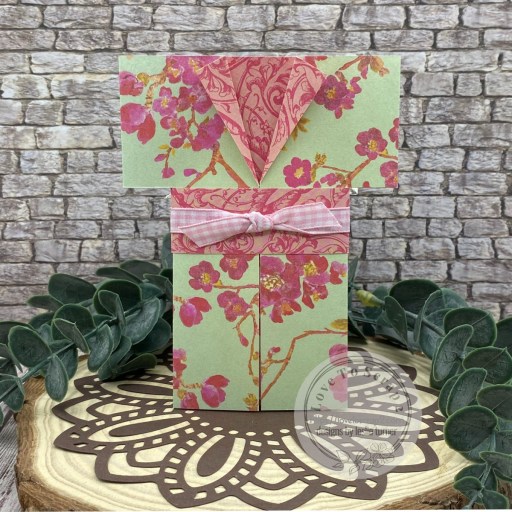
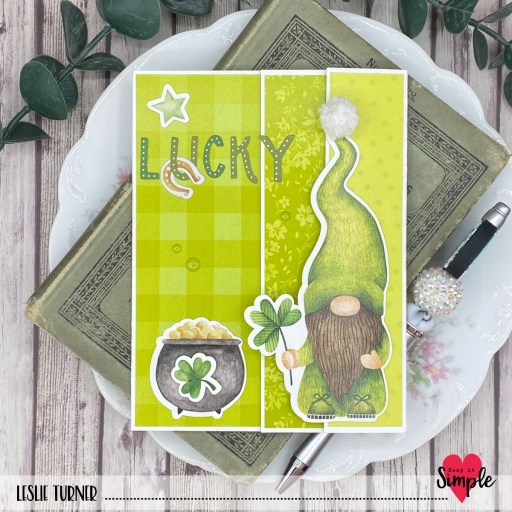
Hey everybody, Happy St. Patty’s Day and may the luck o’ the Irish be with you! I’m excited to share a DT inspiration project for Keep It Simple with you today. Several of our DT members made optional ‘green projects’ to share today and I’m showcasing a super cute hinge card using papers and stamps from our Lucky Day Collection. I recently saw this hinge card on Pinterest that sparked my interest and looked really familiar. I was sure I had made one similar to it but with a different name, and after searching I came up with THIS double flap fun fold from a couple years ago. Similar but slightly different, and a whole lot of fun!

I cut the card base and scored flaps from Neenah Classic Crest Solar White cardstock along with layering panels from assorted prints in the Lucky Day 6×9 Collection Pack. I stamped the rainbow and gnome on Solar White, colored them with an assortment of green Copic Ciao alcohol markers, and adhered them to the narrow front flap on adhesive foam squares. I added some Cosmic Shimmer Fluffy Stuff to the clouds and heated it with my heat tool to fluff it up.

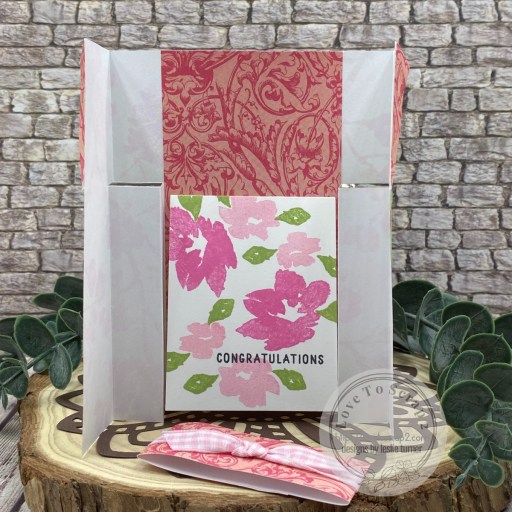
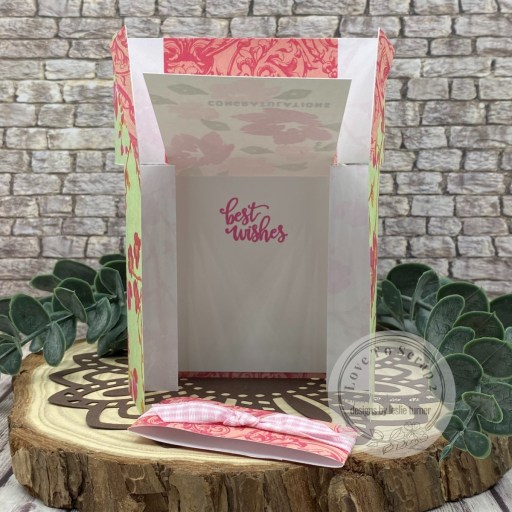
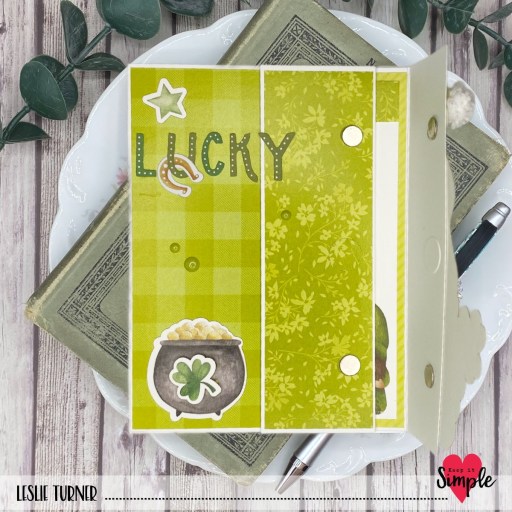
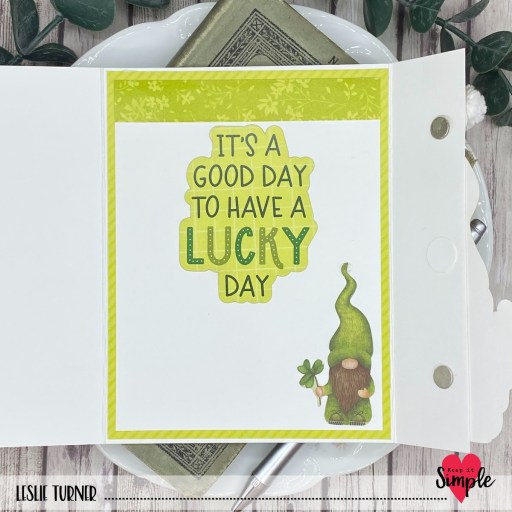
I then stamped the sentiment in two sections (along with some stars and clover) in Memento Cottage Ivy, Bamboo Leaves and Pear Tart inks, and adhered one part to the front and the other part to a panel beneath the narrow front flap. I added a small disc magnet to keep the card closed.

When the narrow front flap is lifted, there is a larger flap that opens to the left. I embellished this area with a strip cut from a print in the Lucky Day Collection Pack as well as a heart die cut from another print in the collection pack. I used the KIS Slimline Cuts Stitched Hearts Die to cut the heart. I stamped a sentiment from the Lucky Day Collection Stamps in Cottage Ivy ink, trimmed it into a strip, and adhered it across the heart.

Keep It Simple products used:
Lucky Day 6×9 Collection Pack
Lucky Day Collection Stamps
KIS Slimline Cuts Stitched Hearts
Back To Basics Stars & Stripes Enamel Stars
Back To Basics Lime Enamel Dots
Affiliate links are used in this post at no cost to you – I really appreciate your support!
Other products used:
CARDSTOCK/PAPER: Neenah Classic Crest 110# and 80# Solar White cardstock
INK: Memento Tuxedo Black, Cottage Ivy, Bamboo Leaves and Pear Tart inks; Copic Ciao alcohol markers- G21 Lime Green, G82 Spring Dim Green, G99 Olive, Y28 Lionet Gold, C-0 Cool Gray; Spectrum Noir Tri-Blends- FS6/7/8; Sakura Clear Star Gelly Roll pen
ACCESSORIES: Fiskars 12″ ProCision Rotary Bypass Paper Trimmer, Bearly Art precision craft glue, My Sweet Petunia Precision Glue Press, Mini MISTI, Big Shot, Cosmic Shimmer Fluffy Stuff, Milwaukee heat tool, Scrapbook Adhesives Thin 3D Foam Squares, small disc magnet
I hope you’ve loved seeing this project as much as I loved creating it and you’re inspired to get crafty! Be sure to check out ALL the fun goodies in the Keep It Simple online store! Save 10% on your entire order when you shop online using code LoveToScrap2 at checkout! There is no minimum purchase requirement and no usage limits, AND it combines with product, order, and shipping discounts! Is that cool, or what?! Be sure to Follow us on Facebook, Instagram, and Pinterest for lots of crafty inspiration! Thanks so much for stopping by today – we’ll see you next time!
Scrappy hugs,