Glittered Merry Christmas

Hi friends! A very Happy Saturday to you! I hope you’re enjoying some nice weather and it’s not too awfully hot where you are! Our new challenge is live this morning over at Christmas BINGO Challenges and I’m thrilled to share my DT inspiration project for CBC #2 – Anything Goes with Featured Christmas BINGO Card! I went with column G – fancy fold, ribbon, glitter, and sentiment as main focus. This is a fancy fold (my own design) and it might look pretty plain, but there is a surprise on the inside!
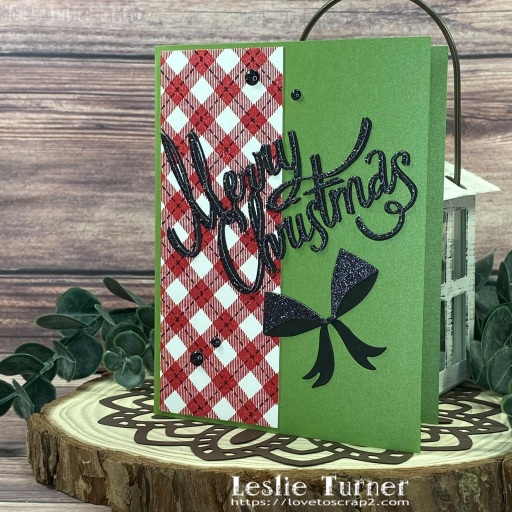
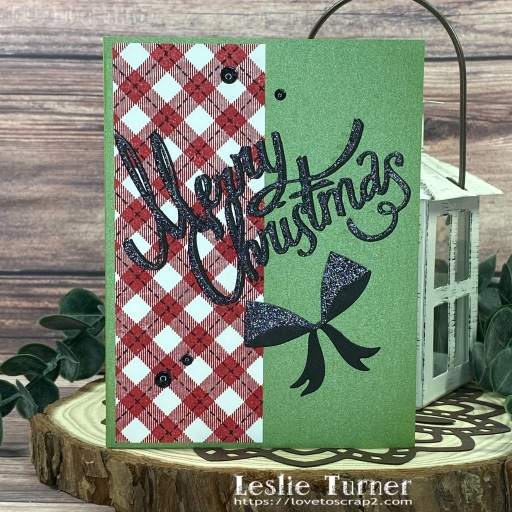
I cut a standard A2 size side-folding card base from CutCardStock Stardream Metallic Fairway cardstock along with a layering panel cut from Neenah Classic Crest 80# Solar White. Using the Concord & 9th Gingham Background stamp set, I stamped the layering panel in Stampin’ Up Real Red and Memento Tuxedo Black ink. I added the sentiment and ribbon which were die cut from CutCardStock Silk Glitter Black Prince and Pop Tone Black Licorice cardstock. The finishing touch was adding several Eyelet Outlet black glittered enamel dots.
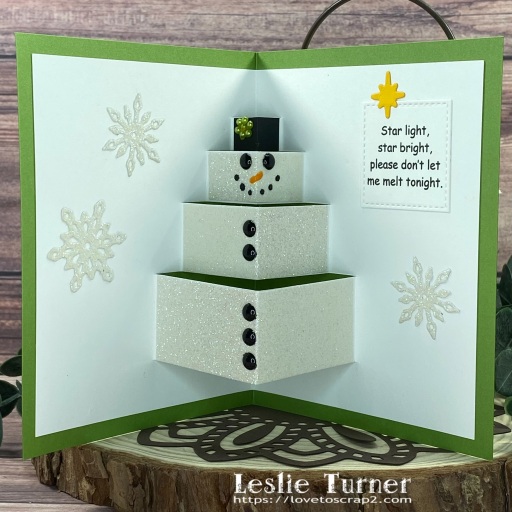
I told you there is a surprise on the inside… a pop-up snowman which is the fancy fold! Using my Fiskars 12″ SureCut paper trimmed, I made the horizontal cuts to form the pop-up snowman and covered the sections with CutCardStock Pop Tone Black Licorice and Silk Glitter Opulent Opal cardstock. I embellished his hat with tiny Eyelet Outlet green pearls.

I added Eyelet Outlet black enamel dots for the eyes and buttons, and used Nuvo Ebony Black and Ripened Pumpkin Crystal Drops for the mouth and nose. Using snowflake dies in the Sizzix Calendar Months Thinlits, I cut three snowflakes from the Silk Glitter Opulent Opal cardstock.

I wanted to use a specific sentiment from The Project Bin Merriest Christmas stamp set but it was just a tad too big, so I typed it on the laptop and cut it with a My Favorite Things Stitched Square STAX die. The finishing touch was adding a star which I die cut from CutCardStock Basis Gold cardstock using The Project Bin Mid Century Christmas dies.
Affiliate links are used in this post at no cost to you – I really appreciate your support! 

Products used:
Cardstock/Paper: Neenah Classic Crest 80# Solar White cardstock, CutCardStock Stardream Metallic Fairway, Silk Glitter Black Prince, Silk Glitter Opulent Opal, Pop Tone Black Licorice and Basis Gold
Stamps: Concord & 9th Gingham Background stamp set, Computer-generated sentiment (same as that in The Project Bin Merriest Christmas stamp set)
Ink: Stampin’ Up Real Red ink, Memento Tuxedo Black ink
Dies/Punches: Sizzix Christmas Ribbon Thinlits and Calendar Months Thinlits, My Favorite Things Stitched Square STAX, The Project Bin Mid Century Christmas dies
Accessories: Tonic Studios 12″ Guillotine Paper Trimmer, Fiskars 12″ SureCut Paper Trimmer, Art Glitter Dries Clear adhesive, 1/4″ Scor-Tape, MISTI stamping tool, Big Shot, Eyelet Outlet black enamel dots, black glittered enamel dots and green pearls, Nuvo Ebony Black and Ripened Pumpkin Crystal Drops

I hope you’ve enjoyed seeing this project and will link up with us this time! Thanks so much for stopping by today – we’ll see you next time! ;)

Scrappy hugs,

A Sea of Thanks

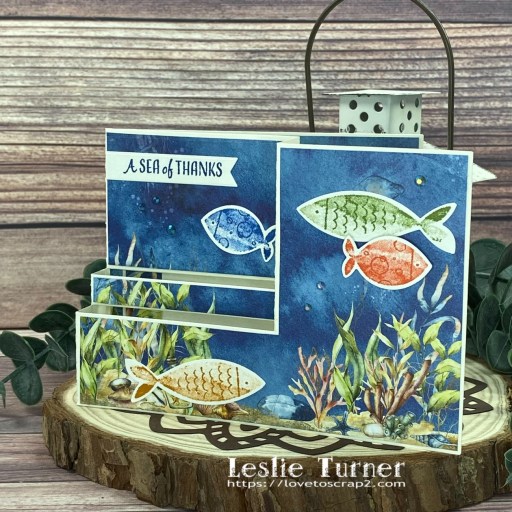
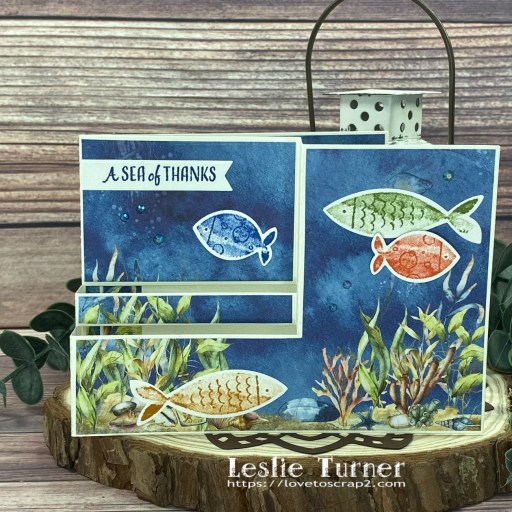
Howdy peeps! Woah, can you believe it’s July 1st already?! We’re officially into the second half of the year! Our new challenge is live this morning over at Love To Craft Challenge Blog and I’m super stoked to share my DT inspiration project for LTCCB #75 – Anything Goes! I used some gorgeous seascapes patterned paper and a side pop-up die set from Hot Off The Press paired with a couple Stampin’ Up stamp sets for this thank you card and I absolutely love how it turned out! I definitely see more of this ‘side pop-up’ style card in my future, lol!

Using the Hot Off The Press Side Pop-Up Card Cutting Dies, I cut the card base from CutCardStock Basis 110# Natural cardstock along with layering panels from Hot Off The Press Seascapes & Sand 6×6 double-sided papers. I stamped several fish from the Stampin’ Up A Fish & A Wish stamp set in Memento Bamboo Leaves, Morocco, Peanut Brittle and Danube Blue inks and punched them with the Stampin’ Up Fish Builder Punch.

I stamped a sentiment from the same stamp set in Memento Paris Dusk ink and cut it with a My Favorite Things Essential Fishtail Sentiment Strips die. The finishing touch was adding several elements from the Buttons Galore & More Beach Mix Upz Embellishments.

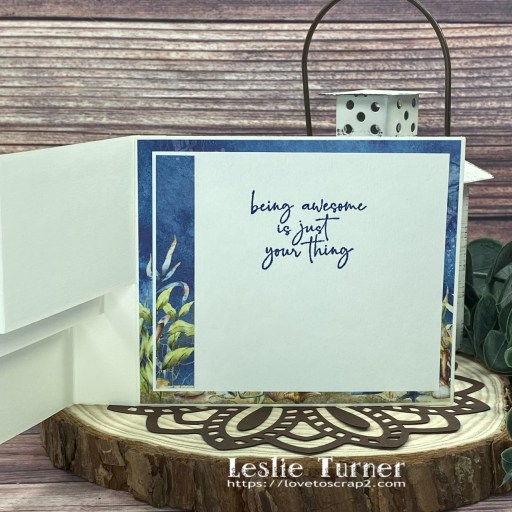
I cut the inside panel from CutCardStock Basis 80# Natural cardstock and embellished it with a strip of the Hot Off The Press Seascapes & Sand paper. I stamped a sentiment from the Stampin’ Up Happy & Heartfelt stamp set in Memento Paris Dusk ink.

Affiliate links are used in this post at no cost to you – I really appreciate your support! 

Products used:
CARDSTOCK/PAPER: CutCardStock Basis 110# Natural and Basis 80# Natural cardstock, Hot Off The Press Seascapes & Sand 6×6 Double-Sided Papers
STAMPS: Stampin’ Up A Fish & A Wish stamp set, Stampin’ Up Happy & Heartfelt stamp set
INK: Memento Bamboo Leaves, Morocco, Peanut Brittle, Danube Blue and Paris Dusk inks
DIES/PUNCHES: Hot Off The Press Side Pop-Up Card Cutting Dies, Stampin’ Up Fish Builder Punch, My Favorite Things Essential Fishtail Sentiment Strips dies
ACCESSORIES: Tonic Studios 12″ Guillotine Paper Trimmer, Tombow Mono permanent adhesive, Art Glitter Dries Clear adhesive, MISTI stamp tool, Big Shot, Buttons Galore & More Beach Mix Upz Embellishments

I hope you’ve enjoyed seeing this project and will link up with us this time! Thanks so much for stopping by today – we’ll see you next time! ;)

Scrappy hugs,
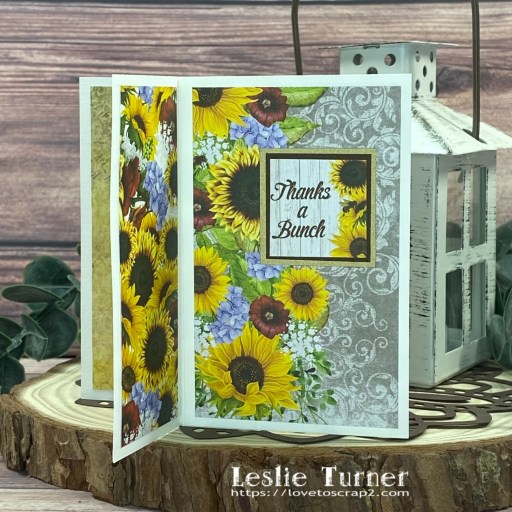
Thanks a Bunch

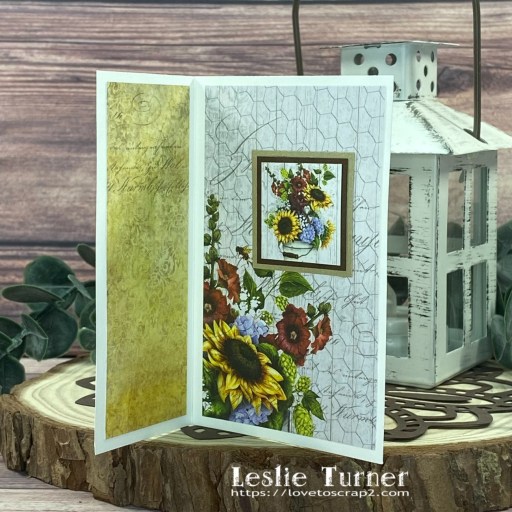
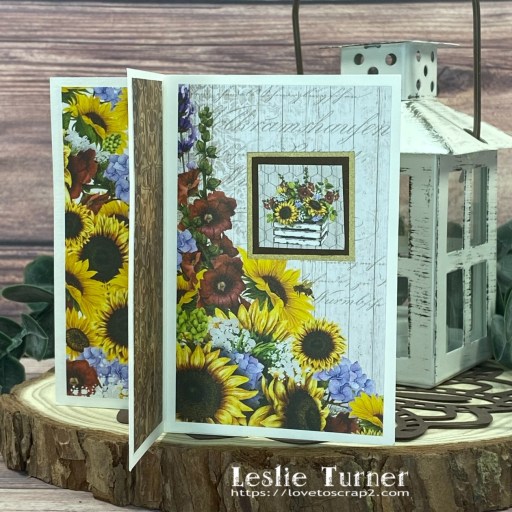
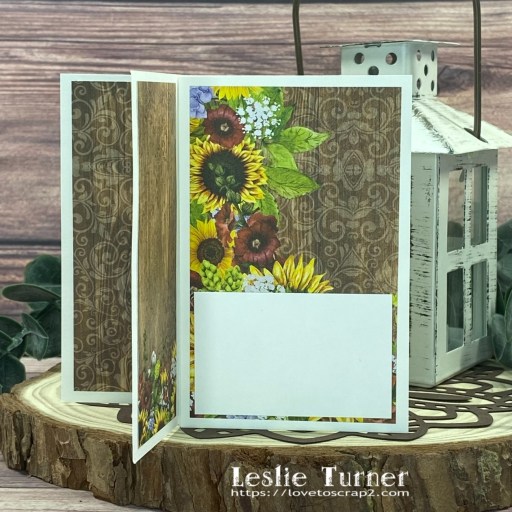
Hey everybody! Today is definitely a busy day on my blog with all the new challenges launching this morning and I hope you will come join in on some (or all) of them! This inspiration project is for our new challenge over at Love To Scrap Challenge Blog, and is a pinwheel twist card for LTSCB #162 – Anything Goes! I used my Scan N Cut, a cut file and some pretty patterned paper from Hot Off The Press. I’ve made several of these 4-sided pinwheel twist cards using a cut file but have also learned to make them by hand-cutting the card base and panels (even a 6-sided one), and either way, they are fun and easy to put together!

Using my Scan N Cut and just the base pieces from My Scrap Chick’s Haunted House Pinwheel Twist Card cut file, I cut the card base and panels from CutCardStock Basis 80# White cardstock and coordinating patterned papers from Hot Off The Press Sunflowers 6×6 papers. I assembled the card, adding ephemera from the paper pack layered on CutCardStock Basis Brown and Curious Metallic Gold Leaf to three sides and an 80# Solar White panel to the fourth side for a handwritten message and/or signature.

Affiliate links are used in this post at no cost to you – I really appreciate your support! 

Products used:
CARDSTOCK/PAPER: CutCardStock Basis 80# White, Curious Metallic Gold Leaf and Basis Brown cardstock; Neenah Classic Crest 80# Solar White cardstock, Hot Off The Press Sunflowers 6×6 papers
DIES/PUNCHES: My Scrap Chick Haunted House Pinwheel Twist Card cut file
ACCESSORIES: Brother Scan N Cut, Art Glitter Dries Clear adhesive

I hope you’ve enjoyed seeing this project and will link up with us this time! We’d love to see what you create! Thanks so much for stopping by today – we’ll see you next time! ;)

Scrappy hugs,

A Merry Little Wish

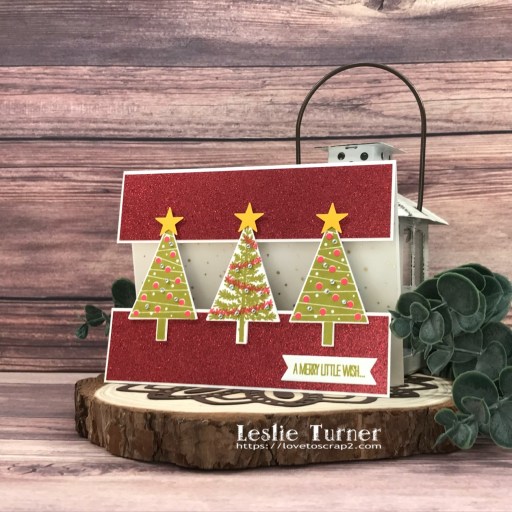
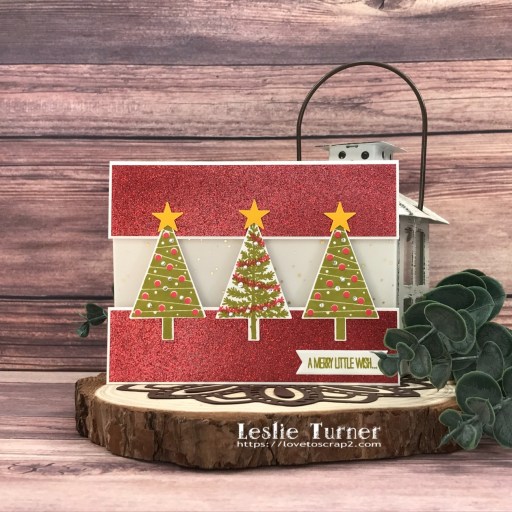
Hi friends! Happy Saturday – I hope you have something fun planned this weekend! It’ll be a long weekend for many of our friends in the US celebrating Independence Day on the 4th! Our new challenge is live this morning over at Birthstone Challenges and I’m stoked to share my DT inspiration project for BSC #4 – Anything Goes with Ruby & Peridot Colors! I pulled out several older Stampin’ Up products and created a split panel Christmas card. The split panel fold is a fun one and I’ve made quite a few of these over the years.

I cut a standard A2 size top-folding landscape card base from Neenah Classic Crest 110# Solar White cardstock and created the split panel feature. Next, I cut layering panels from red glitter paper in the American Crafts Christmas Print 6×6 paper pad. I stamped the trees from the Stampin’ Up Festival of Trees stamp set in Catherine Pooler Green Tea and Memento Lady Bug inks and punched them with the coordinating Stampin’ Up Tree Punch.

I punched stars for the tops of the trees from CutCardStock Basis Gold cardstock using the Stampin’ Up Itty Bitty Star Punch. I stamped the sentiment (from the same Festival of Trees stamp set) in Green Tea ink and cut it with a My Favorite Things Essential Fishtail Sentiment Strip die. The finishing touch was adding Darice tiny clear gemstones to the trees.

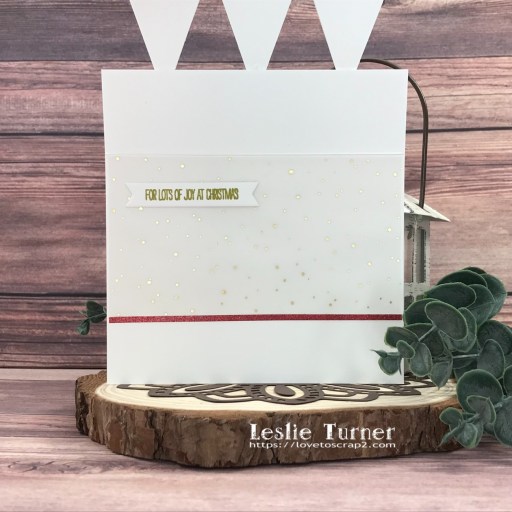
I cut the inside panel from Stampin’ Up winter Wonderland Designer Vellum Stack and embellished it with a narrow strip cut from the red glitter paper used on the front. I then added another sentiment from the Festival of Trees stamp set cut with a My Favorite Things Essential Fishtail Sentiment Strip die. I have to tell you that I switched to Art Glitter Dries Clear adhesive about six months ago and I’m so stoked that it’s completely invisible under the layer of vellum on the inside of this card!

Affiliate links are used in this post at no cost to you – I really appreciate your support! 

Products used:
Cardstock/Paper: Neenah Classic Crest 110# Solar White cardstock, CutCardStock Basis Gold cardstock, American Crafts Christmas Print 6×6 paper pad, Stampin’ Up winter Wonderland Designer Vellum Stack
Stamps: Stampin’ Up Festival of Trees stamp set
Ink: Catherine Pooler Green Tea ink, Memento Lady Bug ink
Dies/Punches: Stampin’ Up Tree Punch and Itty Bitty Star Punch, My Favorite Things Essential Fishtail Sentiment Strip dies
Accessories: Tonic Studios 12″ Guillotine Paper Trimmer, Art Glitter Dries Clear adhesive, MISTI stamp tool, Big Shot, Darice tiny clear gemstones

I hope you’ve enjoyed seeing this project and will link up with us this time! Thanks so much for stopping by today – we’ll see you next time! ;)

Scrappy hugs,
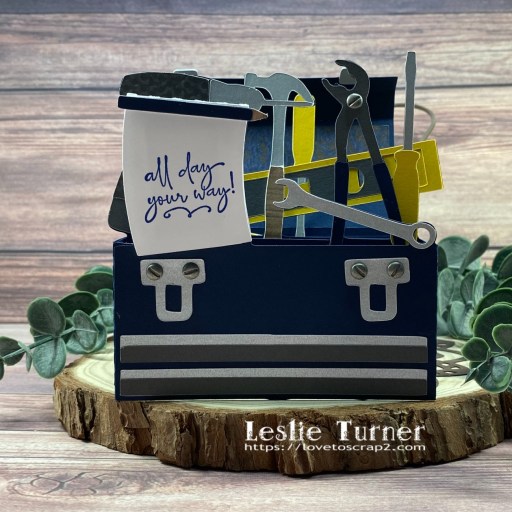
all day your way!

Hey everybody! Happy July 1st! I have but one question… how did July get here so fast?! I’m delighted to share that one of my little matchbooks scored a Top 5 honor in May over at Scrapping4fun Challenges and the lovely Rachelle invited me to guest design in an upcoming challenge, so here I am, just in time for Challenge #225 – Birthday! Rachelle and the Scrapping4fun Challenges blog both have birthdays this month, so a big ol’ Happy Birthday to them – and what better way to celebrate than to have a birthday-themed challenge!

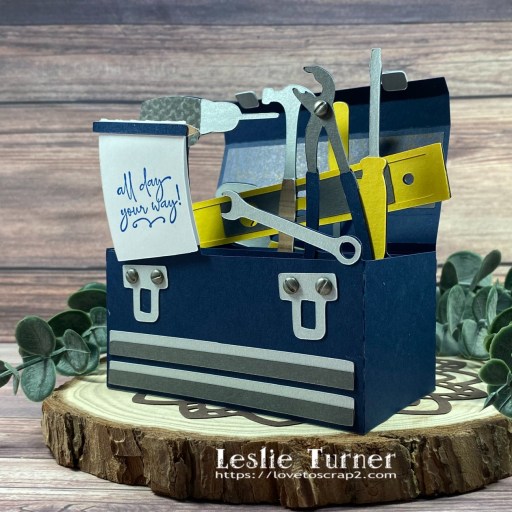
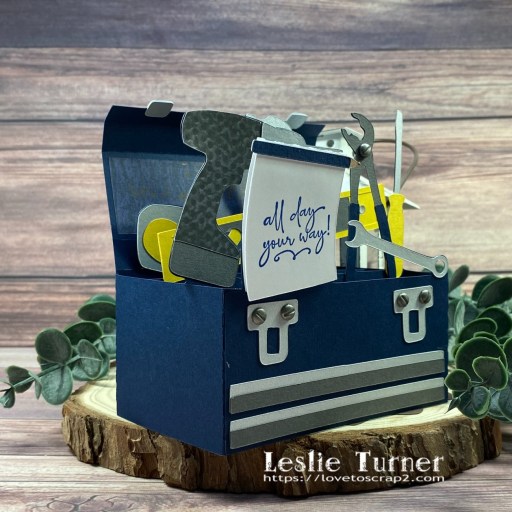
I have sooooo many cut files in my arsenal and had the urge to play, so I got out my Scan N Cut and a cut file from SVG Cuts, and created an awesome toolbox box card for Ed’s birthday. Needless to say, he loved it! With all this amazing detail, who wouldn’t?!

Using my Scan N Cut and the SVG Cuts Toolbox Box Card cut file, I cut the toolbox, tools and note pad from CutCardStock Basis Navy, Basis Gray, Stardream Metallic Silver, Pop Tone Lemon Drop and Cougar Smooth 80# White cardstock. I also used a couple patterned papers from The Paper Studio Entirely Textures 2 12×12 paper pad and P13 Always and Forever 6×8 design paper pack.

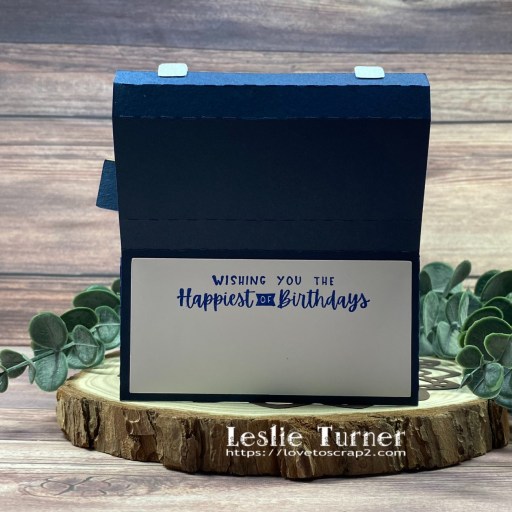
I always totally enjoy the assembly of projects like this – it’s so fun watching them come to life! I used the Stampin’ Up Happy & Heartfelt stamp set for the front sentiment and the Stampin’ Up Charming Sentiments stamp set for the back sentiment, both stamped in Catherine Pooler Suede Shoes ink.

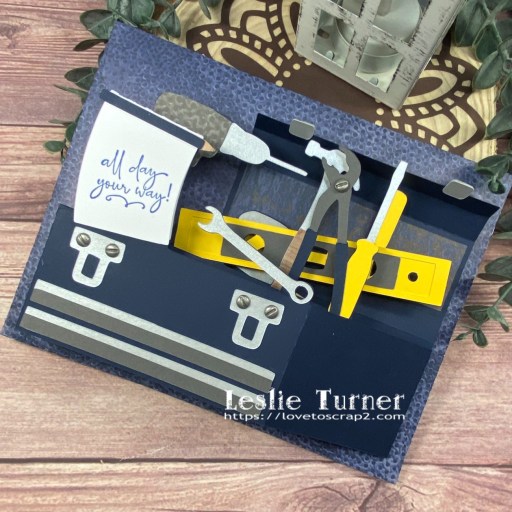
Here’s one final shot of the card folded flat ready to put in the envelope.

Affiliate links are used in this post at no cost to you – I really appreciate your support! 

Products used:
Cardstock/Paper: CutCardStock Basis Navy, Basis Gray, Stardream Metallic Silver, Pop Tone Lemon Drop and Cougar Smooth 80# White cardstock, The Paper Studio Entirely Textures 2 12×12 paper pad, P13 Always and Forever 6×8 design paper pack
Stamps: Stampin’ Up Happy & Heartfelt and Charming Sentiments stamp sets
Ink: Catherine Pooler Suede Shoes ink
Dies/Punches: SVG Cuts Toolbox Box Card cut file
Accessories: Brother Scan N Cut, CutCardStock Plus High Capacity adhesive, Art Glitter Dries Clear adhesive, MISTI stamp tool, 1″ double-sided foam strip

I hope you’ve enjoyed seeing this project and will link up with us this month! We’d love to see your birthday project! Thanks so much for stopping by today – we’ll see you next time! ;)

Scrappy hugs,
You’re Tea-riffic fun fold

Howdy peeps! Well, we’ve hit another Friday because another week has gone POOF – and it’s the last day of June! I keep saying Christmas will be here before we know it! I’ve popped in this morning to share another Splitcoast Stampers Dirty Dozen DT inspiration project. This double gate fold is one of my favorite fun folds to create because it’s so easy and really packs a punch! I love these older Taylored Expressions Tea-riffic stamps and dies, and it definitely helps to have pretty double-sided papers like these from Keep It Simple to make fun folds with!

I cut the double gate fold card base from a double-sided paper in the Keep It Simple Mango 12×12 Collection pack along with layering panels from CutCardStock Basis Natural and two more patterned papers in the Mango paper pack. I stamped the stacked cups from the Taylored Expressions Tea-riffic stamp set on Basis Natural, colored them with alcohol markers, and cut them with the coordinating Taylored Expressions Tea-riffic die set. I adhered the stacked cups on die cut layered circles using the Spellbinders Standard Circles Large and Classic Scalloped Circles Large dies. I stamped a sentiment from the same stamp set in Catherine Pooler Icing on the Cake ink in the lower right corner and added several Eyelet Outlet orange pearls.

I adhered the layers and strips for the inside panel and stamped another sentiment from the same stamp set in Catherine Pooler Icing on the Cake ink, coloring the cups with alcohol markers.

Sharing in the following challenges:
1. Cardz 4 Galz: #202 – More Than One Fold

Affiliate links are used in this post at no cost to you – I really appreciate your support! 

Products used:
CARDSTOCK/PAPER: Keep It Simple Mango 12×12 Collection Pack, CutCardStock Basis 80# Natural cardstock
STAMPS: Taylored Expressions Tea-riffic stamp set
INK: Catherine Pooler Icing on the Cake ink; Arteza alcohol markers- R03/18/43, PB03, YR12, BG05
DIES/PUNCHES: Taylored Expressions Tea-riffic die set, Spellbinders Standard Circles Large and Classic Scalloped Circles Large dies
ACCESSORIES: Tonic Studios 12″ Guillotine Paper Trimmer, Art Glitter Dries Clear adhesive, MISTI stamp tool, Big Shot, Hero Arts clear embossing powder, Milwaukee heat tool, Eyelet Outlet orange pearls

I hope you’ve enjoyed seeing this project and will consider joining the Splitcoast Stampers Fan Club which costs less than $25 for an entire year! There are tons of member perks (like seeing all the Dirty Dozen DT’s inspiration projects each month) in addition to access to all the other free content on the Splitcoast Stampers website. Be sure to check it out! The subscription is seriously awesome! Thanks for stopping by today – we’ll see you again soon!

Scrappy hugs,
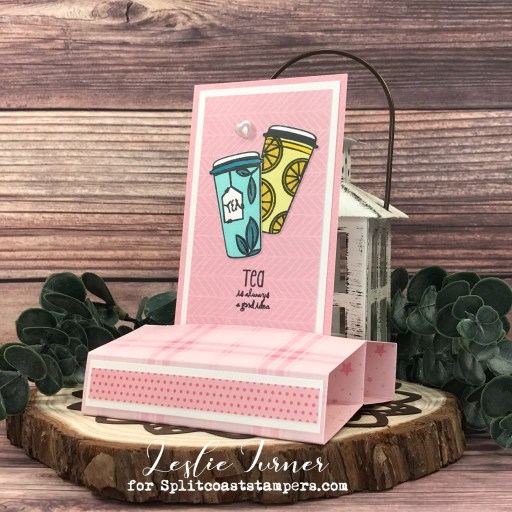
Tea is always a good idea

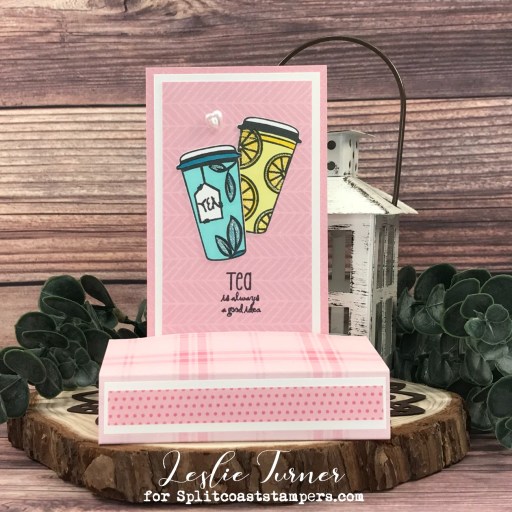
Hi friends! I hope you’re having a fabulous week! I’m back this morning to share another Splitcoast Stampers Dirty Dozen DT inspiration project! You know how I love me some fun folds, and many of the projects I make all year long are fun folds! This sliding pop-up card features tall cups with a tea-theme!

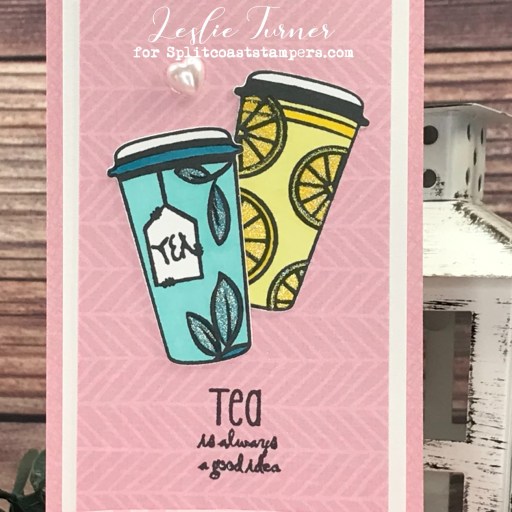
I cut the card base from a double-sided paper in the Keep It Simple Rose 12×12 Collection Pack along with layering panels and strips from CutCardStock Basis 110# White cardstock and coordinating papers in the Rose paper pack. I stamped the tall cups from the Prickley Pear Stamps Tea stamp set in Catherine Pooler Black Jack ink on a scrap piece of Basis White and colored them with alcohol markers. I added a little shimmer to each with a Sakura Clear Star Gelly Roll pen and cut them with the coordinating Prickley Pear Stamps Coffee Cup die set. I stamped a sentiment from the same stamp set in black ink and added an Eyelet Outlet heart pearl.

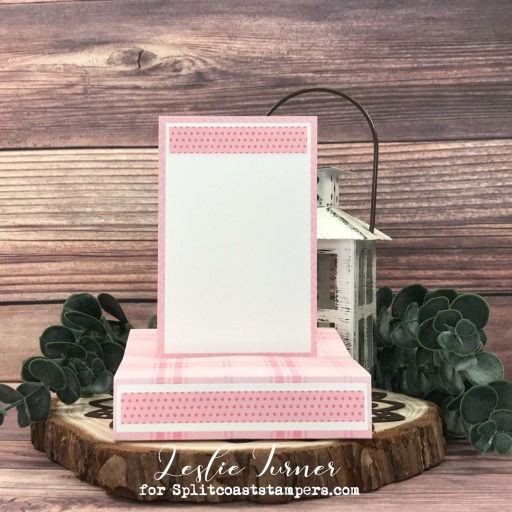
I cut the back panel from Basis White and embellished it with a leftover strip of patterned paper from the Keep It Simple Rose 12×12 Collection Pack. I left it blank for a custom sentiment and signature.

Sharing in the following challenges:
1. Crafting Happiness Challenges: #143 – Anything Goes
2. Dragonfly Dreams: June Challenge – Fancy Folds

Affiliate links are used in this post at no cost to you – I really appreciate your support! 

Products used:
CARDSTOCK/PAPER: CutCardStock Basis 80# White cardstock, Keep It Simple Rose 12×12 Collection Pack
STAMPS: Prickley Pear Stamps Tea stamp set
INK: Catherine Pooler Black Jack ink; Arteza alcohol markers- Y02/07, BG05/19; Sakura Clear Star Gelly Roll pen
DIES/PUNCHES: Prickley Pear Stamps Coffee Cup die set
ACCESSORIES: Tonic Studios 12″ Guillotine Paper Trimmer, Fiskars 12″ SureCut Paper Trimmer, Tape Runner, Art Glitter Dries Clear adhesive, MISTI stamp tool, Big Shot, Eyelet Outlet heart pearls

I hope you’ve enjoyed seeing this project and will consider joining the Splitcoast Stampers Fan Club which costs less than $25 for an entire year! There are tons of member perks (like seeing all the Dirty Dozen DT’s inspiration projects each month) in addition to access to all the other free content on the Splitcoast Stampers website. Be sure to check it out! The subscription is seriously awesome! Thanks for stopping by today – we’ll see you again soon!

Scrappy hugs,
Coffee Diorama Card

Hey everybody! My wish for you is to have a terrific Tuesday! I’ve popped in this morning to share another Splitcoast Stampers Dirty Dozen DT inspiration project! This fun coffee diorama card features fun papers, ephemera, stamps and dies from several different brands. This is such an easy fun fold and I’ve made many of them over the years.

I cut the card base and an embellishing strip from coordinating papers in the Keep It Simple Royal 12×12 Collection Pack. Next, I cut a front layering panel from Neenah Classic Crest Solar White cardstock, added some ephemera from the Royal paper pack and a stamped sentiment from the CAS-ual Fridays Stamps Mwah stamp set (stamped in Catherine Pooler Suede Shoes ink). The finishing touch was adding several Keep It Simple Royal enamel dots.

For the inside, I cut an aperture and frame using the Memory Box Stitched Octagon dies. I used one of the freebie Trinity Stamps coffee cup dies and stamped a sentiment on the cup from the Prickley Pear Stamps Coffee Cup stamps in Memento Tuxedo Black ink. I added steam (from the same Prickley Pear Stamps Coffee Cup stamps) stamped in Catherine Pooler Twilight ink on vellum and cut it with the coordinating Prickley Pear Stamps Coffee Cup dies. A signature panel was added below the aperture with another sentiment from the CAS-ual Fridays Stamps Mwah stamp set stamped in Catherine Pooler Suede Shoes ink.

And here’s a close-up showing off that fun sentiment!

Sharing in the following challenges:
1. Dragonfly Dreams: June Challenge – Fancy Folds
2. Shopping Our Stash: #499 – Sentimentally Yours

Affiliate links are used in this post at no cost to you – I really appreciate your support! 

Products used:
CARDSTOCK/PAPER: Keep It Simple Royal 12×12 Collection Pack (papers and ephemera), Neenah Classic Crest 80# Solar White cardstock, SweetStamps 36# Vellum
STAMPS: Prickley Pear Stamps Coffee Cup stamp set, CAS-ual Fridays Stamps Mwah stamp set
INK: Catherine Pooler Suede Shoes and Twilight inks, Memento Tuxedo Black ink
DIES/PUNCHES: Prickley Pear Stamps Coffee Cup die set, Trinity Stamps Coffee Cup die (freebie with an order), Memory Box Stitched Octagons dies
ACCESSORIES: Tonic Studios 12″ Guillotine Paper Trimmer, Art Glitter Dries Clear adhesive, MISTI stamp tool, Big Shot, Keep It Simple Royal Enamel Dots

I hope you’ve enjoyed seeing this project and will consider joining the Splitcoast Stampers Fan Club which costs less than $25 for an entire year! There are tons of member perks (like seeing all the Dirty Dozen DT’s inspiration projects each month) in addition to access to all the other free content on the Splitcoast Stampers website. Be sure to check it out! The subscription is seriously awesome! Thanks for stopping by today – we’ll see you again soon!

Scrappy hugs,
Merry Christmas twister

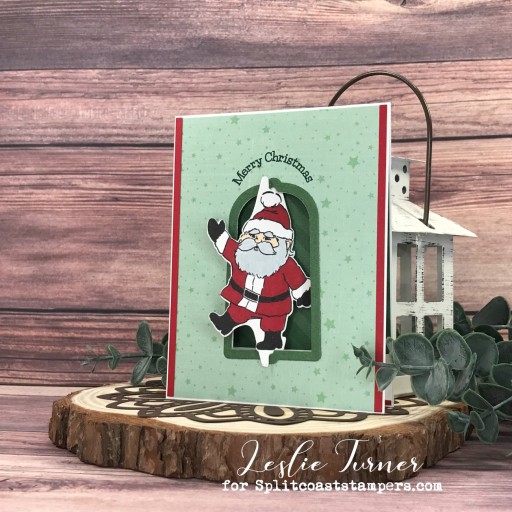
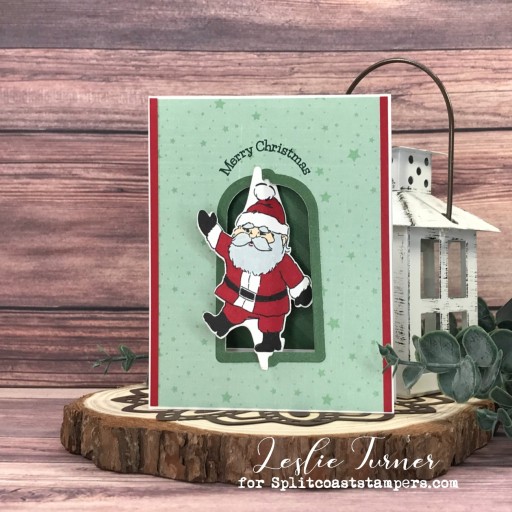
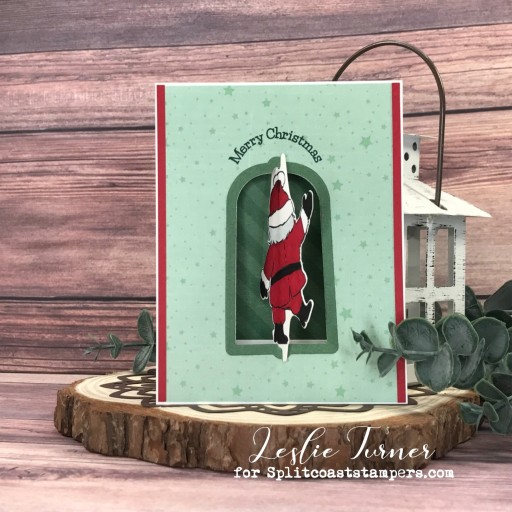
Hey everybody! Happy Friday! I hope you’ve had a great week and are headed into a fun weekend! How about another Splitcoast Stampers Dirty Dozen DT inspiration project?! You know how much I LOVE Art Impressions stamps and dies, and the Twister line is another one of my favorites, so I created a fun twister card using the Santa Twist Set stamps and dies!

I cut a standard A2 size top-folding card base from 110# Solar White cardstock along with a layering panel and aperture frame from two coordinating papers in the Keep It Simple Jade 12×12 Collection Pack. Using the Art Impressions Twist Frame Dies, I cut the aperture into the front flap and layering panel, and adhered the frame. I adhered two narrow strips to the sides cut from CutCardStock Pop Tone Wild Cherry cardstock. I stamped the sentiment from the Santa Twist Set stamps over the aperture and then stamped Santa’s front and back sides (from the same stamp set) on Solar White. I colored Santa with alcohol markers and cut him with the coordinating Santa Twist Set dies.

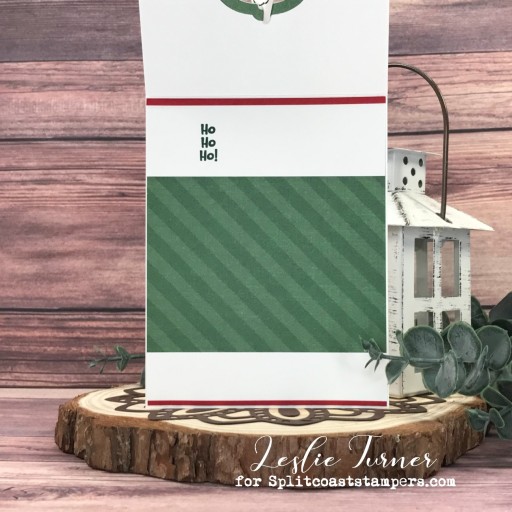
I adhered another panel from a coordinating print in the Keep It Simple Jade 12×12 Collection Pack on the inside (visible through the twist aperture), and stamped another sentiment from the Santa Twist Set stamps in black ink.

Sharing in the following challenges:
1. ABC Christmas Challenge: L is for Lots of Layers and M is for Mice (layers)
2. Dragonfly Dreams: June Challenge – Fancy Folds

Affiliate links are used in this post at no cost to you – I really appreciate your support! 

Products used:
CARDSTOCK/PAPER: Neenah Classic Crest 110# Solar White cardstock, Keep It Simple Jade 12×12 Collection Pack, CutCardStock Pop Tone Wild Cherry cardstock
STAMPS: Art Impressions Santa Twist Set stamps
INK: Memento Tuxedo Black ink; Arteza alcohol markers- R31, RP09, NG08, BR28, BK00; Catherine Pooler Deck The Halls ink
DIES/PUNCHES: Art Impressions Twist Frame die and Santa Twist Set dies
ACCESSORIES: Tonic Studios 12″ Guillotine Paper Trimmer, Tombow Permanent Adhesive, Bearly Art precision craft glue, MISTI stamp tool, Big Shot

I hope you’ve enjoyed seeing this project and will consider joining the Splitcoast Stampers Fan Club which costs less than $25 for an entire year! There are tons of member perks (like seeing all the Dirty Dozen DT’s inspiration projects each month) in addition to access to all the other free content on the Splitcoast Stampers website. Be sure to check it out! The subscription is seriously awesome! Thanks for stopping by today – we’ll see you again soon!

Scrappy hugs,
Merry Christmas fun fold

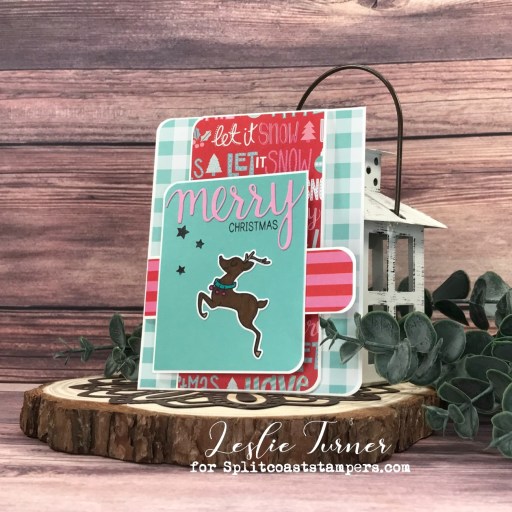
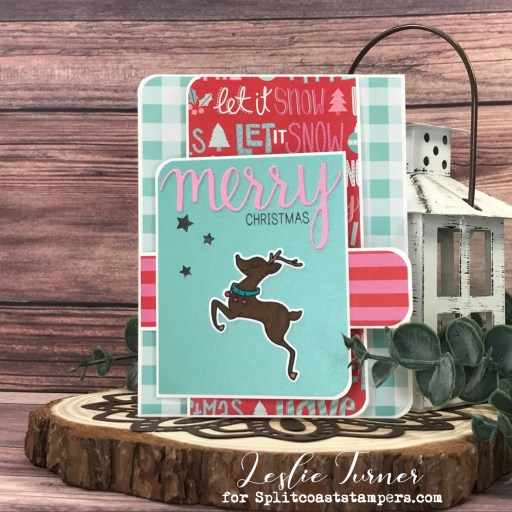
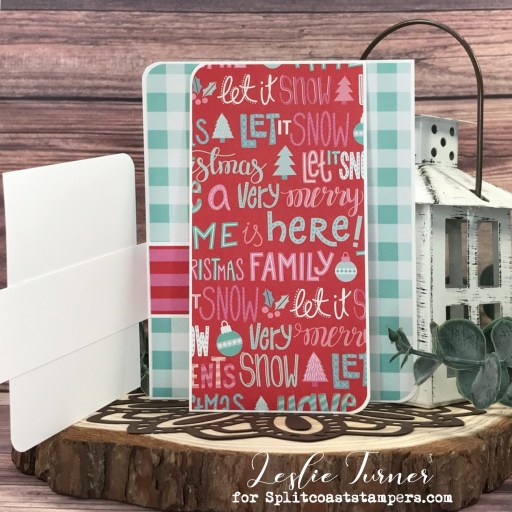
Hi friends! I hope you’re having a wonderful week! It’s unreal that we’re already on the downslide to the end of June! I have another Splitcoast Stampers Dirty Dozen DT inspiration project to share… I hope you aren’t getting tired of seeing them because I sure am enjoying sharing them with you! This Merry Christmas double flap fun fold is one of my favorite designs and I’ve made quite a few of them over the years. I totally love a pink and teal color combo for Christmas!

I cut the card base and flaps from Neenah Classic Crest 80# Solar White cardstock and rounded the corners. I cut layering panels from CutCardStock Stardream Metallic Lagoon cardstock and coordinating papers from The Paper Studio Four Seasons and Everything In Between -2- paper pad.

I stamped the reindeer from the Hero Arts Jingle All The Way stamp set on Solar White cardstock, colored it with alcohol markers and ultra fine point Sharpies, and cut it with the coordinating Jingle All The Way die. I die cut the ‘merry’ portion of the sentiment from CutCardStock Pop Tone Cotton Candy cardstock using the die from the Hero Arts Merry Stamp & Cut, then stamped stars and the other portion of the sentiment from the Merry Stamp & Cut as well.
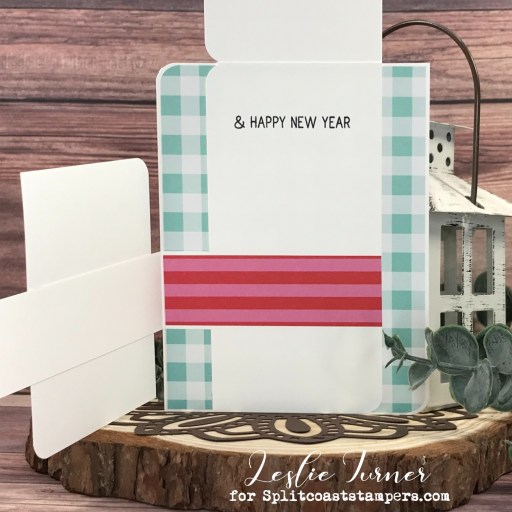
Here are shots of the card opening up with the inside sentiment stamped from the Merry Stamp & Cut. So fun!

Sharing in the following challenges:
1. A Perfect Time To Craft: June #6-2023 – Anything Goes
2. Classic Design Challenge: June #6 – Anything Goes
3. ABC Christmas Challenge: L for Lots of Layers and/or M for Mice (layers)

Affiliate links are used in this post at no cost to you – I really appreciate your support! 

Products used:
CARDSTOCK/PAPER: Neenah Classic Crest 80# Solar White cardstock, CutCardStock Pop Tone Cotton Candy and Stardream Metallic Lagoon cardstock, The Paper Studio Four Seasons and Everything In Between -2- paper pad
STAMPS: Hero Arts Jingle All The Way stamp set and Merry Stamp & Cut
INK: Memento Tuxedo Black ink; Sharpie Ultra Fine Point markers- hot pink, teal and red; Arteza alcohol markers- BR52/84
DIES/PUNCHES: Kadomaru Pro Corner Rounder, Hero Arts Jingle All The Way die set and Merry Stamp & Cut
ACCESSORIES: Tonic Studios 12″ Guillotine Paper Trimmer, Tape Runner, Bearly Art precision craft glue, MISTI stamp tool, Big Shot

I hope you’ve enjoyed seeing this project and will consider joining the Splitcoast Stampers Fan Club which costs less than $25 for an entire year! There are tons of member perks (like seeing all the Dirty Dozen DT’s inspiration projects each month) in addition to access to all the other free content on the Splitcoast Stampers website. Be sure to check it out! The subscription is seriously awesome! Thanks for stopping by today – we’ll see you again soon!

Scrappy hugs,