4/15/24 Spotlight Winner at Sparkles Monthly Challenges!
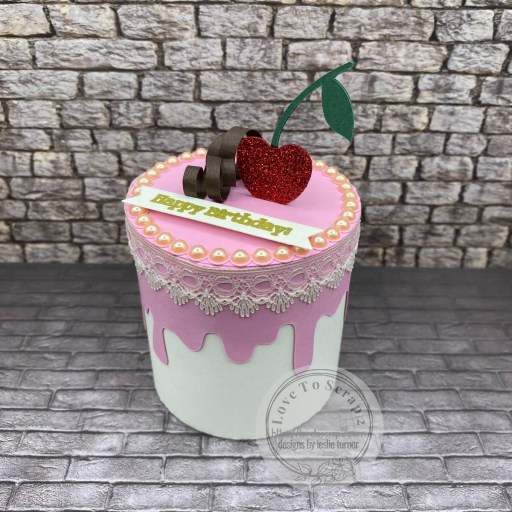
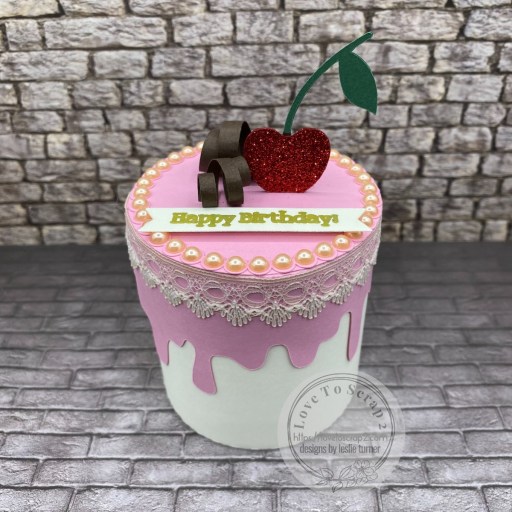
Hi friends! Happy Friday! I hope you’ve had an awesome week and now it’s time for some fun this weekend, hopefully! I’m thrilled to share that I was a Top Cut recently over at Cut It Up Challenge Blog and was invited to guest in an upcoming challenge, so here I am just in time for Challenge #300 – Happy Birthday! A birthday cake treat box couldn’t be more appropriate to create to help them celebrate their birthday! I used an SVG cut file in my arsenal along with cardstock, pearls and lace from my stash. I dyed the white lace with antique linen distress ink and used the draw feature on my cutting machine for the tag. Saying I had ‘fun’ with this project would be an understatement… it was a blast and I love how it turned out!
Using the Dreaming Tree Petite Cake SVG cut file with my Cricut Explore Air 2, I cut the cake pieces with CutCardStock Lessebo Ivory, the icing pieces with CutCardStock Pop Tone Cotton Candy, the chocolate curls with CutCardStock Pop Tone Hot Fudge, and the cherry with Stampin’ Up Red Glimmer paper and CutCardStock Lessebo Hunter Green cardstock. I used the draw function and a Cricut 1.0 Gold Metallic Marker on my cutting machine for the tag which I cut with a My Favorite Things Essential Fish Tail Sentiment Strip.
The assembly is always the most fun. I embellished the top of the cake with Eyelet Outlet ivory pearls along with 3 Girl JAM lace which I dyed with Ranger antique linen distress ink and misted water in my Tim Holtz distress sprayer. I attached the tag with a Gina K Designs Shaker Strip to give it the same height as the pearls.
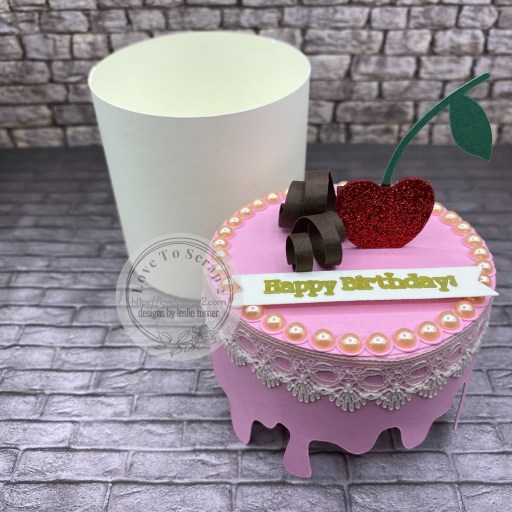
Here’s a shot with the lid removed. It’s actually a good-sized little box – big enough to hold a small gift or some candy. Totally fun! ;)
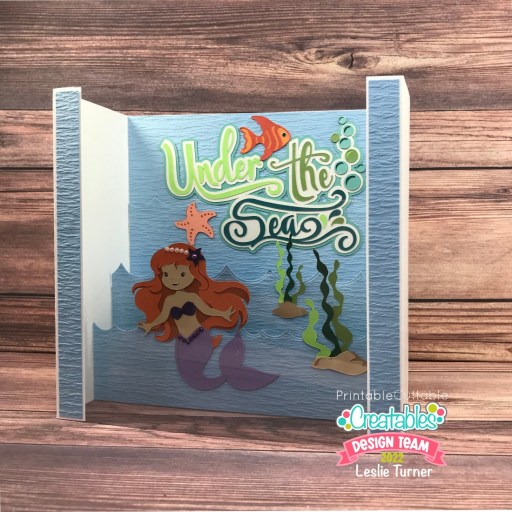
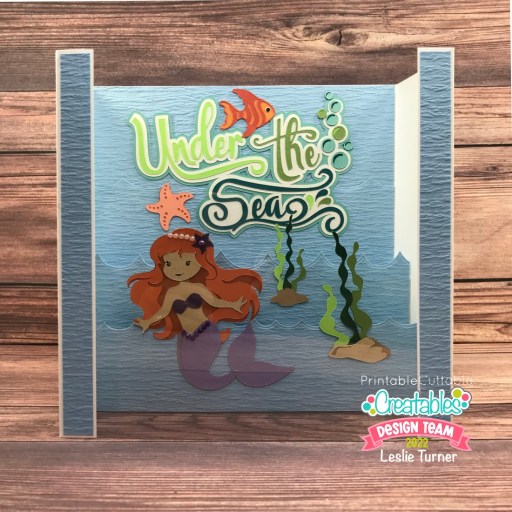
Hi everyone! Happy Thursday – I hope you’re having a great week! I’m stoked to be back on the Printable Cuttable Creatables blog today with another awesome DT inspiration project! Have you ever seen a paper aquarium?! I never have so I made one featuring the Under the Sea Cutting File Scrapbook Title, Cute Mermaid SVG File and Seaweed SVG File! It’s a lot like a box card but 8″ square when standing, has acetate across the front, and it folds flat for mailing if desired!
I started by constructing the aquarium (with two inside strips) from Neenah Classic Crest 110# Solar White cardstock. I cut layering panels for the inside and outside along with die cut waves (using the My Favorite Things Slimline Ocean Motion Die-namics) from The Paper Cut Blue Crinkle Paper, and adhered them in place.
I cut the pieces in the Under the Sea title, assembled it, and adhered it to the back wall of the aquarium. I moved the small seaweed down to the middle wave panel. I then cut the pieces in the Cute Mermaid SVG file after flipping the file, assembled her, and adhered her on the bottom wave panel. I embellished her with pearls and gemstones. Then finally I cut the pieces for one of the options in the Seaweed SVG file, assembled it and adhered it on the bottom wave panel. The final step was adhering a panel of acetate across the front. Acetate is very hard to photograph but this close-up photo actually came out pretty cool-looking because it yields a rippled effect which is somewhat realistic of an underwater scene! I can assure you that all the elements are actually flat! ;)
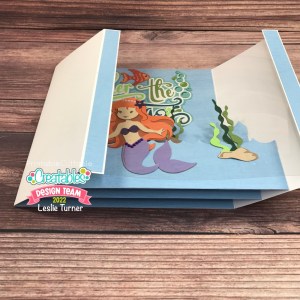
Here is an overhead shot so you can see the simple box card type construction, and a shot of it folding flat for mailing if desired.
I hope you’ve enjoyed today’s project and you’re inspired to get out that electronic cutting machine! Be sure to check out all the fun goodies in the Printable Cuttable Creatables store – you’ll have a blast and there are tons of freebies to get started! Save 15% off your order at Printable Cuttable Creatables by using coupon code love2scrap15 at checkout! Be sure to Follow us on Facebook, Instagram, Pinterest, Twitter and YouTube for lots of crafty inspiration! And while you’re at it, join our Crafting with Printable Cuttable Creatables Facebook Group for more inspiration and to share your projects! Thanks so much for stopping by today – we’ll see you next time!
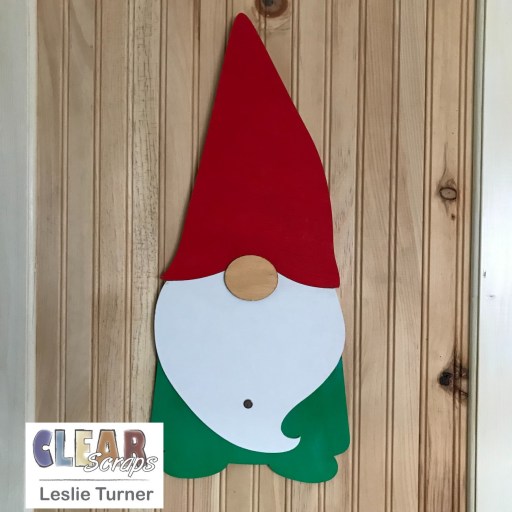
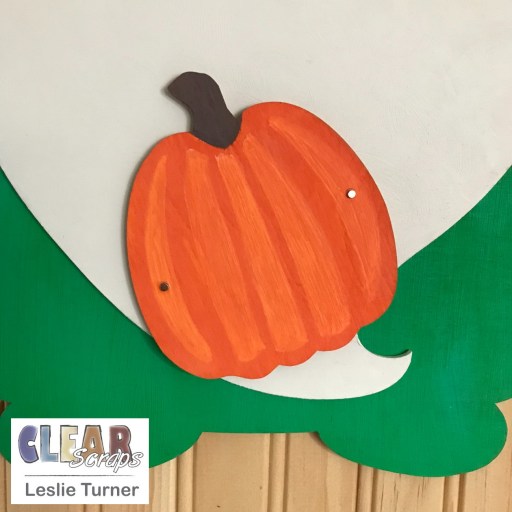
Hey, everybody! Hope you’re having a wonderful weekend! Dang. I can’t believe July is half over already! I’m thrilled to be back on the Clear Scraps blog today with another awesome DT inspiration project! I am really loving gnomes these days and there are so many different ones out there… short, tall, stamped, die cut, male, female, and the list goes on! This dude, created with the XL Wood Gnome 2, is a giant, standing over 20″ tall! He comes with a stand but I fashioned him to hang on a front door to hold different seasonal add-on elements all year long! You’ll get a peek of only one of those add-ons in this post but you’ll see all 12 of them in my final Clear Scraps post in just a few days! So stay tuned… saving the best for last!
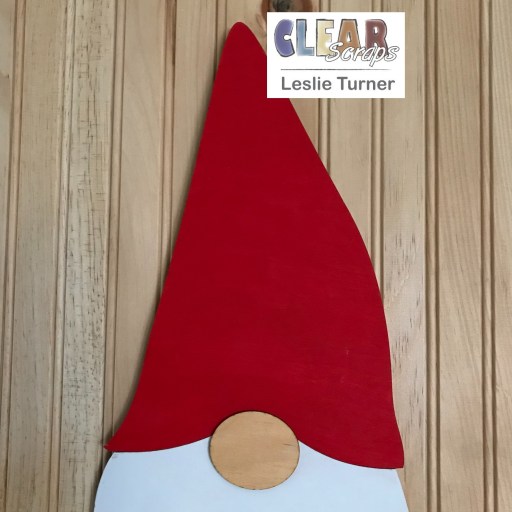
I painted Gnomie’s hat with red acrylic paint. I painted his robe with light green acrylic paint and then swiped on bright aqua green acrylic paint over that to tone down the light green a bit. I painted his beard with white ash paint. Then finally, I colored his nose and hands with a flesh tone alcohol marker.
I adhered a small disc magnet toward the bottom of his beard in the area where he’ll ‘hold’ each of the seasonal add-ons which also have a small disc magnet on the back of each one.
I adhered a tiny magnet to the back of each of his hands.
Each seasonal add-on has two tiny magnets on the front in the areas where his hands will ‘hold’ each one. Stay tuned for my post showcasing all the add-ons in just a few days!
Other products used: Ink/Paint: Liquitex Basis Bright Aqua Green, Light Green Permanent and Naphthol Crimson acrylic paint; Farmhouse White Ash paint; Arteza BR28 alcohol marker Accessories: Ranger Distress Collage Medium, small and tiny disc magnets
I hope you’ve enjoyed today’s project and you’re inspired to get those craft supplies out to play! Be sure to check out all the amazing acrylic, wood and chipboard goodies at Clear Scraps… OMGoodness, you won’t be disappointed! And head on over to the Clear Scraps Facebook Page for lots of inspiration! And while you’re at it, join the Clear Scraps Facebook Creative Group to connect with other Clear Scraps fans! Thanks so much for stopping by today – we’ll see you next time!
7/12/22 Featured at Little Red Wagon! 8/12/22 Top 3 at Winter Wonderland Challenge Blog!
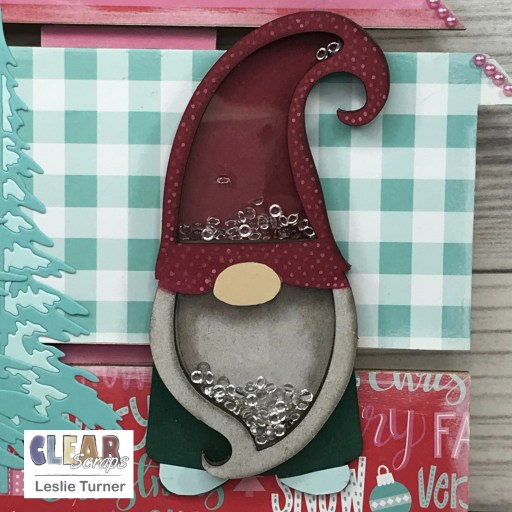
Hey, everybody! Happy Hump Day! I hope you’re having a great week! I’m thrilled to be back on the Clear Scraps blog today with another awesome DT inspiration project! I created a super fun gnome-themed Christmas home decor piece featuring the Medium House DIY Pallet Shape and Mini Shaker Gnome! The pallet shapes and mini shakers are so much fun to play with!
I covered the three sections of the Medium House DIY Pallet Shape with coordinating Christmas patterned papers, inked the edges of the sections with white pigment ink, and added a 3mm pink pearl bling strip to the roof outline. I stamped a sentiment in green ink and die cut it with a sentiment strip die, and adhered it to the roof section.
Next, I die cut two trees from dark aqua cardstock and adhered the outlines to the left of the house. I die cut the two trees once more from light aqua cardstock and adhered the negative space pieces on the tree outlines on the house.
Turning my attention to the Mini Shaker Gnome, I colored his hat and robe with alcohol markers and sponged white pigment ink on his beard. I added accents to his beard with an alcohol marker, added accents to his hat with an acrylic paint pen, and covered his shoes with light aqua cardstock. I assembled the shaker from the bottom up, adhering the two bottom chipboard forms and then adding 3mm clear droplets to the shaker compartments. I adhered the acrylic divider (with the protective film removed from both sides) and then adhered the front chipboard form. I clamped the shaker for about 10-15 minutes to be sure the layers adhered well, and adhered the gnome beside the trees.
And one more look… loving how this turned out! You all know how much I love gnomes and how much I love Christmas, and this piece really makes me happy! ;)
Other products used: Cardstock/Paper: CutCardStock Sandcastle, Basis Aqua, and Pop Tone Sno Cone cardstock; Neenah Classic Crest Solar White cardstock, The Paper Studio Four Seasons and Everything in Between -2- paper pad Stamps: Stampingbella Festive Gnome Sentiments stamp set Ink/Paint: Hero Arts Unicorn ink, Catherine Pooler Daydream ink; Arteza alcohol markers- R35, RP04, BG35, NG08; pink acrylic paint pen Dies/Punches: Sizzix Woodlands Thinlits, My Favorite Things Essential Fishtail Sentiment Strips Die-namics Accessories: Bearly Art precision craft glue, brayer, MISTI stamp tool, Big Shot, Kat Scrappiness 3mm Sparkling Clear Droplets, Eyelet Outlet 3mm pink pearl bling strip
I hope you’ve enjoyed today’s project and you’re inspired to get those craft supplies out to play! Be sure to check out all the amazing acrylic, wood and chipboard goodies at Clear Scraps… OMGoodness, you won’t be disappointed! And head on over to the Clear Scraps Facebook Page for lots of inspiration! And while you’re at it, join the Clear Scraps Facebook Creative Group to connect with other Clear Scraps fans! Thanks so much for stopping by today – we’ll see you next time!
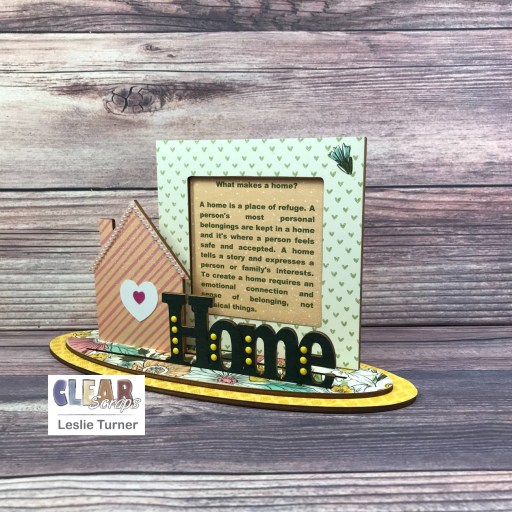
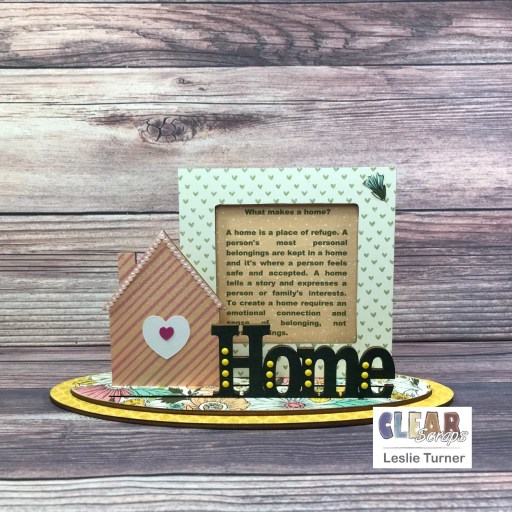
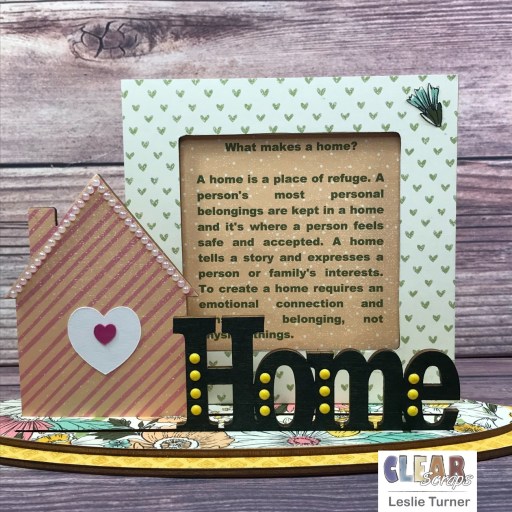
Hey, everybody! Happy Monday! I hope you had a fabulous weekend! I’m thrilled to be back on the Clear Scraps blog today with another awesome DT inspiration project. I’ve been playing with the 3-D Frameables again (maybe still playing with them, lol) and created a sweet home-themed project featuring our Base with Square Frame and Word n Shape Home-House. I really enjoyed creating this!
I started by covering the two base pieces, the frame, and the House shape with patterned paper, and adhered the base pieces together. This was a new pack of paper and I really love all the coordinating patterns.
I printed the home definition on a piece of the patterned paper that I cut down to 8-1/2″ x 11″, trimmed it, and sandwiched it between the two frame pieces. I fussy cut a small flower from the scrap leftover from covering the small base piece, and adhered it to the top right corner of the frame. I adhered two heart die cuts (leftover from another project) to the house and embellished it with white pearl bling strips. I colored the Home word with a dark green alcohol marker and embellished it with yellow enamel dots.
And one more peek… so loving how this turned out! How true is that home definition?! Of course, having fun products to play with is definitely a plus!
Other products used: Cardstock/Paper: Stampin’ Up Daffodil Afternoon DSP Ink: Arteza YG00 Accessories: Computer-generated definition of home, leftover die cut hearts from stash, Bearly Art precision craft glue, Eyelet Outlet Yellow Enamel Dots, Eyelet Outlet White Pearl Bling Strips
I hope you’ve enjoyed today’s project and you’re inspired to get those craft supplies out to play! Be sure to check out all the amazing acrylic, wood and chipboard goodies at Clear Scraps… OMGoodness, you won’t be disappointed! And head on over to the Clear Scraps Facebook Page for lots of inspiration! And while you’re at it, join the Clear Scraps Facebook Creative Group to connect with other Clear Scraps fans! Thanks so much for stopping by today – we’ll see you next time!
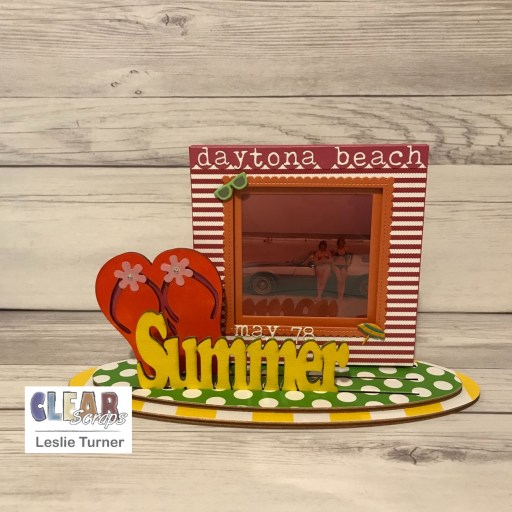
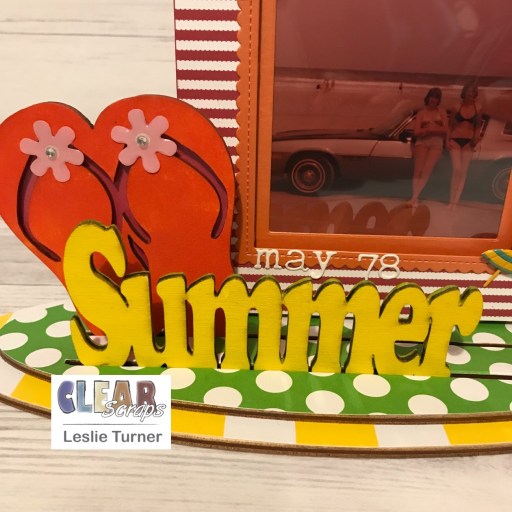
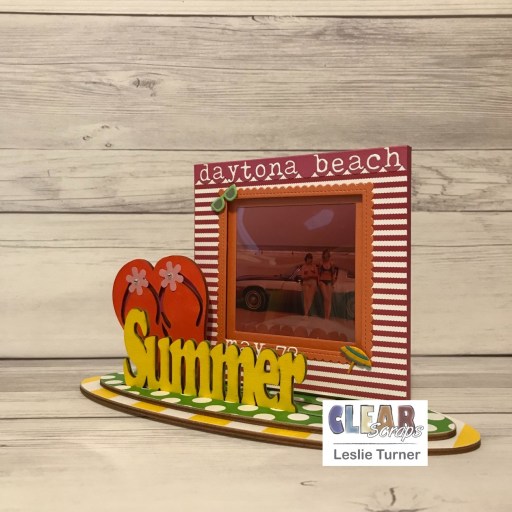
Hey, everybody! I hope you had a great week and you’re having fun this weekend and staying healthy! I’m thrilled to be back on the Clear Scraps blog today with another awesome DT inspiration project! I created another 3-D Frameables project – these are so versatile and so much fun! I used the Base with Square Frame and Word n Shape Summer-Flip Flops this time to document a memory from May 1978 that is still just as fresh in my mind as it was that day! My BFF got a brand new 1978 Chevy Camaro which we drove up and down the strip on Daytona Beach – back in the day when people were actually allowed to drive on the beach. We had such a great time… hard to believe that was 44 years ago, lol!
I painted the word Summer with yellow acrylic paint and the flip flops with orange acrylic paint and let them dry. I adhered a piece of pink cardstock to the back of the flip flops and embellished them with enamel flowers.
I covered the smaller oval base with green dotted paper, the larger oval base with yellow striped paper, and the frame with red and white striped paper. I adhered an orange cardstock mini scallop frame around the opening of the frame. I added acetate to the back of the frame to keep the photo clean and free of dust (which unfortunately casts weird shadows on the photo, lol). I adhered the frame to the wood backing and let it dry overnight with clips. That’s me on the right, by the way. ;)
I added a pink scallop strip to the top edge of the frame and added white die cut letters spelling ‘daytona beach’ and then adhered pink strips to the left and right edges for a finished look. I added the date using white die cuts along with sunglasses and beach umbrealla brads.
Other products used: Cardstock/Paper: Canvas Corp Lots of Color Paper Collection, CutCardStock Stardream Metallic Flame cardstock, CutCardStock Stardream Metallic Azalea cardstock, Neenah Classic Crest Solar White cardstock Dies/Punches: My Favorite Things Stitched Square STAX and Stitched Mini Scallop Square STAX Die-namics, Sizzix Alphanumeric Tiny Type Lower Thinlits, Stampin’ Up Scallop Edge Punch Accessories: Tonic Studios 12″ Guillotine Paper Trimmer, Bearly Art precision craft glue, Liquitex Cadmium Light Hue and Primary Yellow acrylic paints, Eyelet Outlet Pastel Sunglasses and Beach Umbrella Brads, Eyelet Outlet Enamel Flowers and Clear Jewel Bling Strip
I hope you’ve enjoyed today’s project and you’re inspired to get those craft supplies out to play! Be sure to check out all the amazing acrylic, wood and chipboard goodies at Clear Scraps… OMGoodness, you won’t be disappointed! And head on over to the Clear Scraps Facebook Page for lots of inspiration! And while you’re at it, join the Clear Scraps Facebook Creative Group to connect with other Clear Scraps fans! Thanks so much for stopping by today – we’ll see you next time!
6/1/22 Top Pick at Ellibelle’s Crafty Wednesday Challenge!
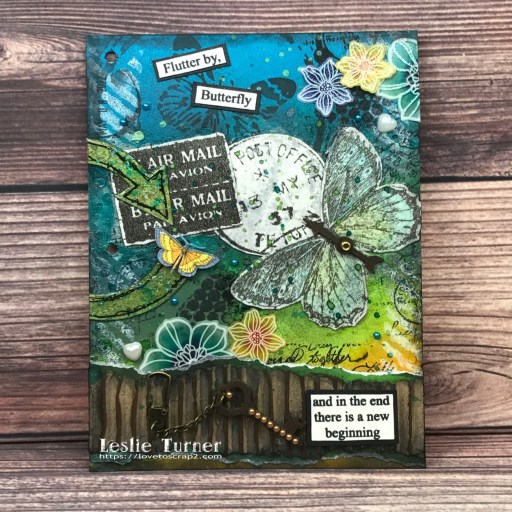
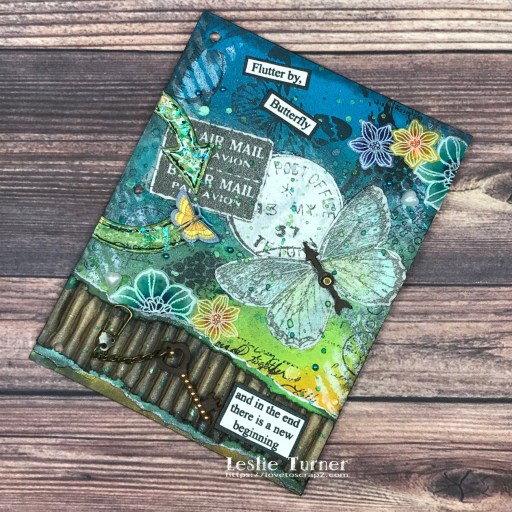
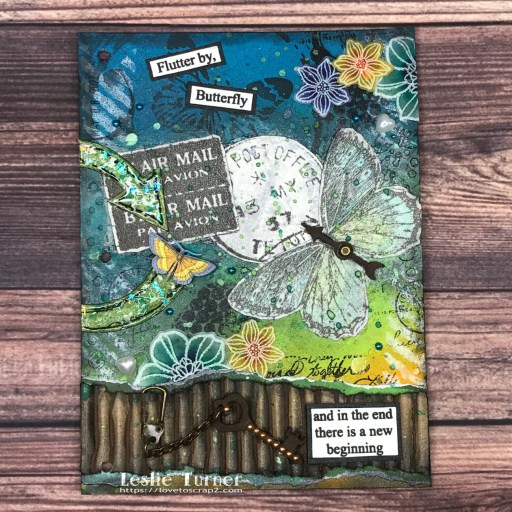
Hey everybody! I hope you’re having a great week and not working too hard! I’m back this morning with a new page in my new art journal that I finished on Mother’s Day. Even though it’s butterfly-themed, I’ve dedicated this page to our little seven-month-old kitten named Flutterby who was killed by a car speeding through our neighborhood three weeks ago. As most of you know, Ed and I rescue cats and kittens, and Flutterby was the last surviving kitten born to feral Mama last September so she had a special place in our hearts. It was hard. I can now talk about her without tearing up (most of the time) and this page makes me feel like she’s in a good place. :)
I started by inking a piece of Neenah Classic Crest 165# Solar White cardstock with mermaid lagoon, peacock feathers, twisted citron and fossilized amber distress inks using the direct-to-paper technique for good bold coverage. Using the Taylored Expressions Bubbly stencil and DreamWeaver Translucent Embossing Paste, I added some bubbles down both sides. Next, I added arrows on both sides using the TCW Susana’s Arrows stencil and Ranger picket fence distress stain, and then added several elements over the page using the TCW Mini Butterfly Collage stencil and Ranger black soot distress ink. Then I randomly stamped clusters of dots, postage stamps and text over the background using Paper Wings Productions Art Textures and Writing Backgrounds stamp sets.
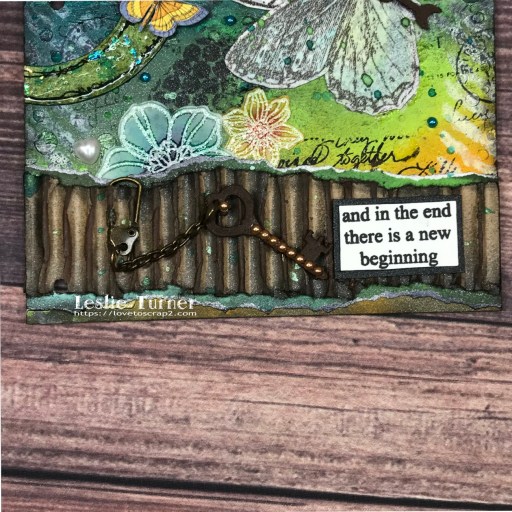
I tore a piece of kraft corrugated paper, inked the edges, and adhered it to a torn piece of Hot Off The Press Flowing Ink double-sided paper and then to the bottom of the page. I grabbed a Hobby Lobby Woodpile Key and coated it with Prima Finnabair Brown Rust Paste and Red Rust Paste to give it a rusted look, and embellished it with a piece of Eyelet Outlet Brown Pearl Bling Strip. I rubbed some of the brown rust paste onto the raised portions of the corrugated paper, then attached a Tim Holtz idea-ology Swivel Clasp to the key with his idea-ology Jump Rings, and attached it to the corrugated paper.
I created an arrow by tracing a curved arrow from the TCW Susana’s Arrows stencil onto a scrap of 110# Solar White cardstock which I fussy cut and then drew lines around the edges with a Sakura Pigma Micron 08 black pen. I sprayed it with Tattered Angels It’s Green and Dragonfly Glimmer Mists, applied Glossy Accents and sprinkled Brutus Monroe Blue Shimmer Flakes over it. I applied another light ‘bumpy’ coat of Glossy Accents for texture, covering and trapping the shimmer flakes. Once dry, I cut the curved arrow in half and adhered the two pieces to the left side of the page, and added a 49 and Market fussy cut and layered butterfly with Darice Double-Sided Adhesive Foam Circles.
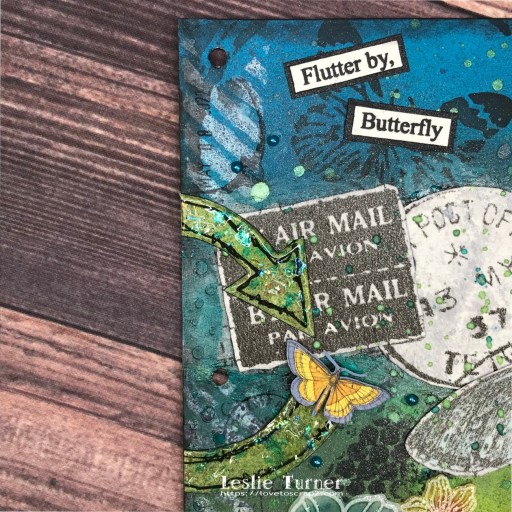
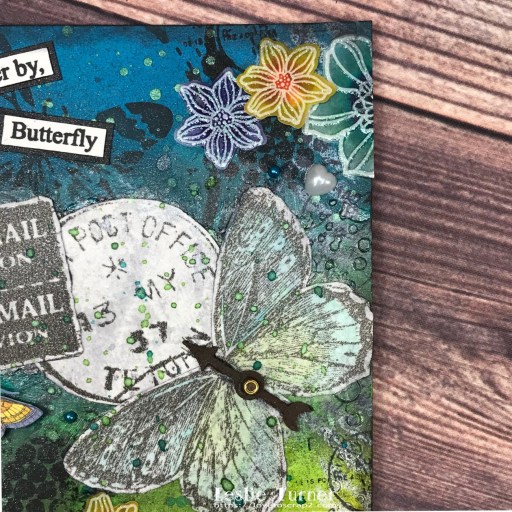
I cut two postal pieces from a roll of Tim Holtz idea-ology Postale Tissue Wrap and a large butterfly from his idea-ology Melange Tissue Wrap, and adhered them to scrap pieces of 110# Solar White cardstock with Ranger Distress Collage Medium. Once dry, I fussy cut each one of them, watercolored the butterfly with Light Green, Turquoise Green, Persian Green and Gray Zig Clean Color Real Brush Markers and a Kuretake Watercolor Brush, and added a Tim Holtz idea-ology Gamer Spinner for the butterfly’s body. I adhered these pieces and lightly sprayed the page with Tattered Angels Tarnished Silver Glimmer Mist. I then splattered Tattered Angels It’s Green and Dragonfly Glimmer Mists by opening the bottle and flicking the bottom part of the spray apparatus over the page.
I stamped the sentiments from the STAMPlorations Layered Butterflies stamp set in Memento Tuxedo Black ink on scraps of 110# Solar White cardstock and trimmed them. I ran a Tuxedo Black marker around the outside edges of each portion, layered them on CutCardStock Curious Metallic Night cardstock and adhered them to the page. I added several vinyl glittered flower stickers from my stash along with some Eyelet Outlet blue pearls and white heart pearls. The final touch was inking the edges of the page with black soot distress ink. Seems I can never do a ‘simple’ mixed media project… I feel like I have to keep adding more and more. Even though this is quite busy, I’m pleased with the result!
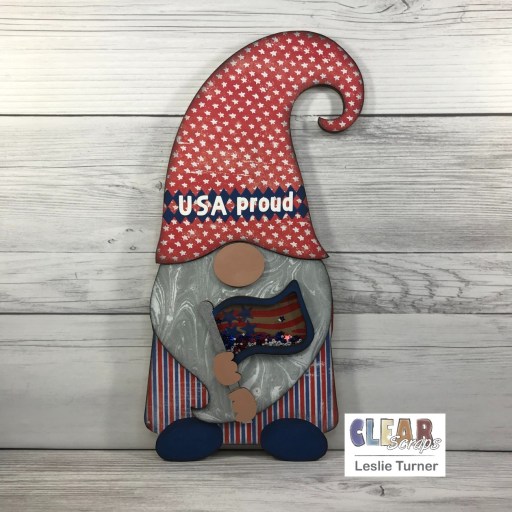
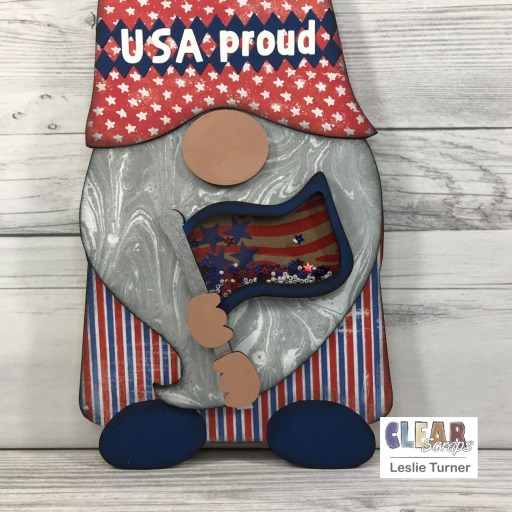
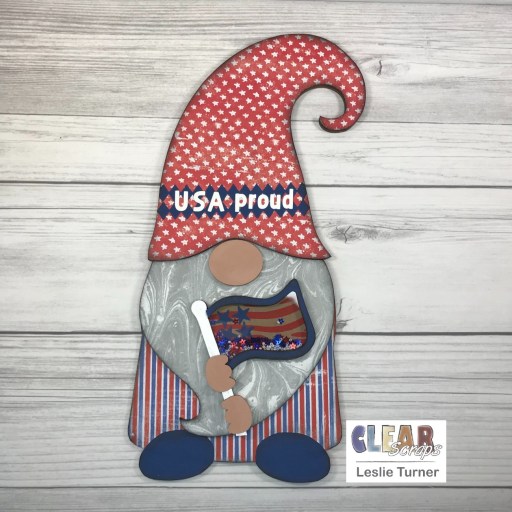
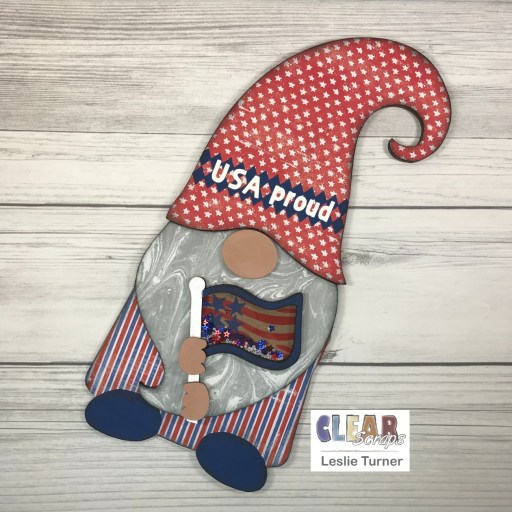
Hey, everybody! Happy Friday – I hope you have a most excellent weekend! I’m stoked to be back on the Clear Scraps blog today with another awesome DT inspiration project! I love anything Americana and I absolutely LOVE gnomes so that combination can only mean the coolest gnomie ever! This project features our Medium Gnome 1 holding a Mini Shaker Flag embellished with the 5×9 Wave Strips Stencil, and he’s all decked out in red, white and blue patterned papers with a gray marble patterned paper beard and blue cardstock shoes! ;) Oh, this was a fun one!
I covered all the wood Medium Gnome 1 pieces with patterned paper and cardstock, and inked the edges in black soot distress ink. The only painting I did on the gnome was his nose and little hands which called for a mixture of paints (Liquitex Raw Umber, Yellow Oxide and Titanium White) to achieve a flesh color. I embellished his hat with two border die cuts and upper/lowercase die cut alphas.
I painted the Mini Shaker Flag pole with a silver metallic paint pen, covered the front chipboard form with the same blue cardstock I used for his shoes, and inked the edges. I used the 5×9 Wave Strips Stencil, Liquitex Cadmium Red Medium Hue acrylic paint and a foam brush to stencil the design to resemble flag stripes on the chipboard back, and adhered four small punched stars. I adhered the next two chipboard forms onto the chipboard back, filled the shaker with red and blue stars and white seed beads, and adhered the acrylic divider (after removing the protective film) and then the front chipboard form. I adhered the flag to the front of the gnome and adhered his hands to appear as though he’s gripping the flag pole. ;)
And here’s one more peek… I’m so smitten with this little guy! LOVE how he turned out! Such a fun project!
Other products used: Cardstock/Paper: CutCardStock Basis Blue cardstock, CutCardStock Basis White cardstock, The Paper Studio Four Seasons and Everything In Between -2- paper pad, Stampin’ Up Perfectly Artistic DSP Ink/Paint: Ranger black soot distress ink, Marvy Uchida DecoColor Silver Metallic paint marker; Liquitex Raw Umber, Yellow Oxide, Titanium White, and Cadmium Red Medium Hue acrylic paints Dies/Punches: Sizzix Border die, Stampin’ Up Itty Bitty Star Punch, CUTplorations Uppercase and Lowercase Alphabet Plate dies Accessories: Bearly Art precision craft glue, Ranger Distress Collage Medium, Big Shot, Eyelet Outlet red and blue star sequins, Pretty Pink Posh Marshmallow seed beads
I hope you’ve enjoyed today’s project and you’re inspired to get those craft supplies out to play! Be sure to check out all the amazing acrylic, wood and chipboard goodies at Clear Scraps… OMGoodness, you won’t be disappointed! And head on over to the Clear Scraps Facebook Page for lots of inspiration! And while you’re at it, join the Clear Scraps Facebook Creative Group to connect with other Clear Scraps fans! Thanks so much for stopping by today – we’ll see you next time!
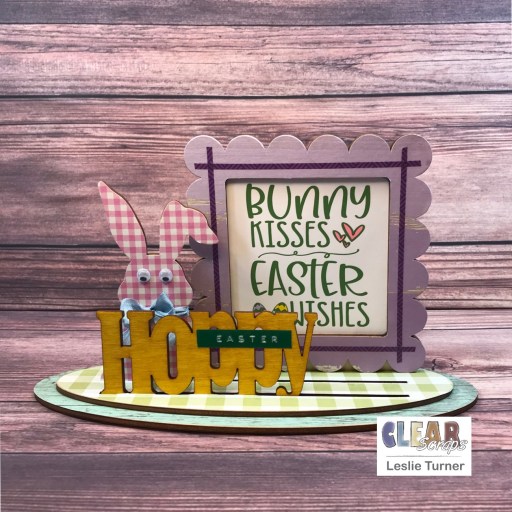
Hey, everybody, happy Friday to you! I hope you’ve had a most excellent week! Our weather has been so amazing – I think Spring has finally sprung here in SW Colorado! I’m thrilled to be back on the Clear Scraps blog today with another awesome DT inspiration project! We have some new products in the store and I got to play with one of the new 3-D Frameables – the Base with Scallop Frame and Word n Shape Hoppy-Bunny – just in time for Easter! I used a combination of patterned papers, washi tape, alcohol markers and the hubby’s Dymo labeler from back in the day. Remember the Dymo labelers?! LOL! I’m not really laughing too hard because they are making a come-back… I’ve seen quite a few projects lately with those awesome funky vintage labels!
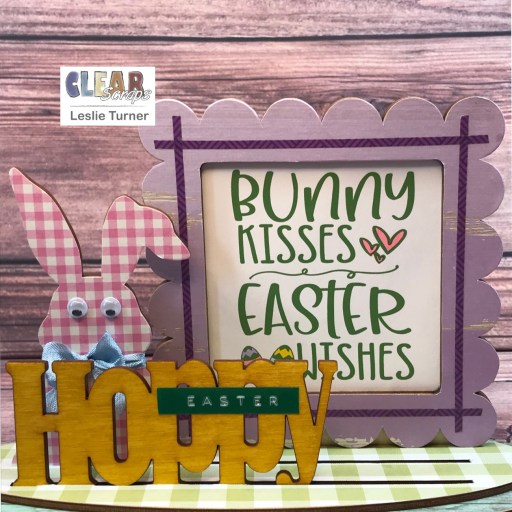
I started by covering the smaller base piece with green and white gingham paper and the larger base piece with green wood-look paper, and adhered them together. I then covered the scallop frame with ombre purple wood-look paper and added four long strips of purple skinny washi tape. I printed the large Easter sentiment on white cardstock, colored the hearts and eggs with alcohol markers, and adhered it between the layers of the frame. I covered the bunny with pink and white gingham paper and added mini wiggly eyes and a blue seam binding bow around her neck. I colored Hoppy with a yellow alcohol marker and added the Easter sentiment created with the Dymo labeler.
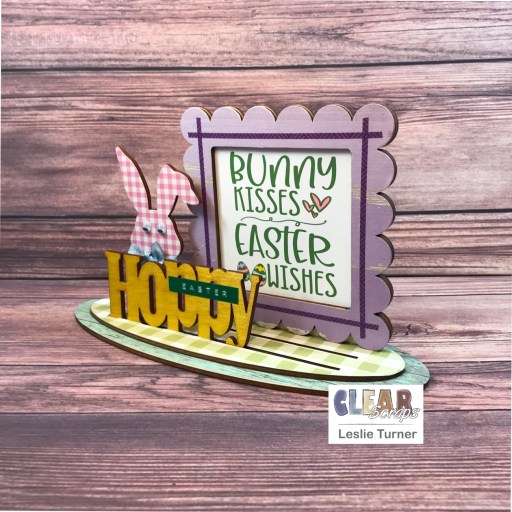
Here are a couple angled shots. This was such a fun project – I’m really enjoying these 3-D Frameables!
Other products used: Cardstock/Paper: Simple Stories Wood & Gingham Basics 12×12 paper pad, Neenah Classic Crest 80# Solar White cardstock Stamps: ewenmedesigns digital Easter Bundle Ink: Arteza alcohol markers- Y02/29, P27, R36, BG19/57 Accessories: Bearly Art precision craft glue, brayer, Me & My Big Ideas purple skinny washi tape, mini wiggly eyes, Dymo labeler, Really Reasonable Ribbon blue seam binding
I hope you’ve enjoyed today’s project and you’re inspired to get those craft supplies out to play! Be sure to check out all the amazing acrylic, wood and chipboard goodies at Clear Scraps… OMGoodness, you won’t be disappointed! And head on over to the Clear Scraps Facebook Page for lots of inspiration! And while you’re at it, join the Clear Scraps Facebook Creative Group to connect with other Clear Scraps fans! Thanks so much for stopping by today – we’ll see you next time!
3/20/22 Rising Star at A Place To Start! 4/3/22 Top 3 at International Art & Soul!
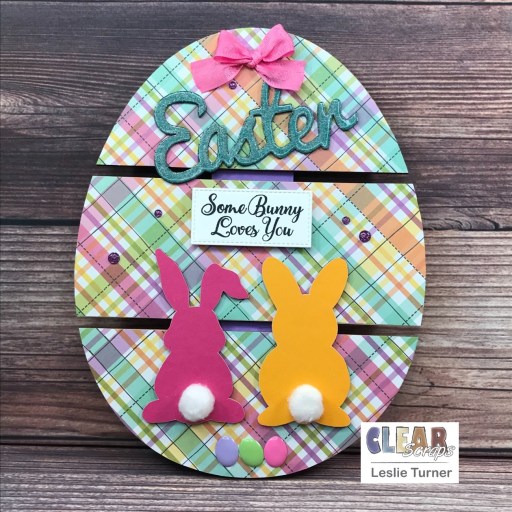
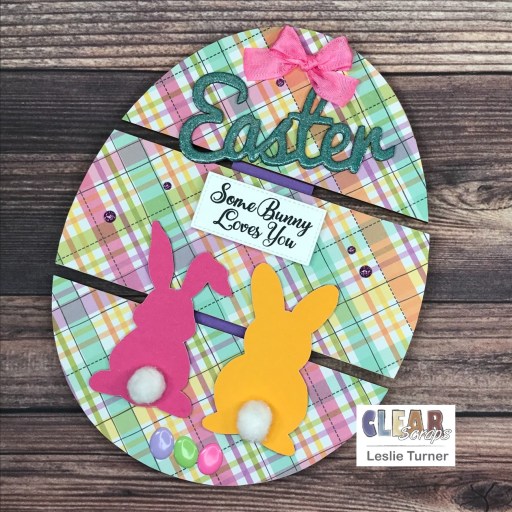
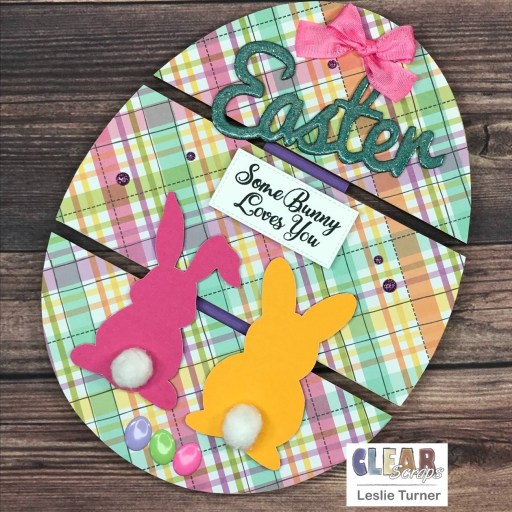
Happy Monday, everybody! Hope you had a great weekend and your weather is warming up… even just a little bit! It’s absolutely gorgeous here and I almost feel guilty for not being outdoors enjoying it! I’m thrilled to be back on the Clear Scraps blog today with another awesome DT inspiration project! I created a fun Easter home decor project featuring our Medium DIY Egg Pallet Shape, Easter Chipboard Word Title and Bunnies Chipboard Embellishments. Spring is my second favorite season and I love everything that Easter represents!
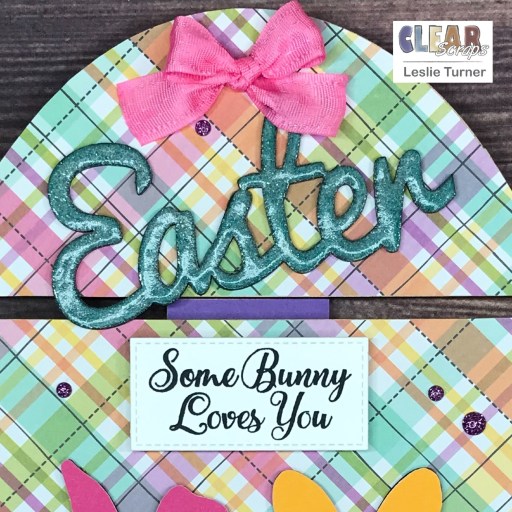
I started by covering all three sections of the Medium DIY Egg Pallet Shape with a pretty pastel plaid patterned paper and the two narrow sections of the mounting stick that are visible from the front with CutCardStock Pop-Tone Grape Jelly cardstock. I always use Bearly Art precision craft glue to adhere the patterned paper to the pallet shape and run my brayer back and forth over it several times, and it sticks very nicely. I fashioned a small bow from a Really Reasonable Ribbon pink ribbon scrap and adhered it to the top with Ranger Distress Collage Medium.
Next I worked on the Easter Chipboard Word Title. I first colored it with a teal alcohol marker, and then applied Versamark (from my dirty ‘grunge’ Versamark pad) and Ranger Bridal Tinsel embossing powder, heat embossed it and let it cool down. I then applied Dare 2B Artzy Paradise ink directly from the ink cube, more Versamark (from my grunge pad) and Hero Arts Clear embossing powder, and heat embossed it a second time. I adhered the Easter word at an angle toward the top. I stamped the bunny sentiment in Catherine Pooler Midnight ink on a scrap of Neenah Classic Crest 110# Solar White cardstock, cut it with a My Favorite Things Stitched Rectangle STAX Die-namics, and adhered it on 3-mm-thick adhesive tabs just under the Easter word.
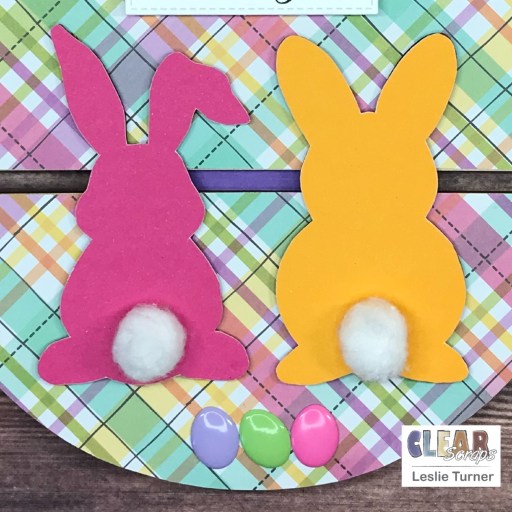
I covered the Bunnies Chipboard Embellishments in Colorbok Bright pink and yellow-orange cardstock, added small cottontails made from cotton balls, and adhered them to the bottom center. I removed the prongs from three colored egg brads and adhered them at the bottom with Ranger Distress Collage Medium. The final touch was adding several YNS purple glitter Gumdrops.
And one more peek… super happy with how this turned out! It’s so simple but really packs a punch… and oh, those colors! These were definitely fun products to play with!
Other products used: Cardstock/Paper: Neenah Classic Crest 110# Solar White cardstock, CutCardStock Pop-Tone Grape Jelly cardstock, Colorbok Bright smooth cardstock, The Paper Studio Four Seasons and Everything In Between -2- paper pad Stamps: Dare 2B Artzy Raggity Rabbit stamp set Ink: Arteza BG35 alcohol marker, Versamark, Dare 2B Artzy Paradise ink cube, Catherine Pooler Midnight ink Dies/Punches: My Favorite Things Stitched Rectangle STAX Die-namics Accessories: We R Memory Keepers Mini Guillotine Paper Trimmer, Bearly Art precision craft glue, Milwaukee heat tool, Ranger Bridal Tinsel embossing powder, Hero Arts Clear embossing powder, MISTI stamp tool, Big Shot, cotton balls, Really Reasonable Ribbon pink ribbon scrap, Ranger Distress Collage Medium, American Crafts 3-mm-thick adhesive foam tabs, YNS purple glitter Gumdrops, Eyelet Outlet Colored Eggs Brads
I hope you’ve enjoyed today’s project and you’re inspired to get those craft supplies out to play! Be sure to check out all the amazing acrylic, wood and chipboard goodies at Clear Scraps… OMGoodness, you won’t be disappointed! And head on over to the Clear Scraps Facebook Page for lots of inspiration! And while you’re at it, join the Clear Scraps Facebook Creative Group to connect with other Clear Scraps fans! Thanks so much for stopping by today – we’ll see you next time!