Thank you note cards for The Outlawz

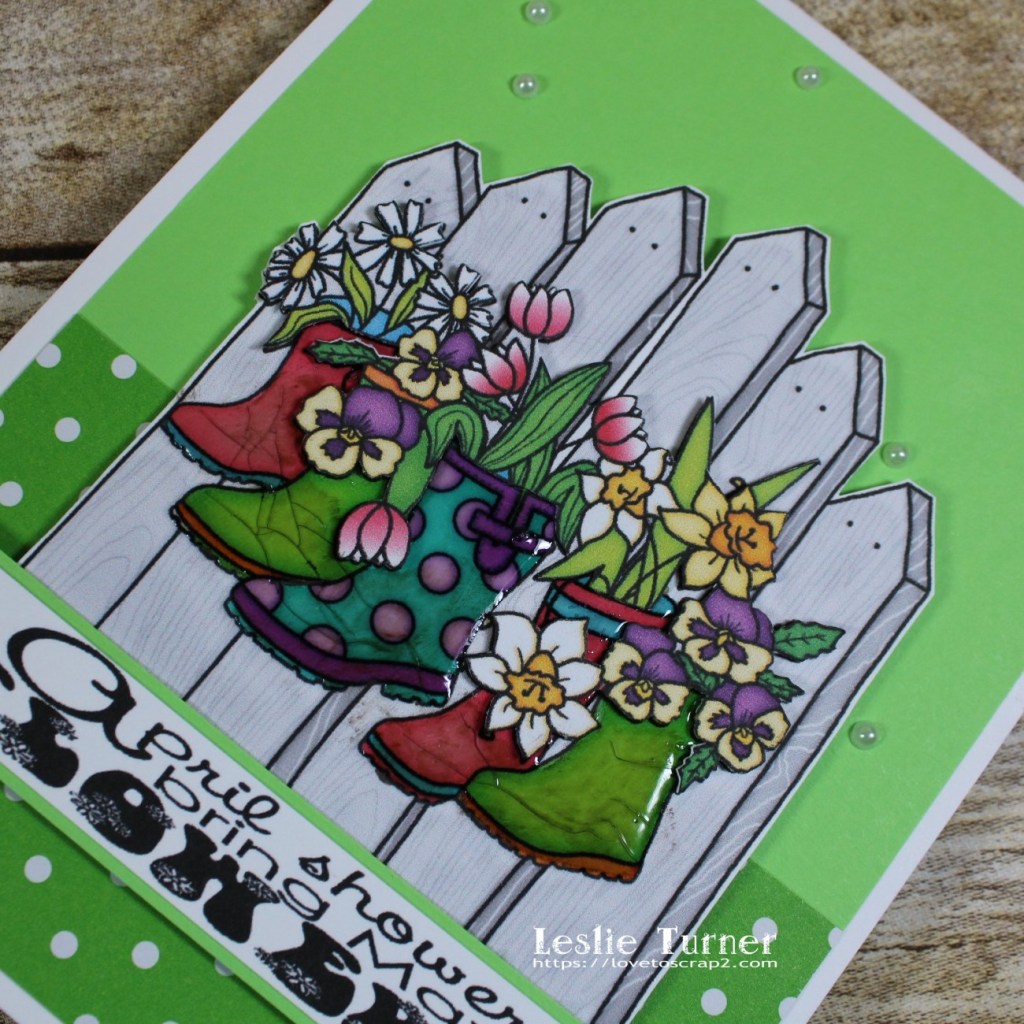
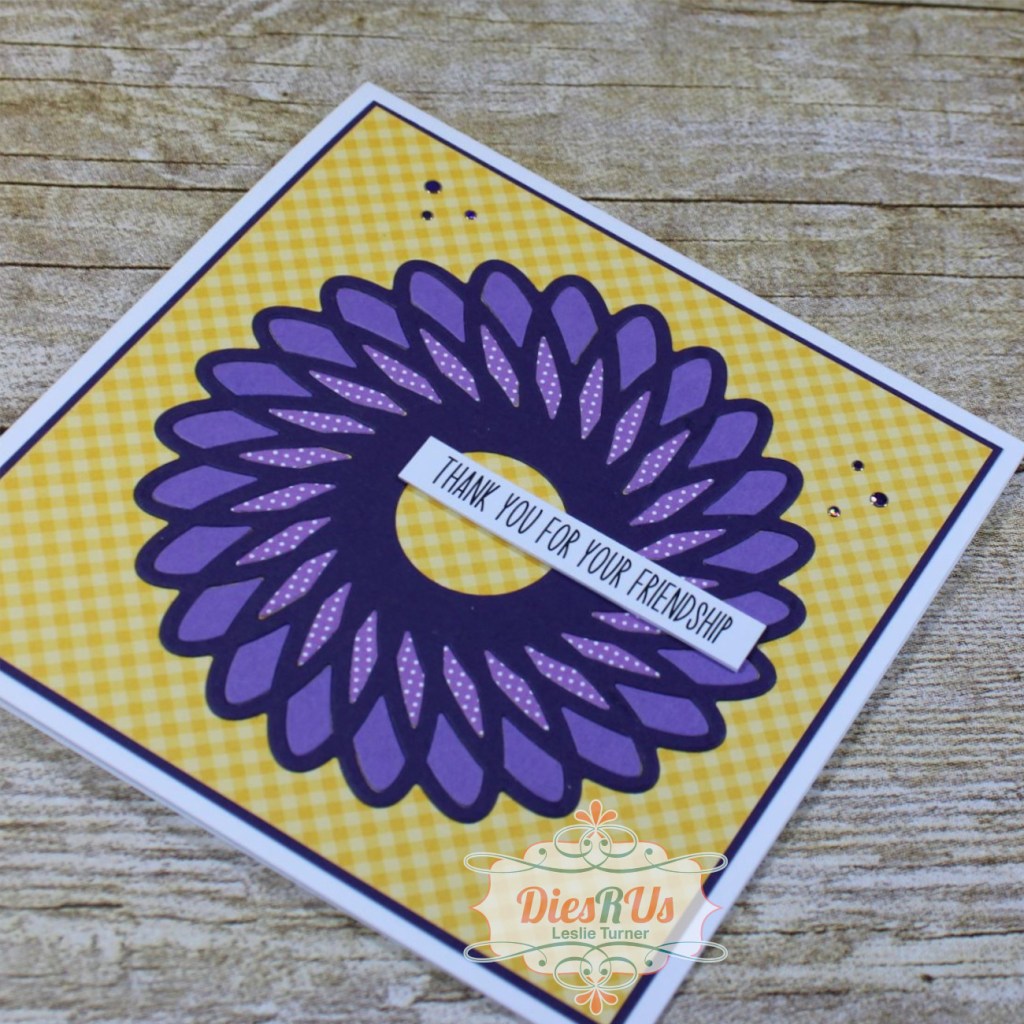
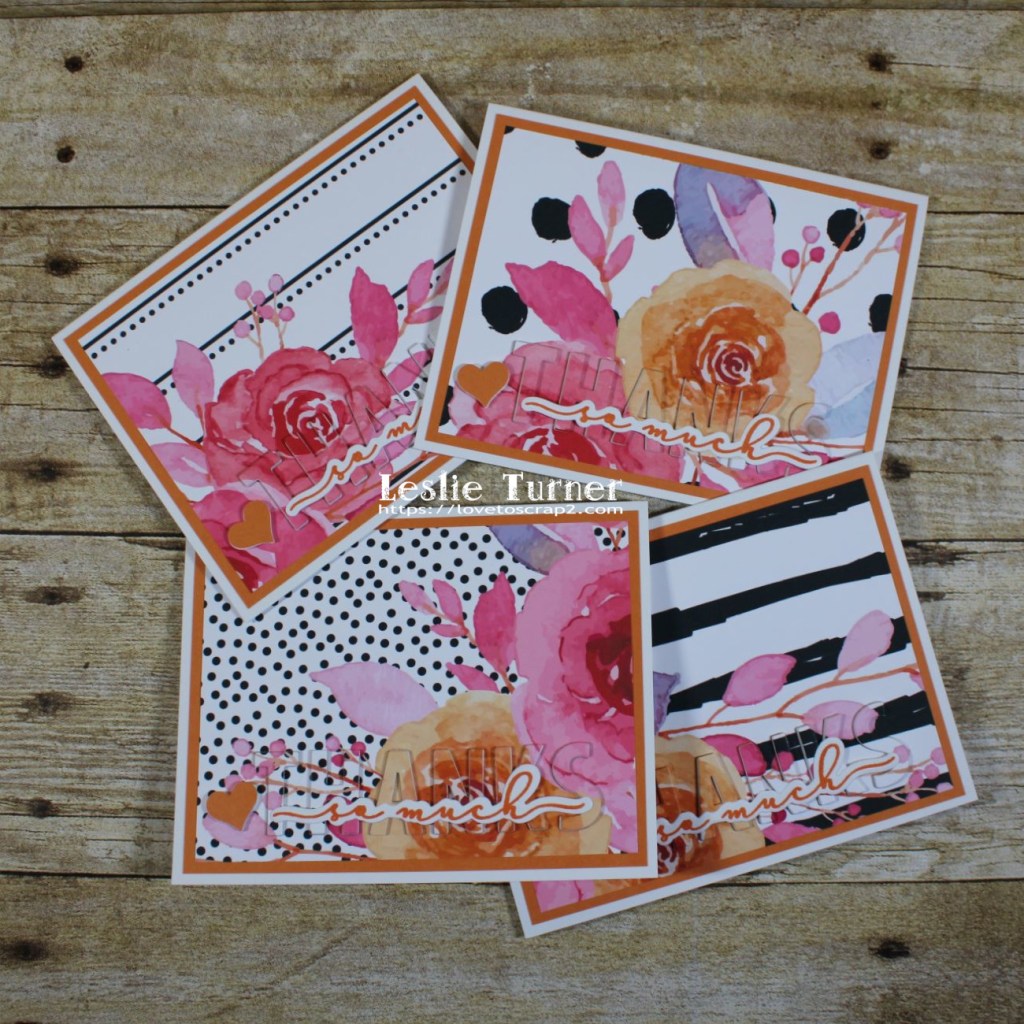
Hi friends! Another week has rolled around and I keep saying it’ll sure be Christmas before we know it! I just can’t believe how fast the time is flying by! Affiliate links are used in this post at no cost to you. I really appreciate your support! A new Tic Tac Toe challenge has started today over at The Outlawz Tuesday Color Challenge and our sponsor is Free Pretty Things For You so be sure to come on over and play! This is my last post for The Outlawz Tuesday Color Challenge, and I’d like to thank Laurian, Jacqui and the crew for having me along these last five months – I’ve had a blast but unfortunately I have so much on my plate right now that I really need to trim back. So I thought it only fitting to create a set of four thank you cards using the absolutely gorgeous Girl Boss Black and White Floral Digital Delilght Papers that were gifted to me for the two challenges this month. These cards feature what I always call the ‘phantom die cutting’ technique which is actually a raised inlaid die cut where typically a foam die cut is adhered into the negative space, then a second foam die cut (if desired) is adhered on top of that one, and then the background die cut is adhered on top of the second layer of foam. I’ve done it with one layer of foam, two layers of foam and multiple layers of cardstock, and it looks great any way it’s done. I used several layers of 110# cardstock for these and I love how they turned out!

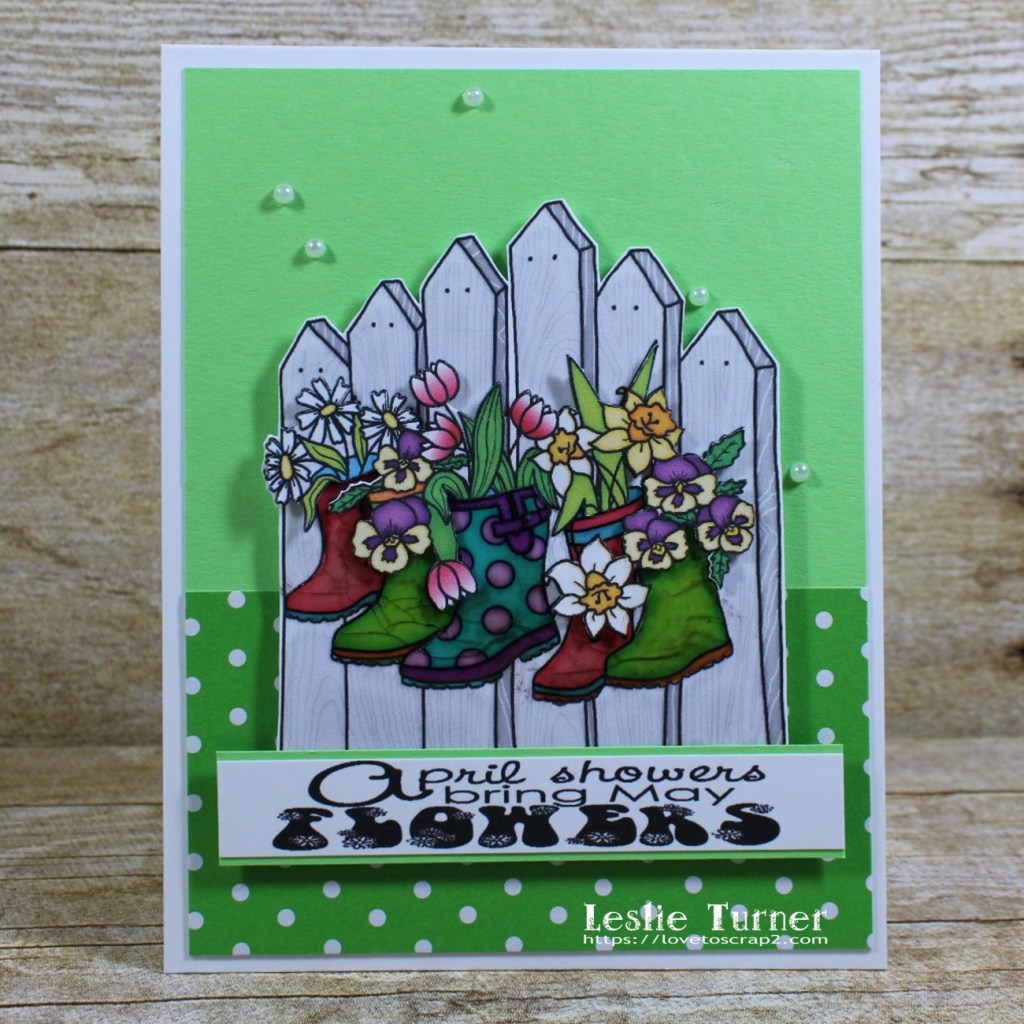
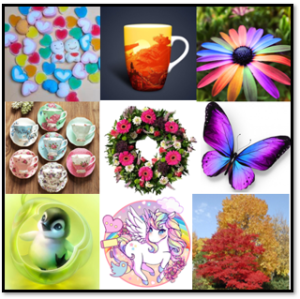
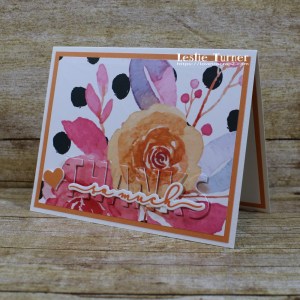
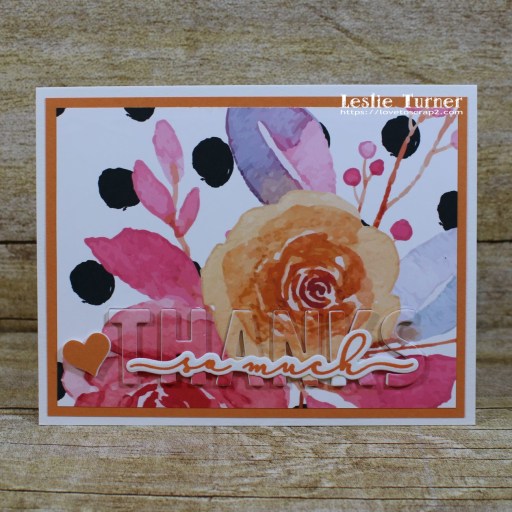
For the Tic Tac Toe Challenge this fortnight, we are to choose a column, row or diagonal, and use something from each image on our project. I chose the diagonal from top left down to bottom right, and used hearts, flowers and colors orange and yellow.

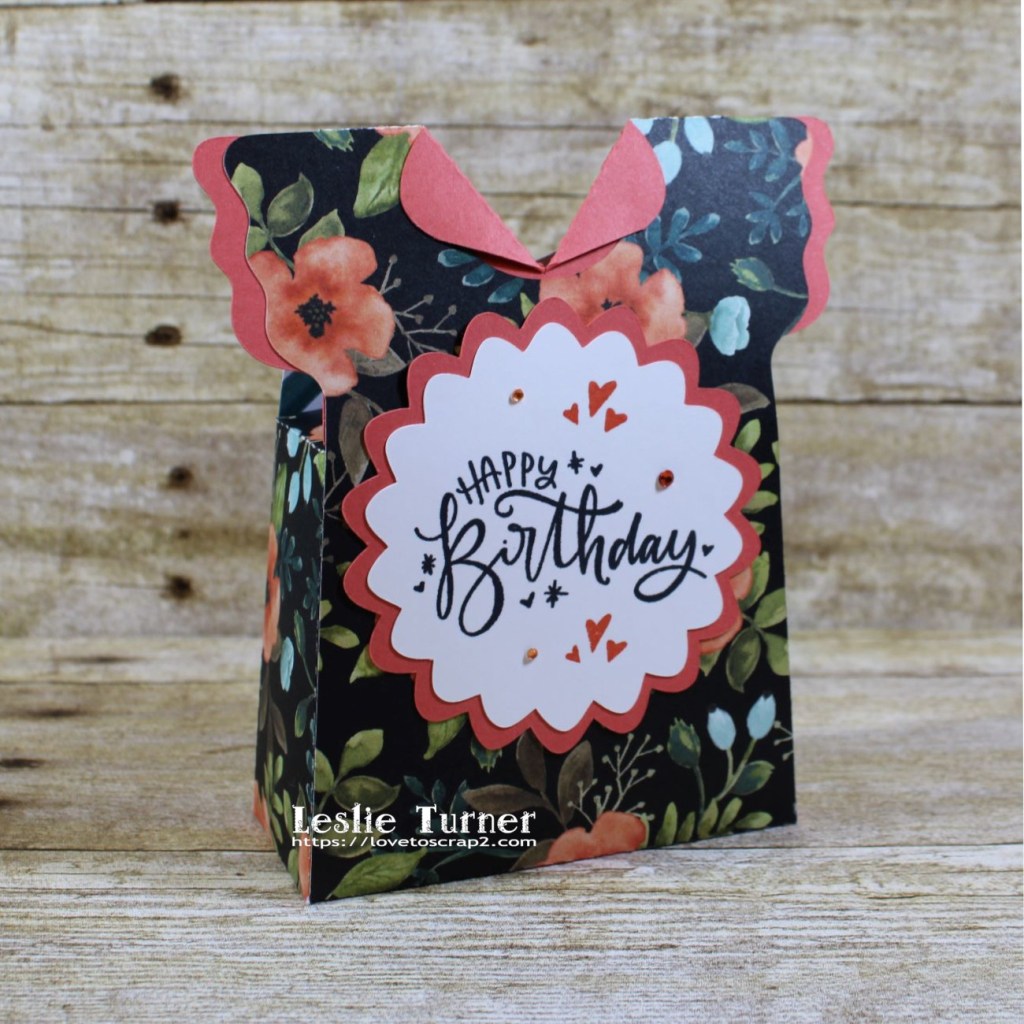
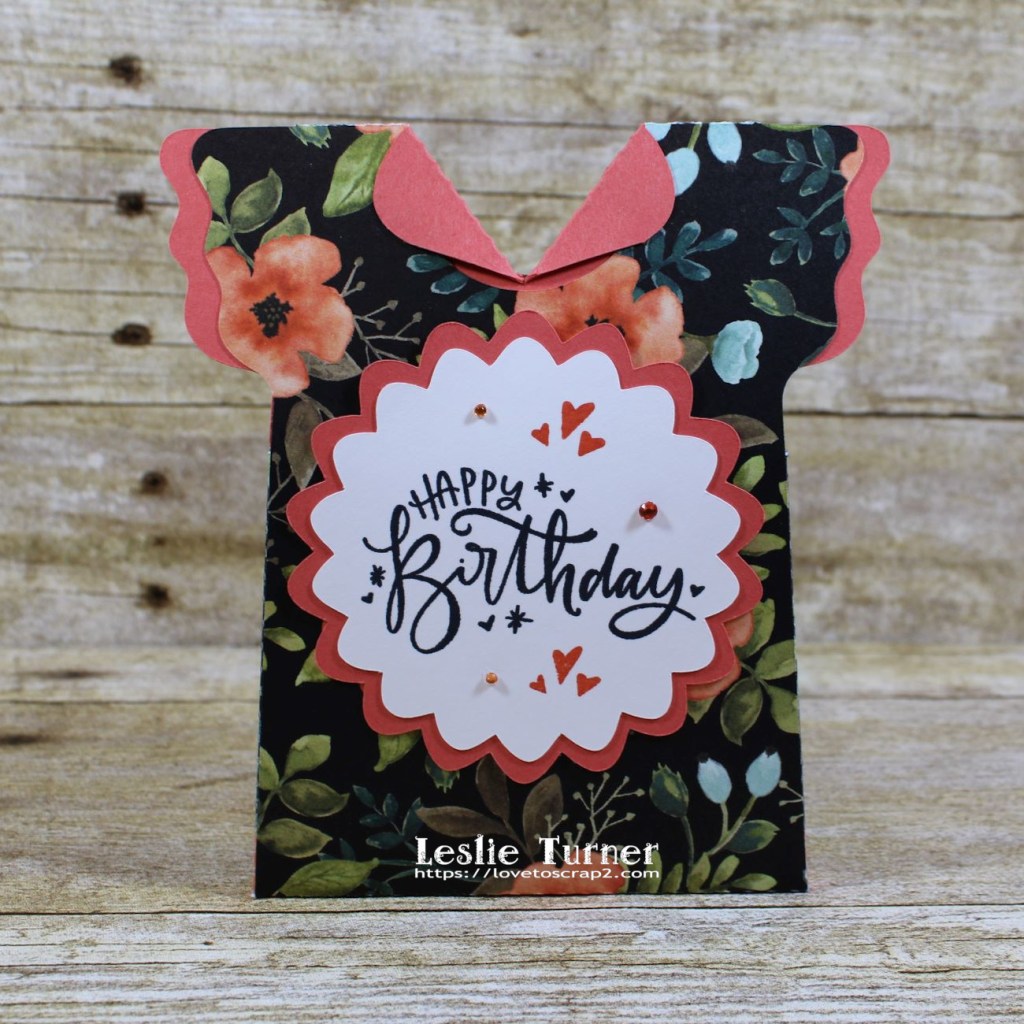
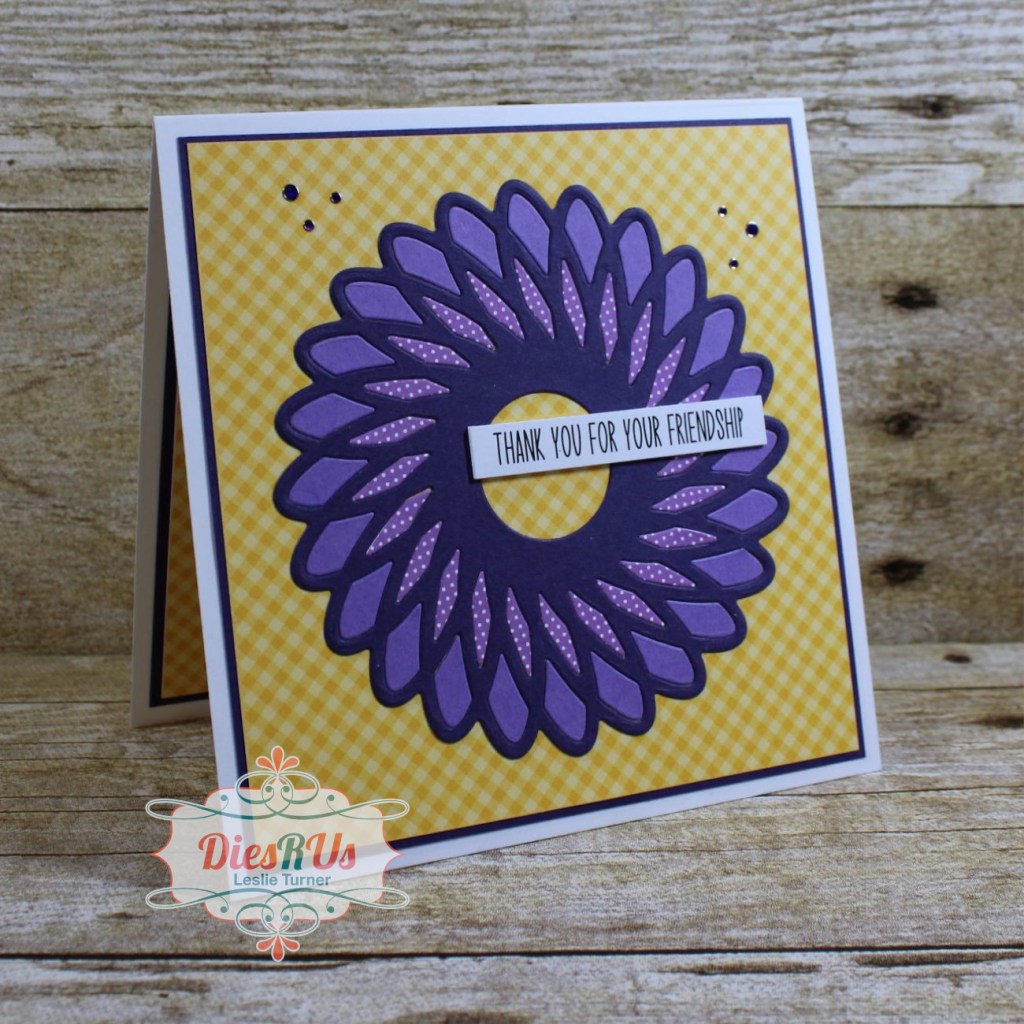
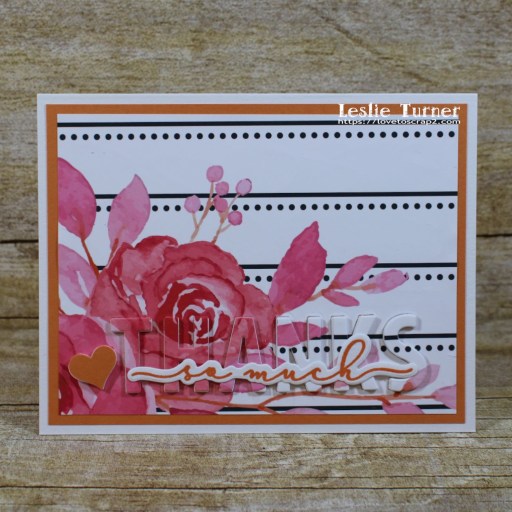
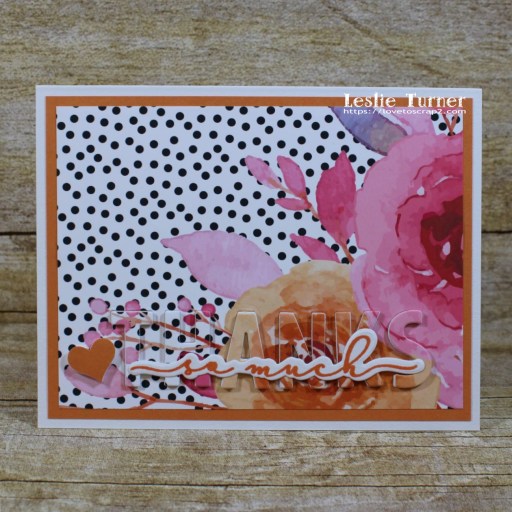
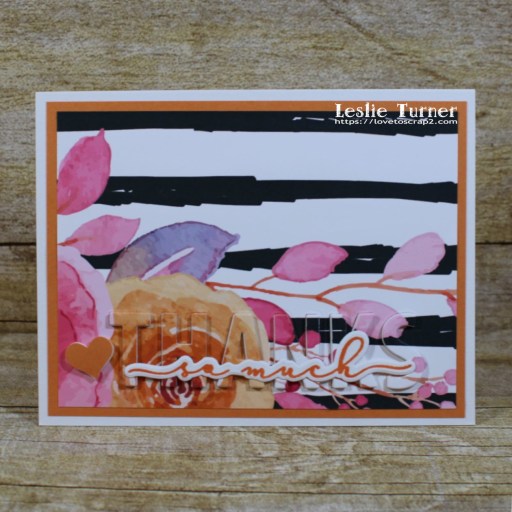
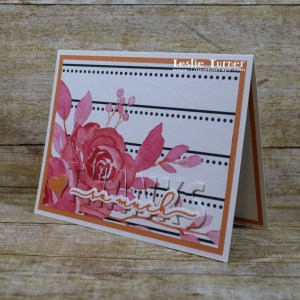
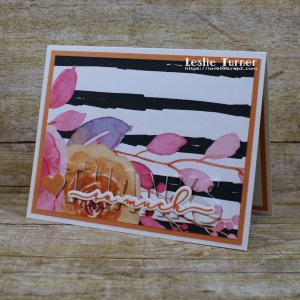
I cut standard A2 size landscape top-folding card bases from Neenah Classic Crest Solar White 110# cardstock. along with layers for each card cut from CutCardStock Pop-Tone 65# Orange Fizz cardstock and the Girl Boss Black and White Floral Digital Delilght Papers printed on 60# Hammermill copy paper. Using the Waffle Flower Bold Alpha Die Set, I washi-taped the THANKS letters together and die cut them into the bottom of each digital paper background. I die cut four more sets of letters from Neenah Classic Crest Solar White 110# cardstock for each card. I adhered the digital paper backgrounds to the orange layers and then adhered the panels to the card bases.

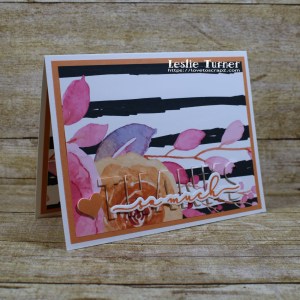
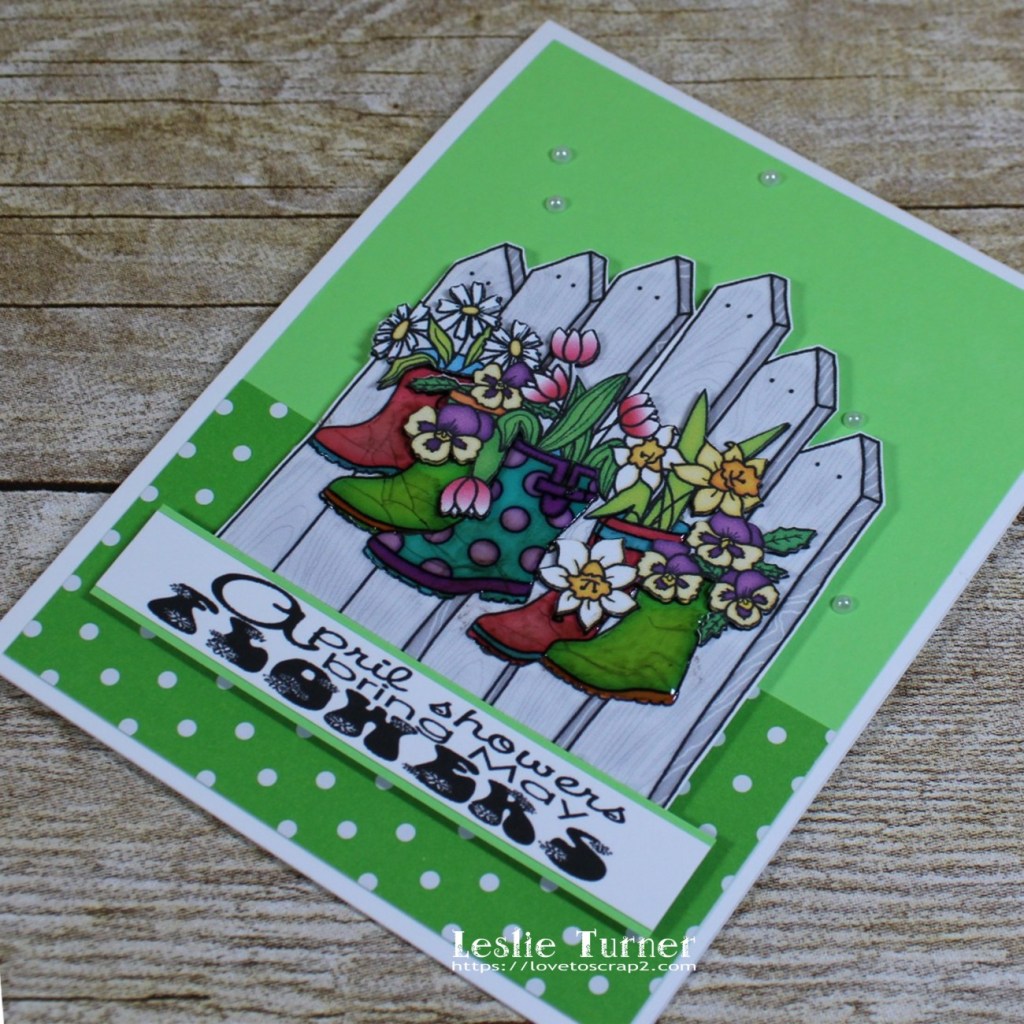
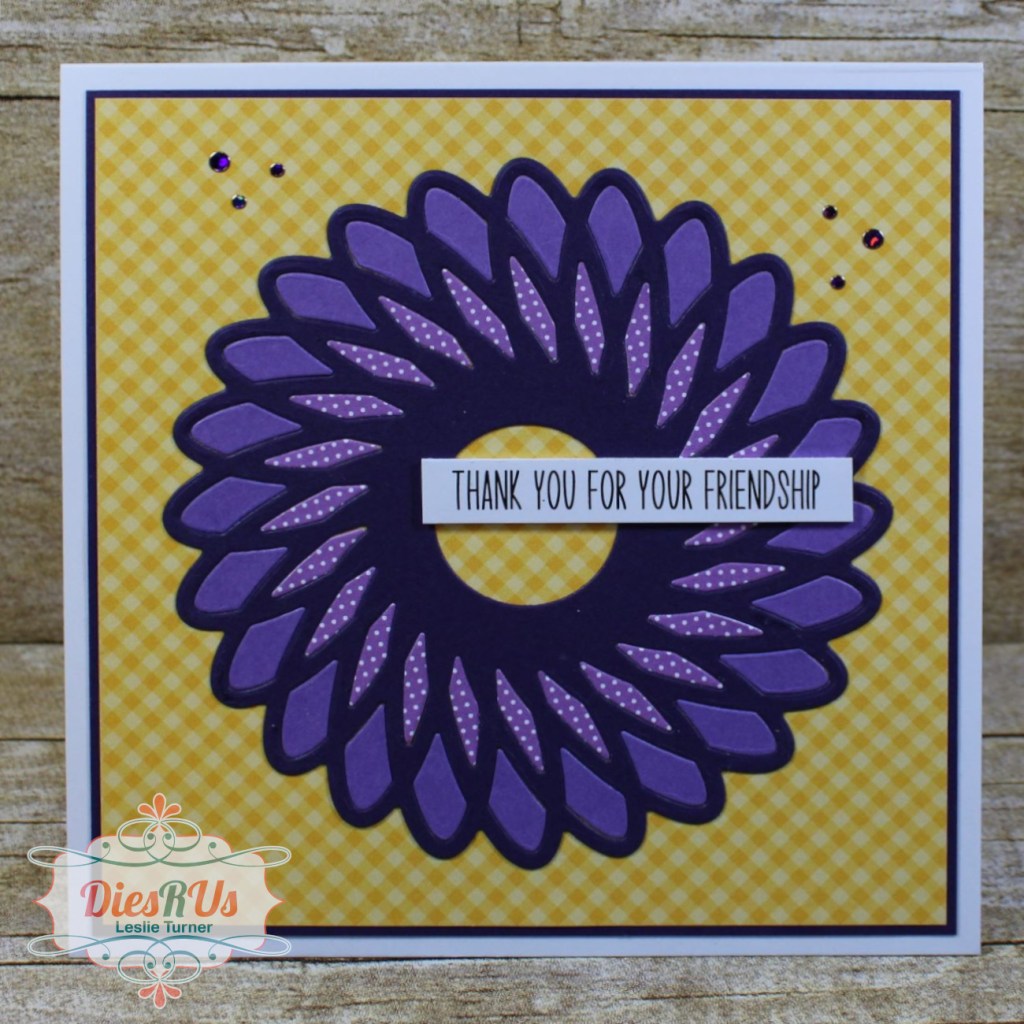
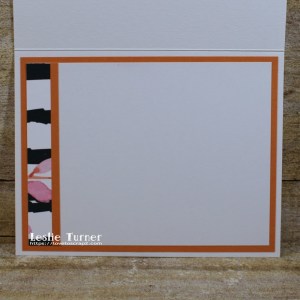
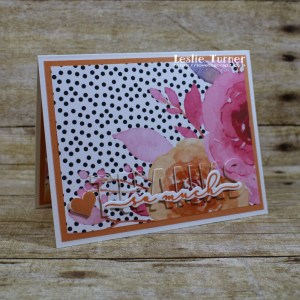
I began adhering the white die cut letters into the negative spaces on each background. After the first layer, I adhered the tiny triangular piece from the A (cut from the digital paper) into the negative space, and then proceeded with three more layers for some nice subtle dimension. Using the Waffle Flower Sentiment Additions Stamp Set, I stamped the second portion of the sentiment in Catherine Pooler Orange Peel ink, cut it with the coordinating Waffle Flower Sentiment Additions Die Set and adhered it over the raised letters. For each card, I punched one heart from the orange cardstock and three more from the 110# white cardstock, layered them together, and adhered it to the left of the sentiment.

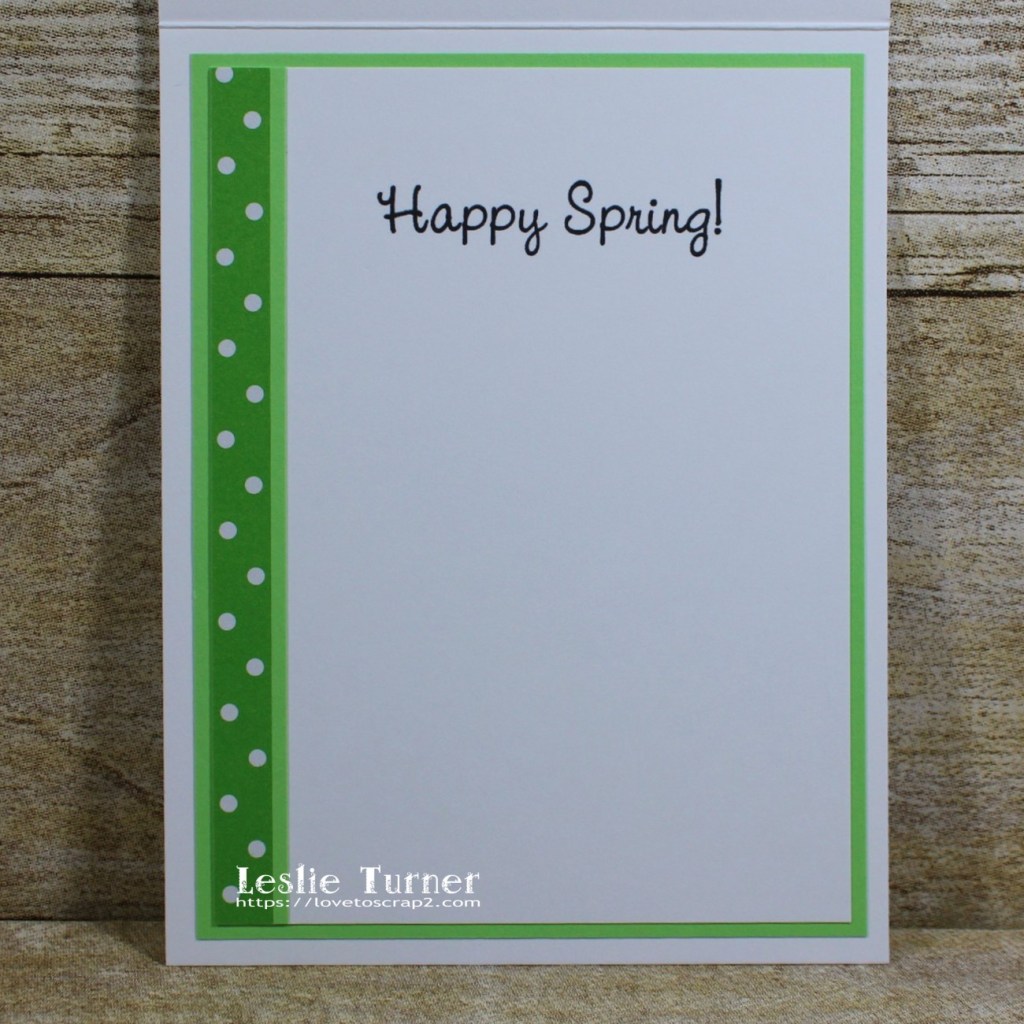
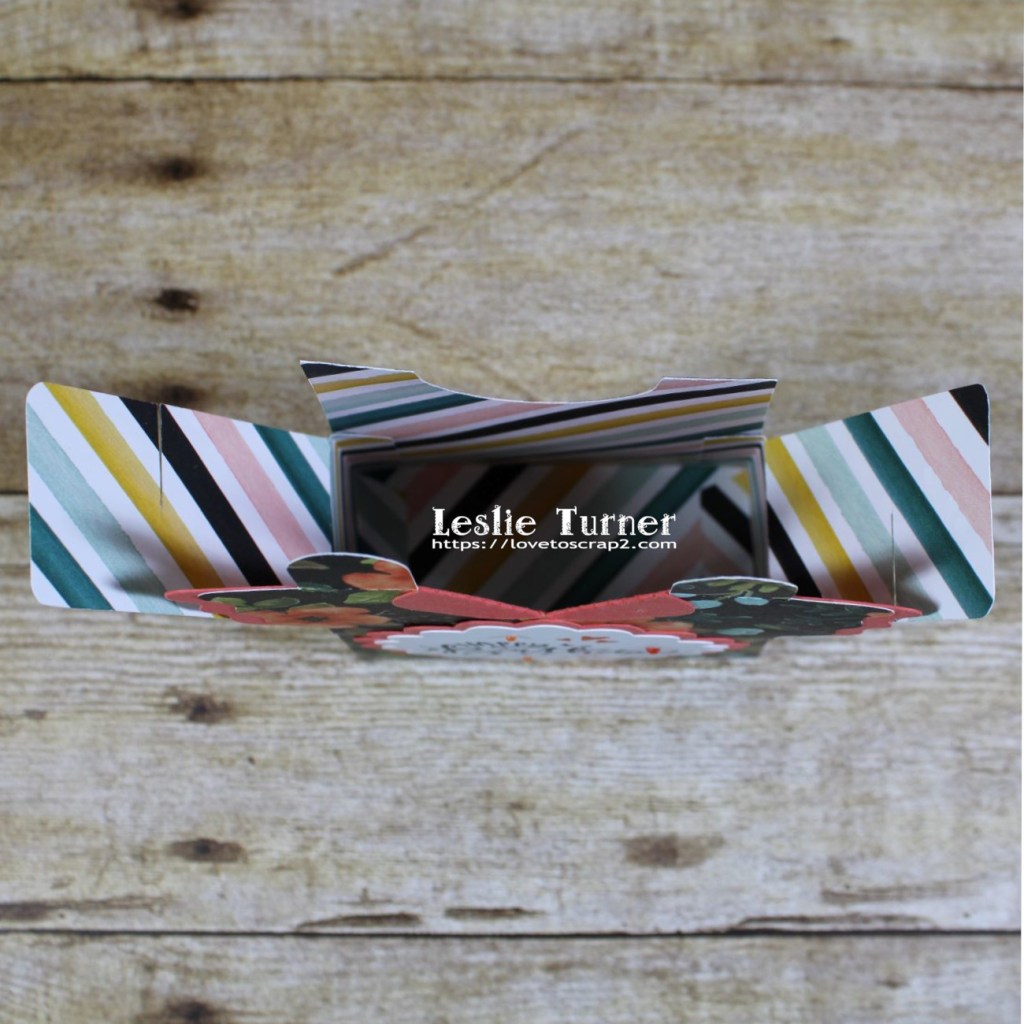
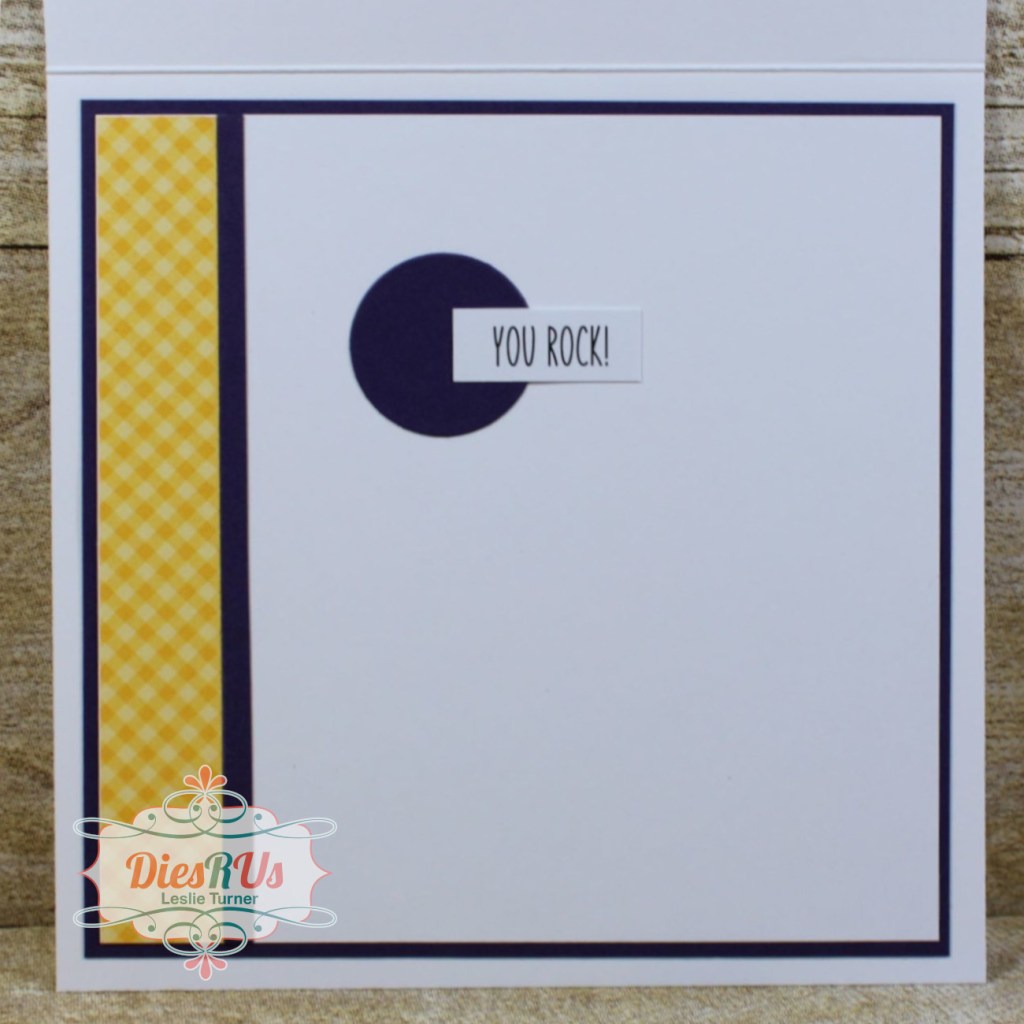
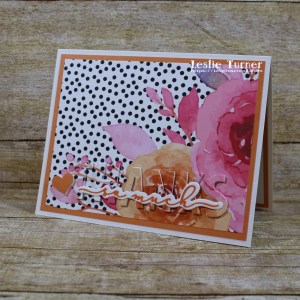
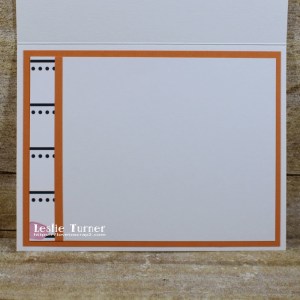
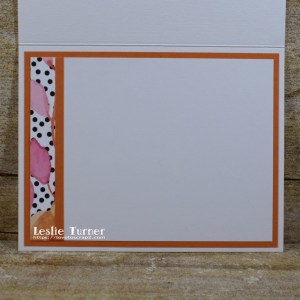
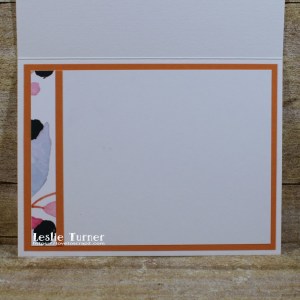
I cut the inside panels from Neenah Classic Crest 80# Solar White cardstock, embellished them with matching strips of the digital paper and a narrow orange cardstock strip, and layered the panels on orange cardstock. Since these are note cards, I left the inside panels blank to write a custom message in each.

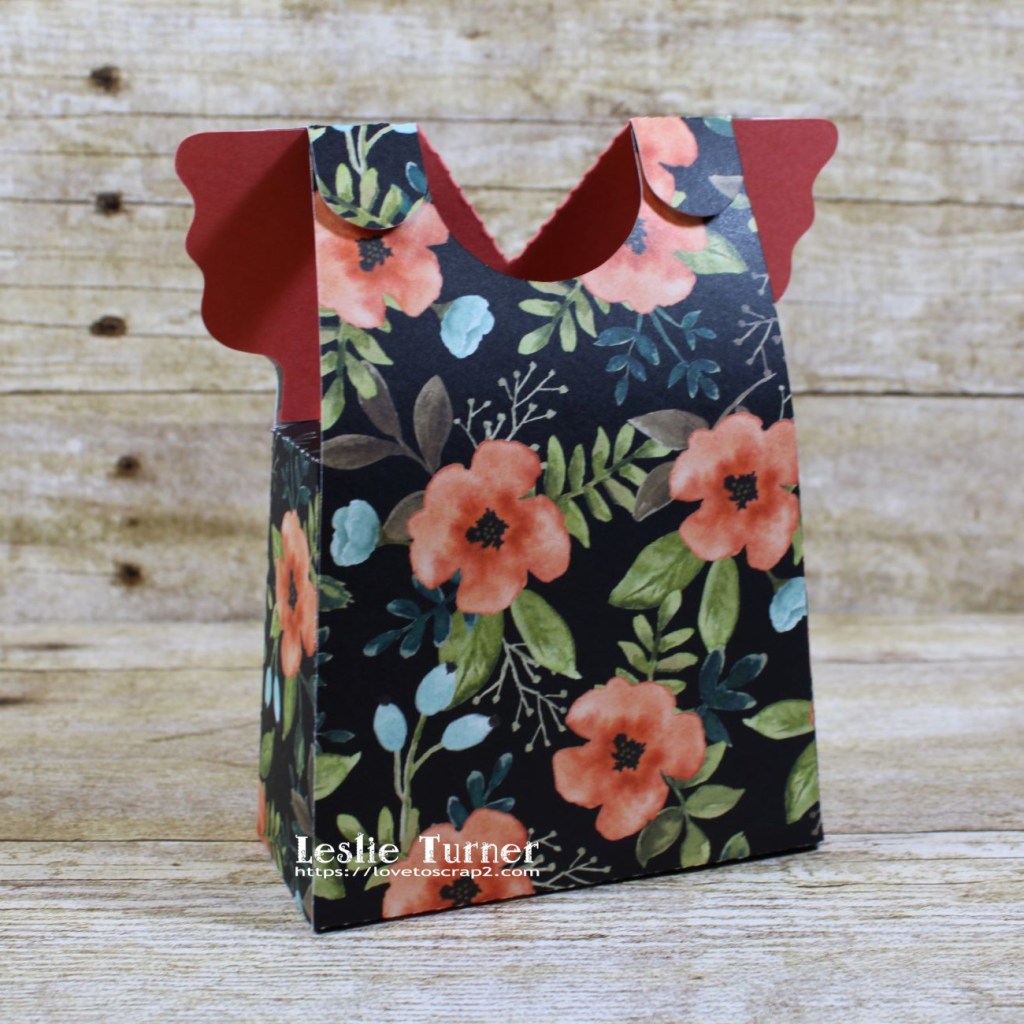
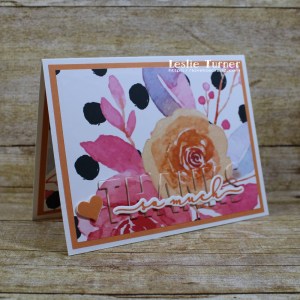
And one more peek at the set… so loving the ‘phantom die cutting’ technique, especially when using such gorgeous digital papers! OMGosh! These turned out so great!

Products used:
Cardstock/Paper: Neenah Classic Crest 110# and 80# Solar White cardstock, CutCardStock Pop-Tone 65# Orange Fizz cardstock, CutCardStock Pop-Tone 65# Sweet Tooth cardstock, Free Pretty Things For You Girl Boss Black and White Floral Digital Delilght Papers, 60# Hammermill copy paper
Stamps: Waffle Flower Sentiment Additions Stamp Set
Ink: Catherine Pooler Orange Peel ink
Dies/Punches: Waffle Flower Bold Alpha Die Set, Waffle Flower Sentiment Additions Die Set, Stampin’ Up Itty Bitty Heart Punch
Accessories: Tonic Studios 12″ Guillotine Paper Trimmer, Bearly Art precision craft glue, Gemini Junior, MISTI stamp tool

I hope you’ve enjoyed this project and will come over and join in all the fun at The Outlawz Challenges! I hope you’ll link up a project this fortnight – we’d love to see what you do with this color challenge! And be sure to check out all the fun digital goodies over at Free Pretty Things For You! Thanks so much for stopping by – we’ll see you next time! ;)

Scrappy hugs,
lesliesig

April showers bring May flowers

Hey, everybody! Hope your Monday went without a hitch and you’re all geared up for Tuesday! ;) Affiliate links are used in this post at no cost to you. I really appreciate your support! Before the evening gets away from me I wanted to share a card I whipped up this morning for The Outlawz Sunday Songs and Rhymes Challenge where the theme is ‘Rain Rain Go Away.’ I’ve had the most perfect digi set featuring rain boots in my stash for a number of years, and have only used it once, so out it came for this challenge! And I’m stoked that I was able to make the rain boots look worn and muddy, lol! ;)

I cut a standard A2 top-folding card base from Neenah Classic Crest 110# Solar White cardstock along with a layering panel from CutCardStock Basis 80# Light Lime cardstock and a strip from Colorbok green Seeing Dots cardstock that I adhered to the bottom of the light green layer and then adhered the panel to the card base. Using the ‘Bloom Where You Are Planted’ digital set from Imagine That digis by Kris, I printed front and inside sentiments along with two pre-colored images on Neenah Classic Crest 80# Solar White cardstock and fussy cut one of them, leaving just a tiny white edge, and then fussy cutting just the flowers on the second one. I adhered the fence and sentiment to the background panel with foam strips.

I covered the rain boots in Glossy Accents and let them dry for about 45 minutes and twisted the cardstock so it would crack. This technique is similar to the shattered glass technique where you twist clear embossing to get a cracked appearance. I’ve never tried it with Glossy Accents and was super stoked that it worked! I let it dry another 15-20 minutes and then rubbed a good bit of brown ink over the boots (and a little on the fence) so it would get down into the cracks and make them look muddy. I adhered the fussy-cut layer of flowers on 1mm thick foam squares for just a little dimension. The finishing touch was adding several tiny white flat-back pearls.

I cut the inside panel from Neenah Classic Crest 80# Solar White cardstock on which I had printed the sentiment, embellished it with strips of green dotted and light green cardstock, and layered it on the green cardstock.

And one more peek… love, love, love how this turned out! I was so happy I remembered I had this digital set in my digital images! I really prefer to stamp with rubber/clear stamps so I don’t use digis that often anymore. And I was double-happy that I was able to make the rain boots look worn and muddy! Score! ;)

Products used:
Cardstock/Paper: Neenah Classic Crest 110# and 80# Solar White cardstock, CutCardStock Basis 80# Light Lime cardstock, Colorbok green Seeing Dots cardstock
Ink: Memento Rich Cocoa ink
Stamps: Imagine That digis by Kris ‘Bloom Where You Are Planted’ digi set
Accessories: Tonic Studios 12″ Guillotine Paper Trimmer, Bearly Art precision craft glue, Glossy Accents, Darice double-sided adhesive strips, 1mm thick double-sided adhesive squares, Darice tiny white flat-back pearls

I hope you’ve enjoyed this project and will come over and join in all the fun at The Outlawz Challenges! Lots of fun going on! Thanks so much for stopping by today – we’ll see you next time! ;)

Scrappy hugs,
lesliesig

Happy Birthday gift bag

Hi friends, Happy Monday! Sure seems like Mondays are rolling around mighty fast these days, then in the blink of an eye, it’s Friday! I need more hours in a day, lol! How about you?! Affiliate links are used in this post at no cost to you. I really appreciate your support! I have an adorable birthday gift bag to share this morning that I’m entering into The Outlawz Festive Fridays Challenge where the themes to choose from are Birthday, Get Well, Christmas and Anything Goes! I actually created this (using a SNC Canvas cut file) for an earlier challenge and missed uploading it, so I waited for the Birthday theme to roll around again, and here we are! ;)

I cut the pieces for the dress from Stampin’ Up Calypso Coral cardstock and Stampin’ Up Whole Lot of Lovely DSP, and the sentiment panels from Stampin’ Up Calypso Coral cardstock and Neenah Classic Crest 80# Solar White cardstock, then assembled it. I stamped the Brutus Monroe sentiment and little hearts in Memento Tuxedo Black ink and Catherine Pooler Mandarin Spice ink, and then added some orange gemstones. I added some tiny magnets for closure to complete the project.

Here’s a view from the back.

And here’s a peek of the inside. So adorable! This was an easy one and could be used for lots of different occasions!

Products used:
Cardstock/Paper: Stampin’ Up Calypso Coral cardstock, Neenah Classic Crest 80# Solar White cardstock, Stampin’ Up Whole Lot of Lovely DSP
Stamps: Brutus Monroe Super Sentimental stamp set
Ink: Memento Tuxedo Black ink, Catherine Pooler Mandarin Spice ink
Dies/Punches: SNC Canvas Dress Gift Box cut file
Accessories: Brother Scan N Cut, Bearly Art precision craft glue, Brutus Monroe Mini Disc Magnets, Tim Holtz Distress Collage Medium, Darice orange gemstones

I hope you’ve enjoyed this project and will come over and join in all the fun at The Outlawz Challenges! Lots of fun going on! Thanks so much for stopping by today – we’ll see you next time! ;)

Scrappy hugs,
lesliesig

thank you for your friendship

Hi everyone! Well, another Friday has rolled around and I’m sure not complaining because every day is like a Friday when you’re retired! Affiliate links are used in this post at no cost to you. I really appreciate your support! I’m stoked to be back on the Dies R Us Inspiration Blog today with another awesome DT inspiration project! I created a pretty friendship card featuring some paper piecing with the gorgeous Memory Box Twirly Circle die! Putting all the small pieces into the negative spaces of the frame reminded me a lot of putting a puzzle together. It was well worth the time it took, as I sure do love the end result!

I cut a square top-folding card base from Neenah Classic Crest Solar White 110# cardstock along with layering panels from CutCardStock Basis 80# Dark Purple cardstock and Doodlebug Design Gingham-Linen Rainbow Petite Prints which I adhered together. Using the Memory Box Twirly Circle die, I cut the focal element once from CutCardStock Basis 80# Dark Purple cardstock, once from CutCardStock Pop-Tone 65# Grape Jelly cardstock and once from Doodlebug Design Swiss Dots Rainbow Petite Prints. I removed and discarded all the inner pieces from the dark purple cardstock, and retained the outermost circle of pieces from the grape jelly cardstock as well as the innermost circle of pieces from the purple swiss dots paper. Then the fun began! I adhered the dark purple cardstock frame to the background layers and proceeded to place all the outermost and then innermost pieces into the negative spaces on the frame using the Crystal Katana Pick-Up & Glue Tool. I have to tell you that this tool is a lifesaver when handling lots of small pieces and parts! I added the Brutus Monroe sentiment to the focal element and the Dot Sparklers to the background, and then adhered the panel to the card base.

I cut the inside panel from Neenah Classic Crest 80# Solar White cardstock and embellished it with strips of the yellow gingham paper and dark purple cardstock, as well as the center circle from the twirly circle die cut. I added another Brutus Monroe sentiment and layered the panel on the dark purple cardstock.

And one more peek… super happy with how this turned out! I can actually think of several friends this could go to! ;)

Dies R Us products used:
Memory Box Twirly Circle
Crystal Katana Pick-Up & Glue Tool

Other products used:
Cardstock/Paper: Neenah Classic Crest 110# and 80# Solar White cardstock, CutCardStock Basis 80# Dark Purple cardstock, CutCardStock Pop-Tone 65# Grape Jelly cardstock, Doodlebug Design Gingham-Linen and Swiss Dot Rainbow Petite Prints 6×6 paper pads
Accessories: Tonic Studios 12″ Guillotine Paper Trimmer, Gemini Junior, Bearly Art precision craft glue, Brutus Monroe Sweet Sayings Conversation Clippings, Stampendous Violet Dot Sparklers

I hope you’ve enjoyed today’s project! Be sure to check out all the fun goodies at the Dies R Us store! They not only sell dies… they also carry stamps, embossing tools and supplies, all kinds of craft supplies, slimline products and even Yupo paper! Be sure to join in the fun going on over at the Dies R Us Challenge Blog – there’s a new challenge theme posted on the 1st and 15th of each month and one lucky random winner will receive a gift voucher prize to the Dies R Us store! And be sure to ‘like’ and ‘follow’ Dies R Us Facebook Page for lots of creative inspiration and to keep up with the latest news! Thanks so much for stopping by today – we’ll see you next time! ;)

Scrappy hugs,
lesliesig

The smell of Christmas goodies

Ahoy, Mateys… okay, this is my last post for today. I don’t particularly like having to write so many blog posts (with interruptions from the hubs and cats) but I do enjoy sharing my projects! Affiliate links are used in this post at no cost to you. I really appreciate your support! This adorable apron box card is for The Outlawz Festive Fridays Challenge where the themes to choose from are Christmas, Thinking of You, Anything Goes or Congratulations, and I chose the Christmas theme this time. Isn’t this apron just the cutest?!

I cut the pieces for the box card from CutCardStock Basis Red cardstock, CutCardStock Basis Brown cardstock, CutCardStock Basis Teal cardstock, Neenah Classic Crest Baronial Ivory cardstock, and The Paper Studio Four Seasons and Everything In Between -2- paper pad, and assembled the card.

I typed the sentiment in brown font, trimmed it and layered it on brown cardstock. I found it handwritten in my stuff and I don’t know who to credit; I’m sure I found it online at some point and thought it was cute, so I jotted it down. It’s perfect for this box card!

And one more look… this is so stinkin’ cute, I can’t stand it! It’s already slated to go to a dear someone who loves to cook! ;)

Products used:
Cardstock/Paper: CutCardStock Basis Red cardstock, CutCardStock Basis Brown cardstock, CutCardStock Basis Teal cardstock, Neenah Classic Crest Baronial Ivory cardstock, The Paper Studio Four Seasons and Everything In Between -2- paper pad
Dies/Punches: My Scrap Chick Christmas Apron Box Card cut file
Accessories: Bearly Art precision craft glue, narrow red/white gingham ribbon from stash

I hope you’ve enjoyed this project and will come over and join in all the fun at The Outlawz Challenges! Lots of fun going on! Thanks so much for stopping by today – we’ll see you next time! ;)

Scrappy hugs,
lesliesig

Festive Noel Word Book

Hey everybody! I’m back with another project for The Outlawz Challenges, and this was truly a fun one to create! My Scan N Cut doesn’t get used nearly enough since I stepped down from the Simply Crafty SVGs DT last year, and I sure enjoy myself every single time I crank her up! Affiliate links are used in this post at no cost to you. I really appreciate your support! This adorable Noel word book is for The Outlawz Twisted Thursday Challenge where the challenges are always Anything Goes with a twist (as the name suggests), and the twist this time is Christmas in July! I used Carta Bella Christmas papers and elements, Tim’s Paper Dolls, and an assortment of die cuts for photos and journaling.

I cut the main book pages from CutCardStock Basis 110# Natural cardstock. Next I cut the page layers from CutCardStock Basis Green cardstock, CutCardStock Basis Red cardstock, CutCardStock Basis Light Brown cardstock, and Carta Bella Christmas Collection papers, and assembled the book. I created hole reinforcements using 1/2″ and 1/4″ circle punches and adhered them to each page, and then added the rings. I decorated each page with Tim Holtz Paper Dolls and Carta Bella Christmas Collection elements, adding tiny iridescent gemstones for a little bling (some colored with alcohol markers). I cut an assortment of die cut shapes for photos and journaling from Neenah Classic Crest Baronial Ivory cardstock, CutCardStock Pop-Tone Gumdrop Green, and CutCardStock Basis Dark Red cardstock. The final step was adding ribbon strips to the rings.

And one more peek… love how this turned out! Without being ‘over-done’ there’s lots of room to document the Christmas holiday!

Add a title

Products used:
Cardstock/Paper: CutCardStock Basis 110# Natural cardstock, CutCardStock Basis Green cardstock, CutCardStock Basis Red cardstock, CutCardStock Basis Light Brown cardstock, Neenah Classic Crest Baronial Ivory cardstock, CutCardStock Pop-Tone Gumdrop Green, CutCardStock Basis Dark Red cardstock, Carta Bella Christmas Collection Kit
Ink: Nuvo alcohol marker collections- Sunshine Yellow, Woodland Greens, Fair Skin Tones
Dies/Punches: My Scrap Chick Noel Word Book cut file, Stampin’ Up 1/2″ and 1/4″ Circle Punches, Memory Box Stitched Oval Layers, Memory Box Stitched Circle Layers, Memory Box Stitched Rectangle Layers, My Favorite Things Stitched Square STAX Die-namics, My Favorite Things Stitched Rectangle STAX Die-namics, My Favorite Things Stitched Mini Scallop Square STAX Die-namics, My Favorite Things Stitched Mini Scallop Oval STAX Die-namics, My Favorite Things Stitched Mini Scallop Circle STAX Die-namics, Spellbinders Postage Stamps dies
Accessories: Brother Scan N Cut, Bearly Art precision craft glue, Tim Holtz Paper Dolls, Darice tiny iridescent gemstones, Really Reasonable Ribbon Christmas Celebrations and Diamond Satin Vintage Ribbon Assortments

I hope you’ve enjoyed this project and will come over and join in all the fun at The Outlawz Challenges! Lots of fun going on! Thanks so much for stopping by today – we’ll see you next time! ;)

Scrappy hugs,
lesliesig

Growing Up vs Growing Old

Hey y’all, I’m baaaack! Today is the day for entering projects into The Outlawz Challenges before several of them end! I think that refers to ‘the skin of my teeth’ lol! The projects have been made but I’ve had a lot going on and haven’t really been entering many challenges lately. I need to fix that! Affiliate links are used in this post at no cost to you. I really appreciate your support! I’m entering this adorable easel card into The Outlawz Monday Greetings Challenge where the theme is to Add Spots or Stripes. I think I’m covered with the spots! Well, I’m not covered with spots but my card is, lol! #insertcheesycornygrin

I cut all the required pieces from CutCardStock Basis Green cardstock, CutCardStock Pop-Tone Jellybean Green cardstock, CutCardStock Pop-Tone Gumdrop Green cardstock, American Crafts Key Lime cardstock, CutCardStock Basis Magenta cardstock, CutCardStock Granny Smith cardstock, CutCardStock Basis Pink cardstock, CutCardStock Basis Gold cardstock, Colorbok Pink cardstock, Neenah Classic Crest Solar White cardstock, Colorbok yellow and pink Seeing Dots cardstock.

I stamped the sentiment from The Cat’s Pajamas Sassy Birthday stamp set in Catherine Pooler Lime Rickey ink.

And one more look, closed and ready to mail… how fun is this?! I’m absolutely loving how this turned out!

Products used:
Cardstock/Paper: CutCardStock Basis Green cardstock, CutCardStock Pop-Tone Jellybean Green cardstock, CutCardStock Pop-Tone Gumdrop Green cardstock, American Crafts Key Lime cardstock, CutCardStock Basis Magenta cardstock, CutCardStock Granny Smith cardstock, CutCardStock Basis Pink cardstock, CutCardStock Basis Gold cardstock, Colorbok Pink cardstock, Neenah Classic Crest Solar White cardstock, Colorbok yellow and pink Seeing Dots cardstock
Stamps: The Cat’s Pajamas Sassy Birthday stamp set
Ink: Catherine Pooler Lime Rickey ink
Dies/Punches: My Scrap Chick Blooming Layers Easel Card
Accessories: Brother Scan N Cut, Bearly Art precision craft glue, Scotch 3M Foam Tape

I hope you’ve enjoyed this project and will come over and join in all the fun at The Outlawz Challenges! Lots of fun going on! Thanks so much for stopping by today – we’ll see you next time! ;)

Scrappy hugs,
lesliesig

Cycle-Riding Santa!

Hi friends! Hope you’re having a great week! We’re on the downside to the weekend and time is zooming by! Affiliate links are used in this post at no cost to you. I really appreciate your support! I’ve popped in this morning to share a project I’m entering into The Outlawz Sunday Songs & Rhymes Challenge where SheepSki Designs is sponsoring and the theme is the song or rhyme “The Open Road.” My inspiration came literally from the word ‘travel’ so I decided to share a cycle-riding Santa box card that I made with my Scan N Cut. What a hoot! He’s definitely ridin’ in for the challenge, lol!

I sure do love me some box cards and made quite a few for a variety of occasions while I had my Scan N Cut out several weeks ago. I cut the pieces for this one from CutCardStock Basis Dark Red cardstock, CutCardStock Basis Red cardstock, CutcardStock Basis Black cardstock, CutCardStock Basis Light Brown cardstock, Neenah Classic Crest Solar White cardstock, Neenah Classic Crest Baronial Ivory cardstock scrap, and Hygloss Silver Foil cardstock.

I cut the sentiment panel on the back from CutCardStock Basis Green cardstock and Neenah Classic Crest Solar White cardstock, and stamped the sentiment from The Project Bin Mid Century Christmas stamp set. So perfect!

And one more look… so smitten with this one! He’s so stinkin’ cute I can’t stand it! The best part about box cards is they fold flat for mailing!

Products used:
Cardstock/Paper: CutCardStock Basis Dark Red cardstock, CutCardStock Basis Red cardstock, CutcardStock Basis Black cardstock, CutCardStock Basis Light Brown cardstock, Neenah Classic Crest Solar White cardstock, Neenah Classic Crest Baronial Ivory cardstock scrap, Hygloss Silver Foil cardstock, CutCardStock Basis Green cardstock
Stamps: The Project Bin Mid Century Christmas stamp set
Ink: Memento Cottage Ivy ink
Dies/Punches: My Scrap Chick Gnome Cycle cut file
Accessories: Brother Scan N Cut, Bearly Art precision craft glue, MISTI stamp tool

I hope you’ve enjoyed this project and will come over and join in all the fun at The Outlawz Challenges! Lots of fun going on! Thanks so much for stopping by today – we’ll see you next time! ;)

Scrappy hugs,
lesliesig

‘thanks’ pinwheel card

Hi everyone! A very Happy Tuesday to you – here’s hoping it’s not too hot where you are! We have little to no humidity out here in Colorado so the hot and cold temps are a little easier to tolerate. But I won’t lie… I’m SO ready for Fall and Winter! I’m stoked to be back on the CutCardStock blog today with an awesome DT inspiration project featuring gorgeous silver cardstock which is on sale this month. I paired the silver with black cardstock and some very cool chalkboard cardstock (which is also on sale). Be sure to grab some silver cardstock while it’s on sale though, as it would make a wonderful addition to your cardstock stash! Affiliate links are used in this post at no cost to you. I really appreciate your support! I created a fun ‘thanks’ pinwheel card. I finally got around to making my first pinwheel card a couple months ago and I couldn’t believe how easy and fast it worked up – and couldn’t wait to make another one!

I cut a square top-folding card base from Neenah Classic Crest Solar White 110# cardstock along with a layering panel from CutCardStock Stardream Metallic 105# Silver cardstock which I adhered to the card base, four squares for the pinwheel and a narrow embellishing strip for the bottom of the front panel. I also punched two 3/4″ circles and four 1/2″ circles which I layered to create the element in the center of the pinwheel. Next, I cut four floral squares for the pinwheel and two strips for the bottom of the front panel from the We R Memory Keepers Chalkboard 6×6 paper pad. And finally I cut eight slightly larger squares from CutCardStock Basis Black cardstock to layer beneath the chalkboard and silver squares. I adhered the squares together to form the pinwheel and affixed the punched circles in the center, then adhered the two chalkboard strips and the narrow silver embellishing strip to the bottom. Using the CUTplorations Skinny Sentiments, I die cut the sentiment from CutCardStock Basis Black cardstock and CutCardStock Stardream Metallic 105# Silver cardstock and adhered it at the bottom on the right side of the strips.

I cut the inside panel from Neenah Classic Crest Solar White 80# cardstock and embellished it with chalkboard strips and a narrow silver cardstock strip, added a stamped and die cut sentiment (using the Waffle Flower Sentiment Additions stamp set with coordinating Waffle Flower Sentiment Additions die set) and layered the panel on silver cardstock.

And one more peek… so loving how this turned out! Pinwheel cards are so much fun, and the right cardstock will definitely do them justice! ;)

CutCardStock products used:
Neenah Classic Crest Solar White 110# and 80# cardstock
CutCardStock Stardream Metallic 105# Silver cardstock
CutCardStock Basis Black cardstock
We R Memory Keepers Chalkboard 6×6 paper pad

Other products used:
Stamps: Waffle Flower Sentiment Additions stamp set
Ink: Delicata Silvery Shimmer ink
Dies/Punches: Stampin’ Up 3/4″ and 1/2″ Circle Punches, CUTplorations Skinny Sentiments, Waffle Flower Sentiment Additions die set
Accessories: Tonic Studios 12″ Guillotine Paper Trimmer, Gemini Junior, MISTI stamp tool, Bearly Arts precision craft glue

I hope you’ve enjoyed today’s project and you’re inspired to get crafty! Be sure to check out all the awesome cardstock and other goodies at CutCardStock (adhesives, labels, stickers, pens, watercolors and ribbon to name a few). And head on over to the CutCardStock Facebook Page for more inspiration! Thanks so much for stopping by today – we’ll see you next time!

Scrappy hugs,
lesliesig

Relax… unwind

Hi everyone! Another Saturday has rolled around and we are that much closer to Christmas! Yaaaaay, my favorite time of year! We literally have just a couple months of hot weather out here in Colorado (that’s why we moved here) so we’re looking forward to some cooler temps coming! We have very little humidity so the hot and cold temps are much easier to tolerate. I’m happy to be back on the Eyelet Outlet blog today with another awesome DT inspiration project! I created a beach card featuring some of the new Flip Flop Brads that hit the store a few days ago… they are so cool! And of course, I had to pair them with a Sun Brad and a Seagull Brad along with Wide Sky Washi Tape and the Water Washi Tape to complete the beach scene!

Beach scenes are so much fun to create with washi tape and brads, and of course torn kraft cardstock for the sand, and makes for a super simple no-fuss design. I cut a standard A2 size top-folding card base from Neenah Classic Crest 110# Solar White cardstock along with a panel cut from Neenah Classic Crest 80# Solar White cardstock which I covered with Wide Sky Washi Tape and Water Washi Tape and rounded all four corners. I added torn strips of CutCardStock 80# Sandcastle cardstock for the sand along with a Sun Brad and a Seagull Brad. Using the Dare 2B Artzy Flip Flops Stamp Set, I stamped the Adirondack chair in Teal Zeal ink on CutCardStock Stardream Metallic Lagoon cardstock and while it was still wet, I sprinkled some Ranger Clear embossing powder over it and hit it with the heat tool. Remember I mentioned a while back the clear embossing powder in my stash that I apparently dumped some white embossing powder into because it now embosses with white specks in it?! Well, this is it… and I cannot bring myself to throw it away because it looks so freaking cool! I cut the Adirondack chair with the coordinating Dare 2B Artzy Flip Flop & Adirondack Chair Die and added it to my scene. I added the Flip Flop Brads and stamped the sentiment from the Dare 2B Artzy Flip Flops Stamp Set in Jet Black StazOn ink to complete the front of the card.

I cut the inside panel from Neenah Classic Crest 80# Solar White cardstock along with a layering panel and embellishing strip from CutCardStock Stardream Metallic Lagoon cardstock, and a wider embellishing strip from CutCardStock 80# Sandcastle cardstock. I adhered the strips, rounded all four corners and stamped another sentiment from the Dare 2B Artzy Flip Flops Stamp Set in Teal Zeal ink, then layered the panel on the lagoon cardstock.

And one more look… so smitten with this card! The sky and water washi tape along with this assortment of brads makes the best beach cards!

Eyelet Outlet products used:
Wide Sky Washi Tape
Water Washi Tape
Flip Flop Brads
Seagull Brads
Sun & Cloud Brads

Other products used:
Cardstock/Paper: Neenah Classic Crest 110# and 80# Solar White cardstock, CutCardStock 80# Sandcastle cardstock, CutCardStock Stardream Metallic Lagoon cardstock
Stamps: Dare 2B Artzy Flip Flops Stamp Set
Ink: Memento Teal Zeal ink, StazOn Jet Black ink
Dies/Punches: Dare 2B Artzy Flip Flop & Adirondack Chair Dies, Kadomaru Pro corner rounder
Accessories: Tonic Studios 12″ Guillotine Paper Trimmer, Ranger Clear embossing powder, Hero Arts White Embossing Powder, Milwaukee heat tool, Big Shot, Tombow Mono permanent adhesive, Bearly Art precision craft glue, MISTI stamp tool

I hope you’ve enjoyed today’s project! Be sure to check out all the fun goodies at Eyelet Outlet! I know you’ll love what you see! Be sure to ‘like’ and ‘follow’ Eyelet Outlet Facebook Page to keep up with news and sales, and while you’re at it, join the Eyelet Outlet Fans Facebook group for lots of creative inspiration! Thanks so much for stopping by today – we’ll see you next time! ;)

Scrappy hugs,
lesliesig