Merry & Bright Mitten

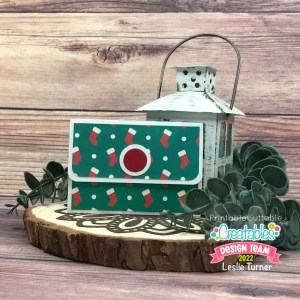
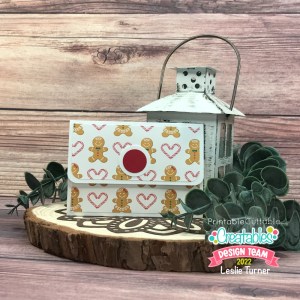
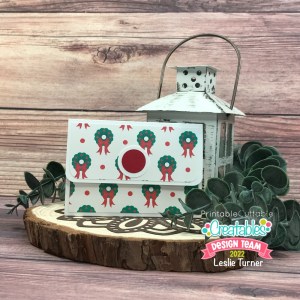
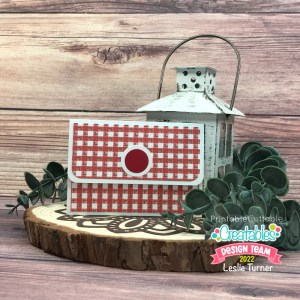
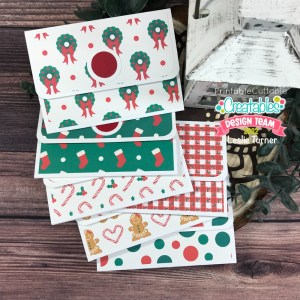
Hi everyone! A big ol’ Happy Hump Day to you! Another day closer to Christmas! I’m stoked to be back to share another ScrapbookingStore DT inspiration project with you today, created with the amazing December 2022 Scrapbook Kit with Upgrades! I’m digging all the festive Christmas prints and traditional colors of the papers in this collection along with the coordinating stickers and upgrades. I love creating shaped cards and used a mitten card template that I designed a number of years ago which you can find HERE if you’d like to play around with it!  

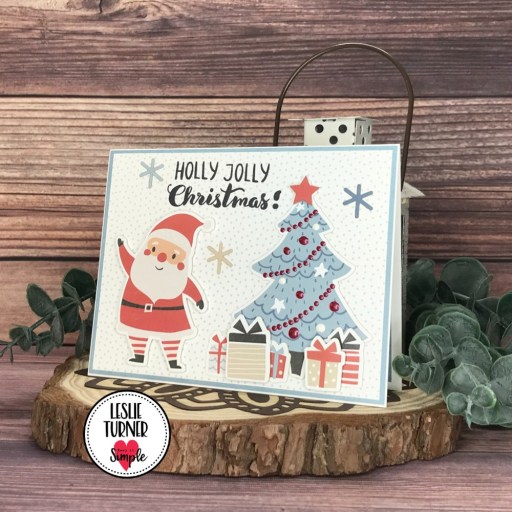
Using my template, I cut the mitten card base once from Neenah Classic Crest 110# Solar White cardstock and again from a snowflake patterned paper in the kit. I fashioned a cuff from a candy stripe patterned paper in the kit layered on CutCardStock Scottish Highlands Green cardstock which I embellished with an Eyelet Outlet 3mm white pearl bling strip. I added hand-cut stripes (from the same paper) also layered on green cardstock. I embellished the mitten with a sentiment banner sticker and several snowflake stickers from the sticker sheet that I popped up on Dimensionals.

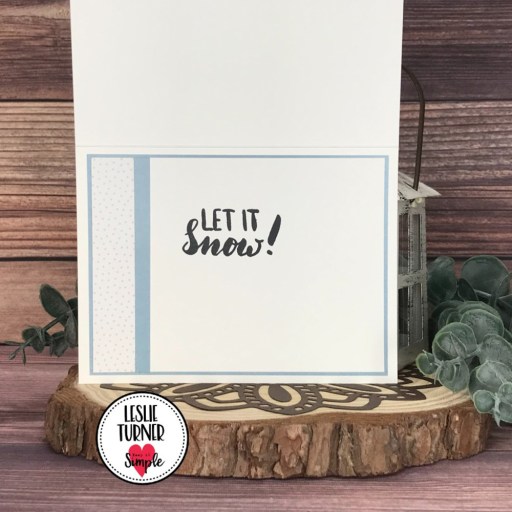
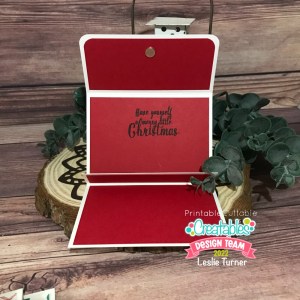
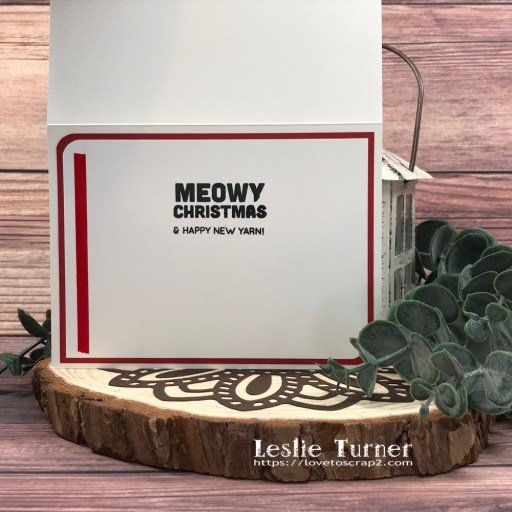
Using the template as a guide, I hand-cut the inside panels from 80# Solar White and CutCardStock Scottish Highlands Green cardstock in graduating smaller sizes which I layered together. I embellished the panel with the candy stripe patterned paper and green cardstock used on the front, and added a sentiment sticker from the sticker sheet.

Affiliate links are used in this post at no cost to you – I really appreciate your support!

ScrapbookingStore products used:
December 2022 Scrapbook Kit with Upgrades

Other products used:
Cardstock/Paper: Neenah Classic Crest 110# and 80# Solar White cardstock, CutCardStock Scottish Highlands Green cardstock
Accessories: Tonic Studios 12″ Guillotine Paper Trimmer, Bearly Art precision craft glue, Eyelet Outlet 3mm white pearl bling strip, Stampin’ Up Dimensionals and Mini Dimensionals

I hope you’ve enjoyed today’s project and you’re thinking about all the fun you could have with this month’s kit… you really ought to think about joining the Subscription Club! Be sure to Follow us on Facebook, Instagram, Pinterest and YouTube for lots of crafty inspiration! And if you do decide to join the Subscription Club, join our ScrapbookingStore Club Member Group on Facebook for more inspiration and to share your projects! Thanks so much for stopping by today – we’ll see you next time!

Scrappy hugs,

Holly Jolly Christmas

Hey everybody! Happy Tuesday! I’m back again this morning, this time sharing another Keep It Simple DT inspiration project! This adorable Christmas card features quite a few items from the Scandinavian Christmas collection which I’m totally loving! To create this fun scene, I used paper from the Scandinavian Christmas 6×9 Cardstock Pack, stamps and die cut pieces from Santa & Friends, and die cut pieces and stamps from Gnomes!

I cut a standard A2 size top-folding landscape card base from Neenah Classic Crest #110# Solar White cardstock along with layering panels from papers in the 6×9 Cardstock Pack. I used die cuts from both the Santa & Friends and Gnomes Die Cut Pieces to create the scene, popping some of the presents up on foam dimensionals and using Nuvo Autumn Red and Gloss White Crystal Drops to embellish the tree. I stamped the sentiment from the Santa & Friends Stamps in Memento Tuxedo Black ink which completed the card front.

I cut the inside panel from 80# Solar White cardstock and embellished it with strips of the papers used on the front, and then stamped the sentiment from the Gnomes Stamps in black ink.

Keep It Simple products used:
Scandinavian Christmas 6×9 Cardstock Pack
Santa & Friends Stamps
Santa & Friends Die Cut Pieces
Gnomes Die Cut Pieces
Gnomes Stamps

Affiliate links are used in this post at no cost to you – I really appreciate your support!

Other products used:
Cardstock/Paper: Neenah Classic Crest 110# and 80# Solar White cardstock
Ink: Memento Tuxedo Black ink
Accessories: Tonic Studios 12″ Guillotine Paper Trimmer, Bearly Art precision craft glue, MISTI stamping tool, Nuvo Autumn Red and Gloss White Crystal Drops, Stampin’ Up Dimensionals and Mini Dimensionals

I hope you’ve loved seeing this project as much as I loved creating it, and you’re inspired to get crafty! Be sure to check out ALL the fun goodies in the Keep It Simple store such as paper, stamps, die cuts, ephemera, washi tape and enamel dots to name just a few! You’ll go cray-cray! Be sure to Follow us on Facebook, Instagram, and Pinterest for lots of crafty inspiration! Thanks so much for stopping by today – we’ll see you next time!

Scrappy hugs,

Christmas Double Pleated Fold

Hi friends! I hope it’s not too cold where you are… it’s technically not even Winter yet, lol! We woke up to 2 degrees a couple days ago and I believe it was 8 degrees yesterday morning! I’m delighted to be back to share another ScrapbookingStore DT inspiration project with you today, created with the amazing December 2022 Scrapbook Kit with Upgrades! I’m really loving all the Christmas-themed papers, coordinating stickers and upgrades in this month’s collection. I make Christmas cards all year long and already mailed out this year’s cards, so I have a head-start on next year’s! This card features a double pleated fold element on the front created from a houndstooth (on one side) and floral (on the other side) paper which I embellished with the chipboard doll from the upgrades!

I cut a standard A2 size side-folding landscape card base from CutCardStock Basis White cardstock along with a layering panel from CutCardStock Kale Green cardstock. I created the double pleated fold element using paper in the collection. I embellished it with Eyelet Outlet clear jewel brads and clear jewel bling strips and adhered it to the card front in a horizontal fashion. I added the chipboard doll from the upgrades to two layered die cut circles which I adhered to the center of the double pleated fold element. The finishing touch was adding a sentiment using a rub-on from the upgrades.

I cut the inside panel from Basis White cardstock and embellished it with strips of the patterned paper and kale green cardstock used on the front. I stamped a sentiment from the Stampin’ Up Oh What Fun stamp set and layered the panel on green cardstock.

Affiliate links are used in this post at no cost to you – I really appreciate your support!

ScrapbookingStore products used:
December 2022 Scrapbook Kit with Upgrades

Other products used:
Cardstock/Paper: CutCardStock Basis 80# White and Kale Green cardstock, Neenah Classic Crest 110# Solar White cardstock
Stamps: Stampin’ Up Oh What Fun stamp set
Ink: Catherine Pooler Deck the Halls ink
Dies/Punches: Spellbinders Standard Circles Large and Small dies
Accessories: Tonic Studios 12″ Guillotine Paper Trimmer, Bearly Art precision craft glue, MISTI stamping tool, Big Shot, Eyelet Outlet clear jewel brads and 3mm clear jewel bling strip

I hope you’ve enjoyed today’s project and you’re thinking about all the fun you could have with this month’s kit… you really ought to think about joining the Subscription Club! Be sure to Follow us on Facebook, Instagram, Pinterest and YouTube for lots of crafty inspiration! And if you do decide to join the Subscription Club, join our ScrapbookingStore Club Member Group on Facebook for more inspiration and to share your projects! Thanks so much for stopping by today – we’ll see you next time!

Scrappy hugs,

I Love Christmas Sticky Note Holder

Hey everybody! Happy Monday! It’s so hard to believe that this is the last week before Christmas! I’m delighted to be back to share another ScrapbookingStore DT inspiration project with you today, created with the amazing December 2022 Scrapbook Kit with Upgrades! You know how I love creating 3-D projects, and when they make practical gifts, that’s a definite win-win! This type of sticky pad holder has been around for a while but was recently featured in a Splitcoast Stamper newsletter HERE and inspired me to make one! It’s a fast project that could easily be mass-produced to make stocking stuffers or co-worker gifts!

I cut the easel base and panel from CutCardStock Kraft chipboard. Then the fun began assembling and decorating. ;) I used a pretty Christmas floral patterned paper from the kit and layered it on a panel of CutCardStock Scottish Highlands Green cardstock. I embellished the panel with floral, cardinal and sentiment stickers from the sticker sheet along with some Eyelet Outlet bumpy red bling. You can’t tell in the photo, but I popped the cardinal up on mini dimensionals for a little interest.

Like most easel-type projects, this sticky pad holder folds flat for gifting/mailing!

Affiliate links are used in this post at no cost to you – I really appreciate your support!

ScrapbookingStore products used:
December 2022 Scrapbook Kit with Upgrades

Other products used:
Cardstock/Paper: CutCardStock Kraft Chipboard and Scottish Highlands Green cardstock
Accessories: Tonic Studios 12″ Guillotine Paper Trimmer, Bearly Art precision craft glue, Stampin’ Up Mini Dimensionals, Eyelet Outlet bumpy red bling

I hope you’ve enjoyed today’s project and you’re thinking about all the fun you could have with this month’s kit… you really ought to think about joining the Subscription Club! Be sure to Follow us on Facebook, Instagram, Pinterest and YouTube for lots of crafty inspiration! And if you do decide to join the Subscription Club, join our ScrapbookingStore Club Member Group on Facebook for more inspiration and to share your projects! Thanks so much for stopping by today – we’ll see you next time!

Scrappy hugs,

Glittered Ornament

Hey everybody! Happy Tuesday – I hope you’re having a good week so far! It’s turning out to be a busy morning here. I’ve popped in again to share a Kat Scrappiness Creative Influencer inspiration project featuring the Snowflake Ornament Shaker Card Kit which I used to create a stand-alone ornament. I love making ornaments even though we haven’t put up a Christmas tree for a number of years because of our feline rescues. We recently talked about putting up a tree (anchored to the ceiling and/or wall, lol) with cat toys as ornaments! How fun would that be?! We’ve been so busy with the cabin that we decided to start this tradition next year. Can’t believe we didn’t think of this sooner! Okay, okay, back to my project… ;)

I started by coloring the face of the ornament with alcohol markers, coated it with Art Glitter Dries Clear glue, and applied Stampin’ Up Dazzling Diamonds Glitter. I die cut a circle from CutCardStock Medium Blue cardstock with a Spellbinders Standard Circles Small die to use as the back of the ornament. Next, I adhered the shaker base and added Kat Scrappiness Mirrored Clear Confetti Dot Sequin Mix, 3mm Sparkling Clear Droplets and 4mm Sparkling Clear Droplets as the shaker mix.

I adhered the acetate and then the face. I adhered quite a few more 3mm Sparkling Clear Droplets to embellish the snowflake, and added a Really Reasonable Ribbon silver metallic string hanger and blue checkerboard ribbon bow, which completed the ornament.

Affiliate links are used in this post at no cost to you – I really appreciate your support!

Kat Scrappiness products used:
Snowflake Ornament Shaker Card Kit

Other products used:
Cardstock/Paper: CutCardStock Basis Medium Blue cardstock
Ink: Arteza alcohol markers- B25/29
Dies/Punches: Spellbinders Standard Circles Small die
Accessories: Art Glitter Dries Clear glue, Bearly Art precision craft glue, Big Shot, Stampin’ Up Dazzling Diamonds Glitter, Kat Scrappiness Mirrored Clear Confetti Dot Sequin Mix, 3mm Sparkling Clear Droplets and 4mm Sparkling Clear Droplets, Really Reasonable Ribbon silver metallic string and blue checkerboard ribbon

I hope you’ve enjoyed this project and I’ve inspired you to get crafty! Be sure to check out all the amazing stuff in the Kat Scrappiness store… there’s some of just about everything you’ll need to get your craft on, I promise! Be sure to Follow us on Facebook, Instagram, Pinterest and YouTube for tons of crafty inspiration! And we’d love it if you’d join the Kat Scrappiness Insiders and Stamping Enablers Facebook Groups for lots of fun crafty ideas and to share your creativity! Thanks so much for stopping by today – we’ll see you next time!

Scrappy hugs,

Christmas Wallets

Hey everybody! Happy Tuesday – I hope you’re having a great week so far! I’m stoked to be back on the Printable Cuttable Creatables blog today with another awesome DT inspiration project! This is definitely the time of year to be thinking about gifts, and I’ve made some more Christmas gift card wallets. These are the smaller ones and feature papers from the Christmas Treats Digital Paper Pack which I chose because of the variety of patterns! I love every one of the patterns in this pack!

I made all six bases the same, in assembly-line fashion, from Neenah Classic Crest 80# Solar White cardstock and rounded the corners on the front flap. I picked out six patterns from the Christmas Treats Digital Paper Pack, printed them on 65# Hammermill copy paper, and cut panels for each of the bases.

I cut the inside panels from CutCardStock Pop Tone Wild Cherry cardstock and stamped a sentiment from the STAMPlorations Christmas Reindeer stamp set in Memento Tuxedo Black ink. I adhered small disc magnets to each one with Ranger distress collage medium and added decorative punched circles as closures to the flaps.

Affiliate links are used in this post at no cost to you – I really appreciate your support!

Printable Cuttable Creatables products used:
Christmas Treats Digital Paper Pack

Other products used:
Cardstock/Paper: 65# Hammermill copy paper, Neenah Classic Crest 110# and 80# Solar White cardstock, CutCardStock Pop Tone Wild Cherry cardstock
Stamps: STAMPlorations Christmas Reindeer stamp set
Ink: Memento Tuxedo Black ink
Dies/Punches: Stampin’ Up 1″ and 3/4″ circle punches
Accessories: Tonic Studios 12″ Guillotine Paper Trimmer, Bearly Art precision craft glue, Tombow Mono permanent adhesive, MISTI stamping tool, small disc magnets, Ranger distress collage medium

I hope you’ve enjoyed today’s project and you’re inspired to get out that electronic cutting machine! Be sure to check out all the fun goodies in the Printable Cuttable Creatables store – you’ll have a blast and there are tons of freebies to get started! Save 15% off your order at Printable Cuttable Creatables by using coupon code love2scrap15 at checkout! Be sure to Follow us on Facebook, Instagram, Pinterest, Twitter and YouTube for lots of crafty inspiration! And while you’re at it, join our Crafting with Printable Cuttable Creatables Facebook Group for more inspiration and to share your projects! Thanks so much for stopping by today – we’ll see you next time!

Scrappy hugs,

Weekender Handbag

Hi everyone! Hope you’re having a great weekend and it’s not too awfully cold where you are… it’s pretty darn chilly here but we don’t mind it! I’m excited to be back to share my last project using the ScrapbookingStore’s amazing November 2022 Scrapbook Kit… and now we wait for the December kit! I love the versatility and vintage feel of the papers in this collection. As you undoubtedly know, I’m a huge fan of paper purses and have a growing collection, so I created a fun Weekender Handbag which definitely has more of a vintage feel than seasonal. See what I mean about versatile papers?!

Using the Concord & 9th Weekender Handbag dies, I cut the handbag pieces from two coordinating patterned papers in the collection along with a scrap of CutCardStock Basis 110# Natural cardstock. I assembled the purse and added a small Inky Stamper Papercrafting Velcro closure.

Here’s a shot of the back. Paper purses can be used as is for collections like mine, or they can be used as gift bags to hold a gift card, cash, jewelry, or candy! The possibilities are endless!

Affiliate links are used in this post at no cost to you – I really appreciate your support!

ScrapbookingStore products used:
November 2022 Scrapbook Kit

Other products used:
Cardstock/Paper: CutCardStock Basis 110# Natural cardstock
Dies/Punches: Concord & 9th Weekender Handbag dies
Accessories: Bearly Art precision craft glue, Big Shot, Inky Stamper Papercrafting Velcro

I hope you’ve enjoyed today’s project and you’re thinking about all the fun you could have with this month’s kit… you really ought to think about joining the Subscription Club! Be sure to Follow us on Facebook, Instagram, Pinterest and YouTube for lots of crafty inspiration! And if you do decide to join the Subscription Club, join our ScrapbookingStore Club Member Group on Facebook for more inspiration and to share your projects! Thanks so much for stopping by today – we’ll see you next time!

Scrappy hugs,

Beautiful Fall

Hi everyone! Wowzers, the weekends sure do roll around quickly these days… and then roll away just as quickly, lol! I’m happy to be back to share another ScrapbookingStore DT inspiration project with you today, created with the amazing November 2022 Scrapbook Kit! I’m loving all the Autumn- and Fall-themed prints and colors of the papers in this collection as well as the coordinating stickers. I know I’ve mentioned a hundred times that Fall is my favorite season because of the wonderful colors and smells, but mostly because of the cooler weather! I created a pretty Fall window scene with a kitty looking out!

I cut a standard A2 size top-folding card base from CutCardStock Basis 110# Natural cardstock along with a CutCardStock Curious Metallic Chestnut layering panel from which I die cut a window using the Cheery Lynn Designs Window B die. I adhered a journaling card featuring a beautiful fall tree beneath the aperture. I created a window sill and adhered an Impression Obsession Cat die cut from CutCardStock Brown Bag Kraft paper. The final step was adding a sentiment sticker from the sticker sheet.

I embellished the inside with a sentiment sticker and leaf stickers from the sticker sheet.

Affiliate links are used in this post at no cost to you – I really appreciate your support!

ScrapbookingStore products used:
November 2022 Scrapbook Kit

Other products used:
Cardstock/Paper: CutCardStock Basis 110# Natural and Curious Metallic Chestnut cardstock, and Brown Bag Kraft paper
Dies/Punches: Cheery Lynn Designs Window B die, Impression Obsession Cats dies
Accessories: Tonic Studios 12″ Guillotine Paper Trimmer,Tombow Mono permanent adhesive, Bearly Art precision craft glue, Big Shot

I hope you’ve enjoyed today’s project and you’re thinking about all the fun you could have with this month’s kit… you really ought to think about joining the Subscription Club! Be sure to Follow us on Facebook, Instagram, Pinterest and YouTube for lots of crafty inspiration! And if you do decide to join the Subscription Club, join our ScrapbookingStore Club Member Group on Facebook for more inspiration and to share your projects! Thanks so much for stopping by today – we’ll see you next time!

Scrappy hugs,

Wishing you a purrfect holiday

Hi friends! Happy Saturday – I hope you have something fun planned this weekend! Our new challenge is live this morning over at Ally’s Angels and I’m stoked to share my DT inspiration project for Challenge #65! I created an adorable CAS hybrid kitty Christmas card featuring Jen Leeflang’s 7 Cats digital image! I also used sentiments from Simon Says Stamp Christmas Cats stamp set and created the card in neutrals with a pop of red! So stinkin’ cute!

I cut a standard A2 size top-folding landscape card base from CutcardStock Basis White and a layering panel from CutCardStock Basis Red. I printed the image on Basis White and colored it with alcohol markers. I trimmed it, rounded the upper left and lower right corners on both layering panels, and adhered them together. I stamped a sentiment from the Simon Says Stamp Christmas Cats stamp set in Memento Tuxedo Black ink and added several Eyelet Outlet White Enamel Dots, which completed the front.

I cut the inside panel from Basis White, rounded the upper left and lower right corners, and embellished it with Eyelet Outlet Skinny Red Washi Tape. I stamped another sentiment from the same stamp set in black ink and layered the panel on Basis Red cardstock.

Affiliate links are used in this post at no cost to you – I really appreciate your support! 

Products used:
Cardstock/Paper: CutCardStock Basis White and Basis Red cardstock
Stamps: Jen Leeflang 7 Cats digital image, Simon Says Stamp Christmas Cats stamp set
Ink: Arteza alcohol markers- NG04/06/08; Memento Tuxedo Black ink
Dies/Punches: Kadomaru Pro Corner Rounder
Accessories: Tonic Studios 12″ Guillotine Paper Trimmer, Tape Runner, MISTI stamp tool, Eyelet Outlet Skinny Red Washi Tape and White Enamel Dots

I hope you’ve enjoyed seeing this project and will link up with us this month! Thanks so much for stopping by today – we’ll see you next time! ;)

Scrappy hugs,

celebrate mini slimline

Hi everyone! Happy Friday! Wow, this week went by rather quickly, didn’t it?! We’re that much closer to Christmas! I have an awesome CutCardStock DT inspiration project to share with you today featuring our Stardream Metallic cardstock which is among my favorites! This white-on-white mini slimline Christmas card turned out gorgeous but was hard as heck to photograph! I really love creating tone-on-tone projects – they really pack a punch!

I cut a 3-1/2″ x 6″ mini slimline card base from Neenah Classic Crest 110# Solar White cardstock. I cut four frames from CutCardStock Stardream Metallic Eris cardstock using the Kat Scrappiness Mini Slimline Fri-Frame Dies, and adhered them together for some dimension. Using the Sizzix Woodlands Thinlits, Sizzix Primitive Stars Framelits and Sizzix Script Celebration Words Thinlits, I die cut two trees, a star and the sentiment from the Stardream Metallic Eris cardstock, and created the scene on the card front. The finishing touch was adding several Darice tiny gemstones.

Using the Waffle Flower Mini Slimline Layers dies, I cut the inside panels from the Stardream Metallic Eris and Neenah Classic Crest 80# Solar White cardstock. I embellished the Solar White panel with a narrow strip cut from the Eris cardstock, and stamped the sentiment from the Prickley Pear Stamps Christmas Trees stamp set in Memento Tuxedo Black ink.

Affiliate links are used in this post at no cost to you – I really appreciate your support!

CutCardStock products used:
Stardream Metallic Eris cardstock
Neenah Classic Crest 110# and 80# Solar White cardstock

Other products used:
Stamps: Prickley Pear Stamps Christmas Trees stamp set
Ink: Memento Tuxedo Black ink
Dies/Punches: Sizzix Woodlands Thinlits, Sizzix Primitive Stars Framelits, Sizzix Script Celebration Words Thinlits, Kat Scrappiness Mini Slimline Tri-Frame Dies, Waffle Flower Mini Slimline Layers dies
Accessories: Tonic Studios 12″ Guillotine Paper Trimmer, Bearly Art precision craft glue, MISTI stamp tool, Big Shot, Darice tiny gemstones

I hope you’ve enjoyed today’s project and you’re inspired to get crafty! Be sure to check out all the awesome cardstock and other goodies at CutCardStock (adhesives, labels, stickers, pens, watercolors and ribbon to name a few). And head on over to the CutCardStock Facebook Page for more inspiration! Thanks so much for stopping by today – we’ll see you next time!

Scrappy hugs,