Thankful

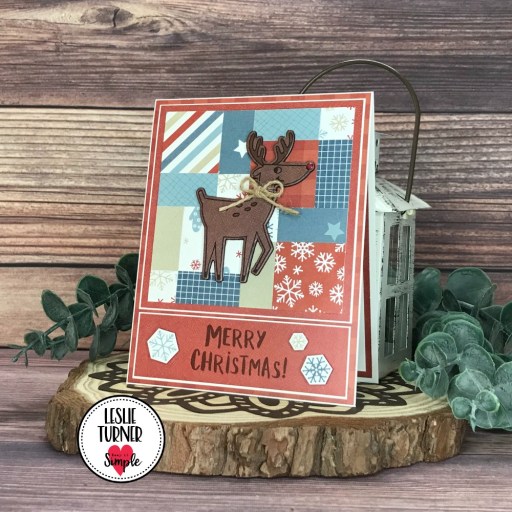
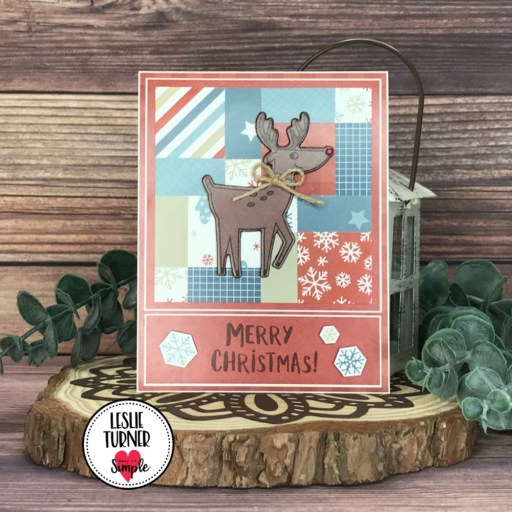
Hi everyone! Happy Fri-YAY! I hope you’ve had a great week and you’re looking forward to a nice relaxing weekend! I’m delighted to be back to share another ScrapbookingStore DT inspiration project with you today, created with the amazing November 2022 Scrapbook Kit! I absolutely LOVE all the Autumn/Fall-themed papers and coordinating stickers in this collection. I love seasonal cards and I’m particularly fond of Autumn/Fall and bold patterns, so this November kit is a ‘win-win’ in my book! And I have to say that this card is at the top of my list of all-time favs – it was so easy and turned out so pretty!

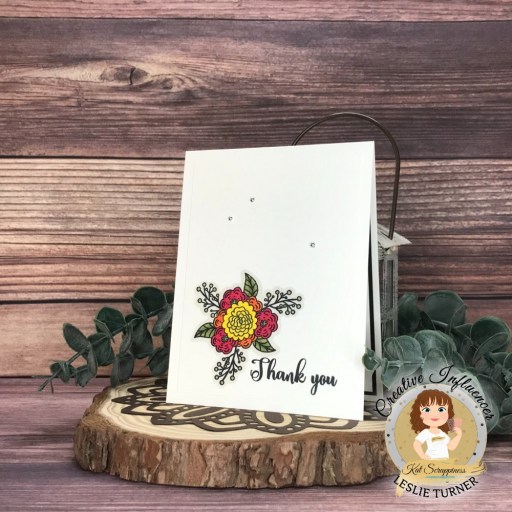
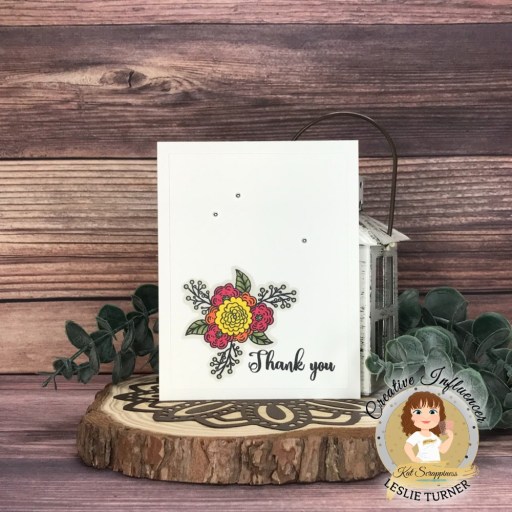
I cut an A2 size side-folding card base from CutCardStock Basis 110# Natural cardstock along with layering panels from CutCardStock Pop Tone Hot Fudge cardstock and a gingham patterned paper in the collection. I punched scalloped edges on the brown cardstock, trimmed a journaling card from the collection and layered them together. I adhered an oval sentiment sticker from the sticker sheet onto a Cottage Cutz Double-Stitched Oval die cut. The finishing touch was adding Darice tiny iridescent gemstones to the scallops.

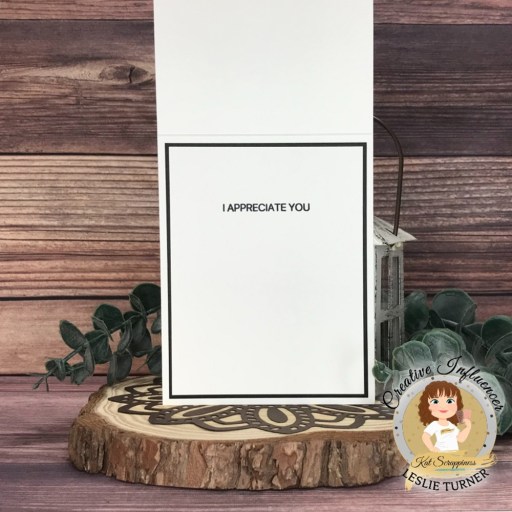
I embellished the inside with strips of the gingham patterned paper and Hot Fudge cardstock used on the front, and a sentiment sticker from the sticker sheet to which I added a green Dot Sparkler.

Affiliate links are used in this post at no cost to you – I really appreciate your support!

ScrapbookingStore products used:
November 2022 Scrapbook Kit

Other products used:
Cardstock/Paper: CutCardStock Basis 110# Natural and Pop Tone Hot Fudge cardstock
Dies/Punches: Stampin’ Up Scallop Edge Punch, Cottage Cutz Double-Stitched Oval dies
Accessories: Tonic Studios 12″ Guillotine Paper Trimmer, Big Shot, Tombow Mono permanent adhesive, Bearly Art precision craft glue, Darice tiny iridescent gemstones, Stampendous green Dot Sparklers

I hope you’ve enjoyed today’s project and you’re thinking about all the fun you could have with this month’s kit… you really ought to think about joining the Subscription Club! Be sure to Follow us on Facebook, Instagram, Pinterest and YouTube for lots of crafty inspiration! And if you do decide to join the Subscription Club, join our ScrapbookingStore Club Member Group on Facebook for more inspiration and to share your projects! Thanks so much for stopping by today – we’ll see you next time!

Scrappy hugs,

Merry Christmas

Hey everybody! I hope you’re having a fantastic week! I’m stoked to be back with another Keep It Simple DT inspiration project to share today! This adorable disappearing nine patch Christmas card features quite a few items from the Scandinavian Christmas collection! I used the Santa & Friends Stamps and Dies, a variety of patterned papers from both the 6×9 Collection Pack and 6×9 Cardstock Pack, and inside sentiments from the Congratulations Sentiments Stamp Set and Gnome Stamps.

I cut a standard A2 size top-folding card base from Neenah Classic Crest 110# Solar White cardstock along with layering panels cut from papers in the 6×9 Cardstock Pack and 80# Solar white cardstock. I created the disappearing nine patch panel using a variety of patterned papers in the 6×9 Collection Pack. I stamped the reindeer from the Santa & Friends Stamps (in Memento Rich Cocoa ink) on brown paper in the 6×9 Cardstock Pack and cut it with the coordinating Outline Die. I colored his spots and antlers with an alcohol marker and added a dot of Nuvo Autumn Red Crystal Drops on his nose. I die cut three more reindeer shapes and adhered them all together with the brown one on top, ran a brown alcohol marker around the edge of the stack, and added a twine bow around his neck. I stamped a sentiment from the Santa & Friends Stamps in Memento Rich Cocoa ink and added several snowflakes cut from a scrap of patterned paper used in the disappearing nine patch panel.

I cut the inside panel from 80# Solar White cardstock and embellished it with strips of two of the papers used on the front and a couple more snowflakes cut from a scrap of patterned paper used in the disappearing nine patch panel. I stamped the sentiment in brown ink using stamps from the Congratulations Sentiments Stamp Set and Gnomes Stamps.

Keep It Simple products used:
Santa & Friends Stamps
Santa & Friends Outline Dies
Scandinavian Christmas 6×9 Collection Pack
Scandinavian Christmas 6×9 Cardstock Pack
Back to Basics Congratulations Sentiments Stamp Set
Gnomes Stamps

Affiliate links are used in this post at no cost to you – I really appreciate your support!

Other products used:
Cardstock/Paper: Neenah Classic Crest 110# and 80# Solar White cardstock
Ink: Memento Rich Cocoa ink; Arteza alcohol markers- BR86/92
Accessories: Tonic Studios 12″ Guillotine Paper Trimmer, Bearly Art precision craft glue, MISTI stamping tool, Big Shot, Canvas Corp twine, Nuvo Autumn Red Crystal Drops, Stampin’ Up Dimensionals and Mini Dimensionals

I hope you’ve loved seeing this project as much as I loved creating it, and you’re inspired to get crafty! Be sure to check out ALL the fun goodies in the Keep It Simple store such as paper, stamps, die cuts, ephemera, washi tape and enamel dots to name just a few! You’ll go cray-cray! Be sure to Follow us on Facebook, Instagram, and Pinterest for lots of crafty inspiration! Thanks so much for stopping by today – we’ll see you next time!

Scrappy hugs,

Autumn Time mini slimline

Hi everyone! Hope you’re having a great week! I’m excited to be back sharing another ScrapbookingStore DT inspiration project with you today. My Halloween shares are complete and now I’m moving onto Autumn/Fall with the November 2022 Scrapbook Kit! I’m loving all the beautiful patterns in this collection – Fall is is my favorite time of year so I’m really enjoying myself! And you know I’m also a fan of slimline and mini slimline cards, so I created a mini slimline featuring paper and stickers from the November kit!

I cut a 3-1/2” x 6” mini slimline card base and a layering panel from CutCardStock Basis 110# Natural cardstock along with a layering panel from a patterned paper in the collection. I added truck and gingham border stickers from the sticker sheet. The finishing touch was adding a few gemstones.

To complete the inside, I added another gingham border and a sentiment sticker from the sticker sheet. This card couldn’t have been any easier! ;)

Affiliate links are used in this post at no cost to you – I really appreciate your support!

ScrapbookingStore products used:
November 2022 Scrapbook Kit

Other products used:
Cardstock/Paper: CutCardStock Basis 110# Natural cardstock
Dies/Punches: Kadomaru Pro Corner Rounder
Accessories: Tonic Studios 12″ Guillotine Paper Trimmer, Tombow Mono permanent adhesive, Bearly Art precision craft glue, Trinity Stamps Topaz Twinkle Embellishment Mix

I hope you’ve enjoyed today’s project and you’re thinking about all the fun you could have with this month’s kit… you really ought to think about joining the Subscription Club! Be sure to Follow us on Facebook, Instagram, Pinterest and YouTube for lots of crafty inspiration! And if you do decide to join the Subscription Club, join our ScrapbookingStore Club Member Group on Facebook for more inspiration and to share your projects! Thanks so much for stopping by today – we’ll see you next time!

Scrappy hugs,

Book of Spells & Potions mini album

Hi everyone! It’s Hump Day and I hope you have a good one! I’m happy to be back today to share another DT inspiration project for ScrapbookingStore, created with the amazing October 2022 Scrapbook Kit with Upgrades! Have I mentioned that I really like the coordinating papers and stickers in October’s kit?! Sure makes creating projects a breeze! Mini albums are at the top of my list of loves, and I made a super cute Halloween mini album. Each page has a tag tucked into a pocket so there is plenty of room for photos and journaling!

I created a 3” square mini album from a sheet of 12×12 American Crafts Black cardstock and adhered a 2-3/4” square panel cut from a variety of patterned papers from the collection to the front and to each page, with an additional piece cut for the spine. I added a ‘Book of Spells and Potions’ sticker to the front and a sentiment sticker to each page. Using the Stampin’ Up Scalloped Tag Topper Punch and American Crafts Dandelion and Key Lime, Neenah Crest Solar White, and CutCardStock Stardream Metallic Aquamarine cardstock, I created a tag for each page and tied twine to the top of each.

Affiliate links are used in this post at no cost to you – I really appreciate your support!

ScrapbookingStore products used:
October 2022 Scrapbook Kit with Upgrades

Other products used:
Cardstock/Paper: American Crafts Black, Dandelion and Key Lime cardstock, Neenah Classic Crest Solar White cardstock, CutCardStock Stardream Metallic Aquamarine cardstock
Dies/Punches: Stampin’ Up Scalloped Tag Topper Punch
Accessories: Tonic Studios 12″ Guillotine Paper Trimmer, Bearly Art precision craft glue, Doodlebug Design Lily White Doodle Twine

I hope you’ve enjoyed today’s project and you’re thinking about all the fun you could have with this month’s kit… you really ought to think about joining the Subscription Club! Be sure to Follow us on Facebook, Instagram, Pinterest and YouTube for lots of crafty inspiration! And if you do decide to join the Subscription Club, join our ScrapbookingStore Club Member Group on Facebook for more inspiration and to share your projects! Thanks so much for stopping by today – we’ll see you next time!

Scrappy hugs,

Stay Out! Graveyard slimline

Hi everyone! Here’s to a Terrific Tuesday to you all! I’m thrilled to be back to share another ScrapbookingStore DT inspiration project with you today, created with the amazing October 2022 Scrapbook Kit with Upgrades! The Halloween-themed prints and colors of the papers in this collection, along with the coordinating stickers and upgrades, are amazing. You know I love slimline cards, and this size was perfect to create a spooky graveyard scene using items from the October collection!

I cut a 3-3/4” x 9” slimline card base from Neenah Classic Crest 110# Solar White cardstock along with a layering panel from a patterned paper in the collection. I created a graveyard scene using CutCardStock Pop Tone Jellybean Green and Tangy Orange cardstock, the fence die from the Stampin’ Up Halloween Scenes Edgelits, stickers from the sticker sheet, and die cuts from the upgrades in the collection.

I cut the inside panel from 80# Solar White cardstock and embellished it with a strip cut from the patterned paper used on the front. I added die cuts and a trimmed sentiment from the upgrades, and layered the panel on CutCardStock Pop Tone Tangy Orange cardstock.

Affiliate links are used in this post at no cost to you – I really appreciate your support!

ScrapbookingStore products used:
October 2022 Scrapbook Kit with Upgrades

Other products used:
Cardstock/Paper: Neenah Classic Crest 110# and 80# Solar White cardstock, CutCardStock Pop Tone Jellybean Green cardstock, CutCardStock Pop Tone Tangy Orange cardstock
Ink: Copic black 0.3 multi-liner pen
Dies/Punches: Stampin’ Up Halloween Scenes Edgelits
Accessories: Tonic Studios 12″ Guillotine Paper Trimmer, Tombow Mono permanent adhesive, Bearly Art precision craft glue, Big Shot, Stampin’ Up Dimensionals

I hope you’ve enjoyed today’s project and you’re thinking about all the fun you could have with this month’s kit… you really ought to think about joining the Subscription Club! Be sure to Follow us on Facebook, Instagram, Pinterest and YouTube for lots of crafty inspiration! And if you do decide to join the Subscription Club, join our ScrapbookingStore Club Member Group on Facebook for more inspiration and to share your projects! Thanks so much for stopping by today – we’ll see you next time!

Scrappy hugs,

I’m just here for the treats!

Hi everyone! Happy Monday – the weekends sure do go by fast, don’t they?! I’m delighted to be back with another DT inspiration project to share for ScrapbookingStore, created with the amazing October 2022 Scrapbook Kit with Upgrades! Loving all the Halloween and treat-themed papers, coordinating stickers and upgrades in this collection. Candy corn is one of my favorite Halloween candies and I wish it was available for other holidays throughout the year! I created a fun card featuring patterned paper and one of the journal cards from the upgrades in the October kit.

I cut a standard A2 size top-folding card base from Neenah Classic Crest 110# Solar white cardstock along with layering panels from CutCardStock Pop Tone Black Licorice cardstock and a striped patterned paper from the collection. I trimmed a journal card from the upgrades and layered it on black cardstock as well. I added several pieces of candy corn and wrapped candies from the upgrades and popped some of them up on mini dimensionals, which completed the card front. Super easy!

I cut the inside panel from 80# Solar White cardstock and embellished it with strips of the striped pattern paper and black cardstock used on the front. I added a sentiment sticker and candy corn from the sticker sheet and layered the panel on black cardstock.

Affiliate links are used in this post at no cost to you – I really appreciate your support!

ScrapbookingStore products used:
October 2022 Scrapbook Kit with Upgrades

Other products used:
Cardstock/Paper: Neenah Classic Crest 110# and 80# Solar White cardstock, CutCardStock Pop Tone Black Licorice cardstock
Accessories: Tonic Studios 12″ Guillotine Paper Trimmer, Tim Holtz 8.5″ Comfort Trimmer, Bearly Art precision craft glue, Stampin’ Up Mini Dimensionals

I hope you’ve enjoyed today’s project and you’re thinking about all the fun you could have with this month’s kit… you really ought to think about joining the Subscription Club! Be sure to Follow us on Facebook, Instagram, Pinterest and YouTube for lots of crafty inspiration! And if you do decide to join the Subscription Club, join our ScrapbookingStore Club Member Group on Facebook for more inspiration and to share your projects! Thanks so much for stopping by today – we’ll see you next time!

Scrappy hugs,

Beware! Halloween Tag

Hi everyone! Happy Sunday – I hope you’re having a great weekend! I’m delighted to be back (finally) to share another ScrapbookingStore DT inspiration project with you, created with the amazing October 2022 Scrapbook Kit with Upgrades! This is the most awesome company to design for. Hurricane Ian caused delays in shipping of the October kit and then the November kit arrived while we were moving and my studio was torn apart, so needless to say, showcasing my projects using the October and November kits has been delayed. So let’s back-track to Halloween… I’m so loving all the coordinating papers in this kit and since I think tags are especially fun, I created a spooky Halloween tag using some of the fun papers and stickers in this kit.

I cut a tag shape from Neenah Classic Crest 110# Solar White cardstock and embellished it with several coordinating papers from the collection, tearing some into strips.

I added stickers from the sticker sheet as well as a variety of elements from the upgrades. The finishing touch was tying Haunted Halloween ribbons from Really Reasonable Ribbon to the top of the tag with Doodlebug Design Lily White Doodle Twine.

Affiliate links are used in this post at no cost to you – I really appreciate your support!

ScrapbookingStore products used:
October 2022 Scrapbook Kit with Upgrades

Other products used:
Cardstock/Paper: Neenah Classic Crest 110# Solar White cardstock
Dies/Punches: Stampin’ Up 1/4″ circle punch
Accessories: Tonic Studios 12″ Guillotine Paper Trimmer, Bearly Art precision craft glue, Trinity Stamps Topaz Twinkle Embellishment Mix, Stampin’ Up Dimensionals, Really Reasonable Ribbon Haunted Halloween ribbon assortment, Doodlebug Design Lily White Doodle Twine

I hope you’ve enjoyed today’s project and you’re thinking about all the fun you could have with this month’s kit… you really ought to think about joining the Subscription Club! Be sure to Follow us on Facebook, Instagram, Pinterest and YouTube for lots of crafty inspiration! And if you do decide to join the Subscription Club, join our ScrapbookingStore Club Member Group on Facebook for more inspiration and to share your projects! Thanks so much for stopping by today – we’ll see you next time!

Scrappy hugs,

JOY double gate fold

Hey everybody! A big ol’ Happy Tuesday to you all! I hope your week has started off nicely! I’m stoked to be back with another Keep It Simple DT inspiration project created with products from the absolutely amazing Scandinavian Christmas Collection! And you know how I love me some fun folds, so this was definitely a ‘win-win’ kind of project! For this double gate fold, I used a buffalo plaid paper from the 6×9 Cardstock Pack, double-sided paper from the Back to Basics Ruby 12×12 Collection Pack, and an assortment of die cuts from the Die Cut Pieces Alphabits, Santa & Friends and Gnomes. This was definitely a fun one!

I created the card base using the double-sided buffalo plaid paper from the 6×9 Cardstock Pack. To create the front detail on the card base, I cut the top portion of each side of the gate fold off at an angle, flipped the pieces down, exposing the reverse side, and adhered them to the bottom of the gate fold flaps.

I created the JOY focal element by adhering die cuts from the Die Cut Pieces Alphabits, Santa & Friends and Gnomes to a circle die cut from Neenah Classic Crest Solar White cardstock, and adhered the element to the left side of the card front.

I cut the inside panel from 80# Solar White cardstock and embellished it with strips cut from a red paper in the Back To Basics Ruby 12×12 Collection Pack and a blue paper in the 6×9 Cardstock Pack along with a die cut from the Die Cut Pieces Santa & Friends. I stamped a sentiment from the Santa & Friends stamps in Catherine Pooler Stone Blue ink, and layered the panel on the blue paper.

Keep It Simple products used:
Scandinavian Christmas 6×9 Cardstock Pack
Back to Basics Ruby 12×12 Collection Pack
Scandinavian Christmas Die Cut Pieces Alphabits
Scandinavian Christmas Die Cut Pieces Santa & Friends
Scandinavian Christmas Die Cut Pieces Gnomes
Scandinavian Christmas Santa & Friends stamps

Affiliate links are used in this post at no cost to you – I really appreciate your support!

Other products used:
Cardstock/Paper: Neenah Classic Crest 110# and 80# Solar White cardstock
Ink: Catherine Pooler Stone Blue ink
Dies/Punches: Spellbinders Standard Circles Large die
Accessories: Tonic Studios 12″ Guillotine Paper Trimmer, Bearly Art precision craft glue, MISTI stamping tool, Big Shot, Stampin’ Up Mini Dimensionals

I hope you’ve loved seeing this project as much as I loved creating it, and you’re inspired to get crafty! Be sure to check out ALL the fun goodies in the Keep It Simple store such as paper, stamps, die cuts, ephemera, washi tape and enamel dots to name just a few! You’ll go cray-cray! Be sure to Follow us on Facebook, Instagram, and Pinterest for lots of crafty inspiration! Thanks so much for stopping by today – we’ll see you next time!

Scrappy hugs,

Assorted Gift Card Holders

Hey everybody! Happy Tuesday – I hope your week has started off nicely and you’re not still too full from your Thanksgiving meal(s)! I’m stoked to be back on the Printable Cuttable Creatables blog today with another awesome DT inspiration project! I absolutely love creating gift card holders – there’s nothing easier than giving the gift of cash or gift cards because the recipient can buy what they want! I’m sharing a set of three awesome gift card holders today which includes one that’s super versatile and could be used for any occasion. I created Christmas versions with the Christmas Tree and Christmas Stocking Gift Card Holder SVG Files, and a birthday version with the Christmas Present Gift Card Holder SVG File!

Using my Scan N Cut and the Christmas Tree Gift Card Holder SVG File, I cut the Christmas tree pieces from several different patterns of green cardstock in the Keep It Simple Jade 12×12 Collection Pack. I also used CutCardStock Bright Gold Foil cardstock for the star along with Brutus Monroe pink, blue and orange glitter sheets for the ornaments.

Next, I used the Christmas Stocking Gift Card Holder SVG File and cut the stocking pieces from Neenah Classic Crest 80# Solar White cardstock and a red plaid pattern cardstock from the Keep It Simple Ruby 12×12 Collection Pack. I lightly inked the edges of the pieces with Ranger Hickory Smoke archival ink, then used a piece of Tim Holtz Idea-ology Festive vintage ephemera (popped up on foam dots), a twine bow, and some Eyelet Outlet red bumpy bling to embellish the stocking.

And last but not least, I used the Christmas Present Gift Card Holder SVG File to create a birthday version of this gift card holder. I cut the present pieces from several different patterns of pink and orange cardstock from the Keep It Simple Mango and Rose 12×12 Collection Packs. I also used Brutus Monroe orange glitter sheet for the bow, and stamped a birthday sentiment from The Cat’s Pajamas Sassy Birthdays stamp set in Memento Rose Bud ink.

Affiliate links are used in this post at no cost to you – I really appreciate your support!

Printable Cuttable Creatables products used:
Christmas Tree Gift Card Holder SVG File
Christmas Stocking Gift Card Holder SVG File
Christmas Present Gift Card Holder SVG File

Other products used:
Cardstock/Paper: Keep It Simple Jade 12×12 Collection Pack, Ruby 12×12 Collection Pack, and Mango and Rose 12×12 Collection Packs; CutCardStock Pop Tone Sweet Tooth, Bright Gold Foil and Pop Tone Hot Fudge cardstock; Brutus Monroe Orange, Blue and Pink Glitter Sheets;  Neenah Classic Crest 110# and 80# Solar White cardstock
Stamps: The Cat’s Pajamas Sassy Birthday stamp set
Ink: Ranger Hickory Smoke archival ink, Memento Rose Bud ink
Accessories: Brother Scan N Cut, Tonic Studios 12″ Guillotine Paper Trimmer, Bearly Art precision craft glue, MISTI stamping tool, Tim Holtz Idea-ology Festive Ephemera Pack, EK Tools 3D Dots, twine, Eyelet Outlet red bumpy bling

I hope you’ve enjoyed today’s project and you’re inspired to get out that electronic cutting machine! Be sure to check out all the fun goodies in the Printable Cuttable Creatables store – you’ll have a blast and there are tons of freebies to get started! Save 15% off your order at Printable Cuttable Creatables by using coupon code love2scrap15 at checkout! Be sure to Follow us on Facebook, Instagram, Pinterest, Twitter and YouTube for lots of crafty inspiration! And while you’re at it, join our Crafting with Printable Cuttable Creatables Facebook Group for more inspiration and to share your projects! Thanks so much for stopping by today – we’ll see you next time!

Scrappy hugs,

Clean and Simple Thank You

Hey everybody! I hope you’re having a great weekend! Are you still stuffed from Thanksgiving?! LOL! I’ve popped in this morning to share a Kat Scrappiness Creative Influencer inspiration project with you! I created a clean and simple Thank You card featuring the Friendship Greetings stamp set along with the Silver Pearl Mix. Really loving how this turned out, and nobody can have too many thank you cards in their stash!

Card base is a standard A2 size top-folding cut from Neenah Classic Crest 110# Solar White cardstock. A sentiment and the largest floral image from the Friendship Greetings stamp set were stamped in Memento Tuxedo Black ink and colored with alcohol markers. The finishing touch was adding several silver pearls from the Silver Pearl Mix.

The inside panel was cut from 80# Solar White cardstock, another sentiment from the Friendship Greetings stamp set stamped in black ink, and panel layered on CutCardStock Pop Tone Black Licorice cardstock.

Affiliate links are used in this post at no cost to you – I really appreciate your support!

Kat Scrappiness products used:
Friendship Greetings stamp set
Silver Pearl Mix

Other products used:
Cardstock/Paper: Neenah Classic Crest 110# and 80# Solar White cardstock, CutCardStock Pop Tone Black Licorice cardstock
Ink: Memento Tuxedo Black ink; Arteza alcohol markers- YG45/46, GS09, R43, YR33, Y03
Accessories: Tonic Studios 12″ Guillotine Paper Trimmer, Tombo Mono permanent adhesive, Bearly Art precision craft glue, MISTI stamping tool, Trinity Pick Up Stick

I hope you’ve enjoyed this project and I’ve inspired you to get crafty! Be sure to check out all the amazing stuff in the Kat Scrappiness store… there’s some of just about everything you’ll need to get your craft on, I promise! Be sure to Follow us on Facebook, Instagram, Pinterest and YouTube for tons of crafty inspiration! And we’d love it if you’d join the Kat Scrappiness Insiders and Stamping Enablers Facebook Groups for lots of fun crafty ideas and to share your creativity! Thanks so much for stopping by today – we’ll see you next time!

Scrappy hugs,