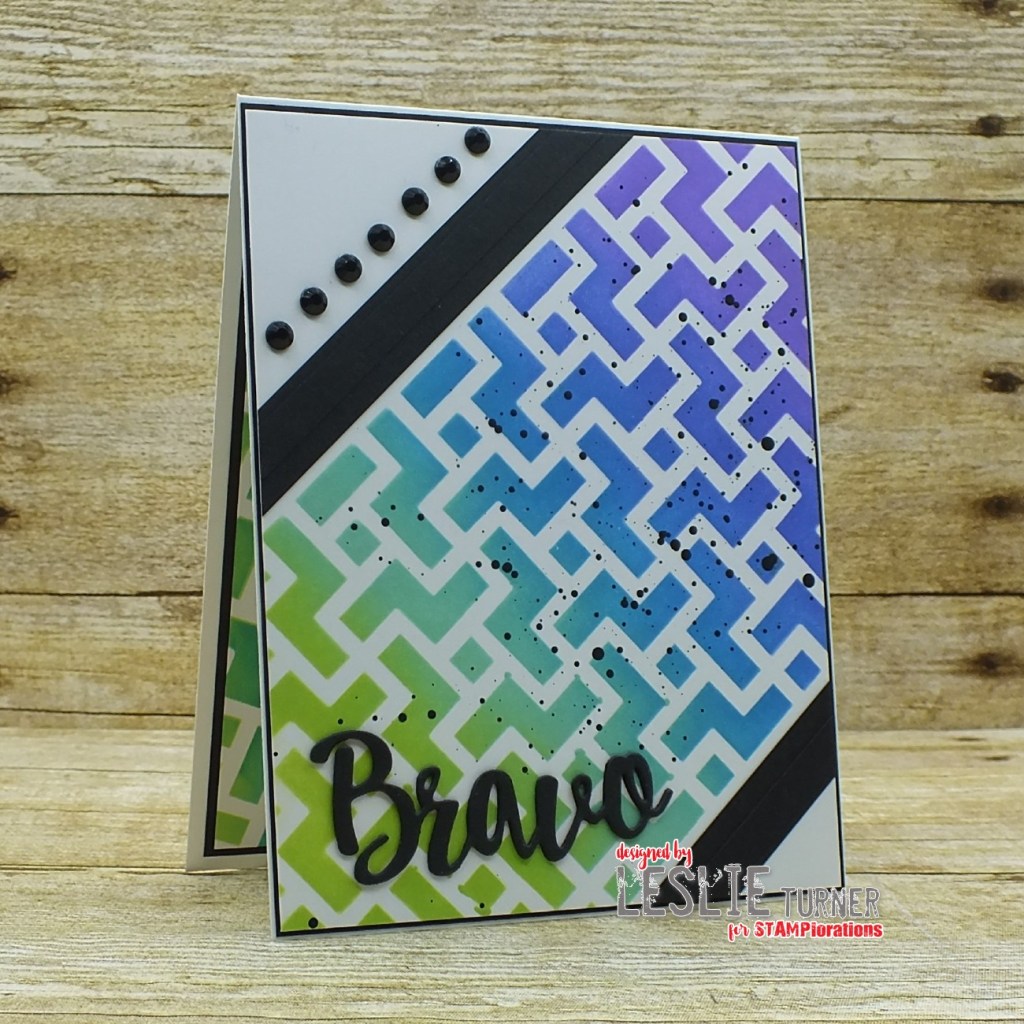
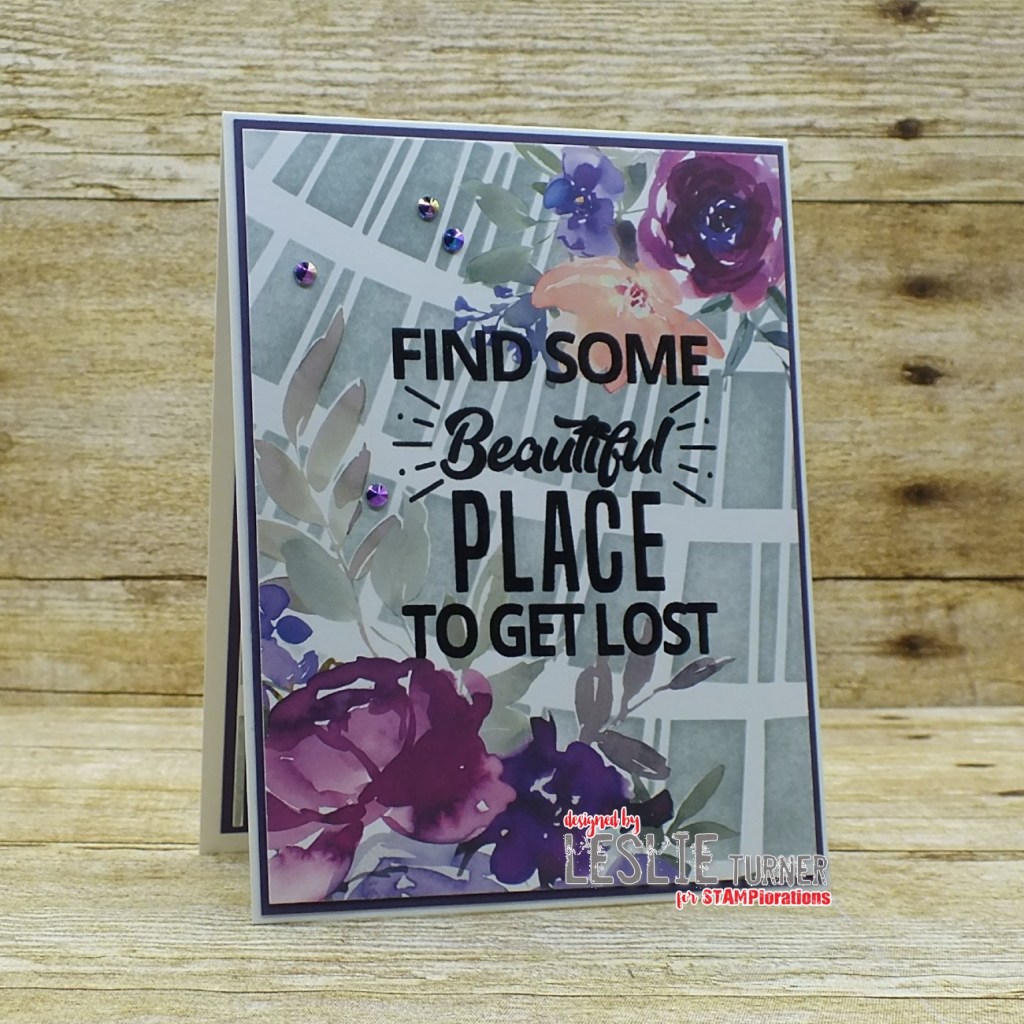
Hi friends! I hope the weather is wonderful where you are! I’m absolutely thrilled to share that I’m guest designing for STAMPlorations Stencil Sunday for the next three months! I’m so excited I can hardly stand it! Affiliate links are used in this post at no cost to you. I really appreciate your support! For my first feature I have three mixed media projects to share using several ARTplorations Stencils and Masks along with other goodies available in the store, so grab a cuppa and hang with me for a few!
For more details and photos of each project, click the link above each photo below which will take you directly to the corresponding blog post. I’m posting each project individually so I can enjoy sharing them in some challenges. :)
I hope you’ll enjoy seeing each of these projects and will be inspired to grab some of your stencils and play! Be sure to check out all the amazing stamps, dies, stencils, digis and other crafty goodies at the STAMPlorations main, outlet and digital stores! Use code STAMPGIRLLESLIE for a 20% discount on your orders in the store (with unlimited uses)! And there is A LOT going on over at the STAMPlorations blog – tons of creative inspiration, tutorials, promotions and giveaways – all month long! If you’ve never visited, you are definitely in for a good time! When you do visit, be sure to leave comments on the posts! Every month Shery draws seven random winners from all the posts published during the month, so the more posts you comment on, the more chances you have to win! And be sure to Follow STAMPlorations on Facebook, Instagram and Pinterest for more creative inspiration! Thanks so much for stopping by today – we’ll see you next time! ;)
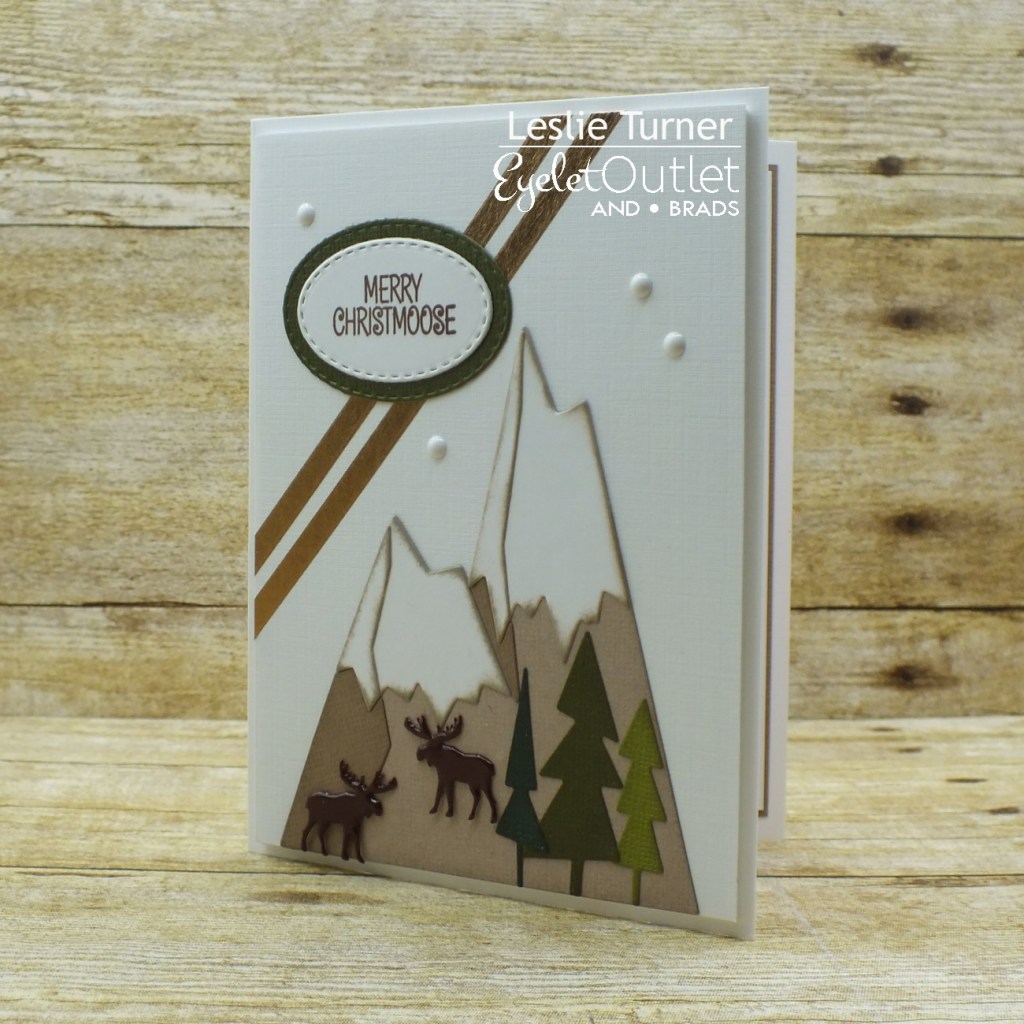
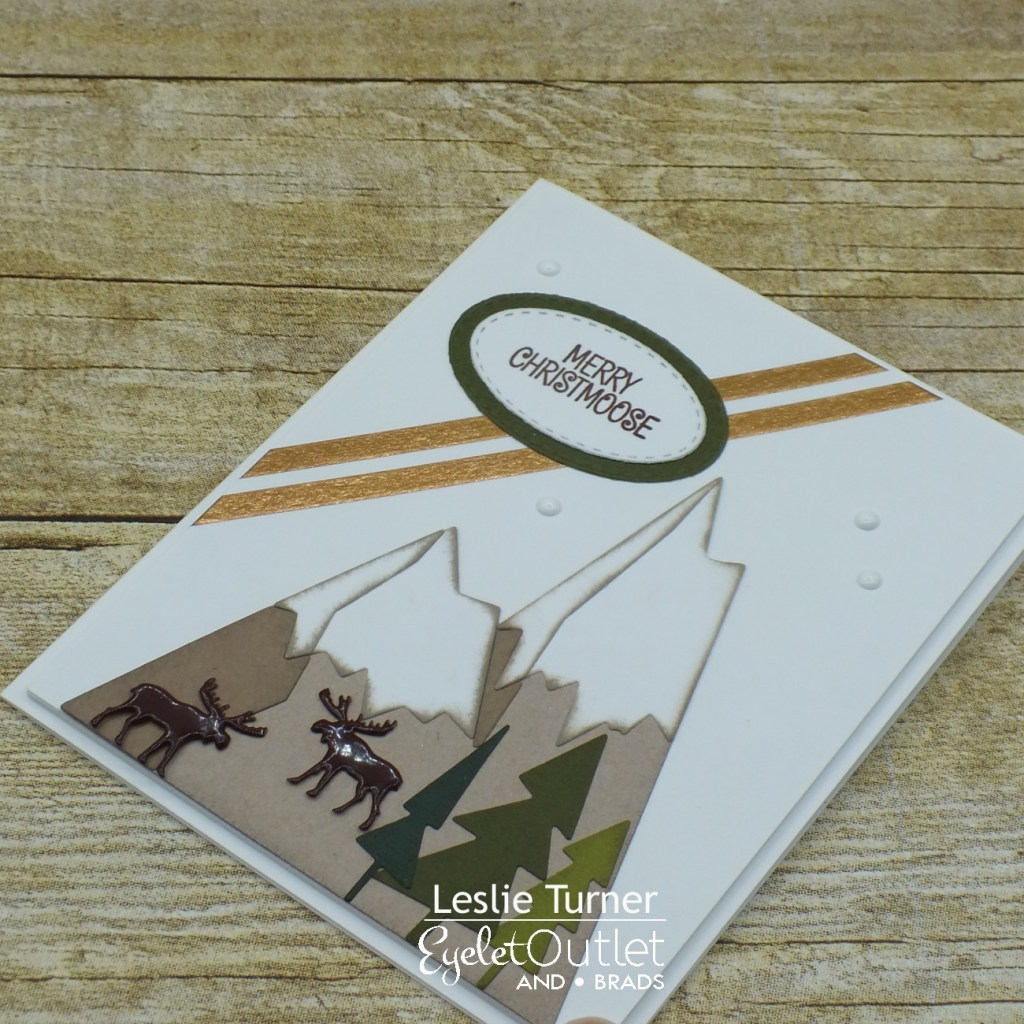
Hi everyone! OMGosh, the weather here is absolutely gorgeous! Three of our cats ninja’d their way out the front door yesterday (they are all inside cats) just so they could enjoy the beautiful weather on the loose, I’m sure! Luckily, they didn’t stay out long. They do have a backyard catio that Ed built several years ago, so they get to go out whenever they want! Darn kids! ;) Affiliate links are used in this post at no cost to you. I really appreciate your support! I’m happy to be back on the Eyelet Outlet blog today with another awesome DT inspiration project! I created a Christmas card (see, I’m still in that mode…) using some awesome brads, washi tape and my favorite enamel dots!
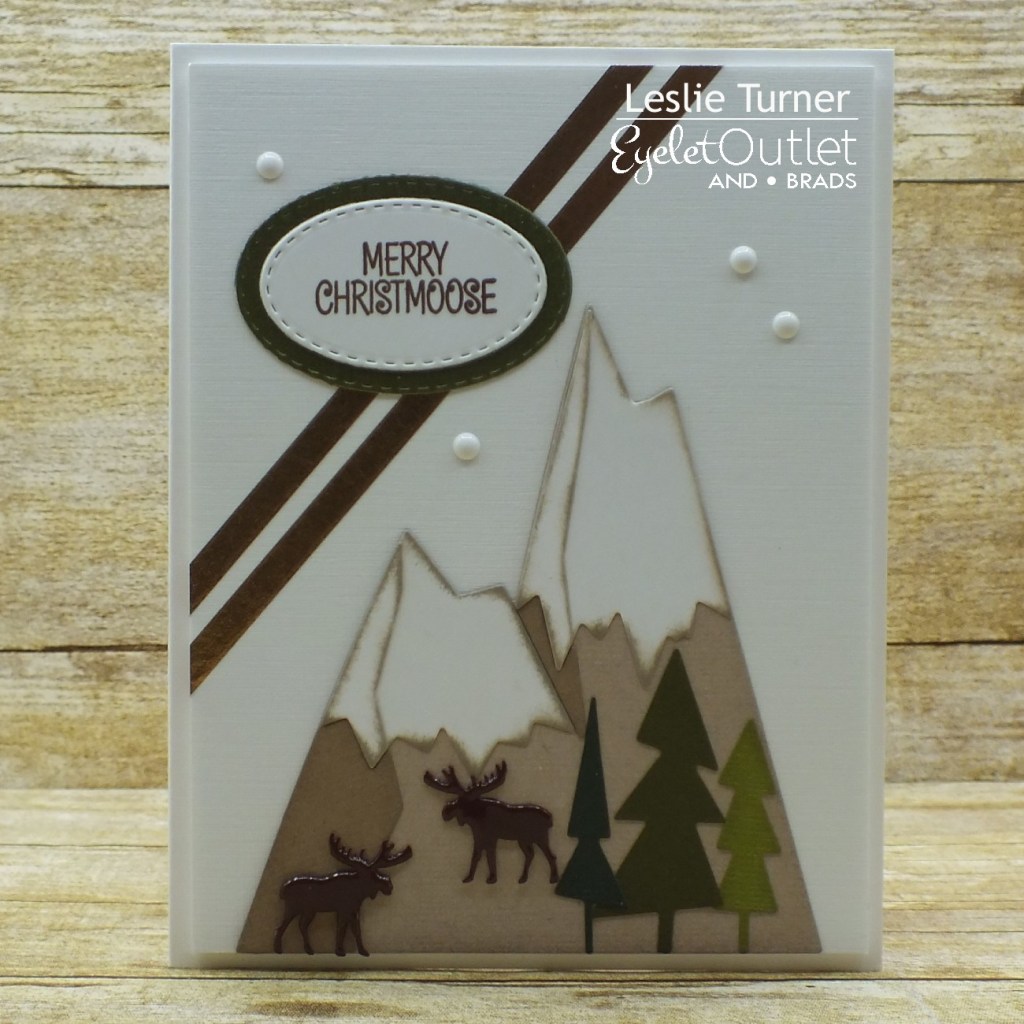
I cut a standard A2 size side-folding card base from Neenah Classic Linen 100# Solar White cardstock along with a layering panel for the front from Neenah Classic Linen 80# Solar White cardstock. I die cut the Alpines from Neenah Classic Crest 80# Solar White cardstock (snow caps) and an assortment of papers from the Core’dinations Kraft-Core Nostalgic Collection, and inked the edges of the pieces with pumice stone distress ink before assembling them. I added two Moose Brads and adhered the Alpines to the linen layering panel. I added two angled strips of Copper Skinny Washi Tape, adhered the panel to a piece of white craft foam and then adhered the piece to the card base. I stamped the sentiment in brown ink, cut it with a stitched oval die and layered it on a slightly larger green die cut, and adhered it to the background panel. The finishing touch was the addition of several White Enamel Dots.
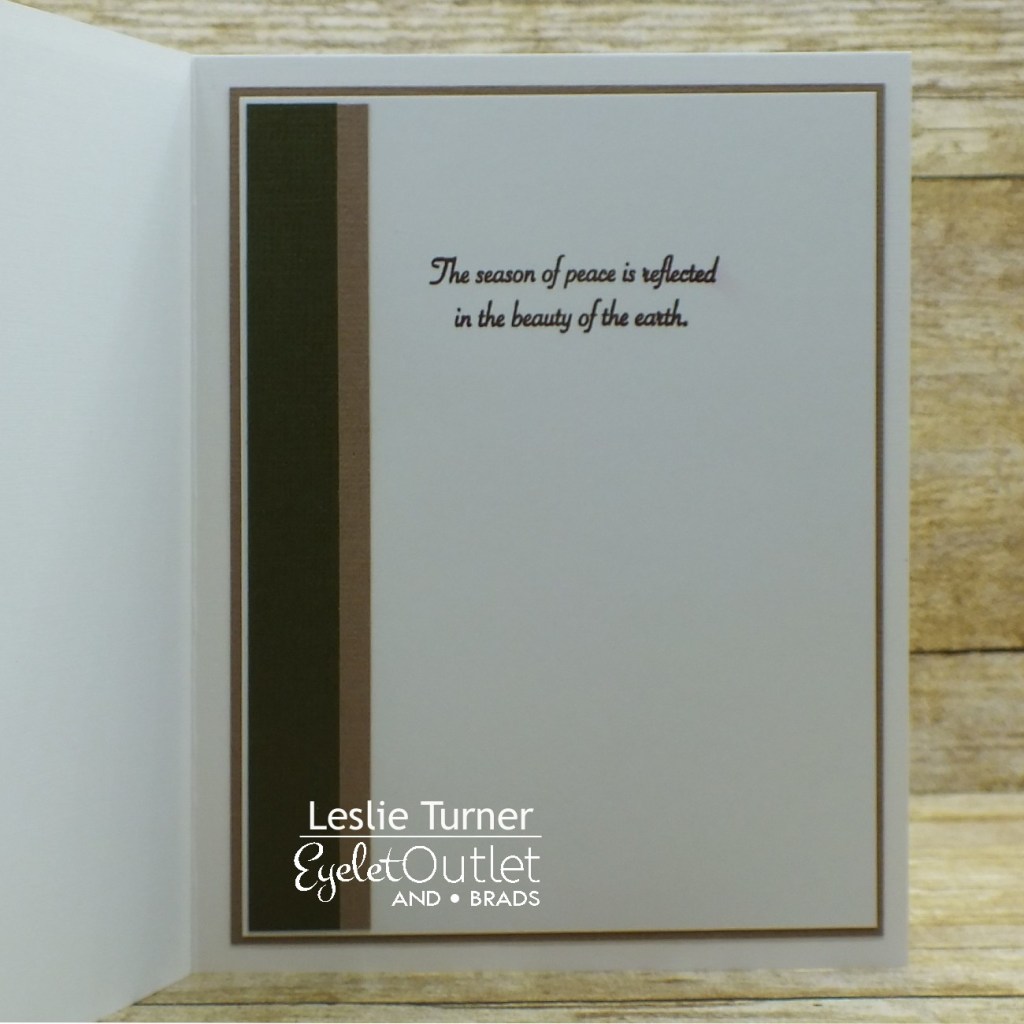
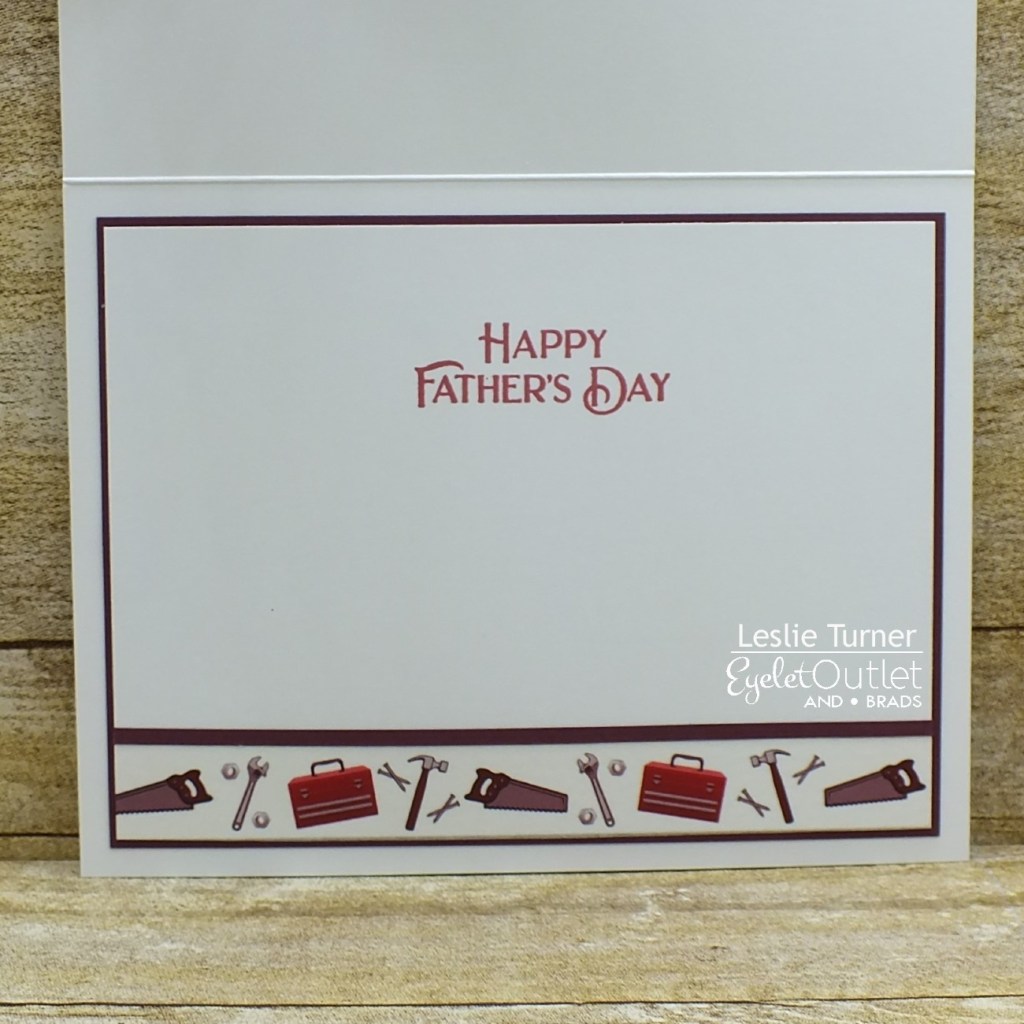
I cut the inside panel from Neenah Classic Crest 80# Solar White cardstock and embellished it with leftover strips of the Core’dinations Kraft-Core used on the front, stamped the sentiment in brown ink and layered the panel on more of the Core’dinations Kraft-Core.
And one more look… totally loving how this turned out! These brads are so fun!
Other products used: Cardstock/Paper: Neenah Classic Linen 100# Solar White cardstock, Neenah Classic Linen 80# Solar White cardstock, Neenah Classic Crest 80# Solar White cardstock, Core’dinations Kraft-Core Nostalgic Collection 6×6 pad Stamps: Clearly Besotted Merry Christmoose stamp set, Prickley Pear Stamps Cardinals clear stamp set Ink: Ranger pumice stone distress ink, Memento Rich Cocoa ink Dies/Punches: Sizzix Alpine thinlits, JustRite Stitched Oval and Vine Dies Accessories: Bearly Art precision craft glue, Tombow Mono permanent adhesive, Gemini Junior, Darice white craft foam
I hope you’ve enjoyed today’s project! Be sure to check out all the fun goodies at Eyelet Outlet! I can already see you drooling, lol! Be sure to ‘like’ and ‘follow’ Eyelet Outlet Facebook Page to keep up with news and sales, and while you’re at it, join the Eyelet Outlet Fans Facebook group for lots of creative inspiration! Thanks so much for stopping by today – we’ll see you next time! ;)
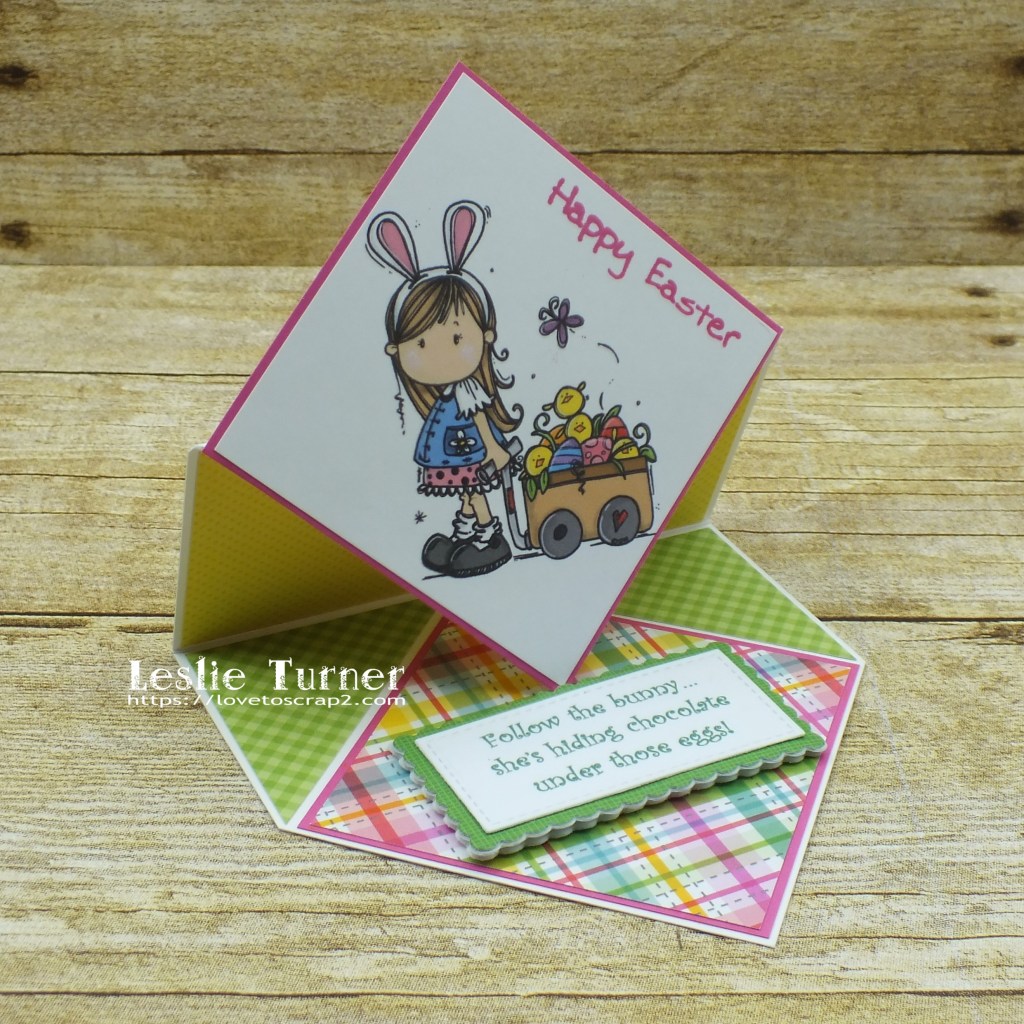
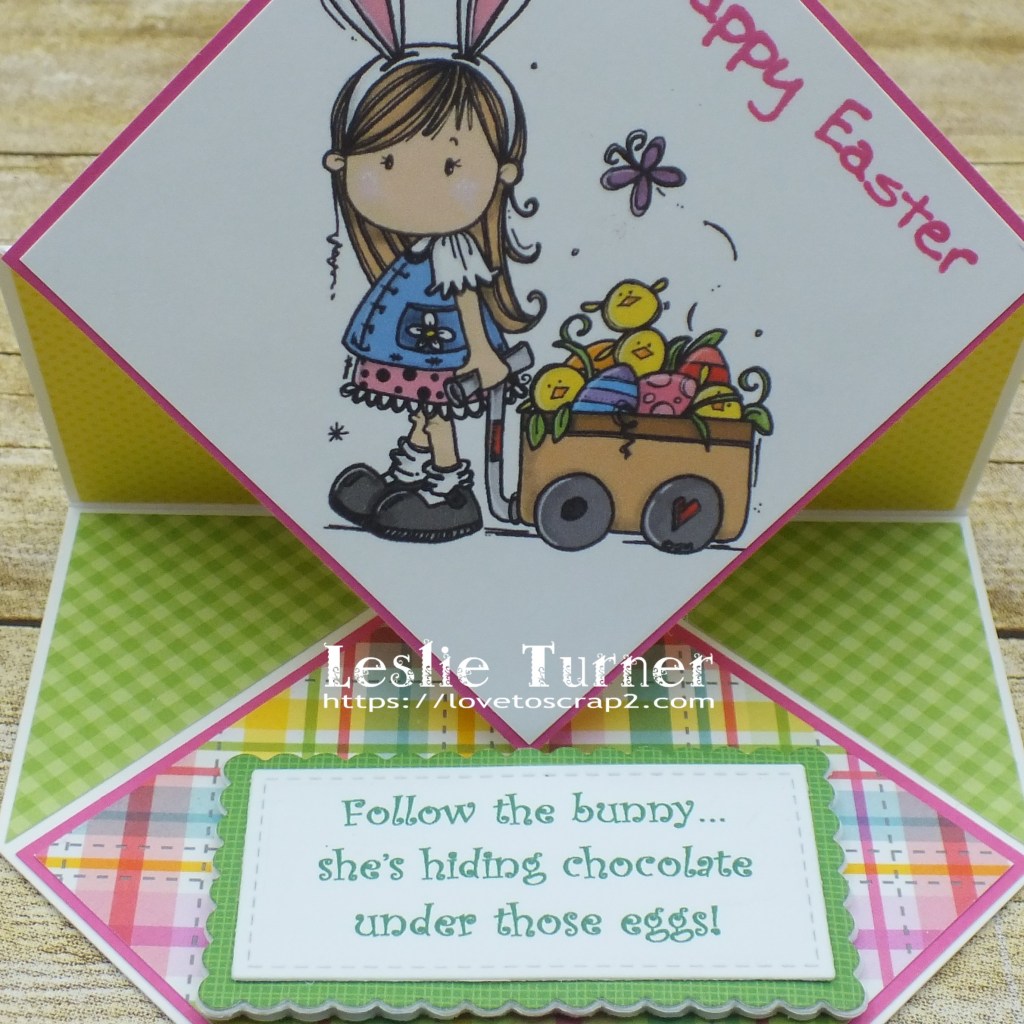
Happy Friday, friends! Well, another week is in the books… they sure are flying by! ZOOM! Affiliate links are used in this post at no cost to you – I really appreciate your support! I’ve popped in this morning with a fun fold that I found on Pinterest last week, so of course I had to make one! I finished it last week (before Easter) but haven’t had a chance to post it until this morning. It’s a diamond easel card that I created for The Outlawz April Freebie/Progressive Challenge! Our sponsor this month is Bugaboo Stamps so be sure to come on over and play for your chance to win a prize! We were gifted the adorable Bugaboo Brats Easter digital image which made the sweetest card, and I had the best time picking out coordinating patterned papers for it!
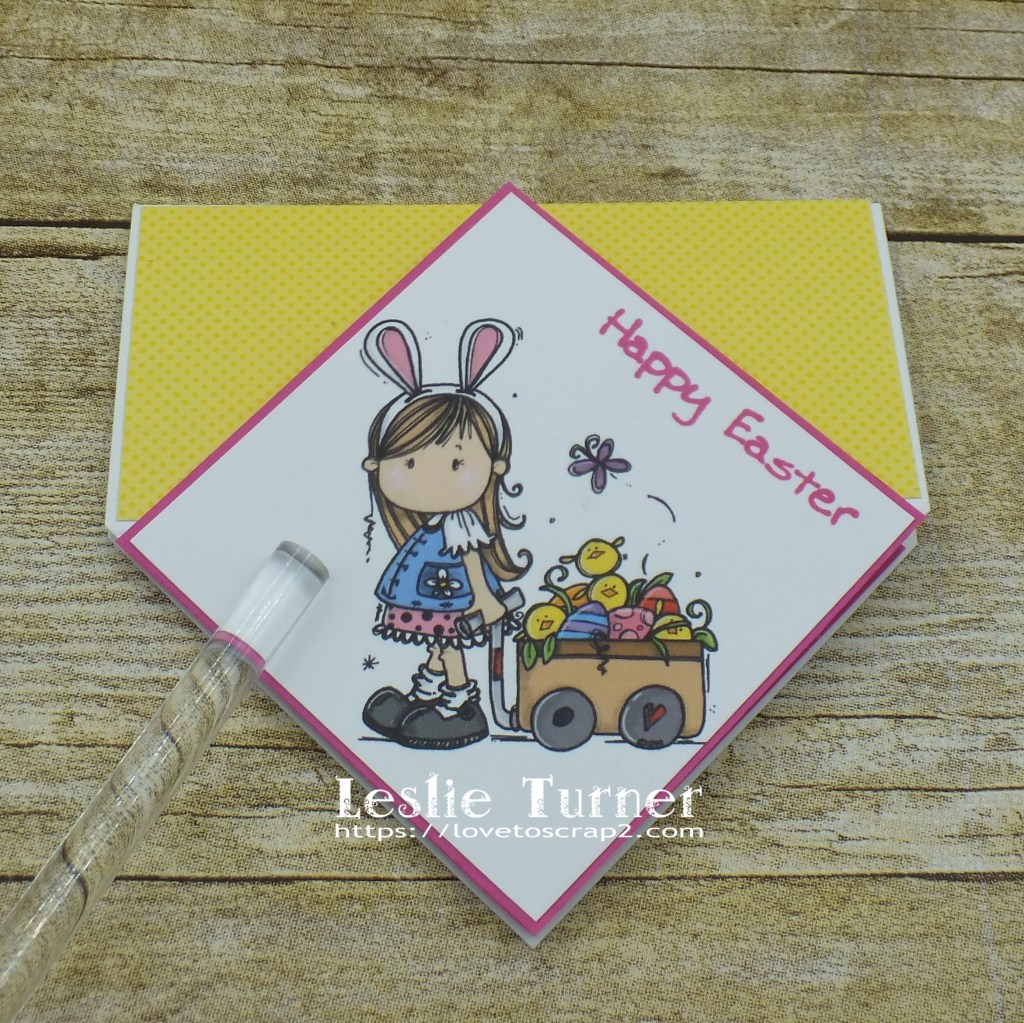
I found many versions of this card on Pinterest and it wasn’t too difficult to figure out how it was constructed. I created the card base from Neenah Classic Crest Solar White 110# cardstock. I printed the pre-colored version of the Bugaboo image on Neenah Classic Crest Solar White 80# cardstock and cut the image in a diamond shape, equal on all four sides. I layered the image on CutCardStock Pop-Tone Razzleberry cardstock and set it aside. I pulled out several Doodlebug Design 6×6 paper pads and found four coordinating prints. I cut the diamond shape for the bottom (same size as the image) from plaid paper and layered it on CutCardStock Pop-Tone Razzleberry cardstock as well. Measuring from the sides to the middle, I cut an additional square from plaid paper and sliced it in half diagonally to fit the triangular spaces. I adhered yellow dotted paper to the front and back rectangular spaces.
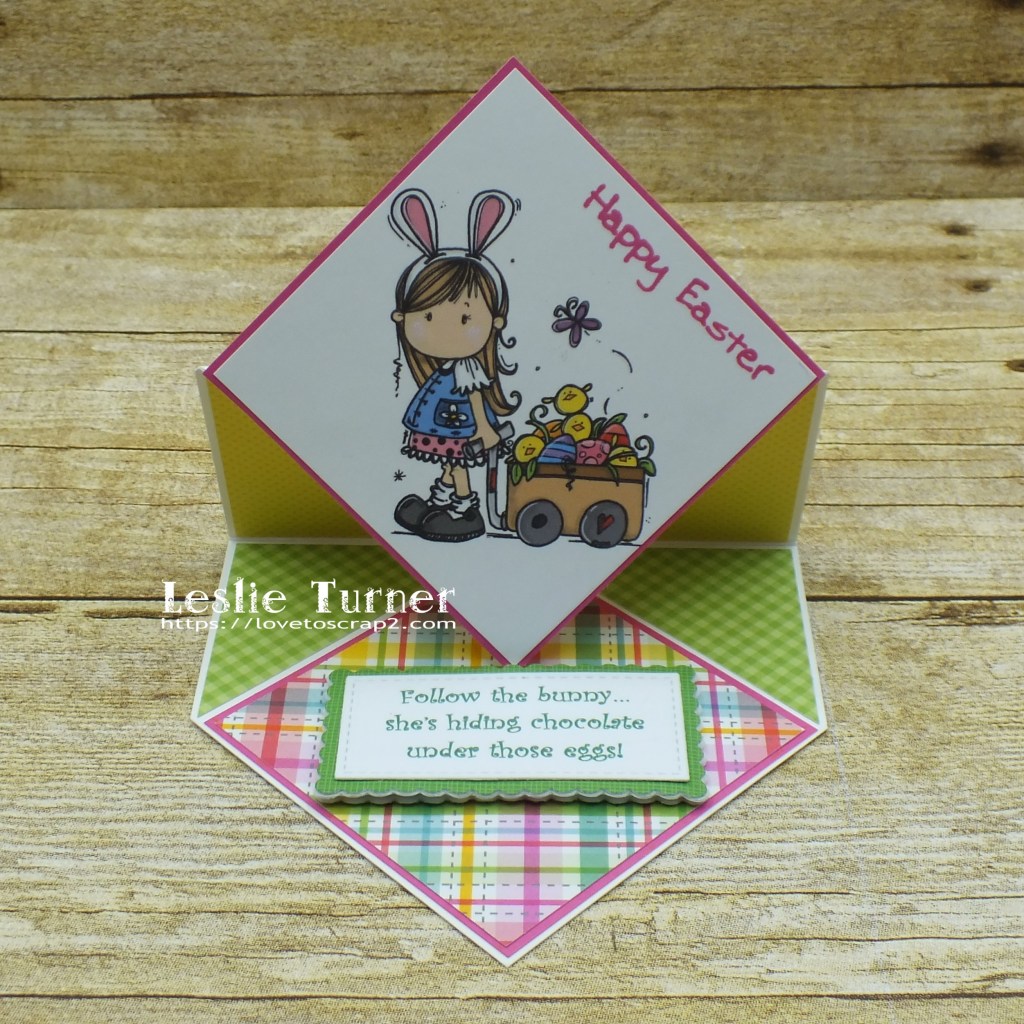
I stamped Happy Easter at an angle on the panel before adhering it to the card base. The sentiment on the base was computer-generated, cut with a stitched rectangle die and layered on a stitched mini scallop rectangle die. I popped it up on two layers of foam cut with the same stitched mini scallop rectangle die to use as the ‘stopper’.
Here’s a side view so you can see the basic easel card construction. The only difference is the pointed ends.
And one more look… folded flat for mailing. I’m so happy with how this turned out – it looks way more complicated than it is! This one turned out to be about 4-1/2″ square so I’m going to play with my measurements a little and come up with a standard A2 size, so stay tuned!
Products used: Cardstock/Paper: Neenah Classic Crest 110# and 80# Solar White cardstock, CutCardStock Pop-Tone Razzleberry cardstock, Doodlebug Design Nifty Notion, Gingham-Linen Rainbow Petite Prints and Dot-Grid-Daisy-Stripe Rainbow Petite Prints Stamps: Bugaboo Stamps Bugaboo Brats Easter precolored digital image, Stamp Camp Simple Sentiments 1 stamp set Ink: Memento Rose Bud ink Dies/Punches: My Favorite Things Stitched Rectangle STAX die and Stitched Mini Rectangle Scallop STAX die Accessories: Tombow Mono permanent adhesive, Bearly Art precision craft glue, MISTI stamp tool, Darice Foamies white craft foam
I hope you’ve enjoyed this project and will come join us in The Outlawz Challenges! Lots of fun going on! Thanks so much for stopping by – we’ll see you next time!
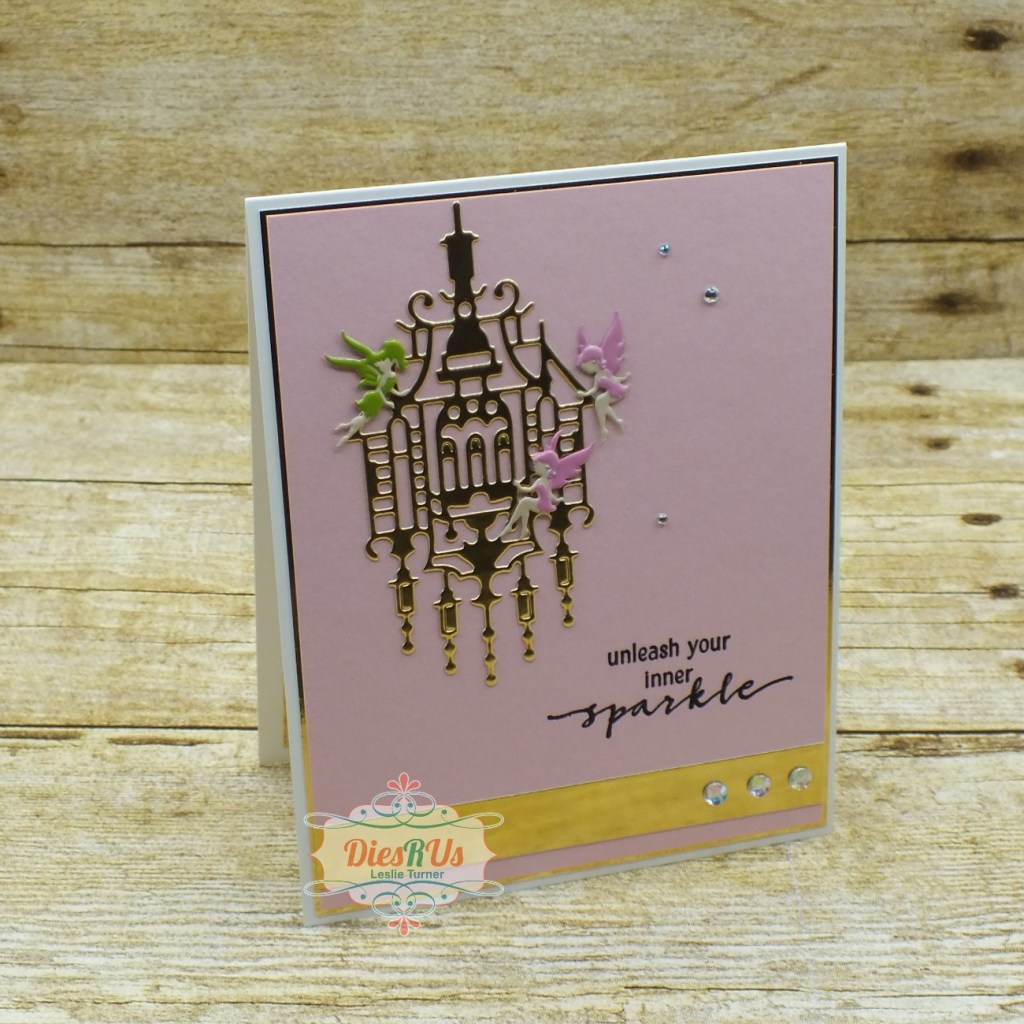
Hi everyone! Happy Fri-YAY – hope you’ve had a great week! I’m delighted to be back on the Dies R Us Inspiration Blog today with another awesome DT inspiration project! Affiliate links are used in this post at no cost to you. I really appreciate your support! I created an adorable CAS fairy birthday card featuring the most adorable fairy castle – complete with fairies! I apologize about the angle of the first photo… foil is SO hard to photograph so I thought I’d angle downward from above which did help a little bit.
I created a standard A2 size top-folding card base from Classic Crest Solar White 110# cardstock, along with a gold foil cardstock layer and a CutCardStock Basis Pink cardstock layer which I adhered together. Using the ScrapMan Fairy Castle die, I cut the fairy castle from gold foil cardstock and adhered it to the upper left portion of the front panel. I added one green fairy and two pink fairies, and some iridescent gemstones. I then added a gold foil strip across the bottom and stamped the sentiment in black ink just above the foil strip. You’ll probably laugh when you notice that I used a unicorn stamp set from my stash – but it yielded the same fantasy/magical result so I went with it! ;) The final touch was adhering three medium size iridescent gemstones to the strip.
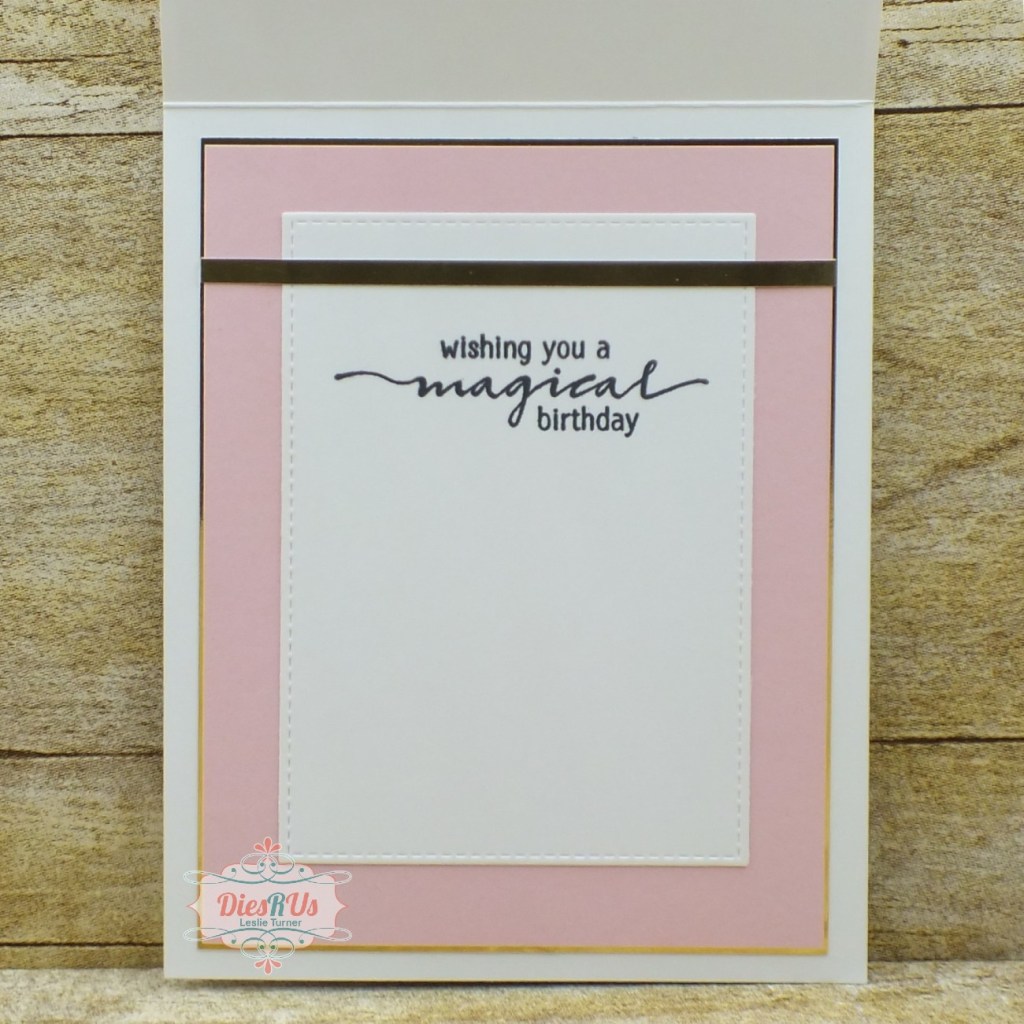
The inside panel consists of a gold foil cardstock layer and a CutCardStock Basis Pink cardstock layer which I adhered together and embellished with a stitched rectangle die cut that I cut from Classic Crest Solar White 80# cardstock. I added a narrow strip of the gold foil cardstock horizontally across the top portion of the panel and stamped the sentiment in black ink.
And one more peek… I’m absolutely smitten with this fairy castle! Such an adorable card! ;)
Other products used: Cardstock/Paper: Classic Crest Solar White 110# and 80# cardstock, CutCardStock Basis Pink cardstock, Hygloss Gold Foil cardstock Stamps: Cas-ual Fridays Stamps Be A Unicorn stamp set Ink: Memento StazOn Jet Black ink, Tuxedo Black ink Accessories: Bearly Art precision craft glue, Tombow Mono permanent adhesive, Eyelet Outlet Fairy Brads, Darice iridescent gemstones
I hope you’ve enjoyed today’s project! Be sure to check out all the fun goodies at the Dies R Us store! They not only sell dies… they also carry stamps, embossing tools and supplies, all kinds of craft supplies, slimline products and even Yupo paper! Be sure to join in the fun going on over at the Dies R Us Challenge Blog – there’s a new challenge theme posted on the 1st and 15th of each month and one lucky random winner will receive a gift voucher prize to the Dies R Us store! And be sure to ‘like’ and ‘follow’ Dies R Us Facebook Page for lots of creative inspiration and to keep up with the latest news! Thanks so much for stopping by today – we’ll see you next time! ;)
4/30/21 Best Technique Winner at Classic Design Challenge Blog!
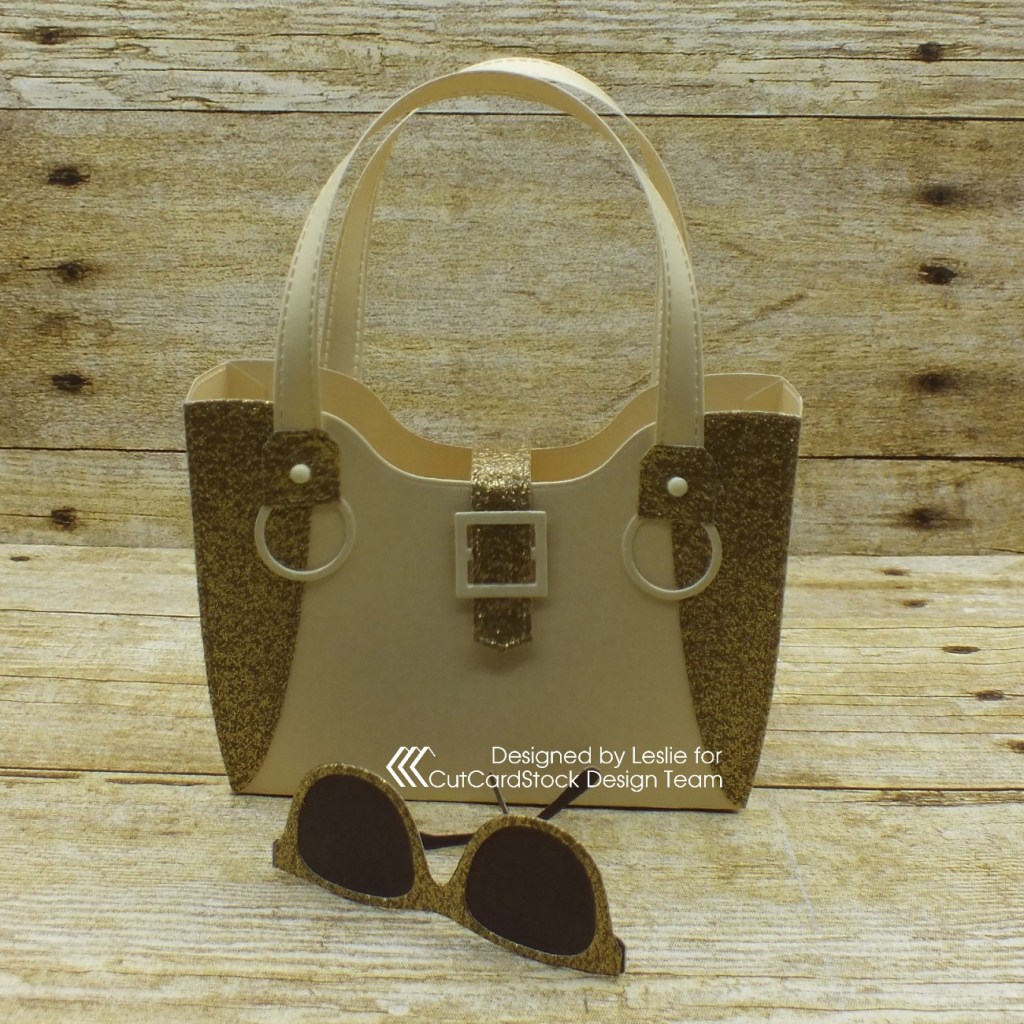
Hi everyone! I hope you’re having an awesome week! I’m stoked to be back on the CutCardStock blog today with an awesome DT inspiration project featuring some gorgeous Glitter cardstock which happens to be on sale this month so be sure to get some! Affiliate links are used in this post at no cost to you. I really appreciate your support! I created a pretty weekender handbag (for my ongoing Paper Purse series) using CCS Gold Glitter cardstock that I paired with Neenah Classic Linen Gold Pearl cardstock – which will hold a gift card, cash, chocolates or maybe some jewelry! And dig this… this handbag has a matching set of sunglasses, also made from CCS Gold Glitter cardstock, that I paired with Pop-Tone Hot Fudge cardstock! I’m so smitten with this ‘glitterlicious’ set I can hardly stand it!
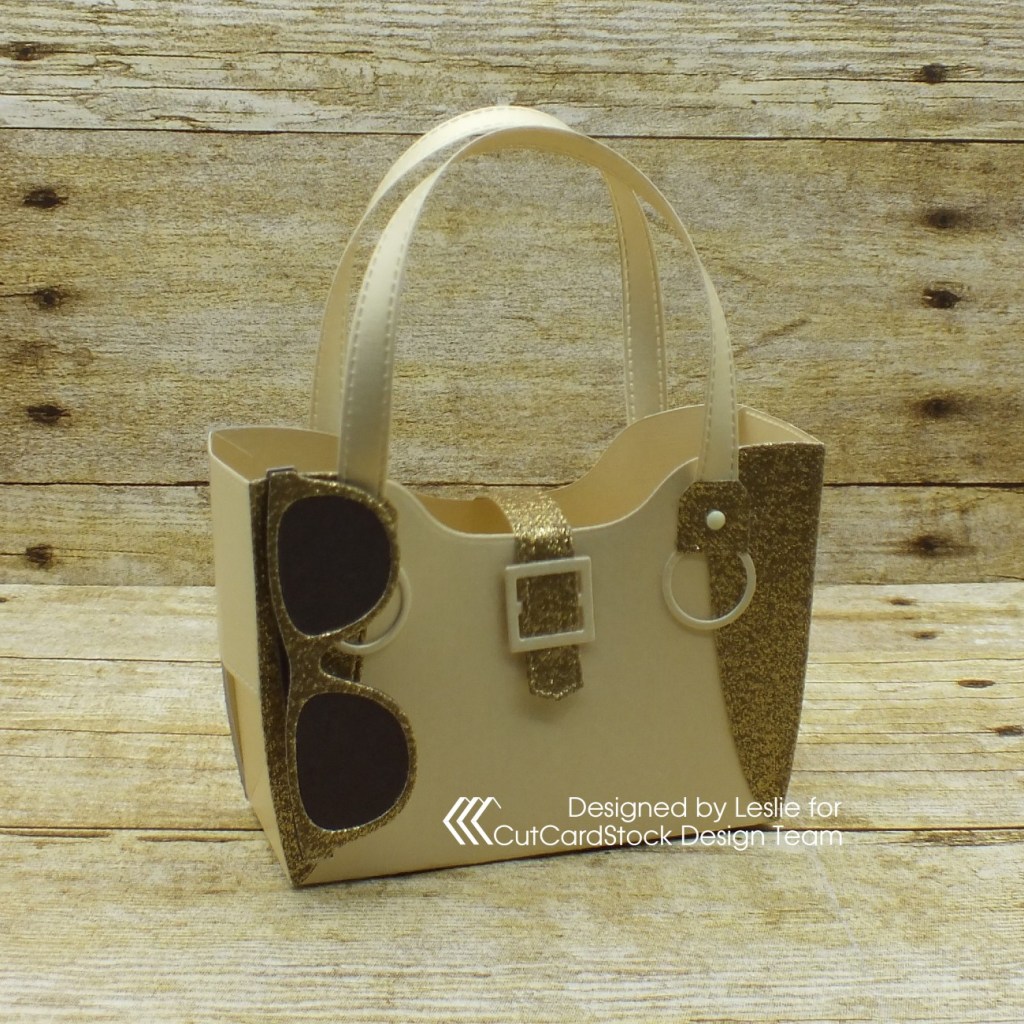
As soon as I found out about this weekender handbag die set, I had to have it! Not to mention the sunglasses die set… I had to have that set too, lol! Both die sets have coordinating stamp sets but I couldn’t work either one of those into this project… but will definitely use them in the foreseeable future, so stay tuned! I cut the purse body pieces from Neenah Classic Linen Gold Pearl cardstock, and the purse accent pieces and sunglasses pieces from CCS Gold Glitter cardstock. I cut the sunglasses lenses and another set of sunglasses pieces from Pop-Tone Hot Fudge cardstock for added stability. I assembled the sunglasses first because they are so stinkin’ cute! I adhered the gold glitter cardstock pieces to the brown cardstock pieces, sandwiching the lenses between the open eye pieces. I did this just to make the sunglasses a little sturdier. I then assembled the purse with the gold glitter accents. I added half of a Velcro circle as the closure under the center flap, and ivory enamel dots to the accent pieces just above the rings. Here are angled and full frontals and a back shot.
And one more peek… so loving how this turned out! I have already made some other weekender handbags using bright patterned papers and they turned out just as adorable as this one did! ;)
Other products used: Dies/Punches: Concord & 9th Weekender Handbag Dies and Bright Eyes Dies Accessories: Bearly Art precision craft glue, Big Shot, 5/8″ Velcro circle, Eyelet Outlet Ivory Enamel Dots
I hope you’ve enjoyed today’s project and you’re inspired to get crafty! Be sure to check out all the awesome cardstock and other goodies at CutCardStock (adhesives, labels, stickers, pens, watercolors and ribbon to name a few). And head on over to the CutCardStock Facebook Page for more inspiration! Thanks so much for stopping by today – we’ll see you next time!
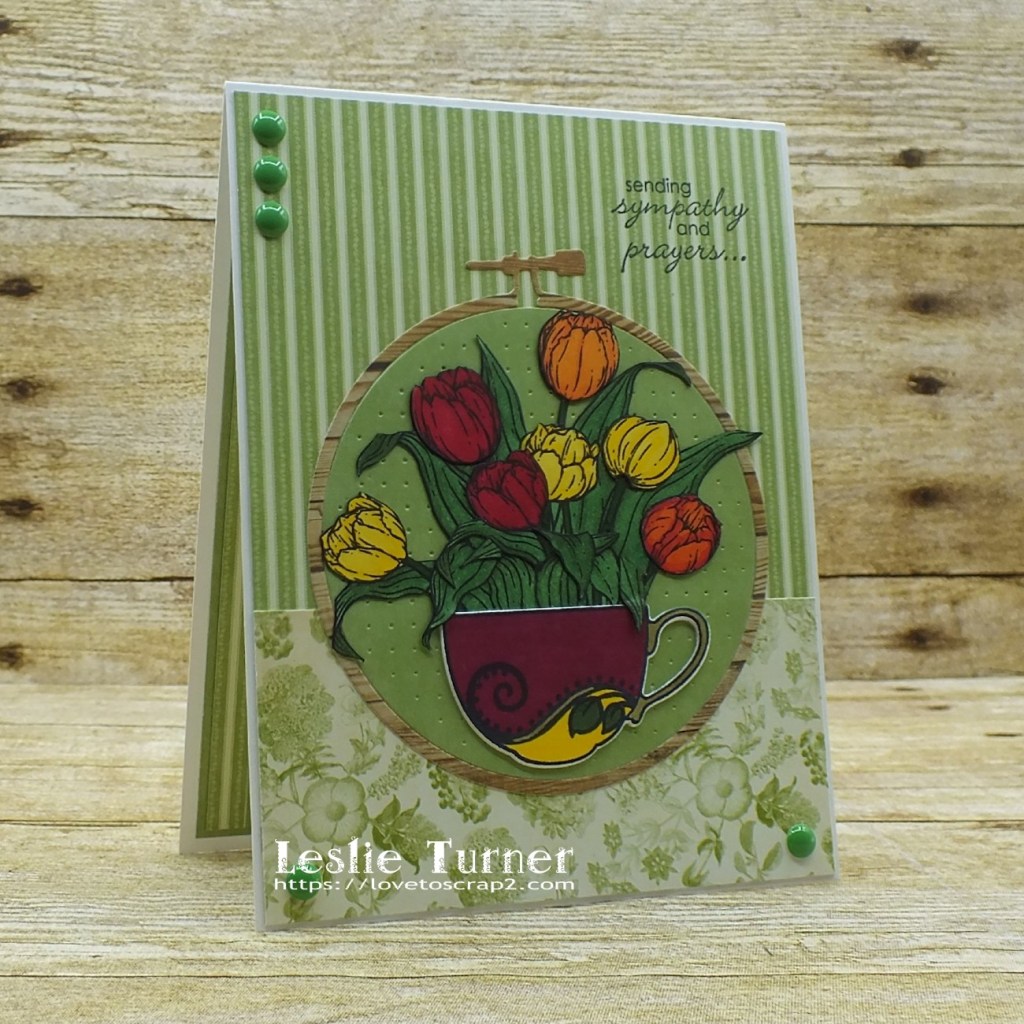
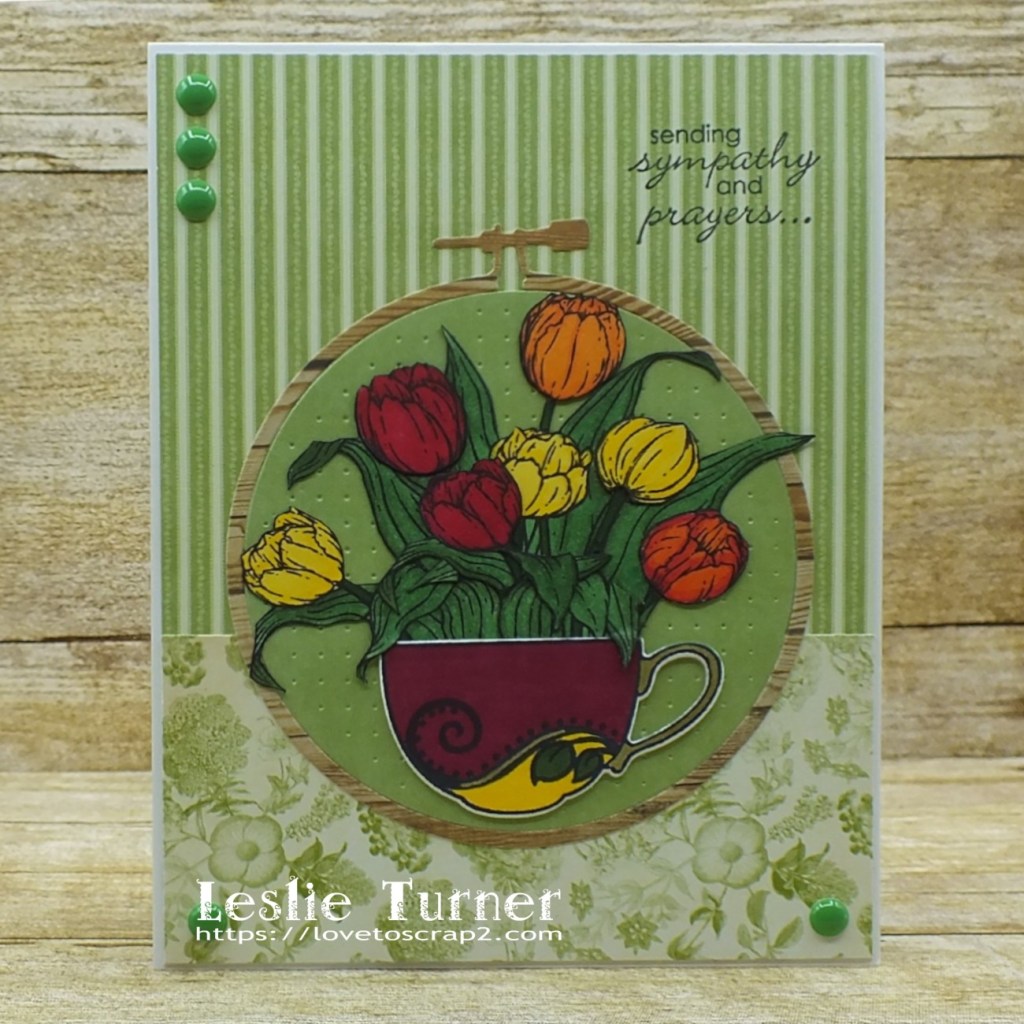
Hi friends! Happy Tuesday! A new Tic Tac Toe challenge has started today over at The Outlawz Tuesday Color Challenge and our sponsor is Beccy’s Place so be sure to come on over and play! Affiliate links are used in this post at no cost to you. I really appreciate your support! I was gifted a beautiful tulips image from Beccy’s Spring Tulips digital image set and created a sympathy card. I know I’ve shared that sympathy cards don’t come easy for me and I typically don’t have many in my stash at any given time, but this design just came together like it was meant to be!
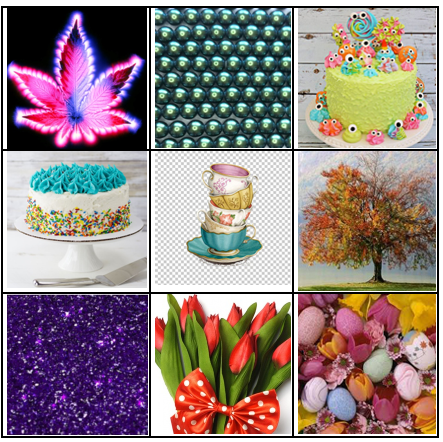
For the Tic Tac Toe challenge this fortnight, we are to use items on our project inspired from those featured in any column or row in the photo below. I was inspired by the green, teacups and tulips in the center column.
I cut a standard A2 size top-folding card base from Neenah Classic Crest Solar White 110# cardstock. Since green is my favorite color and part of the tic tac toe inspiration, I went for two green Graphic 45 coordinating papers for the background, then cut the embroidery hoop from a My Mind’s Eye wood-look paper and gave it a solid green center (another Graphic 45 paper from the same 6×6 pad). I stamped, colored and die cut a Prickley Pear Stamps coffee cup and then arranged the tulips digital image in the cup. This was a little tricky because the digi was in a water can, so I printed the image twice, colored both of them with alcohol markers and fussy cut both. Then I did some overlaying of leaves to cover the water can handle. I stamped the sentiment from the Stampin’ Up Petite Pairs stamp set ink in the upper right corner. The finishing touch was the addition of some green enamel dots.
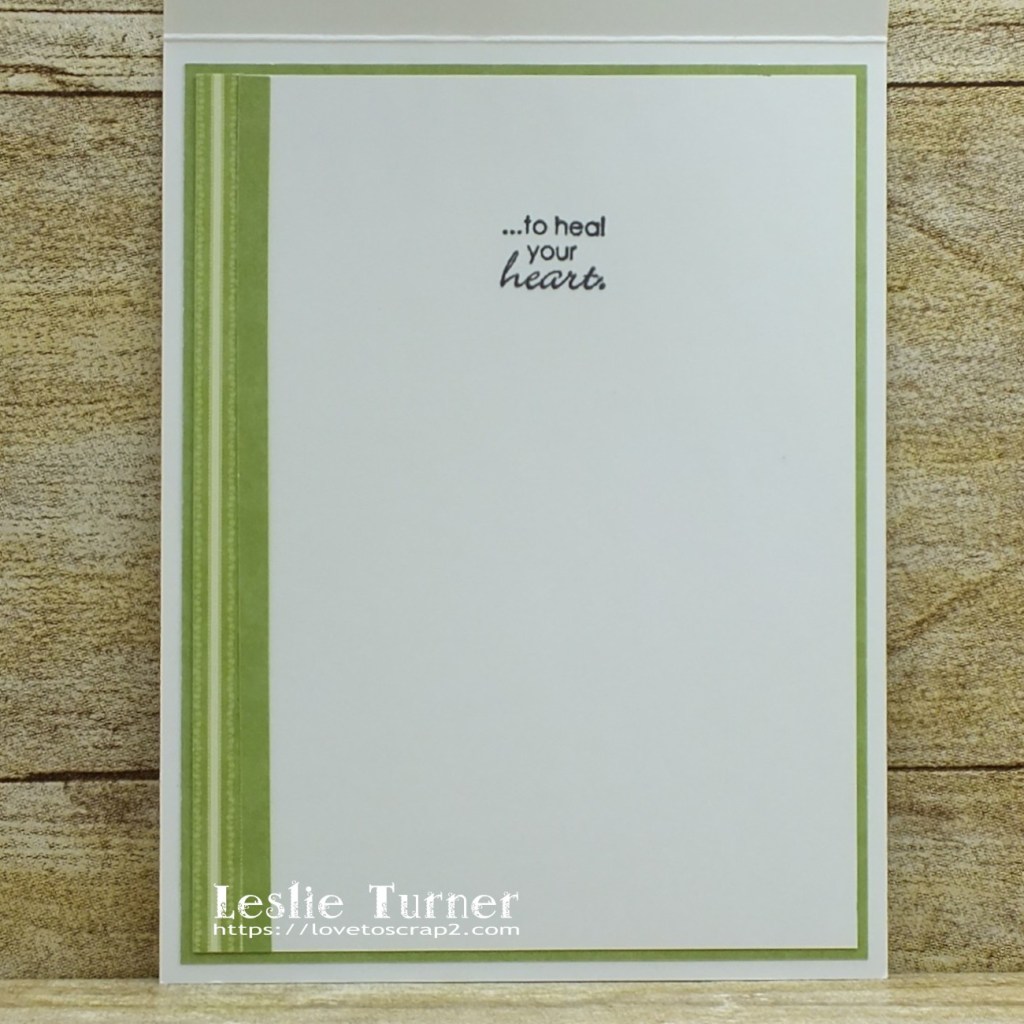
I cut inside layering panels from Neenah Classic Crest 80# Solar White cardstock and the solid green Graphic 45 paper. I embellished the white panel with leftover strips of the striped and solid green papers used on the front, and stamped the sentiment in black ink. I layered the panels together and adhered them to the inside of the card base.
And one more look… very happy with how this turned out! I absolutely love Beccy’s tulips image and I know I’ll be creating with it again soon!
Products used: Cardstock/Paper: Neenah Classic Crest Solar White cardstock, Graphic 45 Botanical Tea 6×6 paper pad, My Mind’s Eye Howdy Doodie 6×6 paper pad Stamps: Beccy’s Place Tulips digital image, Prickley Pear Stamps Coffee Cup stamp set, Stampin’ Up Petite Pairs stamp set Ink: Nuvo alcohol markers- 381, 379, 417, 413, 405, 403, 393, 391; Pentel Slicci Gold pen, Memento Tuxedo Black ink (pad and marker) Dies/Punches: Sizzix Embroidery die set, Coffee Cup die set Accessories: Bearly Art precision craft glue, Tombow Mono permanent adhesive, MISTI stamp tool, Big Shot, Eyelet Outlet Green Enamel Dots
I hope you’ve enjoyed this project and will come over and join in all the fun at The Outlawz Challenges! I hope you’ll link up a project this fortnight – we’d love to see what you do with this color challenge! And be sure to check out all the fun images at Beccy’s Place! Thanks so much for stopping by – we’ll see you next time! ;)
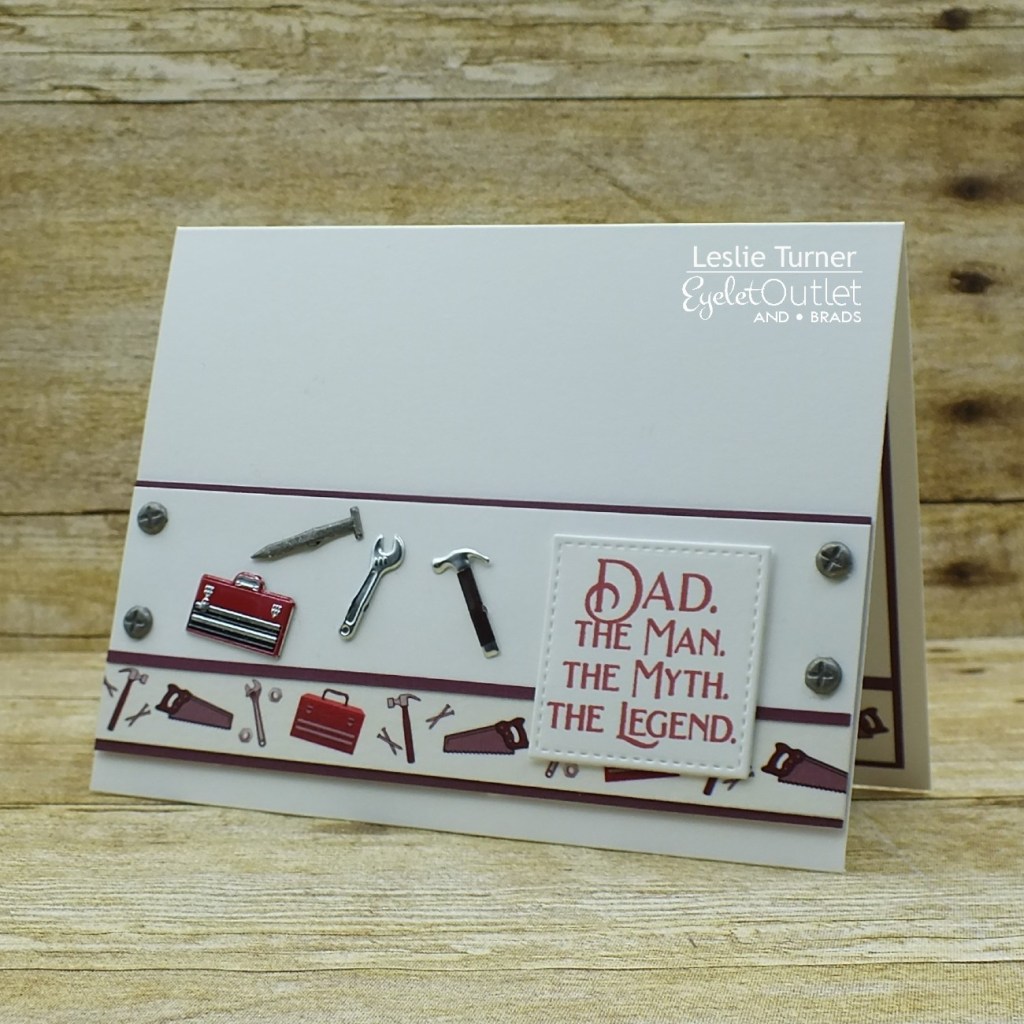
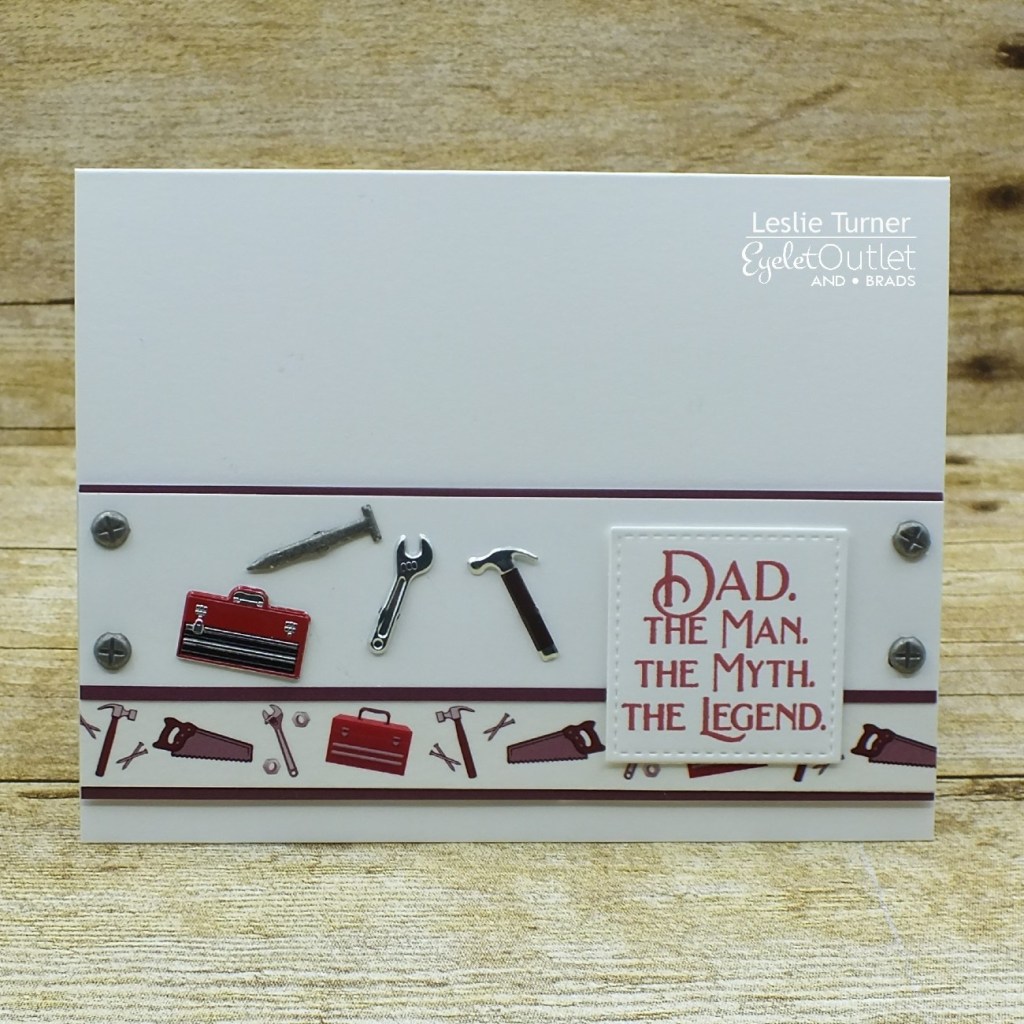
Hi everyone! Hope you’re all doing well and staying safe! Affiliate links are used in this post at no cost to you. I really appreciate your support! I’m happy to be back on the Eyelet Outlet blog today with another awesome DT inspiration project! I created a cool Father’s Day card featuring lots of manly brads and washi tape! Oh, so fun!
I hope you’ve enjoyed today’s project! Be sure to check out all the fun goodies at Eyelet Outlet! I can already see you drooling, lol! Be sure to ‘like’ and ‘follow’ Eyelet Outlet Facebook Page to keep up with news and sales, and while you’re at it, join the Eyelet Outlet Fans Facebook group for lots of creative inspiration! Thanks so much for stopping by today – we’ll see you next time! ;)
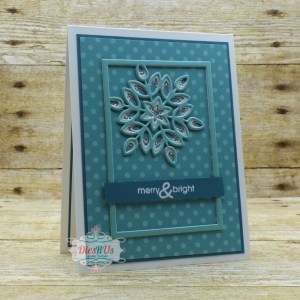
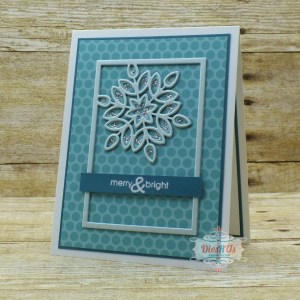
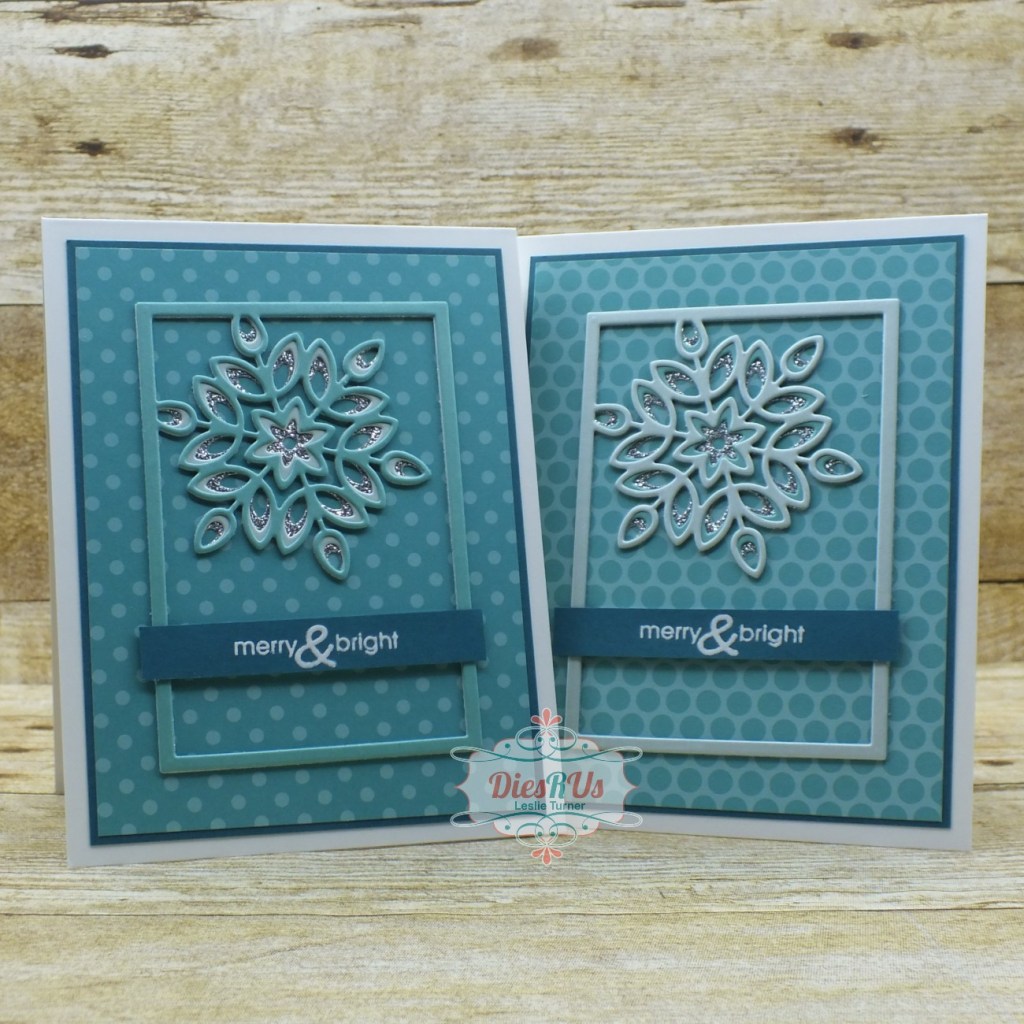
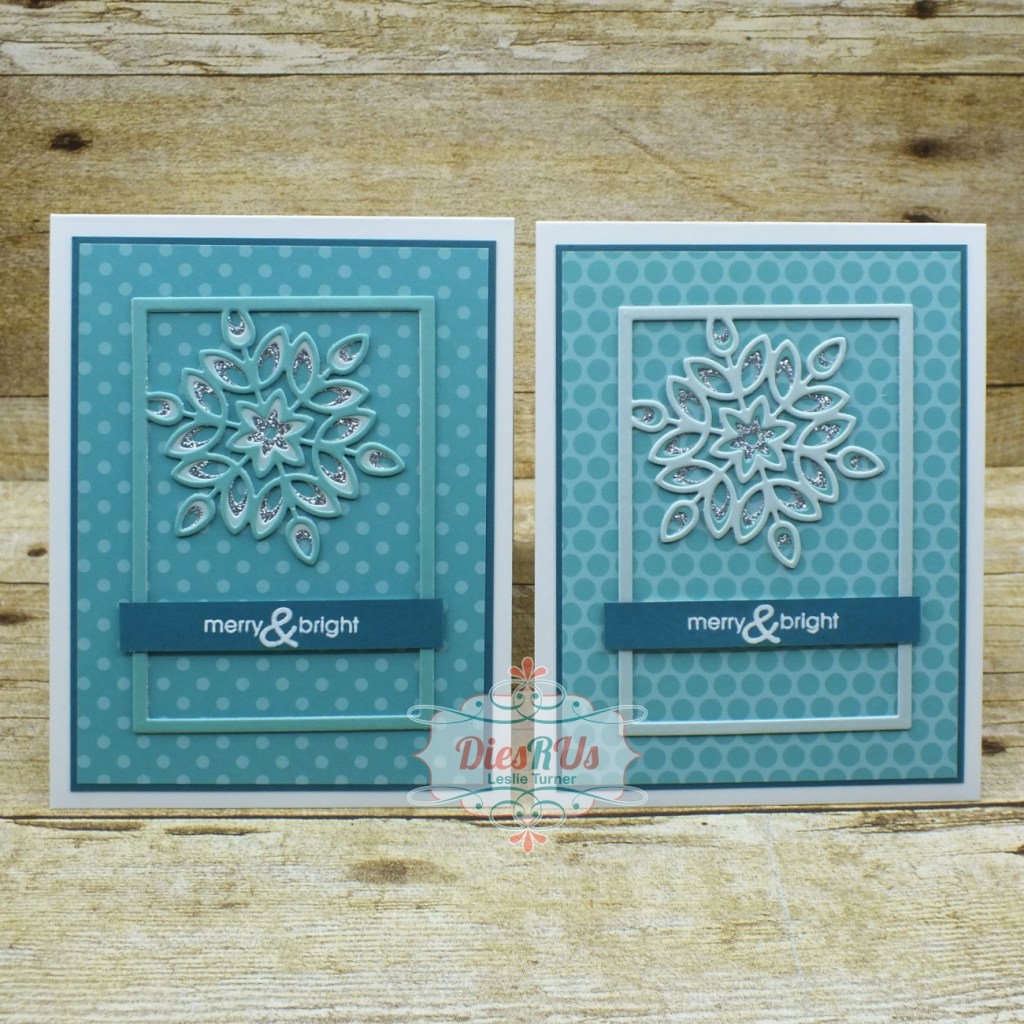
Hi friends! Happy Fri-YAY! It’s definitely a YAY day for me because I’m finally able to announce that I’ve joined the Dies R Us Design Team! Woo-hoo! Affiliate links are used in this post at no cost to you. I really appreciate your support! I’m delighted to be on the Dies R Us Inspiration Blog today with my debut DT inspiration project! I created a pair of Christmas cards featuring the absolutely gorgeous Birch Press Design Mini Snowflake Frame Layer Set! I am so in love with this entire line!
I cut a standard A2 size card base from Neenah Classic Crest 110# Solar White cardstock for each card along with front layering panels from CutCardStock Basis Teal cardstock and teal double-sided patterned paper which I layered together (reversing the sides of the paper for each card) and adhered to the card base. I then adhered a snowflake frame to each card front. I stamped the sentiment twice in Versamark on CutCardStock Basis Teal cardstock and heat embossed them in white. I cut them in strips and adhered them with Scotch 3M foam tape.
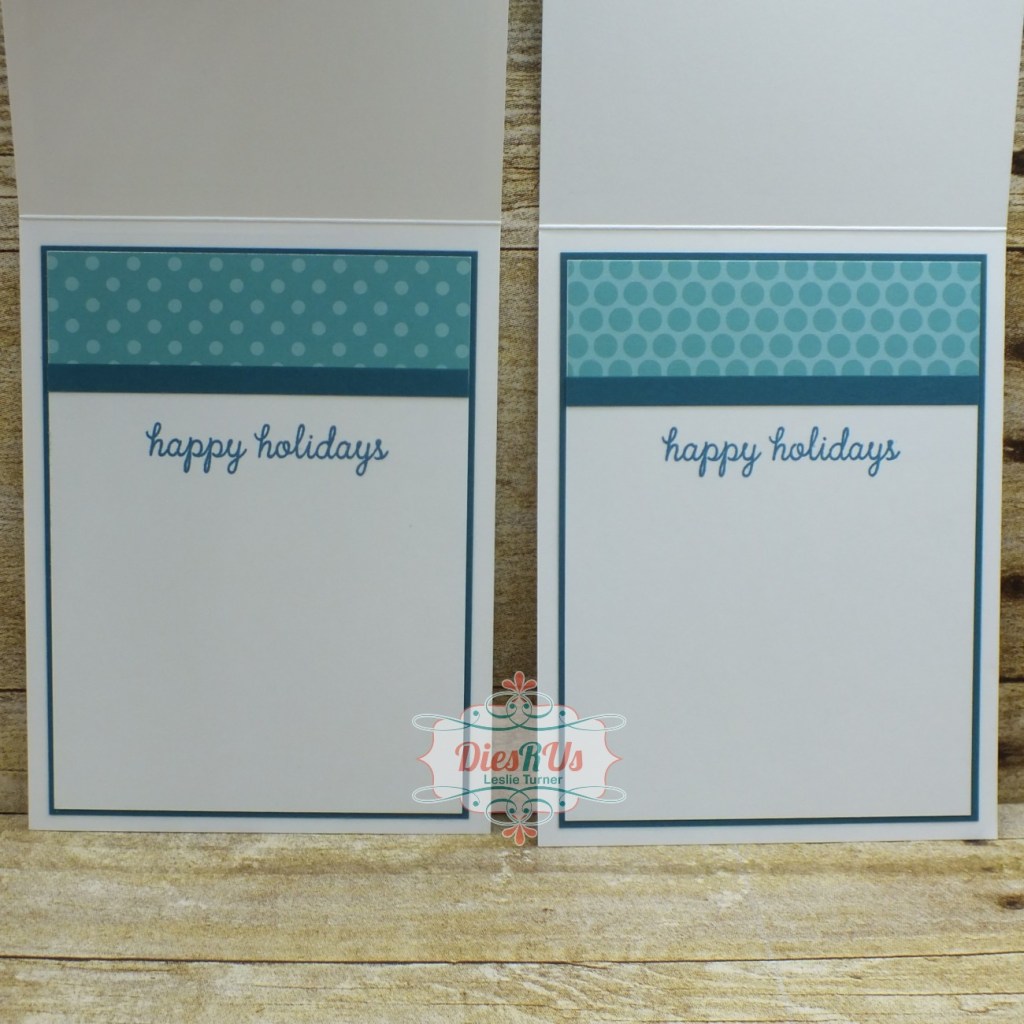
I cut inside layering panels for each card from CutCardStock Basis Teal cardstock and Neenah Classic Crest 80# Solar White cardstock, and adhered them together. I embellished each panel with a strip of teal double-sided patterned paper and narrow strip of teal cardstock used on the front, stamped the sentiment in teal ink on each, and adhered a panel to the inside of each card base.
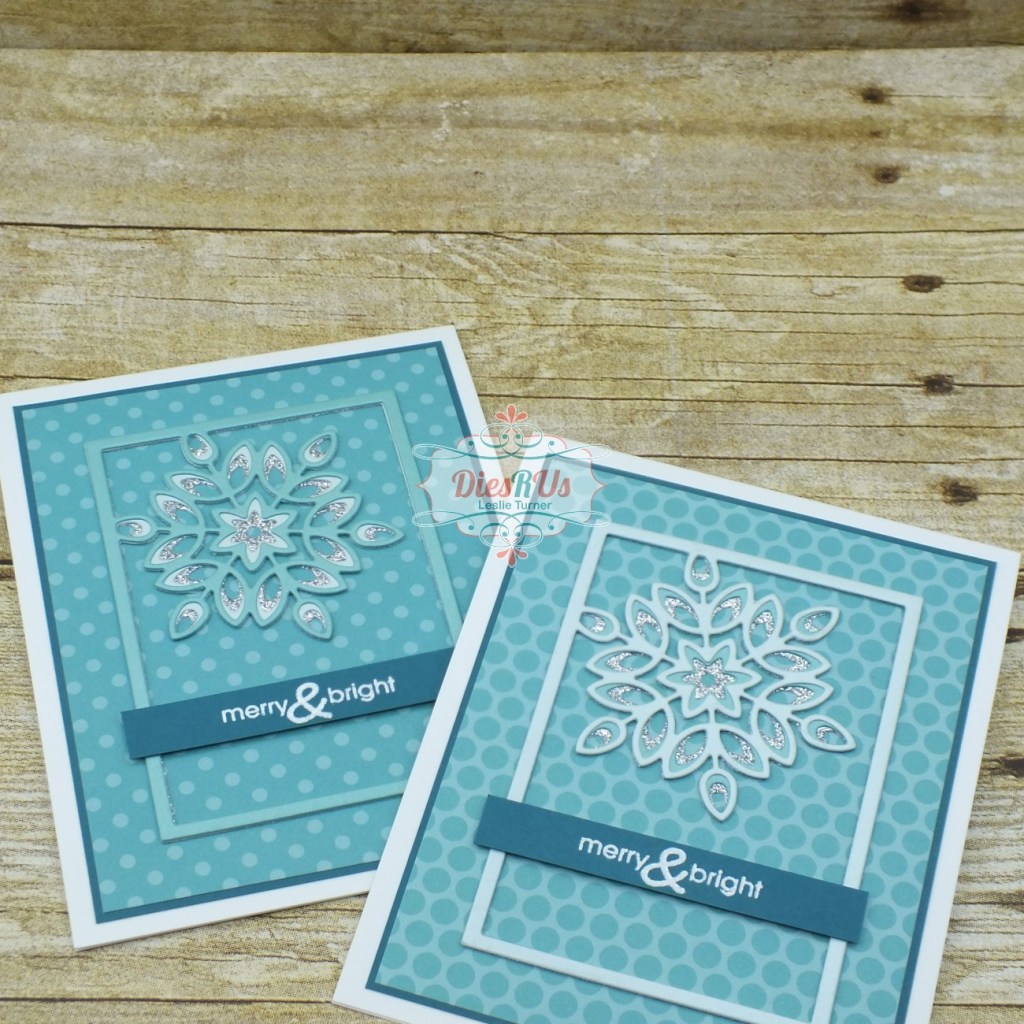
And one more peek… I can’t even begin to tell you how much I love these cards! This die set is amazingly gorgeous and I was extremely lucky to have the patterned paper to match the light and dark teal Stardream Metallic cardstock!
I hope you’ve enjoyed today’s project! Be sure to check out all the fun goodies at the Dies R Us store! They not only sell dies… they also carry stamps, embossing tools and supplies, all kinds of craft supplies, slimline products and even Yupo paper! Be sure to join in the fun going on over at the Dies R Us Challenge Blog – there’s a new challenge theme posted on the 1st and 15th of each month and one lucky random winner will receive a gift voucher prize to the Dies R Us store! And be sure to ‘like’ and ‘follow’ Dies R Us Facebook Page for lots of creative inspiration and to keep up with the latest news! Thanks so much for stopping by today – we’ll see you next time! ;)
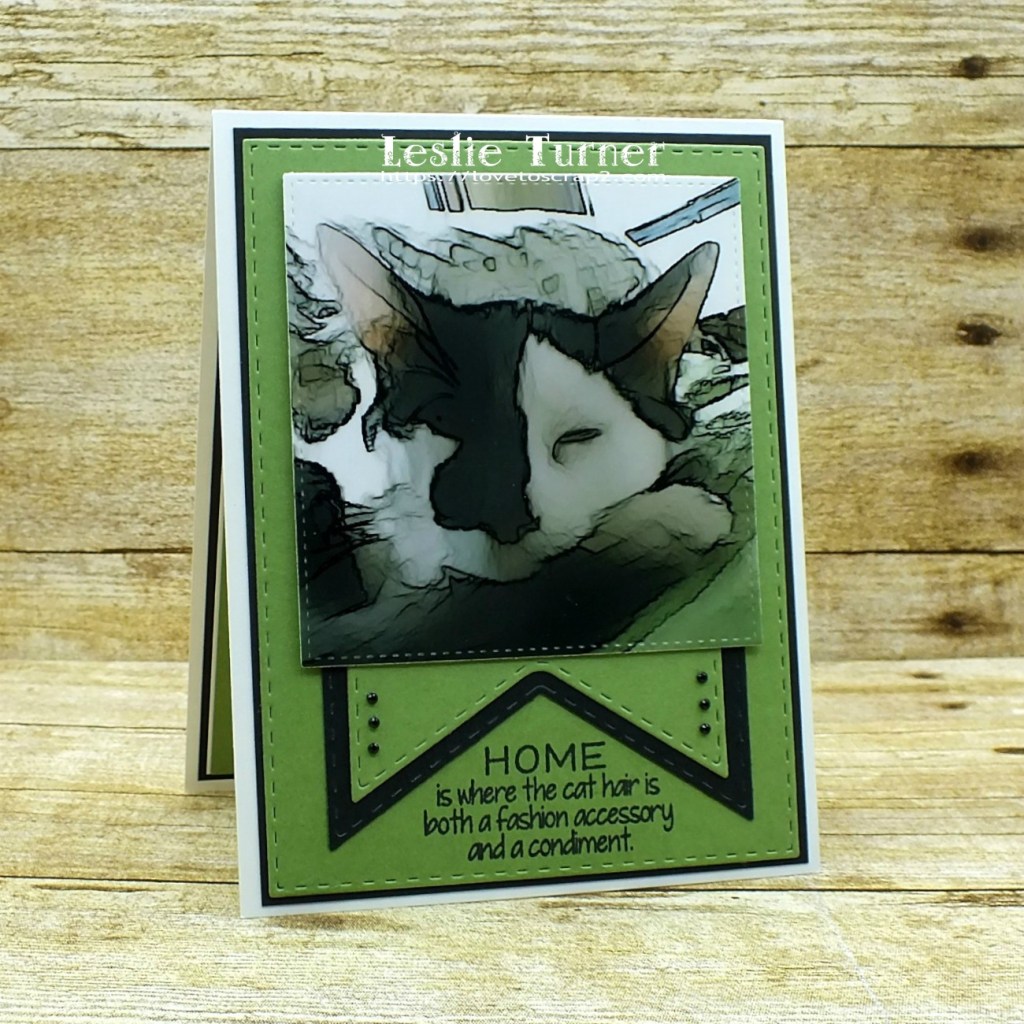
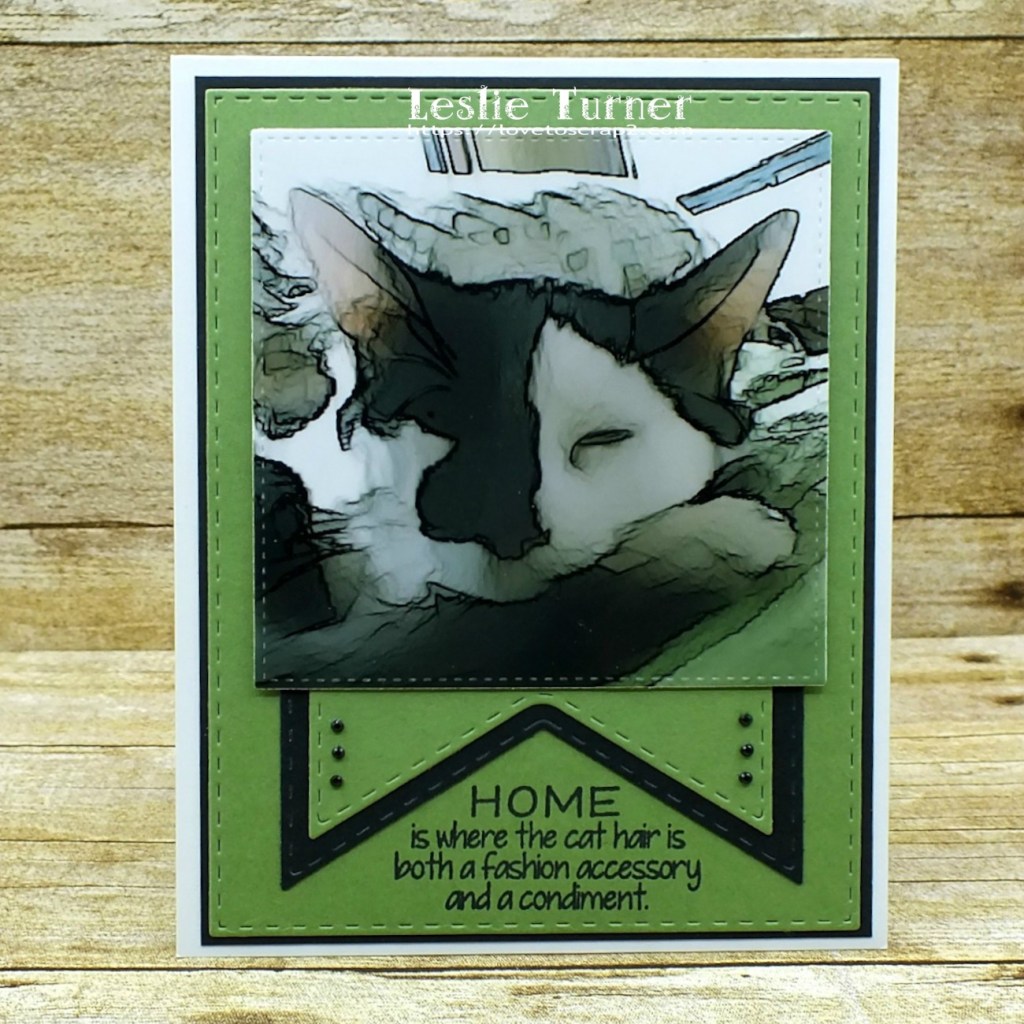
Hi everyone! Lots of posts to see today on my blog – this always happens on the first day of the month! Affiliate links are used in this post at no cost to you. I really appreciate your support! Our new challenge is live over at Love To Craft Challenge Blog this morning and I’m stoked to share my DT inspiration project for LTCCB #57 – April Anything Goes! I downloaded a cool app on my phone several months ago and transformed a photo of our guy, Loki, into a watercolor image. I’ve had this awesome pic in my photos waiting to do something with it, so I worked up a fun note card!
LOL, did the title of this post make you giggle?! Anybody who owns cats knows all about cat hair! This sentiment just cracked me up because it’s so true! I created my go-to A2 size top-folding card base from Neenah Classic Crest Solar White cardstock. I printed the image on glossy photo paper and cut it with a stitched square die. I used the JustRite Stitched A2 Banners and Rectangles die set to create the background, stamped the sentiment in black ink at the bottom and added a few tiny black gemstones.
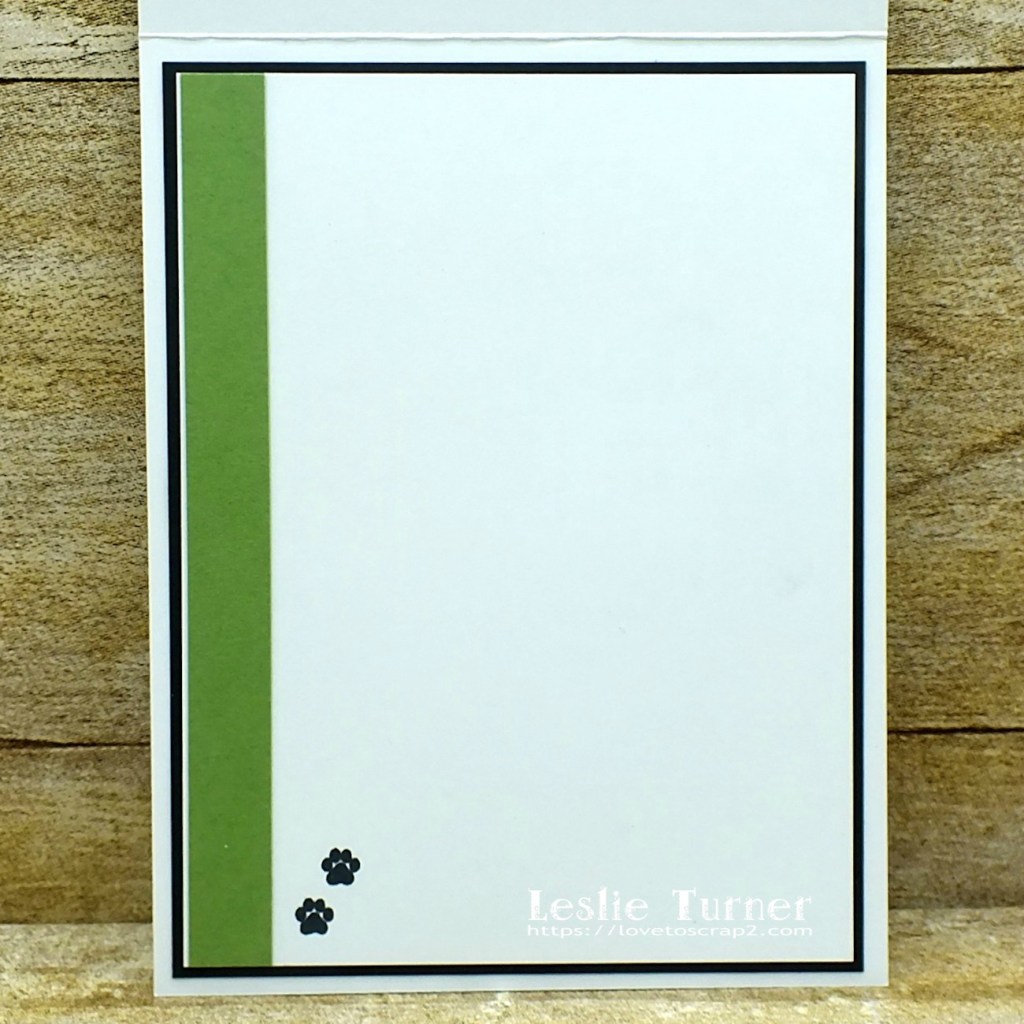
I cut the inside panel from Neenah Classic Crest Solar White cardstock and embellished it with a single strip of green cardstock, stamped the paw prints in the lower left corner, and layered the panel on black cardstock. Since it’s a note card, I left plenty of room to write a custom message.
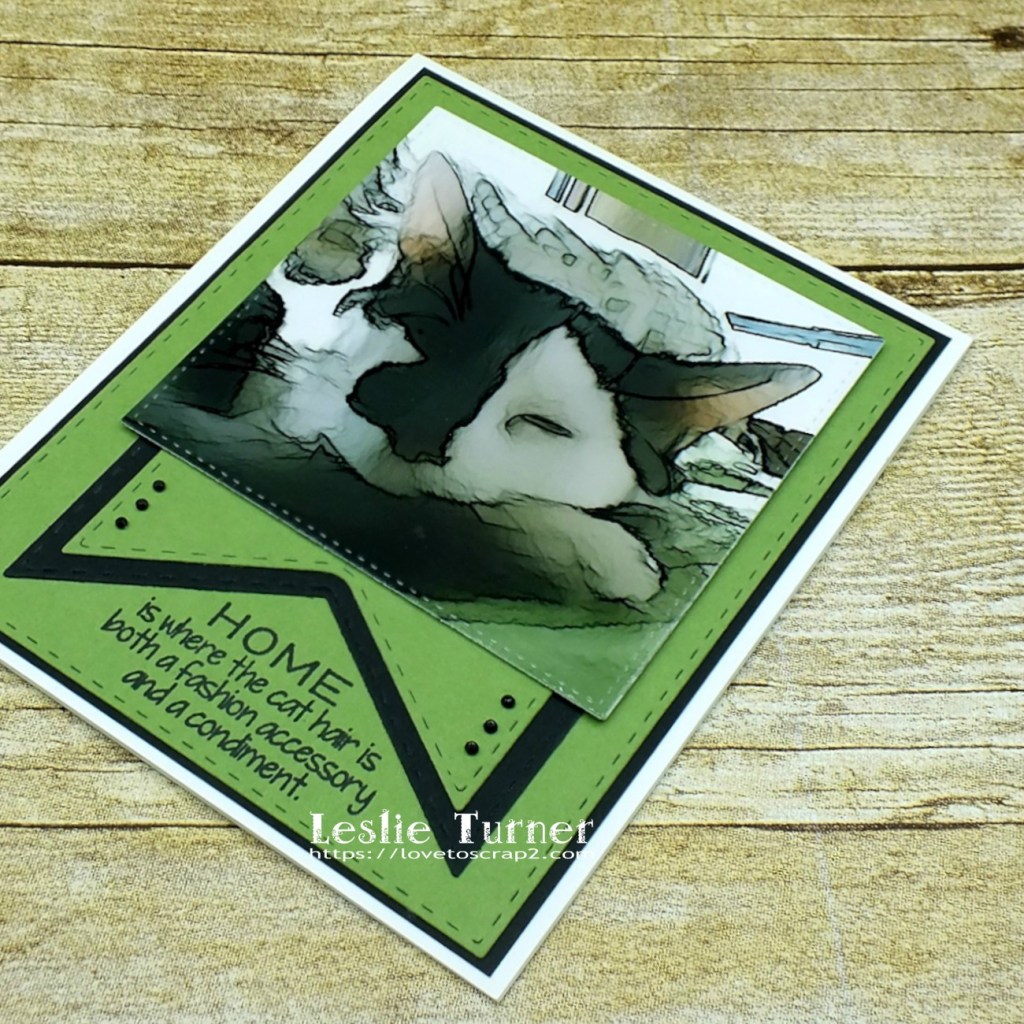
And another peek… totally loving how this turned out! Super simple design that could easily be mass produced for a fun gift set!
Products used: Cardstock/Paper: Neenah Classic Crest Solar White cardstock, GKD Grass Green cardstock, American Crafts Black cardstock Stamps: Frantic Stamper Cat Happiness stamp set Ink: Memento Tuxedo Black ink Dies/Punches: My Favorite things Die-namics Stitched Square STAX die, JustRite Stitched A2 Banners and Rectangles die set Accessories: Bearly Art precision craft glue, Tombow Mono permanent adhesive, Gemini Junior, MISTI stamp tool, Darice tiny black gemstones
I hope you’ve enjoyed today’s project and will link up with us this month! We’d love to see what you’re working on! Thanks so much for stopping by today – we’ll see you again soon! ;)
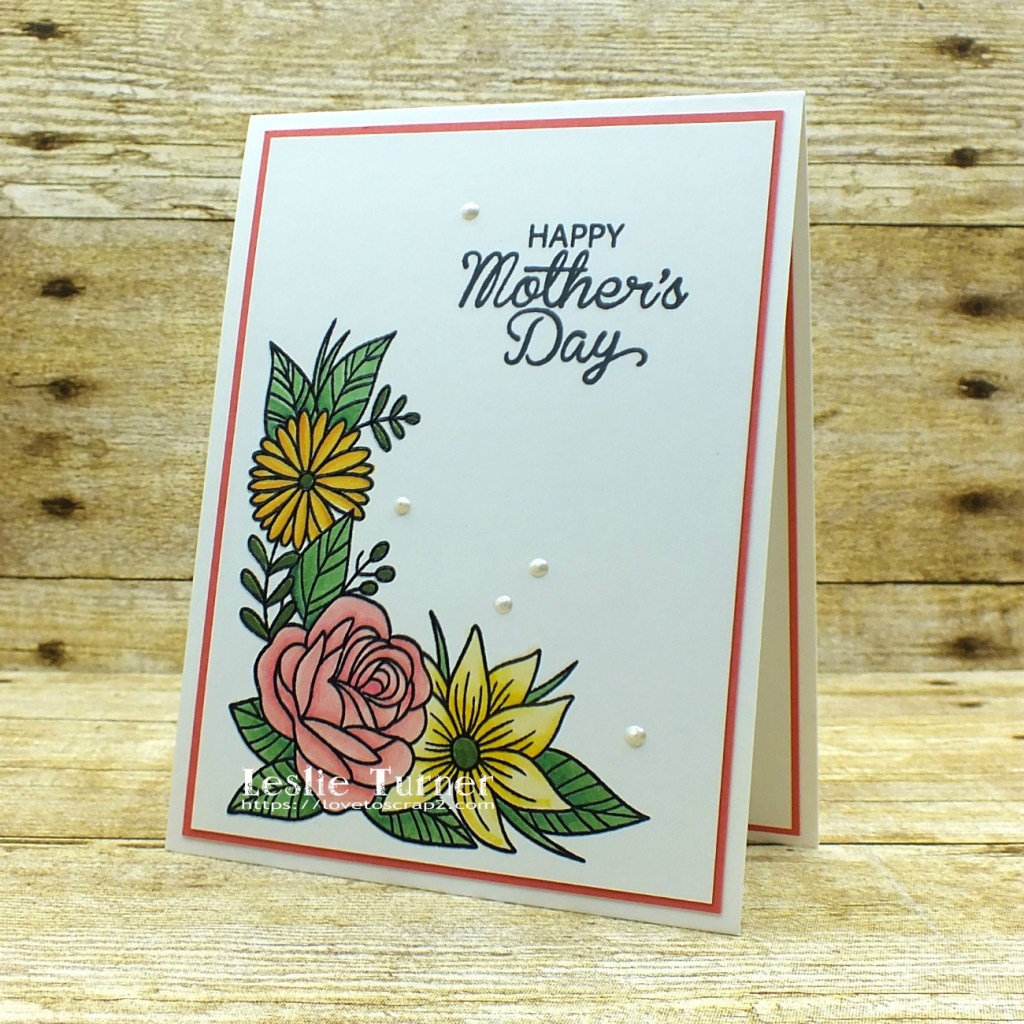
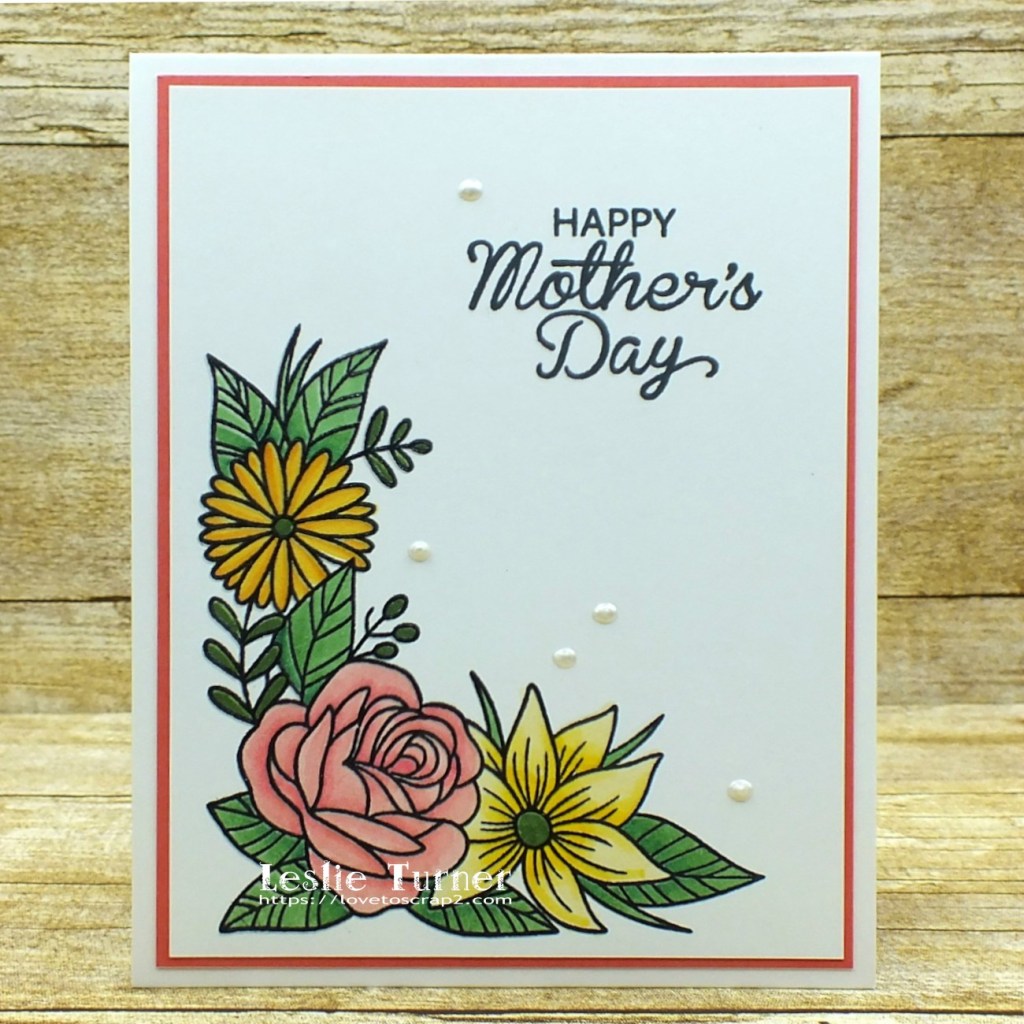
Happy Thursday, friends! Have you any April Fool’s Jokes planned to play on anybody?! I can’t believe how fast this year is going by! Affiliate links are used in this post at no cost to you. I really appreciate your support! Our new challenge is live this morning over at Love To Scrap Challenge Blog and I’m thrilled to share my DT inspiration project for LTSCB #144 – Spring Forward! Yep, we want to see your Spring-themed projects! I’m sharing a pretty Mother’s Day card that I was commissioned to make which features a gorgeous heat embossed Clearly Besotted floral spray. Honestly, you can’t go wrong with a card like this! Mother’s Day is almost upon us so you’ll be seeing a few scattered about my blog! ;)
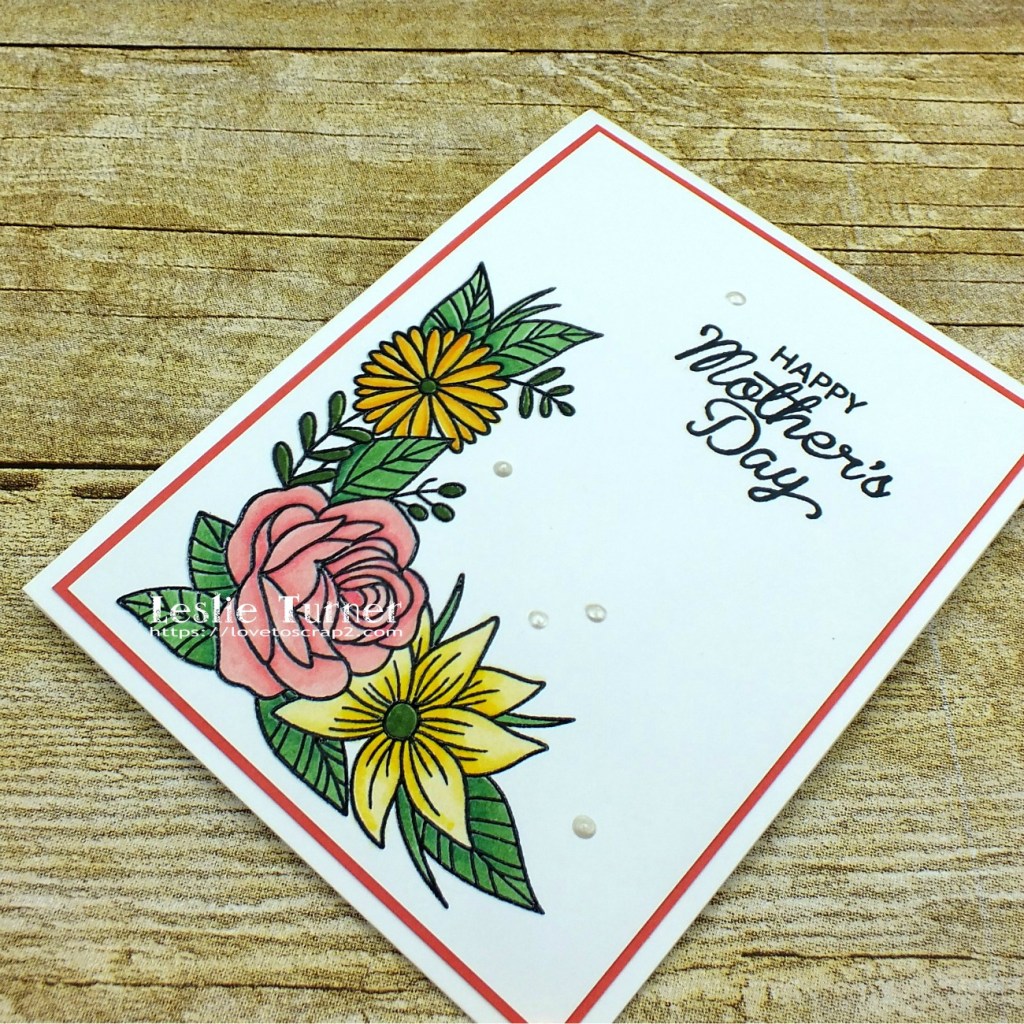
I cut a standard A2 sized top-folding card base from Neenah Classic Crest Solar White cardstock along with slightly smaller white and pink layering panels. I stamped the floral image in black ink on the white panel and then in Versamark (right over the top of the black ink), and heat embossed it with clear embossing powder. I’ve mentioned many times that this is a trick I discovered years and years ago to give virtually any color embossing. ;) I colored the image with alcohol markers and stamped the sentiment. I adhered the panel to the pink layer and then adhered the piece to the card base. The final touch was adding Crystal Drops.
Products used: Cardstock/Paper: Neenah Classic Crest Solar White cardstock, Stampin’ Up Watermelon Wonder cardstock Stamps: Clearly Besotted One In A Million stamp set, Dare 2B Artzy Flowers For Mom stamp set Ink: Memento Tuxedo Black ink; Versamark, Nuvo alcohol markers- 413, 415, 417, 449, 451, 453, 473, 403, 405, 389, 391, 401 Accessories: Tombow Mono permanent adhesive, Tim Holtz Stamp Platform, Hero Arts Clear embossing powder, Milwaukee heat tool, Nuvo Ivory Seashell Crystal Drops
I hope you’ve enjoyed this card and will link up a Spring project with us this month! Thanks so much for stopping by today – we’ll see you again soon! ;)