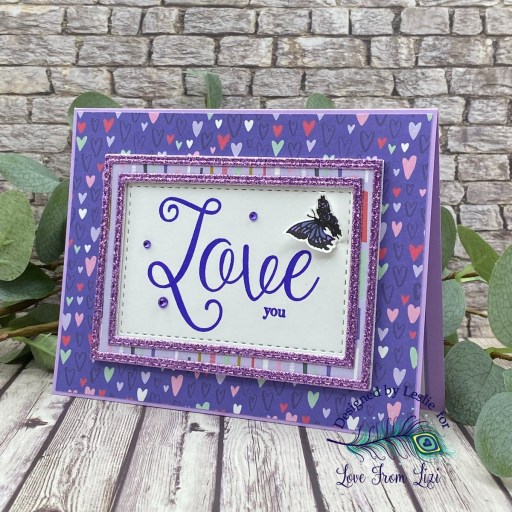
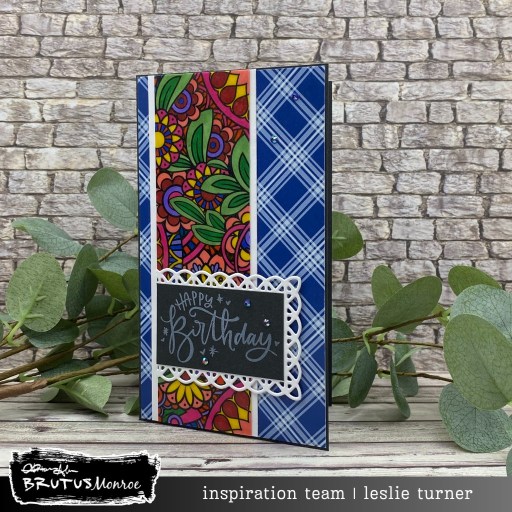
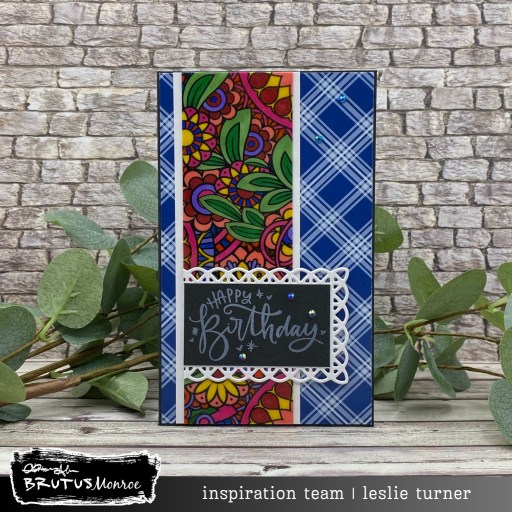
Hey everybody! Another Friday has rolled around which means we’re a little closer to the end of March… daaaaang! I’m delighted to share a Brutus Monroe DT inspiration project today featuring our amazingly beautiful Wisteria Stamps and Dies along with a print in the Plaid Petals 6×6 Paper Pack. I also used our Aubergine cardstock and Violet Shift Crystals (among a few other BM products) to make this card come to life. I’ve made a few lattice cards over the past few years, getting my inspiration originally from Brandy Cox over at Brandy’s Cards. But this is the first one I’ve ‘enclosed’ by adhering a panel behind the front flap which was just a random idea I had. It’s a little different than the regular ‘open’ lattice version and I like it!
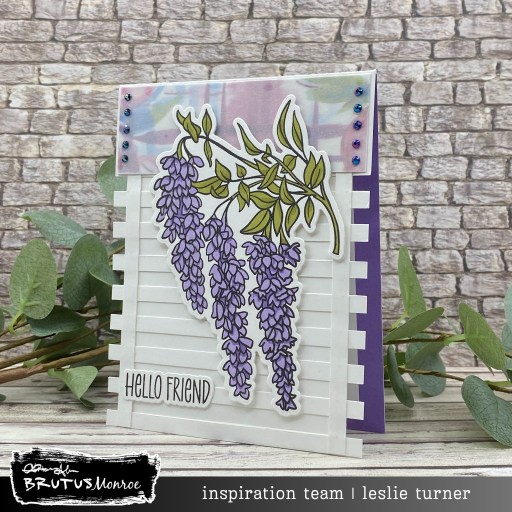
I have to admit, I cheated a little… I had the lattice card base already made for another design team product and decided not to use it. So, you know, it was laying on my craft desk just begging for some Brutus Monroe products to be added to it, lol! I had crafted the card base from Neenah Classic Crest 110# Solar White cardstock, cutting the lattice strips narrower on this card than those on any of the previous ones I’ve made. I cut a panel from a pre-scored card base and adhered it to the back of the front flap to enclose the lattice. And I don’t know why that random thought came into my head, but I went with it.
I added a panel of patterned paper from the Plaid Petals 6×6 Paper Pack to the top and then a panel of CutCardStock Glama Clear Natural Translucent Vellum over top of it to tone it down just a bit. Using the Wisteria stamp, I stamped the sentiment and focal image in Raven ink on Solar White, colored the image with alcohol markers, and cut it with the coordinating Wisteria die. The finishing touch was adding several Violet Shift Flat Back Crystals.

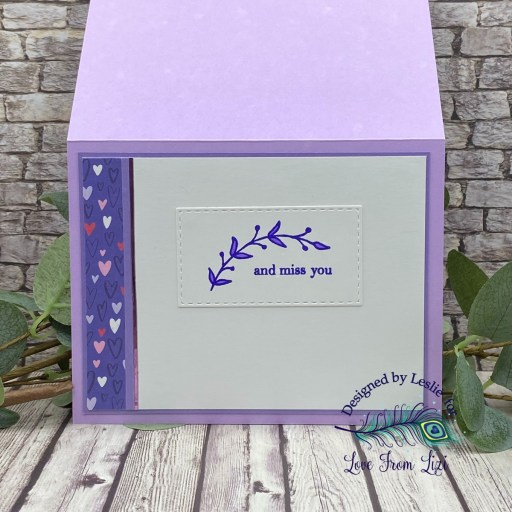
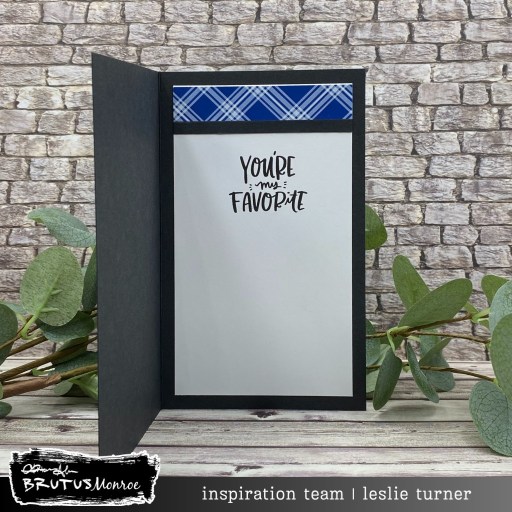
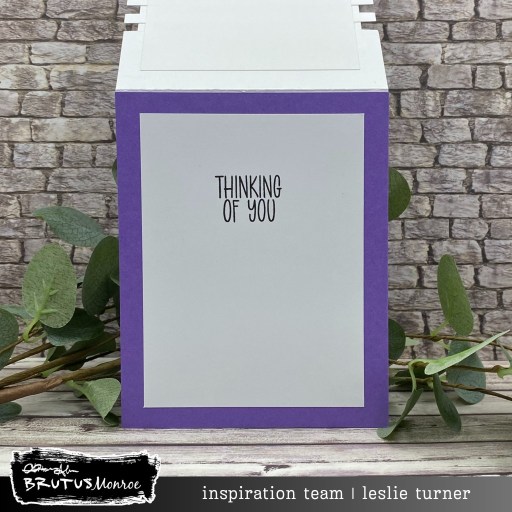
I adhered a panel of our Aubergine cardstock to the inside along with a slightly smaller panel cut from the other half of the pre-scored card base. I stamped another sentiment from the Wisteria stamp set in Raven ink, which completed this super easy card!
Affiliate links are used in this post at no cost to you – I really appreciate your support!
Brutus Monroe products used:
BRU 2047 Wisteria Stamp Set
BRU 2221 Wisteria Die Set
BRU 1322 Plaid Petals 6×6 Paper Pack
BRU 5536 Aubergine Cardstock
BRU 4247 Violet Shift Flat Back Crystals
BRU 2543 Raven Detail 2×2 Ink
BRU 2828-2 Pre-Scored A2 Card Bases
Other products used:
CARDSTOCK/PAPER: Neenah Classic Crest 110# Solar White cardstock, CutCardStock Glama Clear Natural Translucent Vellum
INK: Spectrum Noir Tri-Blends- YG1 and LV1/2
ACCESSORIES: Fiskars 12″ ProCision Rotary Bypass Paper Trimmer, Bearly Art precision craft glue, My Sweet Petunia Precision Glue Press, MISTI stamp tool, Big Shot, Scrapbook Adhesives Thin 3D Foam Squares, Trinity Pick Up Stick
I hope you’ve enjoyed seeing this project and you’re inspired to get your craft on! Be sure to check out all the amazing stamps and dies, pigments and mists, cardstock and tools (just to name a few) at Brutus Monroe! And if you happen to have a sweet tooth and like to munch while you craft (like I do, lol), check out Scoozie’s Confections & Curiosities! OMG, I’m hooked! ;) Follow us on Facebook, Instagram and YouTube for tons of crafty inspiration! And come on over and join our Fan Club Facebook Group to share your crafty makes using our products! Thanks so much for stopping by today – we’ll see you next time!
Scrappy hugs,