A little birdie told me…

Hey everybody! Happy Friday – I hope you’re having a great week! I have some wonderful news to share this morning – I’ve been invited to guest design again for Creative Creases Challenge! Debbie knows how much I love fun folds, so of course, my answer was a big YES! I used the Birdhouse Box Card SVG cut file from My Scrap Chick to make this adorable ‘bird-day’ card for Challenge #92. Box cards definitely fall under the fun fold category and this one was way fun! Be sure to come over and play with us – you know you love some fun folds!

Cyndy G is my favorite MSC designer (I have quite a few of her cut files) and her assembly video for this card is HERE. I wanted to mention that My Scrap Chick often includes a PDF to use to print on cardstock or patterned paper and then fussy cut the pieces. This is a nice option for those who don’t use a cutting machine or for those crafting with children.

Using my Cricut Explore Air 2 and the My Scrap Chick Birdhouse Box Card SVG cut file, I cut all the pieces with a variety of cardstock from CutCardStock. I used Amazon Dark Teal, Sunflower Yellow, Coffee Bean, Pitch Black, Moss Green, Bubble Gum Pink, Cherry Red, Granite Gray and White, all from the Lessebo line. I used the Keep It Simple Build-A-Birdhouse stamp set for the sentiment. The final touch was adding Eyelet Outlet yellow enamel dots to the flower centers.

I stamped another sentiment from the KIS Stamps Build-A-Birdhouse on the back, which completed the project. How stinkin’ cute is this?!

Affiliate links are used in this post at no cost to you – I really appreciate your support! 

Products used:
CARDSTOCK/PAPER: CutCardStock Lessebo Amazon Dark Teal, Lessebo Sunflower Yellow, Lessebo Coffee Bean, Lessebo Pitch Black, Lessebo Moss Green, Lessebo Bubble Gum Pink, Lessebo Cherry Red, Lessebo Granite Gray and Lessebo White cardstock
STAMPS: Keep It Simple Build-A-Birdhouse stamp set
INK: Memento Tuxedo Black ink
DIES/PUNCHES: My Scrap Chick Birdhouse Box Card SVG Cut File
ACCESSORIES: Cricut Explore Air 2, Bearly Art precision craft glue, MISTI stamp tool, Scrapbook Adhesives 3D Foam Squares, Eyelet Outlet Yellow Enamel Dots

I hope you’ve enjoyed seeing this project and will link up with us this time! Thanks so much for stopping by today – we’ll see you next time! ;)

Scrappy hugs,

Mini Handbag Favor Boxes

Howdy peeps! I hope everyone is healthy and enjoying some beautiful Fall-ish weather! I have a super adorable ScrapbookingStore DT inspiration project to share with you today, created with the September 2024 Scrapbook Kit with Upgrades. I’ve thoroughly enjoyed playing with the fun papers and elements in this collection. These mini handbag favor/treat boxes each feature double-sided paper from the collection and a clear sticker from the upgrades. I photographed these with several mini Hershey bars but other kinds of candy or even jewelry or rolled up money could be put in them. And think about all the different occasions they could be used for… the sky is the limit! I saw these cuties on Pinterest (tracked down the video HERE ) and knew I wanted to make some. I did make the flap closure on mine a little different than Trish did.

I picked out two coordinating patterned papers from the collection for each favor box – one for the base and one for the flap. I used Keep It Simple Stitched Rectangles Nested Dies and Stitched Ovals Nested Dies for the flaps and added clear stickers from the upgrades. I used velcro circles for the closures and embellished the base of the straps with Keep It Simple Back To Basics Rose and Lemon Enamel Dots. How stinkin’ cute!

Affiliate links are used in this post at no cost to you – I really appreciate your support!

ScrapbookingStore products used:
September 2024 Scrapbook Kit with Upgrades:
Simple Stories Boho Sunshine 12×12 Collection Kit
Upgrades: The Paper Studio Stick-A-Bilities
The Paper Studio Die Cuts
Dear Lizzy Rub-Ons

Other products used:
DIES/PUNCHES: Keep It Simple Back To Basics Stitched Rectangles Nested Dies and Stitched Ovals Nested Dies
ACCESSORIES: Fiskars 12″ ProCision Rotary Bypass Paper Trimmer, Elmer’s Craft Bond Tape Runner, My Sweet Petunia Precision Glue Press, Nuvo Deluxe Adhesive, Big Shot, InkyStamper Papercrafting Velcro, Keep It Simple Back To Basics Rose and Lemon Enamel Dots

I hope you’ve enjoyed today’s project and you’re thinking about all the fun you could have with this month’s kit… you really ought to think about joining the Subscription Club! Be sure to Follow us on Facebook, Instagram, Pinterest and YouTube for lots of crafty inspiration! And if you do decide to join the Subscription Club, join our ScrapbookingStore Club Member Group on Facebook for more inspiration and to share your projects! Thanks so much for stopping by today – we’ll see you next time!

Scrappy hugs,

Don’t Worry, Be Happy

Hi friends! I hope you’re having a great day and the weather is cooling off at least a little bit where you are. The weather has been absolutely beautiful out here in southwestern Colorado! I have another awesome ScrapbookingStore DT inspiration project to share with you today, created with the September 2024 Scrapbook Kit with Upgrades. I’m really enjoying the bright fun papers in this collection. I created a shadowbox card and despite it’s complex look, it is really fairly simple and sure packs a punch. It features papers and stickers from the collection along with two of the three items in the upgrades. Although I made a few changes, my inspiration came from THIS Splitcoast Stampers tutorial.

I cut the shadowbox card base and front flap from CutCardStock Basis Blue cardstock. Next, I cut layering panels for the front and inside from coordinating papers in the collection and cut an oval aperture into the front flap using a Spellbinders Classic Ovals die. I embellished the front flap and inside of the shadowbox with stickers from the sticker sheet. I added Keep It Simple Back To Basics Ruby and Lemon Enamel Dots to the centers of the flowers. I also added a Velcro circle to keep the flap closed.

Here is a shot of the inside of the shadowbox as well as a back shot. I cut a frame for the shadowbox and added a signature panel to the back which I embellished with a leftover paper strip and clear sticker and rub-on from the upgrades.

Affiliate links are used in this post at no cost to you – I really appreciate your support!

ScrapbookingStore products used:
September 2024 Scrapbook Kit with Upgrades:
Simple Stories Boho Sunshine 12×12 Collection Kit
Upgrades: The Paper Studio Stick-A-Bilities
The Paper Studio Die Cuts
Dear Lizzy Rub-Ons

Other products used:
CARDSTOCK/PAPER: CutCardStock Basis Blue cardstock, Neenah Classic Crest 80# Solar White cardstock
DIES/PUNCHES: Spellbinders Classic Ovals Large dies
ACCESSORIES: Fiskars 12″ ProCision Rotary Bypass Paper Trimmer, My Sweet Petunia Precision Glue Press, Nuvo Deluxe Adhesive, MISTI stamp tool, Big Shot, Stampin’ Up Mini Dimensionals, InkyStamper Papercrafting Velcro, Keep It Simple Back To Basics Ruby and Lemon Enamel Dots

I hope you’ve enjoyed today’s project and you’re thinking about all the fun you could have with this month’s kit… you really ought to think about joining the Subscription Club! Be sure to Follow us on Facebook, Instagram, Pinterest and YouTube for lots of crafty inspiration! And if you do decide to join the Subscription Club, join our ScrapbookingStore Club Member Group on Facebook for more inspiration and to share your projects! Thanks so much for stopping by today – we’ll see you next time!

Scrappy hugs,

Shine Bright

Hey everybody! I hope you’ve had a great week – they sure do seem to be passing by at a rapid rate these days… Christmas will be upon us before we know it! I have a pretty ScrapbookingStore DT inspiration project to share with you today, created with the awesome September 2024 Scrapbook Kit with Upgrades. The papers in this month’s kit are really fun and pair very well with the upgrades. This diagonal pocket card is truly one of the easiest cards to make and the end result is very cool. It can be dressed up or down depending upon the occasion. The card base is simply an embellished pocket with a top-folding mini card tucked inside. I used papers and stickers from the collection along with die cut pieces and rub-ons from the upgrades, and I love how this turned out!

The card base is 5-1/2″ x 8-1/2″ scored at 4-1/4″ which I cut from CutCardStock Basis Dark Orange. I sliced the front flap off at an angle (from top left to bottom right) and glued the flap across the bottom to form the pocket. Next, I embellished the diagonal border with a floral rub-on from the upgrades and then added a very thin strip of the paper used to make the mini card. Finally, I added a large die cut from the upgrades to the diagonal flap and adhered a sentiment with adhesive foam squares.

The mini card is 3-1/2″ x 9-1/2″ scored at 4-3/4″ which I cut from a double-sided paper in the kit and embellished with a die cut and sentiment (being mindful of the placement so it wouldn’t show outside the diagonal border of the pocket). I cut a 3-3/8″ x 4-5/8″ panel for the inside of the mini card from Solar White cardstock which I embellished with a leftover piece of the thin strip used to make the mini card. I also added sentiment and image stickers from the sticker sheet. The finishing touch was adding several clear gemstones to the front of the mini card.

Affiliate links are used in this post at no cost to you – I really appreciate your support!

ScrapbookingStore products used:
September 2024 Scrapbook Kit with Upgrades:
Simple Stories Boho Sunshine 12×12 Collection Kit
Upgrades: The Paper Studio Stick-A-Bilities
The Paper Studio Die Cuts
Dear Lizzy Rub-Ons

Other products used:
CARDSTOCK/PAPER: CutCardStock Basis Dark Orange cardstock, Neenah Classic Crest 80# Solar White cardstock
ACCESSORIES: Fiskars 12″ ProCision Rotary Bypass Paper Trimmer, My Sweet Petunia Precision Glue Press, Nuvo Deluxe Adhesive, Scrapbook.com Double-Sided Adhesive Foam Squares, clear gemstones

I hope you’ve enjoyed today’s project and you’re thinking about all the fun you could have with this month’s kit… you really ought to think about joining the Subscription Club! Be sure to Follow us on Facebook, Instagram, Pinterest and YouTube for lots of crafty inspiration! And if you do decide to join the Subscription Club, join our ScrapbookingStore Club Member Group on Facebook for more inspiration and to share your projects! Thanks so much for stopping by today – we’ll see you next time!

Scrappy hugs,

Ready To Learn

Hey everybody! I hope you’re having a great first day of Fall! Can you believe it’s finally here?! I’m delighted to share a Keep It Simple DT inspiration project created with our Love To Learn Collection. When this collection debuted back in July, I knew it would be a fun one – the papers and ephemera sure make for a bright, bold and fun kid card! So I created my first-ever triangle trifold and love how it turned out! My inspiration came from THIS Splitcoast Stampers tutorial.

I cut the card base and belly band from CutCardStock Lessebo Sunflower Yellow cardstock along with layering panels from the Love To Learn 6×9 Collection Pack. I embellished the belly band with several pieces of ephemera from the Die Cut Pieces, and used two tiny buttons from the pack of Crafty Girls Buttons on the flaps.

I layered the sentiment on CutCardStock Lessebo Salt Water cardstock and added another couple pieces of ephemera from the pack of Die Cut Pieces.

Keep It Simple products used:
Love To Learn 6×9 Collection Pack
Love To Learn Die Cut Pieces

Affiliate links are used in this post at no cost to you – I really appreciate your support!

Other products used:
CARDSTOCK/PAPER: CutCardStock Lessebo Sunflower Yellow and Lessebo Salt Water cardstock, Neenah Classic Crest 80# Solar White cardstock
ACCESSORIES: Cricut Paper Trimmer, Scrapbook.com Deluxe Adhesive Roller Permanent Tape Runner, Bearly Art precision craft glue, Keep It Simple Crafty Girls Buttons

I hope you’ve loved seeing this project as much as I loved creating it and you’re inspired to get crafty! Be sure to check out ALL the fun goodies in the Keep It Simple online store! Save 10% on your entire order when you shop online using code LoveToScrap2 at checkout! There is no minimum purchase requirement and no usage limits, AND it combines with product, order, and shipping discounts! Is that cool, or what?! Be sure to Follow us on Facebook, Instagram, and Pinterest for lots of crafty inspiration! Thanks so much for stopping by today – we’ll see you next time!

Scrappy hugs,

Wishing You A Beautiful Day

Hey everybody! Happy Thursday – we’re on the downslide to the weekend! I’m up on the CutCardStock blog today with a tutorial for making a gorgeous Fall-themed floral box card. I used the Flowers In Bloom Box Card SVG cut file from My Scrap Chick along with my Cricut Explore Air 2 and a variety of our cardstock, mostly from the Lessebo line. I’m in full-on Fall mode so with the colors of cardstock I chose, it definitely has some Fall vibes going on! ;)

I cut the card base from Lessebo Sunflower Yellow and the layering panels from Lessebo Coffee Bean and Basis Light Yellow. Next, I cut the baby’s breath from Lessebo White, and the flowers from Lessebo Sunset Orange, Lessebo Flame Orange, Lessebo Brick Orange, Lessebo Cherry Red, and Lessebo Dawn Maroon. And finally, I cut the flower centers from Lessebo Coffee Bean and the greenery from Lessebo Moss Green and Mantis Green. I printed the sentiment on Lessebo White (from a PDF included in the cut file) and trimmed it.

This was an absolutely beautiful assembly process, especially with these colors. Here is an angled view and a view of the back (with plenty of room to write a message and signature) and the matching A7 envelope cut from patterned paper.

Affiliate links are used in this post at no cost to you – I really appreciate your support!

CutCardStock products used:
Lessebo White cardstock
Lessebo Coffee Bean cardstock
Lessebo Sunflower Yellow cardstock
Lessebo Sunset Orange cardstock
Lessebo Flame Orange cardstock
Lessebo Brick Orange cardstock
Lessebo Moss Green cardstock
Lessebo Cherry Red cardstock
Lessebo Dawn Maroon cardstock
Basis Light Yellow cardstock
Mantis Green cardstock

Other products used:
PAPER: Simple Stories Wood & Gingham Basics 12×12 paper pad
DIES/PUNCHES: My Scrap Chick Flowers In Bloom Box Card SVG cut file
ACCESSORIES: Cricut Explore Air 2, Fiskars 12″ ProCision Rotary Bypass Paper Trimmer, My Sweet Petunia Precision Glue Press, Nuvo Deluxe Adhesive

I hope you’ve enjoyed today’s project and you’re inspired to get crafty! Be sure to check out all the awesome cardstock and other goodies at CutCardStock (adhesives, labels, stickers, pens, watercolors and ribbon to name a few). And head on over to the CutCardStock Facebook Page and for more inspiration! Also, be sure to join our Creating with CutCardStock Facebook Group for even more crafty inspiration! Thanks so much for stopping by today – we’ll see you next time!

Scrappy hugs,

cozy vibes

Hey everybody! Happy Monday – I hope you had a great weekend! I’m thrilled to share a Keep It Simple DT inspiration project with you today created with our new Shaker Frames! We are still vibin’ over here in southwestern Colorado – we had Fall vibes going on last week and now we have some cozy vibes going on today with this fun Christmas card. I totally love shaker cards and Christmas is my favorite holiday so this was definitely a win-win! And you HAVE to check out our new Shaker Frames line – there are six different sets which means six different kinds of shaker fun! The Here Comes Santa Claus Collection used to make this card hasn’t hit the store yet so stay tuned and I will update this post when the collection is available. Update: The collection has hit the store so I’ve added the links to this post!

I cut the A2 size side-folding card base from Neenah Classic Crest 110# Solar White cardstock along with layering panels and the shaker frame pieces from coordinating papers in the soon-to-come Here Comes Santa Claus Collection. I used the adhesive foam from our new Back To Basics Shaker Basics under the shaker frame but used tulle for the shaker front rather than acetate. I filled the shaker areas with a variety of our new Sprinkles. I stamped the Santa from the Collection Stamps, colored him with a variety of markers, and cut him with the coordinating Outline Die. I cut the sentiment from the cut-apart sheet in the Collection Pack.

I cut the inside panel from 80# Solar White cardstock and embellished it with a border and sentiment from the cut-apart sheet in the Collection Pack.

Keep It Simple products used:
KIS Shaker Frames A2 Frames #3
Here Comes Santa Claus 6×9 Collection Pack
Here Comes Santa Claus 12×12 Collection Pack
Here Comes Santa Claus Collection Stamps
Here Comes Santa Claus Outline Dies
Back To Basics Shaker Basics Foam & Acetate
KIS Sprinkles Red Rhinestones
KIS Sprinkles Clear Rhinestones (coming soon)
KIS Sprinkles Matte Red Beads
KIS Sprinkles Matte Dark Green Beads
KIS Sprinkles Dandelion Hearts Glitter

Affiliate links are used in this post at no cost to you – I really appreciate your support!

Other products used:
CARDSTOCK/PAPER: Neenah Classic Crest 110# and 80# Solar White cardstock
INK: Memento Tuxedo Black ink; Bic Mark-It Fine Point markers- Rambunctious Red and Tuxedo Black; American Crafts Gold Metallic marker; Spectrum Noir Tri-Blends- FS6/7/8, IG2, AP2
ACCESSORIES: Fiskars 12″ ProCision Rotary Bypass Paper Trimmer, Bearly Art precision craft glue, MISTI stamp tool, Big Shot, white tulle

I hope you’ve loved seeing this project as much as I loved creating it and you’re inspired to get crafty! Be sure to check out ALL the fun goodies in the Keep It Simple online store! Save 10% on your entire order when you shop online using code LoveToScrap2 at checkout! There is no minimum purchase requirement and no usage limits, AND it combines with product, order, and shipping discounts! Is that cool, or what?! Be sure to Follow us on Facebook, Instagram, and Pinterest for lots of crafty inspiration! Thanks so much for stopping by today – we’ll see you next time!

Scrappy hugs,

heck, yeah!

Hi friends! Happy Sunday – I hope your weekend has been a beautiful one! I can’t brag enough about our weather – seems that Autumn is here and we’ve been having the most wonderful temps! I actually had to put on leggings this past Thursday and that’s actually not a bad thing! Our new challenge is live this morning over at Ally’s Angels and I’m delighted to share my DT inspiration project for Challenge #86. Our challenges are always ‘anything goes’ so come over and play! This month we’re introducing a new ‘spotlight winner’ category in conjunction with our random winner and top picks. We love choosing a random winner because it gives everyone playing in our challenges a chance to be a winner. The spotlight winner will be chosen on merit along with our top picks.

For this challenge I’m sharing an explosion card that I sent to my daughter for her 40th birthday. And let me tell you – it does indeed explode – and there should be a confetti warning but there’s not! Bahahaha! These are made with the We R Memory Keepers Explosion Card Punch Board and I’ve made a few of them over the years. They are truly some of THE most fun cards I’ve ever made. Whenever I send one I always wish I was a fly on the wall to watch the mayhem when it’s opened, lol! I’ve come back to update my post with THIS WRMK YouTube video showing the card being made and then toward the end (about 1:40) it shows a mini explosion. I put a ton more confetti in mine so the explosion is much bigger, lol! ;)

I cut the card base from American Crafts Sunflower cardstock, the layering panels and envelope from Stampin’ Up Daffodil Afternoon DSP, and the sentiment/signature panels die cut from CutCardStock Cougar Smooth White cardstock using a Keep It Simple Stitched Circles Nested Die. The heart shaped confetti is punched with the punch board as well. The card itself was super simple to assemble, and the finishing touch was adding a few Keep It Simple Lemon Enamel Dots to the sentiment panel. Here are shots of all four sides.

And here’s one final shot of the card in the envelope. I wonder if the ‘pull here’ and ‘hold here’ (stamps included with the punch board) gives a little bit of the surprise away when the recipient receives it, lol!

Affiliate links are used in this post at no cost to you – I really appreciate your support! 

Products used:
CARDSTOCK/PAPER: American Crafts Sunflower cardstock, CutCardStock Cougar Smooth 80# White cardstock, Stampin’ Up Daffodil Afternoon DSP
STAMPS: Stampin’ Up Happy & Heartfelt stamp set
INK: Memento Tuxedo Black ink
DIES/PUNCHES: Keep It Simple Stitched Circles Nested Dies
ACCESSORIES: Tonic Studios 12″ Guillotine Paper Trimmer, Bearly Art precision craft glue, MISTI stamp tool, Big Shot, We R Memory Keepers Explosion Card Punch Board (‘pull here’ and ‘hold here’ stamps included), Keep It Simple Lemon Enamel Dots

I hope you’ve enjoyed seeing this project and will link up with us this time! We’d love to see what you create! Thanks so much for stopping by today – we’ll see you next time! ;)

Scrappy hugs,

Life Is Sweet shaker cards

Hey everybody, Happy Tuesday! I’m delighted to share an awesome Keep It Simple DT inspiration project with you today. You may remember that our new Shaker Kits debuted on the website back in early August. We have a Facebook Live craft-along planned for October 5th to celebrate World Cardmaking Day where several members of our design team will demo the Life Is Sweet and Freshly Brewed kits. These are available as a bundle to purchase prior to the FB Live if you’re interested in joining in! But in the meantime, I’m sharing two cards I made with the Life Is Sweet kit. I’ll share the other two cards I made with the Freshly Brewed kit on the day of the Live.

The card bases, adhesive foam, acetate, frames, ephemera, and shaker bits are all included in the kit. I made my cards a little different than the samples on the package. I added Back To Basics Mango and Rose Enamel Dots to the center of the flowers on the front of my first card.

And this is my second card. I have a confession to make… I messed up the scalloped frame included in the kit so I had to go to Plan B… I die cut another frame from a paper in the Back To Basics Mango Collection Pack using a die in the KIS Shaker Frames A2 Frames #3. I honestly don’t think anybody would ever notice but I wanted to share that the A2 Frames work with this kit! These cards turned out so cute and the only extra ingredient needed to make them is adhesive. I used two kinds of double-sided tape and some small foam pads for dimension. I love that everything else is included!

Keep It Simple products used:
Life Is Sweet Shaker Kit
Back To Basics Mango Enamel Dots
Back To Basics Rose Enamel Dots
Back To Basics Mango 12×12 Collection Pack
KIS Shaker Frames A2 Frames #3

Affiliate links are used in this post at no cost to you – I really appreciate your support!

Other products used:
ACCESSORIES: My Sweet Petunia Precision Glue Press, Nuvo Deluxe Adhesive, Scrapbook.com Double-Sided Adhesive Roll, red liner tape, Stampin’ Up Mini Dimensionals

I hope you’ve loved seeing this project as much as I loved creating it and you’re inspired to get crafty! Be sure to check out ALL the fun goodies in the Keep It Simple online store! Save 10% on your entire order when you shop online using code LoveToScrap2 at checkout! There is no minimum purchase requirement and no usage limits, AND it combines with product, order, and shipping discounts! Is that cool, or what?! Be sure to Follow us on Facebook, Instagram, and Pinterest for lots of crafty inspiration! Thanks so much for stopping by today – we’ll see you next time!

Scrappy hugs,

Fall vibes

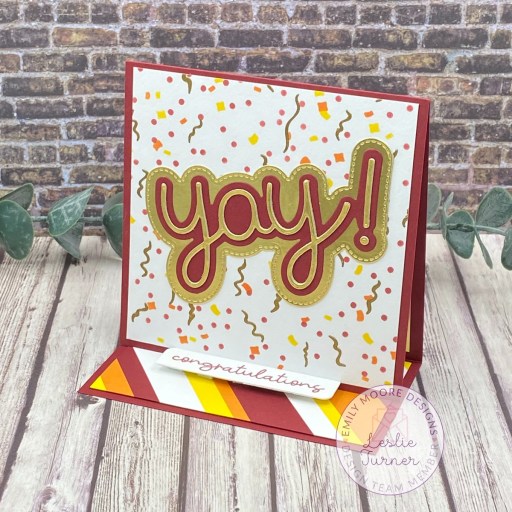
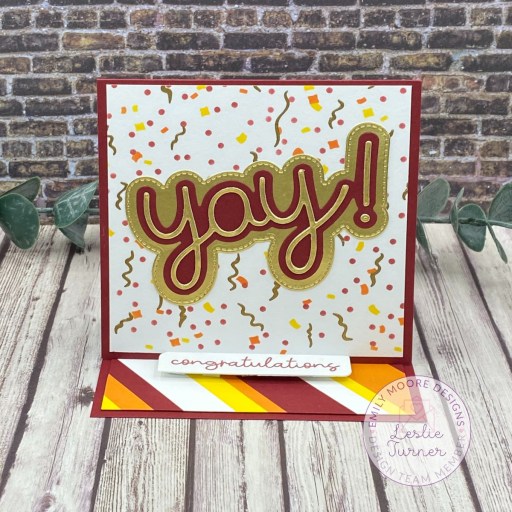
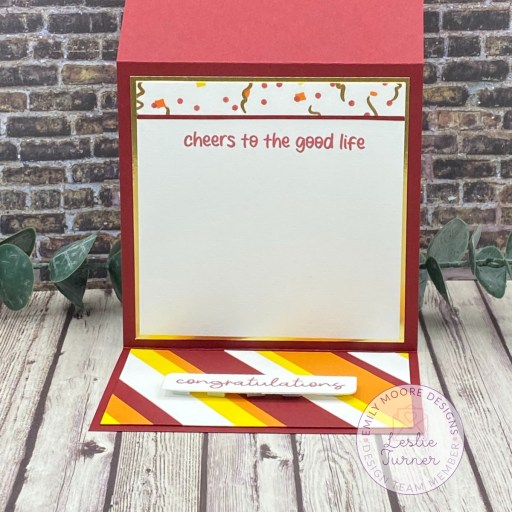
Hey everybody! I hope you’re having a fabulous weekend! I’m stoked to share a Keep It Simple DT inspiration project with you today that I created with our NEW Nuts About Fall Collection! This tented easel card is fun to make and really packs a punch! And it couldn’t be simpler – cardstock size is 4-1/4″ x 11″, scored at 4-1/4″ and 8-1/2″, making the folded card 4-1/4″ square. Front layering panel is 4″ x 4″ and bottom layering panel is 2-1/4″ x 4″ with a white layering panel for the inside cut at 4″ x 4″. Boom. Easy.

The card base was cut from CutCardStock Lessebo Coffee Bean cardstock along with layering panels from coordinating prints in the Nuts About Fall 6×9 Collection Pack. I used a Wavy Borders die to cut a panel for the truck to park on. The truck was stamped on patterned paper along with the front sentiment, pumpkin and acorns on Solar White cardstock (all from the Collection Stamps, stamped in Memento Rich Cocoa ink), and cut with the coordinating Outline Dies.

I colored the pumpkin, acorns and a few elements on the truck with markers in my stash and popped some of them up on foam squares. I cut the sentiment for the bottom flap from a sheet in the Collection Pack and popped it up on foam squares as well to use as the ‘stopper.’ The final touch was adding a few Back To Basics Mango Enamel Dots.

I cut the inside panel from Solar White cardstock and embellished it with a leftover strip of patterned paper used on the bottom flap. I stamped an inside sentiment and leaf from the Collection Stamps in Rich Cocoa ink which completed the card. Oh, I love this!

Keep It Simple products used:
Nuts About Fall 6×9 Collection Pack
Nuts About Fall Collection Stamps
Nuts About Fall Outline Dies
KIS Cuts Wavy Borders
Back To Basics Mango Enamel Dots

Affiliate links are used in this post at no cost to you – I really appreciate your support!

Other products used:
CARDSTOCK/PAPER: CutCardStock Lessebo Coffee Bean cardstock, Neenah Classic Crest 80# Solar White cardstock
INK: Memento Rich Cocoa ink; Spectrum Noir Tri-Blends- EB1/2/3, GY2/3/5; Sharpie fine point white paint pen; Bic Mark-It fine point markers- Cloud Nine Grey and Tuxedo Black
ACCESSORIES: Fiskars 12″ ProCision Rotary Bypass Paper Trimmer, Elmer’s Craft Bond Tape Runner, Bearly Art precision craft glue, MISTI stamp tool, Big Shot, Scrapbook.com Double-Sided Foam Adhesive Squares

I hope you’ve loved seeing this project as much as I loved creating it and you’re inspired to get crafty! Be sure to check out ALL the fun goodies in the Keep It Simple online store! Save 10% on your entire order when you shop online using code LoveToScrap2 at checkout! There is no minimum purchase requirement and no usage limits, AND it combines with product, order, and shipping discounts! Is that cool, or what?! Be sure to Follow us on Facebook, Instagram, and Pinterest for lots of crafty inspiration! Thanks so much for stopping by today – we’ll see you next time!

Scrappy hugs,