I like Big Cups note card

Hey everybody! Happy Saturday – I hope you’ve got something fun planned this weekend! I’ve popped in this morning to share a Kat Scrappiness Creative Influencer inspiration project – and this one will likely bring a smile to your face! I used the awesome Perk Up stamps and coordinating dies along with a coffee ATC in my stash to create this note card. The sentiments in this stamp set are an absolute hoot! My nephew listened to Sir Mix A Lot’s ‘Baby Got Back’ song back in the 90s so this stamp made me chuckle, too!

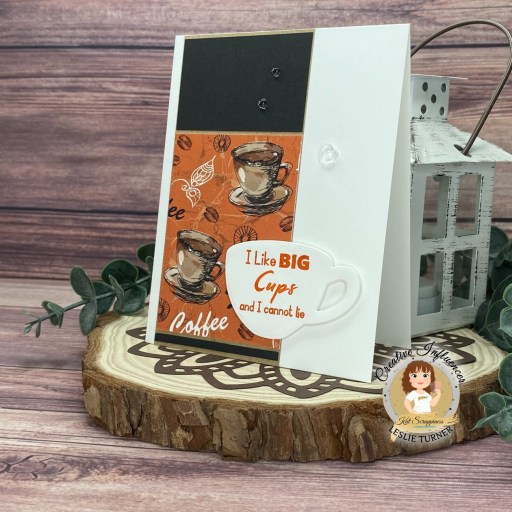
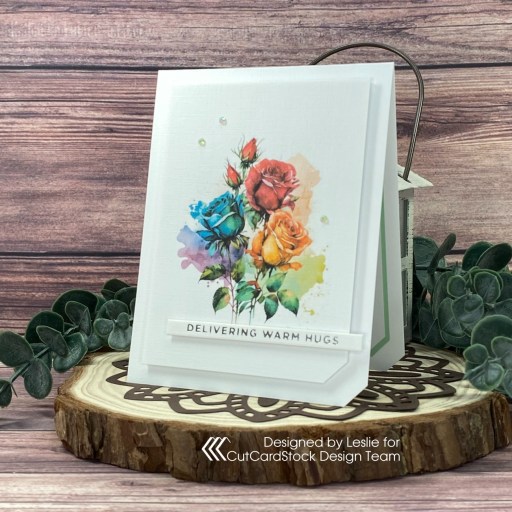
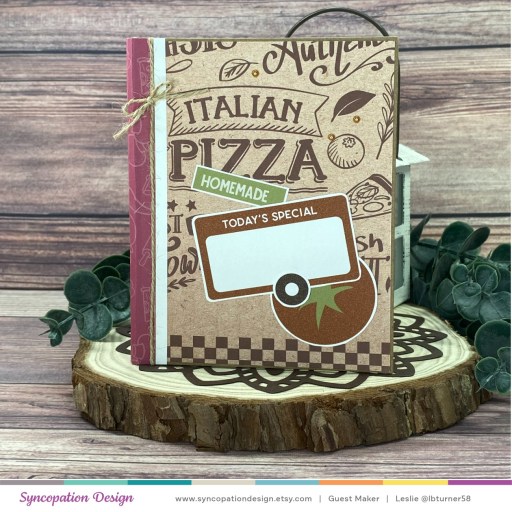
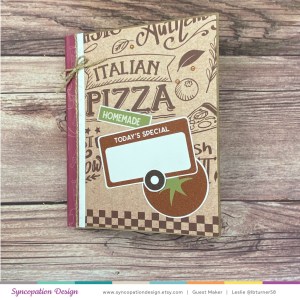
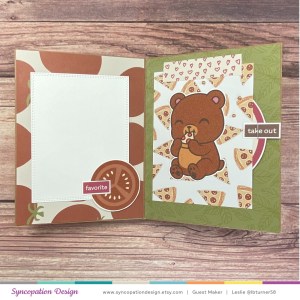
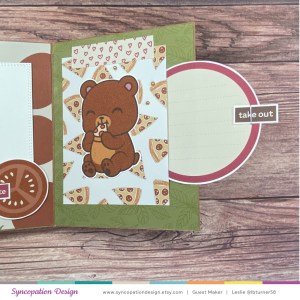
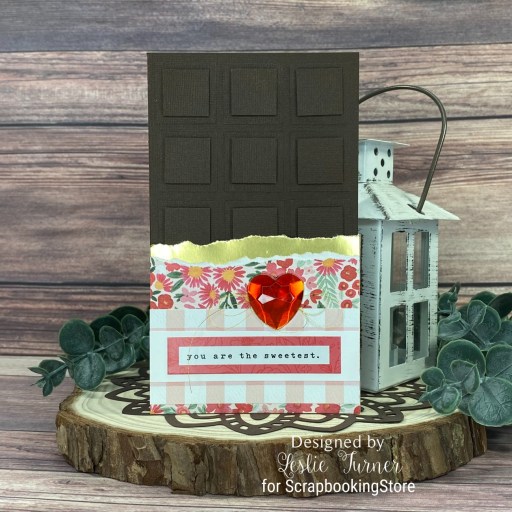
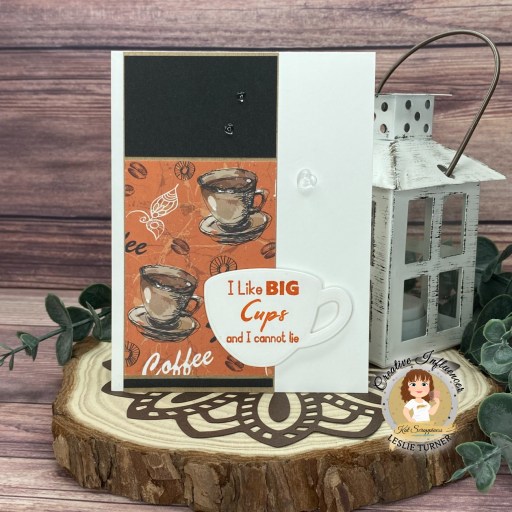
I cut a standard A2 size top-folding card base from Neenah Classic Crest 110# Solar White cardstock along with layering panels from CutCardStock Brown Bag Kraft Paper and Pop Tone Black Licorice. I grabbed a STAMPlorations coffee ATC from my stash and layered the panels and the ATC down the left side of the card base. I stamped the sentiment from the Perk Up stamp set in Catherine Pooler Mandarin Spice ink on Solar White cardstock and cut it with the large coffee cup die in the Perk Up coordinating dies. I cut three more coffee cups and layered them together for a little dimension. The finishing touch was adding several Sparkling Clear Heart Droplets.

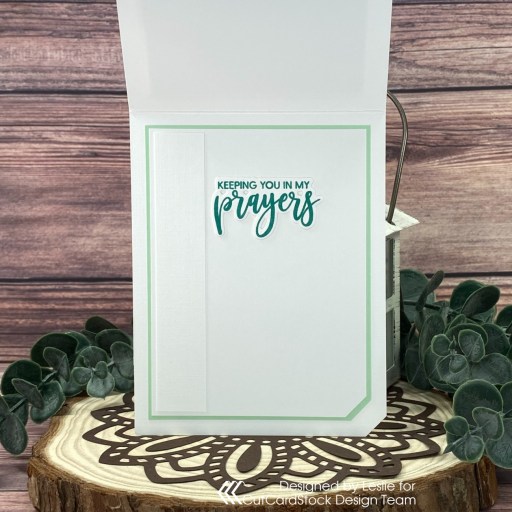
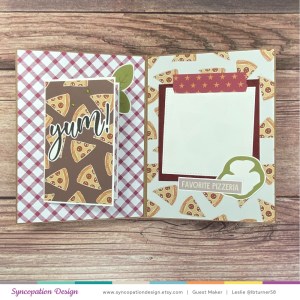
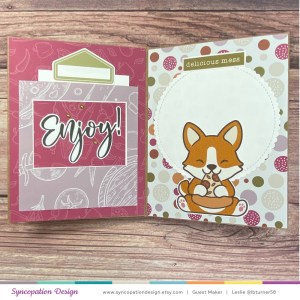
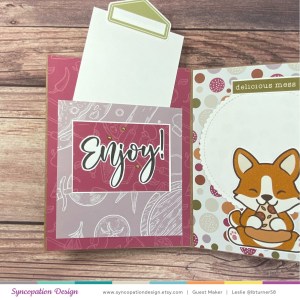
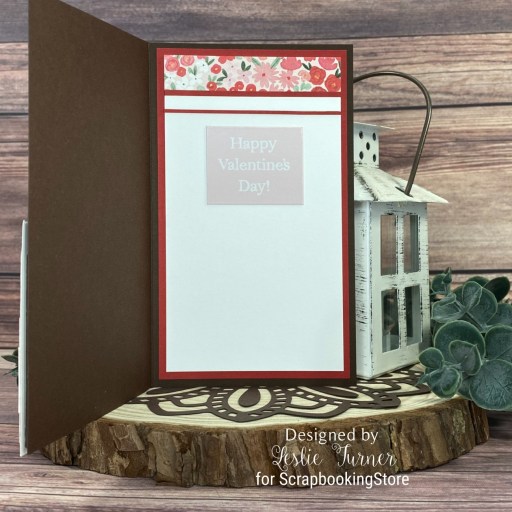
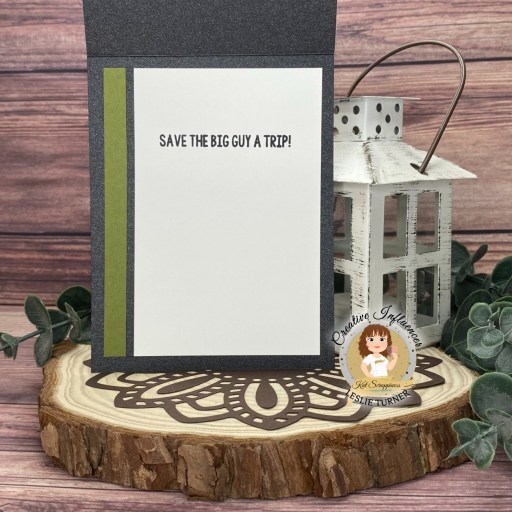
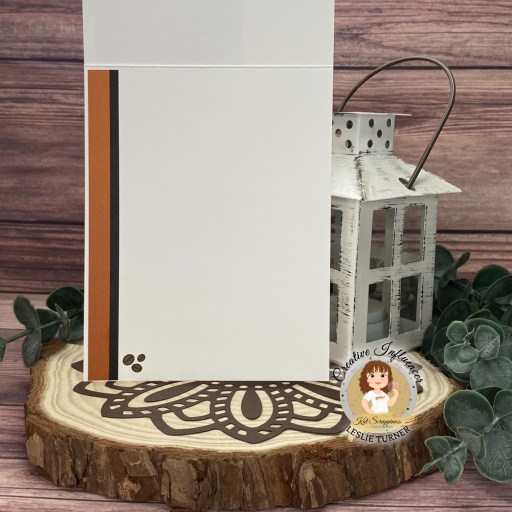
I embellished the inside with strips of CutCardStock Basis Dark Orange and Pop Tone Black Licorice cardstock. I stamped coffee beans (from the same stamp set) in the lower left corner and colored them with an alcohol marker. Since this is a note card, I left the inside blank with plenty of room to write a custom message.

Sharing in the following challenges:
1. Outlawz Challenges Tuesday Color Challenge: Black & White + One Color (used black, white and orange with brown as a neutral)

Affiliate links are used in this post at no cost to you – I really appreciate your support!

Kat Scrappiness products used:
Perk Up Stamp Set
Perk Up Coordinating Dies
Sparkling Clear Heart Droplets

Other products used:
Cardstock/Paper: Neenah Classic Crest 110# Solar White cardstock, CutCardStock Brown Bag Kraft Paper, Pop Tone Black Licorice and Basis Dark Orange cardstock
Ink: Catherine Pooler Mandarin Spice ink; Arteza alcohol marker- BR62
Accessories: Tonic Studios 12″ Guillotine Paper Trimmer, STAMPlorations Coffee Backgrounds ATC Ephemera, Tape Runner, Art Glitter Dries Clear adhesive, MISTI stamping tool, Big Shot

I hope you’ve enjoyed this project and I’ve inspired you to get crafty! Be sure to check out all the amazing stuff in the Kat Scrappiness store… there’s some of just about everything you’ll need to get your craft on, I promise! Be sure to Follow us on Facebook, Instagram, Pinterest and YouTube for tons of crafty inspiration! And we’d love it if you’d join the Kat Scrappiness Insiders and Stamping Enablers Facebook Groups for lots of fun crafty ideas and to share your creativity! Thanks so much for stopping by today – we’ll see you next time!

Scrappy hugs,

Delivering Warm Hugs

3/5/23 Sweet Pick at Cupcake Inspirations!

Hi everyone! I hope you have something fun planned this weekend! It sure got here fast… not that I’m complaining! I love every day of the week! I have an awesome CutCardStock DT inspiration project to share with you today featuring our Solar White Classic Linen and Classic Crest paired with Pop Tone Spearmint cardstock! I printed an absolutely gorgeous digital image from The Hungry Jpeg on 80# Classic Linen, trimmed it down and popped it up on white craft foam on a 100# Classic Linen card base. I added a foiled sentiment and some gemstones, and BOOM, a beautiful clean and simple card was made!

I printed The Hungry Jpeg’s Roses 3 digital image on Neenah Classic Linen 80# Solar White cardstock, trimmed it down to fit the card base, and cut the bottom right corner off with my Tonic corner punch. Here’s a close-up of the image so you can see how gorgeous it looks printed on the linen cardstock!

I cut a standard A2 size top-folding card base from Neenah Classic Linen 100# Solar White cardstock and cut off the bottom right corner. I adhered the digital image to a piece of Darice Foamies white craft foam and then to the card base. I added a foiled sentiment that I created with the Spellbinders Glimmer Hot Foil System, Spellbinders Glimmer Silver Foil, and Spellbinders Glimmer Mini Christmas Sentiment Strips Hot Foil Plate & Die Set. The finishing touch was adding several gemstones from the Trinity Andradite Sparkle Embellishment Mix with my Trinity Pick Up Stick.

I cut the inside panel from Neenah Classic Crest 80# Solar White, embellished it with a leftover strip of Neenah Classic Linen 80# Solar White, and layered the panel on CutCardStock Pop Tone Spearmint cardstock. I stamped the sentiment from Waffle Flower Essential Sentiments in Catherine Pooler Aquatini ink and cut it with the coordinating die.

Sharing in the following challenges:
1. Cardz 4 Galz: #193 – Red, White and Pink
2. Cupcake Inspirations: #563 – Photo Inspiration

3. Cut It Up Challenge Blog: #272 – Clean and Simple (front and inside sentiments cut with dies)
4. My Time To Craft: #502 – Theme of Rainbow(s)

Affiliate links are used in this post at no cost to you – I really appreciate your support!

CutCardStock products used:
Neenah Classic Linen 100# Solar White cardstock
Neenah Classic Linen 80# Solar White cardstock
CutCardStock Pop Tone Spearmint cardstock
Neenah Classic Crest 80# Solar White cardstock

Other products used:
Stamps: The Hungry Jpeg Roses 3 digital image, Waffle Flower Essential Sentiments stamp set
Ink: Catherine Pooler Aquatini ink
Dies/Punches: Tonic Corner Punch, Waffle Flower Essential Sentiments die set
Accessories: Tonic Studios 12″ Guillotine Paper Trimmer, Tombow Mono permanent adhesive, MISTI stamp tool, Big Shot, Darice Foamies white craft foam,  Spellbinders Glimmer Hot Foil SystemSpellbinders Glimmer Silver FoilSpellbinders Glimmer Mini Christmas Sentiment Strips Hot Foil Plate & Die Set, 1/4″ double-sided foam strip, Trinity Stamps Andradite Sparkle Embellishment Mix, Trinity Pick Up Stick

I hope you’ve enjoyed today’s project and you’re inspired to get crafty! Be sure to check out all the awesome cardstock and other goodies at CutCardStock (adhesives, labels, stickers, pens, watercolors and ribbon to name a few). And head on over to the CutCardStock Facebook Page for more inspiration! Thanks so much for stopping by today – we’ll see you next time!

Scrappy hugs,

Pizza-Themed Envelope Mini Album

Hey everybody! Well, another Hump Day is upon us and we’re getting more snow here in southwestern Colorado! We’ve had a couple feet of the sparkly stuff on the ground for weeks now and it’s so pretty! We’re hoping all this moisture will keep the fires away this summer. I’ve popped in this morning to share my debut inspiration project for Syncopation Design using the new Pizza Forever Bundle! Pizza is one of my all-time favorite foods (and has been for a lot of years) so this was right up my alley! I created an envelope mini album featuring papers and elements from the collection and love how it turned out!

I created the mini album base from six American Crafts A2 size dark kraft envelopes which I embellished with patterned papers printed on 32# HP copy paper and elements printed on CutCardStock Basis 80# White cardstock. There is a tri-fold element, a pull-up , a pull-out, and side and top pockets, with lots of room for journaling and photos. I added Eyelet Outlet green and brown pearls along with some Canvas Corp jute rope cord.

Sharing in the following challenges:
1. A Place To Start: February 2023 – Anything Goes w/ optional Pick a Palette (no twist)
2. Classic Design Challenge: February 2023 #2 – Anything Goes
3. Little Red Wagon: #693 – Die Cuts
4. Outlawz Paper a la mode Challenge: February Challenge – I Love … (PIZZA!)

Syncopation Design products used:
Pizza Forever Bundle

Affiliate links are used in this post at no cost to you – I really appreciate your support!

Other products used:
Cardstock/Paper: American Crafts Dark Kraft A2 Envelopes, 32# HP copy paper, CutCardStock Basis 80# White cardstock
Dies/Punches: My Favorite Things Stitched Square STAX, Stitched Mini Scallop Circle STAX and Wonky Stitched Rectangle STAX; Cottage Cutz Double-Stitched Rectangles and Double-Stitched Ovals
Accessories: Tonic Studios 12″ Guillotine Paper Trimmer, Tombow Mono permanent adhesive, Art Glitter Dries Clear adhesive, Canvas Corp jute rope cord, Eyelet Outlet green and brown pearls

I hope you’ve enjoyed this project and are inspired to get crafty! Be sure to check out all the fun digital papers, pocket cards, elements, cut files, bundles and scrap kits, as well as clear stamps in the Syncopation Design Etsy store! And be sure to Follow on Instagram and Facebook for crafty inspiration! Thanks so much for stopping by today – we’ll see you next time!

Scrappy hugs,

Happy Valentine’s Day mini slimline

Howdy peeps! Happy Tuesday – I hope you’re having a good week so far! I’m happy to be back to share the last ScrapbookingStore DT inspiration project I created with the awesome February 2023 Scrapbook Kit with Upgrades! Now we wait for the March kit, lol! I’ve thoroughly enjoyed playing with all the papers, stickers and upgrades in this month’s collection and created a simple mini slimline Valentine. I saved the easiest for last!

I cut a 3-1/2″ x 6″ mini slimline card base from CutCardStock Basis 110# White cardstock along with a layering panel for the focal image from CutCardStock Basis Black cardstock. Using the Kat Scrappiness Mini Slimline Quilted Backdrop Die, I die cut the front panel from a pretty red floral paper in the kit. I layered one of the larger journaling cards from the kit on the black panel and adhered the piece at an angle to the card front. The finishing touch was adding two Hobby Lobby red epoxy hearts.

I cut the inside panel from Basis White cardstock and embellished it with strips of the red floral paper from the kit and Basis Black used on the front. I added a smaller journaling card from the kit which completed the card.

Sharing in the following challenges:
1. A Place To Start: February 2023 – Anything Goes w/ optional Pick a Palette (no twist)
2. Classic Design Challenge: February 2023 #2 – Anything Goes
3. Crafty Friends Challenge: #164 – Love/Romance
4. Crafty Gals Corner: #240 – Add a Heart
5. Once Upon a Time Challenge Blog: #7 – My Heart

Affiliate links are used in this post at no cost to you – I really appreciate your support!

ScrapbookingStore products used:
February 2023 Scrapbook Kit with Upgrades

Other products used:
Cardstock/Paper: CutCardStock Basis 110# White and Basis Black cardstock
Dies/Punches: Kat Scrappiness Mini Slimline Quilted Backdrop Die
Accessories: Tonic Studios 12″ Guillotine Paper Trimmer, Art Glitter Dries Clear adhesive, Big Shot, Hobby Lobby epoxy hearts

I hope you’ve enjoyed today’s project and you’re thinking about all the fun you could have with this month’s kit… you really ought to think about joining the Subscription Club! Be sure to Follow us on Facebook, Instagram, Pinterest and YouTube for lots of crafty inspiration! And if you do decide to join the Subscription Club, join our ScrapbookingStore Club Member Group on Facebook for more inspiration and to share your projects! Thanks so much for stopping by today – we’ll see you next time!

Scrappy hugs,

You are my happy

2/26/23 Rising Star at A Place To Start!

Hey everybody! Happy Monday! Dang, the weekend was gone in a flash! I’m delighted to be back to share another ScrapbookingStore DT inspiration project with you today, created with the amazing February 2023 Scrapbook Kit with Upgrades! I so love all the hearts and romantic papers and stickers in this month’s collection, along with the ribbon and gemstones in the upgrades! I went all-out ‘heartsy’ on this Valentine and created a corner tuck fun fold! This fold was showcased in a recent Splitcoast Stampers newsletter HERE and I just had to make one!

I cut the card base and front flap from Neenah Classic Crest 80# Solar White cardstock along with layering panels and the corner pocket from coordinating patterned papers in the kit. I layered one of the small journaling cards on CutCardStock Bright Silver Foil cardstock, added a flower sticker, and adhered it to the front flap. I added a strip of ribbon and a large red gemstone from the upgrades which complete the card front.

I covered the inside with a patterned paper from the kit, and added a panel cut from Solar White cardstock and embellished with a strip of a coordinating patterned paper from the kit. The finishing touch was adding a sticker from the sticker sheet.

Sharing in the following challenges:
1. A Place To Start: February 2023 – Anything Goes w/ optional Pick a Palette (no twist)
2. Classic Design Challenge: February 2023 #2 – Anything Goes
3. Crafty Calendar Challenge: February Challenge – Add Ribbon
4. Once Upon a Time Challenge Blog: #7 – My Heart

Affiliate links are used in this post at no cost to you – I really appreciate your support!

ScrapbookingStore products used:
February 2023 Scrapbook Kit with Upgrades

Other products used:
Cardstock/Paper: Neenah Classic Crest 80# Solar White cardstock, CutCardStock Bright Silver Foil cardstock
Accessories: Tonic Studios 12″ Guillotine Paper Trimmer, Art Glitter Dries Clear adhesive, Tombow Mono permanent adhesive

I hope you’ve enjoyed today’s project and you’re thinking about all the fun you could have with this month’s kit… you really ought to think about joining the Subscription Club! Be sure to Follow us on Facebook, Instagram, Pinterest and YouTube for lots of crafty inspiration! And if you do decide to join the Subscription Club, join our ScrapbookingStore Club Member Group on Facebook for more inspiration and to share your projects! Thanks so much for stopping by today – we’ll see you next time!

Scrappy hugs,

For You gate fold

Hello friends! I hope you’re having a great weekend and you’re doing something fun! We’ve been waking up to one-digit temps and we still have a couple feet of snow on the ground, so our fun is indoors where it’s warm and cozy! I’m excited to be back with another ScrapbookingStore DT inspiration project created with the amazing February 2023 Scrapbook Kit with Upgrades! I love the pages of journaling cards in this collection (with a variety of sizes) and created another fun fold featuring a larger one with some coordinating papers.

I cut the gate fold card base from Neenah Classic Crest 80# Solar White cardstock along with layering panels from CutCardStock Amaranth cardstock and a patterned paper in the kit. I die cut the journaling card from the kit with a My Favorite Things Mini Scallop Rectangle STAX die and layered it on a rectangle panel cut from CutCardStock Basis Green cardstock and a slightly larger mini scallop rectangle die cut from the Amaranth cardstock. I added a sentiment sticker from the sticker sheet which completed the card front.

I cut the inside panel from Solar White cardstock and embellished it with strips of the patterned paper from the kit and Basis Green cardstock used on the front. I layered the panel on Basis Green and again on Amaranth cardstock, and added another sticker from the sticker sheet.

Sharing in the following challenges:
1. A Place To Start: February 2023 – Anything Goes w/ optional Pick a Palette (no twist)
2. Classic Design Challenge: February 2023 #2 – Anything Goes
3. Crafting Happiness Challenges: #139 – Love
4. QKR Stampede: #461 – Anything Goes

Affiliate links are used in this post at no cost to you – I really appreciate your support!

ScrapbookingStore products used:
February 2023 Scrapbook Kit with Upgrades

Other products used:
Cardstock/Paper: Neenah Classic Crest 80# Solar White cardstock, CutCardStock Amaranth and Basis Green cardstock
Dies/Punches: My Favorite Things Stitched Mini Scallop Rectangle STAX
Accessories: Tonic Studios 12″ Guillotine Paper Trimmer, Art Glitter Dries Clear adhesive, Tombow Mono permanent adhesive, Big Shot

I hope you’ve enjoyed today’s project and you’re thinking about all the fun you could have with this month’s kit… you really ought to think about joining the Subscription Club! Be sure to Follow us on Facebook, Instagram, Pinterest and YouTube for lots of crafty inspiration! And if you do decide to join the Subscription Club, join our ScrapbookingStore Club Member Group on Facebook for more inspiration and to share your projects! Thanks so much for stopping by today – we’ll see you next time!

Scrappy hugs,

hugs & kisses

2/28/23 Best Technique Winner at Classic Design Challenge Blog!

Hey everybody! Happy Saturday! I’m thrilled to be back with another ScrapbookingStore DT inspiration project created with the amazing February 2023 Scrapbook Kit with Upgrades! I’m loving all these double-sided papers and the best part about kits is that the stickers and upgrades coordinate so well with the papers. All the matchy-matchy work is done for you! I’ve created a triple cube Valentine with lots of romantic innuendos! I really love this fun fold!

I cut the card base from CutCardStock Basis Red cardstock along with square panels from CutCardStock Bright Silver Foil and page of small journal cards in the kit. I added stickers from the sticker sheet and clear stickers from the upgrades.

Here’s another angled shot and a look at the back with plenty of room for a custom message and signature. And it folds flat for mailing!

Sharing in the following challenges:
1. 613 Avenue Create: February 2023 Anything Goes w/ optional Use Red for Anything But a Heart (no twist)
2. Classic Design Challenge: February 2023 #2 – Anything Goes
3. Crafting Happiness Challenges: #139 – Love
4. Crafty Friends Challenge: #164 – Love/Romance
5. Crafty Gals Corner: #240 – Add a Heart
6. Once Upon a Time Challenge Blog: #7 – My Heart

Affiliate links are used in this post at no cost to you – I really appreciate your support!

ScrapbookingStore products used:
February 2023 Scrapbook Kit with Upgrades

Other products used:
Cardstock/Paper: CutCardStock Basis Red and Bright Silver Foil cardstock, Neenah Classic Crest 80# Solar White cardstock
Accessories: Tonic Studios 12″ Guillotine Paper Trimmer, Art Glitter Dries Clear adhesive

I hope you’ve enjoyed today’s project and you’re thinking about all the fun you could have with this month’s kit… you really ought to think about joining the Subscription Club! Be sure to Follow us on Facebook, Instagram, Pinterest and YouTube for lots of crafty inspiration! And if you do decide to join the Subscription Club, join our ScrapbookingStore Club Member Group on Facebook for more inspiration and to share your projects! Thanks so much for stopping by today – we’ll see you next time!

Scrappy hugs,

The World is Your Oyster

Hey everybody! Happy Saturday! I hope your weather isn’t too awfully bad where you are! I’ve been playing with Keep It Simple goodies again and have another inspirational fun fold to share with you created with an assortment of products the Clementine Bundle. Have I mentioned how truly awesome this bundle is?! I can’t get enough of it! It contains everything you could possibly need to create a huge variety of cards, ATCs, 3-D projects, or whatever your heart desires. My card today is a diagonal joy fold and it’s the first one like this I’ve ever made. I’ve made diagonal folds and joy folds over the years, but never one like this! And I love it!

I cut the A2 size diagonal card base and layering panels from CutCardStock Basis 80# Natural and Curious Metallic Gold Leaf cardstock, along with coordinating papers from both the Keep It Simple Clementine Flip Sides 12×12 Paper Pack and Clementine Collection 12×12 Paper Pack. I adhered all the layers in place and embellished the panels with Clementine Adhesive Buttons and a Puffy Sticker.

I embellished the inside panel with a sticker from the 12×12 Sticker Sheet which completed the card. Here are shots of the card opening up. So fun!

Sharing in the following challenges:
1. 613 Avenue Create: February 2023 Anything Goes w/ optional Use Red for Anything But a Heart (playing twist)
2. Classic Design Challenge: February 2023 #2 – Anything Goes
3. Penny’s Paper-Crafty Challenges: #540 – Anything Goes with Paper

Affiliate links are used in this post at no cost to you – I really appreciate your support! 

Products used:
Cardstock/Paper: CutCardStock Basis 80# Natural and Curious Metallic Gold Leaf cardstock
Accessories: Tonic Studios 12″ Guillotine Paper Trimmer, Bearly Art precision craft glue; Keep It Simple Clementine Bundle: Flip Sides 12×12 Paper Pack, Clementine Collection 12×12 Paper Pack, Adhesive Buttons, Puffy Stickers, and 12×12 Sticker Sheet

I hope you’ve enjoyed seeing this project and you’re inspired to get crafty! Thanks so much for stopping by today – we’ll see you next time! ;)

Scrappy hugs,

you are the sweetest.

Hi everyone! Well, another week has passed us by and we’re on the down-slide to the end of February already! I’m delighted to be back to share another ScrapbookingStore DT inspiration project with you today, created with the February 2023 Scrapbook Kit with Upgrades! February is the month of love so I made another one of my favorite cards – a chocolate bar card! Who doesn’t love chocolate?! This card was featured in a Splitcoast Stampers newsletter a while back HERE so I made one for my daughter-in-law’s birthday and thought it only fitting to make another one for Valentine’s Day!

I cut a 3-1/2″ x 6″ mini slimline card base from CutCardStock Vanilla Bean Brown cardstock along with layering panels from coordinating patterned papers in the kit and some torn CutCardStock Bright Gold Foil cardstock. I added a sentiment from the sticker sheet and a large red heart gemstone from the upgrades with some looped Coats & Clark Metallic Gold sewing thread behind it, which completed the card front.

I cut the inside panel from Neenah Classic Crest 80# Solar White cardstock and embellished it with strips of the floral patterned paper used on the front and CutCardStock Basis Red. The finishing touch was adding a sentiment from the sticker sheet.

Sharing in the following challenges:
1. 613 Avenue Create: February 2023 Anything Goes w/ optional Use Red for Anything But a Heart (no twist)
2. Classic Design Challenge: February 2023 #2 – Anything Goes
3. Crafting Happiness Challenges: #139 – Love
4. Crafty Friends Challenge: #164 – Love/Romance
5. Crafty Gals Corner: #240 – Add a Heart
6. Once Upon a Time Challenge Blog: #7 – My Heart
7. Penny’s Paper-Crafty Challenges: #540 – Anything Goes with Paper
8. QKR Stampede: #461 – Anything Goes

Affiliate links are used in this post at no cost to you – I really appreciate your support!

ScrapbookingStore products used:
February 2023 Scrapbook Kit with Upgrades

Other products used:
Cardstock/Paper: CutCardStock Vanilla Bean Brown, Bright Gold Foil, and Basis Red cardstock, Neenah Classic Crest 80# Solar White cardstock
Dies/Punches: EK Success 1″ and 3/4″ square punches
Accessories: Tonic Studios 12″ Guillotine Paper Trimmer, Tombow Mono permanent adhesive, Art Glitter Dries Clear adhesive, Scrapbook Adhesives 3D Foam Squares Variety Pack (large black), Coats & Clark Metallic Gold sewing thread

I hope you’ve enjoyed today’s project and you’re thinking about all the fun you could have with this month’s kit… you really ought to think about joining the Subscription Club! Be sure to Follow us on Facebook, Instagram, Pinterest and YouTube for lots of crafty inspiration! And if you do decide to join the Subscription Club, join our ScrapbookingStore Club Member Group on Facebook for more inspiration and to share your projects! Thanks so much for stopping by today – we’ll see you next time!

Scrappy hugs,

Tis the Season to be Naughty

Hey everybody! Happy Friday – I hope you had a good week! I have another super fun Kat Scrappiness Creative Influencer inspiration project to share with you today. I used the new Buffalo Plaid Backdrop Die along with the Naughty Christmas stamps and Naughty word die, and the Christmas Gnome Stamp Set and coordinating dies, all available in the Kat Scrappiness store. This guy looks like he’s behaving himself but I bet he’s not, lol! I love the sentiment and yep, I giggled quite a few times while putting this card together!

I cut a standard A2 size top-folding card base from CutCardStock Curious Metallic Night cardstock and die cut the background from CutCardStock Pop Tone Jellybean Green cardstock using the Buffalo Plaid Backdrop Die. I stamped the sentiment from the Naughty Christmas stamp set and the gnome from the Christmas Gnome stamp set in Memento Tuxedo Black ink on Neenah Classic Solar White cardstock. I colored the gnome with alcohol markers, adding some shimmer to the package with a Sakura Stardust Gelly Roll pen. I colored his buckle with a Pentel Slicci gold pen and then cut him with the coordinating Christmas Gnome die. Using the Naughty word die, I die cut the other part of the sentiment from CutCardStock Basis Red. I cut two more sentiments from Curious Metallic Night cardstock and layered them together for some dimension.

I cut the inside panel from Neenah Classic Crest Solar White cardstock and embellished it with strips cut from CutCardStock Pop Tone Jellybean Green and the Curious Metallic Night cardstock used on the front. I stamped the sentiment (also from the Naughty Christmas stamp set) in Memento Tuxedo Black ink and layered the panel directly on the card base.

Sharing in the following challenges:
1. 613 Avenue Create: February 2023 Anything Goes w/ optional Use Red for Anything But a Heart (no twist)
2. ABC Christmas Challenge: C is for Checks and D is for Die Cuts
3. Classic Design Challenge: February 2023 #2 – Anything Goes
4. Penny’s Paper-Crafty Challenges: #540 – Anything Goes with Paper
5. QKR Stampede: #461 – Anything Goes
6. Worldwide Crafters and Colorists Challenge: #2 – Anything Goes

Affiliate links are used in this post at no cost to you – I really appreciate your support!

Kat Scrappiness products used:
Buffalo Plaid Backdrop Die
Naughty Christmas Stamp Set
Naughty Word Die
Christmas Gnome Stamp Set
Christmas Gnome Coordinating Dies
Silver Pearl Mix
Cosmic Shimmer Fluffy Stuff

Other products used:
Cardstock/Paper: CutCardStock Curious Metallic Night, Pop Tone Jellybean Green and Basis Red cardstock
Ink: Memento Tuxedo Black ink; Arteza alcohol markers- BR28/62, R18/43, B29/32, NG02/08, YG16; Sakura Stardust Gelly Roll pen, Pentel Slicci gold pen
Accessories: Tonic Studios 12″ Guillotine Paper Trimmer, Art Glitter Dries Clear adhesive, MISTI stamping tool, Big Shot, Milwaukee Heat Tool

I hope you’ve enjoyed this project and I’ve inspired you to get crafty! Be sure to check out all the amazing stuff in the Kat Scrappiness store… there’s some of just about everything you’ll need to get your craft on, I promise! Be sure to Follow us on Facebook, Instagram, Pinterest and YouTube for tons of crafty inspiration! And we’d love it if you’d join the Kat Scrappiness Insiders and Stamping Enablers Facebook Groups for lots of fun crafty ideas and to share your creativity! Thanks so much for stopping by today – we’ll see you next time!

Scrappy hugs,