Hey everybody! With all the challenge blogs closing down lately, I’m happy to share that there’s a new one coming to town on January 1st!
Birthstone Challenges is a color challenge blog welcoming all types of handmade projects such as cards, scrapbook layouts, ATCs, mixed media, altered items, 3-D projects, etc. using the featured birthstone colors. Our first challenge January 1st thru February 15th will be Anything Goes with Garnet & Amethyst Colors!
There’s a DT Call also! ;) More info available HERE.
Be sure to stop by and Follow us and sign up to get new posts by email!
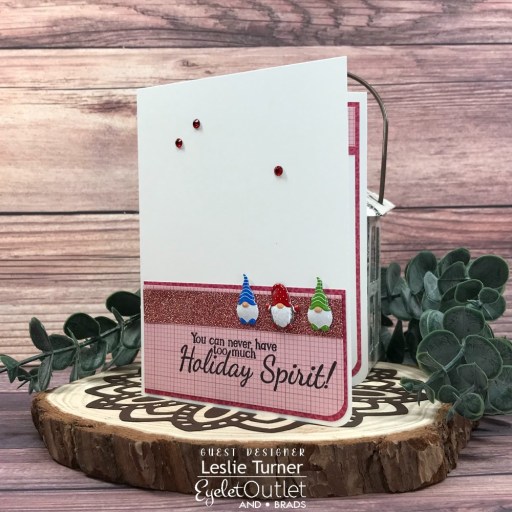
Howdy peeps! I hope you’re having a great weekend and the weather is cooling off some where you live! I’m delighted to be back on the Eyelet Outlet blog today as a guest designer with a fun inspiration project using more of the new brads in the store! I just LOVE the new Gnome 2 Brads, so I created a super cute clean and simple Christmas card to show them off, and added a little extra pizzazz with the Glitter Red Washi Tape and gemstones from the 4mm Red Jewel Bling Strip!
I cut a standard A2 size top-folding card base from 110# Solar White cardstock along with short layering panels cut from two prints in the Doodlebug Design Floral-Graph Rainbow Petite Prints 6×6 cardstock pad, and rounded the bottom right corner of each. I applied a strip of the Glitter Red Washi Tape, stamped the sentiment from the Stampingbella Festive Gnome Sentiments stamp set, and added three Gnome 2 Brads. The finishing touch was adding several gemstones from a 4mm Red Jewel Bling Strip.
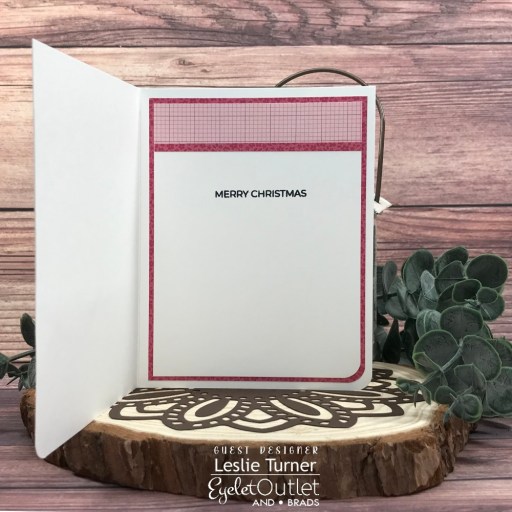
I cut the inside panel from 80# Solar White cardstock, embellished it with the two Doodlebug Design prints used on the front, and stamped the sentiment from the Trinity Stamps A Sentiment For (Almost) Everything.
I hope you’ve enjoyed today’s project! Be sure to check out all the fun goodies at Eyelet Outlet! Their products are so much fun! Be sure to ‘like’ and ‘follow’ Eyelet Outlet Facebook Page to keep up with news and sales, and while you’re at it, join the Eyelet Outlet Fans Facebook group for lots of creative inspiration! Thanks so much for stopping by today – we’ll see you next time! ;)
Hey everybody! Happy Friday – I hope you’re having an awesome week! I’ve popped in this morning to share another Kat Scrappiness Creative Influencer inspiration project with you! I know I’ve shared many times that I absolutely love shakers – so instead of a ‘message in a bottle’, we have a ‘scene in a bottle’ which is one of the many relatively new products in the store. In addition to this Christmas Scene in a Bottle Shaker Card Kit, I used the Christmas Gnomes Stamp Set, Friendship Greetings Stamp Set, 3mm Sparkling Clear Droplets and 4mm Sparkling Clear Droplets to create this Christmas card with an inked background! So fun!
I cut a 3-1/2″ x 6″ mini slimline card base from Neenah Classic Crest 110# Solar White cardstock. Next, I DTP-inked a panel of Strathmore Bristol 100# Smooth with Ranger stormy sky, faded jeans, prize ribbon and villainous potion distress inks. When it was completely dry, I flicked water on it and blotted it with paper towel, and adhered it to the card base.
I colored the cork on the end with a brown Tombow marker and added some CutCardStock Brown Bag Kraft paper to resemble cork. Next, I used brown, red, gold and green Tombow markers to color the scene in the bottle, and applied Nuvo White Blizzard Glitter Drops to the trees and ground for the snow.
I assembled the shaker, laid down 3mm Sparkling Clear Droplets and 4mm Sparkling Clear Droplets onto the background, and adhered the shaker over top of them. I adhered a few more clear droplets on the background and added a stamped and trimmed sentiment from the Christmas Gnomes stamp set, which completed the card front.
I cut the inside panel from #80 Solar White cardstock, stamped a sentiment from the Friendship Greetings stamp set, and layered the panel on CutCardStock Basis Medium Blue cardstock.
I hope you’ve enjoyed this project and I’ve inspired you to get crafty! Be sure to check out all the amazing stuff in the Kat Scrappiness store… there’s some of just about everything you’ll need to get your craft on, I promise! Be sure to Follow us on Facebook, Instagram, Pinterest and YouTube for tons of crafty inspiration! And we’d love it if you’d join the Kat Scrappiness Insiders and Stamping Enablers Facebook Groups for lots of fun crafty ideas and to share your creativity! Thanks so much for stopping by today – we’ll see you next time!
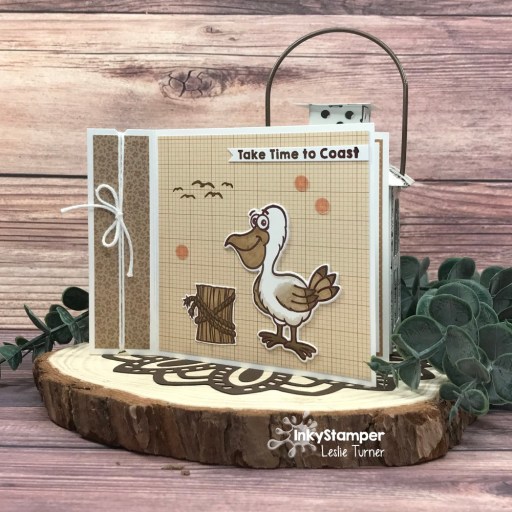
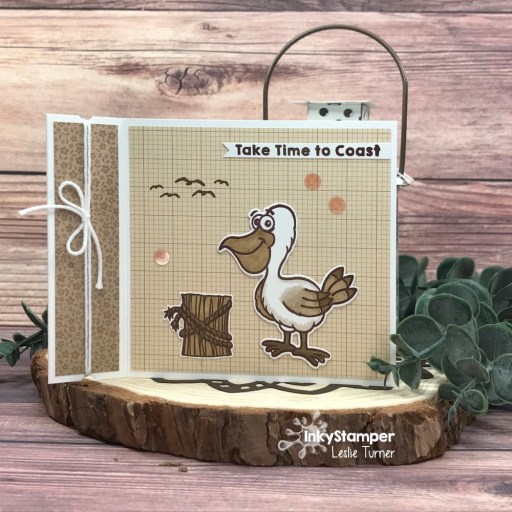
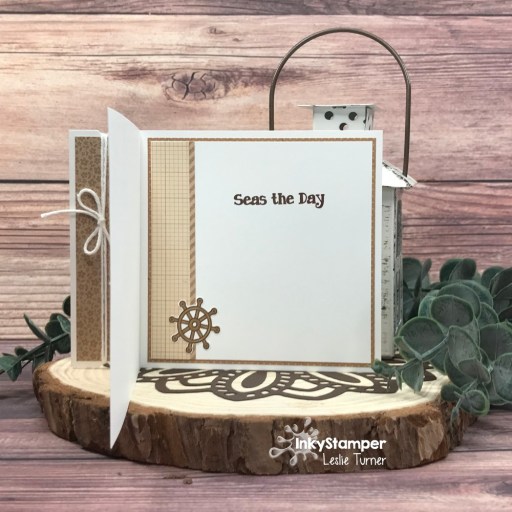
Howdy peeps! Dang, the time just seems to be going by at wicked fast speeds… we’re on the downslide to the end of October already! I’m stoked to be back with another guest design project for InkyStamper using the Pelican stamps and die! This inspirational side fold card (one of my favorites that is super easy) created with the pelican seemed like the perfect kind of card to create in varying tones of brown, and I love how it turned out!
I cut a side fold card base from 110# Solar White cardstock along with layering panels from Doodlebug Design Floral-Graph and Dot-Stripe Rainbow Petite Prints. I cut notches into the side panel and tied some Doodlebug Design Lily White Doodle Twine around it into a bow. I stamped the Pelican in Memento Rich Cocoa ink on 110# Solar White cardstock, colored it with alcohol markers, and cut it with the coordinating die. I also stamped the stump with rope in Rich Cocoa ink on Solar White cardstock, colored it with alcohol markers, and fussy cut it. I adhered the pelican and stump to the card front and then stamped the birds.
I stamped the sentiment on a scrap piece of Solar White cardstock, trimmed it, and adhered it toward the top of the card front. The finishing touch was adding several neutral colored sequins that I picked out of the Picket Fence Studios Spiked Cider Sequins.
I cut the inside panel from 80# Solar White cardstock, embellished it with the Doodlebug Design Floral-Graph print used on the front, and stamped the sentiment in Rich Cocoa ink.
I hope you’ve enjoyed seeing this guest design project for InkyStamper! Check out ALL the fun goodies in the InkyStamper store – not just stamps and dies but lots of other crafty products, too! Follow on Facebook, Instagram and YouTube for lots of crafty inspiration! Thanks so much for stopping by today – we’ll see you next time! ;)
10/24/22 Top Pick at Make My Monday Challenge Blog
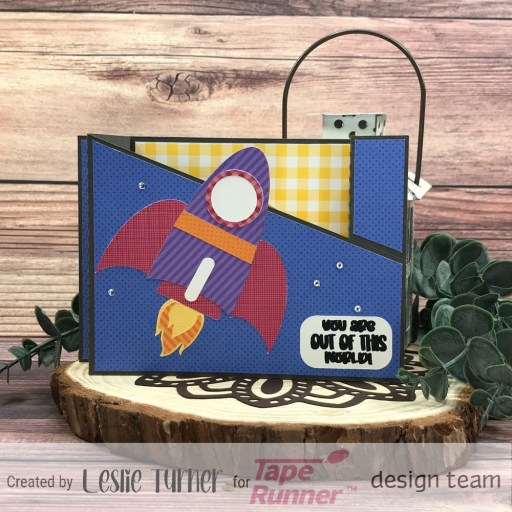
Hey everybody! Happy Hump Day! Brrr, it’s a bit chilly here this morning but that’s how we like it! I’ve popped in this morning to share an awesome Tape Runner DT inspiration project! I created the most adorable rocket wiper card for our youngest grandboy who turned two a few weeks ago, and his mom said he loved it! This is my first wiper card and I used an SVG file from My Scrap Chick. And all panels were adhered with Tape Runner!
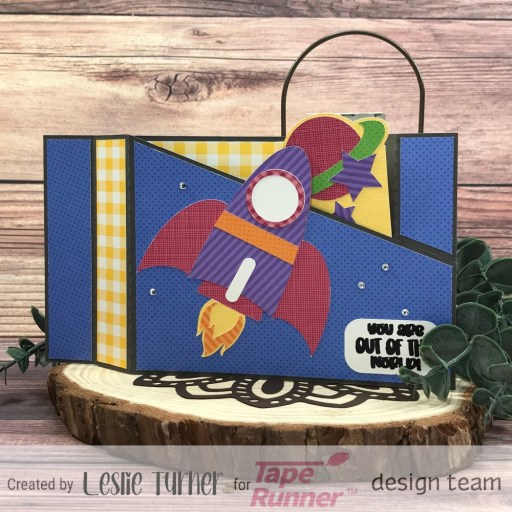
I cut all the pieces from CutCardStock Basis Gray cardstock, Neenah Classic Crest 80# Solar White cardstock, and Doodlebug Design Dot-Stripe, Buffalo Check-Wood Grain and Gingham-Linen Rainbow Petite Prints. These prints from Doodlebug Design are some of my all-time favorites, and I wanted bright patterns for this card, so they definitely fit the bill! I used the Print and Cut function on my Scan N Cut for the sentiment, and I added several clear gemstones from an Eyelet Outlet 3mm clear Jewel Bling Strip. Here’s a shot of the wiper which appears when the sides are pulled out. So cute!
I used a sentiment from the Keep It Simple Birthday Sentiment Stamp Set, stamped in Memento Tuxedo Black ink.
Affiliate links are used in this post at no cost to you – I really appreciate your support!
Other products used: Cardstock/Paper: CutCardStock Basis Gray cardstock, Neenah Classic Crest 80# Solar White cardstock, Doodlebug Design Dot-Stripe, Buffalo Check-Wood Grain and Gingham-Linen Rainbow Petite Prints Stamps: Keep It Simple Birthday Sentiment Stamp Set Ink: Memento Tuxedo Black ink Dies/Punches/Cut File: My Scrap Chick Rocket Wiper Card cut file Accessories: Brother Scan N Cut, Tonic Studios 12″ Guillotine Paper Trimmer, Bearly Art precision craft glue, MISTI stamping tool, Eyelet Outlet 3mm Clear Jewel Bling Strip
I hope you’ve enjoyed today’s project and you’re inspired to get your craft on! Be sure to check out the ah-mazing Tape Runner, Retractable Tape Runner and Highlight Tape Runner at TapeRunner.com! Be sure to Follow us on Facebook and Instagram! Thanks so much for stopping by today – we’ll see you next time!
Hey everybody! I hope you’re having a terrific Tuesday! I’ve popped in this morning with another awesome CutCardStock DT inspiration project to share! This pretty thank you card features a tone-on-tone background with peonies die cut from our Basis cardstock in rich colors of red, gold, teal and dark purple! The Basis line is one of my favorites!
I cut a standard A2 size top-folding card base from Basis Natural 110# cardstock. Next, I die cut the background from Neenah Classic Crest Baronial Ivory cardstock using the Dare 2B Artzy Leaf Background die. Using the Simon Says Stamp Etched Peony Blossom die, I die cut peonies from Basis Red, Basis Gold, Basis Teal and Basis Dark Purple, adhered them to the card front (trimming the edges as needed) and then adhered the panel to the card base. I stamped the sentiment from the Kat Scrappiness Friendship Greetings stamp set in Memento Elderberry ink, fussy cut the outline, and adhered it to the card front. The finishing touch was adding several gemstones (colored with an ivory alcohol marker) from an Eyelet Outlet 3mm clear Jewel Bling Strip.
I cut the inside panel from Baronial ivory and embellished it with strips cut from Basis Dark Purple and Basis Teal along with a leftover piece of a die cut peony used on the front. I stamped a sentiment from the same Kat Scrappiness Friendship Greetings stamp set in Memento Elderberry ink and layered the panel on teal cardstock.
I hope you’ve enjoyed today’s project and you’re inspired to get crafty! Be sure to check out all the awesome cardstock and other goodies at CutCardStock (adhesives, labels, stickers, pens, watercolors and ribbon to name a few). And head on over to the CutCardStock Facebook Page for more inspiration! Thanks so much for stopping by today – we’ll see you next time!
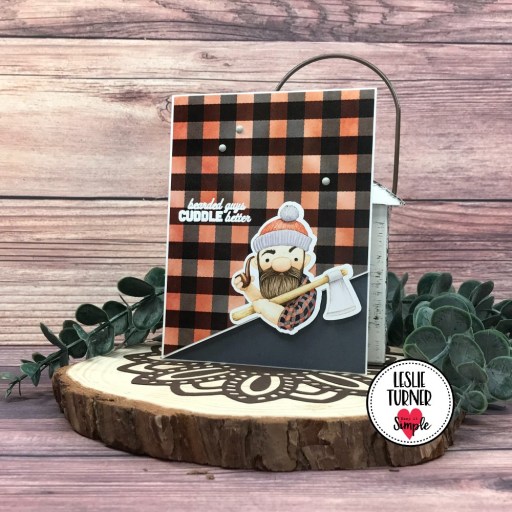
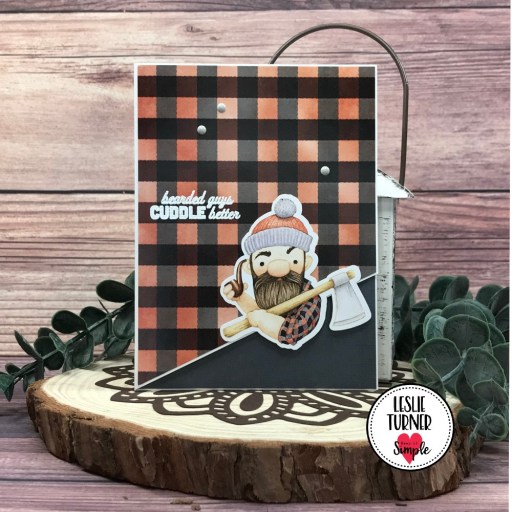
I cut a standard A2 size side-folding card base from Neenah Classic Crest 110# Solar White cardstock and cut the front flap off at an angle. I cut a layering panel from a buffalo check print in the Lumberjack Collection Pack 12×12 Cardstock, and adhered a large lumberjack die cut from the Die Cut Pieces. I stamped a sentiment from the Lumberjack Stamps in Versamark and embossed it in Hero Arts White Embossing Powder. The finishing touch was adding several Eyelet Outlet Gray Enamel Dots.
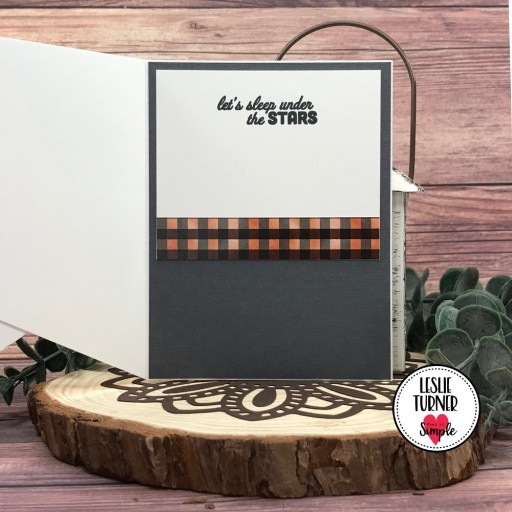
I cut a short inside panel from 80# Solar White cardstock along with a full size layering panel from CutCardStock Shadow Gray cardstock. I stamped a sentiment from the Lumberjack Camping Stamps in Memento Tuxedo Black ink and layered the panel on the gray cardstock along with a buffalo check strip from the Lumberjack Collection Pack 6×6 Cardstock.
I hope you’ve loved seeing this project as much as I loved creating it, and you’re inspired to get crafty! Be sure to check out ALL the fun goodies in the Keep It Simple store such as paper, stamps, die cuts, ephemera, washi tape and enamel dots to name just a few! You’ll go cray-cray! Be sure to Follow us on Facebook, Instagram, and Pinterest for lots of crafty inspiration! Thanks so much for stopping by today – we’ll see you next time!
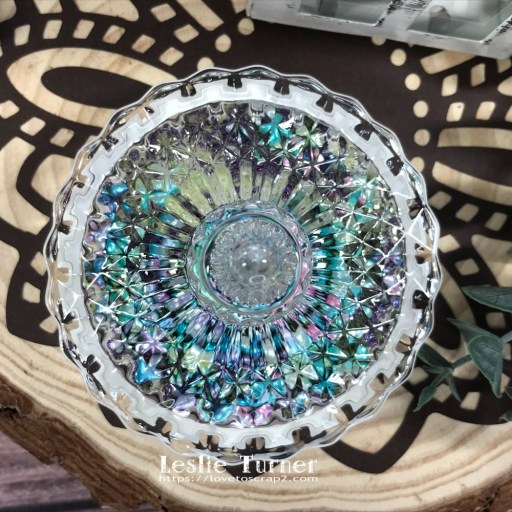
Hey everybody! I hope you’re having a FABulous weekend! How’s the weather where you are? It’s gorgeous out here in southwestern Colorado – fairly chilly mornings and cool days with lots of sun! I have a super awesome project to share with you today. When stamp pressure tools swept the craft world earlier this year, I thought they were one of the silliest things ever thought of because a brayer works just as well. But… when I saw one used in a YouTube video that was hollow and filled with colorful beads and sequins, the lightbulb came on and I decided to make one for myself to see what the hype was all about.
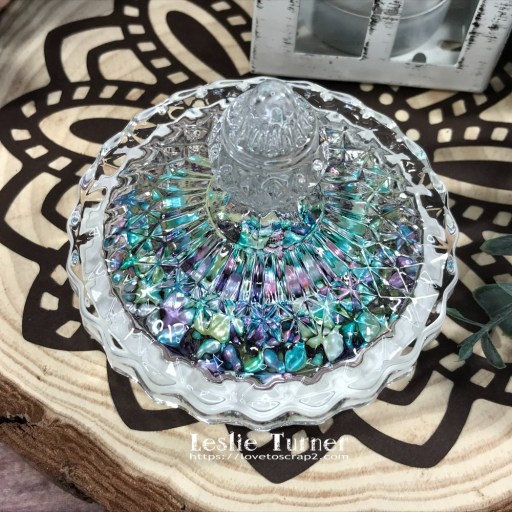
I used the lid from a crystal candy jar that has a handle and is hollow. I turned it upside down with the handle inside the jar and filled it with Renea Bouquets Mermaid Tails, Citrus Breeze and Dark Purple Glass Micro Beads Beautiful Beads, and Fine Diamond and Lime Green German Glitter Glass. I had these in my stash so I didn’t have to buy anything extra. Score! ;)
Using a Spellbinders Standard Circles die, I die cut six circles from Neenah Classic Crest Double Thick 165# Solar White cardstock and adhered them together in a stack with Bearly Arts precision craft glue. Using the same die, I cut a circle from a piece of Taylored Expressions craft leather and adhered it to the bottom of the stack, felt side down, with Ranger Distress Collage Medium. I put a weight on top of the stack for several hours, and then adhered the stack to the upside down lid filled with the Renea Bouquets goodies. I put a weight on top of this for 24 hours to be sure everything adhered well. I ran one last line of Ranger Distress Collage Medium around the lid at the seam where the stack of die cut circles was adhered to the glass and left it for another 24 hours.
It was super easy and turned out beautiful, and it works like a charm! And it was relatively inexpensive since I already had all the supplies!
Affiliate links are used in this post at no cost to you – I really appreciate your support!
I hope you’ve enjoyed seeing this DIY project! If you decide to make one, I’d love to see pics! Thanks so much for stopping by today – we’ll see you next time! ;)
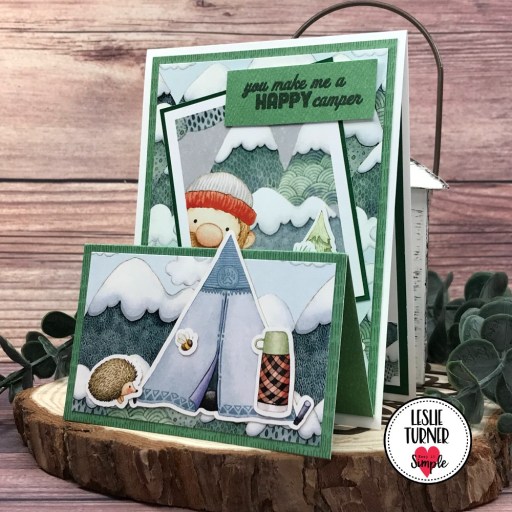
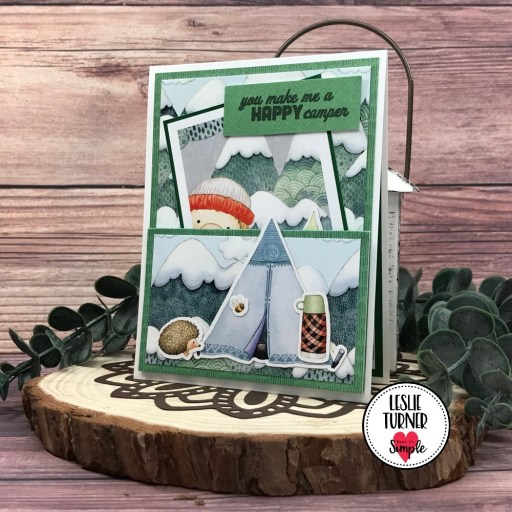
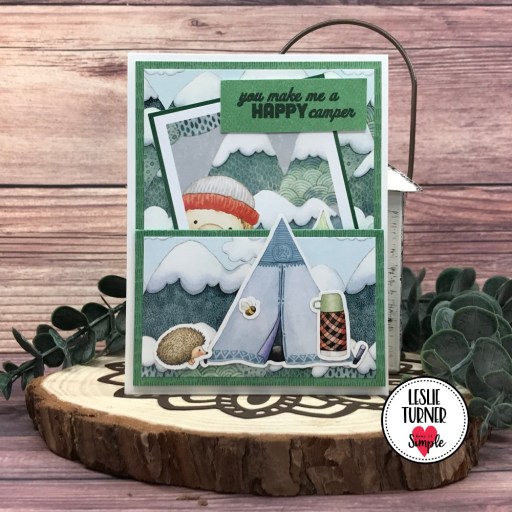
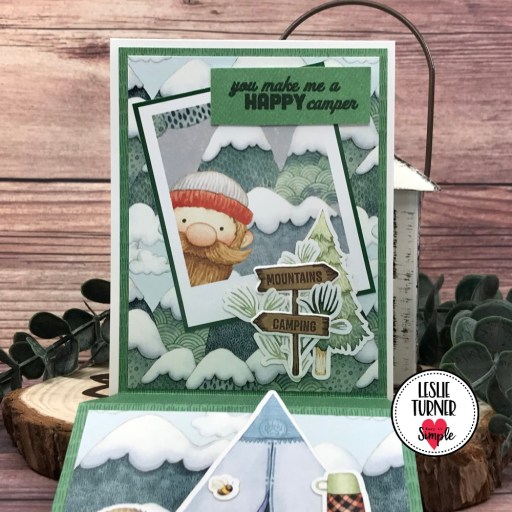
I cut a standard A2 size top-folding card base from Neenah Classic Crest 110# Solar White cardstock, and created the double easel fold element from a green pattern in the Back To Basics Jade Collection Pack 12×12 Cardstock. I cut layering panels from a print in the Lumberjack Collection Pack 12×12 Cardstock.
I added items from the Lumberjack Cards & Ephemera Die Cut Pieces and Lumberjack Die Cut Pieces to both background sections. I stamped, colored and die cut the wooden sign using the Lumberjack Camping Stamp & Die Bundle, and the sentiment is from the same stamp set. The photo-bombing lumberjack just cracks me up, by the way! Bahahaha!
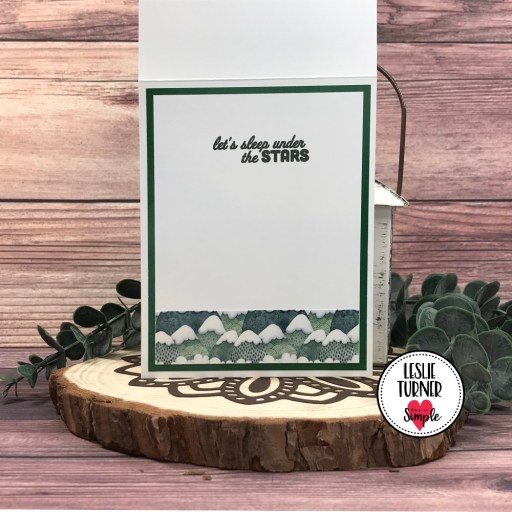
I cut the inside panel from 80# Solar White cardstock and embellished it with a print from the Lumberjack Collection Pack 6×6 Cardstock. I stamped the sentiment in Memento Northern Pine ink and layered the panel on a dark green print from the Back To Basics Jade Collection Pack 6×6 Cardstock.
I hope you’ve loved seeing this project as much as I loved creating it, and you’re inspired to get crafty! Be sure to check out ALL the fun goodies in the Keep It Simple store such as paper, stamps, die cuts, ephemera, washi tape and enamel dots to name just a few! You’ll go cray-cray! Be sure to Follow us on Facebook, Instagram, and Pinterest for lots of crafty inspiration! Thanks so much for stopping by today – we’ll see you next time!
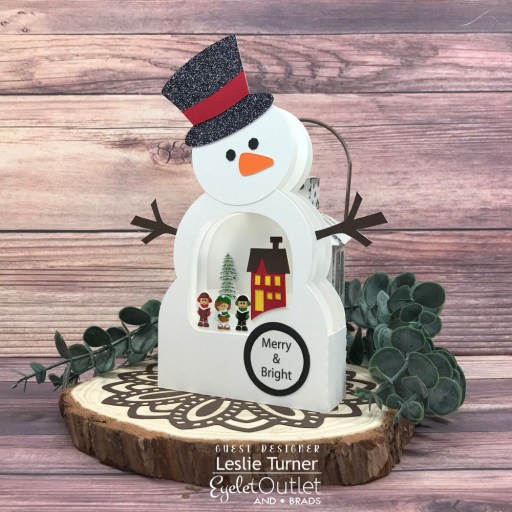
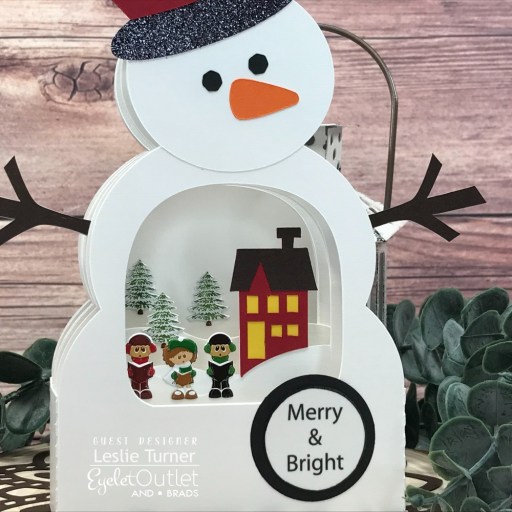
Hi everybody! It’s officially the middle of October and I hope you’re having a great weekend! I’m thrilled to be back on the Eyelet Outlet blog today as a guest designer with a fun inspiration project using some of the new brads in the store! This snowman box card features the new Caroler Brads and Snow Tree Brads along with the Christmas Holly Washi Tape (for the sentiment) that’s already in the store.
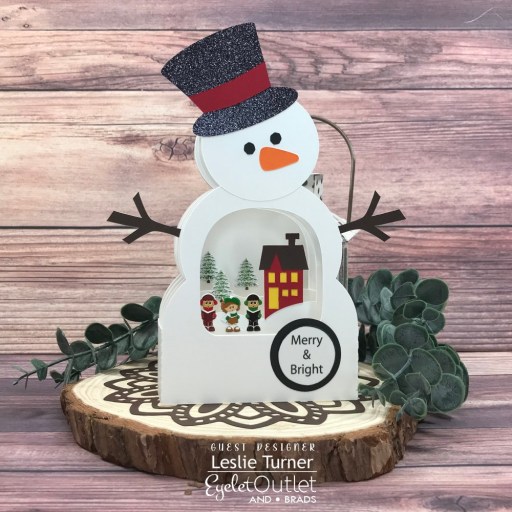
I assembled the box card and added three Caroler Brads and three Snow Tree Brads. I applied a strip of the Christmas Holly Washi Tape to a scrap piece of Solar White cardstock, punched the ‘Merry & Bright’ to use as the sentiment, and layered it on a slightly larger circle punched from Pop Tone Black Licorice cardstock.
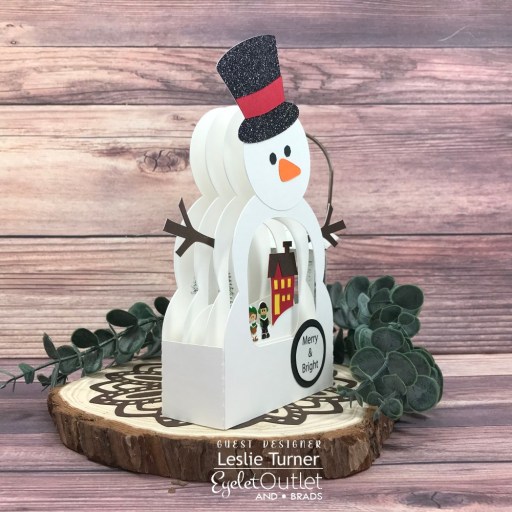
Here’s one more angled shot so you can see the construction. And the best part is that it folds flat for mailing! ;)
I hope you’ve enjoyed today’s project! Be sure to check out all the fun goodies at Eyelet Outlet! Their products are so much fun! Be sure to ‘like’ and ‘follow’ Eyelet Outlet Facebook Page to keep up with news and sales, and while you’re at it, join the Eyelet Outlet Fans Facebook group for lots of creative inspiration! Thanks so much for stopping by today – we’ll see you next time! ;)