to the Best Teacher

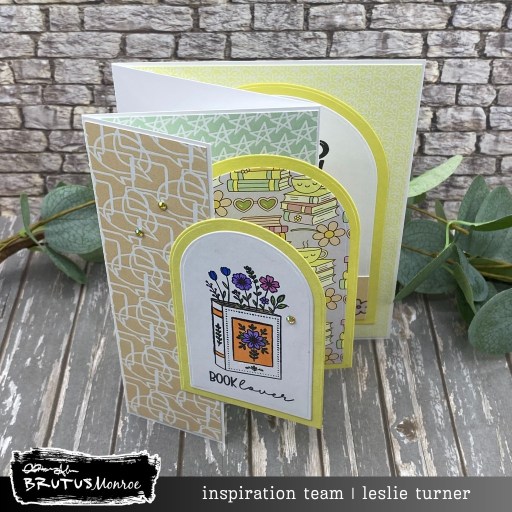
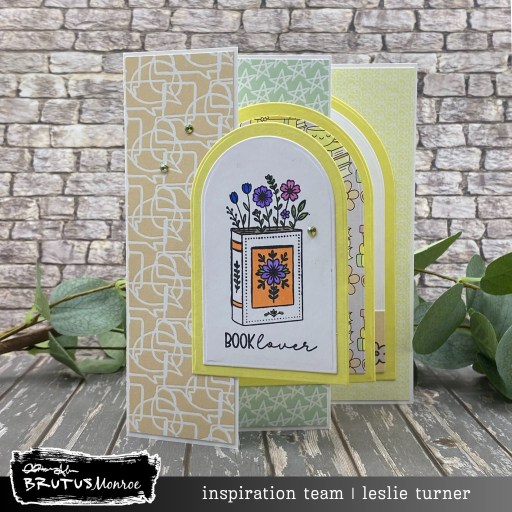
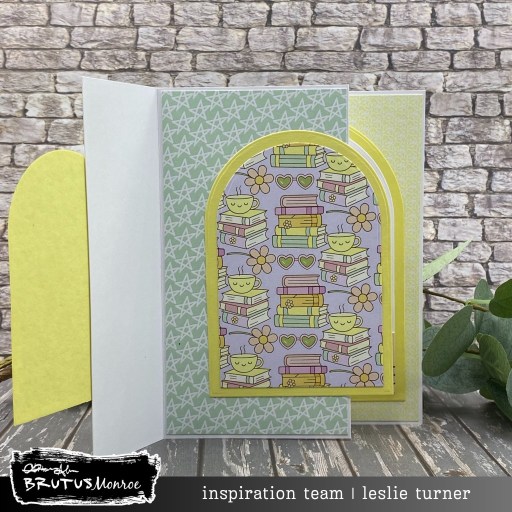
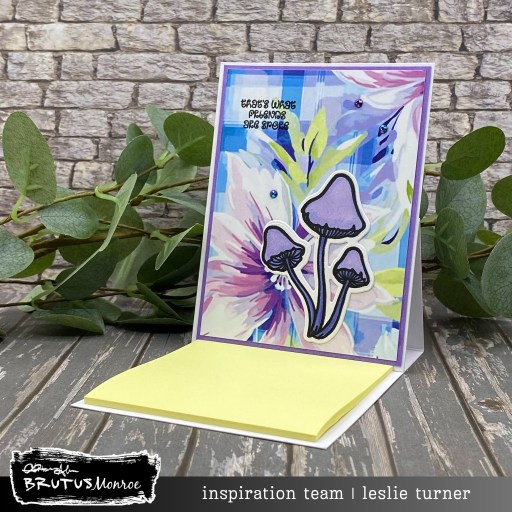
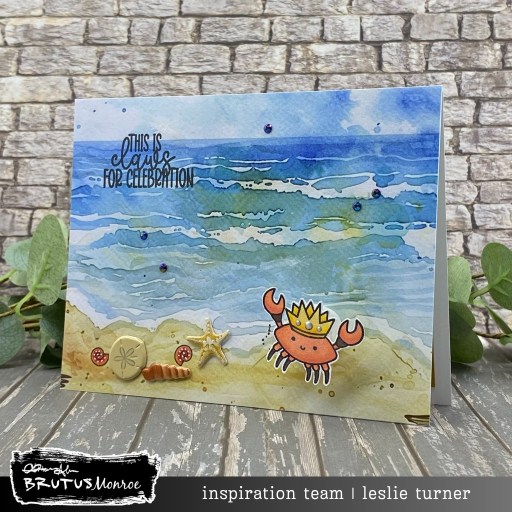
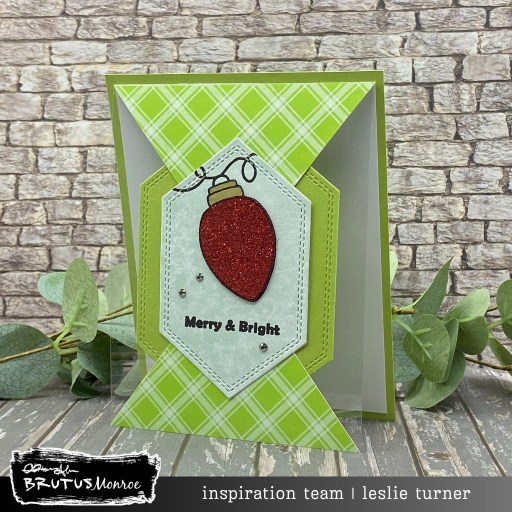
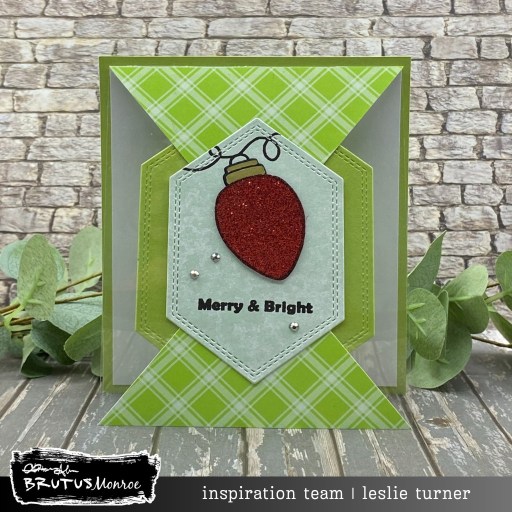
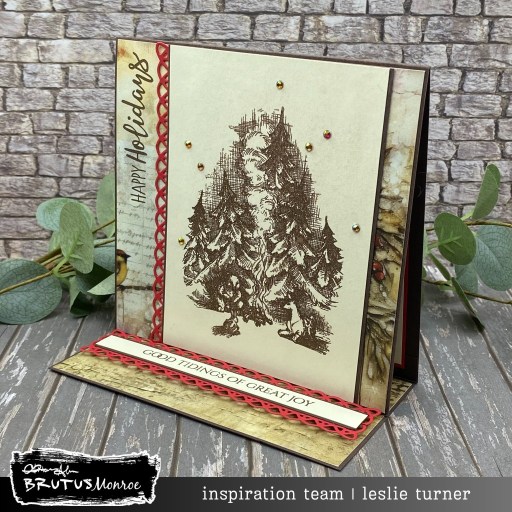
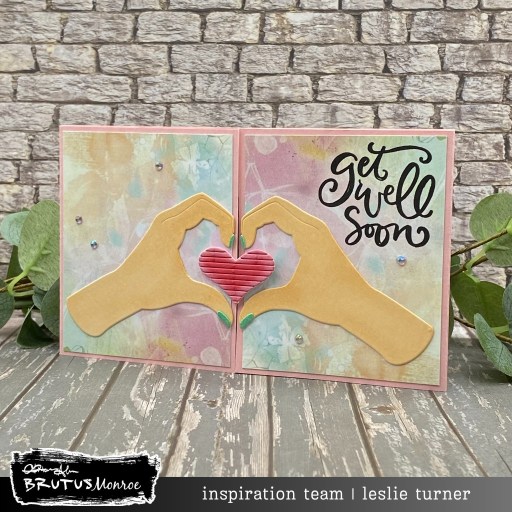
Howdy peeps, Happy Friday! I hope you’ve had a good week. I’m delighted to share my final Brutus Monroe DT inspiration project with you today featuring the Teacher’s Apple stamp set and coordinating prints from the Book Club paper pack. I also used Heather cardstock, the Super Sentimental stamp set (for the inside sentiment), and some Topaz crystals. This is the first explosion card I’ve made in years and I had forgotten how fun they are! It’s such an easy element to add to any card – and it packs a serious punch!

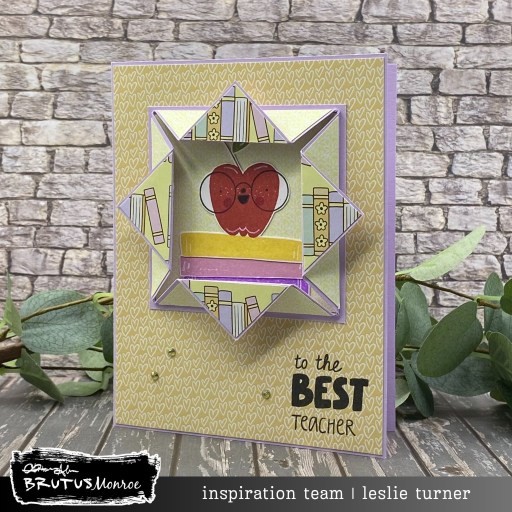
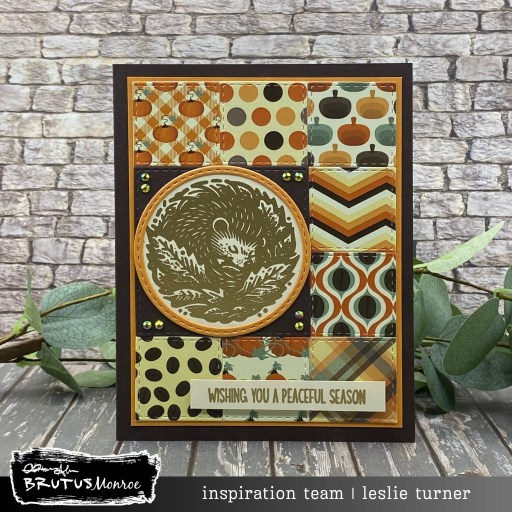
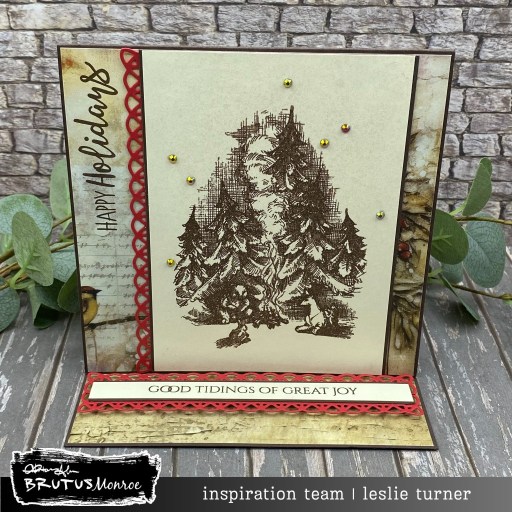
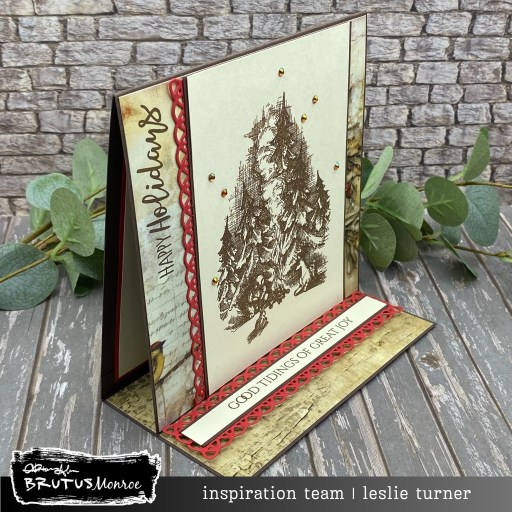
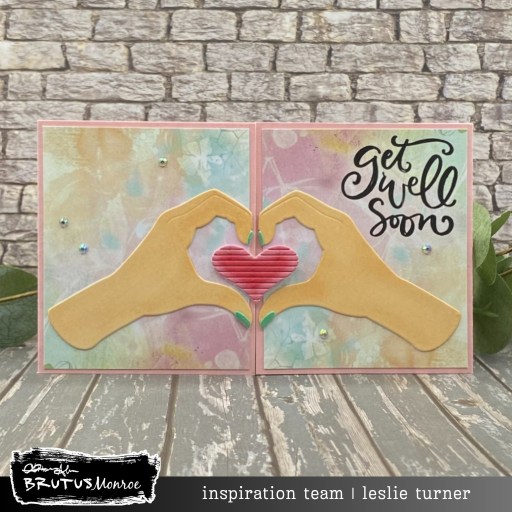
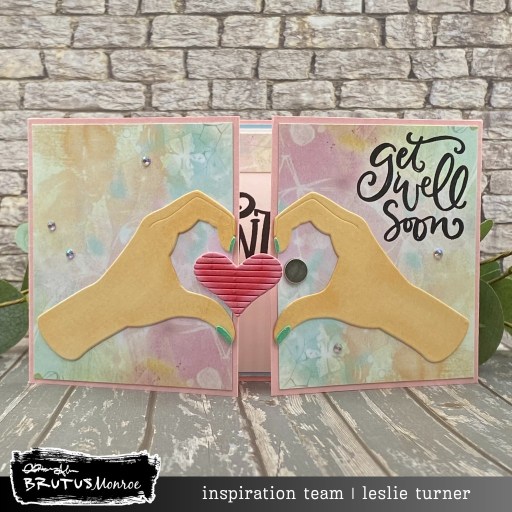
I cut a standard A2 size side-folding card base from Heather cardstock along with a layering panel from the Book Club 6×6 Paper Collection. For the explosion element, cut a 4″ x 4″ square and make a light pencil mark at 1-1/4″, 2″, and 2-3/4″ on all four sides. Make two diagonal score lines across each corner between the two outermost pencil marks. Fold mountain then valley on each score line and erase the pencil marks. If you use a lighter weight double-sided patterned paper, you’ll get different prints on each side. I used the Heather cardstock for this one, which is thicker, so I improvised and added panels of patterned paper from the Book Club paper pack.

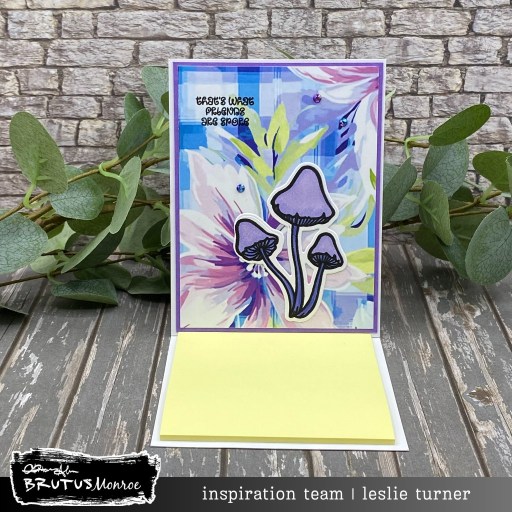
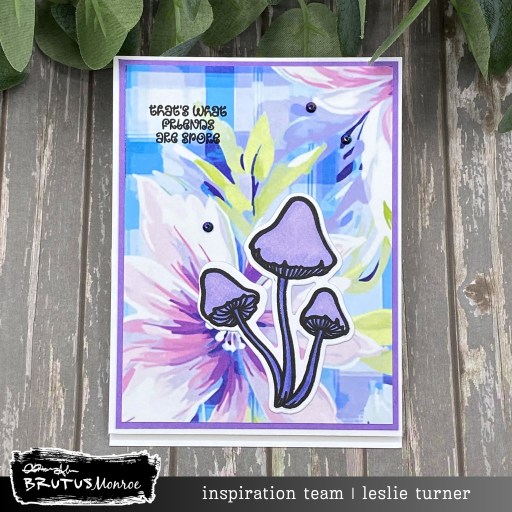
I stamped a sentiment from the Teacher’s Apple stamp set in Raven ink in the lower right corner of the card front. I then stamped the focal image (from the same stamp set) on 80# Solar White cardstock in assorted inks, fussy cut it, and adhered it in the center of the explosion element which I adhered to a 3″ x 3″ panel of Heather cardstock. I added some rosy cheeks to the apple’s face with a Pink Flamingo marker and colored the mouth with a Tuxedo Black marker, and then added some small details with a Sakura White Gelly Roll pen. The finishing touch on the front was adding a few Topaz Flat Back Crystals.

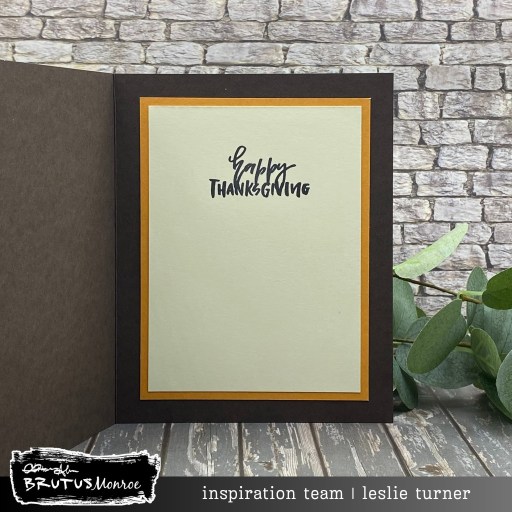
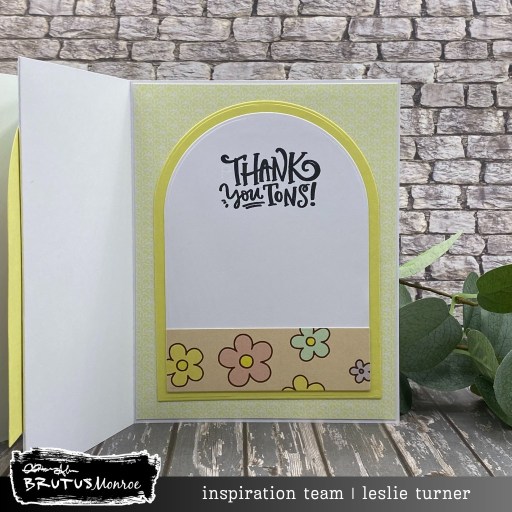
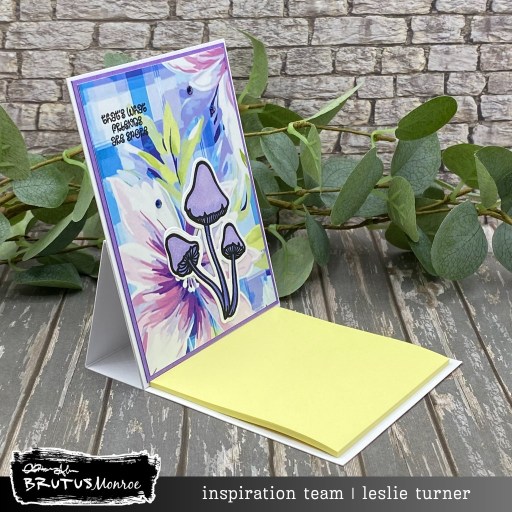
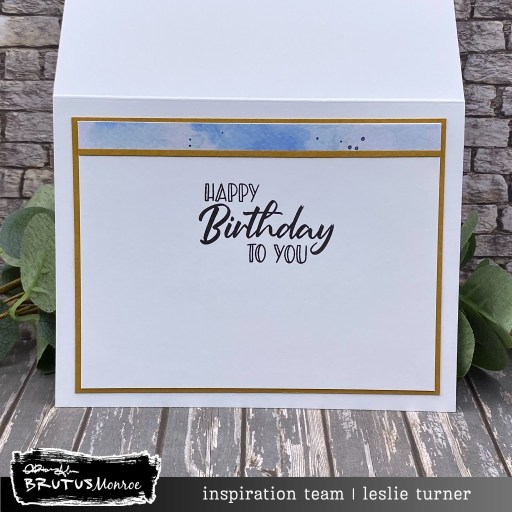
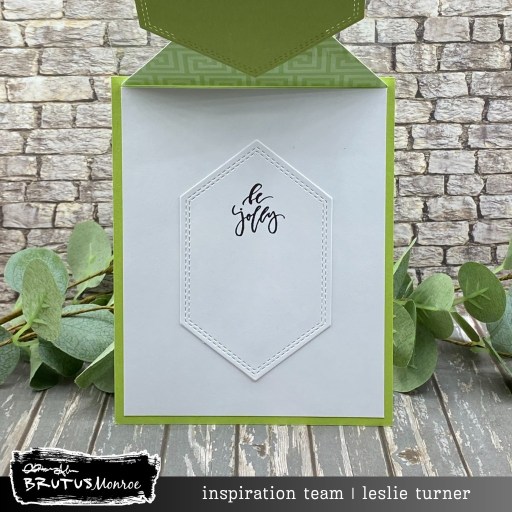
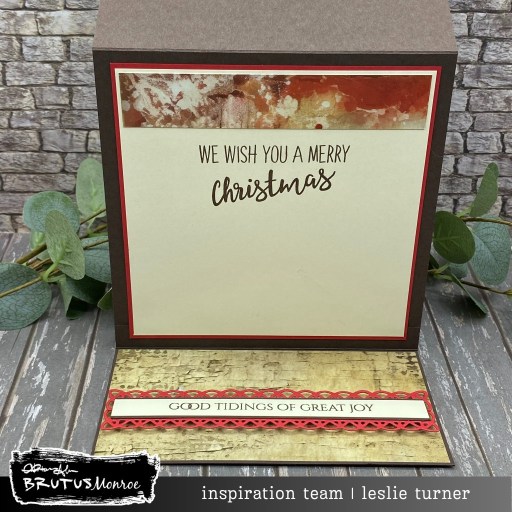
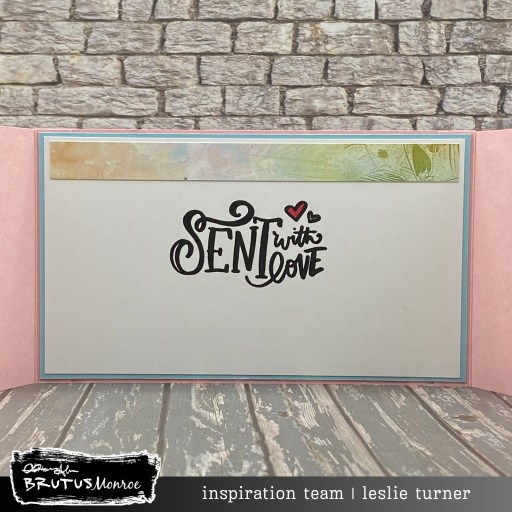
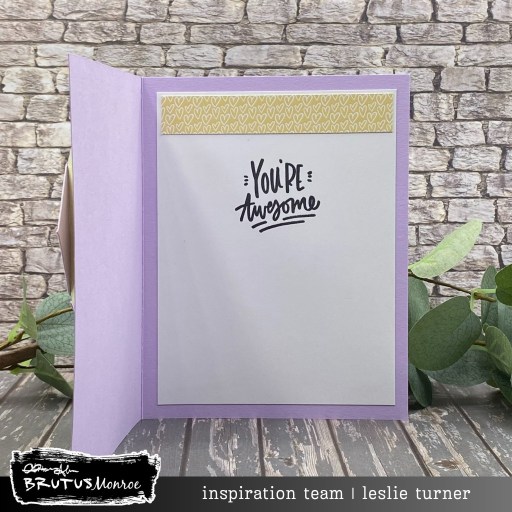
I cut the inside panel from 80# Solar White cardstock and embellished it with a leftover strip of the Book Club paper used on the front. I stamped a sentiment from the Super Sentimental stamp set in Raven ink and adhered the panel to the inside of the card base.

Affiliate links are used in this post at no cost to you – I really appreciate your support!

Brutus Monroe products used:
BRU6342-2 Teacher’s Apple Stamp Set
BRU1448 Book Club 6×6 Paper Collection
BRU5550 Heather Cardstock
BRU7985 Super Sentimental Stamp Set
BRU2543 Raven 2×2 Detail Ink
BRU0060 Topaz Flat Back Crystals

Other products used:
CARDSTOCK/PAPER: Neenah Classic Crest 80# Solar White cardstock
INK: Catherine Pooler Pixie Dust, Pink Champagne, Shea Butter, Rouge, Over Coffee, and Eucalyptus inks; Bic Mark-It Fine Point Markers- Pink Flamingo and Tuxedo Black; Sakura White Gelly Roll Pen
ACCESSORIES: Fiskars 12″ ProCision Rotary Bypass Paper Trimmer, Spellbinders 12×12 Scoring Board, My Sweet Petunia Precision Glue Press, Bearly Art precision craft glue, Mini MISTI, Spellbinders Detail Scissors, Trinity Pick Up Stick

I hope you’ve enjoyed seeing this project and you’re inspired to get your craft on! Be sure to check out all the amazing stamps and dies, pigments and mists, cardstock and tools (just to name a few) at Brutus Monroe! Follow us on Facebook, Instagram and YouTube for tons of crafty inspiration! And come on over and join our Fan Club Facebook Group to share your crafty makes using our products! Thanks so much for stopping by today!

Scrappy hugs,

Wishing You A Peaceful Season

Hey everybody, Happy Friday! Dang, the weeks sure seem to be whizzing by. I’m delighted to share a Thanksgiving card for Brutus Monroe featuring the Peaceful Hedge stamp set, assorted prints from the Pumpkin Spice paper pack, and Gingerbread and Jack O Lantern cardstock. The ‘Star of the Show’ on this patchwork card is the hedgie which I heat embossed with our clear embossing ink and Gilded embossing powder.

I cut a standard A2 size side-folding card base from Gingerbread cardstock along with a layering panel from Jack O Lantern cardstock. Using stitched square dies in my stash, I cut eight small and one medium square from most of the prints in the Pumpkin Spice 6×6 Paper Collection. I applied an adhesive sheet to a piece of copy paper and then adhered all the squares.

I stamped the sentiment and hedgie from the Peaceful Hedge stamp set on Neenah Classic Crest Baronial Ivory cardstock in our Clear Embossing Ink and heat embossed them in our Gilded Embossing Powder. I trimmed the sentiment in a strip and popped it up on foam squares. I cut the hedgie with a stitched circle die and framed it with a thin frame cut from the Jack O Lantern. The finishing touch on the front was adding several Red Shift Flat Back Crystals.

I cut the inside panel from the ivory cardstock and stamped a sentiment from the Occasional Greetings stamp set in Raven ink. I layered the panel on Jack O Lantern cardstock, and this completed the card.

Affiliate links are used in this post at no cost to you – I really appreciate your support!

Brutus Monroe products used:
BRU7653-2 Peaceful Hedge Stamp Set
BRU2081 Embossing Ink 2×2 Clear
BRU2487 Gilded Embossing Powder
BRU3691 Pumpkin Spice 6×6 Paper Collection
BRU7295 Gingerbread Cardstock
BRU5437 Jack O Lantern Cardstock
BRU9306 Occasional Greetings Stamp Set
BRU2543 Raven 2×2 Detail Ink
BRU2345 Red Shift Flat Back Crystals

Other products used:
CARDSTOCK/PAPER: Amazon 25# white copy paper, Neenah Classic Crest Baronial Ivory cardstock
DIES/PUNCHES: Love From Lizi Stitched Square Nested Cutting Dies, Love From Lizi Stitched Circle Nested Cutting Dies
ACCESSORIES: Fiskars 12″ ProCision Rotary Bypass Paper Trimmer, Spellbinders 12×12 Scoring Board, My Sweet Petunia Precision Glue Press, Bearly Art precision craft glue, Mini MISTI, Big Shot, Milwaukee heat tool, Stick It Adhesive Sheet, Scrapbook Adhesives Thin 3D Foam Squares, Trinity Pick Up Stick

I hope you’ve enjoyed seeing this project and you’re inspired to get your craft on! Be sure to check out all the amazing stamps and dies, pigments and mists, cardstock and tools (just to name a few) at Brutus Monroe! Follow us on Facebook, Instagram and YouTube for tons of crafty inspiration! And come on over and join our Fan Club Facebook Group to share your crafty makes using our products! Thanks so much for stopping by today – we’ll see you next time!

Scrappy hugs,

Book lover

Hi friends, Happy Friday – I hope your weather is cooling off and you have something fun planned this weekend! We’ve had some beautiful temps in the high 60s and low 70s, and I sure wish it would stay like this year round. I’m thrilled to share a thank you card for Brutus Monroe featuring the Book Lover stamp and coordinating prints from the Book Club paper pack. This accordion layered fun fold also shows off our Buttercream cardstock, an inside sentiment from the Super Sentimental stamp set, and our Topaz crystals.

I cut the card base at 5-1/2″ x 12″ and scored it at 1-3/4″, 4-3/4″ and 7-3/4. I chose three patterns from the Book Club 6×6 Paper Collection for the three panels seen from the front. I stamped the Book Lover image on Cougar 80# Smooth White cardstock, colored it with assorted markers, and cut it with a Scrapbook.com Nested A2 Arches die. Unfortunately, once again, I’ve discovered that the Book Lover stamp is no longer available. I did a quick scan of the website for book-themed stamps, and a stamp from either the Book Dance or Gnome Books sets would be adorable on this card!

Using more of the Scrapbook.com Nested A2 Arches dies, I cut a series of shaped panels from CutCardStock Cougar 80# Smooth White cardstock, patterned paper from the Book Club paper pack, and Buttercream cardstock. I layered them together in three sets and adhered one set to each of the three panels, smallest to largest, with the stamped image on the front.

I embellished the inside panel with a patterned paper strip and stamped a sentiment from the Super Sentimental stamp set.

Affiliate links are used in this post at no cost to you – I really appreciate your support!

Brutus Monroe products used:
BRU8130 Book Lover Stamp (no longer available but Book Dance or Gnome Books stamp sets could be used)
BRU1448 Book Club 6×6 Paper Collection
BRU5451 Buttercream Cardstock
BRU1985 Super Sentimental Stamp Set
BRU2543 Raven 2×2 Detail Ink
BRU0060 Topaz Flat Back Crystals

Other products used:
CARDSTOCK/PAPER: CutCardStock Cougar Smooth 80# White cardstock
INK: Bic Mark-It Fine Point Markers- Summer Melon, Polynesian Purple, Margarita Green, Blue Skies Blue, Pink Flamingo and Tiki Hut Tan; Sharpie Ultra Fine Point Marker- Brown
DIES/PUNCHES: Scrapbook.com Nested A2 Arches Dies
ACCESSORIES: Fiskars 12″ ProCision Rotary Bypass Paper Trimmer, Spellbinders 12×12 Scoring Board, My Sweet Petunia Precision Glue Press, Bearly Art precision craft glue, Mini MISTI, Big Shot, Trinity Pick Up Stick

I hope you’ve enjoyed seeing this project and you’re inspired to get your craft on! Be sure to check out all the amazing stamps and dies, pigments and mists, cardstock and tools (just to name a few) at Brutus Monroe! Follow us on Facebook, Instagram and YouTube for tons of crafty inspiration! And come on over and join our Fan Club Facebook Group to share your crafty makes using our products! Thanks so much for stopping by today – we’ll see you next time!

Scrappy hugs,

Merry Christmas

Hi friends, happy middle of August! Already. Yep, it’ll be Christmas before we know it, so you better get crackin’ on your cards (if you haven’t already)… I’m in Christmas card mode year round so no issues here building up my stash! This card for Brutus Monroe features the Garden Trellis Dies along with sentiments from the Occasional Greetings and Good Tidings stamp sets.

This was an easy card that started with a Pre-Scored A2 Card Base. I cut the trellis background four times from Perfect Blend Cardstock and once from CutCardStock Bright Silver Foil. I layered them all together, sandwiching the silver one between the white ones, and spritzed it with Holly Berry and Ornament Gold Chroma Mists.

I cut the florals in the die set from Not Your Mamas Cardstock, colored them with a variety of Copic Ciao alcohol markers, and arranged them in the bottom right corner. I stamped a sentiment from the Occasional Greetings Stamp Set in Raven ink and fussy cut it. The finishing touch was adding some randomly placed Red Shift Flat Back Crystals.

I cut the inside panel from Perfect Blend cardstock and embellished it with strips of Scarlet and CutCardStock Bright Silver Foil cardstock. I stamped a sentiment from the Good Tidings stamp set in Raven ink and layered the panel on Scarlet cardstock.

Affiliate links are used in this post at no cost to you – I really appreciate your support!

Brutus Monroe products used:
BRU2382 Garden Trellis A2 Cover Plate Die Set
BRU9306 Occasional Greetings Stamp Set
BRU8190 Holly Berry Chroma Mist
BRU8213 Ornament Gold Chroma Mist
BRU9494 Not Your Mamas Cardstock
BRU5144 Pre-Scored Card Bases
BRU4013 Perfect Blend Cardstock
BRU8547 Stick & Stamp Mat
BRU5413 Scarlet Cardstock
BRU2605 Good Tidings Stamp Set
BRU2543 Raven 2×2 Detail Ink
BRU2345 Red Shift Flat Back Crystals

Other products used:
CARDSTOCK/PAPER: CutCardStock Bright Silver Foil cardstock
INK: Copic Ciao alcohol markers- G82 Spring dim Green, G99 Olive, E08 Brown, YG03 Yellow Green, YG11 Mignonette, Y35 Maize, R14 Light Rouge, R29 Lipstick Red
ACCESSORIES: Fiskars 12″ ProCision Rotary Bypass Paper Trimmer, My Sweet Petunia Precision Glue Press, Bearly Art precision craft glue, MISTI stamp tool, Big Shot, Spellbinders Detail Scissors, Scrapbook Adhesives Thin 3D Foam Squares, Scrapbook Adhesives 3D Foam Squares, Trinity Pick Up Stick

I hope you’ve enjoyed seeing this project and you’re inspired to get your craft on! Be sure to check out all the amazing stamps and dies, pigments and mists, cardstock and tools (just to name a few) at Brutus Monroe! And if you happen to have a sweet tooth and like to munch while you craft (like I do, lol), check out Scoozie’s Confections & Curiosities! OMG, I’m hooked! ;) Follow us on Facebook, Instagram and YouTube for tons of crafty inspiration! And come on over and join our Fan Club Facebook Group to share your crafty makes using our products! Thanks so much for stopping by today – we’ll see you next time!

Scrappy hugs,

That’s What Friends Are Spore

Hi friends, happy Friday to you – I hope you’ve had a great week with some nice-ish weather! I’m delighted to share a Brutus Monroe DT inspiration project today featuring the super cute That’s What Friends Are Spore stamps and dies which I paired with our Not Your Mamas and Aubergine cardstock and Plaid Petals paper. I’m gathering ideas for some DIY Christmas gifts to tuck into Christmas cards, and thought this easel style post-it note holder would be a fun one. It’s such an easy project (with an adorable pun) that entails simple layering, stamping and die cutting, and I’ll share the instructions below.

Cut the easel style base from heavyweight white cardstock at 3-1/4″ x 8-1/2″ and score it at 4-1/4″ and 6-3/8″. Cut the easel panel at 3-1/4″ x 4-1/4″. Fold on the score lines and burnish with a bone folder. Cut cardstock layering panels at 3-1/8″ x 4-1/8″ for the easel panel and 2″ x 3-1/8″ for the middle section of the base (on the back) between the score lines. Cut patterned paper at 3″ x 4″ for the easel panel and 1-7/8″ x 3″ for the middle section of the base. Adhere the easel panel to the base and decorate it as desired.

I used the That’s What Friends Are Spore stamp set, stamped in Raven ink, and colored with alcohol markers. I cut the image with the coordinating That’s What Friends Are Spore die set and a adhered it to the easel panel. I stamped the sentiment (from the same stamp set) directly on the panel in Raven ink.

Here is an angled shot and one with the holder closed flat for mailing. So easy and can be tailored for any theme, holiday or occasion!

Affiliate links are used in this post at no cost to you – I really appreciate your support!

Brutus Monroe products used:
BRU1231 That’s What Friends Are Spore Stamp Set
BRU1248 That’s What Friends Are Spore Dies
BRU9494 Not Your Mamas Cardstock
BRU5536 Aubergine Cardstock
BRU1322 Plaid Petals 6×6 Paper Collection
BRU2543 Raven 2×2 Detail Ink
BRU4247 Violet Shift Flat Back Crystals

Other products used:
INK: Copic Ciao alcohol markers- BV00 Mauve Shadow, BV02 Prune, BV04 Blueberry
ACCESSORIES: Fiskars 12″ ProCision Rotary Bypass Paper Trimmer, My Sweet Petunia Precision Glue Press, Bearly Art precision craft glue, Mini MISTI, Big Shot, Trinity Pick Up Stick

I hope you’ve enjoyed seeing this project and you’re inspired to get your craft on! Be sure to check out all the amazing stamps and dies, pigments and mists, cardstock and tools (just to name a few) at Brutus Monroe! And if you happen to have a sweet tooth and like to munch while you craft (like I do, lol), check out Scoozie’s Confections & Curiosities! OMG, I’m hooked! ;) Follow us on Facebook, Instagram and YouTube for tons of crafty inspiration! And come on over and join our Fan Club Facebook Group to share your crafty makes using our products! Thanks so much for stopping by today – we’ll see you next time!

Scrappy hugs,

This is Claws for Celebration

Hey everybody, happy Friday and happy August! Where in the world did July go?! I’m thrilled to share a Brutus Monroe DT inspiration project today featuring the Happy Crab stamp set from our June release. I created a birthday card and put the crab on a wobble element (cute, cute, cute!), stamped a couple shells from the Fishing You stamp set, and added some seashell brads from my stash. Super easy card!

The paper I used for the background is from the Watercolor Waves 6×6 Paper Collection which, unbeknownst to me, was the June Paper Pad of the Month. That means it was a limited edition item that was only available during the month of June. I didn’t know this and created the card in July, not realizing the paper is no longer available. But I did message our DT leader and was given the okay to go ahead and post the card since no one else had made any samples using this paper pad. It’s a totally awesome paper pad and I apologize if anyone wants it. For what it’s worth, I linked to the Paper Pad of the Month below, but just remember that the paper pads in this subscription are only available during the month they are showcased or while supplies last.

I grabbed a pre-scored A2 card base and adhered a layering panel cut from a print in the Watercolor Waves paper collection. Now that we know this particular paper is no longer available, any water, beach or ocean paper would work for this card. I stamped a couple shells from the Fishing You stamp set and colored them with assorted markers. I took the prongs off of some seashell brads in my stash and adhered them as part of the scene. I stamped the crab from the Happy Crab stamp set on Perfect Blend cardstock in Raven ink and colored him with an assortment of markers. I fussy cut him and attached him to a Hampton Art mini action spring wobble. I stamped the sentiment from the Happy Crab stamp set and added a few Violet Shift Flat Back Crystals.

I cut the inside panel from Perfect Blend cardstock and embellished it with leftover paper strips. I stamped a sentiment from the Occasional Greetings stamp set in Raven ink and layered the panel on Harvest cardstock.

Everybody knows how cute wobble elements are but I couldn’t resist adding a little one-second video! Isn’t he just the cutest ever?!

Affiliate links are used in this post at no cost to you – I really appreciate your support!

Brutus Monroe products used:
BRU 8417 Happy Crab Stamp Set
BRU 9144-2 Fishing You Stamp Set
BRU 0287 Watercolor Waves 6×6 Paper Collection – June Paper Pad of the Month (this is a limited edition item and I’ve linked to the Paper Pad of the Month)
BRU 7264 Harvest Cardstock
BRU 4013 Perfect Blend Cardstock
BRU 2828-2 A2 Card Bases
BRU 9306 Occasional Greetings Stamp Set
BRU 2543 Raven 2×2 Detail Ink
BRU 4247 Violet Shift Flat Back Crystals

Other products used:
INK: Copic Ciao alcohol markers- Y08 Acid Yellow, Y21 Buttercup Yellow, YR02 Light Orange, R14 Light Rouge, R22 Light Prawn, R29 Lipstick Red; Brown Sharpie Ultra Fine Point marker; Sakura White Gelly Roll pen
ACCESSORIES: Fiskars 12″ ProCision Rotary Bypass Paper Trimmer, Bearly Art precision craft glue, My Sweet Petunia Precision Glue Press, MISTI stamp tool, Spellbinders Detail Scissors, Nuvo Ivory Seashell Crystal Drops, Eyelet Outlet Shell Brads and Seashore Brads, Hampton Art Mini Action Spring Wobble, Scrapbook Adhesives Thin 3D Foam Squares

I hope you’ve enjoyed seeing this project and you’re inspired to get your craft on! Be sure to check out all the amazing stamps and dies, pigments and mists, cardstock and tools (just to name a few) at Brutus Monroe! And if you happen to have a sweet tooth and like to munch while you craft (like I do, lol), check out Scoozie’s Confections & Curiosities! OMG, I’m hooked! ;) Follow us on Facebook, Instagram and YouTube for tons of crafty inspiration! And come on over and join our Fan Club Facebook Group to share your crafty makes using our products! Thanks so much for stopping by today – we’ll see you next time!

Scrappy hugs,

Merry & Bright

Hi friends, happy Friday! I hope you’ve had a great week! I’m thrilled to share a Christmas in July inspiration project for Brutus Monroe featuring the small but mighty Merry & Bright stamp set. I also used Poison Apple cardstock, a plaid print in the Playful Patterns papers, the Occasional Greetings stamp set, some heat resistant acetate, Noble Fir and Ornament Gold Chroma Mists, and Hematite crystals. I’ve been seeing a lot of cards with geometric elements around lately so I was inspired to create this one with triangles and hexagons on an acetate front.

I cut the flat card base and a double stitched hexagon die cut from Poison Apple cardstock. I created the acetate front flap by adhering a panel of Heat Resistant Acetate to a panel of Perfect Blend cardstock. I adhered triangle flaps to the front of the acetate and the Poison Apple hexagon to the back side of the acetate. I cut a slightly smaller hexagon from Perfect Blend cardstock and spritzed it with Noble Fir and Ornament Gold Chroma Mists.

I stamped the wire and bulb from the Merry & Bright stamp set in Raven ink on the misted hexagon and the bulb once more on CutCardStock Silk Glitter 4×6 Red Flash cardstock which I fussy cut. I colored the metal top of the bulb with a gold metallic pen and paper pieced the bulb to the hexagon. I stamped the sentiment from the same Merry & Bright stamp set and added a few Hematite Flat Back Crystals.

For the inside, I die cut an additional stitched hexagon from Perfect Blend cardstock and stamped a sentiment from the Occasional Greetings stamp set in Raven ink. I adhered it to the inside being sure it was completely hidden beneath the hexagon on the front.

Affiliate links are used in this post at no cost to you – I really appreciate your support!

Brutus Monroe products used:
BRU 3095 Merry & Bright Stamp Set
BRU 3690 Heat Resistant Acetate
BRU 8152 Noble Fir Chroma Mist
BRU 8213 Ornament Gold Chroma Mist
BRU 5505 Poison Apple Cardstock
BRU 4008 Playful Patterns 6×6 Paper Collection
BRU 4013 Perfect Blend Cardstock
BRU 9306 Occasional Greetings Stamp Set
BRU 2543 Raven 2×2 Detail Ink
BRU 8530 Hematite Flat Back Crystals

Other products used:
CARDSTOCK/PAPER: CutCardStock Silk Glitter 4×6 Red Flash cardstock
INK: Memento Tuxedo Black marker, EK Tools Gold Dual Tip pen
DIES/PUNCHES: Sizzix Belinda Stitched Hexagons Framelits
ACCESSORIES: Fiskars 12″ ProCision Rotary Bypass Paper Trimmer, Bearly Art precision craft glue, My Sweet Petunia Precision Glue Press, MISTI stamp tool, Big Shot, 1/8″ Scor-Tape, Spellbinders Detail Scissors, Trinity Pick Up Stick

I hope you’ve enjoyed seeing this project and you’re inspired to get your craft on! Be sure to check out all the amazing stamps and dies, pigments and mists, cardstock and tools (just to name a few) at Brutus Monroe! And if you happen to have a sweet tooth and like to munch while you craft (like I do, lol), check out Scoozie’s Confections & Curiosities! OMG, I’m hooked! ;) Follow us on Facebook, Instagram and YouTube for tons of crafty inspiration! And come on over and join our Fan Club Facebook Group to share your crafty makes using our products! Thanks so much for stopping by today – we’ll see you next time!

Scrappy hugs,

My Anchor

Hi friends, Happy Friday! I hope you have something fun planned this weekend. I’m thrilled to share a Brutus Monroe DT inspiration project today featuring some fun products from our June release. I did a little bit of mixed media using our Fishing You and Underwater Friendship stamp sets, Make Waves and Coral Reef chipboard, along with Tinsel Blue, Peacock and Wheat Chroma Mists. This is a friendship card and not a birthday card, and the little mermaid in the Fishing You stamp set is holding a birthday cake, so I covered it up with a fish from the Buttons Galore & More Aquarium Flatbackz Embellishments. How’s that for thinking outside the box?!

I started by spritzing a panel of Not Your Mamas cardstock and a wave panel from the Make Waves chipboard with Tinsel Blue, Peacock and Wheat Chroma Mists. I grabbed some coral pieces from the Coral Reef chipboard and colored them with alcohol markers. I stamped the mermaid from the Fishing You stamp set and the anchor from the Underwater Friendship stamp set in Raven ink on Perfect Blend cardstock and colored them with alcohol markers.

Once the background panel was completely dry, I stamped the sentiment from the Underwater Friendship stamp set directly on the panel in the upper left corner in Raven ink. Next, I stamped the little fishes from the Fishing You stamp set directly on the panel and colored them with Sharpie markers to get good coverage through the Chroma Mists. I assembled the card, popping the wave panel up on foam tape and tucking the coral pieces in behind it.

I grabbed a resin fish from the Buttons Galore & More Aquarium Flatbackz Embellishments and adhered it over the birthday cake that the mermaid is holding. The finishing touch was adhering the anchor from the Underwater Friendship stamp set at the bottom.

I cut the inside panel from Perfect Blend cardstock, stamped a sentiment from the Underwater Friendship stamp set in Raven ink, and layered the panel on Sea cardstock.

Affiliate links are used in this post at no cost to you – I really appreciate your support!

Brutus Monroe products used:
BRU 9144-2 Fishing You Stamp Set
BRU 8613 Underwater Friendship Stamp Set
BRU 8995 Make Waves Chipboard
BRU 1374-2 Coral Reef Chipboard
BRU 8206 Tinsel Blue Chroma Mist
BRU 1367 Peacock Chroma Mist
BRU 6037 Wheat Chroma Mist
FBZ 108 Buttons Galore & More Aquarium Flatbackz Embellishments
BRU 2828-2 A2 Card Bases
BRU 4013 Perfect Blend Cardstock
BRU 9494 Not Your Mamas Cardstock
BRU 5529 Sea Cardstock
BRU 2543 Raven 2×2 Detail Ink

Other products used:
INK: EK Tools Gold Dual Tip Pen; Copic Ciao alcohol markers- R22 Light Prawn, R35 Coral, YR68 Orange, Y08 Acid Yellow, E21 Soft Sun, BG72 Ice Ocean, G94 Grayish Olive, C5 Cool Gray; Sharpie Ultra Fine Point markers- blue, teal, lime green, yellow
ACCESSORIES: Fiskars 12″ ProCision Rotary Bypass Paper Trimmer, Bearly Art precision craft glue, My Sweet Petunia Precision Glue Press, MISTI stamp tool, Liquitex White Gesso, Ranger Distress Collage Medium, Spellbinders Detail Scissors, Scrapbook Adhesives Crafty Foam Tape

I hope you’ve enjoyed seeing this project and you’re inspired to get your craft on! Be sure to check out all the amazing stamps and dies, pigments and mists, cardstock and tools (just to name a few) at Brutus Monroe! Follow us on Facebook, Instagram and YouTube for tons of crafty inspiration! And come on over and join our Fan Club Facebook Group to share your crafty makes using our products! Thanks so much for stopping by today – we’ll see you next time!

Scrappy hugs,

Happy Holidays

Hey everybody, happy weekend – I hope you’re having a good one! It’s Christmas in July all over the place! I’m delighted to share a Brutus Monroe DT inspiration project featuring the beautiful Wooded Gathering and Good Tidings stamp sets which I paired with Gingerbread and Scarlet cardstock along with patterned papers from the Winter Wings and Love Letters paper collections. I also used the Lace Layers dies and some Red Shift Flat Back Crystals to bring this card to life. This tented easel card is on my (long) list of all-time favorite fun folds and I’ve made quite a few of them over the years. I love that it showcases large stamps so beautifully.

I cut the card base from Gingerbread cardstock along with layering panels from prints in the Winter Wings and Love Letters paper collections. I stamped the large image from the Wooded Gathering stamp set in Catherine Pooler Icing on the Cake ink on CutCardStock Baronial Ivory cardstock and then spritzed it with Ornament Gold Chroma Mist.

I stamped a sentiment from the same stamp set in brown ink vertically on the left side of the focal image, and then added an edge from a Lace Layers die cut which I cut from Scarlet cardstock. I also stamped a sentiment from the Good Tidings stamp set and layered it on a Lace Layers die cut, also cut from the Scarlet cardstock. I adhered this to the bottom panel, popped up on a foam strip, which was the stopper to aid the card in standing for display.

I cut the inside panel from Baronial Ivory cardstock and embellished it with a leftover patterned paper strip. I stamped another sentiment in brown ink from the same Wooded Gathering stamp set and layered the panel on Scarlet cardstock. I’ve also included an angled shot so you can see the cool construction.

Affiliate links are used in this post at no cost to you – I really appreciate your support!

Brutus Monroe products used:
BRU 1067 Wooded Gathering Stamp Set
BRU 2605 Good Tidings Stamp Set
BRU 8213 Ornament Gold Chroma Mist
BRU 7295 Gingerbread Cardstock
BRU 5413 Scarlet Cardstock
BRU 2812 Winter Wings 6×6 Paper Collection
BRU 6874 Love Letters 6×6 Paper Collection (out of stock at Brutus Monroe but in stock at A Cherry On Top)
BRU 6487 Lace Layers Dies
BRU 2345 Red Shift Flat Back Crystals

Other products used:
CARDSTOCK/PAPER: Neenah Classic Crest Baronial Ivory cardstock
INK: Catherine Pooler Icing on the Cake ink
ACCESSORIES: Fiskars 12″ ProCision Rotary Bypass Paper Trimmer, Bearly Art precision craft glue, My Sweet Petunia Precision Glue Press, MISTI stamp tool, Big Shot, Trinity Pick Up Stick, Scrapbook Adhesives Crafty Foam Tape (54 ft)

I hope you’ve enjoyed seeing this project and you’re inspired to get your craft on! Be sure to check out all the amazing stamps and dies, pigments and mists, cardstock and tools (just to name a few) at Brutus Monroe! And if you happen to have a sweet tooth and like to munch while you craft (like I do, lol), check out Scoozie’s Confections & Curiosities! OMG, I’m hooked! ;) Follow us on Facebook, Instagram and YouTube for tons of crafty inspiration! And come on over and join our Fan Club Facebook Group to share your crafty makes using our products! Thanks so much for stopping by today – we’ll see you next time!

Scrappy hugs,

Get Well gate fold

Hi friends, I’m back with my second post of the day. The weeks sure do seem to fly by quickly these days! It’ll be Christmas before we know it… we are officially past the halfway mark of 2025. Yep, that’s my story and I’m stickin’ to it. I’m delighted to share an inspiration project for Brutus Monroe today where I combined the mini slimline size with the gate fold design and came up with a pretty get well card. This card features the amazing Heart Hands Cutting dies which are absolutely perfect for this design. I paired this die set with panels of Pink Lemonade, Sea, and Not Your Mamas Cardstock along with some Spring Splatter Paper. I also used our timeless (and my favorite) Super Sentimental Stamp Set and some Light Pink Flat Back Crystals.

I cut a 3-1/2″ x 6″ mini slimline landscape gate fold card base from Pink Lemonade cardstock along with layering panels from a print in the Spring Splatter 6×6 paper collection. Using the Heart Hands Cutting Dies, I cut the hands, fingernails and heart from Not Your Mamas cardstock and colored them with Copic Ciao alcohol markers.

I added some shimmer to the fingernails with Sakura Clear Star Gelly Roll pen which I topped with some Ranger Glossy Accents. The heart cut a bunch of tiny strips which I backed on a scrap of the white cardstock and then inked the edges with Alabaster ink. I stamped the sentiment from the Super Sentimental stamp set in Raven ink and added a small disc magnet to keep the card closed.

I embellished the inside white cardstock panel with a strip of the patterned paper used on the front. I stamped another sentiment from the Super Sentimental stamp set in Raven ink, colored the heart red, and layered the panel on Sea cardstock.

Affiliate links are used in this post at no cost to you – I really appreciate your support!

Brutus Monroe products used:
BRU 3141 Heart Hands Cutting Dies
BRU 6557 Pink Lemonade Cardstock
BRU 5529 Sea Cardstock
BRU 9494 Not Your Mamas Cardstock
BRU 2051 Spring Splatter 6×6 Paper Collection
BRU 7985 Super Sentimental Stamp Set
BRU 2524 Alabaster White 2×2 Pigment Ink
BRU 2543 Raven 2×2 Detail Ink
BRU 7907 Light Pink Flat Back Crystals

Other products used:
INK: Copic Ciao alcohol markers- E21 Soft Sun, R29 Lipstick Red, BG34 Horizon Green; Sakura Clear Star Gelly Roll pen
ACCESSORIES: Fiskars 12″ ProCision Rotary Bypass Paper Trimmer, Bearly Art precision craft glue, My Sweet Petunia Precision Glue Press, MISTI stamp tool, Big Shot, Ranger Distress Tiny Blending Tool and Distress Tiny Blending Foams, Ranger Distress Collage Medium, Spellbinders Detail Scissors, Ranger Glossy Accents, small disc magnet

I hope you’ve enjoyed seeing this project and you’re inspired to get your craft on! Be sure to check out all the amazing stamps and dies, pigments and mists, cardstock and tools (just to name a few) at Brutus Monroe! And if you happen to have a sweet tooth and like to munch while you craft (like I do, lol), check out Scoozie’s Confections & Curiosities! OMG, I’m hooked! ;) Follow us on Facebook, Instagram and YouTube for tons of crafty inspiration! And come on over and join our Fan Club Facebook Group to share your crafty makes using our products! Thanks so much for stopping by today – we’ll see you next time!

Scrappy hugs,