Merry Christmas Fun Fold

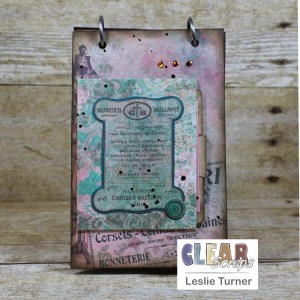
Hey, everybody! A very Happy Monday to you! I hope you had a marvelous weekend and you were able to do something fun! We had our first snow nearly a week ago and I loved every minute of it! Snow is just so beautiful when it’s falling! I’m thrilled to be back on the Clear Scraps blog today with another awesome DT inspiration project! It’s been a minute (2015, lol!) since I created a teepee card (look HERE if you’re interested) so I thought it was time to revisit that fun fold! I used the awesome Vine Circle Chipboard Embellishments to create this Christmas card in non-traditional colors of pink and green! I’m always in Christmas mode and I’m really happy with how this card turned out!

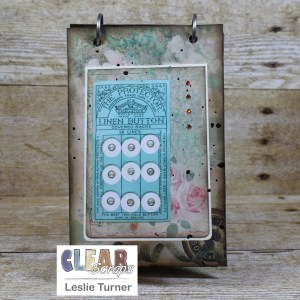
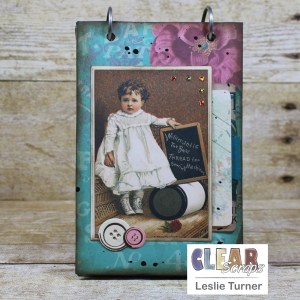
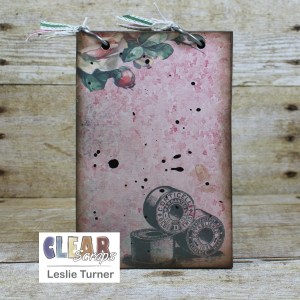
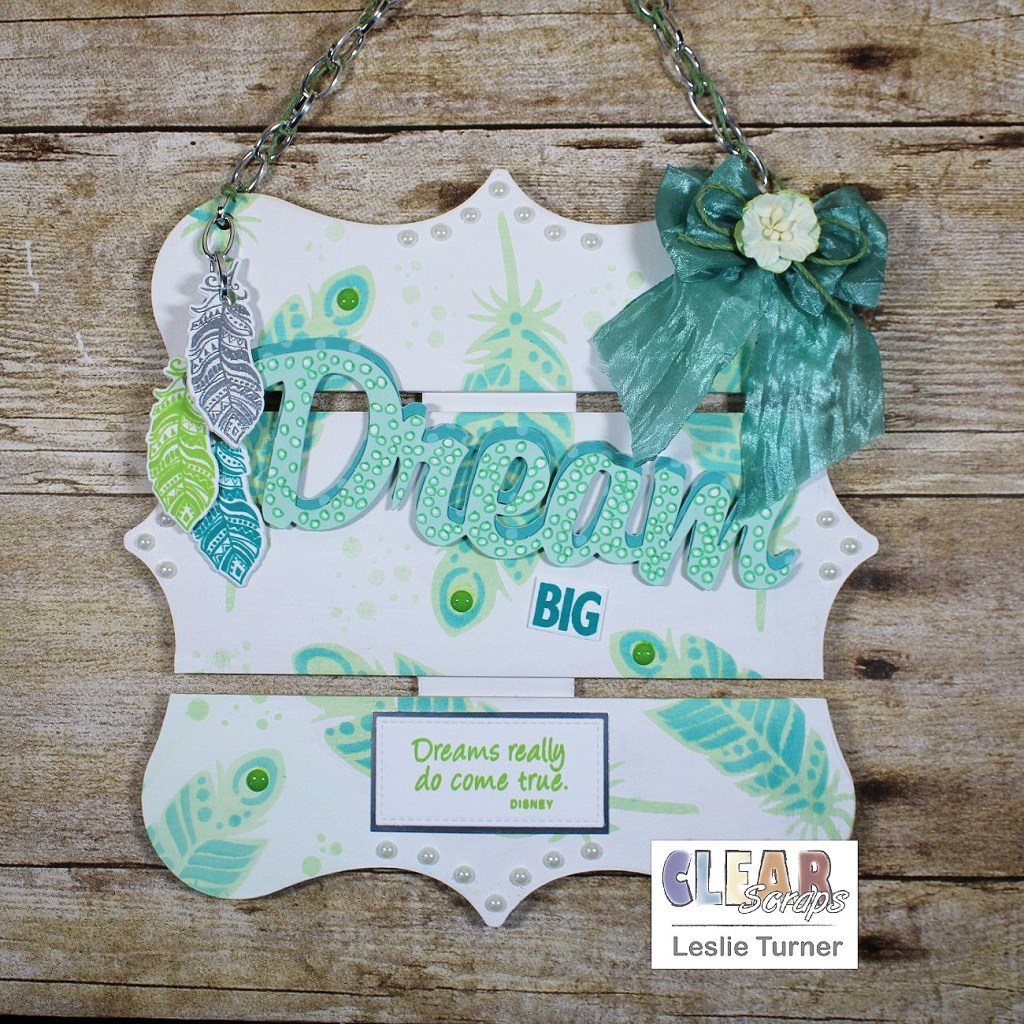
I created the card base from white cardstock, cut layering panels from green cardstock as well as coordinating pink and green patterned paper panels which I adhered to the card base, and then added a round magnet closure. I used both of the Vine Circle Chipboard Embellishments and created Christmas wreaths. I mixed white chalk paint with several drops of green India ink and painted the large one, and mixed white chalk paint with several drops of magenta India ink and painted the small one. Once dry, I dabbed glue on them with a sponge and sprinkled clear glitter on them. I embellished the large green wreath with iridescent gemstones and the small pink wreath with white flat-back pearls for interest and different textures.

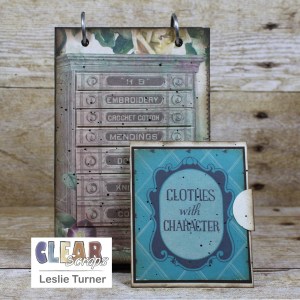
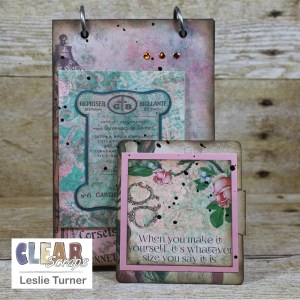
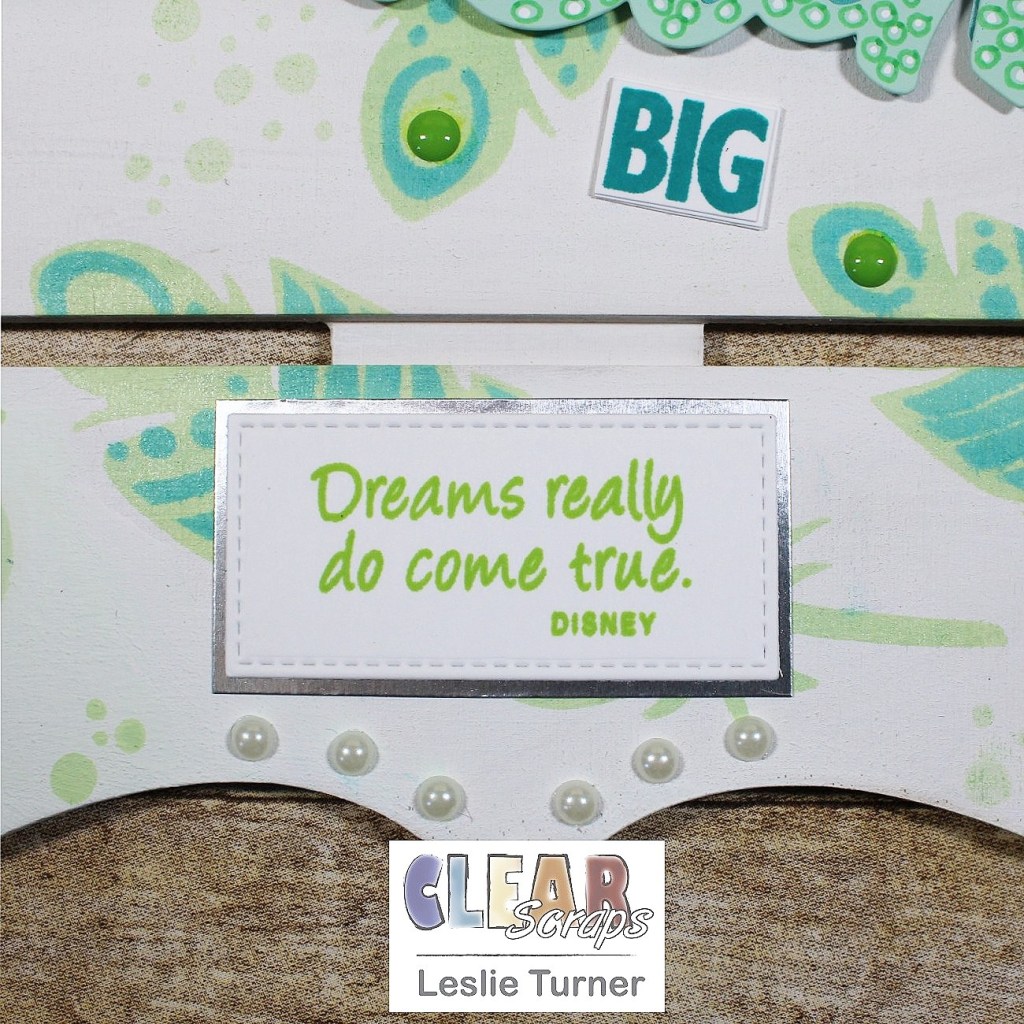
I adhered the wreaths to the front of the card and added a stamped and silver embossed sentiment cut with a fishtail die. The final step was adding a few more pearls at the bottom.

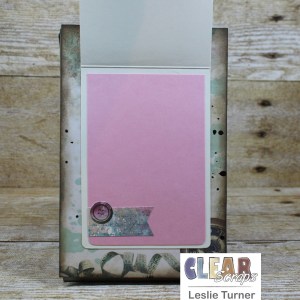
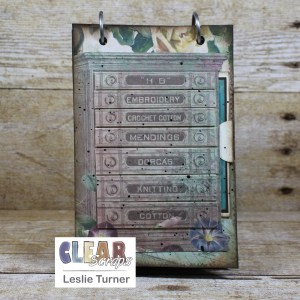
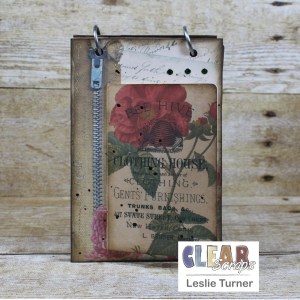
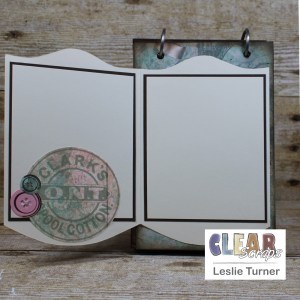
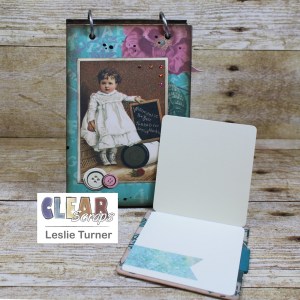
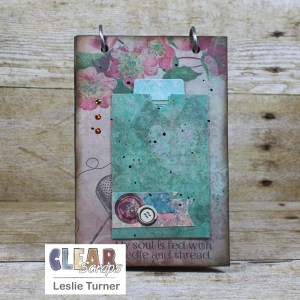
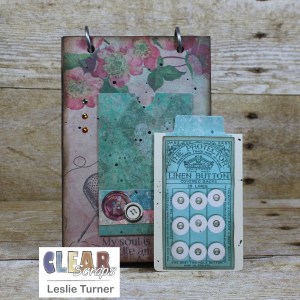
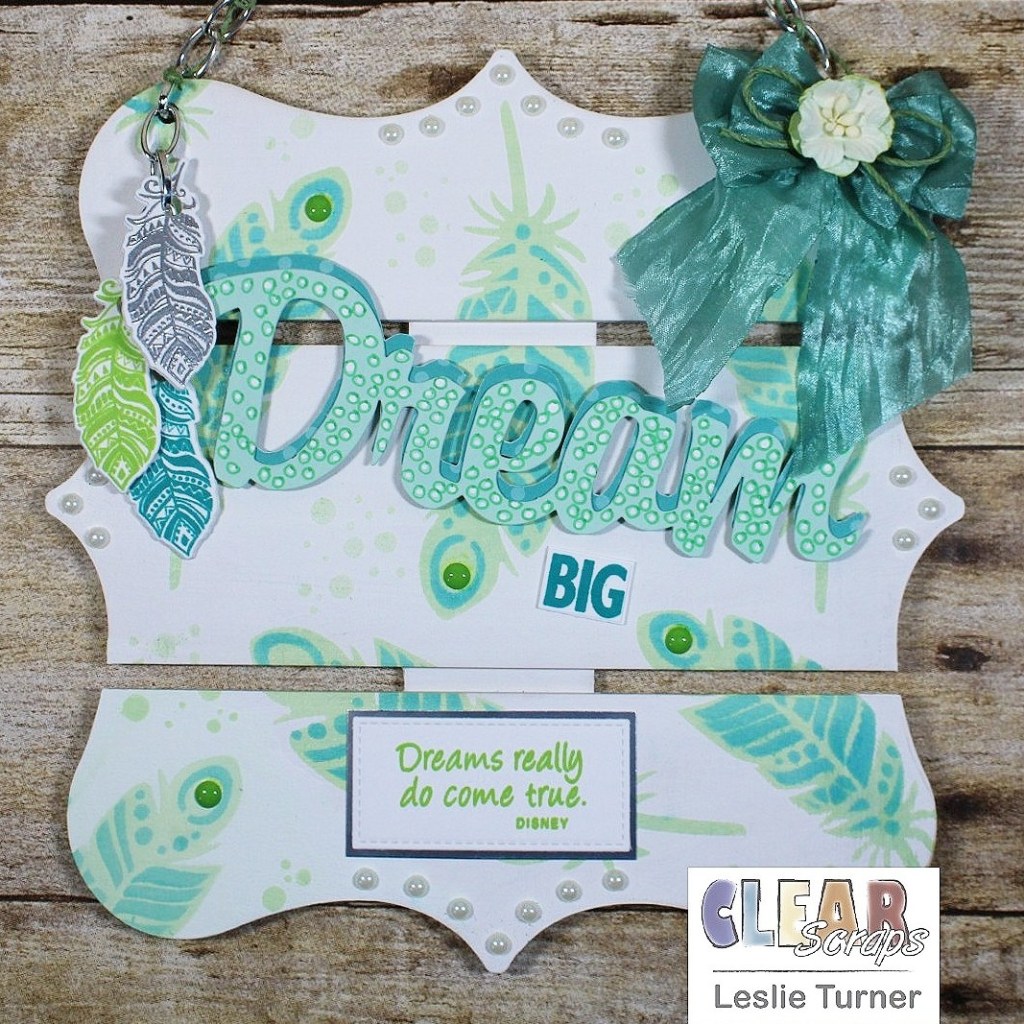
Here are shots of the other two sides. The cool part is that this card folds flat for mailing! Be sure to see my tutorial on the Clear Scraps blog if you’re interested in seeing how it was made!

Clear Scraps products used:
Vine Circle Chipboard Embellishments

Other products used:
Cardstock/Paper: Neenah Classic Crest Solar White cardstock, CutCardStock Basis Light Lime cardstock, Hot Off The Press Sweet Pea 6×6 double-sided papers
Stamps: Trinity Stamps A Sentiment For (Almost) Everything stamp set,
Ink: Dr. Ph. Martin’s Grass Green and Magenta India Inks, Versamark
Dies/Punches: My Favorite Things Die-namics Essential Fishtail Sentiment Strips
Accessories: Tonic Studios 12″ guillotine paper trimmer, Bearly Art precision craft glue, Folkart White Adirondack chalk paint, Stampin’ Up Dazzling Diamonds glitter, Krylon fixative, Darice white flat-back pearls, ScraPerfect iridescent gemstones, Trinity Stamps Pick-Up Stick, MISTI stamp tool, Big Shot, round magnet, SweetStamps fine detail silver embossing powder, Milwaukee heat tool, Darice double-sided adhesive foam circles

I hope you’ve enjoyed today’s project and you’re inspired to get those craft supplies out to play! Be sure to check out all the amazing acrylic, wood and chipboard goodies at Clear Scraps… OMGoodness, you won’t be disappointed! And head on over to the Clear Scraps Facebook Page for lots of inspiration! And while you’re at it, join the Clear Scraps Facebook Creative Group to connect with other Clear Scraps fans! Thanks so much for stopping by today – we’ll see you next time!

Scrappy hugs,
lesliesig

Life Is Good in Flip Flops!

Happy Thursday, everybody! I hope you’re having a fabulous week! I’m thrilled to be back on the Clear Scraps blog today with another cool DT inspiration project! I love Americana and I have a super awesome long-time friend who lives and breathes ‘beach’ so when I saw this amazing pair of giant birch flip flops in the Clear Scraps store, the wheels started turning! Stars and stripes, an Adirondack chair and beach sand, and this project came to life!

I painted the XL Wood Flip Flops base with white chalk paint and the straps with red chalk paint (two coats each) and let them dry. I stamped dots all over the straps in gold ink and set them aside to dry. I painted Multi Stars Chipboard Embellishments with two coats of blue chalk paint and sprinkled clear glitter on them while still wet. Once they were dry, I adhered them to the entire length of the left flip flop along with quite a few tiny stars punched from blue cardstock. I hand-cut stripes from red cardstock and adhered them to the right flip flop along with the Life Is Good Chipboard Word Title that I inked with gold ink to match the dots on the straps.

I embellished the bottom of the right flip flop with a stamped and layered tag tied with gold string, along with a stamped, embossed and die cut Adirondack chair and some beach sand fashioned from torn kraft paper.

The finishing touch was a large multi-looped bow fashioned from wide navy ribbon with a jewel brad embellishment in the center.

Clear Scraps products used:
XL Wood Flip Flops
Life Is Good Chipboard Word Title
Multi Stars Chipboard Embellishments

Other products used:
Cardstock/Paper: Neenah Classic Crest Solar White cardstock, CutCardStock Basis Blue cardstock, CutCardStock Basis Dark Red cardstock, CutCardStock Brown Bag Kraft paper
Stamps: Altenew Happy Dreams stamp set, Dare 2B Artzy Flip Flops stamp set
Ink/Paint: Folkart White Adirondack, Nautical and Tuscan Red Chalk Paint, Delicata Golden Glitz ink, Catherine Pooler Cranberry Fizz and Juniper Mist ink, American Crafts Gold Metallic Marker
Dies/Punches: CUTplorations Stitched Tags nesting dies, Dare 2B Artzy Flip Flops die set, Stampin’ Up Itty Bitty Star punch
Accessories: Big Shot, MISTI stamp tool, Bearly Art precision craft glue, Ranger Distress Collage Medium, Glossy Accents, Ranger Clear Embossing Powder, Stampin’ Up Dazzling Diamonds Glitter, Eyelet Outlet Clear Jewel Gold Rim Brad, Zutter Bow-It-All v2.0, Really Reasonable Ribbon Gold Metallic String and Navy Silk Crush Ribbon, gold ribbon from stash

I hope you’ve enjoyed today’s project and you’re inspired to get those craft supplies out to play! Be sure to check out all the amazing acrylic, wood and chipboard goodies at Clear Scraps… OMGoodness, you won’t be disappointed! And head on over to the Clear Scraps Facebook Page for lots of inspiration! And while you’re at it, join the Clear Scraps Facebook Creative Group to connect with other Clear Scraps fans! Thanks so much for stopping by today – we’ll see you next time!

Scrappy hugs,
lesliesig

Shabby Chic #keepsakes Box

Hey, everybody! A super Happy Thursday and last day of September to you! We are barreling right into October! My ring light came in and I used it with my Ott lights for these photos, and I love how they turned out. I’m super stoked to have finally found the happy medium! I’m thrilled to be back on the Clear Scraps blog today with another awesome DT inspiration project! I created a pretty shabby chic keepsakes box using the Acrylic Keepsake Box with a variety of texture papers and corrugated cardstock, dies and punches, paper flowers and pearls, and ribbon and twine! This was SO much fun! The sky is the limit with the fun you can have with these! ;)

Prior to assembly, I layered blue texture paper onto kraft cardstock for the four side panels which I adhered to the inside of each panel so the paper can be seen through the acrylic. The texture looks like cement on some of the pieces and peeling cardboard on the others. :) I also adhered kraft cardstock to the inside of the lid and blue texture paper to the inside bottom for a more finished look to the inside once it was assembled. I adhered vertical strips on the outside edges where the sides connect, and used a stitched border die on both sides of each strip for a little interest. Then I embellished each side with a horizontal strip of larger channel corrugated cardstock and then adhered die cut hearts embellished with punched gold foil circles, keeping the sides fairly simple with emphasis on the shabby papers. I adhered kraft cardstock to the outside bottom of the box, again for a more finished look.

I used smaller channel corrugated cardstock for the square on the lid which I embellished with punched gold foil circles, gold die cut flourishes, large paper flowers, pearls, and simple ribbon and twine bows for the chic part of the design. I dyed white seam binding to get just the right color blue I needed for the ribbon. This was messy inky fun and I actually remembered to put on gloves, lol! The finishing touch was adding #keepsakes die cuts in the lower right corner.

Clear Scraps products used:
Acrylic Keepsake Box

Other products used:
Cardstock/Paper: CutCardStock Basis 80# Navy cardstock, CutCardStock 80# Twine cardstock, corrugated cardstock, Hygloss gold foil cardstock, Paper Accents 120# kraft cardstock, The Paper Studio Entirely Textures 2 paper pad
Ink: Ranger Denim Adirondack Color Wash
Dies/Punches: Memory Box Stitched Heart Layers, Stampin’ Up 1/2″ circle punch, Lawn Fawn Stitched Borders, JustRite Stitched Oval and Vine dies, Sizzix Alphanumeric tiny Type Lower Thinlits
Accessories: Tonic Studios 12″ Guillotine Paper Trimmer, Bearly Art precision craft glue, Big Shot, Ranger Distress Collage Medium, Wild Orchid Crafts paper flowers, Hug Snug chalk white seam binding, Canvas Corp Jute Cord, Darice flat back pearls

I hope you’ve enjoyed today’s project and you’re inspired to get those craft supplies out to play! Be sure to check out all the amazing acrylic, wood and chipboard goodies at Clear Scraps… OMGoodness, you won’t be disappointed! And head on over to the Clear Scraps Facebook Page for lots of inspiration! And while you’re at it, join the Clear Scraps Facebook Creative Group to connect with other Clear Scraps fans! Thanks so much for stopping by today – we’ll see you next time!

Scrappy hugs,
lesliesig

Be Happy!

Hey, everybody! Happy Monday to you! I hope you had a marvelous weekend and were able to do something fun! You know where I was… yep, you got it! In my studio doing what I love! And our weather is cooling off here and I’m loving life! I’m thrilled to be back on the Clear Scraps blog today with another awesome DT inspiration project! I created a pretty birthday card with two removable dragonfly magnets! The magnets were created with the Dragonflies Chipboard Embellishments and painted with some oh-so-gorgeous metal gloss paint in several colors. So between the dragonflies and the foiled and glitter cardstock, there’s a whole lot of shimmer going on! What a fun way to give a card and gift in one! Magnets are always a big hit no matter where they are placed – they are a constant reminder of who gifted them! 

I painted the bodies of the Dragonflies Chipboard Embellishments with brown chalk paint and then painted one set of dragonfly wings with turquoise and steel blue metal gloss paint, and the other set with magenta and violet metal gloss paint. I added iridescent gemstones to the bodies, and then adhered two tiny disc magnets on the back of each dragonfly with distress collage medium. For the card front, I cut a standard A2 size top-folding card base, a layering panel and two stitched scallop edges from white cardstock. I then cut strips in varying widths from purple and pink glitter cardstock as well as silver and teal foiled cardstock, and adhered the scalloped edges and strips to the layering panel in a diagonal fashion. I adhered the front panel to the card base and stamped the sentiment in brown ink. I finished the front with several blue gemstones in the upper left corner. 

Here are the dragonflies taken off the card front. The magnet backs are on the back side of the front flap of the card base, ‘disguised’ behind 1/2″ circles pressed into a foam mat to form cups and adhered to the magnets with distress collage medium.

I cut the inside layering panel from white cardstock and embellished it with strips of glitter and brown cardstock used on the front. I stamped the sentiment in brown ink as well, and layered the panel on brown cardstock to tie in the color of the dragonfly bodies.

And one more peek… so loving how this turned out! Love me some dragonflies!

Clear Scraps products used:
Dragonflies Chipboard Embellishments

Other products used:
Paper/Cardstock: Neenah Classic Crest 110# and 80# Solar White cardstock, CutCardStock Pop-Tone 65# Hot Fudge cardstock, DCWV Foiled Cardstock Stack, DCWV Glitzy Glitter Cardstock Stack, DCWV Glitzy Pastels Stack
Stamps: Paper Wings Productions Sayings and Sentiments stamp set
Ink: Memento Espresso Truffle ink
Dies/Punches: My Favorite Things Stitched Scallop Basic Edges dies, Kadomaru Pro corner rounder, Stampin’ Up 1/2″ circle punch
Accessories: Plaid Folkart Java chalk paint; Inka Gold Magenta, Steel Blue, Turquoise and Violet metal gloss paint; Bearly Art precision craft glue, ScraPerfect iridescent gemstones, Brutus Monroe small disc magnets, Eyelet Outlet blue gemstones

I hope you’ve enjoyed today’s project and you’re inspired to get those craft supplies out to play! Be sure to check out all the amazing acrylic, wood and chipboard goodies at Clear Scraps… OMGoodness, you won’t be disappointed! And head on over to the Clear Scraps Facebook Page for lots of inspiration! And while you’re at it, join the Clear Scraps Facebook Creative Group to connect with other Clear Scraps fans! Thanks so much for stopping by today – we’ll see you next time!

Scrappy hugs,
lesliesig

Vintage Sewing Album

Hey, everybody! Another Happy Hump Day to you – SO hard to believe we’ve already seen the first week of September! I’m thrilled to be back on the Clear Scraps blog today with another awesome DT inspiration project! I created a very cool vintage sewing album using the Blank Wood Card with Dress Form Chipboard Embellishments! This was such a fun project! I layered the two dress forms together to make one embellishment with some really good dimension as the focal on the front of the album. I cut four pages for the inside and embellished the front and back of each page.

The front and back covers of the album were created with Blank Wood Card. In addition to the stamped and painted Dress Form Chipboard Embellishments on the front, I used a vintage button, charms, ruler ribbon, and elements from the digital accessories. I used Ephemoire’s Til The Bobbin Runs Out digital journal pages and accessories on the covers and all the pages. The edges of the covers and pages are inked with distress ink. The inside of the front and back covers are painted with chalk paint and each has a spool element from the digital accessories. All four of the pages on the inside are embellished with digital journal pages. They also have folders that open, flaps that open up and out, and pull-outs – all embellished with elements from the digital accessories along with stamped and die cut buttons, and all with plenty of room for journaling and/or photos. I did a little ink splattering with a fan brush on each page, trying not to over-do it because I love ink splatters, lol! And finally, I tied two ribbons on the binding rings with crafter’s cord. Here are shots of the front and inside cover, front and back all pages, and the inside and back cover.

Clear Scraps products used:
Blank Wood Card
Dress Form Chipboard Embellishments
Small sanding stick

Other products used:
Cardstock/Paper: CutCardStock Basis Teal cardstock, CutCardStock Basis Brown cardstock, CutCardStock Baronial Ivory cardstock, CutCardStock Pop-Tone Bubblegum cardstock, CutCardStock Sandcastle cardstock
Stamps: Great Impressions Lace background stamp, Ephemoire Til The Bobbin Runs Out digital journal pages and accessories, Sunny Studio Cute As A Button stamp set
Ink: Memento Bamboo Leaves ink, Ranger Walnut Stain distress ink
Dies/Punches: Stampin’ Up 1-3/4″ circle punch, Stampin’ Up 1″ circle punch, Fiskars 2-1/2″ circle punch, Kadomaru Pro corner rounder, Sunny Studio Cute As A Button die set
Accessories: Folkart Java, Oatmeal and Sheepskin chalk paint; MISTI stamp tool, 7 Gypsies binding rings, Tim Holtz idea-ology Ruler Ribbon, 3 Girl JAM vintage button, Blue Moon charms from stash, Ranger distress collage medium, Big Shot, fan brush, Really Reasonable Ribbon pink twill and olive canvas ribbon, Hemptique Bamboo crafting cord, Stampendous green and pink Dot Sparklers

I hope you’ve enjoyed today’s project and you’re inspired to get those craft supplies out to play! Be sure to check out all the amazing acrylic, wood and chipboard goodies at Clear Scraps… OMGoodness, you won’t be disappointed! And head on over to the Clear Scraps Facebook Page for lots of inspiration! And while you’re at it, join the Clear Scraps Facebook Creative Group to connect with other Clear Scraps fans! Thanks so much for stopping by today – we’ll see you next time!

Scrappy hugs,
lesliesig

Documented Road Trip

Happy Friday, everybody! I hope you’ve had a wonderful week – it sure went by fast! I’m thrilled to be back on the Clear Scraps blog today with another awesome DT inspiration project! I created a project documenting a motorcycle road trip to Deals Gap Motorcycle Resort with a group of friends back in July 2010. Hubby and I rode the Tail of the Dragon twice on two different motorcycles. We rode the Harley on our road trip with our friends and my best friend from high school and college trailered our Honda VTX so we could ride it on the Tail also. What fun we had! I used the Scallop Circle Printer Tray which I painted with green chalk paint, and it is perfect to document our amazing trip!

I painted the top layer of the Scallop Circle Printer Tray with green chalk paint. The nice thing about chalk paint is that it dries fairly quickly. I stamped texture all over the layer in brown ink, let it dry and then applied another coat of the Spanish Moss. When it dried there was just a tad bit of the texture stamping showing which I thought looked cool. I cut some striped patterned paper for the center area of the frame and printed a little summary of our trip on white cardstock, and adhered them to the back. 

I printed the six photos I wanted to use, trimmed them and adhered them to the back so they’d show through the apertures. Working from the bottom up, I glued the second and third layers together and glued them to the back. I removed the protective film from the back side of the acrylic piece and glued it down. I removed the protective film from the front side of the acrylic piece and glued the painted top layer down.

I added punched elements, stamping, bling, die cuts and my St. Christopher pendant (the one I wore on all of our rides over the years) to the outside of the frame for interest. 

Clear Scraps products used:
Scallop Circle Printer Tray

Other products used:
Cardstock/Paper: Neenah Classic Crest Solar White cardstock, CutCardStock Basis Brown, CutCardStock Pop-Tone Gumdrop Green cardstock, The Paper Studio Tattered and Worn 12×12 paper pad
Stamps: Stampin’ Up Timeless Textures stamp set, Tim Holtz Idea-ology Type Lower cling foam stamp set, The Project Bin Wild Thing stamp set
Ink: Catherine Poole Icing on the Cake ink
Dies/Punches: Sizzix Primitive Stars dies, Stampin’ Up Banner Triple Punch, Stampin’ Up Itty Bitty Heart Punch, Sizzix Alphanumeric Tiny Type Lower Thinlits
Accessories: Plaid Folkart Spanish Moss chalk paint, Bearly Art precision craft glue, Darice black glitter alpha stickers, clear acrylic stamp block, Trinity Stamps Andradite Sparkle Embellishment Mix, Ranger distress collage medium

I hope you’ve enjoyed today’s project and you’re inspired to get those craft supplies out to play! Be sure to check out all the amazing acrylic, wood and chipboard goodies at Clear Scraps… OMGoodness, you won’t be disappointed! And head on over to the Clear Scraps Facebook Page for lots of inspiration! And while you’re at it, join the Clear Scraps Facebook Creative Group to connect with other Clear Scraps fans! Thanks so much for stopping by today – we’ll see you next time!

Scrappy hugs,
lesliesig

‘You are the sweetest’ refrigerator magnet

Hey, everybody! Well, another Hump Day has rolled around… they sure are coming and going fast these days! I’m thrilled to be back on the Clear Scraps blog today with another awesome DT inspiration project! I created a fun project that could be done with kids or grandkids – a refrigerator magnet! Who doesn’t LOVE refrigerator magnets?! And especially one that’s a shaker?! And it could even be a fun addition for a file cabinet in your crafty friend’s studio – doesn’t have to be just for kids! ;) I used the Ice Cream Mini Shaker with Sprinkles Baby Confetti as the shaker filler, and painted it in vanilla, strawberry and chocolate flavors with ivory, pink and brown chalk paint!

I started with the Ice Cream Mini Shaker and painted the top layer with ivory, pink and brown chalk paint to resemble vanilla, strawberry and chocolate ice cream flavors. I mixed some acrylic paint to get just the right color for the cone, and while it was drying I cut ivory, pink and brown patterned paper pieces and glued them into the back to show through the apertures. 

Working from the bottom up, I glued the second and third layers together and glued them to the back. I added the Sprinkles Baby Confetti to all three compartments, and removed the protective film from the back side of the acrylic piece and glued it down, trapping the shaker filler inside. I removed the protective film from the front side of the acrylic piece and glued the painted top layer down. I stamped the ‘sweet’ sentiment in black solvent ink and added several iridescent gemstones.

The final step was adding three disc magnets to the back with distress collage medium.

Clear Scraps products used:
Ice Cream Mini Shaker
Sprinkles Baby Confetti

Other products used:
Cardstock/Paper: Polly’s Paper Studio patterned paper, Hot Off The Press Sweet Pea patterned paper, P13 Always and Forever patterned paper
Stamps: Prickley Pear Stamps Berry Sweet Fruit Treats stamp set
Ink: Jet Black StazOn ink
Accessories: Plaid Folkart Sheepskin, Prominent Pink and Java chalk paint; Liquitex Burnt Umber and Raw Sienna acrylic paint, Bearly Art precision craft glue, Trinity Stamps Morganite Muse Embellishment Mix, small disc magnets

I hope you’ve enjoyed today’s project and you’re inspired to get those craft supplies out to play! Be sure to check out all the amazing acrylic, wood and chipboard goodies at Clear Scraps… OMGoodness, you won’t be disappointed! And head on over to the Clear Scraps Facebook Page for lots of inspiration! And while you’re at it, join the Clear Scraps Facebook Creative Group to connect with other Clear Scraps fans! Thanks so much for stopping by today – we’ll see you next time!

Scrappy hugs,
lesliesig

Dream BIG Wall Hanging for Clear Scraps

Hey, everybody! Happy Hump Day – I hope you’re having a fantastic week! I’m super stoked to share my debut project as a new Clear Scraps design team member! Oh, the F-U-N I’m having! I’m up on the Clear Scraps blog today with a pretty piece of home decor – a Dream BIG wall hanging (very appropriate for this dream design gig!) created with the Deco Pallet Shape, 5×9 Feathers Layering Stencil, and small Dream Clear Word Title!

I started by sanding and painting the Deco Pallet Shape with white chalk paint. I added feathers randomly over the surface using the 5×9 Feathers Layering Stencil and distress inks, and then stamped clusters of small dots in green ink to fill in blank spaces. I then affixed a green enamel dot to the top of several feathers. I traced the small Dream clear word title backwards onto the back side of a piece of dotted patterned paper and fussy cut it. I painted the Dream word with light teal chalk paint, added whimsical dots and circles with white paint pen and green Sharpie for some interest, and adhered the patterned paper tracing behind it for a shadow effect. I adhered it to the pallet with double-sided foam circles, and then added the BIG stamped portion just beneath it with craft glue. I added white flat-back pearls to the top, bottom and sides of the pallet, and then fashioned a hanger from silver chain and looped green crafting cord through every other chain link. 

I created some cute little feather ‘charms’ to dangle from the top left – one silver embossed, one stamped in green and one stamped in teal – and all die cut and layered three times. I punched holes through each charm and added them to several extra chain links. 

I fashioned a double-loop bow from teal ribbon which I adhered to the top right with hot glue, and embellished it with a green crafting cord bow and paper flower.

The final addition to the piece was a sentiment stamped in green, die cut and layered on silver foil cardstock, which I adhered to the bottom center with glue.

Clear Scraps products used:
Deco Pallet Shape
5×9 Feathers Layering Stencil
Small Dream clear word title

Other products used:
Cardstock/Paper: Neenah Classic Crest Solar White 110# cardstock, Hygloss silver foil cardstock, Sunny Studio Polka-dot Parade 6×6 paper
Stamps: Dare2BArtzy Dream BIG stamp set, Altenew Happy Dreams stamp set
Ink: Ranger Twisted Citron and Peacock Feathers distress ink, Versamark, Posca white paint pen, Sharpie Lime ultra fine point pen
Dies/Punches: Dare2BArtzy Dream BIG die set, My Favorite Things Stitched Rectangle STAX Die-namics
Accessories: Plaid Folkart White Adirondack and Seaside Villa Chalk paint, Doodlebug Design Sprinkles Limeade assortment, MISTI stamp tool, Big Shot, SweetStamps fine detail silver embossing powder, Crop-A-Dile Big Bite, Bearly Art precision craft glue, Darice double-sided adhesive foam circles, Darice white flat-back pearls, 2″ square acrylic stamp block, eeBeads silver chain, hot glue gun, Really Reasonable Ribbon Silky Crush teal ribbon, Hemptique green hemp crafting cord, Wild Orchid Crafts paper flower

I hope you’ve enjoyed today’s project and you’re inspired to get those craft supplies out to play! Be sure to check out all the amazing acrylic, wood and chipboard goodies at Clear Scraps… OMGoodness, you won’t be disappointed! And head on over to the Clear Scraps Facebook Page for lots of inspiration! And while you’re at it, join the Clear Scraps Facebook Creative Group to connect with other Clear Scraps fans! Thanks so much for stopping by today – we’ll see you next time!

Scrappy hugs,
lesliesig