Hi everyone! Happy Tuesday – here’s to a wonderful week! I’m stoked to be back on the CutCardStock blog today with an awesome DT inspiration project featuring the amazing Classic Crest cardstock which is on sale this month. I love it and it’s a staple in my studio! Affiliate links are used in this post at no cost to you – I really appreciate your support! Most of my card bases are created from Neenah Classic Crest Solar White 110# cardstock – there is no better cardstock for a card base! This birthday card is clean and simple, and has a dimensional paper pieced die cut rose with a little pink and green tone on tone going on!
NOTE: The supply chain issues with the Classic Crest and Linen cardstock that I mentioned a couple weeks ago are still ongoing so I wanted to remind everyone. Some other really good options that I can personally vouch for, which I have in my stash also, are 110# Basis White, 80# Basis White, 65# Pop-Tone Sweet Tooth and Royal Sundance 80# Fiber White.
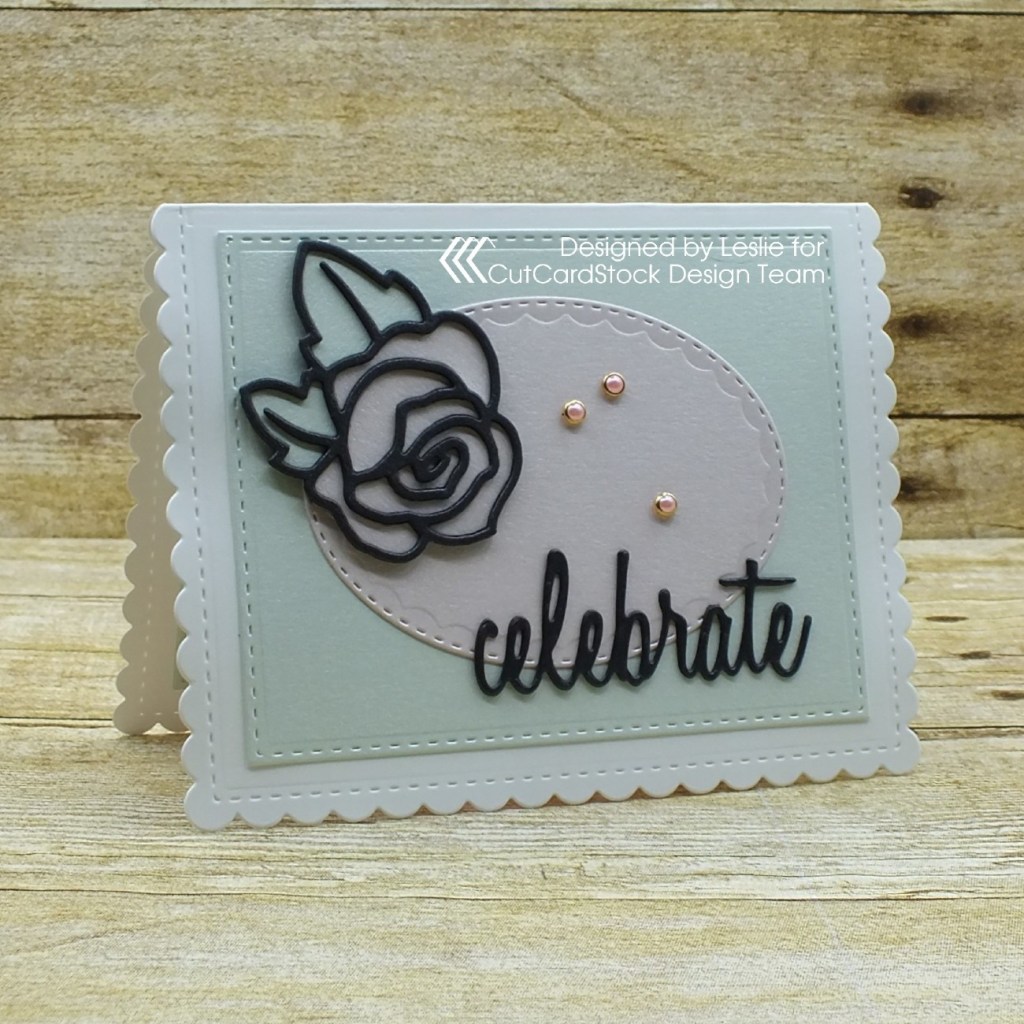
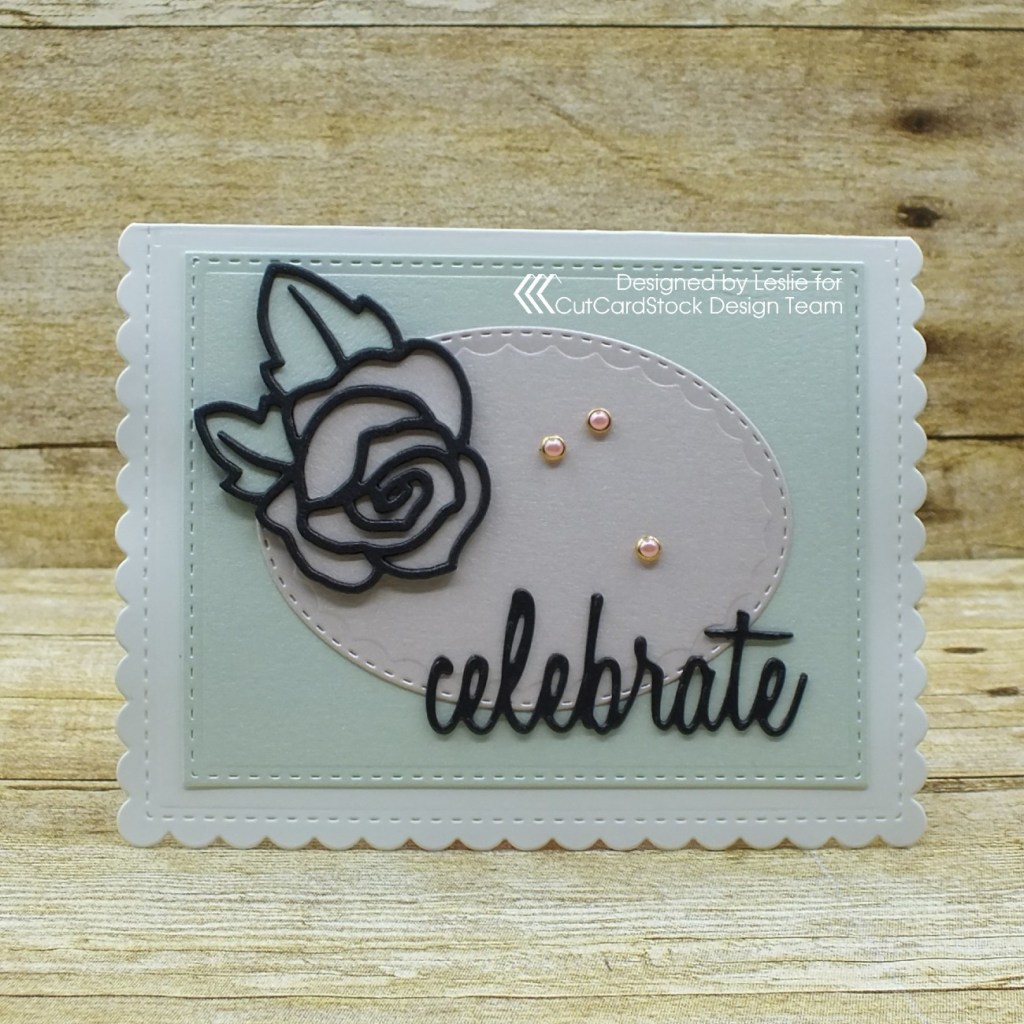
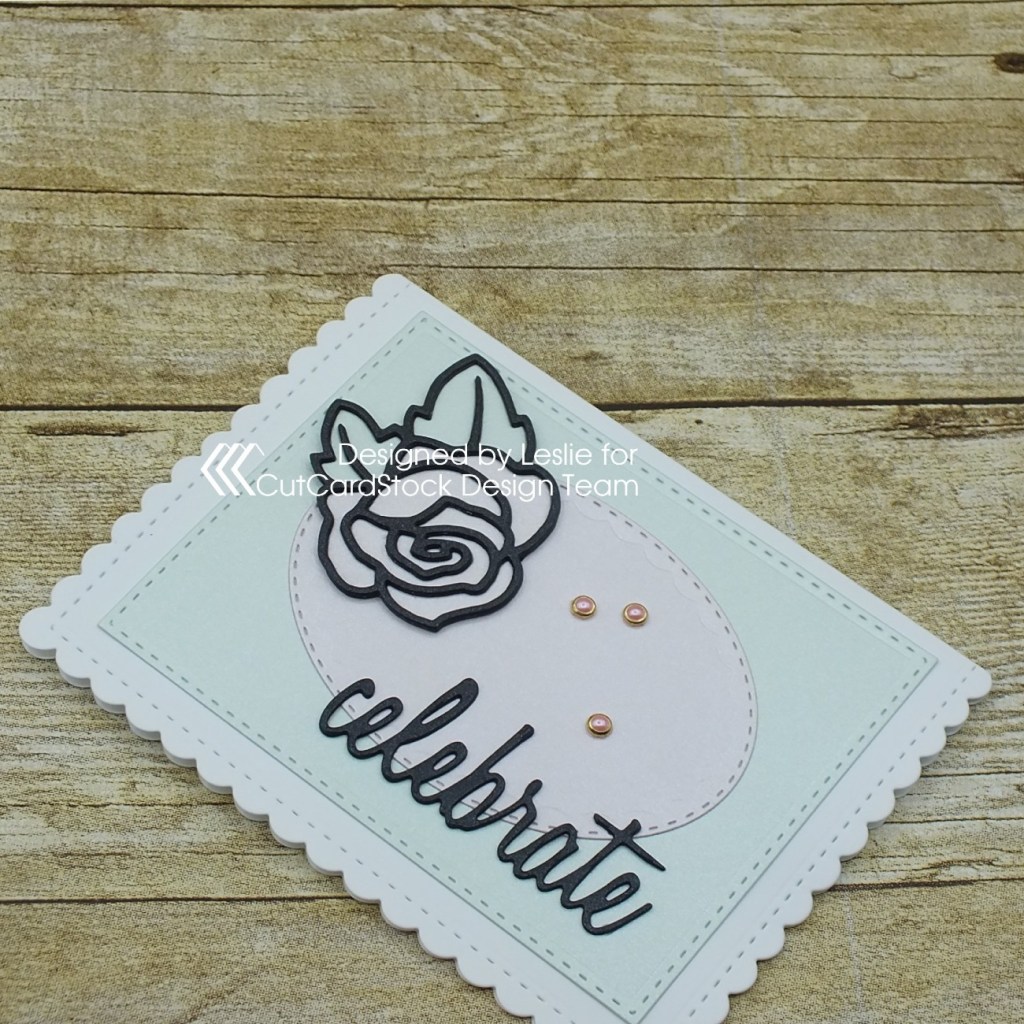
This Papertrey Ink Noted: Scalloped A2 Die Collection is an oldie and one of my favorites, and I thought it would make a really pretty and dainty birthday card in pale pink and pale green which is one of my favorite color combos. And there’s a lot to be said about the pop of black on pastels! I cut the card base from Classic Crest Solar White 110# cardstock and layered a stitched rectangle cut from Curious Metallic Aloe 111# cardstock with a stitched oval with debossed scallops cut from Curious Metallic Pink Quartz 111# cardstock. The rose (another old die in my stash) is paper pieced using the green and pink cardstock with four layered outlines cut from Curious Metallic Night 111# cardstock for some hefty dimension. I placed the rose in the upper left corner and positioned it where the pink rose was on the pink oval and the green leaves were on the green rectangle for a tone on tone effect. I cut the sentiment twice from the black cardstock and layered one on top of the other for just a little dimension. I finished the front with three small gold rim pink pearls.
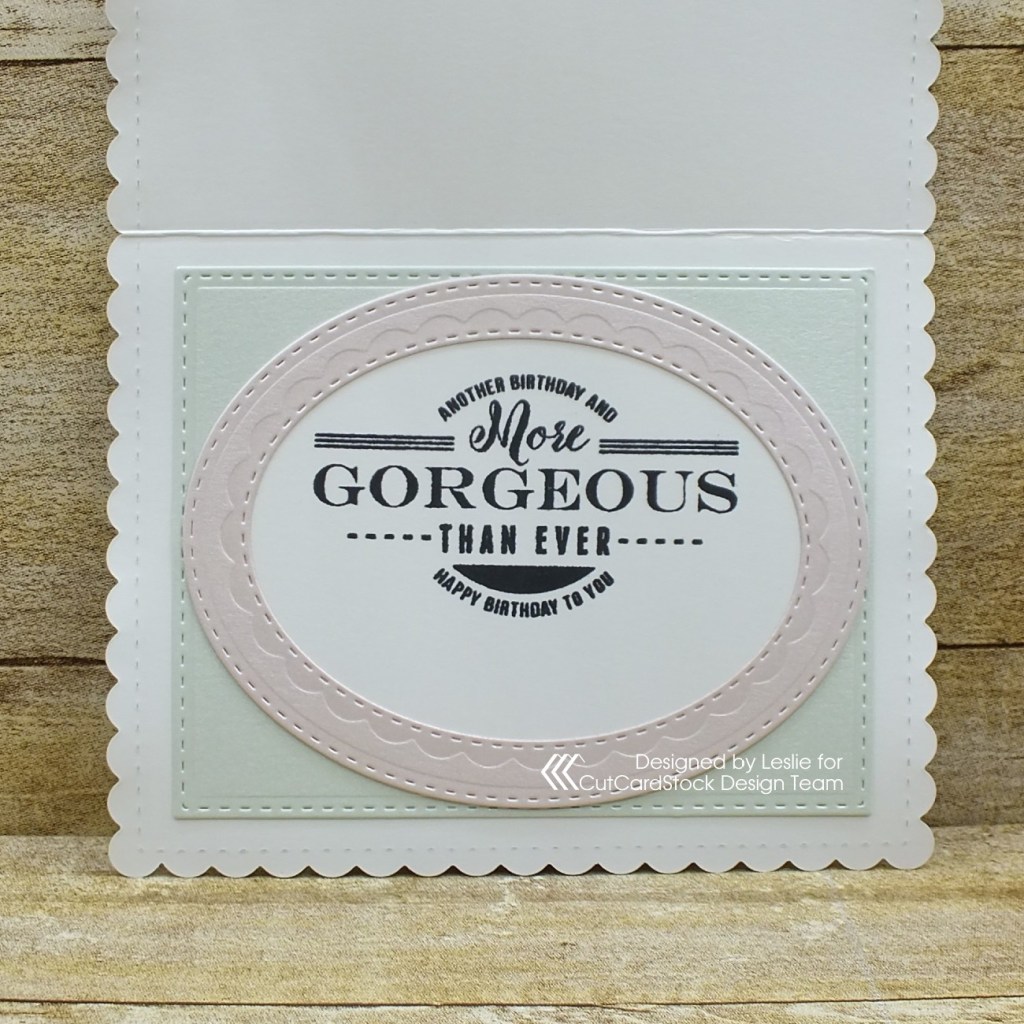
I cut/embossed a pink frame with debossed scallops for the inside which I adhered to a white cardstock oval and adhered to a green rectangle. I stamped the sentiment in black ink leaving some room for a signature.
And one more look… really loving how this turned out! Love me some pink and green – and this shimmery cardstock on a Classic Crest card base is THE BEST!
Sharing in the following challenges:
1. A Perfect Time To Craft Open Challenge Blog: #2-2022 – Anything Goes
2. A Place To Start: #202202 – Anything Goes w/ optional My Fauna Valentine (Include a Critter) — no twist
3. Addicted To Stamps And More: #423 – Birthdays
4. Classic Design Challenge: February #2 – Anything Goes
5. Crafting Happiness Challenges: #120 – Anything Goes
6. Crafty Catz: #583 – Anything Goes w/ optional Add A Sentiment (playing twist)
7. Cupcake Inspirations: #538 – Anything Goes
8. Fab ‘n’ Funky: #545 – Birthdays
9. Lil Patch of Crafty Friends: #176 – Anything Goes
10. Use Your Stuff: #442 – Birthday
CutCardStock products used:
Classic Crest Solar White 110# cardstock
Curious Metallic Night 111# cardstock
Curious Metallic Aloe 111# cardstock
Curious Metallic Pink Quartz 111# cardstock
Other products used:
Stamps: The Project Bin Born Yesterday stamp set
Ink: Memento Tuxedo Black ink
Dies/Punches: Papertrey Ink Noted: Scalloped A2 Die Collection, Paper Smooches Single Rose die, Sizzix Celebration Words: Script die
Accessories: Tonic Studios 12″ Guillotine Paper Trimmer, Tombow Mono permanent adhesive, Bearly Art precision craft glue, Gemini Junior, MISTI stamp tool, ScraPerfect gold rim pink pearls
I hope you’ve enjoyed today’s project and you’re inspired to get crafty! Be sure to check out all the awesome cardstock and other goodies at CutCardStock (adhesives, labels, stickers, pens, watercolors and ribbon to name a few). And head on over to the CutCardStock Facebook Page for more inspiration! Thanks so much for stopping by today – we’ll see you next time!
Scrappy hugs,