HO HO HO

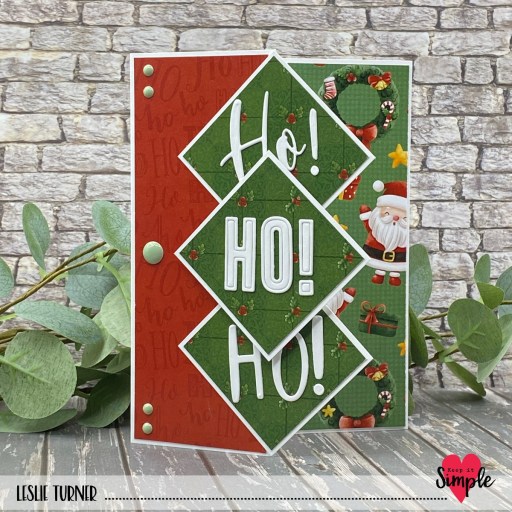
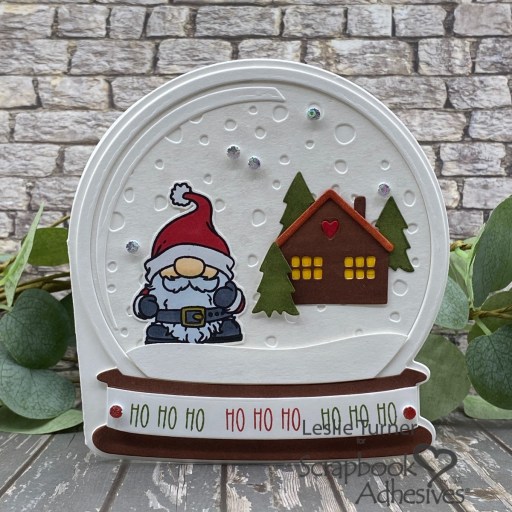
Hey everybody – happy Monday! I hope you had a most excellent weekend! I’m up on the Scrapbook Adhesives By 3L blog today sharing a tutorial for making a shaped snowglobe card that I created for the Scrapbook Adhesives collaboration with Trinity Stamps. I used the super cute Snowglobe Card Die Set and North Pole Gnomes Stamp Set along with some of the best adhesives in the land to put it all together! I LOVE shaped cards and I totally love how this turned out!

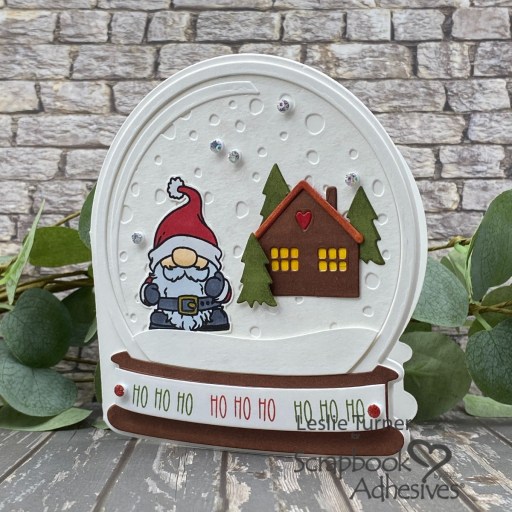
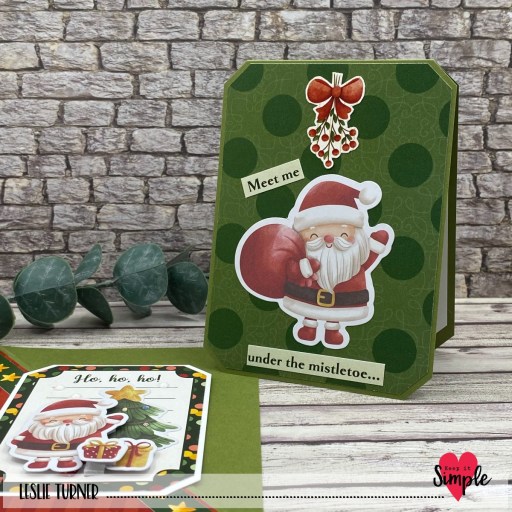
I won’t go into a huge amount of detail here, so be sure to visit the Scrapbook Adhesives by 3L blog to see my tutorial if you want to see how I made this. As mentioned above, I used the Trinity Stamps Snowglobe Card Die Set along with Solar White cardstock (in both 110# and 80# weights) for the entire card, coloring the snowglobe base, cabin, and trees with a variety of markers. You can’t see it too well in the photos but I used Tattered Angels Iridescent Silver Glimmer Mist over the background for a little snowy shimmer.

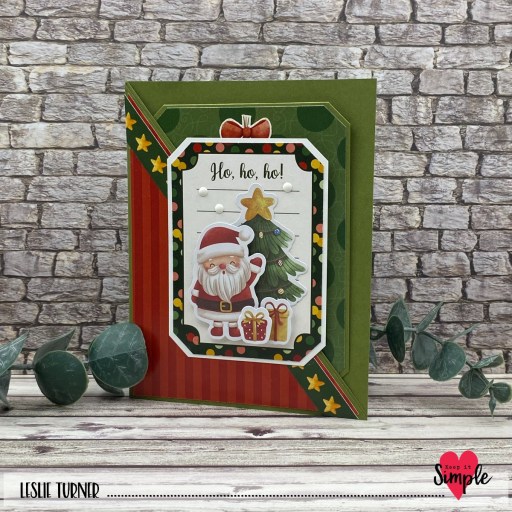
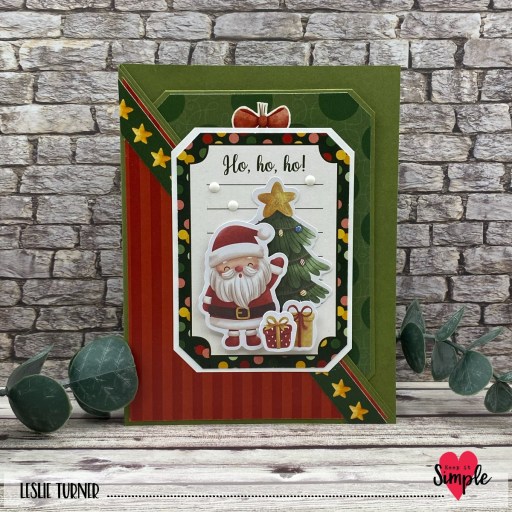
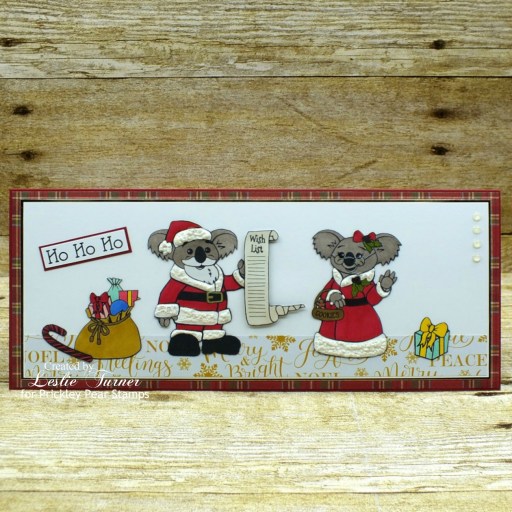
The lil’ gnome dude and sentiment on the base are from the Trinity Stamps North Pole Gnomes Stamp Set, stamped in Memento Tuxedo Black, Versafine Onyx Black, and Catherine Pooler Rockin’ Red and Eucalyptus inks. And I employed my new favorite ‘Wear Your Adhesive on the Outside’ technique using small circles from our 3D Foam Christmas Shapes with Metallic Transfer Foil Sheets Celebrate Colors. So fun!

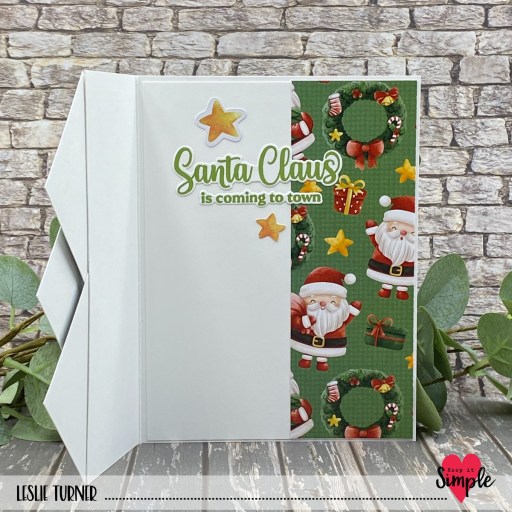
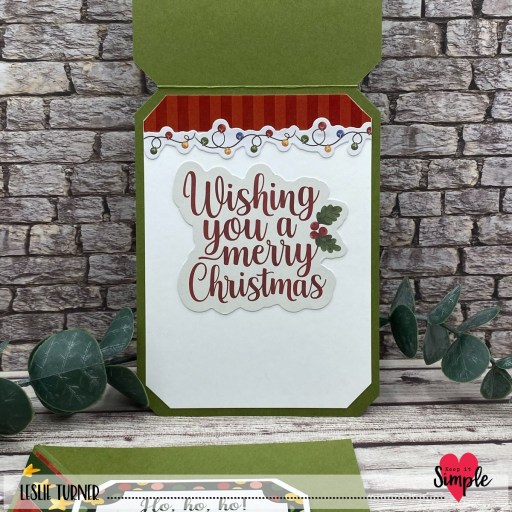
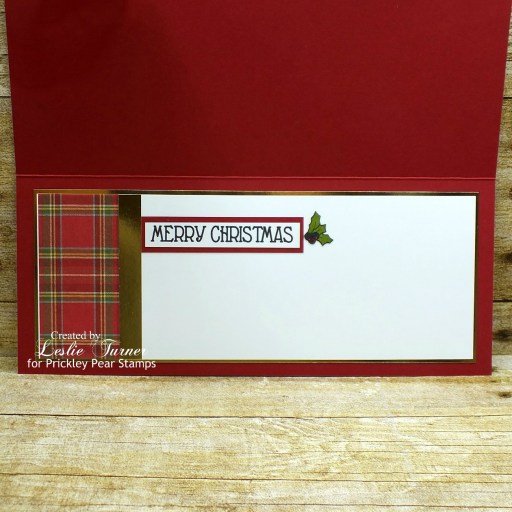
The inside sentiment is another one from the Trinity Stamps North Pole Gnomes Stamp Set, stamped in Versafine Onyx Black ink.

Scrapbook Adhesives By 3L products used:
E-Z Runner Grand Permanent Strips Refillable Dispenser
Thin 3D Foam Squares White Mix
Crafty Foam Tape White 54ft.
3D Foam Christmas Shapes
Metallic Transfer Foil Sheets Celebrate Colors
Dual Tip Glue Pen

Affiliate links are used in this post at no cost to you – I really appreciate your support!

Trinity Stamps products used:
Snowglobe Card Die Set
North Pole Gnomes Stamp Set

Other products used:
CARDSTOCK/PAPER: Neenah Classic Crest 110# and 80# Solar White cardstock
INK: Memento Tuxedo Black ink, Versafine Onyx Black ink, Catherine Pooler Rockin’ Red and Eucalyptus inks; Copic Ciao alcohol markers- R29, E00/08/21/29, G99, Y35, C-1/7; EK Success Gold Dual Tip Marker, Sakura Micron 08 Pigma Black Pen, Tattered Angels Iridescent Silver Glimmer Mist
ACCESSORIES: Fiskars 12″ ProCision Rotary Bypass Paper Trimmer, Big Shot, Mini MISTI, 1-1/2″ stamp block

I hope you’ve enjoyed this project and you’re inspired to get your crafty supplies out and play! Be sure to check out the awesome array of adhesives and other craft supplies Scrapbook Adhesives By 3L has to offer! And be sure to follow us on FacebookPinterestInstagram and Twitter for lots of crafty inspiration! And if you haven’t yet subscribed to our YouTube Channel, be sure to do that, too, for even more inspiration! Thanks so much for stopping by today – we’ll see you next time! 

Scrappy hugs,

Ho! Ho! Ho!

Hey everybody, happy Friday! It’s amazing how fast the weeks in this last month of the year are rolling by! I’m stoked to be back with another super cute and festive project for Keep It Simple! I created a diamond panel card featuring our KIS Cuts Christmas Sentiments Dies, along with papers, stamps, dies and die cut pieces from our Here Comes Santa Claus collection… one of my favorites. Keep It Simple actually has SEVERAL absolutely adorable Christmas collections, and if you haven’t already, you might want to check them out!

This is a super easy design that is very customizable. It’s as simple as cutting some off the front flap and cutting three squares (turned into diamonds) from that strip. Easy peasy! I cut layering panels from assorted papers in the Here Comes Santa Claus Collection Pack and embellished the squares (diamonds) with die cuts made using KIS Cuts Christmas Sentiments Dies. The center diamond is popped up on one of our Adhesive Basics foam squares. I added a few of our Back To Basics Jade Enamel Dots and the front was finished.

I stamped the inside sentiment (from the Here Comes Santa Claus collection) in Memento Bamboo Leaves ink on a scrap of white cardstock and cut it with the coordinating outline dies. I grabbed a couple stars from the Die Cut Pieces pack and the inside was finished. I told you it was an easy one!

Keep It Simple products used:
KIS Cuts Christmas Sentiments Dies
Here Comes Santa Claus 6×9 Collection Pack
Here Comes Santa Claus Collection Stamps
Here Comes Santa Claus Outline Dies
Here Comes Santa Claus Die Cut Pieces
Back To Basics Jade Enamel Dots
Back To Basics Adhesive Basics Squares & Strips

Affiliate links are used in this post at no cost to you – I really appreciate your support!

Other products used:
CARDSTOCK/PAPER: Neenah Classic Crest 110# Solar White Pre-Folded Card Base, Neenah Classic Crest 110# and 80# Solar White cardstock
INK: Memento Bamboo Leaves Ink
ACCESSORIES: Fiskars 12″ ProCision Rotary Bypass Paper Trimmer, Spellbinders 12×12 Scoring Board, My Sweet Petunia Precision Glue Press, Bearly Art precision craft glue, Mini MISTI, Big Shot

I hope you’ve loved seeing this project as much as I loved creating it and you’re inspired to get crafty! Be sure to check out ALL the fun goodies in the Keep It Simple online store! Save 10% on your entire order when you shop online using code LoveToScrap2 at checkout! There is no minimum purchase requirement and no usage limits, AND it combines with product, order, and shipping discounts! Is that cool, or what?! Be sure to Follow us on Facebook, Instagram, and Pinterest for lots of crafty inspiration! Thanks so much for stopping by today – we’ll see you next time!

Scrappy hugs,

Ho ho ho

Hey everybody, Happy Weekend! I hope you have something fun planned! I’m stoked to share a DT inspiration project for Keep It Simple created with papers and die cut pieces from our Here Comes Santa Claus Collection! This is a super basic fun fold called a diagonal pocket card and it is really easy. I love creating Christmas cards and DIY gifts for Christmas and I love me some fun folds, so this was definitely a win-win!

I cut the A2 size side-folding card base from CutCardStock Pop Tone Jellybean Green cardstock and sliced the front flap in half diagonally from top left down to bottom right. I added some wet glue along the very bottom edge of the diagonal flap and adhered it to the back flap. BOOM… super easy! I embellished the diagonal flap with papers and ephemera from the cut-apart sheet in the Here Comes Santa Claus 12×12 Collection Pack. I cut the corners of the focal panel with a Tonic Corner Punch and layered it on a piece of Neenah Classic Crest 80# Solar White cardstock. I used an assortment of die cut pieces to embellish the focal panel, popping some of them up on adhesive foam squares. The finishing touch was adding a few Back to Basics White Enamel Dots.

I created a top folding card from the Jellybean Green cardstock to slip into the diagonal pocket, and cut the corners with the Tonic Corner Punch. I embellished the front and inside of the folded card with more papers and ephemera from the cut-apart sheet in the Here Comes Santa Claus 12×12 Collection Pack, as well as a few more die cut pieces.

Keep It Simple products used:
Here Comes Santa Claus 12×12 Collection Pack
Here Comes Santa Claus Die Cut Pieces
Back To Basics White Enamel Dots

Affiliate links are used in this post at no cost to you – I really appreciate your support!

Other products used:
CARDSTOCK/PAPER: CutCardStock Pop Tone Jellybean Green cardstock, Neenah Classic Crest 80# Solar White cardstock
INK: Sakura Clear Star Gelly Roll pen
DIES/PUNCHES: Tonic Corner Punch
ACCESSORIES: Fiskars 12″ ProCision Rotary Bypass Paper Trimmer, My Sweet Petunia Precision Glue Press, Nuvo Deluxe Adhesive, MISTI stamp tool, Scrapbook.com Double-Sided Adhesive Foam Squares

I hope you’ve loved seeing this project as much as I loved creating it and you’re inspired to get crafty! Be sure to check out ALL the fun goodies in the Keep It Simple online store! Save 10% on your entire order when you shop online using code LoveToScrap2 at checkout! There is no minimum purchase requirement and no usage limits, AND it combines with product, order, and shipping discounts! Is that cool, or what?! Be sure to Follow us on Facebook, Instagram, and Pinterest for lots of crafty inspiration! Thanks so much for stopping by today – we’ll see you next time!

Scrappy hugs,

Ho Ho Ho

Hey everybody! It’s busy on my blog this morning with all the new challenges launching on this first day of September! Our new challenge is live this morning over at Merry Little Christmas Challenge Blog and I’m excited to share my DT inspiration project for MLCCB #52 – Anything Christmas Goes! I created an adorable card with a vintage feel featuring Santa and Rudolph! These stamps and dies are from Prickley Pear Stamps and are so cute I can’t stand it!

I cut a standard A2 side-folding card base from Cougar Smooth White cardstock along with layering panels from two coordinating prints from the Hot Off The Press Joyful Christmas 6×6 double-sided paper pack. I added several strips of Me & My Big Ideas striped skinny washi tape across the seam of the two papers. I stamped the images and sentiment from the Prickley Pear Stamps Santa and Rudolph stamp set on Cougar White cardstock in Memento Rich Cocoa ink, colored Santa and the reindeer with alcohol markers, and cut all of them with the coordinating Santa and Rudolph dies. The finishing touch was adding several red gemstones.

I cut the inside panel from Cougar Smooth White cardstock and embellished it with strips of the Hot Off The Press peach patterned paper and a strip of the MAMBI striped skinny washi tape used on the front. I stamped a sentiment from the same Santa and Rudolph stamp set in Memento Rich Cocoa ink and added two stamped and die cut snowflakes.

Sharing in the following challenges:
1. A Perfect Time To Craft Open Challenge: September #9-2023 – Anything Goes
2. Classic Design Challenge: September #9 – Anything Goes

Affiliate links are used in this post at no cost to you – I really appreciate your support!

Products used:
CARDSTOCK/PAPER: Cougar Smooth 80# White cardstock, CutCardStock Flamingo cardstock, Hot Off The Press Joyful Christmas 6×6 double-sided papers
STAMPS: Prickley Pear Stamps Santa and Rudolph stamp set
INK: Memento Rich Cocoa ink; Arteza alcohol markers- BR28/52/64/66/74, RP09/15, R31, YG04, Y02, PB09, B17; Pentel Slicci gold pen
DIES/PUNCHES: Kadomaru Pro corner rounder, Prickley Pear Stamps Santa and Rudolph die set
ACCESSORIES: Tonic Studios 12″ Guillotine Paper Trimmer, CutCardStock Plus High Capacity adhesive, Art Glitter Dries Clear adhesive, MISTI stamp tool, Big Shot, Me & My Big Ideas striped skinny washi tape, red gemstones

I hope you’ve enjoyed seeing this project and will link up with us this time! Thanks so much for stopping by today – we’ll see you next time! ;)

Scrappy hugs,

Ho Ho Ho

11/30/20 Special Mention Winner at Classic Design Challenge!

Good Sunday morning to you all! I’m back this morning to share a Christmas slimline card that I created for the Prickley Pear Stamps “Wish List” themed Spotlight article in the Rubber Stamp Madness Holidays 2020 Issue! This card features a little scene I created with the Santa Koala and Mrs Claus clear stamp set! So stinkin’ cute! My copy of the Holiday Edition is on it’s way and I will update this post when I receive it. What a thrill! ;)

UPDATE: Holiday Edition received in the mail today! Sorry about the glare on the cover, though. Love the ‘Spotlight’ article on Prickley Pear Stamps! Woo-hoo!

I created my go-to size slimline card base of 9″ x 3-3/4″ from red cardstock and layered on some Christmas plaid. I stamped all the images in black ink on Neenah Solar White cardstock and colored them with alcohol markers. I created this card prior to the dies being available so I fussy cut all the images and created the scene. I used my snow marker to accent their outfits which gave the images nice texture. Since the Prickley Pear Stamps article theme was “Wish List” I made sure to pop up the wish list on foam pads. I layered the focal panel on gold foil cardstock and adhered it to the card base. I stamped, layered and trimmed the sentiment, and added a few glittered Gumdrops in the upper right corner.

I embellished the inside panel with plaid paper and a strip of gold foil cardstock, added a layered sentiment and fussy-cut holly, and layered the panel on the gold foil cardstock.

And one more peek… I totally love how this turned out and so proud it was published!

Sharing in the following challenges:
1. A Perfect Time To Craft Open Challenge: #11-2020
2. ABC Christmas Challenge: W is for Winter Wonderland and/or X is for Xtra Special (X is for Xtra Special)
3. Classic Design Challenge: #11 – November Anything Goes
4. Crafty Catz: #528 – Anything Goes w/ optional Christmas (playing twist)
5. Jan’s Digi Stamps Challenge: November Anything Goes
6. Lemon Shortbread Challenge Blog: #133 – Anything Goes
7. Lil Patch of Crafty Friends: #146 – Anything Goes
8. The Creative Crafters Challenge: #34 – Anything Goes
9. Try it on Tuesday: Traditional Christmas Colors
10. Word Art Wednesday: Weeks #466/467 – Anything Goes
11. World Wide Open Design Team Challenge: #11 – Anything Goes

Products used:
Cardstock/Paper: Neenah Classic Crest Solar White cardstock, American Crafts Rouge cardstock, Hygloss Gold Foil cardstock, The Paper Studio Four Seasons and Everything In Between -2- paper pad
Stamps: Prickley Pear Stamps Santa Koala and Mrs Claus clear stamp set
Ink: Memento Tuxedo Black ink (pad and marker); Nuvo alcohol markers- 416, 405, 495, 497, 453, 449, 428, 360, 461, 379, 479, 466, black; Spectrum Noir- IG1; Pentel Slicci Gold pen
Accessories:  Marvy Uchida Snow marker, Milwaukee heat tool, YNS clear Glittered Gumdrops

I hope you’ve enjoyed this project! Be sure to check out all the awesome stamps and dies at Prickley Pear Stamps! If you’d like to save 10% on anything on the site when you shop at Prickley Pear Stamps, use the coupon code LESLIE10 at checkout! And be sure to ‘like’ and ‘follow’ the Prickley Pear Stamps Facebook page to keep up with news and sales, and join Prickley Pear Pals (the fan group) for lots of fun crafty ideas and to share your creativity! And finally, we’d love to see you visit the Prickley Pear Stamps blog that’s in the process of being revived and become a Follower! Hope to see you there! Thanks so much for stopping by today – we’ll see you next time! ;)

Scrappy hugs,
lesliesig

Ho Ho Ho

Hi friends, and Happy Thursday to you! Today is our oldest granddaughter’s 17th birthday and I’m sitting here shaking my head at how fast these years have flown by! Every year I feel a little bit older, lol! This morning I’m sharing another website sample for Prickley Pear Stamps. You know how I love fun folds and I’ve created another split panel fold using the most adorable Santa Koala and Mrs Claus clear stamp set for the focal image which I absolutely love! I shared one of these folds for another design team a couple weeks ago that I created in portrait orientation, so I thought this one in landscape mode would be a fun alternative!

I used a fun tree print from one of my favorite 6×6 Christmas paper pads for the narrow panels. I stamped the images on white cardstock in black ink and colored them with Nuvo alcohol markers. I trimmed the panel, layered it on red cardstock, and added a candy cane brad along with several small light green gemstones. I stamped the sentiment on the bottom narrow panel, and the final touch was Glossy Accents on Mrs Claus’s glasses!

I embellished the inside panel with strips of tree print and red cardstock used on the front, stamped the sentiment in black ink, and layered the panel on red cardstock.

And one more peek… so loving how this turned out! I think this fold is one of my new favorites!

https://worldwideopendesignteamchallenge.blogspot.com/2020/10/world-wide-open-design-team-challenge.htmlSharing in the following challenges:
1. 613 Avenue Create: October Anything Goes w/ optional Winged Things (no twist)
2. Creative Inspirations: October Anything Goes
3. Jan’s Digi Stamps Challenge: October Anything Goes
4. The Creative Crafters: #33 – Anything Goes
5. The Sisterhood of Crafters: Lots of Layers
6. World Wide Open Design Team Challenge Blog: #10 – Anything Goes

Products used:
Cardstock/Paper: Neenah Classic Crest Solar White cardstock, American Crafts Rouge cardstock, Bella Blvd Christmas Wishes 6×6 paper pack
Stamps: Prickley Pear Stamps Santa Koala and Mrs Claus stamp set
Ink: Memento Tuxedo Black ink; Nuvo alcohol markers- 379, 466, 416, 487, 495, 497, black
Accessories: Tombow Mono permanent adhesive, Bearly Art precision craft glue, MISTI stamp tool, Eyelet Outlet Candy Cane brad, Darice light green gemstones, Glossy Accents

I hope you’ve enjoyed this project! Be sure to check out all the awesome stamps and dies at Prickley Pear Stamps! If you’d like to save 10% on anything on the site when you shop at Prickley Pear Stamps, use the coupon code LESLIE10 at checkout! And be sure to ‘like’ and ‘follow’ the Prickley Pear Stamps Facebook page to keep up with news and sales, and join Prickley Pear Pals (the fan group) for lots of fun crafty ideas and to share your creativity! And finally, we’d love to see you visit the Prickley Pear Stamps blog that’s in the process of being revived and become a Follower! Hope to see you there! Thanks so much for stopping by today – we’ll see you next time! ;)

Scrappy hugs,
lesliesig

Ho Ho Ho

12/11/18 Spotlight Artist Award at City Crafter Challenge Blog!
1/6/19 Top 3 at Creative With Stamps!

Hi everyone! Happy Tuesday! A new challenge has launched this morning over at Stinkin’ Inkers Challenge Blog and I’m happy to share my DT inspiration project for our Winter Wonderland challenge! We’d love to see you create something this month that reminds you of Winter! I created another Christmas card for my pile featuring Santa and his reindeer flying through the sky on a snowy Winter night!

2018_11160005a

I inked the background with several shades of blue distress ink, along with one purple shade. I started with the lightest, then using slightly darker ink with each layer around the outside of the panel, I left the center slightly lighter to depict moonlight. I splattered water with a fan brush and when that dried, I splattered Copic Opaque White pigment mixed with a tiny bit of water with the fan brush to mimmick snowfall, and then affixed the panel to the card base. I punched a circle of white cardstock for the moon and slightly inked it, and then cut the cityscape nightline from navy blue cardstock. I added these elements to the panel and colored the window openings in all the buildings with a mechanical pencil. I stamped Santa and his reindeer and the sentiment, and then added several tiny gemstones in the sky.

2018_11160006a

For the inside, I cut a white panel which I layered on navy blue cardstock and left just a tiny bit of border showing on all four sides. I added a leftover navy blue cardstock strip to the left side, stamped the sentiment and affixed the panel to the card base.

2018_11160007a

And one more look… love, love, love!

2018_11160008a

I’d love to enter this pretty Christmas card into the following challenges:
A Bit More Time To Craft: #81 – Anything Goes
A Perfect Time To Craft: #12 – Anything Goes
Alphabet Challenge Blog: R for Reindeer
Card Mania: #111 – Christmas
Christmas Crafts All Year ‘Round: December Anything Goes
City Crafter Challenge Blog: Week #441 – Santa Claus
Classic Design Team Open Challenge Blog: #12 – Anything Goes
Country View Challenges: December Christmas Challenge
Crafts Galore Encore Challenge Blog: #58 – Anything Goes
Crafty Calendar Challenge Blog: It’s Christmas Time
Crafty Friends: #98 – Christmas
Creative With Stamps: #33 – Santa or Gift
Dragonfly Dreams: Anything Goes
Dragonfly Journeys: #130 – Handmade Holiday Magic
Incy Wincy Designs: Create Your Own Background
Inkspirational: #175 – Designer’s Choice – Anything Christmas
Jingle Belles: Taking Back Our Eight Christmas
Not Just Cards: November Anything Goes
Stamping Sensations: December – Winter Sparkle
Sweet Stampers Challenge: #26 – Christmas
Sweet Stampin Christmas: November Challenge
The Paper Girls: #165 – Die Cuts
Tuesday Throwdown: #420 – Anything Goes
Your Scrapbook Place: December Anything Goes

Products used:
Cardstock/Paper: Stampin’ Up thick and regular Whisper White cardstock, Stampin’ Up Night of Navy cardstock
Stamps: Stampin’ Up Cozy Christmas and Oh, What Fun stamp sets
Ink: Ranger Distress Ink- Stormy Sky, Dusty Concord, Faded Jeans, Chipped Sapphire; Copic Opaque White Pigment, Memento Tuxedo Black ink, Copic Multi-liner Black pen
Dies/Punches: Memory Box Cityscape Nightline die, Stampin’ Up 1-1/4″ Circle Punch
Accessories:  Tim Holtz Stamp Platform, Fan brush, mechanical pencil, tiny rhinestones,

I hope you’ve enjoyed this card and will link up a Wintery project with us this month! We can’t wait to see what you create! Thanks so much for stopping by today – we’ll see you next time! ;)

Scrappy hugs,
lesliesig