Mini Handbag Favor Boxes

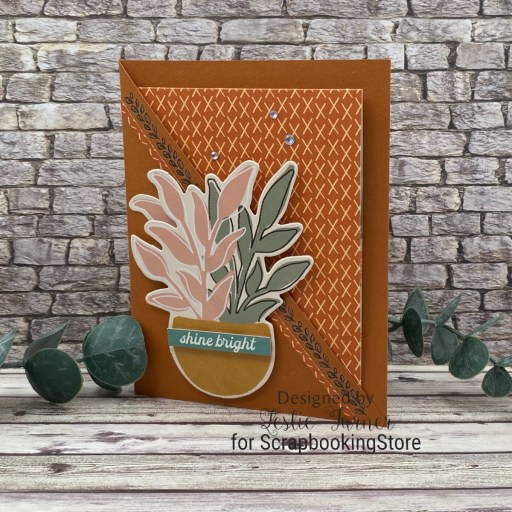
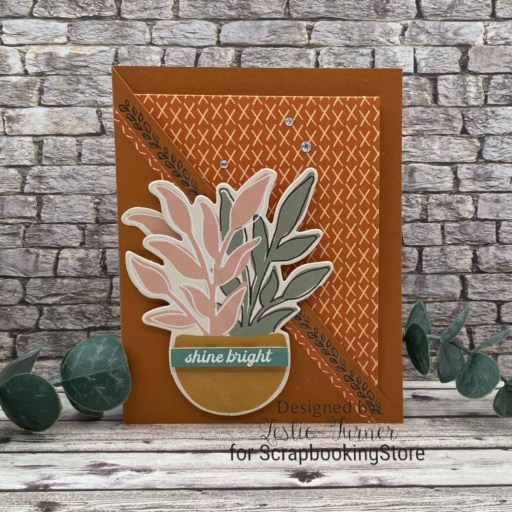
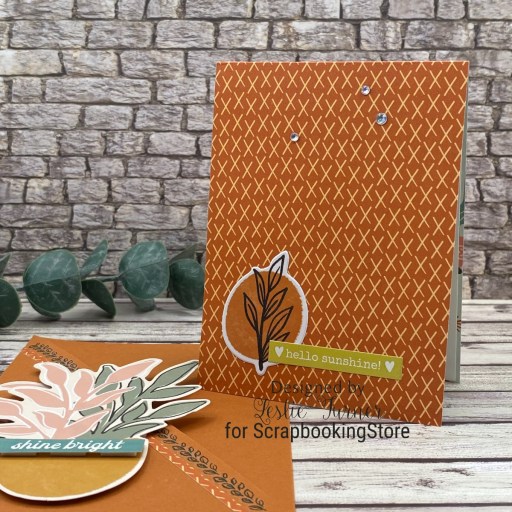
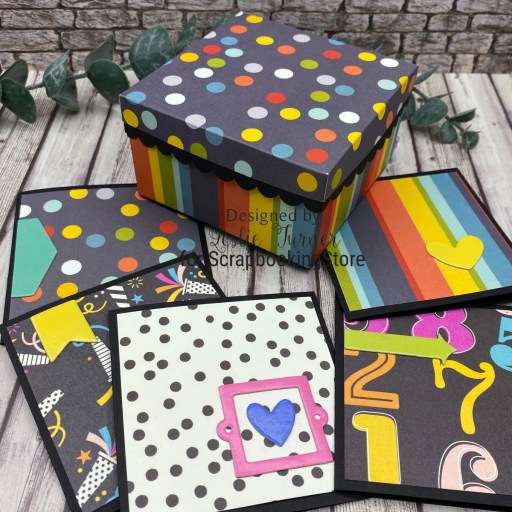
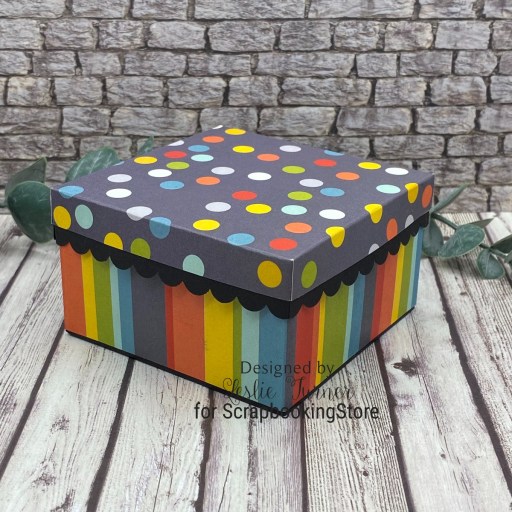
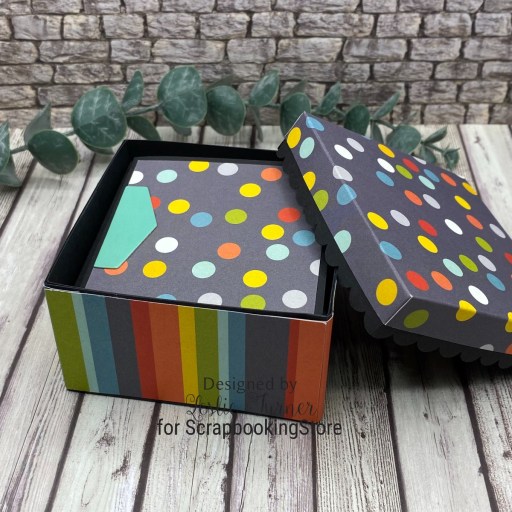
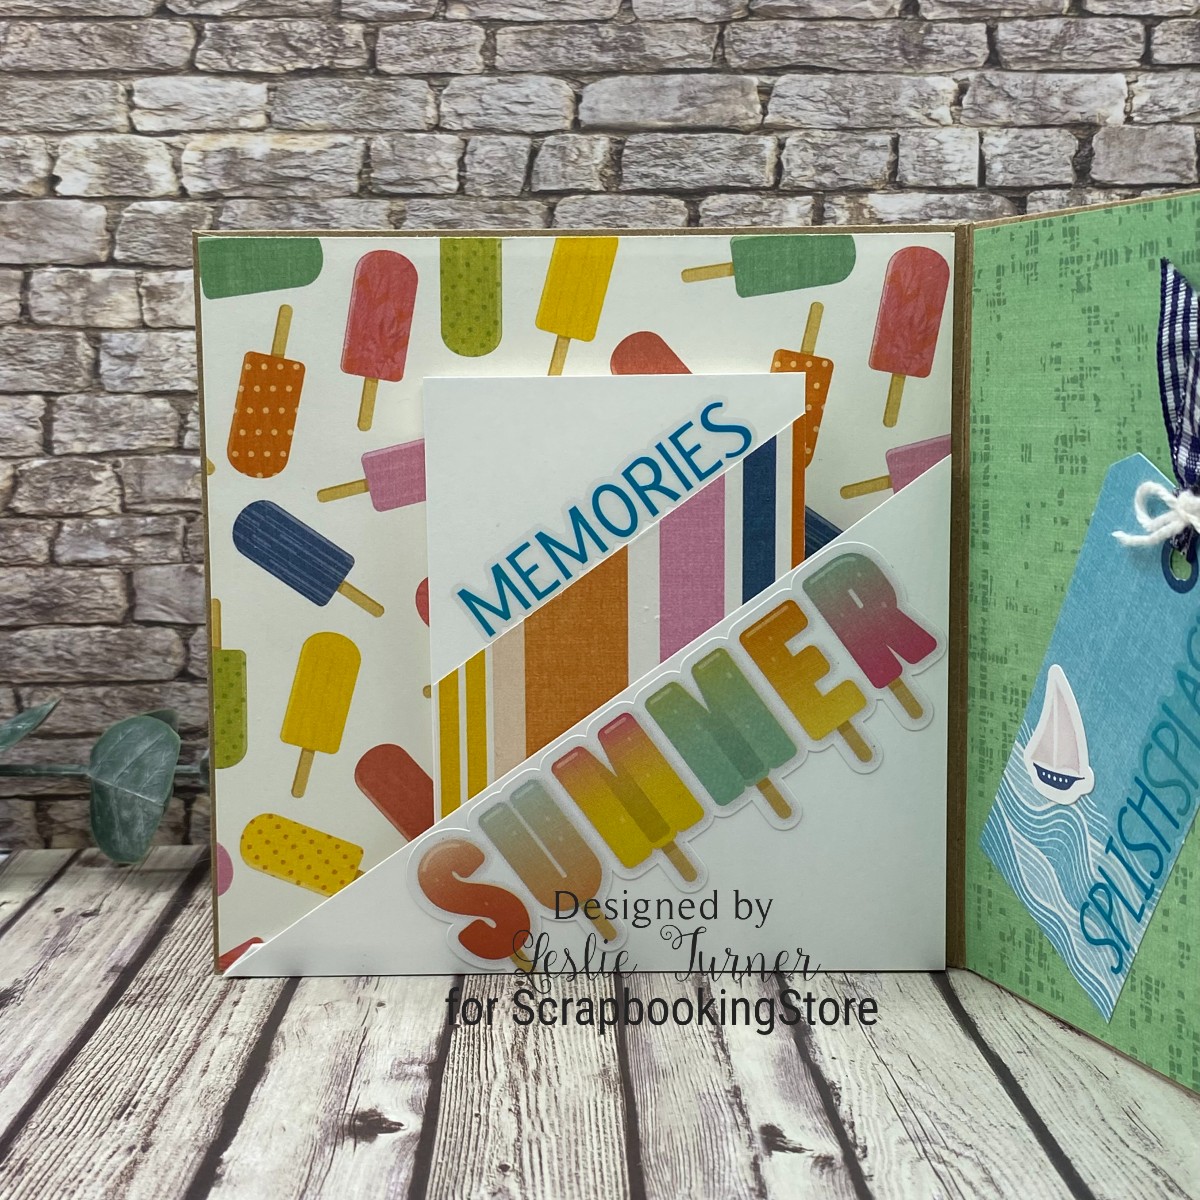
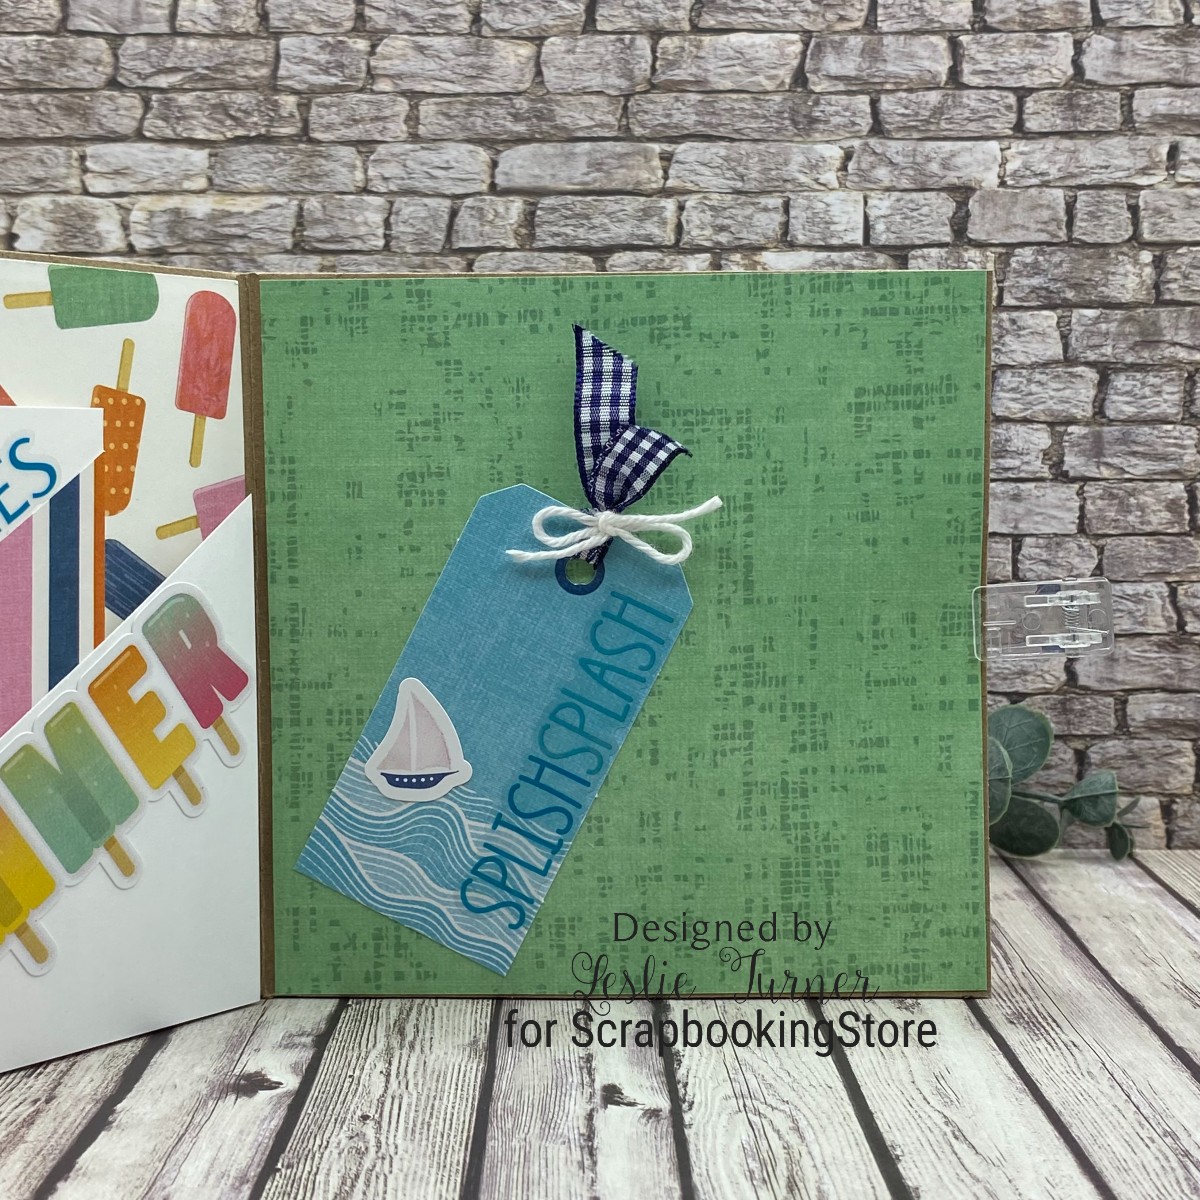
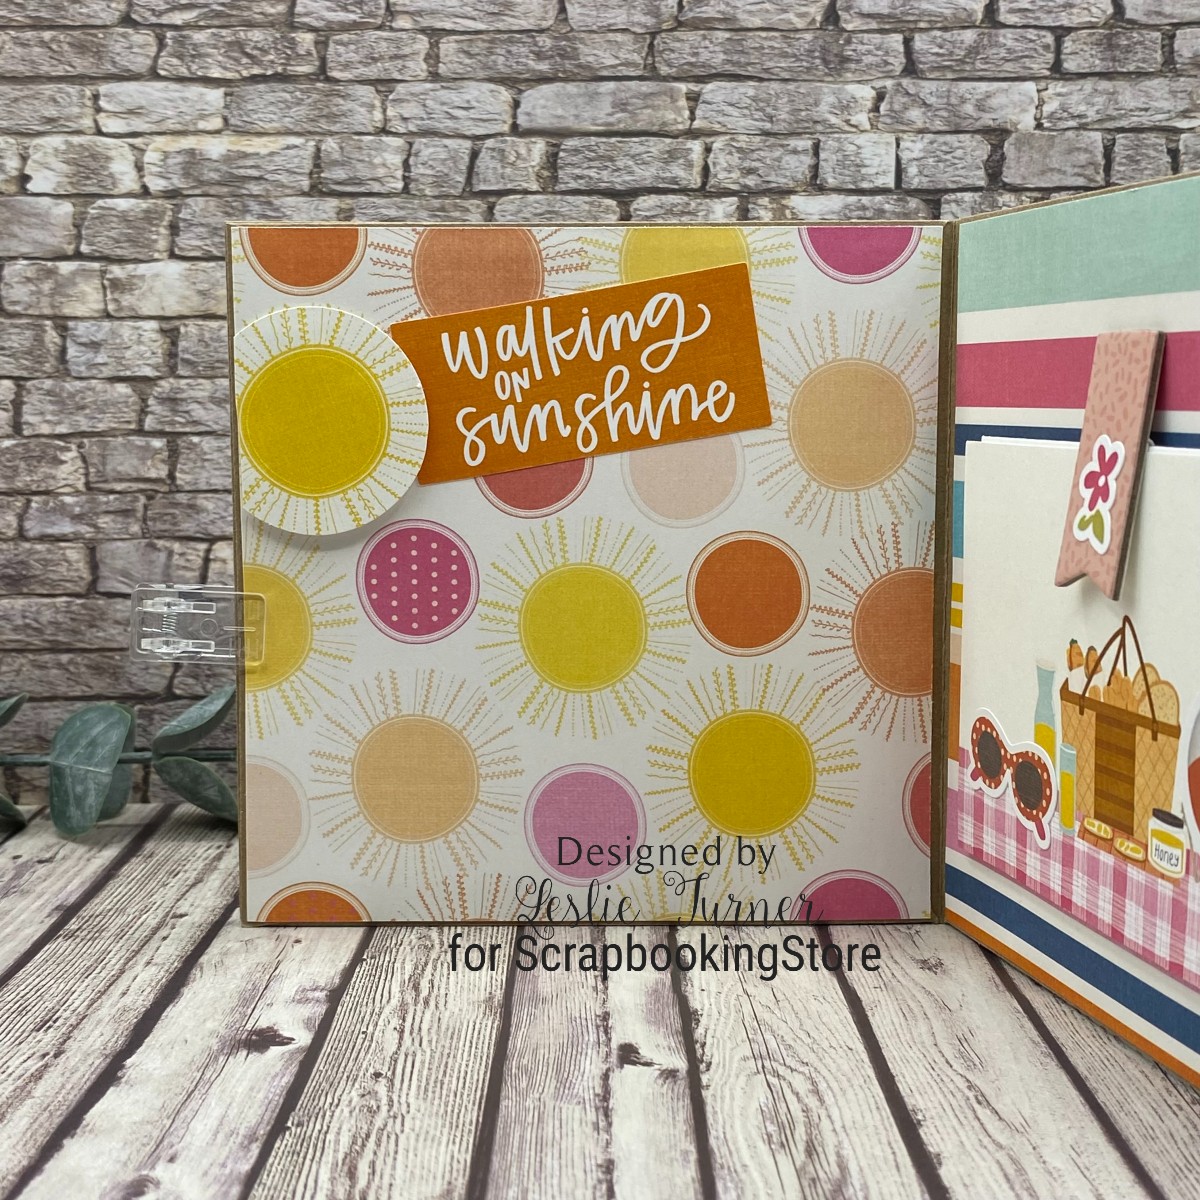
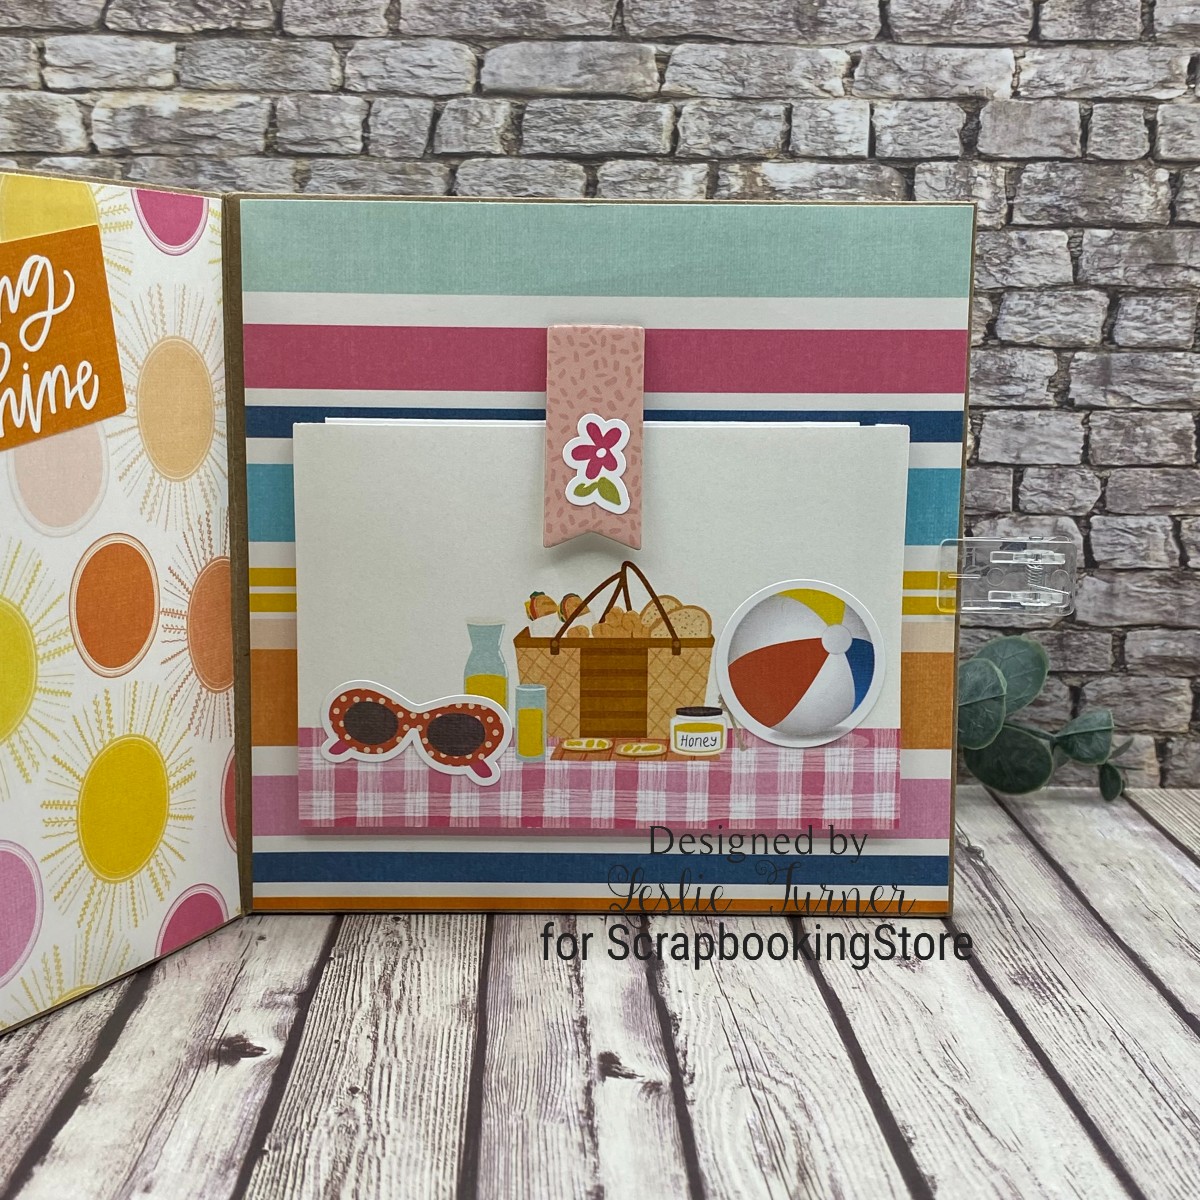
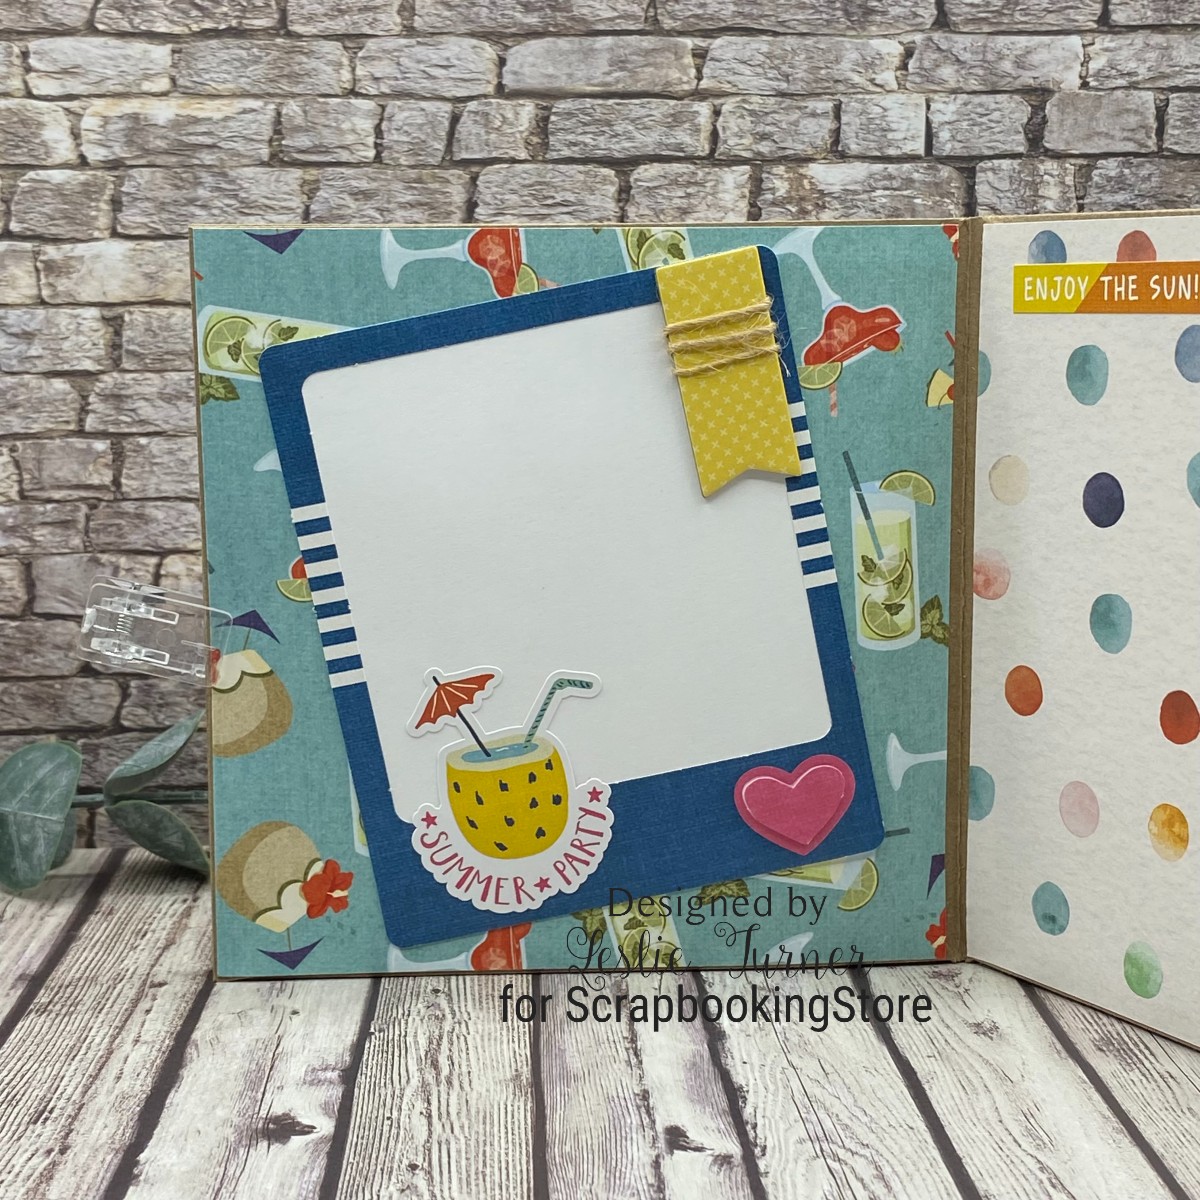
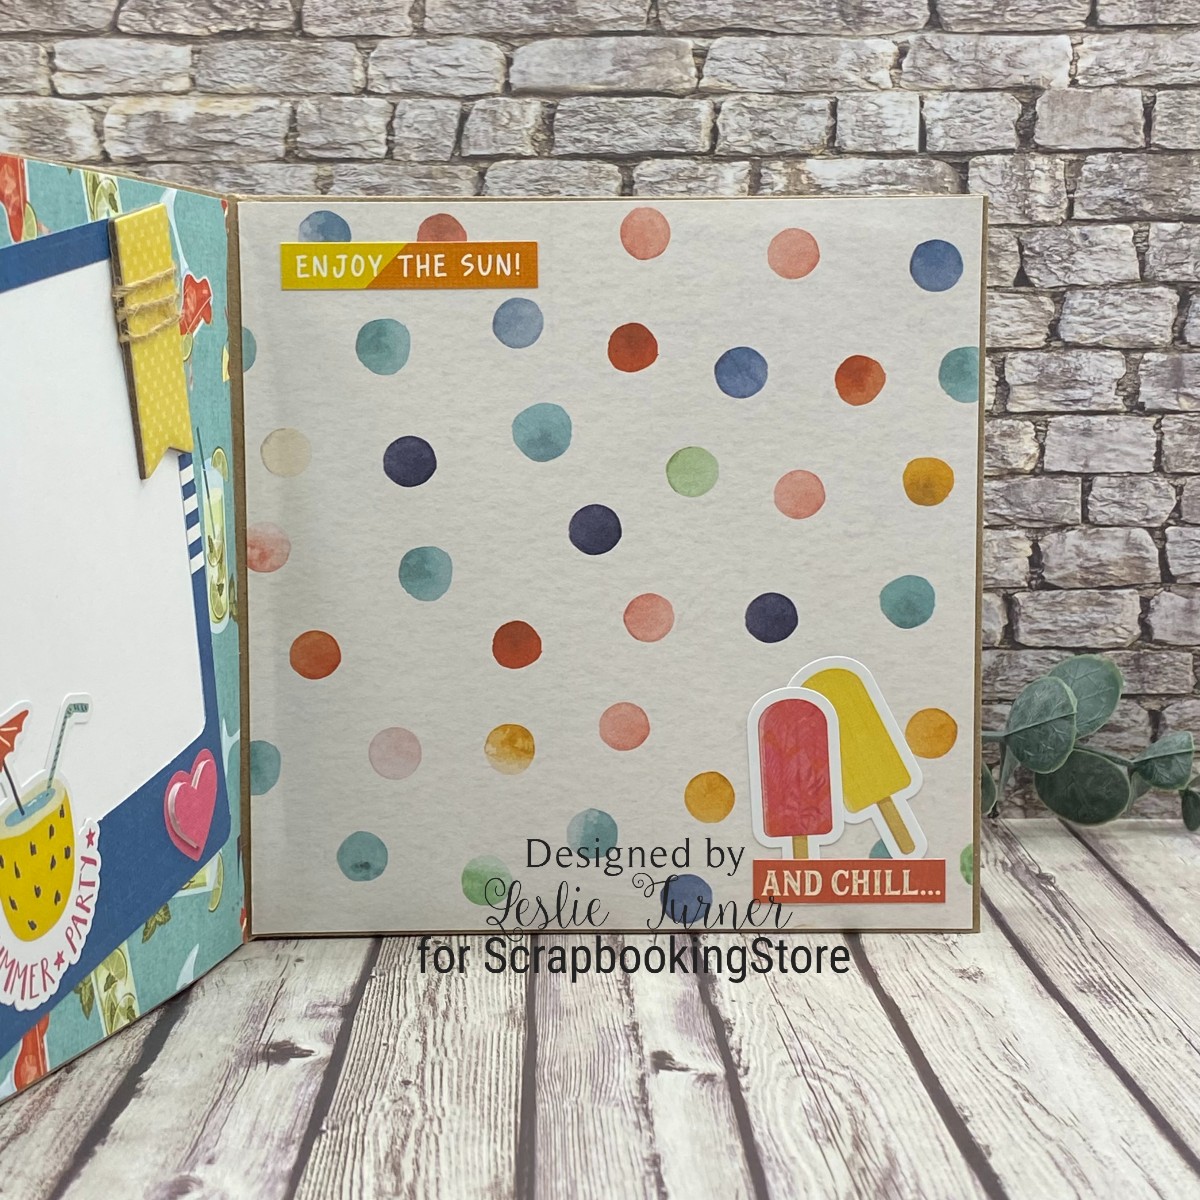
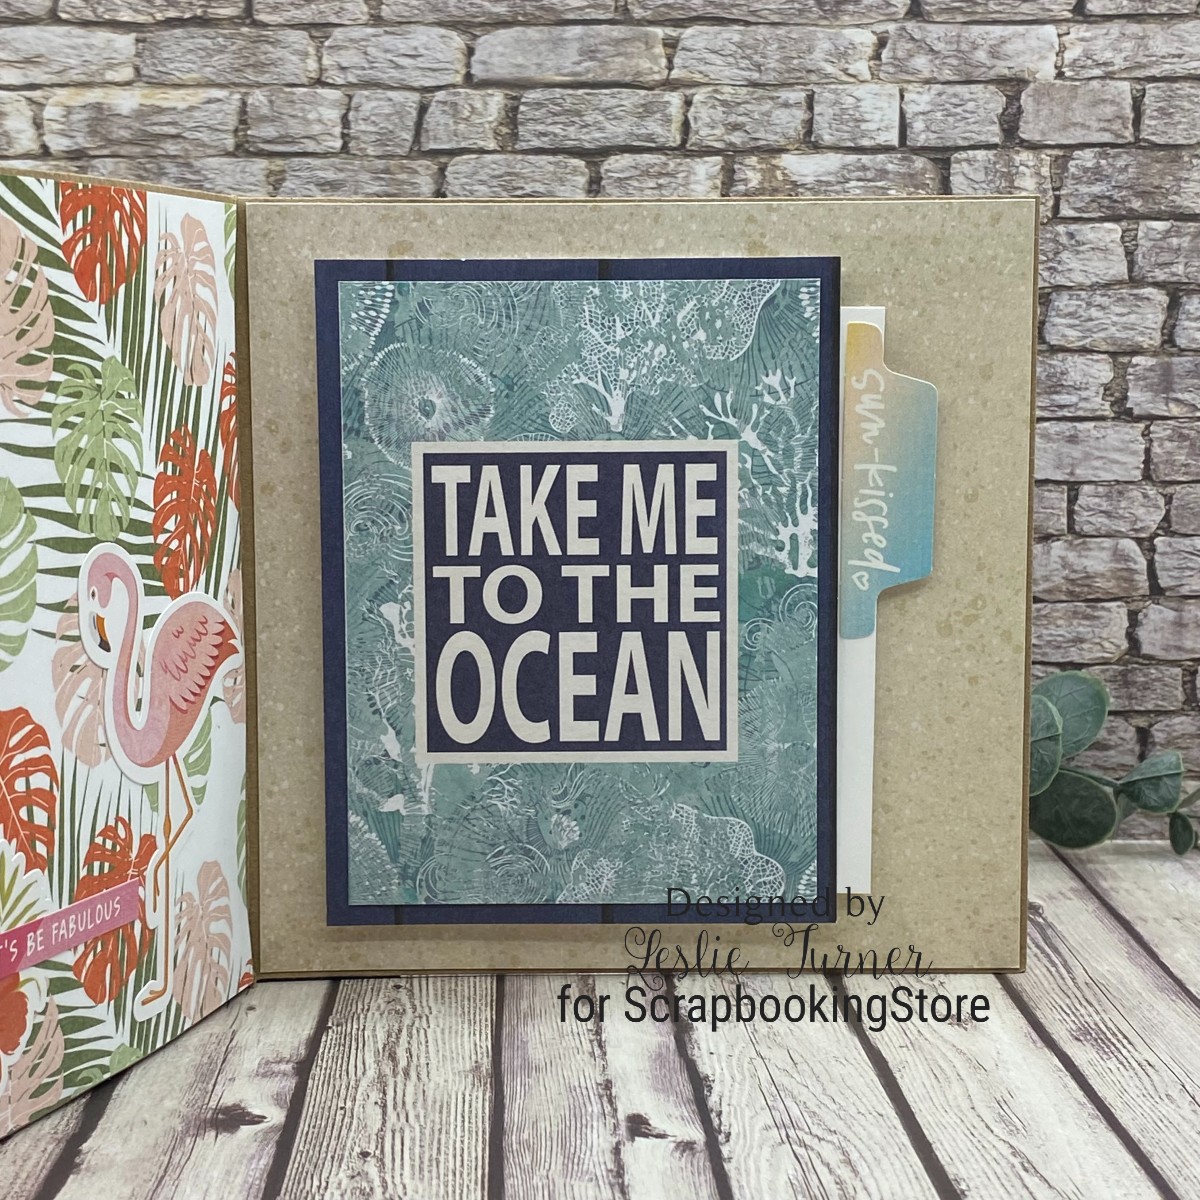
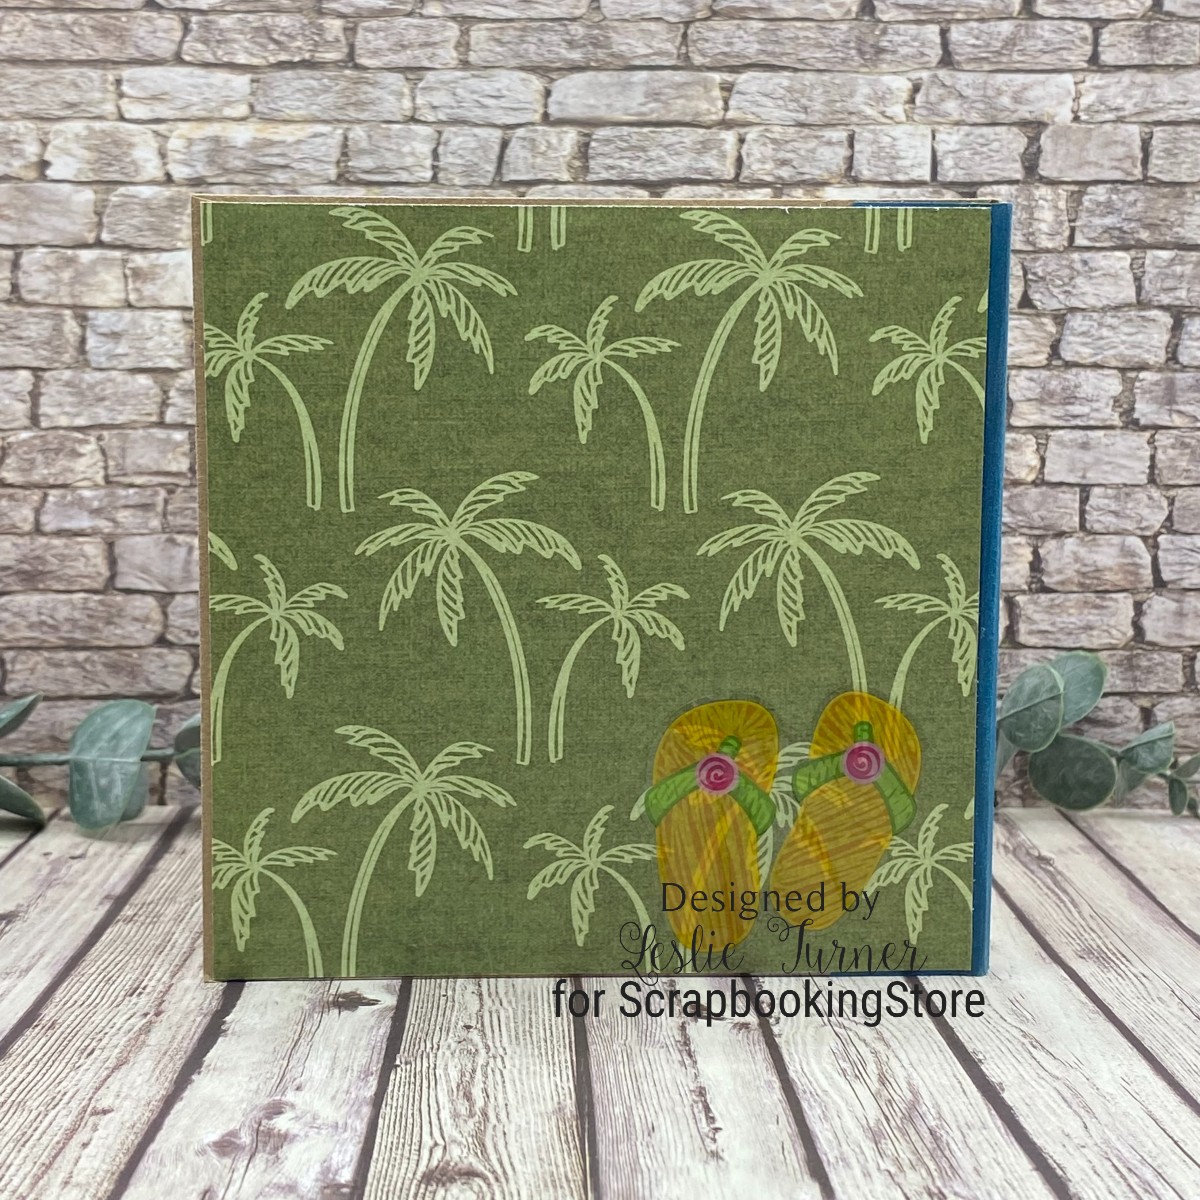
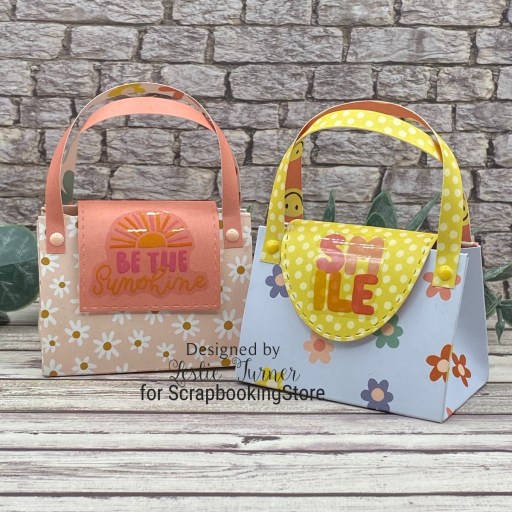
Howdy peeps! I hope everyone is healthy and enjoying some beautiful Fall-ish weather! I have a super adorable ScrapbookingStore DT inspiration project to share with you today, created with the September 2024 Scrapbook Kit with Upgrades. I’ve thoroughly enjoyed playing with the fun papers and elements in this collection. These mini handbag favor/treat boxes each feature double-sided paper from the collection and a clear sticker from the upgrades. I photographed these with several mini Hershey bars but other kinds of candy or even jewelry or rolled up money could be put in them. And think about all the different occasions they could be used for… the sky is the limit! I saw these cuties on Pinterest (tracked down the video HERE ) and knew I wanted to make some. I did make the flap closure on mine a little different than Trish did.

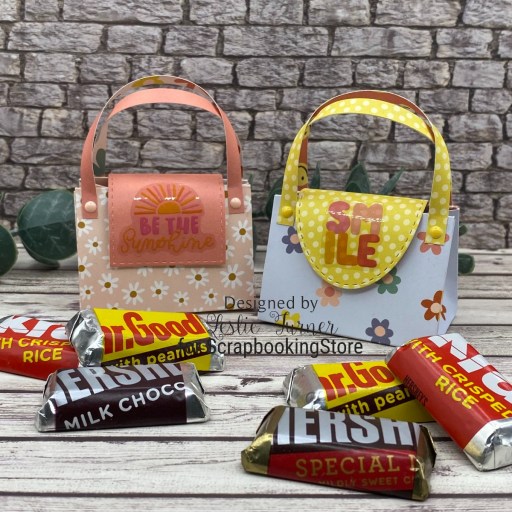
I picked out two coordinating patterned papers from the collection for each favor box – one for the base and one for the flap. I used Keep It Simple Stitched Rectangles Nested Dies and Stitched Ovals Nested Dies for the flaps and added clear stickers from the upgrades. I used velcro circles for the closures and embellished the base of the straps with Keep It Simple Back To Basics Rose and Lemon Enamel Dots. How stinkin’ cute!

Affiliate links are used in this post at no cost to you – I really appreciate your support!

ScrapbookingStore products used:
September 2024 Scrapbook Kit with Upgrades:
Simple Stories Boho Sunshine 12×12 Collection Kit
Upgrades: The Paper Studio Stick-A-Bilities
The Paper Studio Die Cuts
Dear Lizzy Rub-Ons

Other products used:
DIES/PUNCHES: Keep It Simple Back To Basics Stitched Rectangles Nested Dies and Stitched Ovals Nested Dies
ACCESSORIES: Fiskars 12″ ProCision Rotary Bypass Paper Trimmer, Elmer’s Craft Bond Tape Runner, My Sweet Petunia Precision Glue Press, Nuvo Deluxe Adhesive, Big Shot, InkyStamper Papercrafting Velcro, Keep It Simple Back To Basics Rose and Lemon Enamel Dots

I hope you’ve enjoyed today’s project and you’re thinking about all the fun you could have with this month’s kit… you really ought to think about joining the Subscription Club! Be sure to Follow us on Facebook, Instagram, Pinterest and YouTube for lots of crafty inspiration! And if you do decide to join the Subscription Club, join our ScrapbookingStore Club Member Group on Facebook for more inspiration and to share your projects! Thanks so much for stopping by today – we’ll see you next time!

Scrappy hugs,

Don’t Worry, Be Happy

Hi friends! I hope you’re having a great day and the weather is cooling off at least a little bit where you are. The weather has been absolutely beautiful out here in southwestern Colorado! I have another awesome ScrapbookingStore DT inspiration project to share with you today, created with the September 2024 Scrapbook Kit with Upgrades. I’m really enjoying the bright fun papers in this collection. I created a shadowbox card and despite it’s complex look, it is really fairly simple and sure packs a punch. It features papers and stickers from the collection along with two of the three items in the upgrades. Although I made a few changes, my inspiration came from THIS Splitcoast Stampers tutorial.

I cut the shadowbox card base and front flap from CutCardStock Basis Blue cardstock. Next, I cut layering panels for the front and inside from coordinating papers in the collection and cut an oval aperture into the front flap using a Spellbinders Classic Ovals die. I embellished the front flap and inside of the shadowbox with stickers from the sticker sheet. I added Keep It Simple Back To Basics Ruby and Lemon Enamel Dots to the centers of the flowers. I also added a Velcro circle to keep the flap closed.

Here is a shot of the inside of the shadowbox as well as a back shot. I cut a frame for the shadowbox and added a signature panel to the back which I embellished with a leftover paper strip and clear sticker and rub-on from the upgrades.

Affiliate links are used in this post at no cost to you – I really appreciate your support!

ScrapbookingStore products used:
September 2024 Scrapbook Kit with Upgrades:
Simple Stories Boho Sunshine 12×12 Collection Kit
Upgrades: The Paper Studio Stick-A-Bilities
The Paper Studio Die Cuts
Dear Lizzy Rub-Ons

Other products used:
CARDSTOCK/PAPER: CutCardStock Basis Blue cardstock, Neenah Classic Crest 80# Solar White cardstock
DIES/PUNCHES: Spellbinders Classic Ovals Large dies
ACCESSORIES: Fiskars 12″ ProCision Rotary Bypass Paper Trimmer, My Sweet Petunia Precision Glue Press, Nuvo Deluxe Adhesive, MISTI stamp tool, Big Shot, Stampin’ Up Mini Dimensionals, InkyStamper Papercrafting Velcro, Keep It Simple Back To Basics Ruby and Lemon Enamel Dots

I hope you’ve enjoyed today’s project and you’re thinking about all the fun you could have with this month’s kit… you really ought to think about joining the Subscription Club! Be sure to Follow us on Facebook, Instagram, Pinterest and YouTube for lots of crafty inspiration! And if you do decide to join the Subscription Club, join our ScrapbookingStore Club Member Group on Facebook for more inspiration and to share your projects! Thanks so much for stopping by today – we’ll see you next time!

Scrappy hugs,

Shine Bright

Hey everybody! I hope you’ve had a great week – they sure do seem to be passing by at a rapid rate these days… Christmas will be upon us before we know it! I have a pretty ScrapbookingStore DT inspiration project to share with you today, created with the awesome September 2024 Scrapbook Kit with Upgrades. The papers in this month’s kit are really fun and pair very well with the upgrades. This diagonal pocket card is truly one of the easiest cards to make and the end result is very cool. It can be dressed up or down depending upon the occasion. The card base is simply an embellished pocket with a top-folding mini card tucked inside. I used papers and stickers from the collection along with die cut pieces and rub-ons from the upgrades, and I love how this turned out!

The card base is 5-1/2″ x 8-1/2″ scored at 4-1/4″ which I cut from CutCardStock Basis Dark Orange. I sliced the front flap off at an angle (from top left to bottom right) and glued the flap across the bottom to form the pocket. Next, I embellished the diagonal border with a floral rub-on from the upgrades and then added a very thin strip of the paper used to make the mini card. Finally, I added a large die cut from the upgrades to the diagonal flap and adhered a sentiment with adhesive foam squares.

The mini card is 3-1/2″ x 9-1/2″ scored at 4-3/4″ which I cut from a double-sided paper in the kit and embellished with a die cut and sentiment (being mindful of the placement so it wouldn’t show outside the diagonal border of the pocket). I cut a 3-3/8″ x 4-5/8″ panel for the inside of the mini card from Solar White cardstock which I embellished with a leftover piece of the thin strip used to make the mini card. I also added sentiment and image stickers from the sticker sheet. The finishing touch was adding several clear gemstones to the front of the mini card.

Affiliate links are used in this post at no cost to you – I really appreciate your support!

ScrapbookingStore products used:
September 2024 Scrapbook Kit with Upgrades:
Simple Stories Boho Sunshine 12×12 Collection Kit
Upgrades: The Paper Studio Stick-A-Bilities
The Paper Studio Die Cuts
Dear Lizzy Rub-Ons

Other products used:
CARDSTOCK/PAPER: CutCardStock Basis Dark Orange cardstock, Neenah Classic Crest 80# Solar White cardstock
ACCESSORIES: Fiskars 12″ ProCision Rotary Bypass Paper Trimmer, My Sweet Petunia Precision Glue Press, Nuvo Deluxe Adhesive, Scrapbook.com Double-Sided Adhesive Foam Squares, clear gemstones

I hope you’ve enjoyed today’s project and you’re thinking about all the fun you could have with this month’s kit… you really ought to think about joining the Subscription Club! Be sure to Follow us on Facebook, Instagram, Pinterest and YouTube for lots of crafty inspiration! And if you do decide to join the Subscription Club, join our ScrapbookingStore Club Member Group on Facebook for more inspiration and to share your projects! Thanks so much for stopping by today – we’ll see you next time!

Scrappy hugs,

Yay, it’s your bday!

Howdy peeps! It’s Saturday and I hope you have something fun planned this weekend and you’ll be able to stay cool while doing it! I have one more awesome ScrapbookingStore DT inspiration project to share with you created with the August 2024 Scrapbook Kit with Upgrades. I am totally digging all the papers, stickers and items in the upgrades this month… the colors and coordination are amazing!

There are a gazillion versions of the slider card out there and I’ve been looking at them on Pinterest and YouTube. I’ve made several over the years with a hidden message pop-up feature, penny sliders with tracks, and waterfall cards to name a few. The version I’m sharing today is slightly different in that it’s flat and won’t require extra postage to mail. I used papers and stickers from the sticker sheet along with chipboard bits from the upgrades. I’m including instructions in the Freebies section of my blog HERE if you’re interested in learning how to make this card.

I cut the card base from CutCardStock Raspberry Ice cardstock along with several arched die cuts (in graduating sizes) cut from coordinating papers in the kit with the Scrapbook.com Nested A2 Arches die set. I embellished the front panels with stickers from the collection and chipboard bits from the upgrades. I used Keep It Simple Back To Basics Mango Ribbon tied with Doodlebug Design Lily White Twine for the pull mechanism. Like the other versions, as you pull upwards, you expose a hidden message underneath.

I added another arched die cut to the back with a sentiment from the sticker sheet in the kit.

Affiliate links are used in this post at no cost to you – I really appreciate your support!

ScrapbookingStore products used:
August 2024 Scrapbook Kit with Upgrades:
Simple Stories Birthday 12×12 Collection Kit
Upgrades: (1) Simple Stories Color Vibe Summer Chipboard Bits
(2) Stick-A-Bilities Glitter Stickers
(3) Stick-A-Bilities Calendar Number Stickers

Other products used:
CARDSTOCK/PAPER: CutCardStock Raspberry Ice cardstock
DIES/PUNCHES: Scrapbook.com Nested A2 Arches die set, Stampin’ Up 1-3/8″ Circle Punch, 1/8″ Circle Punch
ACCESSORIES: Fiskars 12″ ProCision Rotary Bypass Paper Trimmer, Cricut Paper Trimmer, My Sweet Petunia Precision Glue Press, Nuvo Deluxe Adhesive, Big Shot, Keep It Simple Mango Ribbon, Doodlebug Design Lily White Doodle Twine

I hope you’ve enjoyed today’s project and you’re thinking about all the fun you could have with this month’s kit… you really ought to think about joining the Subscription Club! Be sure to Follow us on Facebook, Instagram, Pinterest and YouTube for lots of crafty inspiration! And if you do decide to join the Subscription Club, join our ScrapbookingStore Club Member Group on Facebook for more inspiration and to share your projects! Thanks so much for stopping by today – we’ll see you next time!

Scrappy hugs,

Celebrating You!

Hi friends! A big ol’ Happy Friday – I hope you’ve had an amazing week! I have another fun project to share for ScrapbookingStore, created with the awesome August 2024 Scrapbook Kit with Upgrades. Everybody needs birthday cards in their stash and with a birthday-themed kit, it can’t be any easier. I created a mini bendi card which is fun to make and very easy. I’ve made several of these over the years, having originally seen THESE instructions in a Splitcoast Stampers newsletter back in 2020. I changed a few of the measurements and instructions and have posted them in the Freebies section of my blog HERE if you’d like to learn how to make it. I used several coordinating papers and lots of stickers from the collection, along with glitter stickers and chipboard bits from the upgrades.

I cut the flat card base and two dimensional panels from CutCardStock Lessebo Sunset Orange cardstock along with layering panels for each from three coordinating prints in the collection. I ‘went to town’ decorating each panel with stickers from the sticker sheet along with glitter stickers and chipboard bits from the upgrades.

I popped up the glittered gifts on the right side with Kool Tac clear foam pads. I haven’t used these clear foam pads in forever and was afraid they’d be dried out, but they weren’t. I’m not even sure this company is still around. But these work very well under see-through elements. The stars on the left side of the bottom strip are chipboard and provide some fun texture.

Here’s a slight overhead shot so you can see the construction; this card is an A2 size and folds flat for mailing. I adhered two Solar White panels on the back which I embellished with sentiment and glitter stickers.

Affiliate links are used in this post at no cost to you – I really appreciate your support!

ScrapbookingStore products used:
August 2024 Scrapbook Kit with Upgrades:
Simple Stories Birthday 12×12 Collection Kit
Upgrades: (1) Simple Stories Color Vibe Summer Chipboard Bits
(2) Stick-A-Bilities Glitter Stickers
(3) Stick-A-Bilities Calendar Number Stickers

Other products used:
CARDSTOCK/PAPER: CutCardStock Lessebo Sunset Orange cardstock, Neenah Classic Crest 80# Solar White cardstock
ACCESSORIES: Fiskars 12″ ProCision Rotary Bypass Paper Trimmer, My Sweet Petunia Precision Glue Press, Nuvo Deluxe Adhesive, Kool Tak Clear Foam Pads

I hope you’ve enjoyed today’s project and you’re thinking about all the fun you could have with this month’s kit… you really ought to think about joining the Subscription Club! Be sure to Follow us on Facebook, Instagram, Pinterest and YouTube for lots of crafty inspiration! And if you do decide to join the Subscription Club, join our ScrapbookingStore Club Member Group on Facebook for more inspiration and to share your projects! Thanks so much for stopping by today – we’ll see you next time!

Scrappy hugs,

10 Notelets in a Box

Hey everybody! Happy Thursday – can you believe we’re on the downslide to another weekend already?! I have a cool ScrapbookingStore DT inspiration project to share created with the awesome August 2024 Scrapbook Kit with Upgrades. This birthday-themed collection has really pretty coordinating papers that can be used for nearly any occasion besides birthdays. I love the versatility! I crafted a 3-1/2″ square box with a scalloped lid that holds a set of ten all-occasion 3-1/4″ square notelets (two each of the five patterns shown below). I used coordinating papers from the collection and chipboard bits from the upgrades, adapting my project from THIS 2008 Splitcoast Stampers tutorial. The basic instructions are the same but I did change some of the measurements and I’ve added them to the Freebies section of my blog HERE.

I cut the box, lid and notelet bases from CutCardStock Lessebo Pitch Black cardstock. I used the Stampin’ Up Scallop Edge Punch around the edge of the lid piece and then covered the box and lid with two coordinating prints in the collection. I cut two layering panels from five prints in the kit for the front of the notelets and embellished them with chipboard bits from the upgrades.

I cut layering panels for the insides from Neenah Classic Crest Solar White cardstock, leaving the insides blank to write a custom message for the occasion. The final step was making little envelopes (not pictured) with my WRMK All-In-One Tool – The Works from 32# HP copy paper with 1/8″ Scor-Tape on the flaps. This was a fun project!

Affiliate links are used in this post at no cost to you – I really appreciate your support!

ScrapbookingStore products used:
August 2024 Scrapbook Kit with Upgrades:
Simple Stories Birthday 12×12 Collection Kit
Upgrades: (1) Simple Stories Color Vibe Summer Chipboard Bits
(2) Stick-A-Bilities Glitter Stickers
(3) Stick-A-Bilities Calendar Number Stickers

Other products used:
CARDSTOCK/PAPER: CutCardStock Lessebo Pitch Black cardstock, Neenah Classic Crest 80# Solar White cardstock
DIES/PUNCHES: Stampin’ Up Scallop Edge Punch, We R Memory Keepers All-In-One Tool – The Works
ACCESSORIES: Fiskars 12″ ProCision Rotary Bypass Paper Trimmer, Elmer’s Craft Bond Tape Runner, My Sweet Petunia Precision Glue Press, Nuvo Deluxe Adhesive, 1/8″ Scor-Tape

I hope you’ve enjoyed today’s project and you’re thinking about all the fun you could have with this month’s kit… you really ought to think about joining the Subscription Club! Be sure to Follow us on Facebook, Instagram, Pinterest and YouTube for lots of crafty inspiration! And if you do decide to join the Subscription Club, join our ScrapbookingStore Club Member Group on Facebook for more inspiration and to share your projects! Thanks so much for stopping by today – we’ll see you next time!

Scrappy hugs,

Paradise mini album

Howdy peeps! I hope you have something fun planned this weekend! I have one more ScrapbookingStore DT inspiration project to share created with the gorgeous July 2024 Scrapbook Kit with Upgrades. I’m so smitten with all the fun journaling cards and tags included with the papers in this month’s kit. I love to make mini albums and this one was created from five square kraft envelopes. The front features a beach scene from a journaling card to which I added some fun brads to complete the scene. Envelope mini album instructions are already available in the Freebies section of my blog HERE and these instructions can be used with any size envelopes.

I assembled the mini album from five CutCardStock Brown Bag Kraft 5″ square envelopes and embellished each page with patterned paper from the kit. I also used stickers from the sticker sheet, tags and journaling cards from the paper pack, and clear stickers, chipboard pieces and ephemera from the upgrades. I included pull-outs and pull-ups, leaving plenty of room for photos and journaling. This was definitely a fun one!

Affiliate links are used in this post at no cost to you – I really appreciate your support!

ScrapbookingStore products used:
July 2024 Scrapbook Kit with Upgrades:
PhotoPlay Sweet Sunshine 12×12 Collection Kit
Upgrades: PhotoPlay Sweet Sunshine Ephemera
Echo Park Summertime Chipboard Phrases
The Paper Studio Stick-A-Bilities clear stickers

Other products used:
CARDSTOCK/PAPER: CutCardStock Brown Bag Kraft 5″ square envelopes, CutCardStock Lessebo Amazon Dark Teal cardstock, Neenah Classic Crest 80# Solar White cardstock
ACCESSORIES: Fiskars 12″ ProCision Rotary Bypass Paper Trimmer, Bearly Art precision craft glue, Doodlebug Design Lily White Doodle Twine, Studios Blackbird twine, 1mm thin foam squares, 1/4″ double-sided foam strips, Scrapbook.com Double-sided Foam Adhesive Squares; Eyelet Outlet copper skinny washi tape; Eyelet Outlet Lobster, Seashore and Boat brads

I hope you’ve enjoyed today’s project and you’re thinking about all the fun you could have with this month’s kit… you really ought to think about joining the Subscription Club! Be sure to Follow us on Facebook, Instagram, Pinterest and YouTube for lots of crafty inspiration! And if you do decide to join the Subscription Club, join our ScrapbookingStore Club Member Group on Facebook for more inspiration and to share your projects! Thanks so much for stopping by today – we’ll see you next time!

Scrappy hugs,

beach Vibes

Hi friends! A big ol’ Happy Friday to you! I’m thrilled to share another ScrapbookingStore DT inspiration project with you today created with the awesome July 2024 Scrapbook Kit with Upgrades. I love all the coordinating beachy prints in this month’s collection and created a faux center step card featuring a journaling card included in the patterned papers. It’s totally amazing watching a simple card like this one come to life in just a few minutes! My inspiration for this fun fold came from Beccy Muir’s blog HERE when I visited a while back but I made some adjustments to the dimensions to make it an A2 size.

I cut the two pieces for the card base from Neenah Classic Crest 80# Solar White cardstock along with layering panels from coordinating prints in the collection. I trimmed a journaling card for the front and fussy cut a sentiment and seashell from other journaling cards which I popped up on foam squares. The finishing touch on the front was the addition of a few gemstones and pearls.

I cut the inside panel from Solar White cardstock, embellished it with a leftover piece of patterned paper used on the front, and added a clear sticker from the upgrades. I adhered a panel of patterned paper to the back to give it a more finished look.

Affiliate links are used in this post at no cost to you – I really appreciate your support!

ScrapbookingStore products used:
July 2024 Scrapbook Kit with Upgrades:
PhotoPlay Sweet Sunshine 12×12 Collection Kit
Upgrades: PhotoPlay Sweet Sunshine Ephemera
Echo Park Summertime Chipboard Phrases
The Paper Studio Stick-A-Bilities clear stickers

Other products used:
CARDSTOCK/PAPER: Neenah Classic Crest 80# Solar White cardstock
ACCESSORIES: Cricut Paper Trimmer, Elmer’s Craft Bond Tape Runner, Bearly Art precision craft glue, Eyelet Outlet 8mm Amber Cut Jewels and 4mm Champagne Pearls, Scrapbook.com Double-Sided Foam Adhesive Squares

I hope you’ve enjoyed today’s project and you’re thinking about all the fun you could have with this month’s kit… you really ought to think about joining the Subscription Club! Be sure to Follow us on Facebook, Instagram, Pinterest and YouTube for lots of crafty inspiration! And if you do decide to join the Subscription Club, join our ScrapbookingStore Club Member Group on Facebook for more inspiration and to share your projects! Thanks so much for stopping by today – we’ll see you next time!

Scrappy hugs,

hello Summer fun fold

Hey everybody! Happy Thursday – we’re getting close to Friday so that means another week has bit the dust! I have another awesome ScrapbookingStore DT inspiration project to share with you today created with the July 2024 Scrapbook Kit with Upgrades. I am totally loving all the summery and beachy feels this month’s kit has to offer. You know I love me some fun folds so I made a wiper card featuring papers and stickers along with a chipboard piece and clear sticker from the upgrades.

This is one of my all-time favorite fun folds and I actually have an SVG cut file for a wiper card which I’ve used a couple times but I prefer this hand-cut version. If you prefer videos, my original inspiration came from Julie Davison’s video HERE a few years back; otherwise I’m sharing written instructions in the Freebies section of my blog HERE.

I cut the two pieces for the card base from CutCardStock Amazon Dark Teal along with layering panels from coordinating prints in the collection. I added a chipboard piece from the upgrades for the sentiment along with stickers from the sticker sheet and a fussy-cut crab to embellish the front panel.

And here is where the magic happens (the reason I love this fun fold so much) – when the sides of the card are pulled outward, up pops a fussy-cut seahorse!

I cut the back panel from Neenah Classic Crest Solar White cardstock and embellished it with clear stickers from the upgrades.

Affiliate links are used in this post at no cost to you – I really appreciate your support!

ScrapbookingStore products used:
July 2024 Scrapbook Kit with Upgrades:
PhotoPlay Sweet Sunshine 12×12 Collection Kit
Upgrades: PhotoPlay Sweet Sunshine Ephemera
Echo Park Summertime Chipboard Phrases
The Paper Studio Stick-A-Bilities clear stickers

Other products used:
CARDSTOCK/PAPER: CutCardStock Lessebo Dark Amazon Teal cardstock, Neenah Classic Crest 80# Solar White cardstock
ACCESSORIES: Fiskars 12″ ProCision Rotary Bypass Paper Trimmer, Elmer’s Craft Bond Tape Runner, Bearly Art precision craft glue, Grafix Crystal Clear Craft Plastic, Therm O Web medium and small Zots

I hope you’ve enjoyed today’s project and you’re thinking about all the fun you could have with this month’s kit… you really ought to think about joining the Subscription Club! Be sure to Follow us on Facebook, Instagram, Pinterest and YouTube for lots of crafty inspiration! And if you do decide to join the Subscription Club, join our ScrapbookingStore Club Member Group on Facebook for more inspiration and to share your projects! Thanks so much for stopping by today – we’ll see you next time!

Scrappy hugs,

palm trees & 80 degrees

Hey everybody, Happy Wednesday – I hope you’re having a great week! I have an amazing ScrapbookingStore DT inspiration project to share with you today created with the July 2024 Scrapbook Kit with Upgrades. OMGoodness, this is an awesome Summer-themed collection. You know I love all the summer vibes but I just can’t take the heat, lol! I made several shirt cards for Father’s Day (for a friend to sell at her store) which I still need to share. This is truly one of the easiest shaped card designs ever.

The card base was cut from CutCardStock Lessebo Moss Green cardstock along with the shirt panel, placket and collar pieces from a tropical leaf print in the kit. I added Keep It Simple Jade Enamel Dots for the buttons and a piece of ephemera from the upgrades for the sentiment. The final step was cutting the card base across the shoulders and up the sides of the collar.

I cut the inside panel from Neenah Classic Crest 80# Solar White cardstock and embellished it with a leftover strip of the tropical leaf pattern used on the front. I added a sticker from the sticker sheet for the sentiment which completed the card.

Affiliate links are used in this post at no cost to you – I really appreciate your support!

ScrapbookingStore products used:
July 2024 Scrapbook Kit with Upgrades:
PhotoPlay Sweet Sunshine 12×12 Collection Kit
Upgrades: PhotoPlay Sweet Sunshine Ephemera
Echo Park Summertime Chipboard Phrases
The Paper Studio Stick-A-Bilities clear stickers

Other products used:
CARDSTOCK/PAPER: CutCardStock Lessebo Moss Green cardstock, Neenah Classic Crest 80# Solar White cardstock
ACCESSORIES: Fiskars 12″ ProCision Rotary Bypass Paper Trimmer, Cricut Paper Trimmer, Elmer’s Craft Bond Tape Runner, Bearly Art precision craft glue, Keep It Simple Back To Basics Jade Enamel Dots, 1/2″ double-sided foam strip, Scrapbook.com double-sided foam adhesive squares

I hope you’ve enjoyed today’s project and you’re thinking about all the fun you could have with this month’s kit… you really ought to think about joining the Subscription Club! Be sure to Follow us on Facebook, Instagram, Pinterest and YouTube for lots of crafty inspiration! And if you do decide to join the Subscription Club, join our ScrapbookingStore Club Member Group on Facebook for more inspiration and to share your projects! Thanks so much for stopping by today – we’ll see you next time!

Scrappy hugs,