Thinking of You

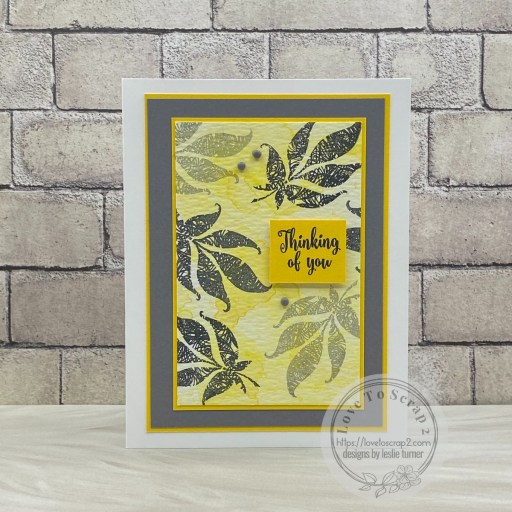
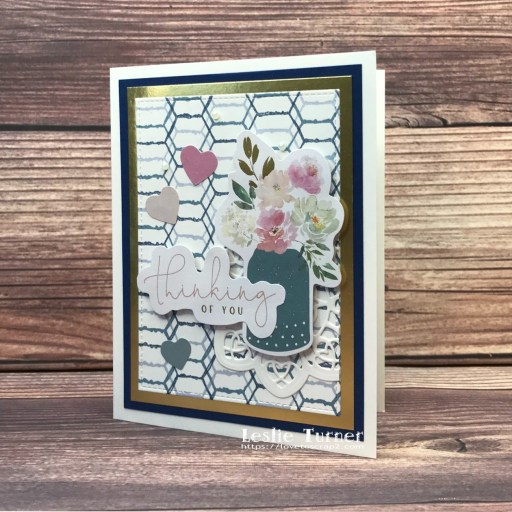
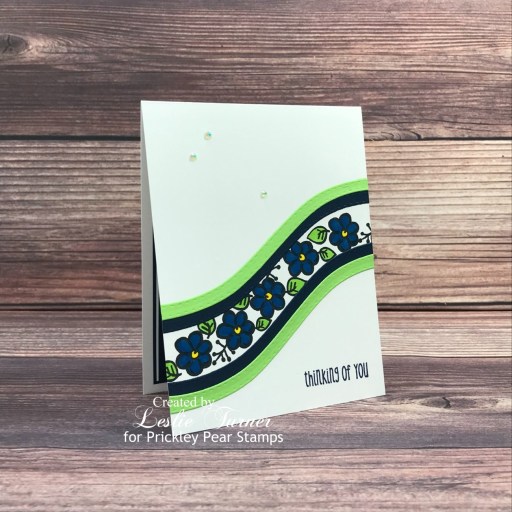
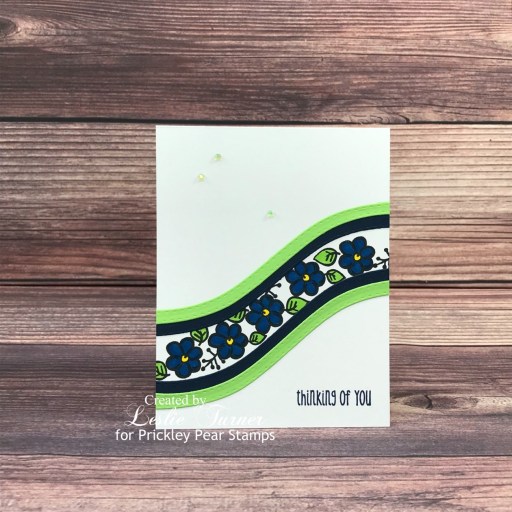
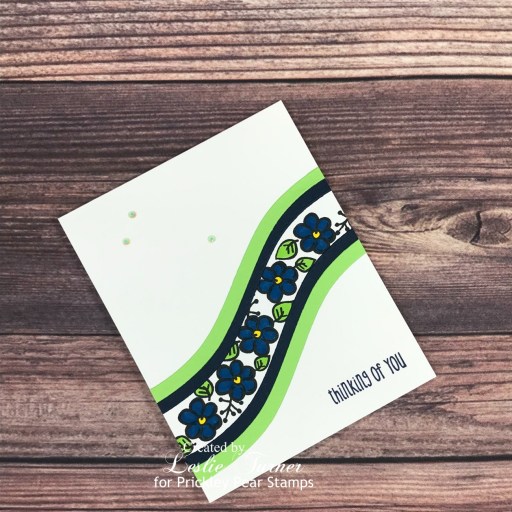
Hi friends, it’s Friday (again) and I hope you have something fabulous planned this weekend. I just can’t believe how fast the days, weeks and months are flying by! Our new challenge is live this morning over at Creative Creases and I’m thrilled to share my DT inspiration project for Challenge #106. I love pansies and I really enjoyed putting this card together. I made it a while back for a friend battling cancer and I’m not even sure she received it. I had sent her several cards and never got a response about any of them, so I just don’t know. If she did get it, I hope she enjoyed it as much as I enjoyed making it. ;)

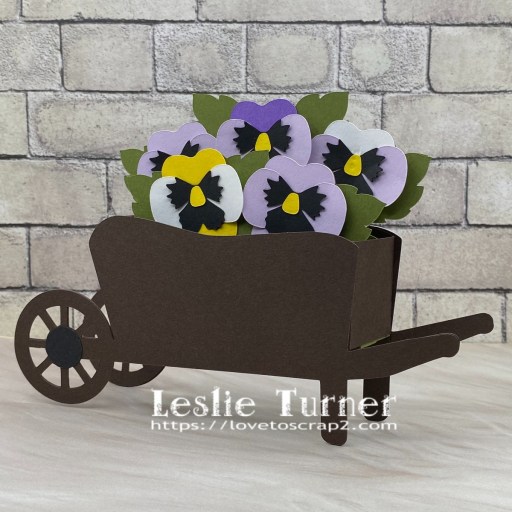
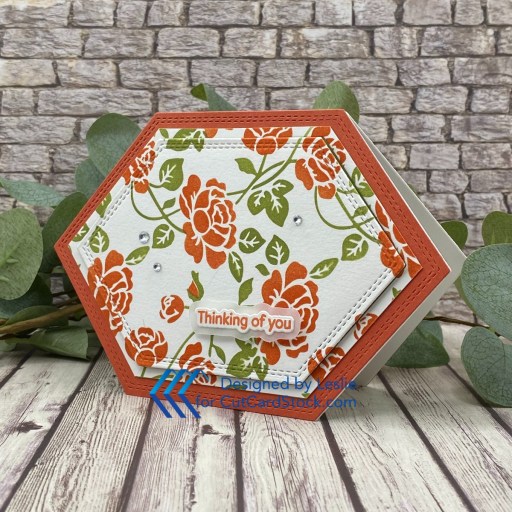
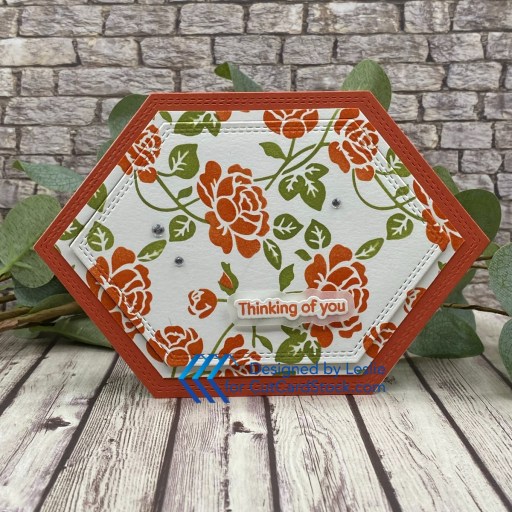
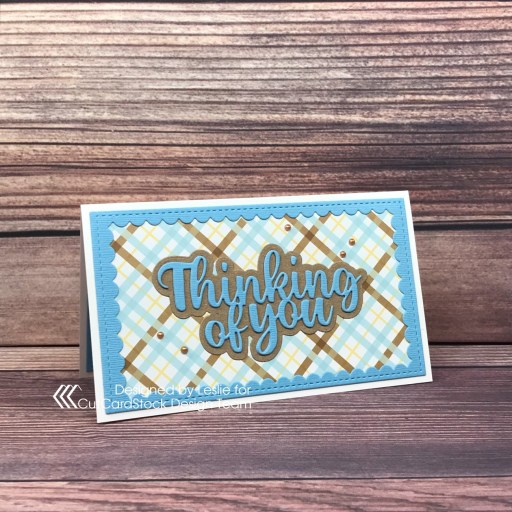
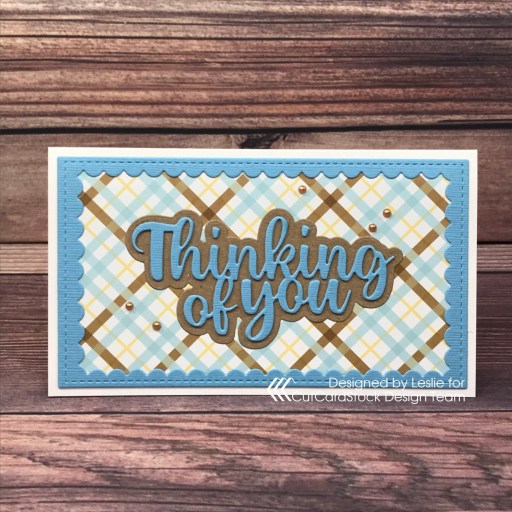
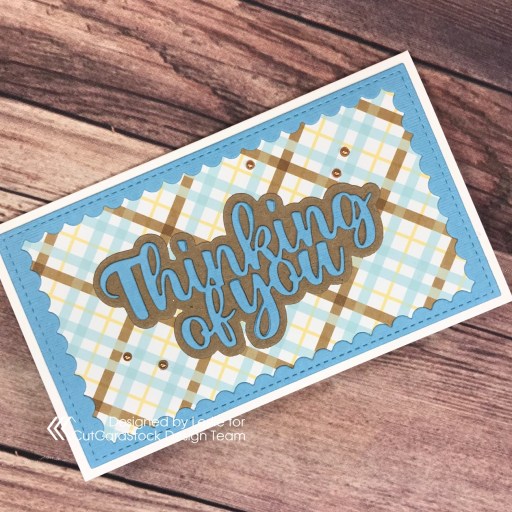
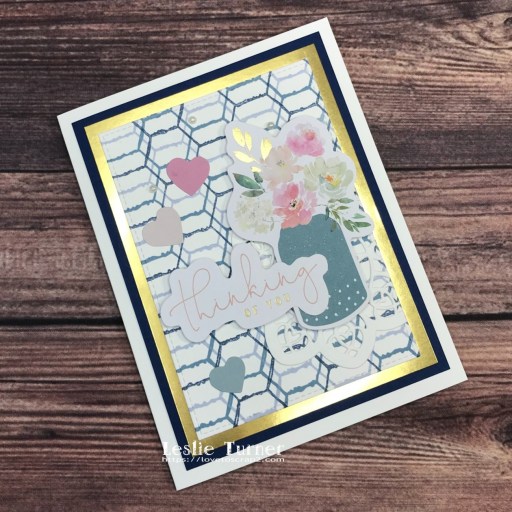
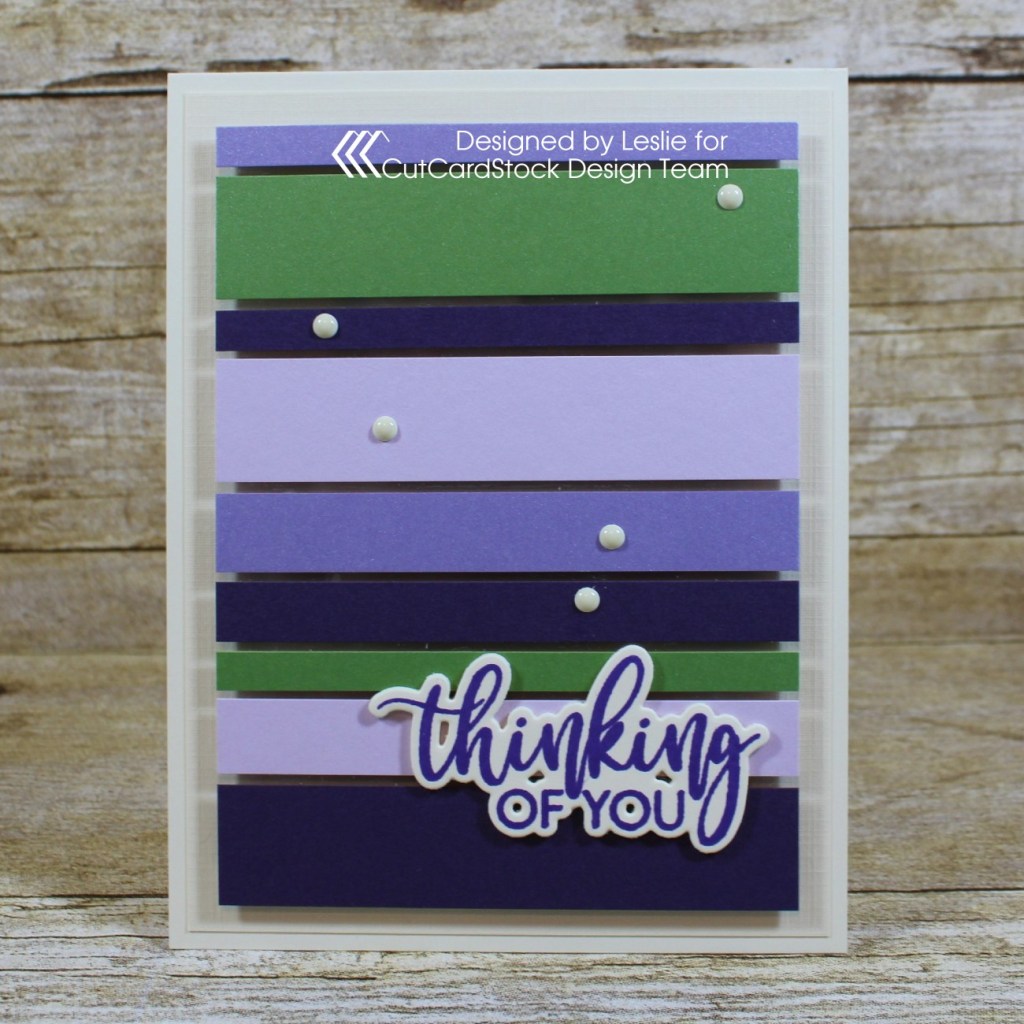
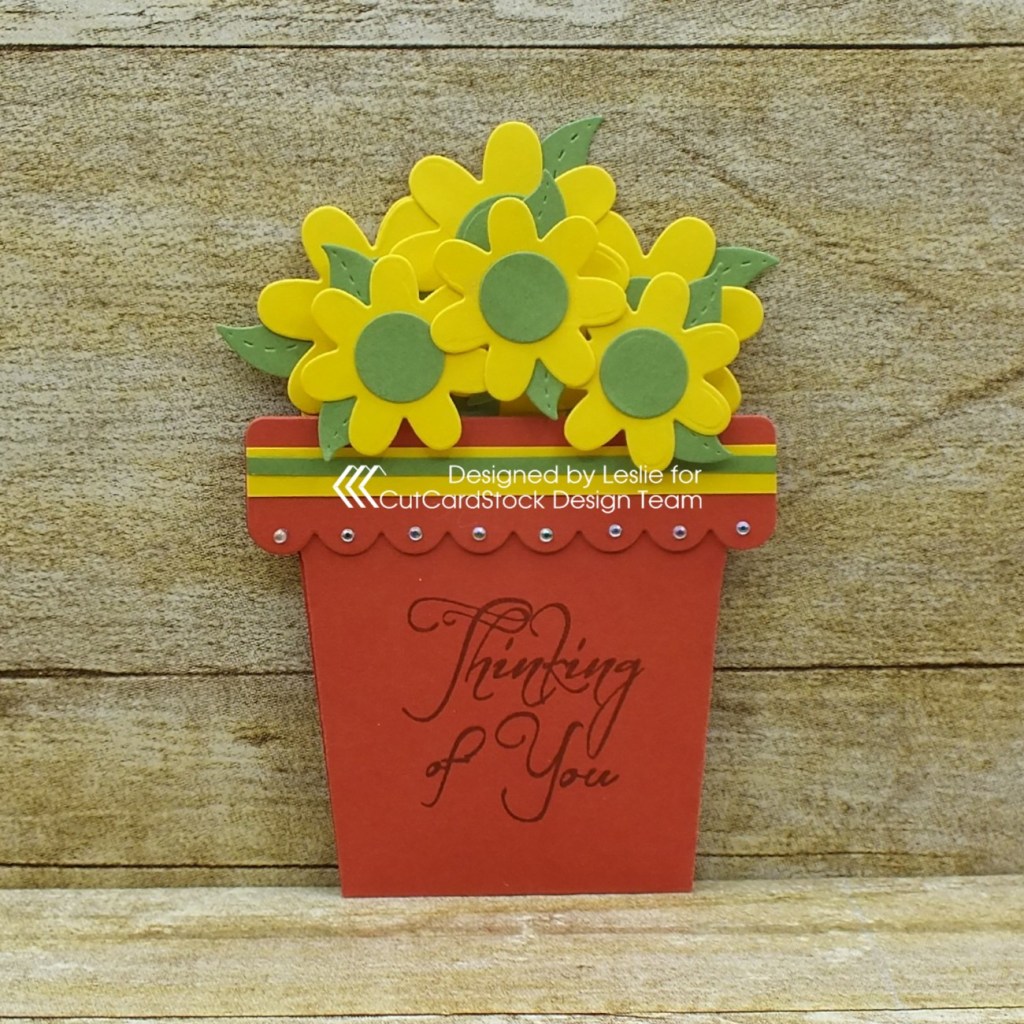
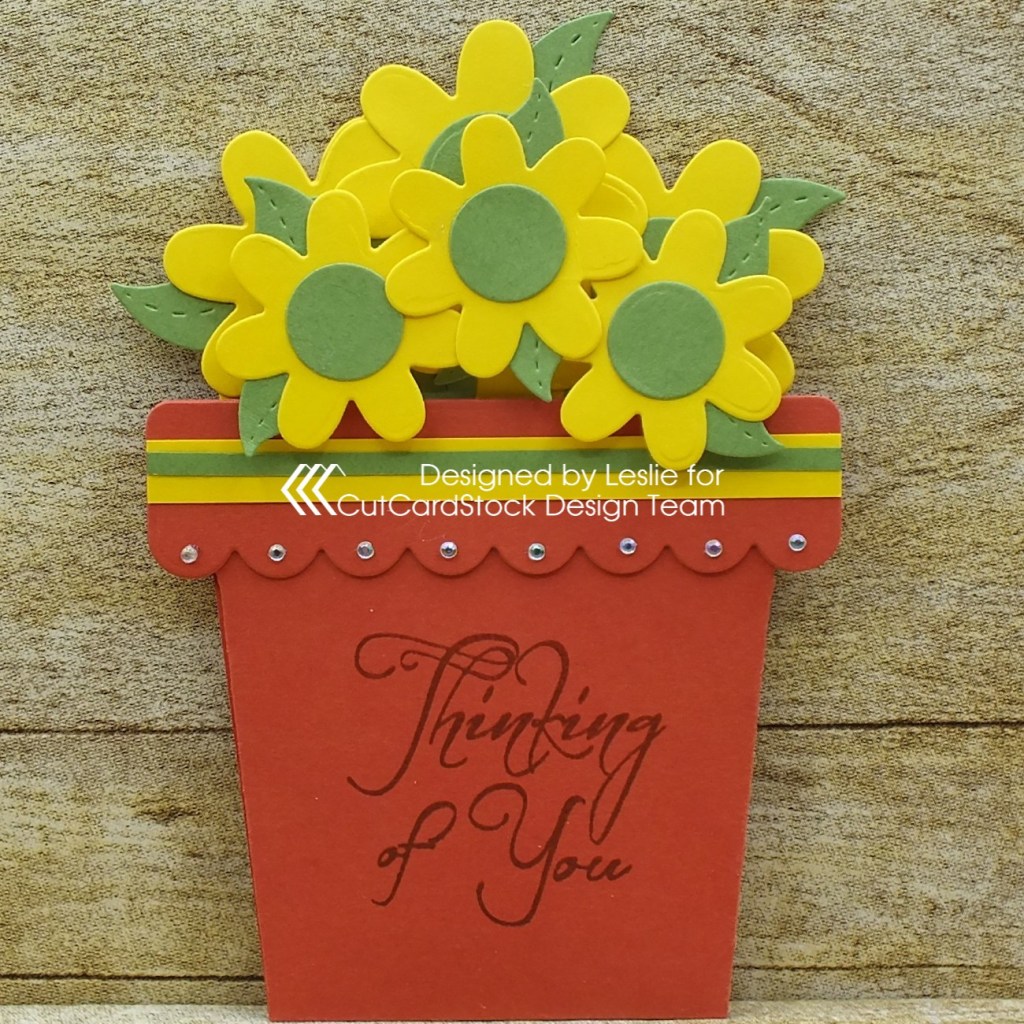
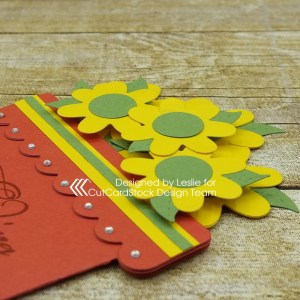
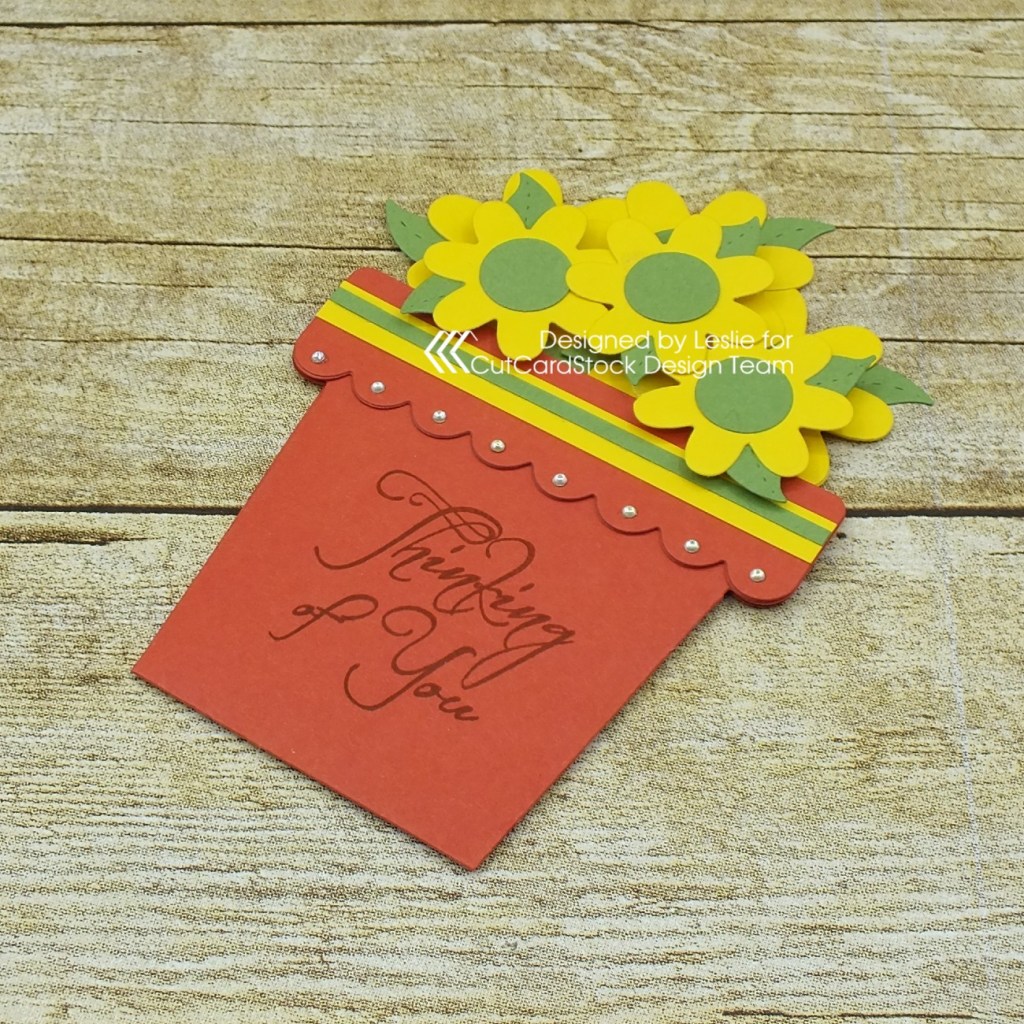
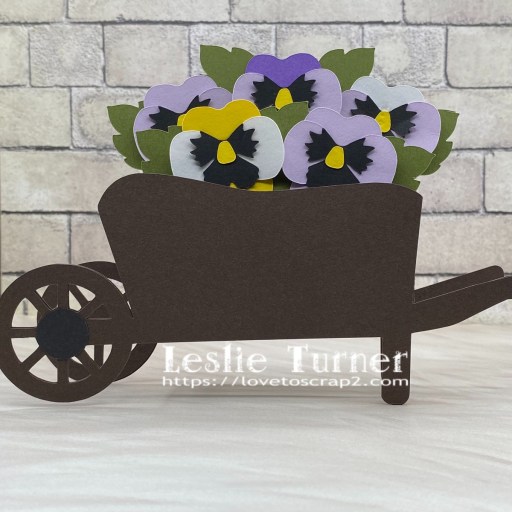
Using the Wheelbarrow Box Card cut file from Cyndy G SVG, I cut all the pieces from CutCardStock Pop Tone Hot Fudge, Pop Tone Black Licorice, Pop Tone Grapesicle, Pop Tone Lemon Drop, Pop Tone Sweet Tooth, Pop Tone Grape Jelly and Pop Tone Jellybean Green cardstock. In looking back, I wish I had used a woodgrain stamp on the background. I will definitely do that the next time I use this cut file.

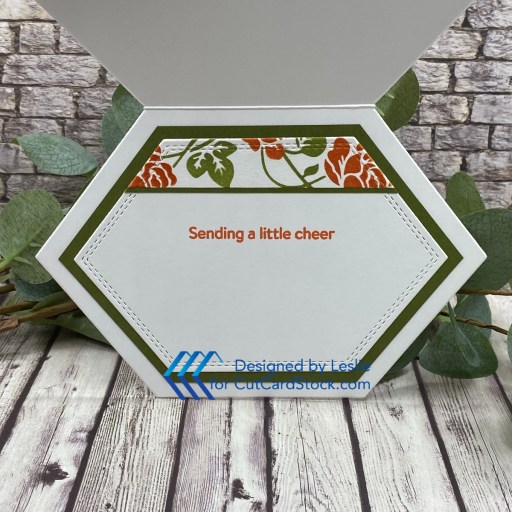
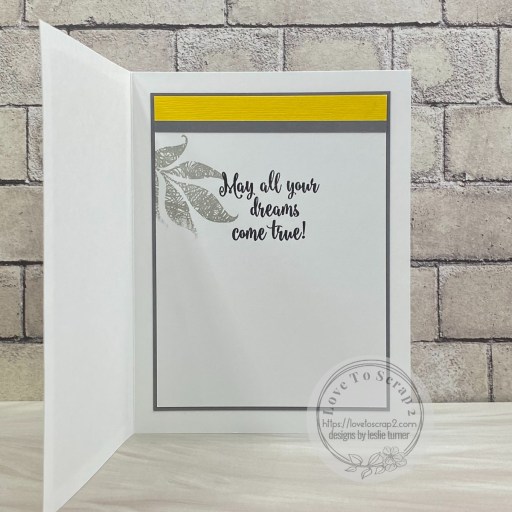
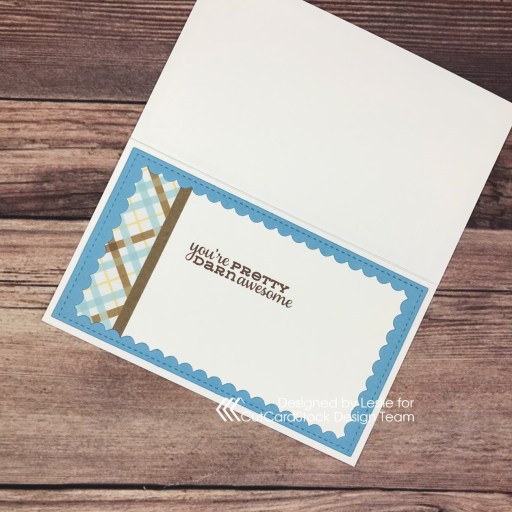
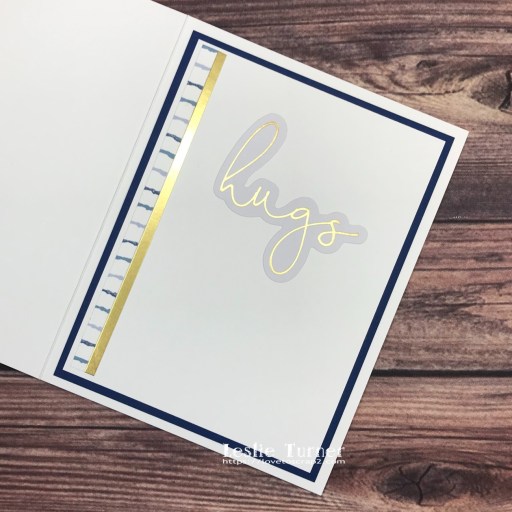
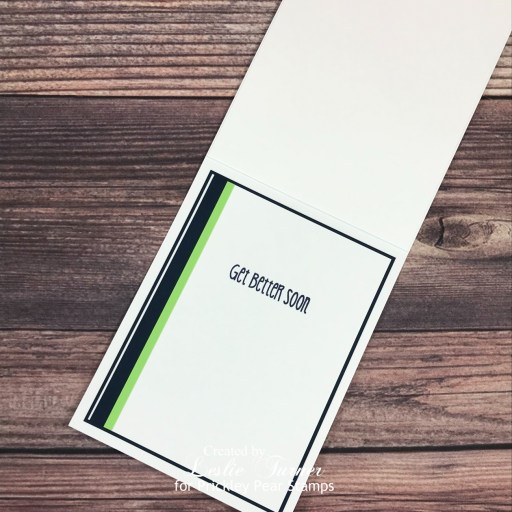
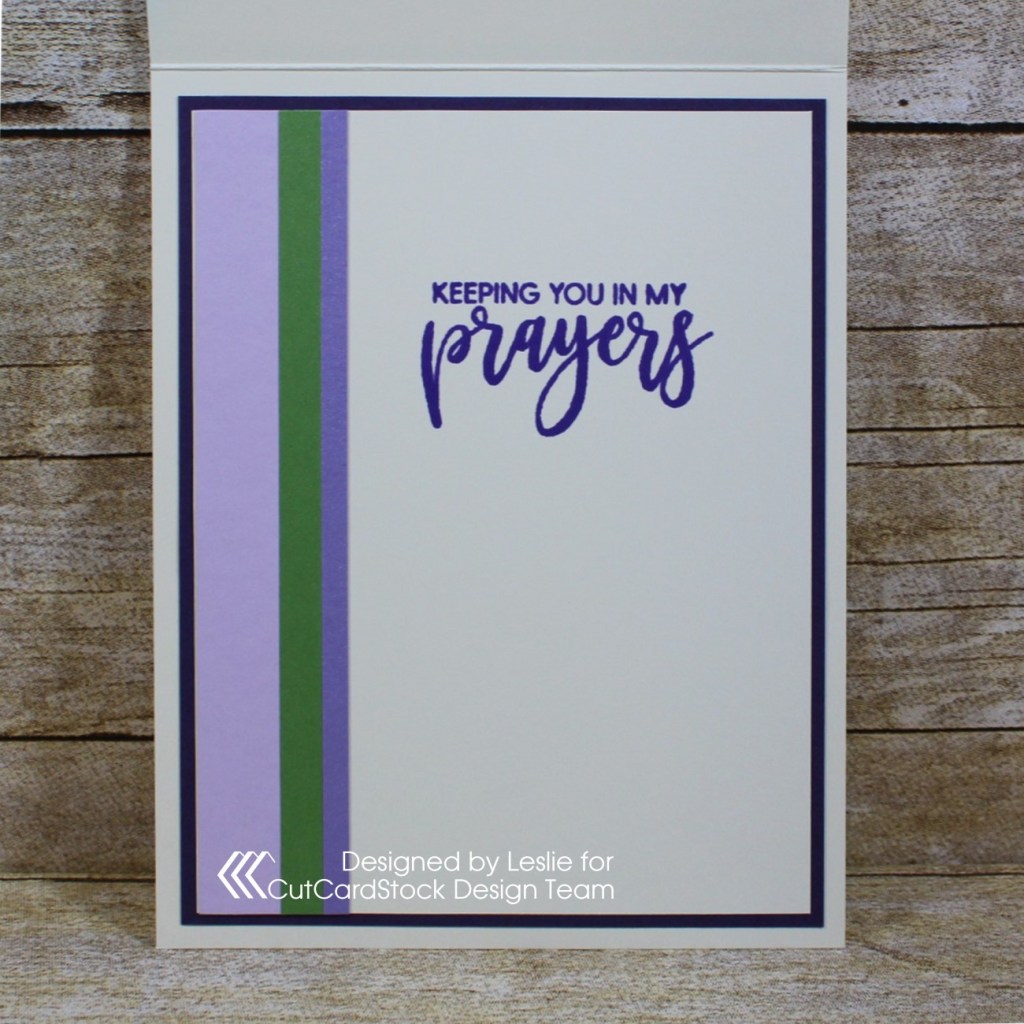
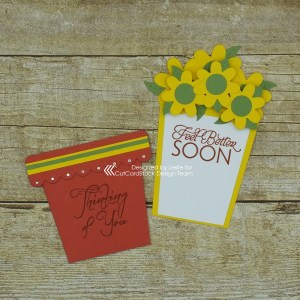
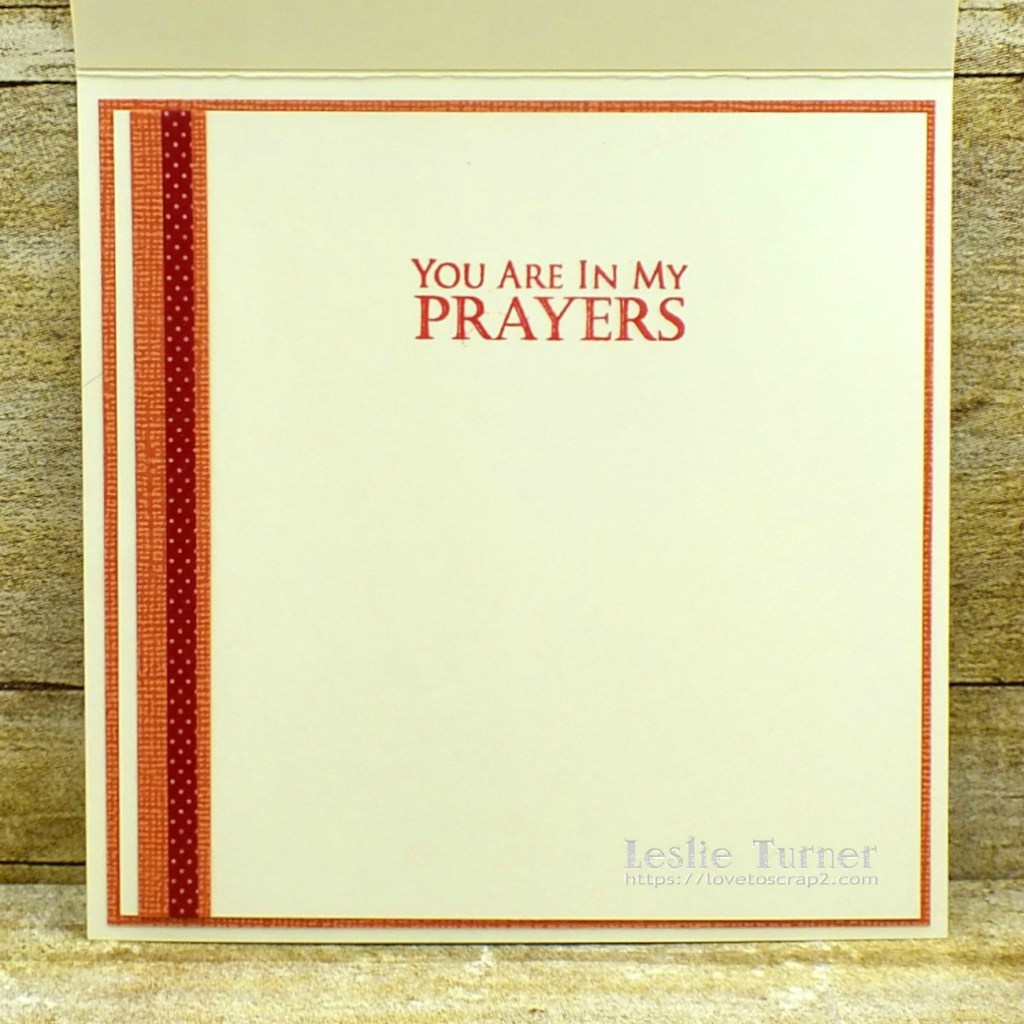
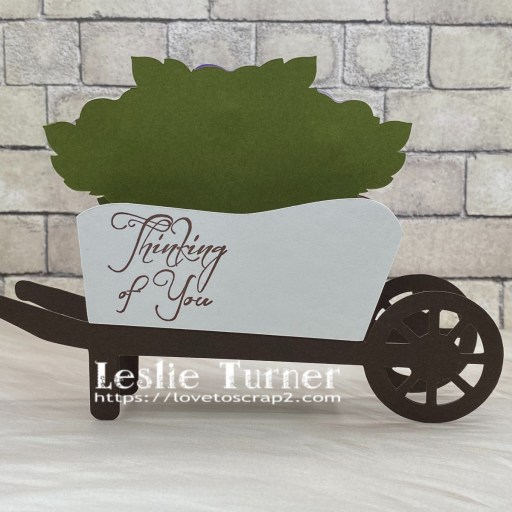
Here’s a shot of the back. I stamped a sentiment from The Cat’s Pajamas Simply Stacked Sentiments stamp set in Memento Rich Cocoa ink. Easy peasy and sure packs a punch!

Affiliate links are used in this post at no cost to you – I really appreciate your support! 

Products used:
CARDSTOCK/PAPER: CutCardStock Pop Tone Hot Fudge, Pop Tone Black Licorice, Pop Tone Grapesicle, Pop Tone Lemon Drop, Pop Tone Sweet Tooth, Pop Tone Grape Jelly and Pop Tone Jellybean Green cardstock
STAMPS: The Cat’s Pajamas Simply Stacked Sentiments stamp set
INK: Memento Rich Cocoa ink
DIES/PUNCHES: Cyndy G SVG Wheelbarrow Box Card SVG cut file
ACCESSORIES: Scan N Cut SDX 125e, Bearly Art precision craft glue, MISTI stamp tool

I hope you’ve enjoyed seeing this project and will link up your fun fold with us this month! We’d love to see what you’re working on! Thanks so much for stopping by today – we’ll see you next time! ;)

Scrappy hugs,

Thinking of you

Happy Wednesday, everybody! I hope you’re having a great week. I’m up on the CutCardStock blog today with a tutorial for making a hexagon shaped card to send a little cheer. As you know, fun folds are my most favorite kind of cards to make, and next in line at the top of that list are shaped cards. They are so fun and really pack a punch. I used our Neenah Fluorescent White Cotton cardstock for the stenciled climbing rose panel. Next up are Pop Tone Tangy Orange and Pop Tone Jellybean Green. And, of course, I used my studio staple Neenah Classic Crest Solar White (110# and 80# weights) for my card base and inside panel. Oh, and there’s a tiny bit of our Glama Natural Translucent Vellum under that front sentiment. ;)

Using the Honey Bee Climbing Rose stencils and Ranger crackling campfire and peeled paint distress inks along with a couple blending brushes, I created the focal panel. I gotta tell you that the Neenah Fluorescent White Cotton cardstock is FABulous for inking. Next, I used the Sizzix Belinda Stitched Hexagons Fanciful Framelits to cut the card base and a layering panel from Neenah Classic Crest 110# Solar White, the inside panel from 80# Solar White, a couple layering panels from Pop Tone Tangy Orange, and a couple layering panels from Pop Tone Jellybean Green.

Using the same hexagon die set, I die cut a stitched hexagon panel from the stenciled climbing rose piece. Then I trimmed a 1/8″ frame from the outside of the leftover negative space of the hexagon shape for a little interest. I adhered the extra Solar White panel to the front of the card base, and then one of the Tangy Orange panels to the back of the card base. I layered a Jellybean Green panel and the frame to the other orange panel, popping it up on foam strips.

Next, I stamped a sentiment from the Honey Bee Fall Swags stamp set in Memento Morocco ink on a scrap piece of Solar White. I cut it with the coordinating die and added it to a scrap of Glama Natural Translucent Vellum, trimming around the die cut and popping it up on a foam strip. The finishing touch was adding a few clear gemstones.

I embellished the 80# Solar White panel for the inside with a leftover piece of the stenciled climbing rose panel and a very thin strip of Jellybean Green cardstock. I stamped another sentiment from the Honey Bee Fall Swags stamp set in Morocco ink and layered the panel on the remaining green panel.

Affiliate links are used in this post at no cost to you – I really appreciate your support!

CutCardStock products used:
Neenah Classic Crest 110# Solar White cardstock
Neenah Classic Crest 80# Solar White cardstock
Neenah Fluorescent White Cotton cardstock
Pop Tone Tangy Orange cardstock
Pop Tone Jellybean Green cardstock
Glama Natural Translucent Vellum

Other products used:
STAMPS: Honey Bee Fall Swags stamp set
INK: Ranger crackling campfire and peeled paint distress inks; Memento Morocco ink
DIES/PUNCHES: Sizzix Belinda Stitched Hexagons Fanciful Framelits, Honey Bee Fall Swags die set
ACCESSORIES: Fiskars 12″ ProCision Rotary Bypass Paper Trimmer, Ranger-Wendy Vecchi Make Art Stay-tion 12″, MISTI Sticky Mats, blending brushes, Honey Bee Climbing Rose Stencils, Bearly Art precision craft glue, My Sweet Petunia Precision Glue Press, Mini MISTI, Big Shot, Scrapbook Adhesives Crafty Foam Tape White 54 ft, clear gemstones

I hope you’ve enjoyed today’s project and you’re inspired to get crafty! Be sure to check out all the awesome cardstock and other goodies at CutCardStock (adhesives, labels, stickers, pens, watercolors and ribbon to name a few). And head on over to the CutCardStock Facebook Page and for more inspiration! Also, be sure to join our Creating with CutCardStock Facebook Group for even more crafty inspiration! Thanks so much for stopping by today – we’ll see you next time!

Scrappy hugs,

Thinking of you

Howdy peeps! Can you believe it’s the first day of September already?! Seems like the new year just started, lol! Our new challenge is live this morning over at Mix It Up Challenge Blog and I’m delighted to share my DT inspiration project for MIUCB #73 – Anything Goes + optional Smooshing! Remember that all of our challenges are ‘anything goes’ and the technique twist is optional and not required to play! Do what inspires you! I have to admit that there’s nothing more relaxing to me than spritzing a little water over ink and then smooshing paper into it! No matter what color(s) you use or how much (or how little) ink you use, the look is different every single time – and I love that! This card features the older Gina K Designs Simply the Best stamp set, Ranger fossilized amber distress oxide ink for smooshing, and Catherine Pooler Twilight, Black Jack and Midnight inks for stamping. I totally love how it turned out!

A standard A2 size side-folding card base was cut from Neenah Classic Crest Solar White cardstock. I also cut two layering panels from CutCardStock Yellow Jacket Textured 4×6 cardstock and one from Lessebo Granite Gray cardstock. Finally, I cut a layering panel from Tim Holtz distress watercolor cardstock and created the smooshed background using a Tim Holtz distress sprayer and Ranger fossilized amber distress oxide ink. I trimmed the panel and stamped a leaf image (from the GKD Simply the Best stamp set) multiple times in Catherine Pooler Twilight, Black Jack and Midnight inks. I stamped the sentiment (from the same GKD stamp set) on a scrap piece of Yellow Jacket cardstock, trimmed it and added it to the panel on a double-sided foam strip. The finishing touch was adding several Stampin’ Up Classic Matte Dots.

I cut the inside panel from Solar White and embellished it with leftover strips of Yellow Jacket and Granite Gray cardstock used on the front. I stamped a leaf from the same GKD stamp set in Twilight ink and the sentiment in Midnight ink, and layered the panel on Granite Gray cardstock.

Affiliate links are used in this post at no cost to you – I really appreciate your support! 

Products used:
CARDSTOCK/PAPER: Neenah Classic Crest 80# Solar White cardstock, CutCardStock Lessebo Granite Gray and Yellow Jacket Textured 4×6 cardstock, Tim Holtz distress watercolor cardstock
STAMPS: Gina K Designs Simply the Best stamp set
INK: Ranger fossilized amber distress oxide ink; Catherine Pooler Twilight, Black Jack and Midnight inks
ACCESSORIES: Tonic Studios 12″ Guillotine Paper Trimmer, Tombow Mono Dots adhesive, Bearly Art precision craft glue, Tim Holtz distress sprayer, MISTI stamp tool, 1″ double-sided foam strip, Stampin’ Up Classic Matte Dots

I hope you’ve enjoyed seeing this project and will link up with us this time! Thanks so much for stopping by today – we’ll see you next time! ;)

Scrappy hugs,

Thinking of You

Hey everybody, Happy Tuesday! I hope you had a great weekend! I just can’t believe how fast the days are zipping by… so hard to believe we’re on the downslide to the end of August already! I have an awesome CutCardStock DT inspiration project to share with you today featuring my favorite Neenah Classic Crest Solar White cardstock that I paired with our textured Blue Hydrangea cardstock, Brown Bag Kraft paper and Beach Side Prints cardstock. I love a blue and brown color combo, and even with a few brown pearls, this card has a masculine feel.

I cut a 3-1/2″ x 6″ mini slimline card base from Neenah Classic Crest 110# Solar White cardstock along with a layering panel from Beach Side Prints cardstock and a reversed scallop frame from Blue Hydrangea cardstock using the Kat Scrappiness Mini Slimline Reversed Scallop Dies. Using the Kat Scrappiness Thinking of You Word Die with Shadow, I cut the sentiment from Blue Hydrangea cardstock and the shadow from Brown Bag Kraft Paper and adhered them together. I adhered the frame to the panel and adhered them to the card base, and then added the sentiment. The finishing touch was adding several Eyelet Outlet 3mm brown pearls.

I cut the inside panel from Neenah Classic Crest 80# Solar White cardstock and embellished it with strips cut from the Beach Side Prints cardstock and Brown Bag Kraft Paper. I cut another reversed scallop frame from Blue Hydrangea cardstock using the Kat Scrappiness Mini Slimline Reversed Scallop Dies and adhered it to the panel. I stamped the sentiment from the Paper Smooches Lovely Thoughts stamp set in Catherine Pooler Over Coffee ink, and adhered the panel to the inside of the card base.

And one more look… what a great color combo along with amazing cardstock and dies! Love how this one turned out!

Sharing in the following challenges:
1. 613 Avenue Create: #202208 – August Anything Goes
2. A Perfect Time To Craft Open Challenge: August #8 2022 – Anything Goes
3. A Place To Start: #082022 – Anything Goes w/optional By The Book (no twist)
4. Classic Design Challenge: August #8 – Anything Goes
5. Penny’s Paper-Crafty Challenge Blog: #528 – Anything Goes with Paper
6. The Creative Crafters: #55 – Anything Goes
7. Wednesday’s Creative Inspirations Challenge Blog: August Challenge – Anything Goes

Affiliate links are used in this post at no cost to you – I really appreciate your support!

CutCardStock products used:
Neenah Classic Crest 110# Solar White cardstock
Blue Hydrangea cardstock
Brown Bag Kraft Paper
Beach Side Prints cardstock

Other products used:
Stamps: Paper Smooches Lovely Thoughts stamp set
Ink: Catherine Pooler Over Coffee ink
Dies/Punches: Kat Scrappiness Mini Slimline Reversed Scallop with Hello Dies, Kat Scrappiness Thinking of You Word Die with Shadow
Accessories: We R Memory Keepers Large Guillotine Paper Trimmer, Bearly Art precision craft glue, MISTI stamp tool, Big Shot, Eyelet Outlet 3mm Brown Pearl Bling Strip

I hope you’ve enjoyed today’s project and you’re inspired to get crafty! Be sure to check out all the awesome cardstock and other goodies at CutCardStock (adhesives, labels, stickers, pens, watercolors and ribbon to name a few). And head on over to the CutCardStock Facebook Page for more inspiration! Thanks so much for stopping by today – we’ll see you next time!

Scrappy hugs,

Thinking of You

Hey everybody! Well, another weekend has come and gone, and here we are on Monday! I hope you have a great week coming up! I have a pretty Tape Runner DT inspiration project to share with you today featuring die cut shapes from Spellbinders. And of course, all panels were adhered with Retractable Tape Runner. I made this card for someone very dear to me who was going through a rough time. I thought the gold accents were so pretty and cheerful.

As mentioned above, all panels were adhered with Retractable Tape Runner. Wet glue was used only to adhere the doily and pearls, and the two elements with the gold accents were popped up on foam squares. I cut a standard A2 size side-folding card base from 110# Solar White cardstock along with layering panels from Basis Blue, Bright Gold Foil and 80# Solar White cardstock. Using the Prickley Pear Stamps Chicken Wire Background stamp and Catherine Pooler Tranquil, Stone Blue and Cove Blue inks, I stamped the background, cut it with the My Favorite Things Stitched Rectangle STAX Die-namics, and layered the panels together. I cut a doily from 80# Solar White cardstock using the Spellbinders Medallion Four die and adhered it to the card front along with several small die cut hearts. I adhered the flowers and sentiment with Scrapbook Adhesives 3-D Foam Squares, and added several white pearls which completed the card front.

I cut the inside panel from 80# Solar White cardstock and embellished it with leftover strips from the background and gold foil used on the front. I added a die cut sentiment and layered the panel on Basis Blue cardstock.

And one more peek… such a pretty card and I’m loving all the layers and touches of gold! And it’s great to have Tape Runner to hold it all together! ;)

Sharing in the following challenges:
1. 613 Avenue Create: #202207 – Anything Goes w/ optional Black & White (no twist)
2. A Perfect Time To Craft: #7-2022 – Anything Goes
3. A Place To Start: #072022 – Anything Goes w/ optional Balloons and Flowers (no twist)
4. Classic Design Challenge: July #7 – Anything Goes
5. Crafting Happiness Challenges: #125 – Anything Goes Always
6. Ellibelle’s Crafty Wednesday Challenge: July Anything Goes
7. Penny’s Paper-Crafty Challenge Blog: #525 – Anything Goes with Paper
8. {PIN}spirational Challenges: #291 – Photo Inspiration

9. Through The Craft Room Door: July 5th Anything Goes

Tape Runner products used:
Retractable Tape Runner

Affiliate links are used in this post at no cost to you – I really appreciate your support!

Other products used:
Cardstock/Paper: Neenah Classic Crest 110# and 80# Solar White cardstock, CutCardStock Basis Blue cardstock, CutCardStock Bright Gold Foil cardstock
Stamps: Prickley Pear Stamps Chicken Wire Background stamp
Ink: Catherine Pooler Tranquil, Stone Blue and Cove Blue inks
Dies/Punches: My Favorite Things Stitched Rectangle STAX Die-namics, Spellbinders Medallion Four die
Accessories: We R Memory Keepers Large Guillotine Paper Trimmer, Bearly Art precision craft glue, MISTI stamping tool, Big Shot, Spellbinders Always Remember Die Cut Shapes, Scrapbook Adhesives 3D Foam Squares Variety Pack, Darice white pearls

I hope you’ve enjoyed today’s project and you’re inspired to get your craft on! Be sure to check out the ah-mazing Tape Runner, Retractable Tape Runner and Highlight Tape Runner at TapeRunner.com! Be sure to Follow us on Facebook and Instagram! Thanks so much for stopping by today – we’ll see you next time!

Scrappy hugs,

Thinking of You

Hi friends! I hope you’re having a wonderful weekend and either relaxing or doing something fun – whichever suits! To those who have jumped on the affiliate links train – I’ve been told that the FTC is issuing fines to people who are not properly disclosing affiliate links, so it probably would be a good idea to tell your readers that your blog posts contain affiliate links before you list the affiliate links in your posts. I’ve been doing this all along, but have decided that it shouldn’t be one of the first things people see when they read my posts, so I’ve moved it to the bottom of my posts going forward. Cleaner posts with less work = happier me, LOL!

I have a pretty CAS get well card to share this morning that I created for Prickley Pear Stamps which features the Flourish Border stamp set and Stitched Scallop Border die set. These stamp sets are so much fun with those little curves that really add some sassy pizzazz to this card! And I’m so in love with that sentiment font!

I cut a standard A2 size top-folding card base from 110# Solar White cardstock along with two narrow curved borders each from CutCardStock Basis Light Lime and CutCardStock Royal Sundance Linen Midnight Blue cardstock using the Stitched Scallop Border die set. I stamped a curved row of flowers from the Flourish Border stamp set in Catherine Pooler Midnight ink on a scrap piece of 80# Solar White cardstock, cut it with dies from the Stitched Scallop Border die set, and colored it with Karin Brushmarkers.

I adhered the stamped border and the narrow curved borders to the bottom front of the card base and stamped the sentiment (from the same stamp set) in Catherine Pooler Juniper ink. The finishing touch was adding gemstones from the Trinity Stamps Andradite Sparkle Embellishment Mix using the Trinity Pick Up Stick.

I cut the inside panel from 80# Solar White cardstock and embellished it with strips cut from CutCardStock Royal Sundance Linen Midnight Blue and CutCardStock Basis Light Lime cardstock. I stamped the sentiment in Catherine Pooler Juniper ink and layered the panel on the midnight blue cardstock.

And one more look… love how this card turned out! This is a great stamp set to use for creating cards for a variety of occasions. These flowers – and the sentiment font – just make me happy!

Sharing in the following challenges:
1. A Perfect Time To Craft Open Challenge Blog: #4-April 2022
2. Classic Design Challenge: April #4
3. Crafting Happiness Challenges: #122 – Anything Goes Always

Affiliate links are used in this post at no cost to you – I really appreciate your support! 

Prickley Pear Stamps products used:
Flourish Border stamp set
Stitched Scallop Border die set

Other products used:
Cardstock/Paper: Neenah Classic Crest 110# and 80# Solar White cardstock, CutCardStock Basis Light Lime cardstock, CutCardStock Royal Sundance Linen Midnight Blue cardstock
Ink: Catherine Pooler Midnight and Juniper Mist inks; Karin Brushmarkers- Sapphire blue, Apple, Canary
Accessories: Tonic Studios 12″ Guillotine Paper Trimmer, Bearly Art precision craft glue, MISTI stamp tool, Big Shot, Trinity Stamps Andradite Sparkle Embellishment Mix, Trinity Pick Up Stick

I hope you’ve enjoyed this project! Be sure to check out all the awesome stamps and dies at Prickley Pear Stamps! If you’d like to save 10% on anything on the site when you shop at Prickley Pear Stamps, use the coupon code LESLIE10 at checkout! And be sure to ‘like’ and ‘follow’ the Prickley Pear Stamps Facebook page to keep up with news and sales, and join Prickley Pear Pals (the fan group) for lots of fun crafty ideas and to share your creativity! And finally, we’d love to see you visit the Prickley Pear Stamps blog that’s in the process of being revived and become a Follower! Hope to see you there! Thanks so much for stopping by today – we’ll see you next time! ;)

Scrappy hugs,

thinking of you

Hi everyone! Happy Tuesday and a few days into another month! My sister’s birthday is in another few days and I’ve always said that once her birthday hits, it’s no time before Christmas is here! I’m stoked to be back on the CutCardStock blog today with an awesome DT inspiration project featuring ivory cardstock that’s on sale this month (along with white cardstock), so be sure to stock up! It’s timeless and a staple in my studio. I paired the ivory with some gorgeous shades of purple and a pop of green… one of my favorite color combos. Affiliate links are used in this post at no cost to you. I really appreciate your support! I created a pretty thinking of you card using the floating strips technique. I saw this technique done quite some time ago and had never tried it. I saw it in a recent Splitcoast Stampers newsletter HERE and was inspired to move it way up on the ‘to do’ list and give it a go. Not sure what I had been waiting for… it was so fun and yielded such a beautiful result!

I cut a standard A2 size top-folding card base from Neenah Classic Crest Baronial Ivory cardstock along with a layering panel from Royal Sundance Linen Ivory cardstock. I cut a slightly smaller panel from acetate along with strips from Pop-Tone Grapesicle cardstock, Stardream Metallic Amethyst, Stardream Metallic Fairway cardstock and Basis Dark Purple cardstock in varying widths which I adhered to the acetate, leaving a small space between each strip. I adhered the acetate panel to the front layering panel with adhesive foam strips and then adhered the piece to the card base. I stamped the sentiment from the Waffle Flower Essential Sentiments stamp set in purple ink and cut it with the coordinating Waffle Flower Essential Sentiments die, and layered it on several additional die cuts for some dimension. I adhered it to the bottom of the panel and added several ivory enamel dots to finish the front.

Here’s an angled view showing all the dimension of this floating strips technique. It’s very cool and I’ll definitely be making some more cards like this!

I cut the inside panel from Neenah Classic Crest Baronial Ivory cardstock and embellished it with strips cut from Stardream Metallic Amethyst, Stardream Metallic Fairway cardstock and Pop-Tone Grapesicle cardstock. I stamped the sentiment from the same Waffle Flower Essential Sentiments stamp set in purple ink and layered the panel on Basis Dark Purple cardstock.

And one more peek… I’m really loving how this turned out and I can’t wait to do this technique again! ;)

CutCardStock products used:
Neenah Classic Crest Baronial Ivory cardstock
Royal Sundance Linen Ivory cardstock
Pop-Tone Grapesicle cardstock
Stardream Metallic Amethyst
Stardream Metallic Fairway cardstock
Basis Dark Purple cardstock

Other products used:
Stamps: Waffle Flower Essential Sentiments stamp set
Ink: Catherine Pooler Grape Crush ink
Dies/Punches: Waffle Flower Essential Sentiments die set
Accessories: Tonic Studios 12″ Guillotine Paper Trimmer, Grafix Craft Plastic, Bearly Art precision craft glue, MISTI stamp tool, Gemini Junior, Darice Double-Sided Adhesive Foam Strips, Eyelet Outlet Ivory Enamel Dots

I hope you’ve enjoyed today’s project and you’re inspired to get crafty! Be sure to check out all the awesome cardstock and other goodies at CutCardStock (adhesives, labels, stickers, pens, watercolors and ribbon to name a few). And head on over to the CutCardStock Facebook Page for more inspiration! Thanks so much for stopping by today – we’ll see you next time!

Scrappy hugs,
lesliesig

Thinking of You

Hi everyone! I’m stoked to be back on the CutCardStock blog today with an awesome DT inspiration project featuring more of the Astrobright cardstock that was included in our Designer’s Pack – which happens to be on sale this month so be sure to get some! Affiliate links are used in this post at no cost to you. I really appreciate your support! I created a super adorable Get Well card – the flower pot is a pocket and the flowers are adhered to a pull-out card that slides into the pocket! OMG, so cute I can’t stand it!

I started by die cutting all the pieces. I cut three large flowers, three small flowers, the pull-out card base and an embellishing strip from Astrobright Solar Yellow cardstock. Then I cut three large flower centers and six large leaves, three small flower centers and six small leaves, and a thin embellishing strip from Pop-Tone Gumdrop Green cardstock. Next I cut the flower pot and three scalloped rims (to layer together) from Pop-Tone Tangy Orange cardstock. And finally I cut the sentiment layer for the pull-out card from Classic Crest Solar White 80# cardstock.

I assembled the flower pot to form a pocket that the pull-out card slides into. I adhered the centers to the six flowers and two leaves to each flower, then adhered the three large flowers to the pull-out card base and adhered the sentiment layer to the pull-out card. I stamped the front sentiment on the flower pot and the inside sentiment on the pull-out card. I affixed the three smaller flowers to the pull-out card using two Double-Sided Adhesive Foam Circles behind each flower. The dimension is needed for the flowers to hang over the rim of the flower pot when the card is inserted into the flower pot. The final touch was the addition of a tiny iridescent gemstone on each scallop on the rim of the flower pot.

And one more peek… totally loving how this turned out! I’ll be making a few more of these for my stash using different colors of cardstock for the flowers!

CutCardStock products used:
Astrobright Solar Yellow 80# cardstock
Pop-Tone Tangy Orange 65# cardstock
Pop-Tone Gumdrop Green 65# cardstock
Classic Crest Solar White 80# cardstock
Double-Sided Adhesive Foam Circles

Other products used:
Stamps: The Cat’s Pajamas Simply Stacked sentiments
Ink: Stampin’ Up Cajun Craze ink
Dies/Punches: Honey Bee Stamps Flower Pot Card die set
Accessories: Tombow Mono permanent adhesive, Bearly Art precision craft glue, Gemini Junior, MISTI stamp tool, Darice tiny iridescent gemstones

I hope you’ve enjoyed today’s project and you’re inspired to get crafty! Be sure to check out all the awesome cardstock and other goodies at CutCardStock (adhesives, labels, stickers, pens, watercolors and ribbon to name a few). And head on over to the CutCardStock Facebook Page for more inspiration! Thanks so much for stopping by today – we’ll see you next time!

Scrappy hugs,
lesliesig

Thinking of YOU

Hi friends! I’ve fallen a little behind in sharing my Prickley Pear Stamps samples created for the Hochanda show in early September. We’ve been moving and thankfully we’re finally feeling like we’re getting settled in our house after being full-time RVers since March 2016. Moving is always hard, and the older we get the harder moving is on us, and we feel like we’ve made the right decision to sell the fifth wheel and settle down in a house.

I’ve popped in this morning to share a fun fold called a front flap card that I created with the gorgeous Birdcage and Birdcage Winter 2 stamp sets. If you know me, you know that I LOVE fun folds and I’m always on the hunt for new ones to try! ;)

My inspiration for this fun card fold came from a Splitcoast Stampers newsletter a few months ago, and the tutorial is HERE if you’re interested! I created the base from my favorite white cardstock and used coordinating papers from a pretty 12×12 paper pad in my stash which I layered on light gray and teal cardstock. For the focal image, I stamped the bird in teal ink, and then stamped the birdcage in Versamark, heat embossed it in platinum embossing powder, and cut it with a circle die. I adhered it beneath a frame created with a stitched mini scallop die and a slightly smaller plain circle die. I adhered the focal image piece to the flap and affixed tiny iridescent gemstones around it.

I embellished the inside panel with the floral and gray cardstock, created the sentiment with a partial silver metallic quotation sticker and a die cut sentiment, and layered the panel on the teal cardstock.

And one more peek… absolutely loving how this turned out! This is one of my favorite stamp sets!

In closing, here’s a screenshot of Alex holding this card up during the Hochanda show! What a rush seeing my samples on air, lol!

Sharing in the following challenges:
1. 2 Crafty Critter Crazies: #43 – Anything Goes
2. 613 Avenue Create: October Anything Goes w/ optional Winged Things (playing twist)
3. Moving Along With The Times: #123 – Animal(s) and/or Bird(s)

Cardstock/Paper: Neenah Classic Crest Solar White cardstock, CutCardStock Dolphin cardstock, Stampin’ Up Pool Party cardstock, Colorbok Delilah designer paper
Stamps: Prickley Pear Stamps Birdcage and Birdcage Winter 2 stamp sets
Ink: Versamark, Stampin’ Up Pool Party ink, Memento Tuxedo Black ink
Dies/Punches: My Favorite Things Die-namics Stitched Mini Scallop Circle STAX die, Memory Box Stitched Circle Layers die, Sizzix Celebration Words: Script die
Accessories: MISTI stamp tool, Gemini Junior, Tombow Mono permanent adhesive, Bearly Art precision craft glue, Ranger Liquid Platinum embossing powder, Tim Holtz Silver Metallic Quotation, Darice tiny smoke gemstones

I hope you’ve enjoyed this project! Be sure to check out all the awesome stamps and dies at Prickley Pear Stamps! If you’d like to save 10% on anything on the site when you shop at Prickley Pear Stamps, use the coupon code LESLIE10 at checkout! And be sure to ‘like’ and ‘follow’ the Prickley Pear Stamps Facebook page to keep up with news and sales, and join Prickley Pear Pals (the fan group) for lots of fun crafty ideas and to share your creativity! And finally, we’d love to see you visit the Prickley Pear Stamps blog that’s in the process of being revived and become a Follower! Hope to see you there! Thanks so much for stopping by today – we’ll see you next time! ;)

Scrappy hugs,
lesliesig

Thinking of You

Hi everyone! Happy Saturday – hope you’re doing something fun! We are having some super windy weather with a few raindrops here and there, so I’m busy taking project photos and writing blog posts! I’m sharing a clean and simple card I created for The Outlawz Monday Greetings Challenge where the theme is flowers with dry or heat embossed background. Jan’s Digi Stamps is our sponsor this month so come on over and play! I created an encouragement card in warm tones with some pretty paper flowers and an embossed sentiment across the bottom.

The Core’dinations cardstock already had a cool embossed linen look so I thought an embossed sentiment across the bottom of the CAS design would be perfect. I’ve had a set of sentiment embossing folders in my stash for several years and have never used them, so in my quest to use ‘new unused stuff’ from my stash, I thought this would be a wonderful opportunity to use one of them!

I dug through my stash of paper flowers and found three that complimented the paper beautifully. I put down a strip of red glitter Washi Tape and then another strip of skinny red dotted Washi Tape on top, and then added the flowers. I finished the front with some randomly placed sprinkles and glittered gumdrops.

I embellished the inside panel with a strip of the cardstock and Washi Tape used on the front, and layered it on the same cardstock.

One more peek… absolutely loving how this turned out! I believe this would be just the ticket to let a friend know you’re thinking about her!

Sharing in these additional challenges:
1. Crafty Calendar Challenge: June Challenge – Flowers
2. Crafty Catz Challenge: #509 – Anything Goes w/optional CAS (playing twist)
3. Crafty Friends Challenge Blog: #137 – Anything Goes
4. Through The Purple Haze: #168 – Wedding, Anniversary or Anything Goes

Products used:
Cardstock/Paper: Neenah Classic Crest Baronial Ivory cardstock, Core’dinations Vintage Collection cardstock
Stamps: The Cat’s Pajamas Simply Stacked Sentiments stamp set
Ink: Ranger barn door archival ink
Accessories:  Tombow Mono permanent adhesive, Ranger distress collage medium, Darice Phrases embossing folder set, Gemini Junior, Peachy Cheap red glitter Washi Tape, skinny red dotted Washi Tape, MISTI stamp tool, Wild Orchid Crafts paper flowers, YNS red glittered Gumdrops, Doodlebug Design tangerine Sprinkles

I hope you’ve enjoyed this project and will come join us in The Outlawz Challenges! Lots of fun going on! Thanks so much for stopping by – we’ll see you next time!

Scrappy hugs,
lesliesig