1/23/22 Favorite at The Outlawz Sunday Songs & Rhymes Challenge!
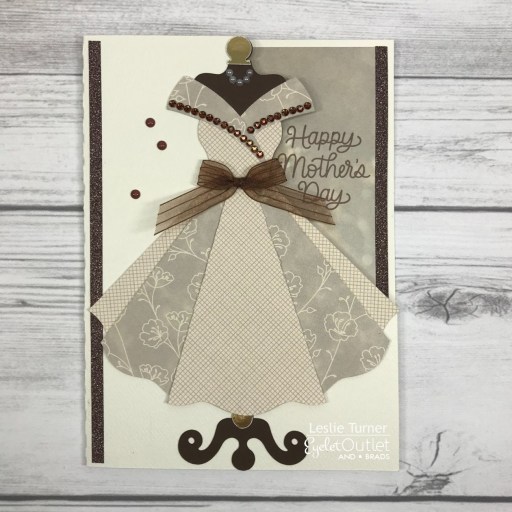
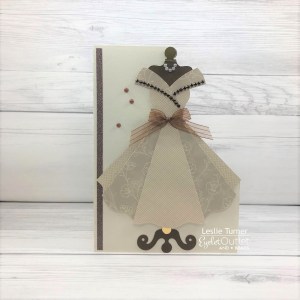
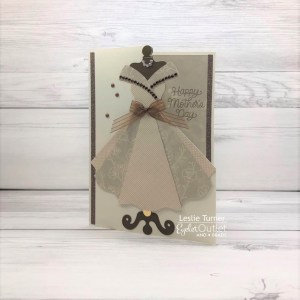
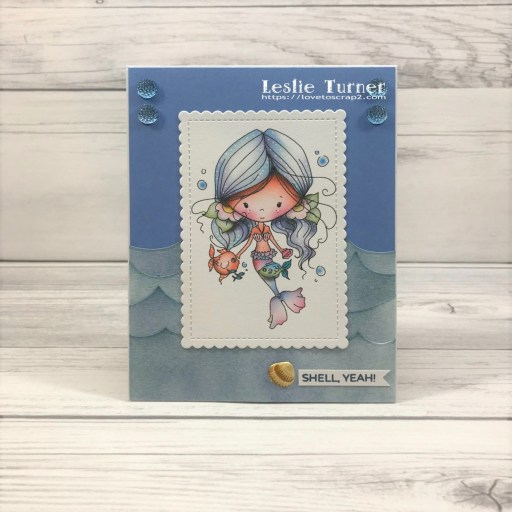
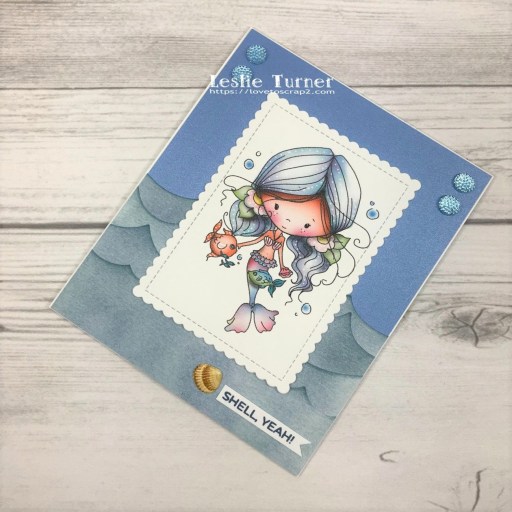
Hey y’all! It’s a beautiful 42 degrees here (mid-day) in southwestern Colorado – the sun’s out and the sky is blue! Couldn’t ask for a better day! Affiliate links are used in this post at no cost to you – I really appreciate your support! There’s a whole lotta fun going on over at The Outlawz Challenges and I’ve created a cute card to enter into the current Sunday Songs and Rhymes Challenge! Polkadoodles is the sponsor this time and we were given the Mermaid Song from which to find inspiration, so I thought it only fitting to use the Polkadoodles Winnie Mermaid Kisses digital image which I combined with the fun Trinity Stamps Summertime Sentiments stamp set.
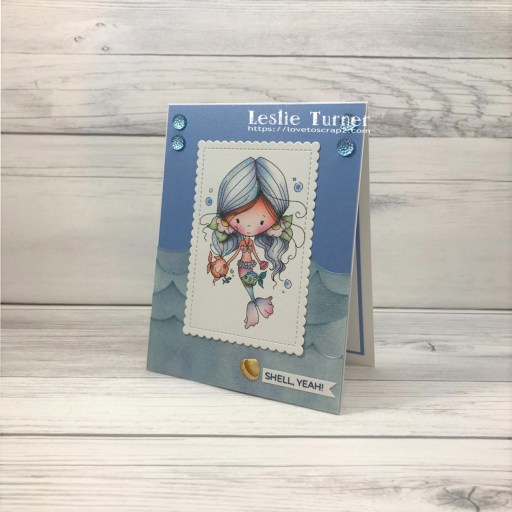
I cut a standard A2 size top-folding card base from CutCardStock Basis 110# White cardstock along with layering panels from CutCardStock Stardream Metallic Vista cardstock and Tim Holtz watercolor cardstock. I adhered the metallic blue cardstock to the card base. I inked the watercolor cardstock with Ranger stormy sky and chipped sapphire distress inks, cut four waves from the panel using the My Favorite Things Ocean Motion Die-namics and adhered them together in horizontal strips. I added an Eyelet Outlet shell brad and adhered the waves to the card front. I stamped the sentiment from the Trinity Stamps Summertime Sentiments stamp set which I trimmed and flagged with a square punch, and adhered it to the bottom of the waves. I printed the pre-colored version of the image on CutCardStock Basis 80# White cardstock, die cut it with the My Favorite Things Stitched Mini Scallop Rectangle STAX Die-namics and adhered it to the card front. The finishing touch was the addition of some blue bumpy bling from Eyelet Outlet.
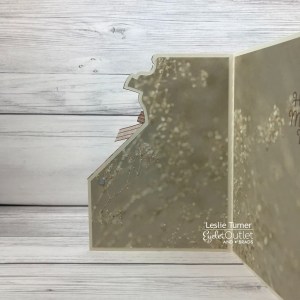
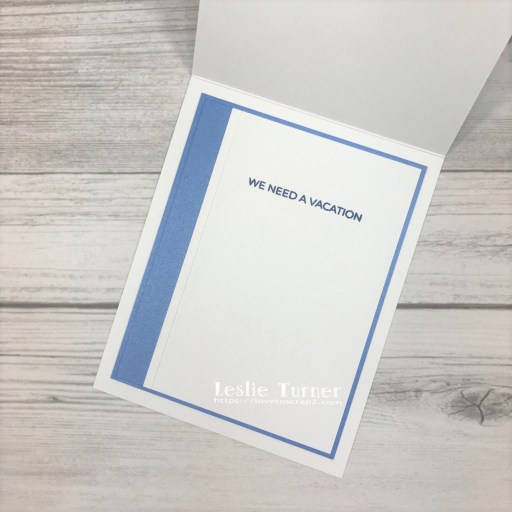
I cut the inside panel from CutCardStock Basis 80# White cardstock and embellished it with a strip of CutCardStock Stardream Metallic Vista cardstock. I stamped the sentiment from the same Trinity Stamps Summertime Sentiments stamp set in Catherine Pooler Cove Blue ink and layered the panel on the metallic blue cardstock.
And one more peek… such an adorable image that I’m glad I remembered I had. I believe this is only the second time I’ve used it.
Sharing in these additional challenges:
1. 613 Avenue Create: #202201 – January Anything Goes
2. A Place to Start: #012022 – January Anything Goes
3. Aud Sentiments Challenge Blog: #290 – Anything Goes + A Sentiment
4. Crafting Happiness Challenges: #119 – January Anything Goes
5. Wednesday’s Creative Inspirations Challenge Blog: January Anything Goes
Products used:
Cardstock/Paper: CutCardStock Basis 110# White cardstock, CutCardStock Basis 80# White cardstock, CutCardStock Stardream Metallic Vista cardstock, Tim Holtz watercolor cardstock
Stamps: Polkadoodles Winnie Mermaid Kisses digital image, Trinity Stamps Summertime Sentiments stamp set
Ink: Ranger stormy sky and chipped sapphire distress inks, Catherine Pooler Cove Blue ink
Dies/Punches: My Favorite Things Stitched Mini Scallop Rectangle STAX Die-namics, My Favorite Things Ocean Motion Die-namics, EK Success 3/4″ square punch (to flag front sentiment)
Accessories: Tonic Studios 12″ Guillotine Paper Trimmer, MISTI stamp tool, Big Shot, Tombow Mono permanent adhesive, Eyelet Outlet Shell Brads, Eyelet Outlet Blue Bumpy Bling
I hope you’ve enjoyed this project and will come over and join in all the fun at The Outlawz Challenges! Lots of fun going on! Thanks so much for stopping by today – we’ll see you next time! ;)
Scrappy hugs,