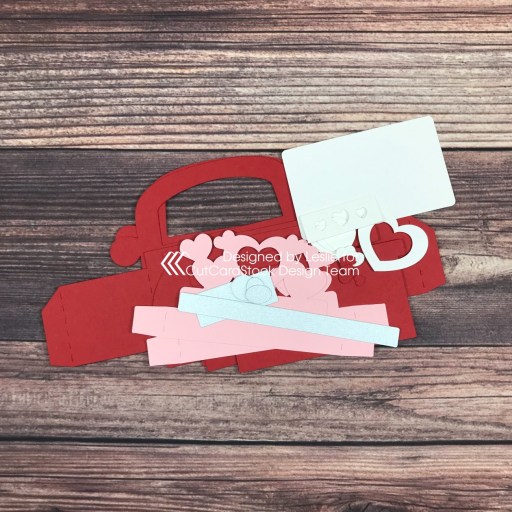
Love Block Card

2/13/22 Rising Star at A Place To Start!
2/25/22 Top Pick at Cut It Up!

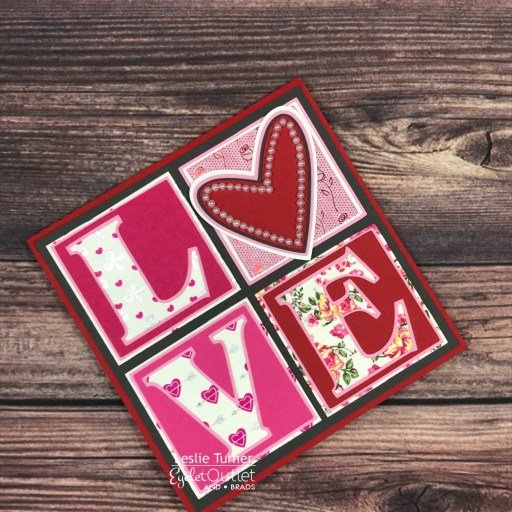
Hi everyone! A very Happy Saturday to you – I hope you’ve had a great week! Affiliate links are used in this post at no cost to you – I really appreciate your support! I’m stoked to be back on the Eyelet Outlet blog today with another awesome DT inspiration project! I have one more Valentine to share before the day of love arrives! This block card features our Valentine Washi Tape which I used on the background of all four blocks, and White Pearl Bling Strip that I used to embellish the heart. Another fun and easy card created with my Scan N Cut!
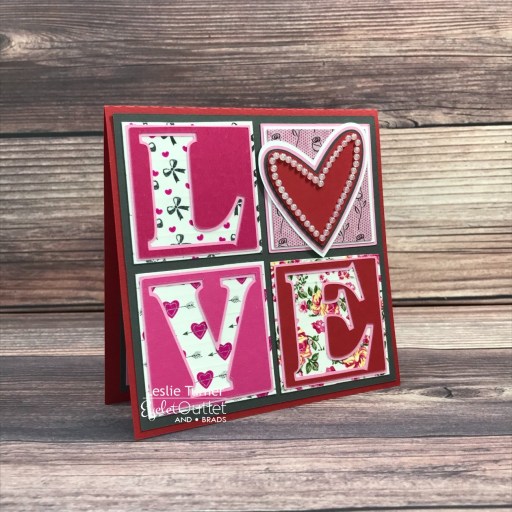
I cut the card base, layering panel, and blocks and layers from CutCardStock Basis Red, Basis Gray, Amaranth, Pop-Tone Cotton Candy, Pop-Tone Razzleberry cardstock, Neenah Classic Crest Solar White and Neenah Classic Linen Solar White cardstock. I covered the Crest Solar White blocks with four different patterns from the Valentine Washi Tape, and added the layers. I assembled the card and added White Pearl Bling Strip around the edge of the heart.

I cut the inside panels from CutCardStock Basis Gray and Pop-Tone Cotton Candy cardstock along with a panel cut from Neenah Classic Crest Solar White which I embellished with more of the Valentine washi tape. I stamped the sentiment from the Hero Arts Year Round Messages stamp set in Catherine Pooler Be Mine ink.
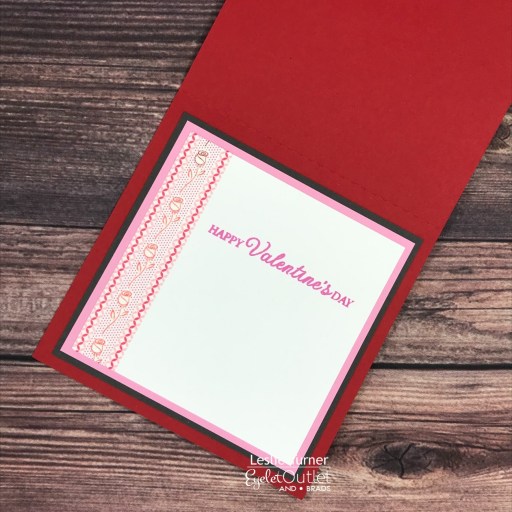
And one more look… such a fun Valentine! The assortment of 8 rolls of Valentine washi tape is amazing and made awesome backgrounds on these little blocks! AND it’s on sale!
Sharing in the following challenges:
1. A Perfect Time To Craft Open Challenge: #2-2022 – Anything Goes
2. A Place To Start: #202202 – Anything Goes w/ optional My Fauna Valentine (Include a Critter) — no twist
3. Ally’s Angels: #55 – Anything Goes
4. Classic Design Challenge: February #2 – Anything Goes
5. Crafting Happiness Challenges: #120 – Anything Goes
6. Crafty Catz: #582 – Anything Goes w/ optional Add Ribbon — no twist
7. Crafty Gals Corner: #228 – Add A Heart
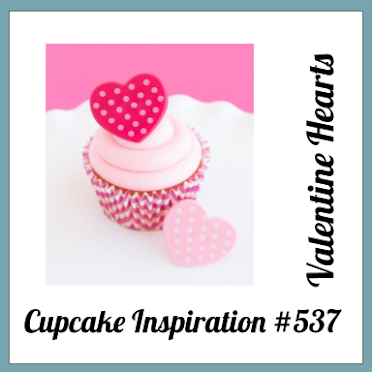
8. Cupcake Inspirations: #537 – Photo Inspiration
9. Cut It Up: #245 – Love or Valentine’s Day
10. Little Red Wagon: #640 – Be My Love – Valentine
11. My Time To Craft: #475 – All You Need Is Love
12. Penny’s Paper-Crafty Challenge Blog: #514 – Anything Goes with Paper
13. {PIN}spirational Challenges: #286 – February Photo Inspiration
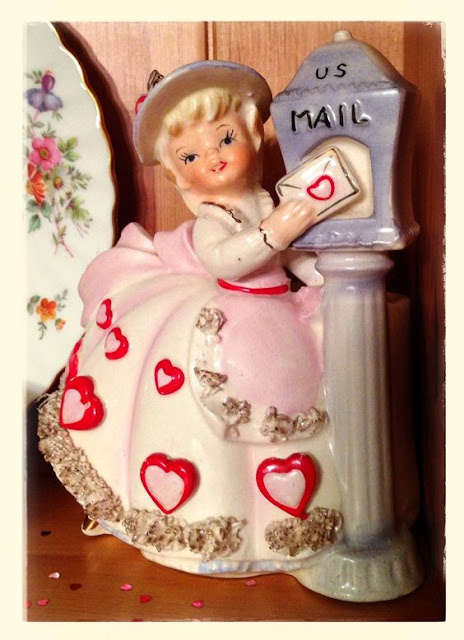
14. Try It On Tuesday: All Loved Up
15. Use Your Stuff: #441 – Hearts/Love

Eyelet Outlet products used:
Valentine Washi Tape
White Pearl Bling Strips

Other products used:
Cardstock/Paper: CutCardStock Basis Red, Basis Gray, Amaranth, Pop-Tone Cotton Candy, Pop-Tone Razzleberry cardstock, Neenah Classic Crest Solar White and Neenah Classic Linen Solar White cardstock
Stamps: Hero Arts Year Round Messages stamp set
Ink: Catherine Pooler Be Mine ink
Dies/Punches/Cut Files: My Scrap Chick Love Heart Card cut file
Accessories: Brother Scan N Cut, Bearly Art precision craft glue

I hope you’ve enjoyed today’s project! Be sure to check out all the fun goodies at Eyelet Outlet! I can already see you drooling, lol! Be sure to ‘like’ and ‘follow’ Eyelet Outlet Facebook Page to keep up with news and sales, and while you’re at it, join the Eyelet Outlet Fans Facebook group for lots of creative inspiration! Thanks so much for stopping by today – we’ll see you next time! ;)

Scrappy hugs,

Always My Valentine!

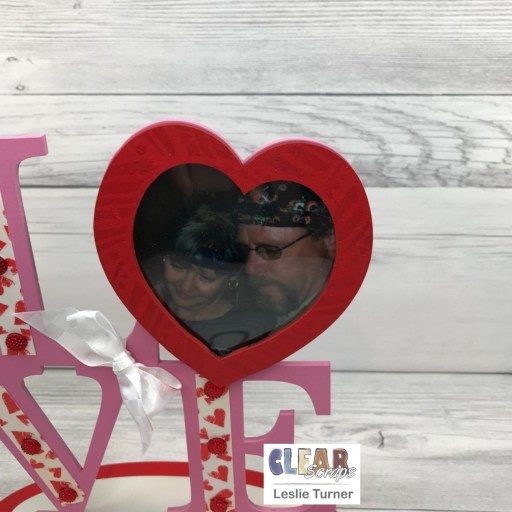
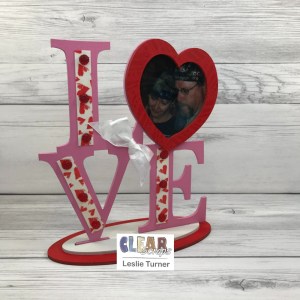
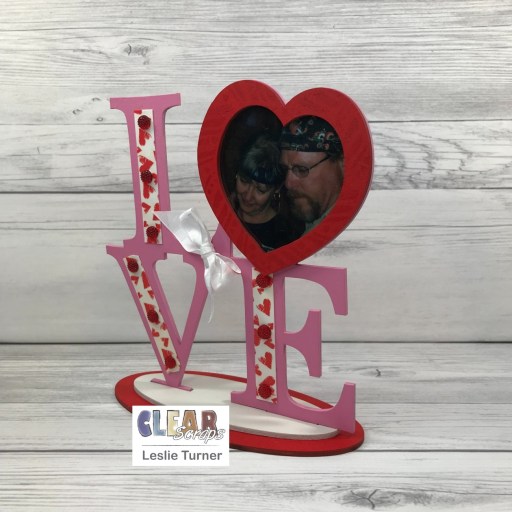
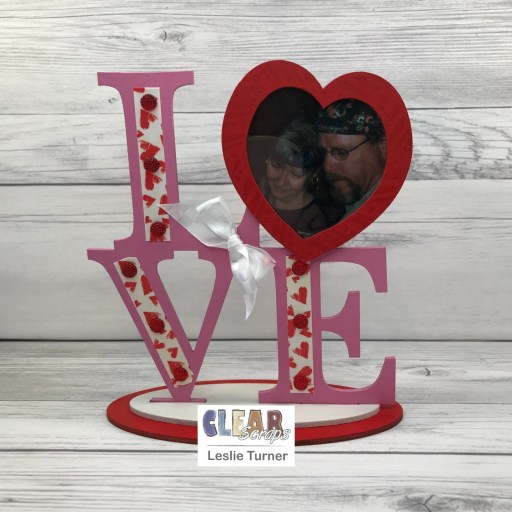
Happy Fri-YAY, friends! Hope you had a wonderful week and have something fun planned this weekend! I’m happy to be back on the Clear Scraps blog today with another awesome DT inspiration project! I used the Love Desktop Frame to create a display for a pic of the hubs and I that was taken in 2009. I also used the 5×9 Feathers Layering Stencil to add some tone-on-tone detail to the heart cut-out. Even though this project is just in time for Valentine’s Day, it would definitely look great on a desktop all year long! This was a fun project that worked up fairly quickly with some paint, washi tape, bling and ribbon! I’ve never been keen on using red and pink together because we always thought they ‘clashed’ growing up, but I’ve been seeing more and more projects lately pairing the two colors together so I decided I was going to try my hand at it! And I think I like it! ;)

I started by painting the main L-O-V-E part of the Love Desktop Frame with pink chalk paint, the heart cut-out and large base piece with red acrylic paint, and the small base piece with white paint. I sandwiched the photo and a piece of acetate (to keep the photo dust-free) between the frame and the heart cut-out and adhered them all together. I covered three narrow strips of white cardstock with heart washi tape, adhered them to three of the letters, and affixed several red gemstones to each.

I used some distress ink and the Feathers Layering Stencil to add some tone-on-tone detail to the heart cut-out. The finishing touch was tying a small bow fashioned from white checkerboard satin ribbon.

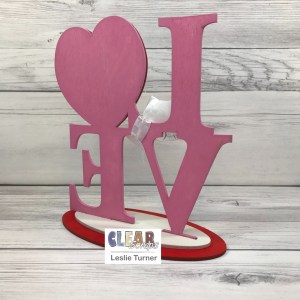
Here is a shot from a different angle and one from the back. Love how this turned out! I sure do love my guy!

Sharing in the following challenges:
1. A Perfect Time To Craft Open Challenge: #2-2022 – Anything Goes
2. Classic Design Challenge: February #2 – Anything Goes
3. Crafting Happiness Challenges: #120 – Anything Goes
4. International Art & Soul: #126 – All About Love/Hearts
5. Lil Patch of Crafty Friends Challenge Blog: #175 – Anything Goes
6. {PIN}spirational Challenges: #286 – February Photo Inspiration

7. Through the Purple Haze: #189 – Anything Goes
8. Try It On Tuesday: All Loved Up
9. Wednesday’s Creative Inspirations Challenge Blog: February Challenge – With Love

Clear Scraps products used:
Love Desktop Frame
5×9 Feathers Layering Stencil

Other products used:
Cardstock/Paper: Neenah Classic Crest 80# Solar White cardstock
Ink: Ranger fired brick distress ink
Accessories: Folkart Prominent Pink chalk paint, Liquitex Cadmium Red Medium Hue acrylic paint, Farmhouse White Ash paint, Bearly Art precision craft glue, Eyelet Outlet Heart washi tape, Eyelet Outlet 8mm red cut jewels, Really Reasonable Ribbon white checkerboard satin ribbon

I hope you’ve enjoyed today’s project and you’re inspired to get those craft supplies out to play! Be sure to check out all the amazing acrylic, wood and chipboard goodies at Clear Scraps… OMGoodness, you won’t be disappointed! And head on over to the Clear Scraps Facebook Page for lots of inspiration! And while you’re at it, join the Clear Scraps Facebook Creative Group to connect with other Clear Scraps fans! Thanks so much for stopping by today – we’ll see you next time!

Scrappy hugs,

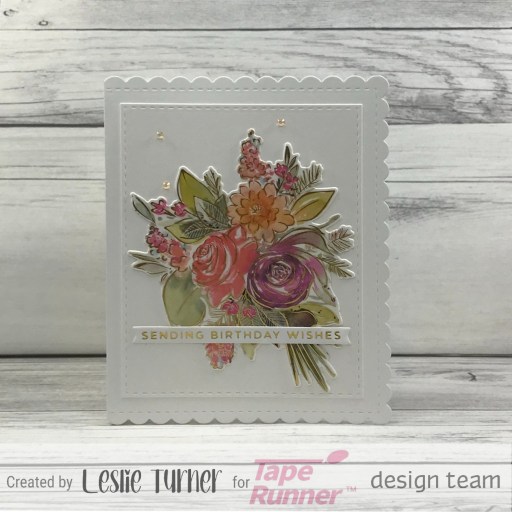
Sending Birthday Wishes

Hi everybody! It’s Thursday already and I hope you’ve had a fabulous week! We only had one appointment this week and it was to get shots for two of our inside feline kids. I keep the inside and outside kitty appointments in the same planner I keep Ed’s and my appointments in, lol, since there are quite a few to keep up with! ;) Affiliate links are used in this post at no cost to you – I really appreciate your support! I’ve popped in today to share an awesome Tape Runner DT inspiration project!

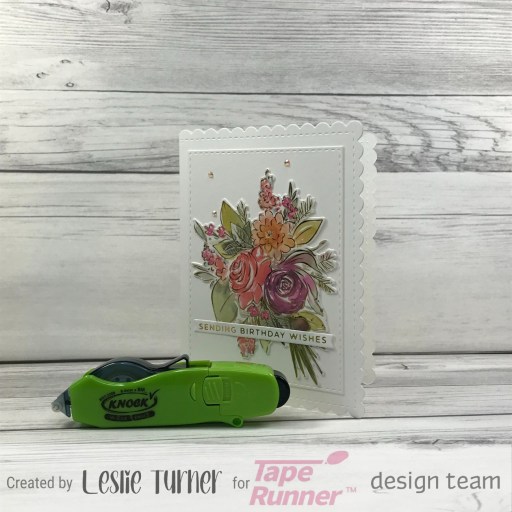
Y’all, this card literally took five minutes to make. Yep, you read that right… five minutes… albeit I already had the floral die cut and the foiled sentiment made. It would have taken a little longer had I needed to make those as well. So let me side-track for a minute… I got the four sets of PinkFresh Studio coordinating washi tape and die sets last week that I’ve been wanting, and I’m in love! They are ah-maaazing and so fun to play with! I die cut whole sets at once so they’re ready to put on cards. And the foiled sentiment is one of many that I made a while back when I got my Spellbinders Glimmer Hot Foil System.

The panels and floral die cut were adhered with Retractable Tape Runner. Wet glue was used only to adhere the narrow sentiment strip and gemstones. Using the Papertrey Ink Noted: Scalloped A2 Die Collection, I cut a standard size A2 stitched scalloped card base and stitched rectangle layering panel from CutCardStock Basis 80# White cardstock. I had already applied the PinkFresh Studio Joyful Bouquet washi tape to a piece of Neenah Classic Crest 110# Solar White cardstock (heavyweight for stability) and then cut the florals with the coordinating PinkFresh Studio Joyful Bouquet die set. I adhered the largest bouquet to the stitched rectangle layering panel.

I had already used the Spellbinders Glimmer Hot Foil System, Spellbinders Glimmer Gold Foil and Spellbinders Mini Everyday Sentiments Glimmer Hot Foil Plate & Die Set to create a variety of sentiments on Neenah Classic Crest Solar White 80# cardstock. So I chose the sentiment from the bunch that I wanted to use on this card and adhered it across the bottom portion of the bouquet. The finishing touch was adding several gemstones from the Trinity Stamps Amber Glow Embellishment Mix using the Trinity Pick-Up Stick.

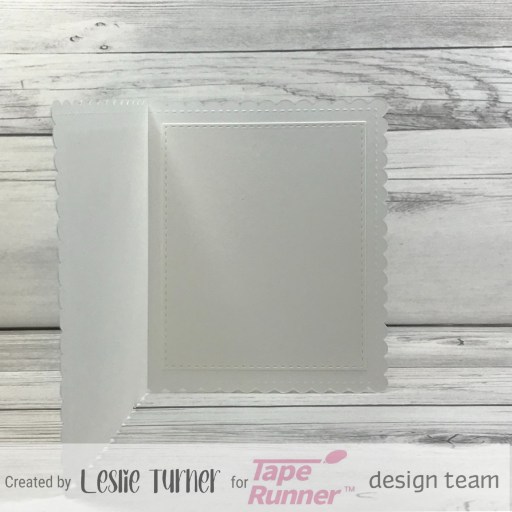
I cut a second stitched rectangle layering panel from CutCardStock Basis 80# White cardstock using the Papertrey Ink Noted: Scalloped A2 Die Collection and adhered it to the inside of the card base. I’m donating this card to the Bearly Arts Cards for Cubs project so I left the inside blank with plenty of room to write a custom message.

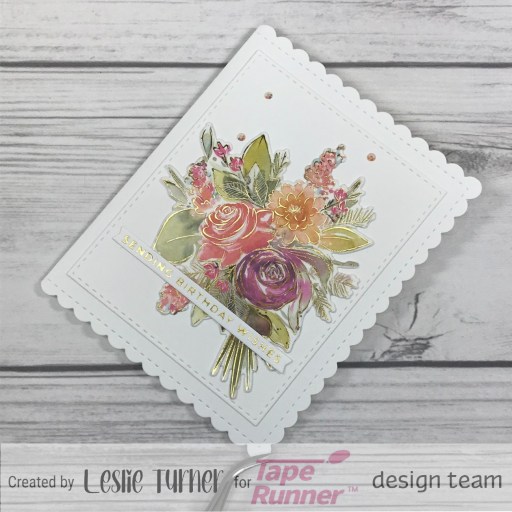
And one more peek… I’m smitten with this super simple card and can’t wait to make more using the Retractable Tape Runner to assemble them! So clean and easy to use!

Sharing in the following challenges:
1. A Perfect Time To Craft Open Challenge: #2-2022 – Anything Goes
2. Classic Design Challenge: February #2 – Anything Goes
3. Crafting Happiness Challenges: #120 – Anything Goes
4. Lil Patch of Crafty Friends Challenge Blog: #175 – Anything Goes
5. Through the Purple Haze: #189 – Anything Goes

Tape Runner products used:
Retractable Tape Runner

Other products used:
Cardstock/Paper: Neenah Classic Crest 110# and 80# Solar White cardstock, CutCardStock Basis 80# White cardstock
Dies/Punches: PinkFresh Studio Joyful Bouquet die set, Papertrey Ink Noted: Scalloped A2 Die Collection
Accessories: We R Memory Keepers Large Guillotine Paper Trimmer, PinkFresh Studio Joyful Bouquet Washi Tape, Spellbinders Glimmer Hot Foil System, Spellbinders Glimmer Gold Foil, Spellbinders Mini Everyday Sentiments Glimmer Hot Foil Plate & Die Set, Bearly Art precision craft glue, Trinity Stamps Amber Glow Embellishment Mix, Trinity Pick-Up Stick

I hope you’ve enjoyed today’s project and you’re inspired to get your craft on! Be sure to check out the ah-mazing Tape Runner, Retractable Tape Runner and Highlight Tape Runner at TapeRunner.com! Be sure to Follow us on Facebook and Instagram! Thanks so much for stopping by today – we’ll see you next time!

Scrappy hugs,

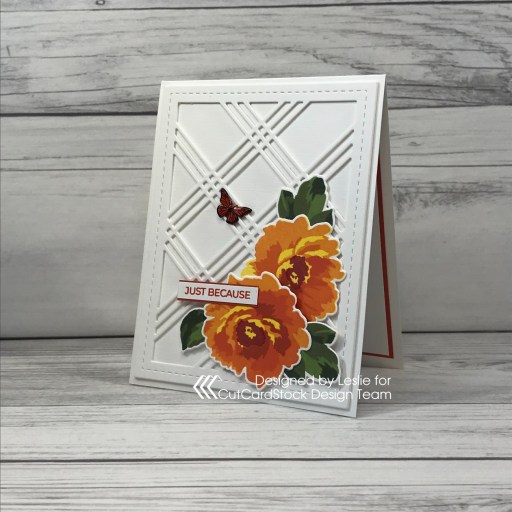
Just Because

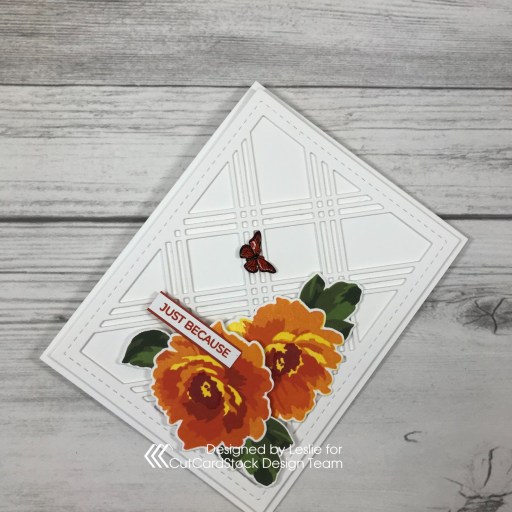
Howdy, peeps! A real big Happy Tuesday shout-out to you all! I hope you had a great weekend and your week is going great so far! Affiliate links are used in this post at no cost to you – I really appreciate your support! I’m stoked to be back on the CutCardStock blog today with an awesome DT inspiration project featuring more of our Classic Crest and Classic Linen cardstock that’s on sale this month so be sure to stock up! I used both Neenah Classic Linen 100# Solar White cardstock and Neenah Classic Linen 80# Solar White cardstock along with Neenah Classic Crest Solar White 80# cardstock which I paired with our Pop-Tone Tangy Orange cardstock to create this pretty ‘just because’ card.

NOTE: Several weeks ago we were notified by CutCardStock that there are supply chain issues with the Classic Crest and Linen cardstock so I wanted you all to be aware. Some other really good options that I can personally vouch for, which I have in my stash also, are 110# Basis White, 80# Basis White, 65# Pop-Tone Sweet Tooth and Royal Sundance 80# Fiber White.

I took care of the florals first. Using the Altenew Fabulous Florals stamp set along with Hero Arts Dandelion and Red Royal inks, and Memento Tangelo, Morocco, Lady Bug, Rhubarb Stalk, Bamboo Leaves, Olive Grove and Northern Pine inks, I stamped the florals and leaves on Neenah Classic Crest 80# Solar White cardstock and cut them with the coordinating Altenew Fabulous Florals die set.

I cut a standard A2 size top-folding card base from Neenah Classic Linen 100# Solar White cardstock along with a layering panel from Neenah Classic Linen 80# Solar White cardstock and three die cuts using the Waffle Flower Triple Line Diamond Panel die which I cut from Neenah Classic Crest 80# Solar White cardstock and layered together for dimension. I adhered the diamond die cut panel to the linen layering panel, and then adhered the floral images to the panel with Darice Double-Sided Adhesive Foam Circles and added an Eyelet Outlet Butterfly Brad. I stamped the sentiment from the Trinity Stamps A Sentiment For (Almost) Everything stamp set in Catherine Pooler Mandarin Spice ink on a scrap piece of Crest cardstock, trimmed it and layered it on a scrap piece of Pop-Tone Tangy Orange cardstock and trimmed it again. I adhered the sentiment to the diamond die cut panel and then adhered the panel to the card base.

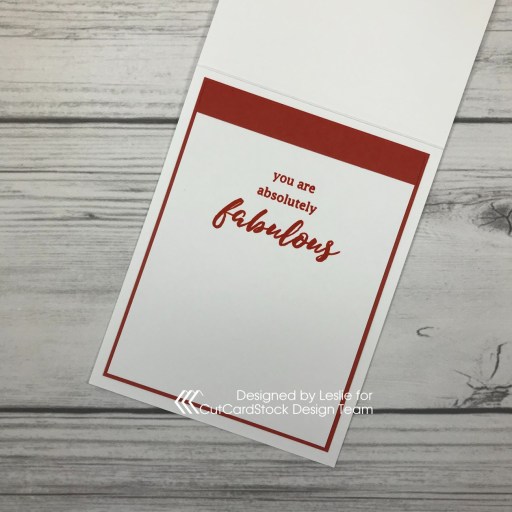
I cut the inside panel from Neenah Classic Crest 80# Solar White cardstock and embellished it with a strip of Pop-Tone Tangy Orange cardstock across the top. I stamped the sentiment from the Altenew Fabulous Florals stamp set in the Mandarin Spice ink and layered it on the orange cardstock.

And one more look… I’m totally smitten with this card! I LOVE IT when a card turns out exactly like I pictured it in my head!

Sharing in the following challenges:
1. A Perfect Time To Craft Open Challenge: #2-2022 – Anything Goes
2. Classic Design Challenge: February #2 – Anything Goes
3. Crafting Happiness Challenges: #120 – Anything Goes
4. Lil Patch of Crafty Friends Challenge Blog: #175 – Anything Goes
5. Through the Purple Haze: #189 – Anything Goes

CutCardStock products used:
Neenah Classic Linen 100# Solar White cardstock
Neenah Classic Linen 80# Solar White cardstock
Neenah Classic Crest 80# Solar White cardstock
Pop-Tone Tangy Orange cardstock

Other products used:
Stamps: Altenew Fabulous Florals stamp set, Trinity Stamps A Sentiment For (Almost) Everything stamp set
Ink: Hero Arts Dandelion and Red Royal inks; Memento Tangelo, Morocco, Lady Bug, Rhubarb Stalk, Bamboo Leaves, Olive Grove and Northern Pine inks; Catherine Pooler Mandarin Spice ink
Dies/Punches: Altenew Fabulous Florals die set, Waffle Flower Triple Line Diamond Panel die
Accessories: We R Memory Keepers Large Guillotine Paper Trimmer, Bearly Art precision craft glue, MISTI stamp tool, Big Shot, Darice Double-Sided Adhesive Foam Circles, Eyelet Outlet Butterfly Brads

I hope you’ve enjoyed today’s project and you’re inspired to get crafty! Be sure to check out all the awesome cardstock and other goodies at CutCardStock (adhesives, labels, stickers, pens, watercolors and ribbon to name a few). And head on over to the CutCardStock Facebook Page for more inspiration! Thanks so much for stopping by today – we’ll see you next time!

Scrappy hugs,

Tape Runner DT

Hey everybody! Our Tape Runner DT boss posted our DT collage yesterday, so I guess that makes the announcement that I joined the Tape Runner design team in January officially official, lol! Hopefully you caught the three projects I posted last month!

It’s a great team to be on with some very talented designers and I’m stoked! Hope you all have a great rest of your week!

Scrappy hugs,

Birthday Blessings Note Card

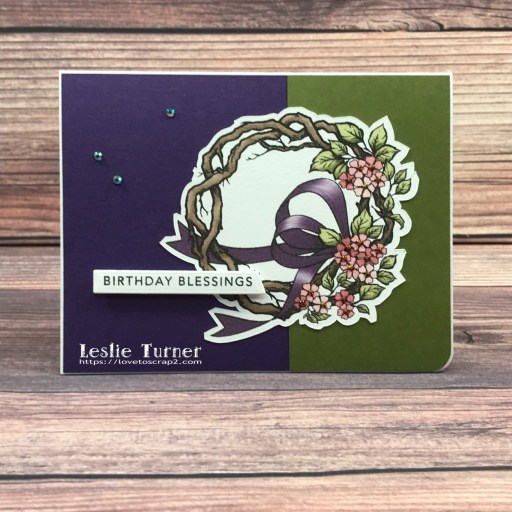
Hi friends! Happy Sunday – I hope you’re having a wonderful weekend and staying warm! Affiliate links are used in this post at no cost to you – I really appreciate your support! I’m thrilled to share that I’ve been invited to guest design for The Outlawz Sunday Songs & Rhymes because one of my projects was chosen as a Favorite in their challenge a few weeks ago. Beccy’s Place is the sponsor this fortnight so come on over and play for a chance to win a prize! We were given the first verse of The Yellow Jessamine poem to find inspiration which I found in the word ‘wreath’. I used Beccy’s gorgeous Gnarled Wreath Flowers digital image (a freebie which I cut with my Scan N Cut) for this pretty birthday card created in one of my favorite color combos of purple and green!

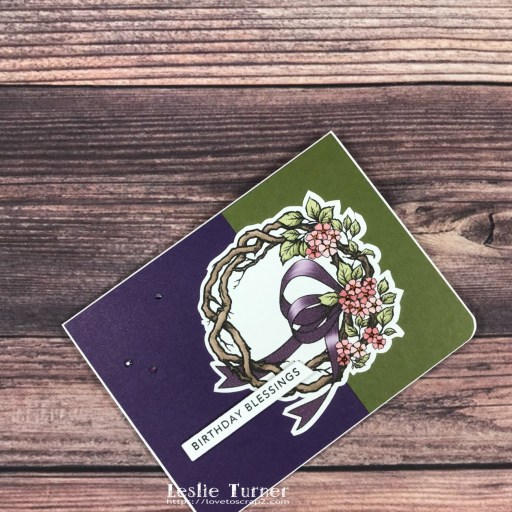
I cut a standard A2 size top-folding landscape card base from CutCardStock Basis White 110# cardstock and rounded the bottom right corner. I also cut layering panels from CutCardStock Curious Metallic Violette cardstock and CutCardStock Pop-Tone Jellybean Green cardstock which I adhered to the card base. I printed the pre-colored digital image on CutCardStock Basis White 80# cardstock, cut it with my Scan N Cut, and adhered it to the card front. You can’t see it at all in the photos, but I added Nuvo Golden Sunset Glitter Drops to the centers of the flowers. I stamped a sentiment from the Taylored Expressions Simple Strips – Birthday stamp set, cut it with the coordinating Taylored Expressions Simple Strips – Asymmetrical die and adhered it to the card front with double-sided adhesive foam strips in an offset fashion. The finishing touch was adding several gemstones from the Trinity Stamps Amethyst Accent Embellishment Mix using the Trinity Pick Up Stick.

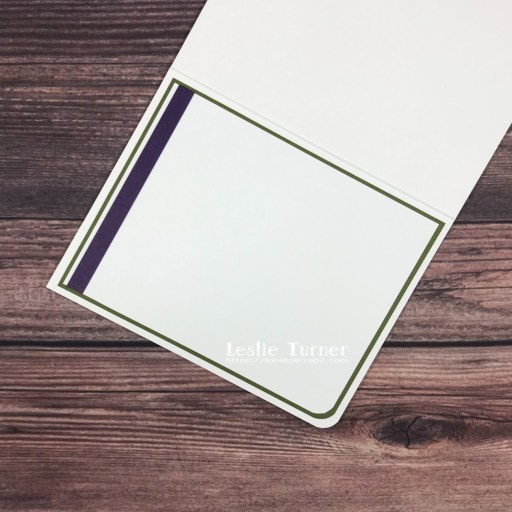
I cut the inside panel from CutCardStock Basis White 80# cardstock and embellished it with a strip of CutCardStock Curious Metallic Violette cardstock. I left the panel blank (as this is a note card) and layered it on CutCardStock Pop-Tone Jellybean Green cardstock.

And one more look… I absolutely love how this turned out! What a beautiful image from the talented Beccy! I’m going to donate this card to the Bearly Arts Cards for Cubs project.

Sharing in the following challenges:
1. A Perfect Time To Craft Open Challenge: #02-2022 – February Anything Goes
2. Classic Design Challenge: February #2 – Anything Goes
3. Crafting Happiness Challenges: #120 – Anything Goes
4. Paperbabe Stamps: #160 – Anything Goes
5. QKR Stampede: #437 – Anything Goes
6. Through The Craft Room Door: February Anything Goes

Products used:
Cardstock/Paper: CutCardStock Basis White 110# cardstock, CutCardStock Basis White 80# cardstock, CutCardStock Curious Metallic Violette cardstock, CutCardStock Pop-Tone Jellybean Green cardstock
Stamps: Beccy’s Place Gnarled Wreath Flowers digital image, Taylored Expressions Simple Strips – Birthday stamp set
Ink: Memento Tuxedo Black ink
Dies/Punches: Kadomaru Pro corner rounder, Taylored Expressions Simple Strips – Asymmetrical die
Accessories: Brother Scan N Cut, We R Memory Keepers Mini Guillotine Paper Trimmer, Bearly Arts precision craft glue, MISTI stamp tool, Big Shot, Trinity Stamps Amethyst Accent Embellishment Mix, Trinity Pick Up Stick, Nuvo Golden Sunset Glitter Drops, Darice Double-Sided Adhesive Foam Strips

I hope you’ve enjoyed this project and will come over and join in all the fun at The Outlawz Challenges! Lots of fun going on! Thanks so much for stopping by today – we’ll see you next time! ;)

Scrappy hugs,
You are Fabulous

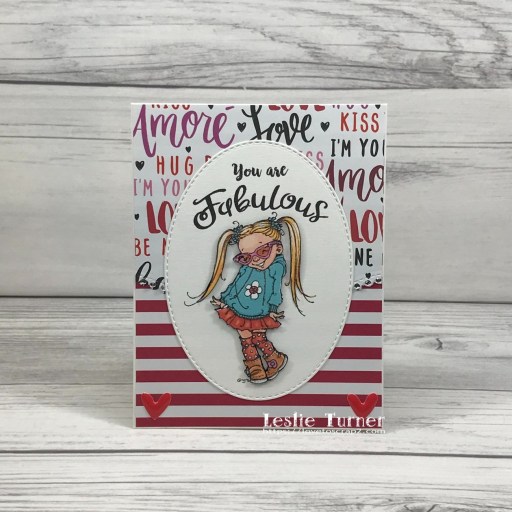
Hey everybody! I hope you’re having a fantastic weekend! You know where I am, lol! ;) Affiliate links are used in this post at no cost to you – I really appreciate your support! I was dubbed a 2021 Front Porch Gang Master Rocker (along with quite a few others) by the lovely Chana, owner of 613 Avenue Create, which is an honor bestowed upon those who often made the Top Rocker list in 2021! We were offered a guest design gig and I chose the month of February, so here I am! The challenge this month is Anything Goes with an optional twist of My Whimsical Valentine. I dug into my digital image stash and found a precolored image and sentiment from Mo’s Digital Pencil and created this super adorable Valentine! This image is called Fabulous – and yes, she is fabulous and just the cutest little thing ever!

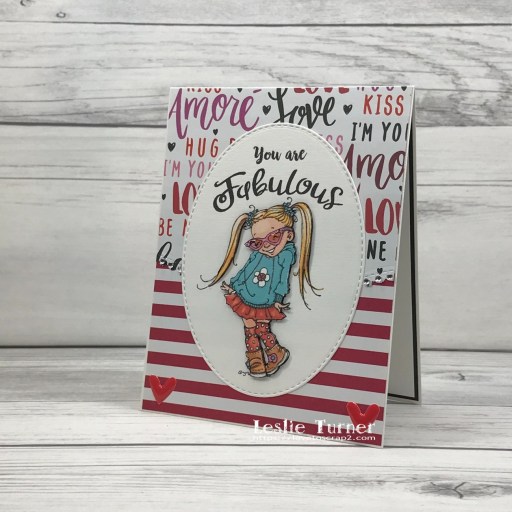
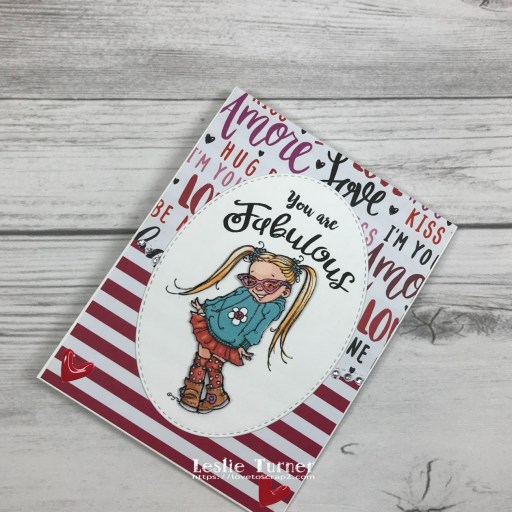
I cut a standard A2 top-folding card base from CutCardStock Basis 110# White cardstock along with layering panels from two coordinating patterned papers from The Paper Studio Four Seasons and Everything In Between -2- paper pad. Using the My Favorite Things Stitched Scallop Basic Edges Die-namics, I cut one of the patterned papers off just below the half-way point and adhered them together and then to the card base. I printed the image twice on CutCardStock Basis 80# White cardstock and cut one of them with a Memory Box Stitched Oval Layers die. I fussy cut the second image, ran a black marker around the outside edge, and layered it on top of the die cut image with foam squares for a little dimension. I added Ranger Glossy Accents to her glasses for some interest. I adhered the die cut to the card front, and added some clear bling and enamel hearts to finish it off.

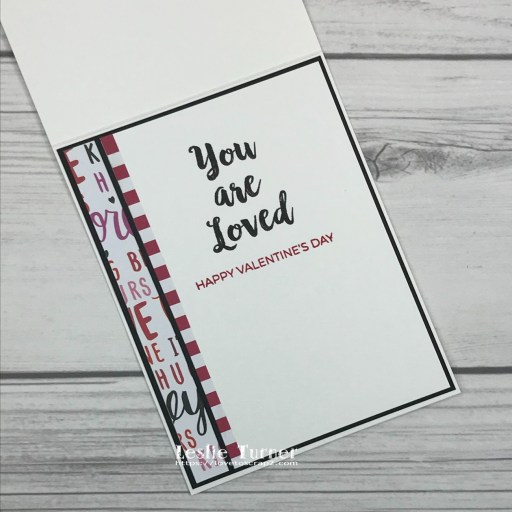
I printed the inside sentiment on CutCardStock Basis 80# White cardstock, trimmed it, and embellished it with leftover strips of the patterned paper used on the front along with a very thin strip of CutCardStock Pop-Tone Black Licorice cardstock. I stamped an additional Valentine sentiment in red ink and layered the panel on the black cardstock.

And one more peek… such an adorable image! I don’t use digital images very often anymore but I couldn’t resist this one! ;)

Sharing in the following challenges:
1. A Perfect Time To Craft Open Challenge: #02-2022 – February Anything Goes
2. Classic Design Challenge: February #2 – Anything Goes
3. Crafting Happiness Challenges: #120 – Anything Goes
4. Di’s Digi Challenge: Use Red and/or Pink
5. Make the Cards Challenge: #47 – Make a Valentine
6. Moving Along With The Times: #139 – Love/Anniversary/Wedding
7. Paperbabe Stamps: #160 – Anything Goes
8. QKR Stampede: #437 – Anything Goes
9. Through The Craft Room Door: February Anything Goes
10. Wednesday’s Creative Inspirations Challenge Blog: February With Love

Products used:
Cardstock/Paper: CutCardStock Basis 110# White cardstock, CutCardStock Basis 80# White cardstock, CutCardStock Pop-Tone Black Licorice cardstock, The Paper Studio Four Seasons and Everything In Between -2- paper pad
Stamps: Mo’s Digital Pencil Fabulous digital image and You are loved digital sentiment, Trinity Stamps A Sentiment For (Almost) Everything stamp set
Ink: Memento Tuxedo Black marker, Catherine Pooler Rockin’ Red ink
Dies/Punches: Memory Box Stitched Oval Layers, My Favorite Things Stitched Scallop Basic Edges Die-namics
Accessories: Tonic Studios 12″ Guillotine Paper Trimmer, Tombow Mono Adhesive, Ranger Glossy Accents, Scrapbook Adhesives 3D Foam Squares Variety Pack, Flourish with a Bling clear gemstones, Eyelet Outlet Enamel Hearts

I hope you’ve enjoyed seeing this whimsical Valentine and will link up with us this month! Thanks so much for stopping by today – we’ll see you next time! ;)

Scrappy hugs,
Happy Valentine’s Day Birdhouse Box Card

3/5/22 Top 3 at Crafty Calendar Challenge!
3/28/22 DT Favorite at A Perfect Time To Craft Open Challenge!

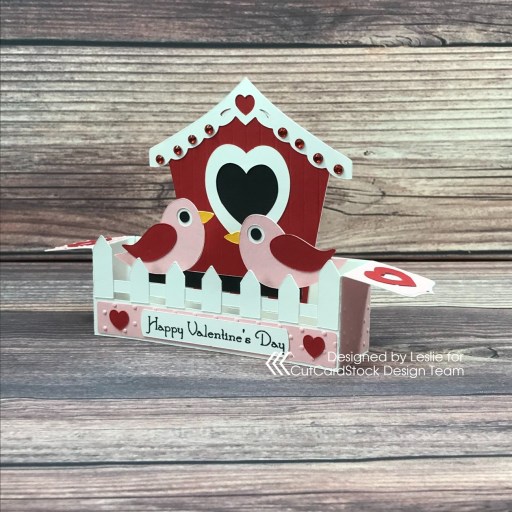
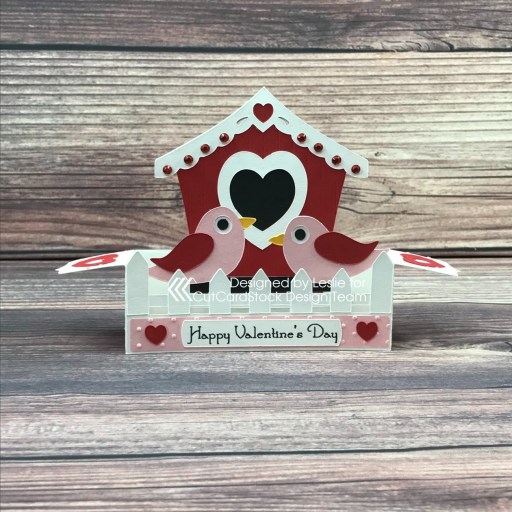
Hey everybody! I’m back on this fine Saturday morning with my second project share for the CutCardStock My Sweet Valentine Blog Hop going on today and tomorrow! Be sure to hop along with us for a chance to win a $40 CutCardStock gift card! Affiliate links are used in this post at no cost to you – I really appreciate your support! I’ve been having the best time playing with my Scan N Cut and thoroughly enjoyed creating the two Valentines from our amazing Basis cardstock for the hop. As mentioned in my last post, I’m showcasing both cards separately so I can enter them into some challenges. I am a fun fold geek and box cards run right there at the top of my favorite list! This card features lots of hearts in various forms and sizes, an adorable birdhouse adorned with red bling, embossed panels, and two of the cutest love birds ever perched in front of their house behind a white picket fence!

I cut all the pieces from Basis 80# Red cardstock, Basis 80# Pink cardstock, Basis 80# Black cardstock, Basis 80# White cardstock and Basis 80# Gold cardstock. Picking out the colors of cardstock is always fun when creating with the Scan N Cut, but I always look forward to the assembly the most! And the sentiment on the front of this card was also printed with the Scan N Cut using the draw feature which I’ve used several times and have grown to love!

Here’s a shot from a different angle. The back (which I didn’t photograph) is completely blank with plenty of room to write a custom message and sign.

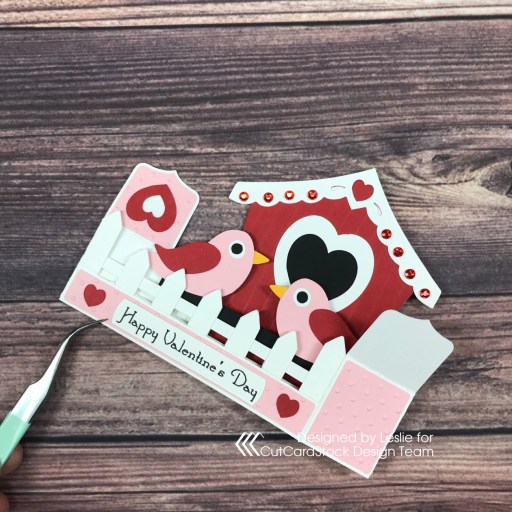
And one more peek of the card folded flat for mailing. Another super cute box card that I’m totally in love with!

Sharing in the following challenges:
1. A Perfect Time To Craft Open Challenge: #2-2022 – Anything Goes
2. Aud Sentiments Challenge Blog: #291 – Love Sentiment
3. Classic Design Challenge: February #2 – Anything Goes
4. Crafting Happiness Challenges: #120 – February Anything Goes
5. Crafty Calendar Challenge: February Anything Goes
6. Crafty Catz: #581 – Anything Goes w/ optional twist of Anything But Square
7. Critter Crazy Challenges: #59 – Anything Goes with a Featured Critter
8. Di’s Digi Challenge: Use Red and/or Pink
9. International Art & Soul: #126 – All About Love/Hearts
10. Let’s Craft and Create: #180 – Anything Goes + From The Heart
11. Make The Cards Challenge: #47 – Create a Valentine
12. Moving Along With The Times: #139 – Love/Anniversary/Wedding
13. Wednesday’s Creative Inspirations Challenge Blog: February With Love

CutCardStock products used:
Basis 80# Red cardstock
Basis 80# Pink cardstock
Basis 80# Black cardstock
Basis 80# White cardstock
Basis 80# Gold cardstock

Other products used:
Dies/Punches/Cut Files: Simply Crafty SVGs Valentine Birdhouse Box Card cut file
Accessories: Brother Scan N Cut, Bearly Art precision craft glue, Martha Stewart Scoring Board, Cuttlebug Swiss Dots Embossing Folder, Big Shot, Eyelet Outlet Red Jewel Bling

I hope you’ve enjoyed today’s project and you’re inspired to get crafty! Be sure to check out all the awesome cardstock and other goodies at CutCardStock (adhesives, labels, stickers, pens, watercolors and ribbon to name a few). And head on over to the CutCardStock Facebook Page for more inspiration! Thanks so much for stopping by today – we’ll see you next time!

Scrappy hugs,
Be Mine Love Truck Box Card

2/11/22 Top 3 Winner at Alphabet Challenge Blog!

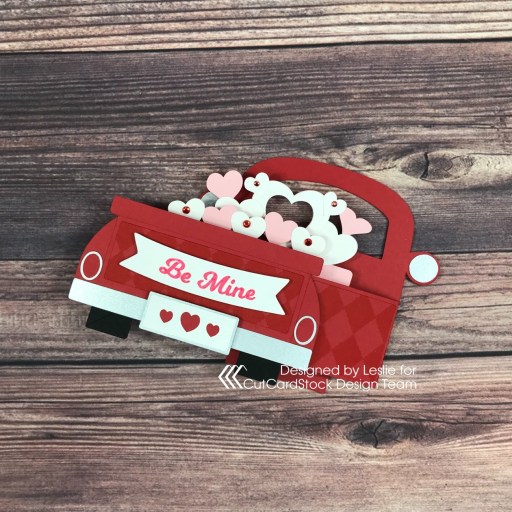
Hi everyone! Happy Saturday! I hope you have something fun planned this weekend… but if you don’t, let me suggest that you hop along with us in the CutCardStock My Sweet Valentine Blog Hop going on today and tomorrow for a chance to win a $40 CutCardStock gift card! Affiliate links are used in this post at no cost to you – I really appreciate your support! I’m stoked to be participating in the hop showcasing two absolutely adorable box cards created with our amazing Basis cardstock and I’ve popped in to share my first project. I’m posting both cards separately so I can enter them into some challenges. Box cards are at the top of my all-time favorite list of fun folds and this one has several really cute features – metallic silver elements, stamped side and back panels, embossed tires, and lots of hearts (some adorned with red gemstones).

I cut all the pieces from Basis 80# Red cardstock, Basis 80# Pink cardstock, Basis 80# Black cardstock, Basis 80# White cardstock and Stardream Metallic Silver cardstock. To me, the real fun is assembling the box cards, and this one was no different! And I have to tell you that I was SO intimidated by the draw feature on my Scan N Cut that I’ve never (you read that right… never) used it in the 6+ years I’ve been using a Scan N Cut. Not sure what happened, but the process just clicked in my brain – I’ve used it several times now and love it!

There’s a panel on the back with a stamped sentiment and room for a signature.

And one more peek of the card folded flat for mailing. I’m so smitten with this card – it turned out so stinkin’ cute I can’t stand it!

Sharing in the following challenges:
1. A Perfect Time To Craft Open Challenge: #2-2022 – Anything Goes
2. Alphabet Challenge Blog: V is for Vehicle
3. Aud Sentiments Challenge Blog: #291 – Love Sentiment
4. Classic Design Challenge: February #2 – Anything Goes
5. Crafting Happiness Challenges: #120 – February Anything Goes
6. Crafty Calendar Challenge: February Anything Goes
7. Crafty Catz: #581 – Anything Goes w/ optional twist of Anything But Square
8. Creative Creases Challenge: #25 – Anything Goes with a Fun Fold
9. Di’s Digi Challenge: Use Red and/or Pink
10. International Art & Soul: #126 – All About Love/Hearts
11. Let’s Craft and Create: #180 – Anything Goes + From The Heart
12. Make The Cards Challenge: #47 – Create a Valentine
13. Moving Along With The Times: #139 – Love/Anniversary/Wedding
14. Wednesday’s Creative Inspirations Challenge Blog: February With Love

CutCardStock products used:
Basis 80# Red cardstock
Basis 80# Pink cardstock
Basis 80# Black cardstock
Basis 80# White cardstock

Other products used:
Stamps: Blockheads Paper Arts Backgrounds for All Occasions stamp set, Hero Arts Year Round Messages stamp set
Ink: Catherine Pooler Samba and Rockin’ Red inks
Dies/Punches/Cut Files: Simply Crafty SVGs Love Truck Box Card cut file
Accessories: Brother Scan N Cut, Bearly Art precision craft glue, Darice Chevon Embossing Folder, Scrapbook Adhesives 3D Foam Squares Variety Pack, Eyelet Outlet Red Jewel Bling

I hope you’ve enjoyed today’s project and you’re inspired to get crafty! Be sure to check out all the awesome cardstock and other goodies at CutCardStock (adhesives, labels, stickers, pens, watercolors and ribbon to name a few). And head on over to the CutCardStock Facebook Page for more inspiration! Thanks so much for stopping by today – we’ll see you next time!

Scrappy hugs,
Box Cards for CutCardStock My Sweet Valentine Blog Hop!

Hi friends! A big giant WELCOME to the CutCardStock’s My Sweet Valentine Blog Hop going on this weekend (February 5th and 6th), starting at 7:00 AM Central Time today and ending at 11:55 PM Central Time tomorrow! Affiliate links are used in this post at no cost to you. I really appreciate your support! This is going to be loads of fun with lots of crafty Valentine inspiration, so COME HOP WITH US!

AND there is a $40 CutCardStock gift card up for grabs! Woo-hoo!

The winner will be randomly selected via number generator and announced on Monday, February 7th, on the CutCardstock blog and Facebook page! To be eligible for the $40 gift card, you must comment at each stop along the hop (good for ONE gift card entry) or upload a Valentine’s Day/Love/Friendship project using CutCardStock products (good for TWO gift card entries). We would absolutely LOVE IT if you link up a project with us, PLUS it will increase your chances to win the gift card! ;)
=  =  =  =  =  =  =  =  =  =  =  =  =  =  =  =

Now, let me side-track you for a minute or three to share my two Valentine box cards which I’m showcasing separately on my blog so I can enter them in some challenges. Both of these cards feature a variety of colors in the Basis cardstock line, both were cut with my Scan N Cut, and both have front sentiments printed with my Scan N Cut using the draw feature. I absolutely love Basis cardstock and use it in nearly all of my projects. First up is my Be Mine Love Truck Box Card (click the link to go a separate blog post for more details and photos).

Here is a super quick tutorial showing you my process for making this box card. Cut all the pieces from Basis 80# Red cardstock, Basis 80# Pink cardstock, Basis 80# Black cardstock, Basis 80# White cardstock and Stardream Metallic Silver cardstock.

Stamp a harlequin background design on the back and side panels. Emboss a chevron design on the tires.

Print the front sentiment using the draw feature on the Scan N Cut, assemble and add red gemstones. Super cute and loads of Valentine fun! ;)

CutCardStock products used:
Basis 80# Red cardstock
Basis 80# Pink cardstock
Basis 80# Black cardstock
Basis 80# White cardstock
Stardream Metallic Silver cardstock

Other products used:
Stamps: Blockheads Paper Arts Backgrounds for All Occasions stamp set, Hero Arts Year Round Messages stamp set
Ink: Catherine Pooler Samba and Rockin’ Red inks
Dies/Punches/Cut Files: Simply Crafty SVGs Love Truck Box Card cut file
Accessories: Brother Scan N Cut, Bearly Art precision craft glue, Darice Chevon Embossing Folder, Scrapbook Adhesives 3D Foam Squares Variety Pack, Eyelet Outlet Red Jewel Bling

=  =  =  =  =  =  =  =  =  =  =  =  =  =  =  =

And next up is my Happy Valentine’s Day Birdhouse Box Card (click the link to go a separate blog post for more details and photos).

Here is a quick tutorial showing you my process for making this box card. Cut all the pieces from Basis 80# Red cardstock, Basis 80# Pink cardstock, Basis 80# Black cardstock, Basis 80# White cardstock and Basis 80# Gold cardstock.

Add some texture to the panels with a swiss dots embossing folder. Score vertical lines down the birdhouse with a scoring board for a little texture there as well.

Print the front sentiment using the draw feature on the Scan N Cut, assemble and add red gemstones to the roof. Another super cute Valentine box card on the books!

CutCardStock products used:
Basis 80# Red cardstock
Basis 80# Pink cardstock
Basis 80# Black cardstock
Basis 80# White cardstock
Basis 80# Gold cardstock

Other products used:
Dies/Punches/Cut Files: Simply Crafty SVGs Valentine Birdhouse Box Card cut file
Accessories: Brother Scan N Cut, Bearly Art precision craft glue, Martha Stewart Scoring Board, Cuttlebug Swiss Dots Embossing Folder, Big Shot, Eyelet Outlet Red Jewel Bling

=  =  =  =  =  =  =  =  =  =  =  =  =  =  =  =

Okay, let’s get back to the hop! Here is the complete list of stops:

• Cutcardstock
• Janet A
• Judy VZ
• Maureen
• Leslie –>you’re here!<–
• Teri
• Niki
• CutCardstock – C’mon, you know you want to link up! The linky tool is at the end of the post on the CutCardstock blog so that’s where you’ll want to head to link up your project – each upload is worth two entries for the gift card! Two entries per person!

You should have arrived here from Maureen’s blog and your next stop is Teri’s blog. I hope you are enjoying the hop and seeing all the fun Valentine projects! If you get lost along the way or if you landed here in the middle of the hop somehow and want to join in the fun, be sure to head on over to the CutCardstock blog to read all the details and start from the beginning!

In closing, I hope you’ve enjoyed seeing my Valentine box cards and you’re inspired to get crafty AND hop with us AND link up a Valentine’s Day/Love/Friendship project! Be sure to check out all the awesome cardstock and other goodies at CutCardStock (adhesives, labels, stickers, pens, watercolors and ribbon to name a few). And head on over to the CutCardStock Facebook Page for lots of crafty inspiration! Thanks so much for stopping by today – we’ll see you next time!

Scrappy hugs,