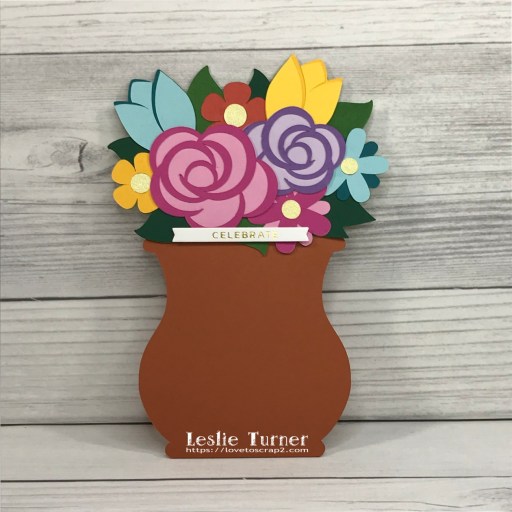
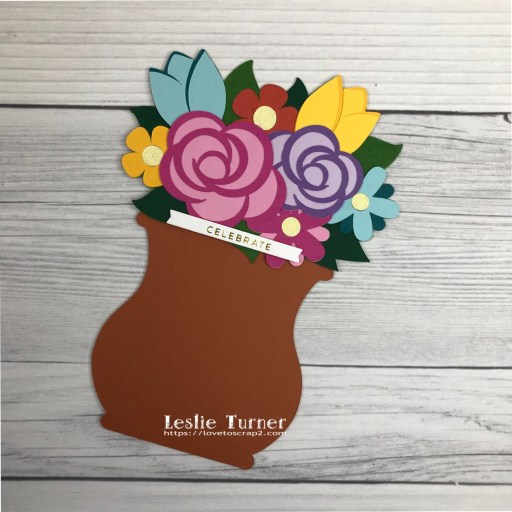
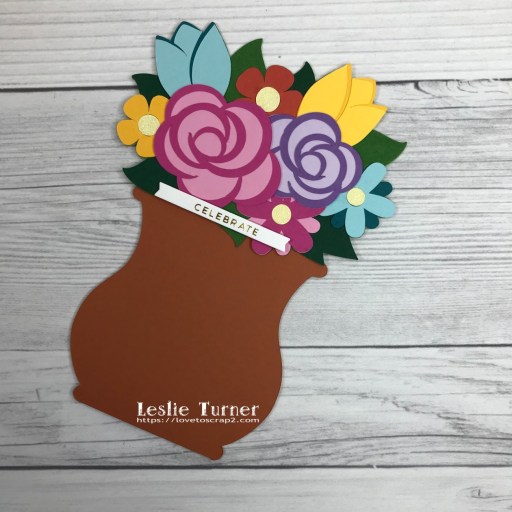
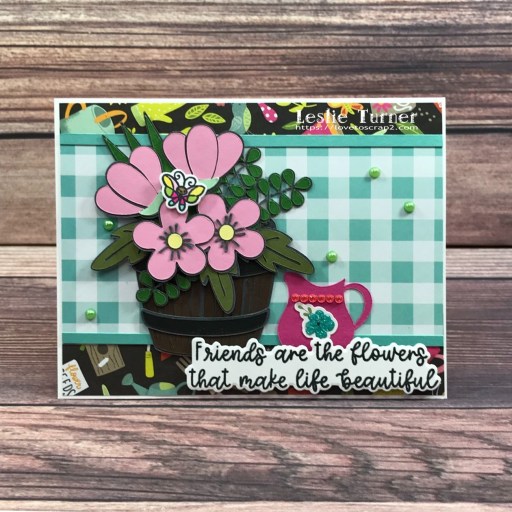
Hey everybody! I hope you’re having a great week and it’s not too hot yet where you are! It’s definitely getting warm here but we don’t have much humidity so it never feels as warm as it does in other places with higher humidity levels. I was asked by Becca, the owner of FarmQuest Challenge Blog, to be a guest designer for Theme #7 – Barrel AND Watering Can, Pitcher or Bucket. Of course, I said yes, so I created a pretty friendship card featuring the Bearly Art Flower Barrel SVG and the pitcher from the Simply Crafty SVGs Pitcher of Flowers cut file. I also used sentiments from Trinity Stamps Friends are Flowers and Supporting Script Sentiments stamp sets.
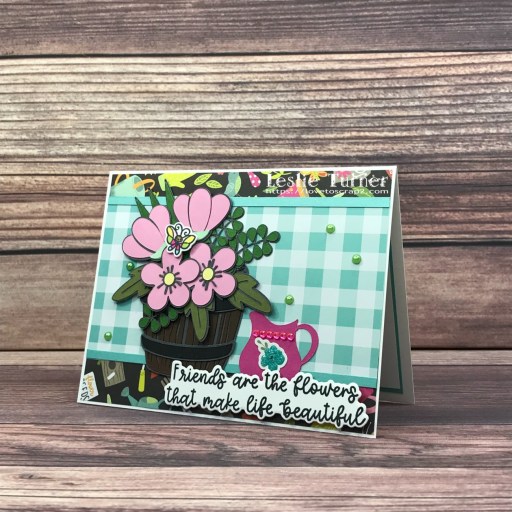
I started by creating the main card element using my Scan N Cut, the Bearly Art Flower Barrel SVG and CutCardStock Basis Black, Basis Brown, Basis Magenta, Pop Tone Jellybean Green, Pop Tone Spearmint, Pop Tone Cotton Candy, Pop Tone Banana Split, Shadow Gray and Scottish Highlands Green cardstock. As I always say, the most fun of working with SVGs is putting the projects together, and I really enjoyed this one! I also cut a flat pitcher from CutCardStock Stardream Metallic Lagoon using the Simply Crafty SVGs Pitcher of Flowers cut file and embellished it with some Eyelet Outlet pink gemstones and a die cut flower that was out on my desk.
I cut a standard A2 size top-folding landscape card base from 110# Solar White cardstock along with a layering panel and strips from two coordinating patterned papers from the The Paper Studio Four Seasons and Everything In Between -2- paper pad (one of my all-time favorites). I also cut narrow strips from CutCardStock Stardream Metallic Lagoon cardstock and adhered all the panels and strips to the card base. I added the flower barrel and the pitcher, along with a sentiment (and stamped and colored butterfly) from the Trinity Stamps Friends are Flowers stamp set, stamped in Memento Tuxedo Black ink and cut with the coordinating Trinity Stamps Friends are Flowers die set. The finishing touch was adding some Eyelet Outlet green pearl bling.
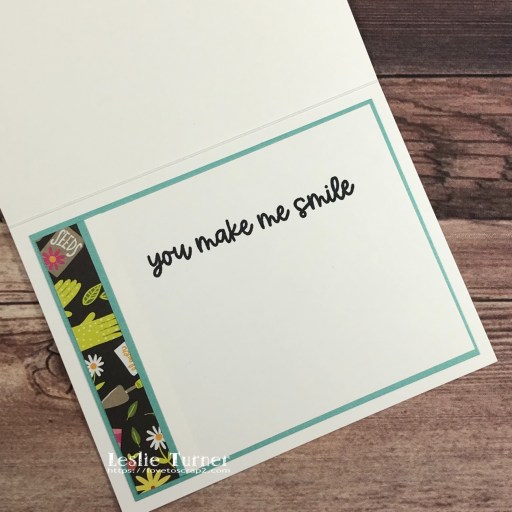
I cut the inside panel from 80# Solar White cardstock and embellished it with strips cut from the patterned paper and Lagoon cardstock used on the front. I stamped the sentiment from the Trinity Stamps Supporting Script Sentiments stamp set in black ink and layered the panel on Lagoon cardstock.
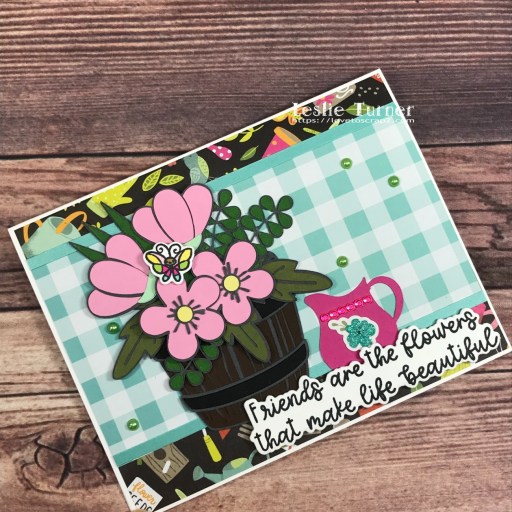
And one more look… really loving how this card turned out and how well it fits the theme for the FarmQuest Challenge Blog guest gig!
Sharing in the following challenges:
1. Fab ‘n’ Funky Challenges: #554 – Summer Colors
2. Penny’s Paper-Crafty Challenge Blog: #524 – Anything Goes with Paper
3. The Creative Crafters: #53 – Anything Goes
4. Through The Craft Room Door: June 21st Anything Goes
5. Use Your Stuff: #451 – Plants/Flowers
Affiliate links are used in this post at no cost to you – I really appreciate your support!
Products used:
Cardstock/Paper: Neenah Classic Crest 110# and 80# Solar White cardstock; CutCardStock Stardream Metallic Lagoon, Basis Black, Basis Brown, Basis Magenta, Pop Tone Jellybean Green, Pop Tone Spearmint, Pop Tone Cotton Candy, Pop Tone Banana Split, Shadow Gray, Scottish Highlands Green; The Paper Studio Four Seasons and Everything In Between -2- paper pad
Stamps: Trinity Stamps Friends are Flowers stamp set, Trinity Stamps Supporting Script Sentiments stamp set
Ink: Memento Tuxedo Black ink; Arteza alcohol markers- RP04/09, YG06, Y16, BG37, BR64
Dies/Punches/Cut Files: Bearly Art Flower Barrel SVG, Simply Crafty SVGs Pitcher of Flowers cut file, Trinity Stamps Friends are Flowers die set
Accessories: Brother Scan N Cut, We R Memory Keepers Large Guillotine Paper Trimmer, Bearly Art precision craft glue, Scrapbook.com Refillable Adhesive Roller, MISTI stamp tool, Big Shot, Nuvo White Blizzard Glitter Drops, Stampin’ Up Dimensionals and Mini Dimensionals, Darice Double-Sided Adhesive Foam Strips, Eyelet Outlet 3mm pink gemstones and 4mm green pearl bling
I hope you’ve enjoyed seeing this project and will link up a project with a barrel AND a watering can, pitcher or bucket! Thanks so much for stopping by today – we’ll see you next time! ;)
Scrappy hugs,