You are the best

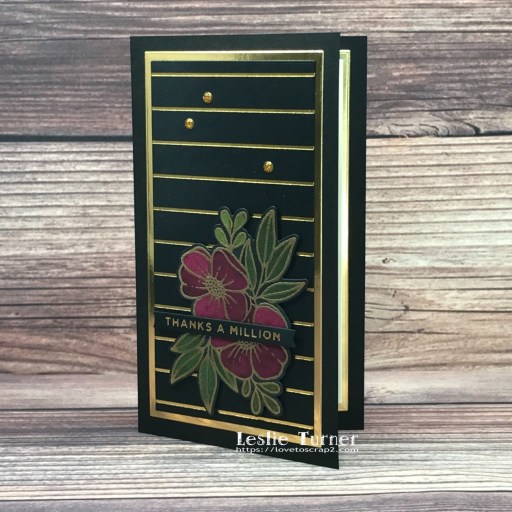
Hey everybody! I hope you’re having a good week – it’s almost the weekend! I have an awesome CutCardStock DT inspiration project to share with you today featuring our Stardream Metallic Onyx cardstock and Cougar Smooth White cardstock that I paired with a pretty foiled sentiment. This design is super simple, has some great texture, and would be easy to mass produce with different sentiments.
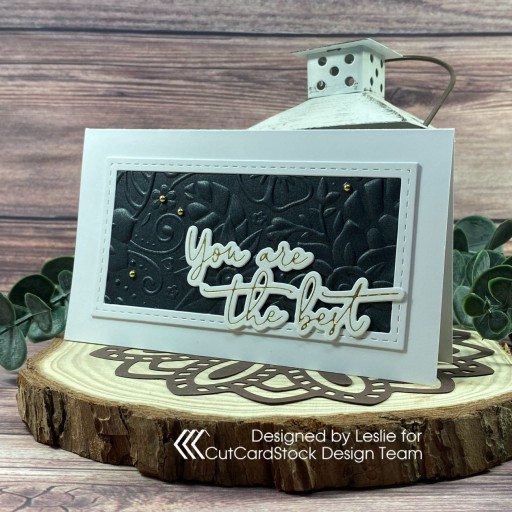
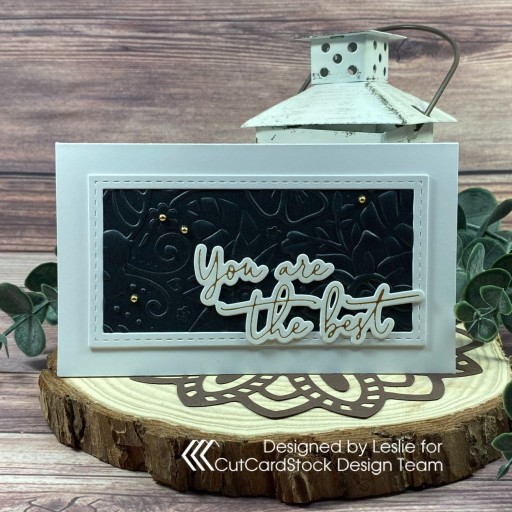
I cut a 3-1/2″ x 6″ mini slimline card base from Cougar Smooth 100# White cardstock. Using a Kat Scrappiness Mini Slimline Tri-Frame Die, I die cut three stitched frames from Cougar Smooth 80# White cardstock and one from Stardream Metallic Onyx cardstock. I adhered the white frames together for dimension and reserved one of the negative space rectangles for the inside panel.

Using the Sizzix Bohemian Botanicals 3-D Textured Impressions Embossing Folder, I dry embossed the black negative space rectangle (after spritzing the back side with a little water) to use as the focal panel on the card front. I created the sentiment using a Pinkfresh Studio Fancy Script Words Hot Foil Plate along with Spellbinders Glimmer Hot Foil System and a foil roll from the Glimmer Hot Foil Spellbound Variety Pack, and cut it with the coordinating Pinkfresh Studio Fancy Script Words Die. The finishing touch was adding several pearls from the Kat Scrappiness Gold Pearl Mix.
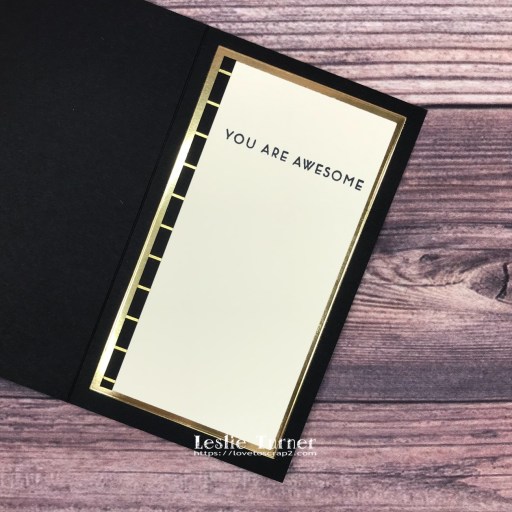
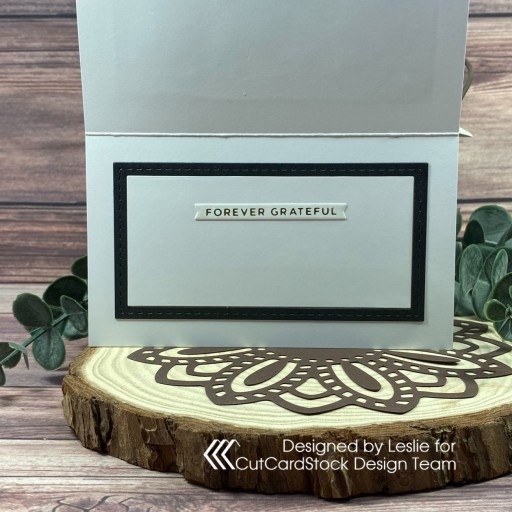
The inside panel consisted of one of the Cougar Smooth 80# White cardstock negative space rectangles and the Stardream Metallic Onyx cardstock frame. I added a sentiment created with a Spellbinders Mini Everyday Sentiments Glimmer Plate, Glimmer Hot Foil System and Glimmer Hot Foil Gold Roll, and cut it with the coordinating Spellbinders Mini Everyday Sentiments Die.
Sharing in the following challenges:
1. Penny’s Paper-Crafty Challenge Blog: #549 – Anything Goes with Paper
2. Shopping Our Stash: #499 – Sentimentally Yours
3. Wednesday’s Creative Inspirations Challenge Blog: June Challenge – Something for the Girls

Affiliate links are used in this post at no cost to you – I really appreciate your support!

CutCardStock products used:
Cougar Smooth 100# White cardstock
Cougar Smooth 80# White cardstock
Stardream Metallic Onyx cardstock

Other products used:
Dies/Punches: Kat Scrappiness Mini Slimline Tri-Frame Dies, Pinkfresh Studio Fancy Script Words Dies, Spellbinders Mini Everyday Sentiments Dies
Accessories: Tonic Studios 12″ Guillotine Paper Trimmer, CutCardStock Plus High Capacity adhesive, Art Glitter Dries Clear adhesive, Big Shot, Sizzix Bohemian Botanicals 3-D Textured Impressions Embossing Folder, Pinkfresh Studio Fancy Script Words Hot Foil Plates; Spellbinders Glimmer Hot Foil System, Glimmer Hot Foil Gold Roll, Glimmer Hot Foil Spellbound Variety Pack and Mini Everyday Sentiments Glimmer Plates; Kat Scrappiness Gold Pearl Mix

I hope you’ve enjoyed today’s project and you’re inspired to get crafty! Be sure to check out all the awesome cardstock and other goodies at CutCardStock (adhesives, labels, stickers, pens, watercolors and ribbon to name a few). And head on over to the CutCardStock Facebook Page and for more inspiration! Also, be sure to join our Creating with Card Stock Facebook Group for even more crafty inspiration! Thanks so much for stopping by today – we’ll see you next time!

Scrappy hugs,

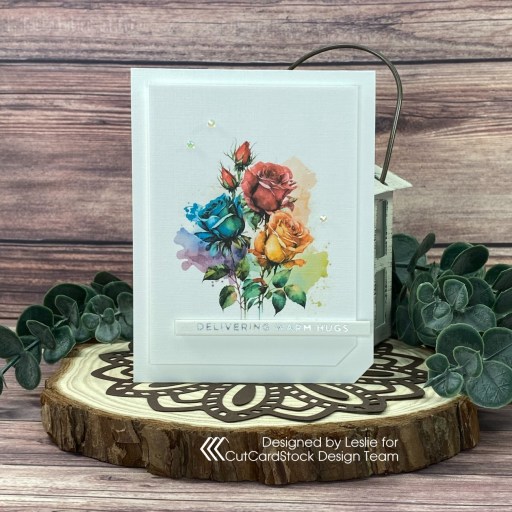
Delivering Warm Hugs

3/5/23 Sweet Pick at Cupcake Inspirations!

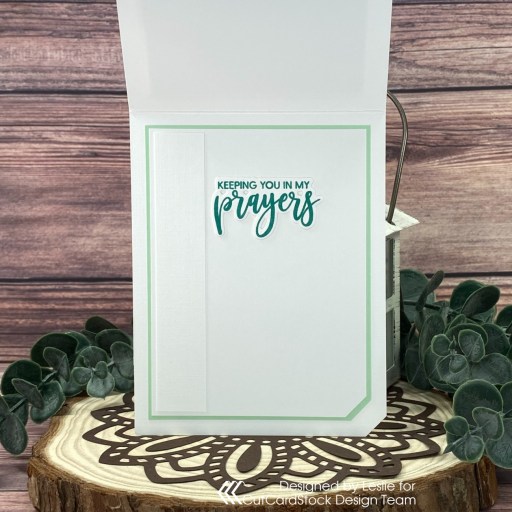
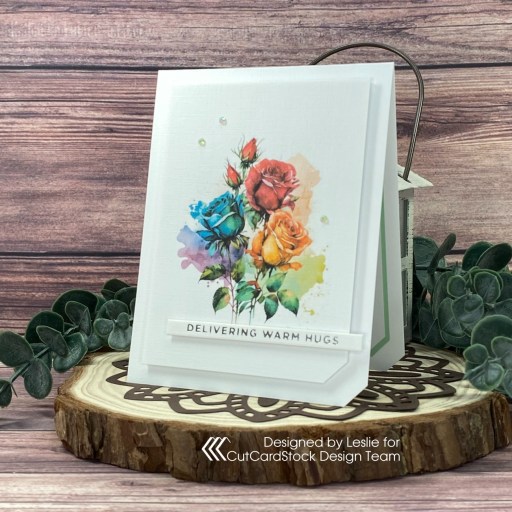
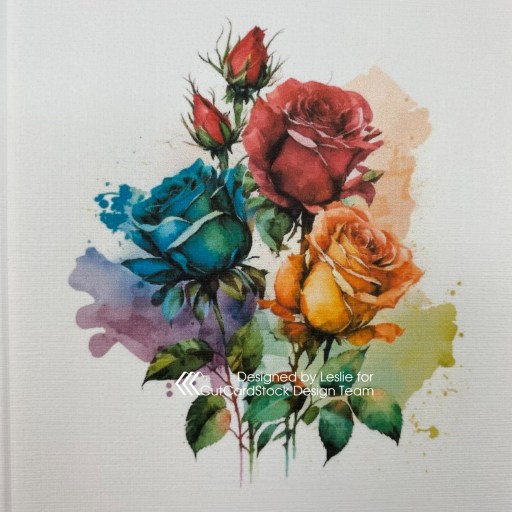
Hi everyone! I hope you have something fun planned this weekend! It sure got here fast… not that I’m complaining! I love every day of the week! I have an awesome CutCardStock DT inspiration project to share with you today featuring our Solar White Classic Linen and Classic Crest paired with Pop Tone Spearmint cardstock! I printed an absolutely gorgeous digital image from The Hungry Jpeg on 80# Classic Linen, trimmed it down and popped it up on white craft foam on a 100# Classic Linen card base. I added a foiled sentiment and some gemstones, and BOOM, a beautiful clean and simple card was made!

I printed The Hungry Jpeg’s Roses 3 digital image on Neenah Classic Linen 80# Solar White cardstock, trimmed it down to fit the card base, and cut the bottom right corner off with my Tonic corner punch. Here’s a close-up of the image so you can see how gorgeous it looks printed on the linen cardstock!

I cut a standard A2 size top-folding card base from Neenah Classic Linen 100# Solar White cardstock and cut off the bottom right corner. I adhered the digital image to a piece of Darice Foamies white craft foam and then to the card base. I added a foiled sentiment that I created with the Spellbinders Glimmer Hot Foil System, Spellbinders Glimmer Silver Foil, and Spellbinders Glimmer Mini Christmas Sentiment Strips Hot Foil Plate & Die Set. The finishing touch was adding several gemstones from the Trinity Andradite Sparkle Embellishment Mix with my Trinity Pick Up Stick.

I cut the inside panel from Neenah Classic Crest 80# Solar White, embellished it with a leftover strip of Neenah Classic Linen 80# Solar White, and layered the panel on CutCardStock Pop Tone Spearmint cardstock. I stamped the sentiment from Waffle Flower Essential Sentiments in Catherine Pooler Aquatini ink and cut it with the coordinating die.

Sharing in the following challenges:
1. Cardz 4 Galz: #193 – Red, White and Pink
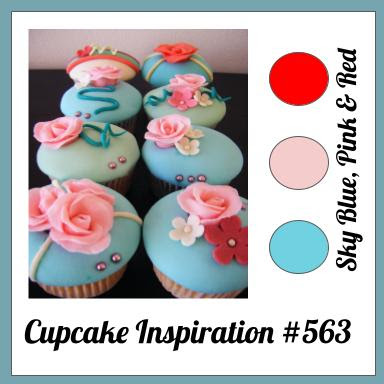
2. Cupcake Inspirations: #563 – Photo Inspiration

3. Cut It Up Challenge Blog: #272 – Clean and Simple (front and inside sentiments cut with dies)
4. My Time To Craft: #502 – Theme of Rainbow(s)

Affiliate links are used in this post at no cost to you – I really appreciate your support!

CutCardStock products used:
Neenah Classic Linen 100# Solar White cardstock
Neenah Classic Linen 80# Solar White cardstock
CutCardStock Pop Tone Spearmint cardstock
Neenah Classic Crest 80# Solar White cardstock

Other products used:
Stamps: The Hungry Jpeg Roses 3 digital image, Waffle Flower Essential Sentiments stamp set
Ink: Catherine Pooler Aquatini ink
Dies/Punches: Tonic Corner Punch, Waffle Flower Essential Sentiments die set
Accessories: Tonic Studios 12″ Guillotine Paper Trimmer, Tombow Mono permanent adhesive, MISTI stamp tool, Big Shot, Darice Foamies white craft foam,  Spellbinders Glimmer Hot Foil SystemSpellbinders Glimmer Silver FoilSpellbinders Glimmer Mini Christmas Sentiment Strips Hot Foil Plate & Die Set, 1/4″ double-sided foam strip, Trinity Stamps Andradite Sparkle Embellishment Mix, Trinity Pick Up Stick

I hope you’ve enjoyed today’s project and you’re inspired to get crafty! Be sure to check out all the awesome cardstock and other goodies at CutCardStock (adhesives, labels, stickers, pens, watercolors and ribbon to name a few). And head on over to the CutCardStock Facebook Page for more inspiration! Thanks so much for stopping by today – we’ll see you next time!

Scrappy hugs,
Thanks A Million

10/15/22 Top Rocker at 613 Avenue Create!

Hi friends! A very Happy Monday to you all – I hope you had a great weekend! Our new challenge is live over at Ally’s Angels this morning and I’m stoked to share my DT inspiration project for Challenge #63! I created a pretty foiled thank you card using the bleaching technique. All of our challenges are Anything Goes, so the sky is the limit for creating a handmade project! Come on over and play!

I cut a 3-1/2″ x 6″ mini slimline card base from CutCardStock Basis Black cardstock along with a layering panel from Hygloss Metallic Gold Foil cardstock using the Waffle Flower Mini Slimline Layers Dies. I used my Spellbinders Glimmer Hot Foil System, Gold Glimmer Foil, and Skinny Stripe Background Hot Foil Plate to create the background and adhered it to the gold metallic foil layering panel and then to the card front.

I used the Trinity Stamps First Bloom stamps and dies on GKD Black Onyx cardstock for the focal image which I heat embossed with Ranger Super Fine Detail Gold Embossing Powder, bleached, and colored with Karin Brushmarkers. I created a sentiment with the Spellbinders Mini Everyday Sentiments Hot Foil Plate and adhered it on Scrapbook Adhesives Black 3D Foam Squares. The finishing touch was adding several Eyelet Outlet Gold Glitter Enamel Dots.

I cut the inside panel from Neenah Classic Crest Baronial Ivory cardstock using the Waffle Flower Mini Slimline Layers Dies, and embellished it with a leftover striped foiled piece trimmed from the front panel. I stamped the inside sentiment (from the Altenew Painted Butterflies stamp set) in Memento Tuxedo Black ink and layered the panel on metallic gold foil cardstock.

And one more peek… really loving how this turned out! What a gorgeous way to send a thank you!

Sharing in the following challenges:
1. 613 Avenue Create: #202210 – Anything Goes w/optional But First… (no twist)
2. A Perfect Time To Craft Open Challenge: #10-2022 – Anything Goes
3. A Place To Start – #102022 – Anything Goes w/ optional Circles and Squares (no twist)
4. Classic Design Challenge: October #10 – Anything Goes
5. Jan’s Digi Stamps Challenges: October Anything Goes
6. Paperbabe Stamps: #178 – Anything Goes

Affiliate links are used in this post at no cost to you – I really appreciate your support!

Products used:
Cardstock/Paper: GKD Black Onyx cardstock, CutCardStock Basis Black cardstock, Hygloss Metallic Gold Foil cardstock, Neenah Classic Crest Baronial Ivory cardstock
Stamps: Trinity Stamps First Bloom stamp set, Altenew Painted Butterflies stamp set
Ink: Karin Brushmarkers- Red Lilac, Olive Green and Apple; Versamark, Memento Tuxedo Black ink
Dies/Punches: Waffle Flower Mini Slimline Layers Dies, Trinity Stamps First Bloom die set, Mini Everyday Sentiments Hot Foil & Die Set
Accessories: Tonic Studios 12″ Guillotine Paper Trimmer, Spellbinders Glimmer Hot Foil System, Gold Glimmer Foil, Skinny Stripe Background Hot Foil Plate, Mini Everyday Sentiments Hot Foil Plate; Bearly Art precision craft glue, MISTI stamp tool, Big Shot, Ranger Super Fine Detail Gold Embossing Powder, Scrapbook Adhesives 3D Foam Squares Variety Pack, Eyelet Outlet Gold Glitter Enamel Dots

I hope you’ve enjoyed seeing this project and will link up with us this month! We can’t wait to see what you create! Thanks so much for stopping by today – we’ll see you next time! ;)

Scrappy hugs,

Merry Christmas Mini Slimline

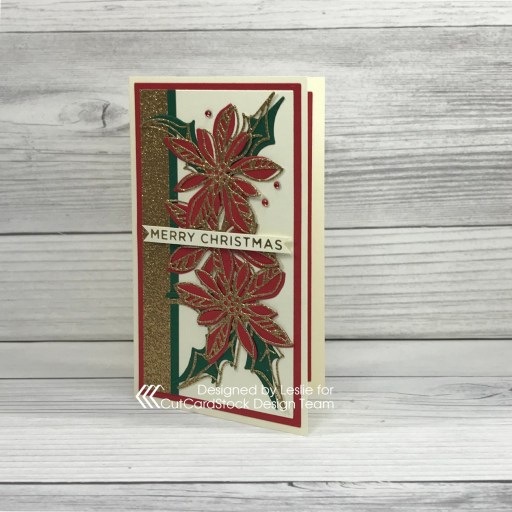
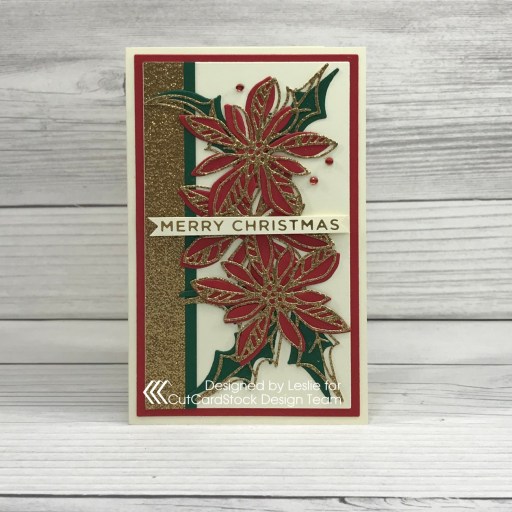
Hey everybody! A very Happy Saturday to you – another week has come and gone! My sister’s 70th birthday is in two days, and for years now, I’ve said that once her birthday comes and goes, Christmas will be here in no time! I have an awesome CutCardStock DT inspiration project to share with you today featuring Neenah Classic Crest Baronial Ivory cardstock that I paired with our Basis Red and Basis Green cardstock along with our Gold Glitter cardstock. What a gorgeous traditional Christmas color combo in a mini slimline size which is one of my favorites!

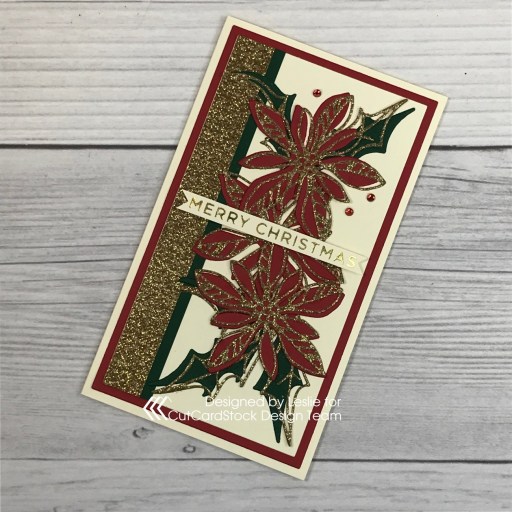
I cut a 3-1/2″ x 6″ mini slimline card base from Neenah Classic Crest Baronial Ivory cardstock, along with layering panels from Basis Red and Baronial Ivory cardstock using the Waffle Flower Mini Slimline Layers die set, and embellishing strips from Gold Glitter and Basis Green cardstock. I cut the poinsettia layers from Basis Red, Basis Green and Gold Glitter cardstock. I assembled the panels and adhered them to the card base, and then adhered the poinsettias. I created a foiled sentiment strip with a Baronial Ivory cardstock scrap and my Spellbinders Glimmer Hot Foil System, Spellbinders Glimmer Gold Foil, and Spellbinders Glimmer Holiday Sentiments Series 2 Hot Foil Plate & Die Set. I flagged the ends with an EK Success 3/4″ square punch and adhered it to the card front with a Darice double-sided adhesive foam strip. The finishing touch was adding several Eyelet Outlet red gemstones.

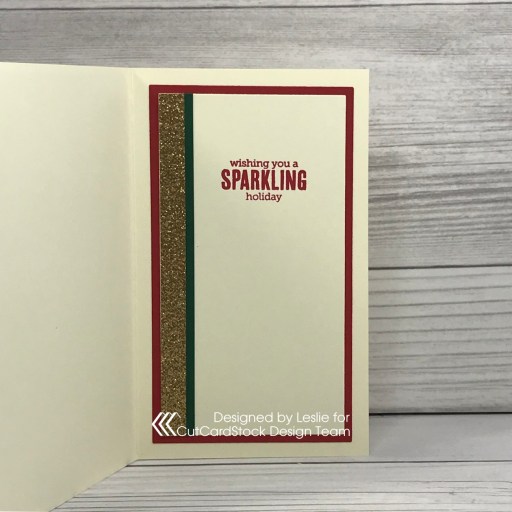
I cut the inside panels from Neenah Classic Crest Baronial Ivory and Basis Red cardstock using the Waffle Flower Mini Slimline Layers die set. I embellished the ivory panel with strips cut from Gold Glitter and Basis Green cardstock, stamped the sentiment from the Hero Arts Christmas Messages stamp set in Catherine Pooler Rockin’ Red ink, and adhered the panel to the red cardstock layer.

And one more peek… I really love a Christmas card in traditional red and green… as much as I love Christmas cards in non-traditional colors! And I have to say that this die set is one of my favorites!

Sharing in the following challenges:
1. A Perfect Time To Craft Open Challenge: August #8 2022 – Anything Goes
2. A Place To Start: #082022 – Anything Goes w/optional By The Book (no twist)
3. Classic Design Challenge: August #8 – Anything Goes
4. Crafty Calendar Challenge: August Anything Goes
5. Wednesday’s Creative Inspirations Challenge Blog: August Challenge – Anything Goes

Affiliate links are used in this post at no cost to you – I really appreciate your support!

CutCardStock products used:
Neenah Classic Crest Baronial Ivory cardstock
Basis Red cardstock
Basis Green cardstock
Gold Glitter cardstock

Other products used:
Stamps: Hero Arts Christmas Messages stamp set
Ink: Catherine Pooler Rockin’ Red ink
Dies/Punches: Sizzix Seasonal Sketch Thinlits, Waffle Flower Mini Slimline Layers die set, EK Success 3/4″ square punch (used to flag the sentiment strip)
Accessories: We R Memory Keepers Large Guillotine Paper Trimmer, Bearly Art precision craft glue, MISTI stamp tool, Big Shot, Spellbinders Glimmer Hot Foil SystemSpellbinders Glimmer Gold FoilSpellbinders Glimmer Holiday Sentiments Series 2 Hot Foil Plate & Die Set, Darice Double-Sided Adhesive Foam Strips, Eyelet Outlet Red Jewel Bling Strip

I hope you’ve enjoyed today’s project and you’re inspired to get crafty! Be sure to check out all the awesome cardstock and other goodies at CutCardStock (adhesives, labels, stickers, pens, watercolors and ribbon to name a few). And head on over to the CutCardStock Facebook Page for more inspiration! Thanks so much for stopping by today – we’ll see you next time!

Scrappy hugs,
Blinged Out Christmas Cup

7/25/22 Top Pick at Crafting Happiness Challenges!
7/31/22 Best Technique Winner at Classic Design Challenge!
8/1/22 Top 5 at QKR Stampede!
8/28/22 Honorable Mention at A Perfect Time To Craft Open Challenge!

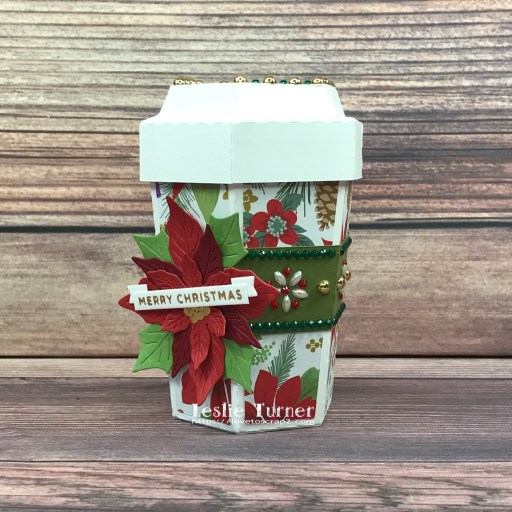
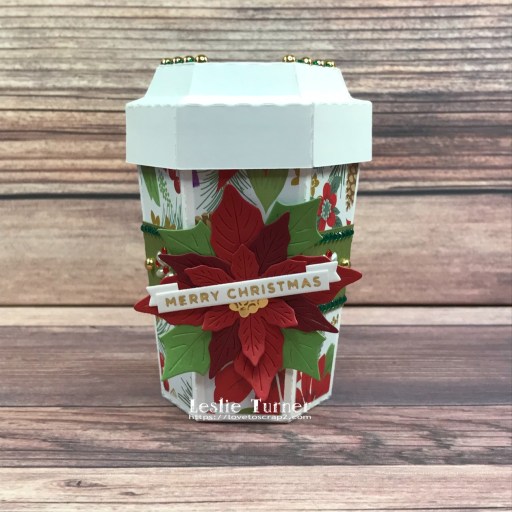
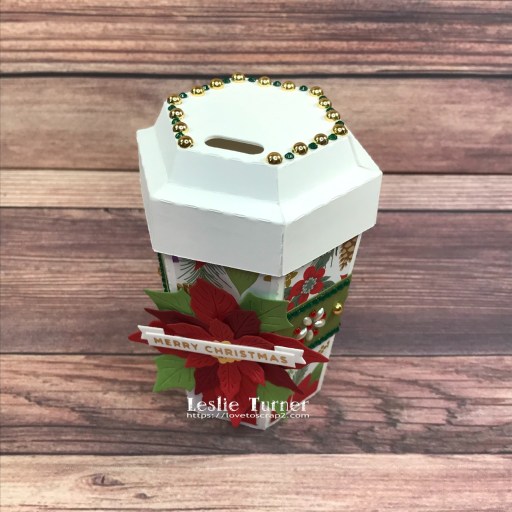
Hey everybody! I hope your week is off to a great start! It’s going by fast and will soon be the weekend! Again, lol! It’s Christmas in July all over blogland so I thought I’d share my blinged out Christmas cup featuring the Simply Crafty SVGs Takeout Coffee Cups cut file along with a variety of cardstock, patterned paper, dies and bling. So festive and I love how it turned out!

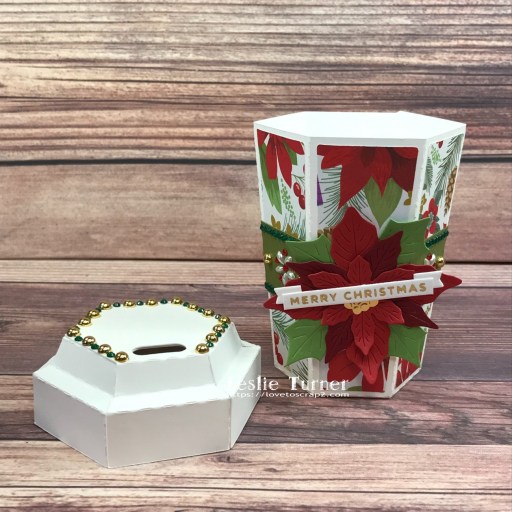
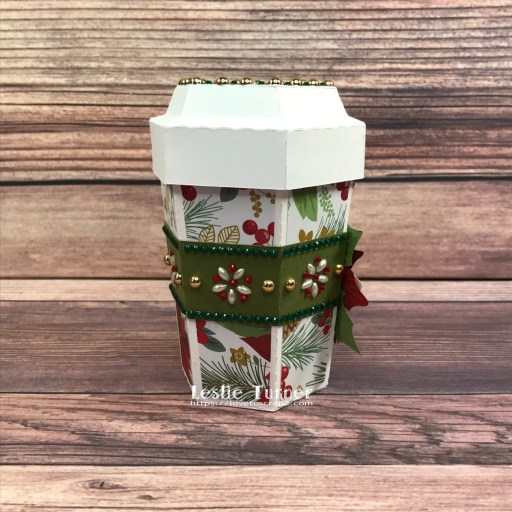
Using my Scan N Cut, I cut the coffee cup and lid from Neenah Classic Crest 110# Solar White cardstock and the layering panels from The Paper Studio’s Four Seasons and Everything in Between -2- paper pad (one of my all-time favorites), and assembled the cup and lid. Next, I adhered a 1″ strip of CutCardStock Pop Tone Gumdrop Green cardstock around the cup and embellished it with Eyelet Outlet 3mm Green Jewel Bling Strip and Red Snowflake Bling along with Kat Scrappiness gold pearls.

Using the Hero Arts Paper Layering Poinsettia die set, I die cut the poinsettia from CutCardStock Basis Dark Red, Basis Red, Pop Tone Gumdrop Green and Bright Gold Foil cardstock, assembled it and adhered it to the front of the cup. I adhered a foiled sentiment created with the Spellbinders Glimmer Hot Foil System, Glimmer Gold Foil, Glimmer Mini Christmas Sentiment Strips Hot Foil Plate & Die Set, and Glimmer Mini Everyday Sentiments Plate & Die Set.

The final touch was adding a little more bling (green gemstones and gold pearls) to the lid. Here are a couple more shots.

And one more peek… I just love how this turned out! You know how I love me some 3-D projects! And especially Christmas projects! ;)

Sharing in the following challenges:
1. 613 Avenue Create: #202207 – Anything Goes w/ optional Black & White (no twist)
2. A Perfect Time To Craft Open Challenge Blog: #07-2022 – Anything Goes
3. A Place To Start: #072022 – Anything Goes w/ optional Balloons and Flowers (no twist)
4. Alphabet Challenge Blog: H is for Holidays (Christmas in the USA)
5. Classic Design Challenge: #7 – Anything Goes
6. Crafting Happiness Challenges: #125 – Anything Goes Always
7. Crafty Catz: #604 – Anything Goes w/ optional Christmas in July
8. Crafty Gals Corner: #233 – Christmas in July
9. Christmas Craft Creations: July Challenge – Patterned Paper

10. Di’s Digi Challenge: Christmas in July
11. Fab ‘n’ Funky Challenges: #556 – Anything Goes
12. My Time To Craft: #486 – Christmas in July
13. Paperbabe Stamps: #172 – Anything Goes
14. QKR Stampede: #448 – Anything Goes
15. Through The Craft Room Door: July 19th Anything Goes
16. Wide World Open Design Team Challenge: #07 – Anything Goes

Affiliate links are used in this post at no cost to you – I really appreciate your support! 

Products used:
Cardstock/Paper: Neenah Classic Crest 110# Solar White cardstock, CutCardStock Basis Dark Red, Basis Red, Pop Tone Gumdrop Green and Bright Gold Foil cardstock, The Paper Studio Four Seasons and Everything In Between -2- paper pad
Dies/Punches/Cut Files: Simply Crafty SVGs Takeout Coffee Cups cut file, Hero Arts Paper Layering Poinsettia die set, banner die from Spellbinders Glimmer Mini Everyday Sentiments Plate & Die Set
Accessories: Brother Scan N Cut, Bearly Art precision craft glue, Big Shot, Spellbinders Glimmer Hot Foil SystemSpellbinders Glimmer Gold FoilSpellbinders Glimmer Mini Christmas Sentiment Strips Hot Foil Plate & Die Set, Kat Scrappiness Gold Pearl Mix, Eyelet Outlet 3mm Green Jewel Bling Strip and Red Snowflake Bling

I hope you’ve enjoyed seeing this project and will link up with us this time! Thanks so much for stopping by today – we’ll see you next time! ;)

Scrappy hugs,

Vase of Flowers Gift Card Holder

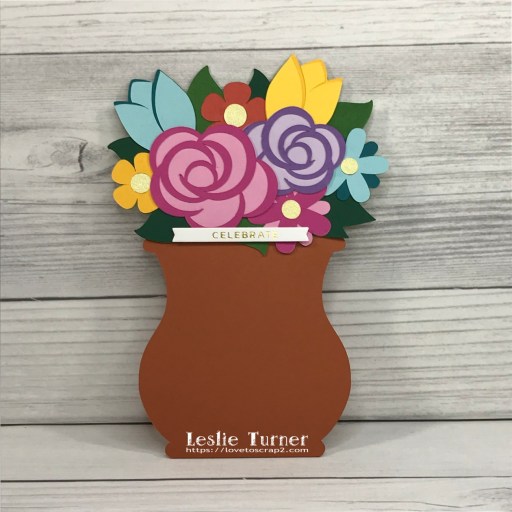
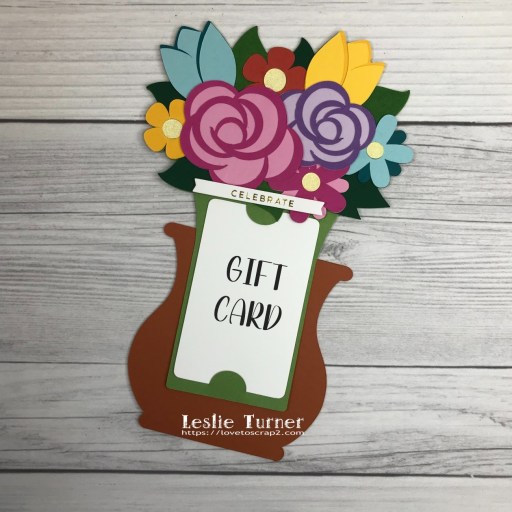
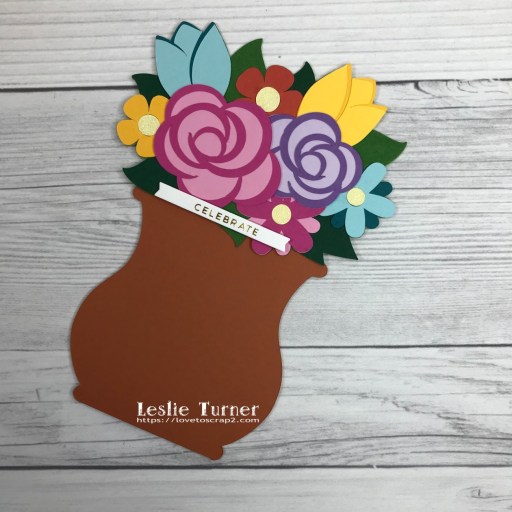
Hi friends! Happy Fri-YAY! I hope you’ve had a great week! I mentioned a couple days ago that I found a new online SVG store called Printable Cuttable Creatables, and I’ve created two more projects using her cut files that I’ll be sharing this morning. The first one is THE cutest gift card holder created with the Flower Vase Gift Card Holder cut file. It’s so bright and cheerful, and definitely a beautiful way to present a gift card for a birthday! I really enjoyed putting it together and watching it come to life!

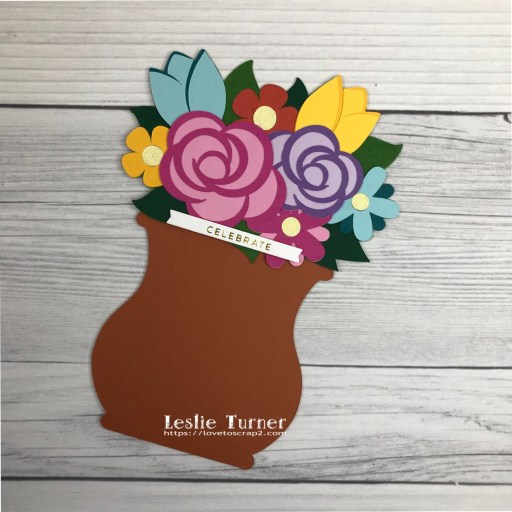
Using my Scan N Cut, I cut all the pieces for the Flower Vase Gift Card Holder from CutCardStock Basis Dark Orange, Basis Gold, Basis Green, Basis Light Yellow, Basis Magenta, Basis Teal, Pop Tone Berrylicious, Pop Tone Cotton Candy, Pop Tone Grape Jelly, Pop Tone Grapesicle, Pop Tone Gumdrop Green, Pop Tone Tangy Orange, Camomile, and Scottish Highlands Green cardstock. Then the fun began with the assembly! I always love putting these projects together! I didn’t have a real gift card to use for the photo so I made one from a 80# Solar White cardstock scrap. I added a foiled and die cut sentiment created with a scrap of 110# Solar White cardstock and my Spellbinders Glimmer Hot Foil System, Glimmer Gold Foil and Glimmer Mini Everyday Sentiments Plate & Die Set. The finishing touch was coloring the flower centers with Nuvo White Blizzard Glitter Drops.

And one more look… such a fun gift card holder that was an absolute delight to make! Can’t wait to send it to somebody now! ;)

Sharing in these additional challenges:
1. A Perfect Time To Craft Open Challenge Blog: #6-2022 – Anything Goes
2. Classic Design Challenge: June #6 – Anything Goes
3. Crafting Happiness Challenges: #124 – Anything Goes Always
4. Crafty Gals Corner: #232 – Anything Goes
5. Fab ‘n’ Funky Challenges: #553 – Celebrations (birthday)
6. Sparkles Monthly Challenges: #152 – Floral Frenzy
7. Use Your Stuff: #449 – Anything Goes

Affiliate links are used in this post at no cost to you – I really appreciate your support! 

Products used:
Cardstock/Paper: CutCardStock Basis Dark Orange, Basis Gold, Basis Green, Basis Light Yellow, Basis Magenta, Basis Teal, Pop Tone Berrylicious, Pop Tone Cotton Candy, Pop Tone Grape Jelly, Pop Tone Grapesicle, Pop Tone Gumdrop Green, Pop Tone Tangy Orange, Camomile, Scottish Highlands Green cardstock; Neenah Classic Crest 110# and 80# Solar White cardstock
Dies/Punches/Cut Files: Printable Cuttable Creatables Flower Vase Gift Card Holder cut file
Accessories: Brother Scan N Cut, Bearly Art precision craft glue; Spellbinders Glimmer Hot Foil System, Glimmer Gold Foil and Glimmer Mini Everyday Sentiments Plate & Die Set, Big Shot, Stampin’ Up Mini Dimensionals, Nuvo White Blizzard Glitter Drops

I hope you’ve enjoyed seeing this awesome gift card holder as much as I enjoyed making it! Thanks so much for stopping by today – we’ll see you next time! ;)

Scrappy hugs,

Thanks for lifting my spirits

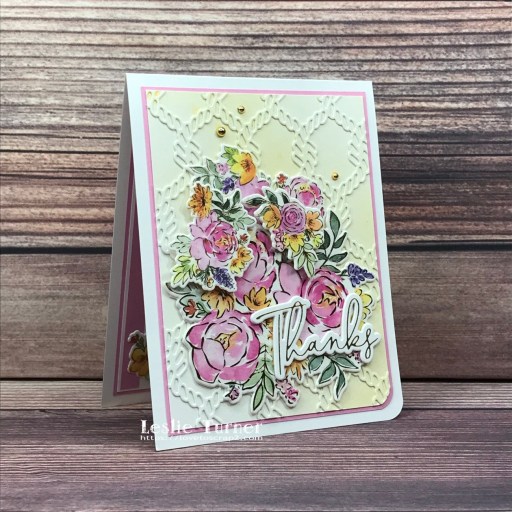
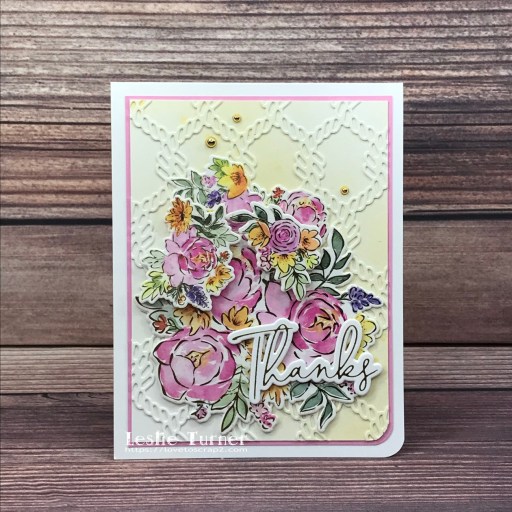
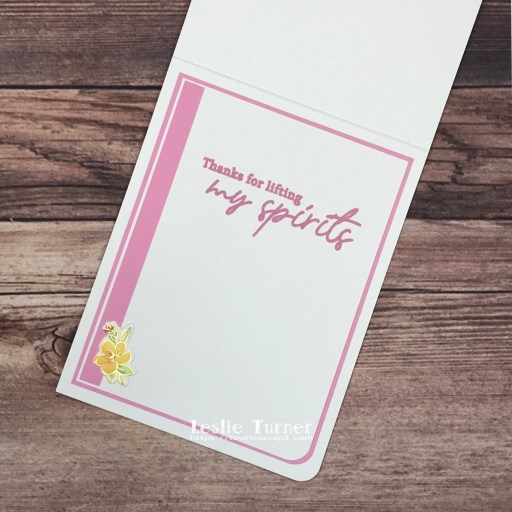
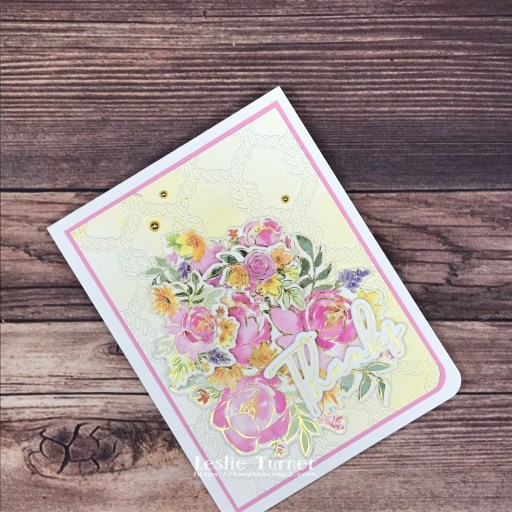
Hi friends! I hope you’re having a wonderful week! Life is pretty darn good here in southwestern Colorado! We are having some gorgeous weather, our feline rescues are all healthy, and we are able to enjoy our hobbies. I’ve popped in this morning to share a pretty thank you card that I created to enter into the Pinkfresh Studio May 2022 Challenge – Anything Spring! I started this card with a different background a couple weeks ago and just wasn’t happy with it, so it sat on my desk until yesterday afternoon when the lightbulb came on and I ran with a totally different idea. I used a variety of Pinkfresh Studio products – the Painted Peony Mix Washi Tape and Die for the focal image, the Fancy Script Words Hot Foil Plate and Die for the front sentiment, and the Hibiscus stamp set for the inside sentiment! I think this captures the Spring theme pretty well, and I used four of the five gorgeous colors in the inspiration photo.

I cut a standard A2 size top-folding card base from 110# Solar White cardstock along with layering panels from CutCardStock Pop Tone Cotton Candy cardstock and 80# Solar White cardstock, and rounded the bottom right corner of each. I die cut a rope background from 110# Solar White cardstock and adhered it to the lighter weight white cardstock panel with Elmer’s Craft Bond Spray Adhesive, using a brayer to get good adhesion, and trimming the excess around all four edges. I sprayed Tattered Angels Gold Glimmer Mist on the background panel, and adhered it to the Cotton Candy panel and then to the card base.

I had previously created the flower cluster using the Pinkfresh Studio Painted Peony Mix Washi Tape and Die with 110# Solar White cardstock, so I adhered that to the background. Using the Spellbinders Glimmer Hot Foil System, a scrap of 110# Solar White cardstock and a roll of gold foil, I created the front sentiment using the Pinkfresh Studio Fancy Script Words Hot Foil Plate and Die (three layers thick) and adhered it to the card front. The finishing touch was adding several Kat Scrappiness gold pearls.

I cut the inside panel from 80# Solar White cardstock and embellished it with a strip of CutCardStock Cotton Candy cardstock and a die cut flower from the Pinkfresh Studio Painted Peony Mix Washi Tape. I stamped the sentiment in Catherine Pooler Pink Champagne ink and layered the panel on Cotton Candy cardstock.

And one more look… so loving how this turned out! I’m totally in love with all of the Pinkfresh Studio Washi Tape and Die bundles! The gold is such an elegant touch and you just can’t go wrong!

Sharing in the following challenges:
1. A Perfect Time To Craft Open Challenge: #05-2022 – Anything Goes
2. Alphabet Challenge Blog: D is for Die Cuts
3. Classic Design Challenge: #5 May Anything Goes
4. Crafting Happiness Challenges: #123 – Anything Goes Always
5. Crafty Catz: #596 – Anything Goes w/ optional Add Some Pink
6. Little Red Wagon: #654 – With a Little Help From My Friends
7. Use Your Stuff: #448 – Touch of Gold

Affiliate links are used in this post at no cost to you – I really appreciate your support! 

Products used:
Cardstock/Paper: Neenah Classic Crest 110# and 80# Solar White cardstock, CutCardStock Pop Tone Cotton Candy cardstock
Stamps: Pinkfresh Studio Hibiscus stamp set
Ink: Tattered Angels Gold Glimmer Mist, Catherine Pooler Pink Champagne ink
Dies/Punches: Kadomaru Pro corner rounder, Tutti Designs Twisted Rope background die
Accessories: We R Memory Keepers Large Guillotine Paper Trimmer, Bearly Art precision craft glue, MISTI stamp tool, Big Shot, brayer, Elmer’s Craft Bond Spray Adhesive, Pinkfresh Studio Painted Peony Mix Washi Tape and Die, Pinkfresh Studio Fancy Script Words Hot Foil Plate and Die, Spellbinders Glimmer Hot Foil System, Spellbinders Glimmer Gold Foil, Darice Double-Sided Adhesive Foam Circles, Kat Scrappiness Gold Pearl Mix

I hope you’ve enjoyed seeing this project! Thanks so much for stopping by today – we’ll see you next time! ;)

Scrappy hugs,

Heaven & Nature Sing

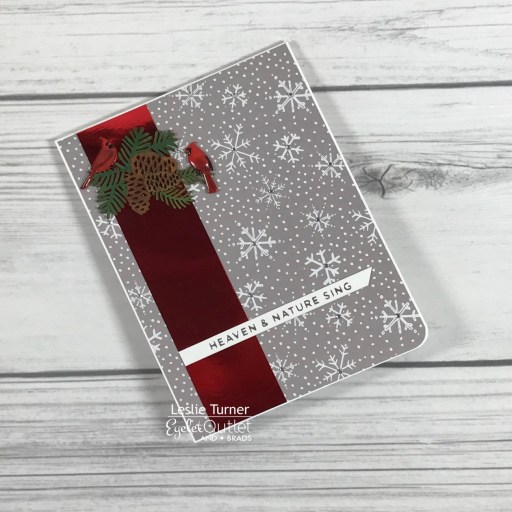
Hi friends! A very Happy Saturday to you – I hope you’ve had a great week! I’m happy to be back on the Eyelet Outlet blog today with another awesome DT inspiration project! I created a pretty Christmas card in traditional red and gray that features our Cardinal Brads and Cardinal Profile Brads along with Clear Jewel Bling. This was a fun card to put together and involved putting to good use two leftover chipboard ornament pieces I had on my desk from another project that I had previously thrown away! ;)

I cut a standard A2 size top-folding card base from 110# Solar White cardstock along with a layering panel from a pretty gray snowflake pattern and a red foil cardstock strip which I adhered to the card front. I added Clear Jewel Bling to the center of each snowflake, and then adhered a silver foiled sentiment toward the bottom.

I colored the chipboard pieces with alcohol markers, added a Cardinal Brad and a Cardinal Profile Brad, and adhered the embellishment to the top left corner.

I cut the inside panel from 80# Solar White cardstock and embellished it with strips of the snowflake pattern and red foil cardstock used on the front. I added another silver foiled sentiment and layered the panel on Basis Red cardstock.

And one more look… such a gorgeously simple design! I know I’ve mentioned before that these cardinal brads are some of my favorites in the store! And SO glad I thought to rummage through my studio can for these chipboard pieces… I knew I’d eventually find just the right project to use them on!

Sharing in the following challenges:
1. Crafty Catz: #593 – Anything Goes w/ optional Use Three Favorite Colors (all traditional Christmas colors!)
2. Paperbabe Stamps: #166 – Anything Goes
3. Through The Craft Room Door: April 26th Anything Goes
4. World Wide Open Design Team Challenge: #04-April 2022 – Anything Goes

Eyelet Outlet products used:
Cardinal Brads
Cardinal Profile Brads
Clear Jewel Bling Multi Size

Affiliate links are used in this post at no cost to you – I really appreciate your support!

Other products used:
Cardstock/Paper: Neenah Classic Crest 110# and 80# Solar White cardstock, CutCardStock Basis Red cardstock, American Crafts Christmas Print 6×6 Cardstock Pad
Ink: Arteza alcohol markers- YG01/43, BR62
Dies/Punches: Kadomaru Pro corner rounder
Accessories: We R Memory Keepers Large Guillotine Paper Trimmer, Bearly Art precision craft glue, MISTI stamp tool, Big Shot, leftover pieces from Hot Off The Press Cardinal Chipboard Ornament, Spellbinders Glimmer Hot Foil System, Spellbinders Glimmer Silver Foil, Spellbinders Glimmer Mini Christmas Sentiment Strips Hot Foil Plate & Die Set

I hope you’ve enjoyed today’s project! Be sure to check out all the fun goodies at Eyelet Outlet! I can already see you drooling, lol! Be sure to ‘like’ and ‘follow’ Eyelet Outlet Facebook Page to keep up with news and sales, and while you’re at it, join the Eyelet Outlet Fans Facebook group for lots of creative inspiration! Thanks so much for stopping by today – we’ll see you next time! ;)

Scrappy hugs,

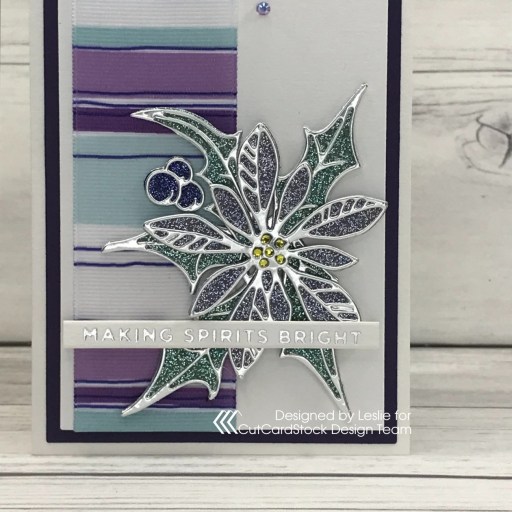
Making Spirits Bright

4/16/22 Top Rocker at 613 Avenue Create!

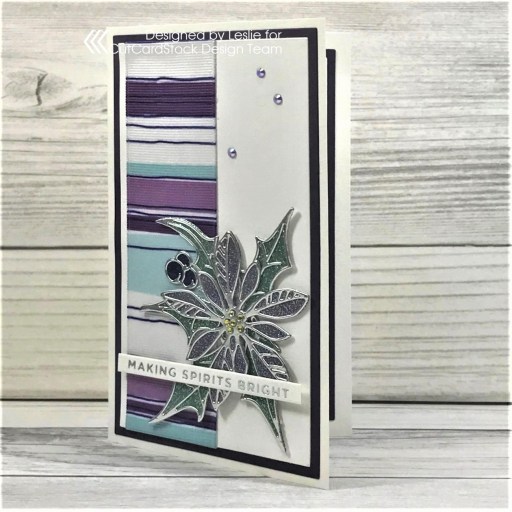
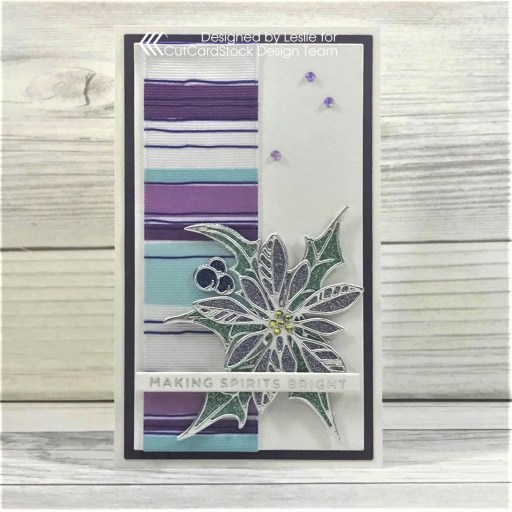
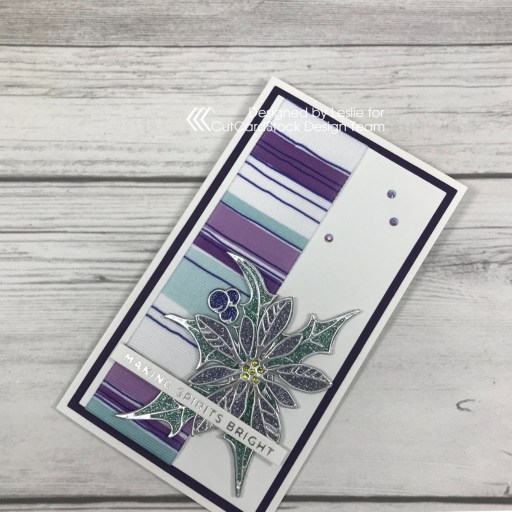
Hi everyone! Happy Saturday – I hope you had a fabulous week and you’re doing something fun this weekend! I have an awesome CutCardStock DT inspiration project to share with you today featuring our glitter cardstock that’s on sale this month. Our glitter cardstock is amazing because the glitter doesn’t rub off like some of the other brands out there. I created this mini slim Christmas card in non-traditional colors of purple and teal, and it features our Silver Glitter cardstock that I colored with alcohol markers and paired with our Bright Silver Foil cardstock. There’s nothing prettier to me than a Christmas card in colors other than the traditional red and green!

I cut a 3-1/2″ x 6″ mini slimline card base from Basis 110# White cardstock along with layering panels from Basis 80# White cardstock and Basis Dark Purple cardstock using the Waffle Flower Mini Slimline Layers Dies. I upcycled a pretty piece of wide teal, white and purple ribbon for this project that a stamp order was wrapped in a couple months ago. I adhered it to the left side of the white cardstock layering panel and then adhered the panel to the dark purple panel.

Using the Sizzix Seasonal Sketch Thinlits, I die cut the base flower petals, berries and leaves from Silver Glitter cardstock and colored them with purple and teal alcohol markers, and then die cut the outlines from Bright Silver Foil cardstock. I colored several tiny clear gemstones with a yellow alcohol marker and adhered them to the center of the flower. I adhered the flower to the card front and added a foiled sentiment that I created with the Spellbinders Glimmer Hot Foil System, Spellbinders Glimmer Silver Foil, and Spellbinders Glimmer Mini Christmas Sentiment Strips Hot Foil Plate & Die Set. The finishing touch was adding several gemstones from the Trinity Amethyst Accent Embellishment Mix with the Trinity Pick Up Stick.

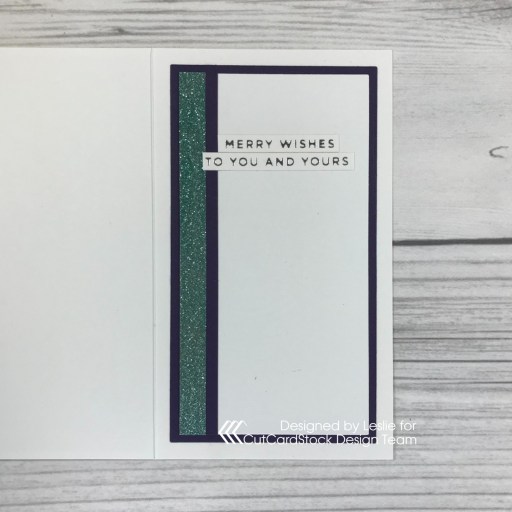
I cut the inside panel from Basis 80# White cardstock and embellished it with a strip of Basis Dark Purple cardstock and Silver Glitter cardstock colored with the teal alcohol marker. I added another foiled sentiment created with the Spellbinders Glimmer Hot Foil System, Spellbinders Glimmer Silver Foil, and Spellbinders Glimmer Mini Christmas Sentiment Strips Hot Foil Plate & Die Set, and layered the panel on the dark purple cardstock.

And one more peek… totally loving how this turned out! This silver glitter and silver foil cardstock is ah-maazing and makes the most beautiful embellishments for cards! Who doesn’t love glitter and shine?!

Sharing in the following challenges:
1. 613 Avenue Create: #202204 – Anything Goes w/ optional April Showers (no twist)
2. A Perfect Time To Craft Open Challenge: #4-2022 – Anything Goes
3. A Place To Start: #042022 – Anything Goes w/ optional Key It Simple (no twist)
4. Christmas Craft Creations: Slimline

5. Classic Design Challenge: April #4 – Anything Goes
6. Crafting Happiness Challenges: #122 – Anything Goes Always
7. Crafty Catz: #590 – Anything Goes
8. Jan’s Digi Stamps Challenges: April 2022 – Always Anything Goes
9. Lil Patch of Crafty Friends: #179 – Anything Goes
10. Paperbabe Stamps: #165 – Anything Goes
11. QKR Stampede: #441 – Anything Goes

Affiliate links are used in this post at no cost to you – I really appreciate your support!

CutCardStock products used:
Basis 110# White cardstock
Basis 80# White cardstock
Basis Dark Purple cardstock
Silver Glitter cardstock
Bright Silver Foil cardstock

Other products used:
Ink: Arteza alcohol markers- BG57, PB06/23, YG35
Dies/Punches: Waffle Flower Mini Slimline Layers Dies, Sizzix Seasonal Sketch Thinlits
Accessories: We R Memory Keepers Large Guillotine Paper Trimmer, Bearly Art precision craft glue, MISTI stamp tool, Big Shot, Darice tiny clear gemstones, recycled ribbon scrap,  Spellbinders Glimmer Hot Foil System, Spellbinders Glimmer Silver Foil, Spellbinders Glimmer Mini Christmas Sentiment Strips Hot Foil Plate & Die Set, Trinity Amethyst Accent Embellishment Mix, Trinity Pick Up Stick

I hope you’ve enjoyed today’s project and you’re inspired to get crafty! Be sure to check out all the awesome cardstock and other goodies at CutCardStock (adhesives, labels, stickers, pens, watercolors and ribbon to name a few). And head on over to the CutCardStock Facebook Page for more inspiration! Thanks so much for stopping by today – we’ll see you next time!

Scrappy hugs,
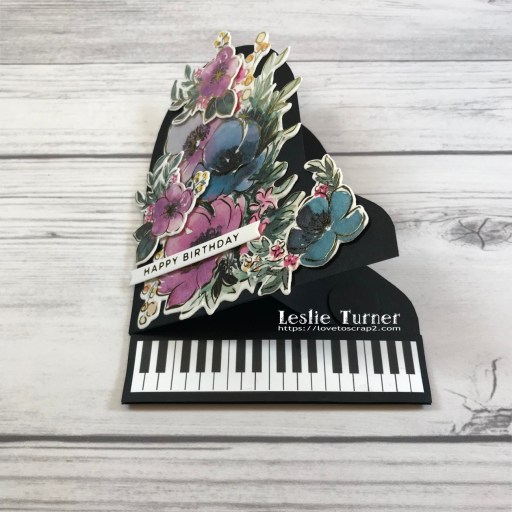
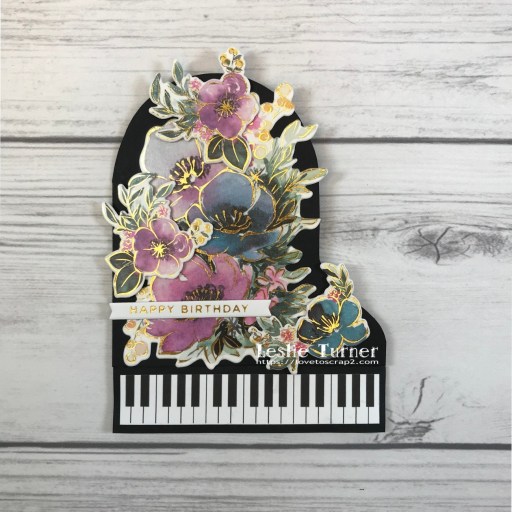
Happy Birthday Grand Piano Easel Card

4/9/22 Top Rocker at 613 Avenue Create!
4/10/22 Rising Star at A Place To Start!
4/15/22 Top 5 at QKR Stampede!
4/30/22 Top Pick at Crafting Happiness Challenges!
5/1/22 Top Pick at Jan’s Digi Stamps Challenges!
5/28/22 2nd Prize Winner at A Perfect Time To Craft Open Challenge!

Hi friends! Happy Tuesday! I hope you’re having a most excellent week! I’ve popped in today to share an awesome Tape Runner DT inspiration project! I created a gorgeous birthday card featuring the gorgeous Pinkfresh Studio Anemone Magic washi tape and die, and all panels were adhered with Retractable Tape Runner! My inspiration came from the Grand Piano Card tutorial from Splitcoast Stampers HERE (with a printable piano template) that was showcased in one of their newsletters several months ago. You know me and fun folds – I’m always on the search to try new ones!

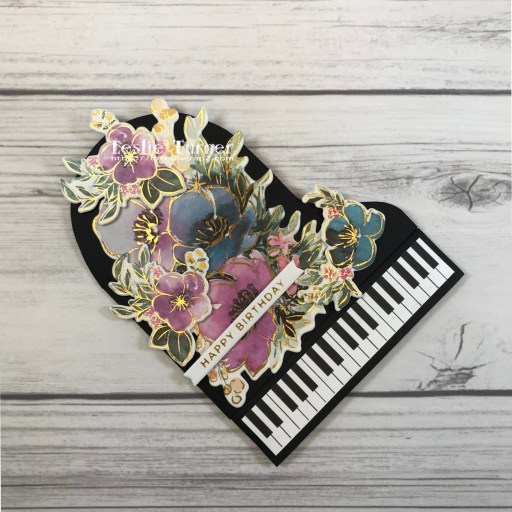
As mentioned above, all panels were adhered with Retractable Tape Runner. Foam pads and foam strips were used to adhere the smaller flowers, sentiment strip and piano keys section for dimension. I printed the piano template on Neenah Classic Crest 80# Solar White cardstock and cut out the piano and one set of piano keys. I traced the card base and easel panel onto CutCardStock Basis Black cardstock, punched a four-layer circle ‘stop’ for the easel, and assembled the card. I applied the Pinkfresh Studio Anemone Magic washi tape to 110# Solar White cardstock, cut the flowers with the Pinkfresh Studio Anemone Magic die, and adhered them to the top of the piano. The final step was adding a foiled sentiment created with the Spellbinders Glimmer Hot Foil System, Spellbinders Glimmer Gold Foil, Spellbinders Glimmer Hot Foil Mini Everyday Sentiments Plate and Die Set.
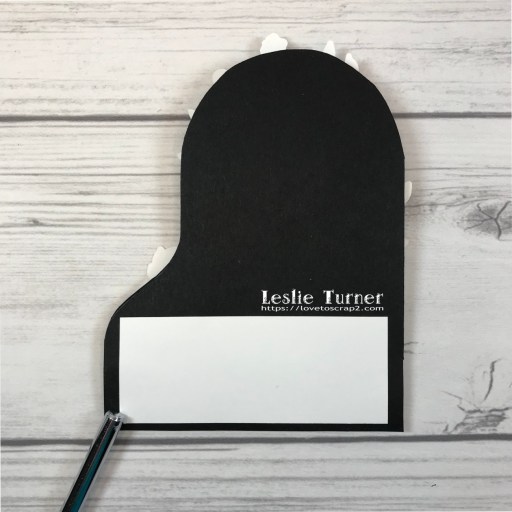
I cut a panel from 80# Solar White cardstock for the back of the card (not part of the tutorial) for a handwritten sentiment and signature.

Here’s a shot showing the easel tucked under the stop for display.

And one more peek… so loving how this turned out! I’m in love with this piano design and Pinkfresh Studio washi tape and die – and having awesome adhesive is for sure a win-win!

Sharing in the following challenges:
1. 613 Avenue Create: #202204 – Anything Goes w/ optional twist of April Showers (no twist)
2. A Perfect Time To Craft Open Challenge Blog: #4-April 2022
3. A Place To Start: #042022 – Anything Goes w/ optional Key It Simple (no twist)
4. Classic Design Challenge: April #4
5. Crafting Happiness Challenges: #122 – Anything Goes Always
6. Crafts Galore Encore Challenge Blog: #98 – April Anything Goes
7. Crafty Catz: #589 – Anything Goes w/ optional Lots of Layers
8. Jan’s Digi Stamp Challenges: April Anything Goes
9. Lil Patch of Crafty Friends: #179 – Anything Goes
10. Pinkfresh Studio Challenges: April Geometric Shapes (rectangular piano keys :)
11. QKR Stampede: #441 – Anything Goes
12. Your Scrapbook Place: April Anything Goes

Affiliate links are used in this post at no cost to you – I really appreciate your support! 

Tape Runner products used:
Retractable Tape Runner

Products used:
Cardstock/Paper: CutCardStock Basis Black cardstock, Neenah Classic Crest 110# and 80# Solar White cardstock
Dies/Punches/Templates: Pinkfresh Studio Anemone Magic die, Splitcoast Stampers Piano Card template, Stampin’ Up 3/4″ Circle Punch
Accessories: We R Memory Keepers Mini Guillotine Paper Trimmer, Bearly Art precision craft glue, Big Shot, Pinkfresh Studio Anemone Magic Washi Tape, Spellbinders Glimmer Hot Foil System, Spellbinders Glimmer Gold Foil, Spellbinders Glimmer Hot Foil Mini Everyday Sentiments Plate and Die Set, Stampin’ Dimensionals, Darice Double-Sided Adhesive Foam Strips

I hope you’ve enjoyed today’s project and you’re inspired to get your craft on! Be sure to check out the ah-mazing Tape Runner, Retractable Tape Runner and Highlight Tape Runner at TapeRunner.com! Be sure to Follow us on Facebook and Instagram! Thanks so much for stopping by today – we’ll see you next time!

Scrappy hugs,