fun fold thank you

Hey everybody! Happy Hump Day! We’re still waiting for some semblence of Spring here in southwestern Colorado… how about you?! I think we can safely say that ol’ Punxsutawney Phil was a little confused, lol! I have another awesome ScrapbookingStore DT inspiration project to share with you today created with the March 2024 Scrapbook Kit with Upgrades! This side accordion panel card is a great fun fold that really packs a punch. My inspiration for this one came from Pinterest, and I’ve watched videos on Lisa Curcio’s blog and Sharon Armstrong’s blog.

Here are the mini instructions: Cut the 5-1/2″ x 11″ card base from CutCardStock Lessebo Bubble Gum Pink cardstock, score at 1-3/4″, 3-1/2″, 5-1/4″ and 7″, and fold on all the score lines. Cut a smaller folded piece from Bubble Gum Pink at 3″ x 6″ and score at 3″. From coordinating prints in the Carta Bella Flora No. 6 Collection Kit, cut three 1-1/2″ x 5-1/4″ panels for the left side, a 3-3/4″ x 5-1/4″ panel for the right side, and two 2-3/4″ square panels for the smaller folded piece. Cut one additional 2-3/4″ square panel for a sentiment. Embellish as desired.

I embellished the front with elements from the Paige Evans Garden Shoppe Embellishments in the upgrades and a sentiment sticker from the sticker sheet which I popped up on dimensional foam squares. The inside sentiment is a trimmed journaling card from the collection.

Here’s a shot of the card folded flat for mailing. I totally love how this one turned out!

Sharing in the following challenges:
1. https://aperfecttimetocraft.blogspot.com/2024/03/a-perfect-time-to-craft-open-challenge.html
2. https://avenue613.blogspot.com/2024/03/march-2024-anything-goes-w-optional.html
3. https://barrelofmonkeyschallenges.blogspot.com/2024/03/march-barrel-of-monkeys-challenge-13.html
4. https://classicdesignchallenge.blogspot.com/2024/03/classic-design-challenge-03-2024-marapr.html
5. https://fabnfunkychallenges.blogspot.com/2024/03/challenge-591-spring.html
6. https://lilredwagon.blogspot.com/2024/03/challenge-748-florals.html

Affiliate links are used in this post at no cost to you – I really appreciate your support!

ScrapbookingStore products used:
March 2024 Scrapbook Kit with Upgrades:
Carta Bella Flora No. 6 12×12 Collection Kit with Element Sticker Sheet
Upgrades: Simple Stories St. Patrick’s Day Page Pieces
Pink Paislee 5th & Monaco Embellishments
Paige Evans Garden Shoppe Embellishments

Other products used:
CARDSTOCK/PAPER: CutCardStock Lessebo Bubble Gum Pink cardstock
ACCESSORIES: Fiskars 12″ ProCision Rotary Bypass Paper Trimmer, Elmer’s Craft Bond Tape Runner, Bearly Art precision craft glue, dimensional foam squares

I hope you’ve enjoyed today’s project and you’re thinking about all the fun you could have with this month’s kit… you really ought to think about joining the Subscription Club! Be sure to Follow us on Facebook, Instagram, Pinterest and YouTube for lots of crafty inspiration! And if you do decide to join the Subscription Club, join our ScrapbookingStore Club Member Group on Facebook for more inspiration and to share your projects! Thanks so much for stopping by today – we’ll see you next time!

Scrappy hugs,

in a field of roses

Hi friends! Happy Monday to everybody! I have another amazing ScrapbookingStore DT inspiration project to share with you today created with the gorgeous March 2024 Scrapbook Kit with Upgrades! I’m totally in love with all the florals in this month’s kit and have created a motivational side pop-up card using a set of Hot Off The Press dies in my stash. It never hurts to have a few cards handy to give to someone who needs a little lift, and florals are always the ticket!

Using the Hot Off The Press Side Pop-Up Card Dies, I cut the card base from CutCardStock Lessebo Dawn Maroon cardstock along with layering panels from a floral print in the Carta Bella Flora No. 6 Collection Kit. I cut a coordinating journaling card from the kit using a Keep It Simple Stitched Rectangles Nested Die to use as the focal image. I adhered an assortment of floral stickers from the sticker sheet to Solar White cardstock scraps, fussy cut them and adhered them to the tiers on the card base. The finishing touch was adding iridescent gemstones for a little bit of bling.

I added a Solar White panel to the back which I embellished with a leftover strip of the floral paper used on the front and a sentiment sticker from the sticker sheet. This was an easy one!

Sharing in the following challenges:
1. https://aperfecttimetocraft.blogspot.com/2024/03/a-perfect-time-to-craft-open-challenge.html
2. https://avenue613.blogspot.com/2024/03/march-2024-anything-goes-w-optional.html
3. https://classicdesignchallenge.blogspot.com/2024/03/classic-design-challenge-03-2024-marapr.html
4. https://cutitupchallenges.blogspot.com/2024/03/cut-it-up-challenge-299-colors-of-spring.html
5. https://fabnfunkychallenges.blogspot.com/2024/03/challenge-591-spring.html
6. https://mmmchallengeblog.blogspot.com/2024/03/221-spring-flowers-weather-etc.html
7. https://pennyschallenges.blogspot.com/2024/03/pennys-challenge-567.html
8. https://scrapping4funchallenges.blogspot.com/2024/03/march-easter-spring.html
9. https://cinspirations.blogspot.com/2024/03/march-challenge-anything-goes.html

Affiliate links are used in this post at no cost to you – I really appreciate your support!

ScrapbookingStore products used:
March 2024 Scrapbook Kit with Upgrades:
Carta Bella Flora No. 6 12×12 Collection Kit with Element Sticker Sheet
Upgrades: Simple Stories St. Patrick’s Day Page Pieces
Pink Paislee 5th & Monaco Embellishments
Paige Evans Garden Shoppe Embellishments

Other products used:
CARDSTOCK/PAPER: CutCardStock Lessebo Dawn Maroon cardstock, Neenah Classic Crest 80# Solar White cardstock
DIES/PUNCHES: Hot Off The Press Side Pop-Up Card Dies, Keep It Simple Stitched Rectangles Nested Dies
ACCESSORIES: Fiskars 12″ ProCision Rotary Bypass Paper Trimmer, Elmer’s Craft Bond Tape Runner, Bearly Art precision craft glue, Big Shot, iridescent gemstones

I hope you’ve enjoyed today’s project and you’re thinking about all the fun you could have with this month’s kit… you really ought to think about joining the Subscription Club! Be sure to Follow us on Facebook, Instagram, Pinterest and YouTube for lots of crafty inspiration! And if you do decide to join the Subscription Club, join our ScrapbookingStore Club Member Group on Facebook for more inspiration and to share your projects! Thanks so much for stopping by today – we’ll see you next time!

Scrappy hugs,

lucky, lucky me!

Hey everybody, Happy St. Patrick’s Day! Are you wearing green or do you want to be pinched?! Bahahaha! I have a fun ScrapbookingStore DT inspiration project to share with you today created with the awesome March 2024 Scrapbook Kit with Upgrades! I created a pocket front card and my inspiration came from THIS Splitcoast Stampers tutorial. I’ve had these instructions in my arsenal for a few years and had never made one, so I figured it was about time. Dina made hers with a gnome theme and it kind of grabbed my attention since I was looking for a fun design for a St. Patrick’s Day card!

I cut the card base from CutCardStock 100# Cougar Smooth White along with layering panels from a clover print in the Carta Bella Flora No. 6 Collection Kit as well as CutCardStock Scottish Highlands Green. I embellished the front with elements from the Simple Stories St. Patrick’s Day Page Pieces in the upgrades as well as a stamped gnome from the Stampingbella Gnomes Have Feelings Too stamp set which I colored with alcohol markers and fussy cut. I created a separate round card that I tucked into the pocket – it’s not a very big one but it does have room on the inside for a short message and signature. ;)

I added a large shamrock (also from the Simple Stories St. Patrick’s Day Page Pieces) to the inside of the card. This fun fold can be used for any occasion and I’m sure I’ll be making it again. Next time I think it would be fun to add a sentiment to the inside and tuck some fun tags and ephemera into the pocket on the front. The sky is the limit, as they say! ;)

Sharing in the following challenges:
1. https://aperfecttimetocraft.blogspot.com/2024/03/a-perfect-time-to-craft-open-challenge.html
2. https://hereisaplacetostart.blogspot.com/2024/03/march-2024-anything-goes-woptional.html
3. https://cardz4galz.blogspot.com/2024/03/220-use-some-green.html
4. https://classicdesignchallenge.blogspot.com/2024/03/classic-design-challenge-03-2024-marapr.html
5. https://craftygalscornerchallenges.blogspot.com/2024/03/challenge-253-anything-goes.html
6. https://secretstamper.com/2024/03/anything-goes-with-a-fun-fold-for-creative-creases-78/

Affiliate links are used in this post at no cost to you – I really appreciate your support!

ScrapbookingStore products used:
March 2024 Scrapbook Kit with Upgrades:
Carta Bella Flora No. 6 12×12 Collection Kit with Element Sticker Sheet
Upgrades: Simple Stories St. Patrick’s Day Page Pieces
Pink Paislee 5th & Monaco Embellishments
Paige Evans Garden Shoppe Embellishments

Other products used:
CARDSTOCK/PAPER: CutCardStock Cougar Smooth 100# White, Cougar Smooth 80# White and Scottish Highlands Green cardstock
STAMPS: Stampingbella Gnomes Have Feelings Too stamp set
INK: Memento Tuxedo Black ink; Spectrum Noir Tri-Blends- BG5/6/7, LG1/3/5, FS6/7/8
DIES/PUNCHES: Keep It Simple Stitched Circles Nested Dies
ACCESSORIES: Fiskars 12″ ProCision Rotary Bypass Paper Trimmer, Elmer’s Craft Bond Tape Runner, Bearly Art precision craft glue, MISTI stamp tool, Big Shot, Scrapbook Adhesives Foam Squares (small white), Keep It Simple Crafty Girls Buttons

I hope you’ve enjoyed today’s project and you’re thinking about all the fun you could have with this month’s kit… you really ought to think about joining the Subscription Club! Be sure to Follow us on Facebook, Instagram, Pinterest and YouTube for lots of crafty inspiration! And if you do decide to join the Subscription Club, join our ScrapbookingStore Club Member Group on Facebook for more inspiration and to share your projects! Thanks so much for stopping by today – we’ll see you next time!

Scrappy hugs,

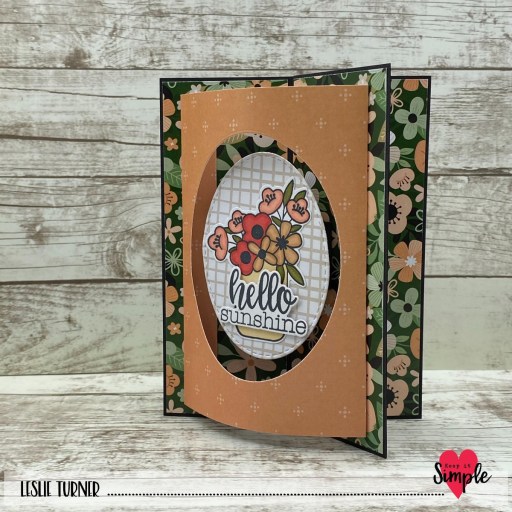
hello sunshine

Hi friends, happy weekend! I’m delighted to share a Keep It Simple DT inspiration project with you today! Yesterday was launch day for our new Simply Spring Collection and OMGoodness it’s gorgeous! I’ve created a 3D window card showcasing several of the prints in the 12×12 Collection Pack along with the 6×8 Collection Stamps and coordinating Outline Dies. My inspiration for this awesome fold came from Lisa Curcio’s blog. This is the second one I’ve made and I definitely see more of them in my future – it’s so fun and really packs a punch with these pretty papers and stamps!

I cut the card base from CutCardStock Basis Black cardstock along with layering panels from prints in the Simply Spring 12×12 Collection Pack. I used the Back To Basics Stitched Ovals Nested Dies to cut the aperture into the curved panel on the front and a slightly smaller one to cut the oval inside the aperture. I stamped the image and sentiment on the oval using stamps in the Simply Spring 6×8 Collection Stamps, colored them with alcohol markers, and cut them with the coordinating Outline Dies.

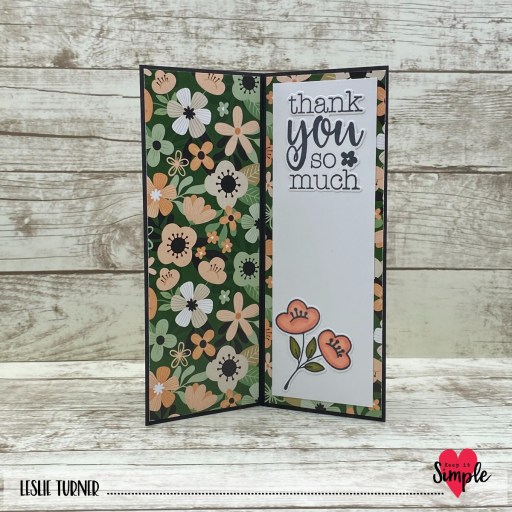
I cut a back signature panel from CutCardStock Cougar Smooth White and added a signature and image (colored with alcohol markers) which I stamped from the 6×8 Collection Stamps and cut with the coordinating Outline Dies.

Sharing in the following challenges:
1. https://aperfecttimetocraft.blogspot.com/2024/03/a-perfect-time-to-craft-open-challenge.html
2. https://hereisaplacetostart.blogspot.com/2024/03/march-2024-anything-goes-woptional.html
3. https://classicdesignchallenge.blogspot.com/2024/03/classic-design-challenge-03-2024-marapr.html
4. https://craftycatzweeklychallenge.blogspot.com/2024/03/crafty-catz-667-anything-goes.html
5. https://craftygalscornerchallenges.blogspot.com/2024/03/challenge-253-anything-goes.html
6. https://secretstamper.com/2024/03/anything-goes-with-a-fun-fold-for-creative-creases-78/
7. https://cutitupchallenges.blogspot.com/2024/03/cut-it-up-challenge-299-colors-of-spring.html
8. https://giveacrafteracookie.blogspot.com/2024/03/cookie-challenge-190-reminder-march.html
9. https://mmmchallengeblog.blogspot.com/2024/03/221-spring-flowers-weather-etc.html

Keep It Simple products used:
Simply Spring 12×12 Collection Pack
Simply Spring 6×8 Collection Stamps
Simply Spring Outline Dies
Back To Basics Stitched Ovals Nested Dies

Affiliate links are used in this post at no cost to you – I really appreciate your support!

Other products used:
CARDSTOCK/PAPER: CutCardStock Basis Black and Cougar 80# Smooth White cardstock
INK: Memento Tuxedo Black ink; Spectrum Noir Tri-Blends- CR1/3/6/7/8/10, GB1/3/5, TN1/2/4, YG1/2/3
ACCESSORIES: Fiskars 12″ ProCision Rotary Bypass Paper Trimmer, Elmer’s Craft Bond Tape Runner, Bearly Art precision craft glue, MISTI stamp tool, Big Shot, 1-mm-thick foam squares, 1″ double-sided foam strip

I hope you’ve loved seeing this project as much as I loved creating it and you’re inspired to get crafty! Be sure to check out ALL the fun goodies in the Keep It Simple online store! Save 10% on your entire order when you shop online using code LoveToScrap2 at checkout! There is no minimum purchase requirement and no usage limits, AND it combines with product, order, and shipping discounts! Is that cool, or what?! Be sure to Follow us on Facebook, Instagram, and Pinterest for lots of crafty inspiration! Thanks so much for stopping by today – we’ll see you next time!

Scrappy hugs,

top o’ the mornin’ to ya!

Hey everybody, Happy Thursday! I hope your week is going well and you’re gearing up for a fun weekend! I’m delighted to share another Keep It Simple DT inspiration project today that I created with the new Lucky Day Collection released last month! This collection has some of THE best products for creating fun St. Patrick’s Day (or just plain good luck) projects! I’m sure by now you know how much I love me some gnomes so I decided on a wiper card to showcase a couple of them! I have an SVG cut file for a wiper card and I also have some handwritten instructions from Julie’s easy tutorial HERE which I used for this card. It’s a fun one! If you like the Keep It Simple products I’ve used and are inclined to go shopping, be sure to use my discount code LoveToScrap2 at checkout to save 10% on your entire order! There is no minimum purchase requirement and no usage limits, plus the code combines with product, order, and shipping discounts!

I cut the wiper card base from Neenah Classic Crest 110# Solar White cardstock along with layering panels from an assortment of patterned papers from the Lucky Day 12×12 Collection Pack. The gnomes, sentiments and other ephemera are from the Lucky Day and Lucky Phrases Die Cut Pieces, and some were popped up on 3D Foam Squares.

I cut the back panel from Neenah Classic Crest 80# Solar White cardstock and embellished it with strips of patterned paper from the 12×12 Collection Pack and a die cut star popped up on a 3D Foam Square. I stamped a sentiment from the Lucky Day 4×6 Collection Stamps in Catherine Pooler Twilight ink and layered the panel on another print from the Collection Pack.

Sharing in the following challenges:
1. https://aperfecttimetocraft.blogspot.com/2024/03/a-perfect-time-to-craft-open-challenge.html
2. https://hereisaplacetostart.blogspot.com/2024/03/march-2024-anything-goes-woptional.html
3. https://craftycatzweeklychallenge.blogspot.com/2024/03/crafty-catz-667-anything-goes.html
4. https://craftygalscornerchallenges.blogspot.com/2024/03/challenge-253-anything-goes.html

Keep It Simple products used:
Lucky Day 12×12 Collection Pack
Lucky Day Die Cut Pieces
Lucky Day Lucky Phrases Die Cut Pieces
Lucky Day 4×6 Collection Stamps

Affiliate links are used in this post at no cost to you – I really appreciate your support!

Other products used:
CARDSTOCK/PAPER: Neenah Classic Crest 110# and 80# Solar White cardstock
INK: Catherine Pooler Twilight ink
ACCESSORIES: Tonic Studios 12″ Guillotine Paper Trimmer, Bearly Art precision craft glue, MISTI stamp tool, Scrapbook Adhesives 3D Foam Squares (large and small white)

I hope you’ve loved seeing this project as much as I loved creating it and you’re inspired to get crafty! Be sure to check out ALL the fun goodies in the Keep It Simple online store! Save 10% on your entire order when you shop online using code LoveToScrap2 at checkout! There is no minimum purchase requirement and no usage limits, AND it combines with product, order, and shipping discounts! Is that cool, or what?! Be sure to Follow us on Facebook, Instagram, and Pinterest for lots of crafty inspiration! Thanks so much for stopping by today – we’ll see you next time!

Scrappy hugs,

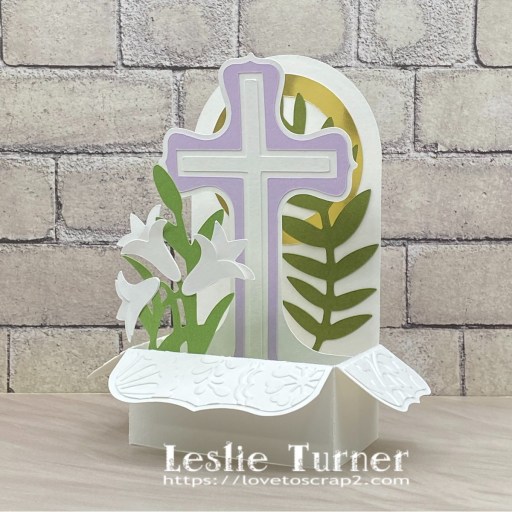
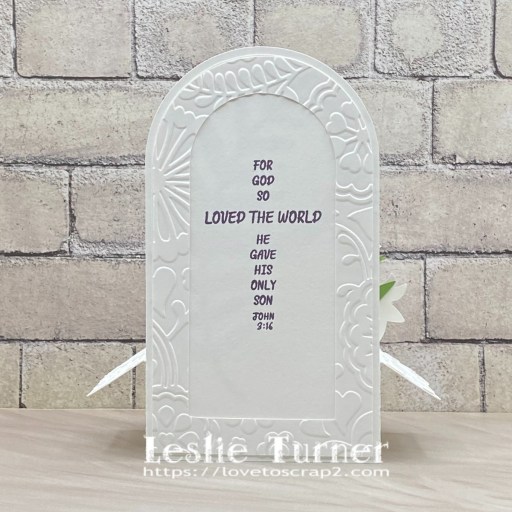
For God So Loved The World

Hi friends! I hope you’re having a beautiful weekend! How apropos to post this pretty card today, on Sunday, even though Easter isn’t for another three weeks! Our new challenge is live this morning over at Ally’s Angels and I’m delighted to share my DT inspiration project for Challenge #80! This project was among the final large batch of SVG files that I cut with my Scan N Cut prior to it’s demise a while back. It’s such a pretty design and I love how it turned out in purple and green with just a pop of gold. And before I forget, I want to mention that our challenges at Ally’s Angels will commence on the 15th of the month (and end on the 10th of the following month) beginning in April, which will align nicely with many of the other challenges out there in blogland.

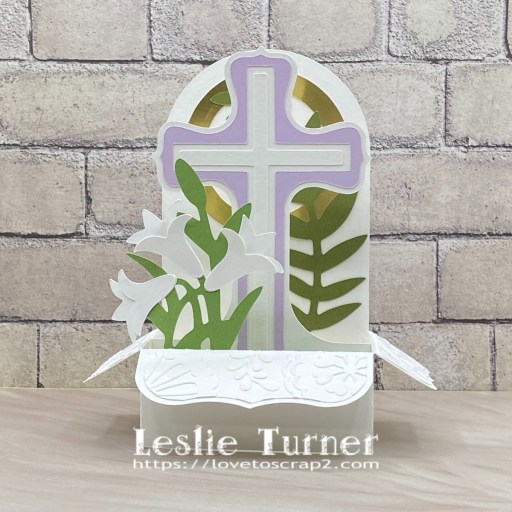
I cut the card base, flap panels, cross and backing, and lilies from CutCardStock Basis White and dry embossed the flap panels with the Cuttlebug Floral Fantasy embossing folder (an oldie but goodie). I cut the ring from CutCardStock Bright Gold Foil and the cross panel from CutCardStock Pop Tone Grapesicle. Finally, the greenery was cut from CutCardStock Pop Tone Jellybean Green and Pop Tone Gumdrop Green.

I used the Prickley Pear Stamps Easter Cross stamp set for the sentiment on the back, stamped in Memento Elderberry ink.

Sharing in the following challenges:
1. https://aperfecttimetocraft.blogspot.com/2024/03/a-perfect-time-to-craft-open-challenge.html
2. https://avenue613.blogspot.com/2024/03/march-2024-anything-goes-w-optional.html
3. http://craftycalendarchallenge.blogspot.com/2024/03/march-challenge-more-than-one-fold.html
4. https://cutitupchallenges.blogspot.com/2024/03/cut-it-up-challenge-299-colors-of-spring.html
5. https://scrapping4funchallenges.blogspot.com/2024/03/march-easter-spring.html
6. https://cinspirations.blogspot.com/2024/03/march-challenge-anything-goes.html

Affiliate links are used in this post at no cost to you – I really appreciate your support! 

Products used:
CARDSTOCK/PAPER: CutCardStock Basis White 80# 12×12, Bright Gold Foil, Pop Tone Jellybean Green, Pop Tone Gumdrop Green and Pop Tone Grapesicle
STAMPS: Prickley Pear Stamps Easter Cross stamp set
INK: Memento Elderberry ink
DIES/PUNCHES: SVG Cuts Easter Sunday Box Card SVG file
ACCESSORIES: Brother Scan N Cut SDX 125e, Bearly Art precision craft glue, MISTI stamp tool, Big Shot, Cuttlebug Floral Fantasy embossing folder

I hope you’ve enjoyed seeing this project and will link up with us this time! Thanks so much for stopping by today – we’ll see you next time! ;)

Scrappy hugs,

Lucky Day

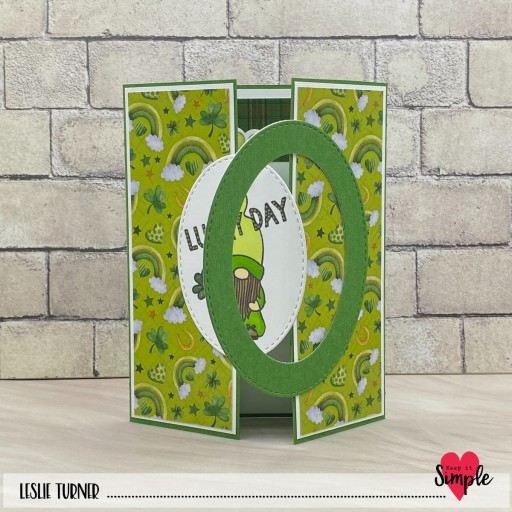
Hi friends, Happy Friday! I hope you have something fun planned for the weekend! I’m delighted to bring you another awesome Keep It Simple DT inspiration project today! I created this fun interlocking gate fold card using papers, stamps and die cut pieces from the new Lucky Day Collection that was released last month! The products in this collection are so much fun and the sky is the limit with what you can create! I do love me some gnomes, especially the lucky kind! I’ve had handwritten instructions for this fun fold in my tutorial arsenal for a number of years and I think I may have gotten my inspiration from THIS tutorial. If you like the Keep It Simple products I’ve used and are inclined to shop, be sure to use my discount code LoveToScrap2 at checkout to save 10% on your entire order! There is no minimum purchase requirement and no usage limits, plus the code combines with product, order, and shipping discounts!

The card base and oval frame were cut from CutCardStock Scottish Highlands Green cardstock along with layering panels and an oval die cut (using the Stitched Ovals Nested Dies) from Neenah Classic Crest Solar White. I chose a couple coordinating patterned papers in the Lucky Day 6×9 Collection Pack for the front panels and an inside strip.

The image and sentiment were stamped on the oval die cut (the interlocking piece) and colored with alcohol markers, adding accents with an American Crafts Metallic Gold Marker and Sakura Clear Star Gelly Roll pen. The finishing touch to the front was adding a tiny ScraPerfect iridescent gemstone to the center of his shamrock ‘flower’.

I embellished the patterned paper strip on the inside panel with a die cut strip from the Die Cut Pieces and added a sentiment stamped with the Collection Stamps. I needed to cut a few of the little round elements off the strip so I used one of them on the tip of the gnome’s hat. ;)

Sharing in the following challenges:
1. https://aperfecttimetocraft.blogspot.com/2024/03/a-perfect-time-to-craft-open-challenge.html
2. https://avenue613.blogspot.com/2024/03/march-2024-anything-goes-w-optional.html
3. https://cardz4galz.blogspot.com/2024/03/220-use-some-green.html
4. http://craftycalendarchallenge.blogspot.com/2024/03/march-challenge-more-than-one-fold.html
5. https://craftycatzweeklychallenge.blogspot.com/2024/03/crafty-catz-667-anything-goes.html
6. https://cinspirations.blogspot.com/2024/03/march-challenge-anything-goes.html

Keep It Simple products used:
Lucky Day 6×9 Collection Pack
Lucky Day Collection Stamps
Lucky Day Die Cut Pieces
Back To Basics Stitched Ovals Nested Dies

Affiliate links are used in this post at no cost to you – I really appreciate your support!

Other products used:
CARDSTOCK/PAPER: CutCardStock Scottish Highlands Green cardstock, Neenah Classic Crest 80# Solar White cardstock
INK: Memento Tuxedo Black ink; Arteza alcohol markers- YG02/05/08, BR28/82/84; American Crafts Metallic Gold Marker, Sakura Clear Star Gelly Roll pen
ACCESSORIES: Tonic Studios 12″ Guillotine Paper Trimmer, Bearly Art precision craft glue, MISTI stamp tool, Big Shot, Stampin’ Up Mini Dimensionals, ScraPerfect tiny iridescent gemstone

I hope you’ve loved seeing this project as much as I loved creating it and you’re inspired to get crafty! Be sure to check out ALL the fun goodies in the Keep It Simple online store! Save 10% on your entire order when you shop online using code LoveToScrap2 at checkout! There is no minimum purchase requirement and no usage limits, AND it combines with product, order, and shipping discounts! Is that cool, or what?! Be sure to Follow us on Facebook, Instagram, and Pinterest for lots of crafty inspiration! Thanks so much for stopping by today – we’ll see you next time!

Scrappy hugs,

Hello shaker

Hi friends! Wow, can you believe it’s March 1st already! Has the weather started warming up any where you are? It’s still pretty chilly here but it’s not unbearable. Our new challenge is live this morning over at the newly re-structured Christmas [or not] BINGO Challenges and I’m delighted to share my DT inspiration project for ConBC #6 – Anything Goes with Featured BINGO Card! I went with Column B this time and used the enamel dots, frame, shaker and clean and simple options for my card. I used two different kinds of confetti and a square shaker pouch from This Calls For Confetti along with some of my favorite sentiment dies from STAMPlorations!

I cut a standard A2 size side-folding card base from Neenah Classic Crest 110# Solar White cardstock and rounded the bottom right corner. I cut a frame from CutCardStock Stardream Metallic Lagoon cardstock using a My Favorite Things Stitched Mini Scalloped Square and a Keep It Simple Stitched Squares Nesting Die. Next, I trimmed a STAMPlorations Watercolor ATC Journaling Card to fit behind the frame and adhered it to the card base. I affixed a This Calls For Confetti square shaker pouch to the back side of the frame with 1/8″ red liner tape.

I added a pinch of Opalescent Island Blue Sequins and a pinch of Iridescent Clear Sequin Confetti (both from This Calls For Confetti) and sealed the shaker with foam strips. I added a sentiment cut from Solar White and Lagoon cardstock using the STAMPlorations Skinny Sentiments dies. The finishing touch was adding a few Eyelet Outlet White Enamel Dots.

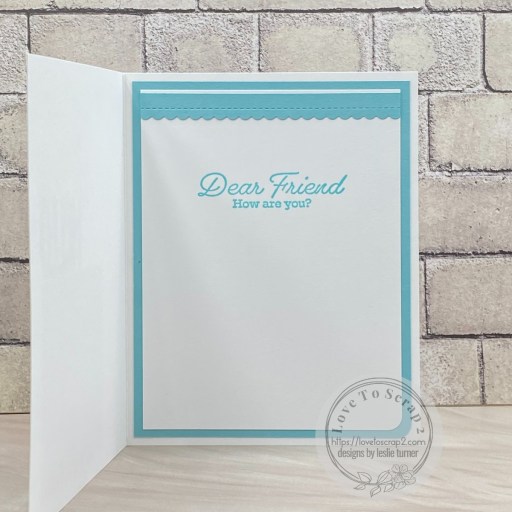
I cut the inside panel from 80# Solar White cardstock and embellished it with a scalloped border cut from the Lagoon cardstock using a My Favorite Stamps Stitched Mini Scallop Rectangle STAX. I stamped a sentiment from the Stampin’ Up Eden’s Garden stamp set in Catherine Pooler Cummerbund ink.

Sharing in the following challenges:
1. https://aperfecttimetocraft.blogspot.com/2024/03/a-perfect-time-to-craft-open-challenge.html
2. https://classicdesignchallenge.blogspot.com/2024/02/classic-design-challenge-02-2024-febmar.html
3. https://pennyschallenges.blogspot.com/2024/02/pennys-challenge-566.html

Affiliate links are used in this post at no cost to you – I really appreciate your support! 

Products used:
CARDSTOCK/PAPER: Neenah Classic Crest 110# Solar White cardstock, CutCardStock Stardream Metallic Lagoon and Basis Aqua cardstock, STAMPlorations Watercolor ATC Journaling Cards Ephemera
STAMPS: Stampin’ Up Eden’s Garden stamp set
INK: Catherine Pooler Cummerbund ink
DIES/PUNCHES: Kadomaru Pro Corner Rounder, My Favorite Things Stitched Mini Scallop Square STAX and Stitched Mini Scallop Rectangle STAX, Keep It Simple Stitched Squares Nested Dies, STAMPlorations Skinny Sentiments
ACCESSORIES: Tonic Studios 12″ Guillotine Paper Trimmer, Gina K Designs Adhesive Dot Runner, Bearly Art precision craft glue, MISTI stamp tool, Big Shot, This Calls For Confetti Square Shaker Pouch, Opalescent Island Blue Sequins and Iridescent Clear Sequin Confetti, 1/8″ red liner tape, 1/4″ double-sided foam strips, Eyelet Outlet White Enamel Dots

I hope you’ve enjoyed seeing this project and will link up with us this time! We can’t wait to see what you create! Thanks so much for stopping by today – we’ll see you next time! ;)

Scrappy hugs,
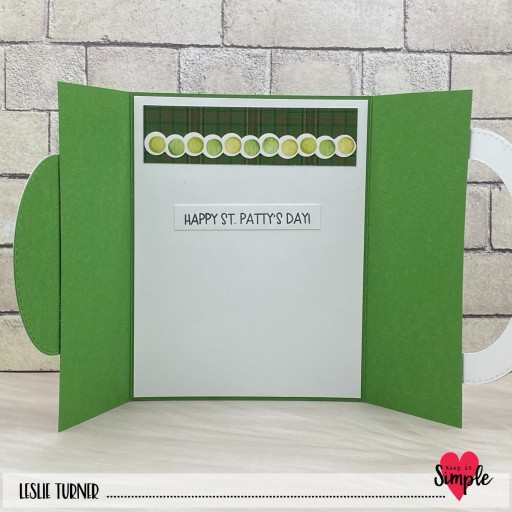
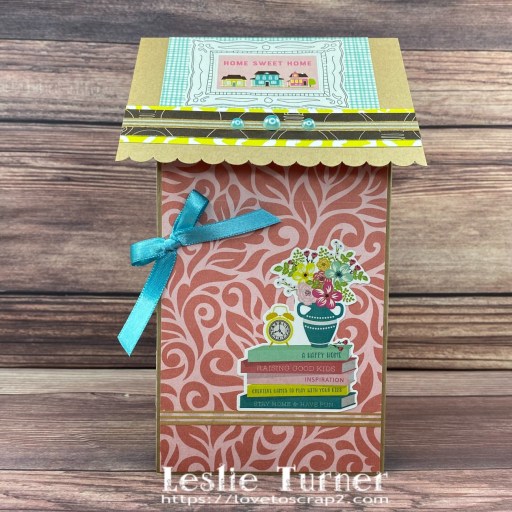
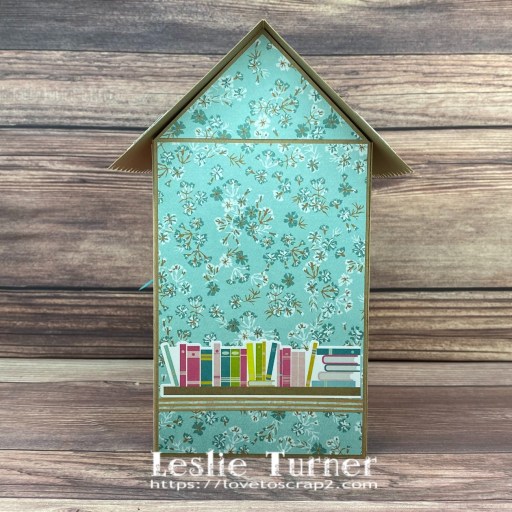
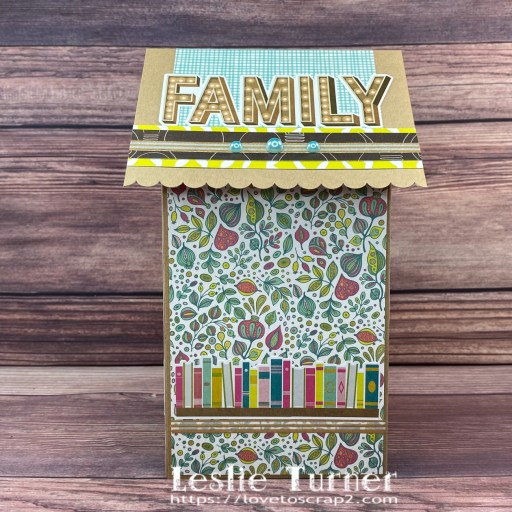
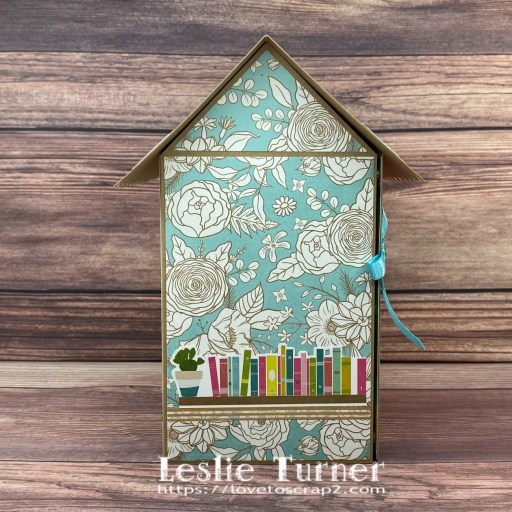
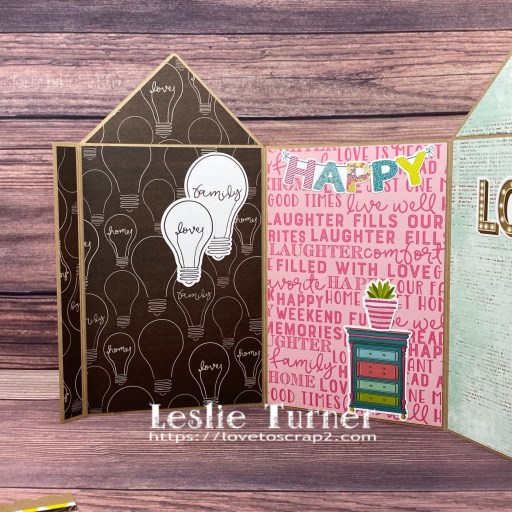
Home Sweet Home mini album

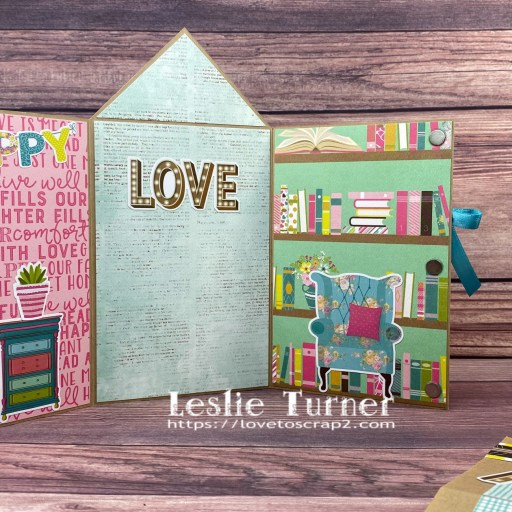
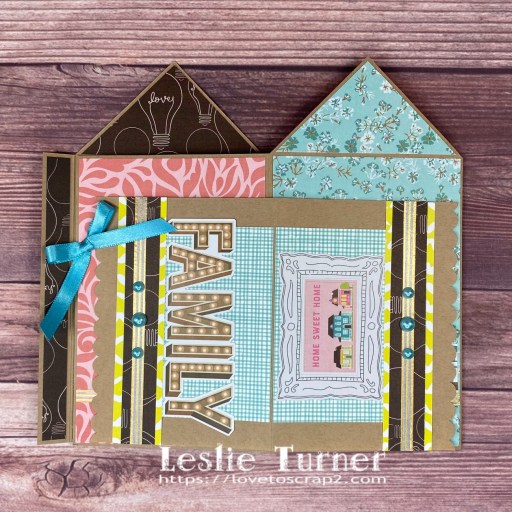
Hey everybody! I hope you’ve got some fun planned this weekend… and maybe your weather is warming up just a slight bit and looking toward Spring?! It’s a busy morning here with seven of my eight challenge blogs launching new challenges. This project is for Mix It Up Challenge Blog where MIUCB #70 – Anything Goes + optional Fancy Fold is live and we’d love to see your project with two or more folds – or straight anything goes if that’s your jam! But c’mon and admit it, you know you love fun folds, so come play with us either way! I had a large time creating this house-themed mini album (tutorial from Splitcoast Stampers HERE) using the Keep It Simple Namaste Home Collection.

This Collection is on clearance over at Keep It Simple Paper Crafts and has been deeply discounted, so if you’re so inclined to go shopping, be sure to use my discount code LoveToScrap2 for 10% off your entire order! The coolest thing about our specialized discount codes is that there is no minimum purchase requirement or usage limit, and the code combines with product, order, and shipping discounts!

The mini album base and roof were cut from CutCardStock Twine 12×12 cardstock along with layering panels from coordinating papers in the Keep It Simple Namaste Home Collection. I scalloped the edges of the roof with the Stampin’ Up Scalloped Edge Punch, and then used Me & My Big Ideas washi tape, Keep It Simple Clementine pearls, and stickers from the Namaste Home sticker sheet to embellish the roof and all the sections. I used a couple disc magnets for the closure, and added a bow fashioned from some Ellen Hutson teal ribbon.

And here it is folded flat for mailing!

Sharing in the following challenges:
1. https://aperfecttimetocraft.blogspot.com/2024/03/a-perfect-time-to-craft-open-challenge.html
2. https://classicdesignchallenge.blogspot.com/2024/02/classic-design-challenge-02-2024-febmar.html
3. https://craftycatzweeklychallenge.blogspot.com/2024/02/crafty-catz-challenge-666.html
4. https://inkspirationalchallenges.blogspot.com/2024/02/inkspirational-challenge-310-mood-board.html (inspired by the colors)

5. https://mmmchallengeblog.blogspot.com/2024/02/220-fun-folds-any-theme.html

Affiliate links are used in this post at no cost to you – I really appreciate your support! 

Products used:
CARDSTOCK/PAPER: CutCardStock Twine 12×12 cardstock, Keep It Simple Namaste Home Collection Pack
DIES/PUNCHES: Stampin’ Up Scalloped Edge Punch
ACCESSORIES: Tonic Studios 12″ Guillotine Paper Trimmer, Tombow Mono Dots Adhesive, Bearly Art precision craft glue, Keep It Simple Clementine Pearls, MAMBI skinny gold stripe washi tape, small disc magnets, Ellen Hutson teal ribbon

I hope you’ve enjoyed seeing this project and will link up with us this time! Thanks so much for stopping by today – we’ll see you next time! ;)

Scrappy hugs,

Mother’s Day I love you

Hey everybody! Okay, the weeks are just disappearing and this is the last Monday in February! What the heck?! I’m up on the Pajama Crafter Stamps blog today with my last inspiration project as a PCS designer. I’ve been on the Prickley Pear Stamps (now Pajama Crafter Stamps) team for almost four years and I feel like it’s time to step down and let the team of new designers shine. Since I always work ahead, I have a ton of PPS/PCS projects that were made while I was still on the team but not yet showcased on their blog, so I plan to share all of them on my blog over the next few months. It’s been a great run and I so appreciate Sharon, and now Joy, for having me along all these years! This split panel card features the gorgeous new Lovely Bouquet stamp set – I love this image and have really enjoyed creating with it. I went with a coral and green color palette and totally love how it turned out! I’ve made many split panel cards in a horizontal orientation over the years and I created this one in a vertical orientation with gatefold flaps scored and folded backwards rather than actually cutting a chunk out of the panel. I’ll be making this version of the split panel fold again for sure!

I cut a gatefold card base from Neenah Classic Crest 80# Solar White cardstock along with layering panels from coordinating papers in the Keep It Simple Ruby 12×12 Collection Pack. As mentioned above, rather than cutting a chunk out of the front flap to create the split panel, I scored each half of the gatefold and folded the flaps backwards which left a vertical split.

I stamped the front and inside sentiments and the large rose image on Solar White cardstock and colored the image with alcohol markers. I fussy cut it, adhered it to a second panel of Solar White and fussy cut it again, which yielded some nice dimension.

I trimmed the sentiment and popped it up on a foam strip. Then I added a small magnet closure (another option would be a belly band) and some gemstones from the Buttons Galore & More Pitter Patter Doo Dadz Embellishments. I added the sentiment to the inside panel along with a heart from the ephemera sheet in the Ruby Collection Pack, which completed the card.

Sharing in the following challenges:
1. https://classicdesignchallenge.blogspot.com/2024/02/classic-design-challenge-02-2024-febmar.html
2. https://craftycatzweeklychallenge.blogspot.com/2024/02/crafty-catz-challenge-666.html
3. https://inkspirationalchallenges.blogspot.com/2024/02/inkspirational-challenge-310-mood-board.html

4. https://lilredwagon.blogspot.com/2024/02/challenge-744-off-edge.html
5. https://mmmchallengeblog.blogspot.com/2024/02/220-fun-folds-any-theme.html

Affiliate links are used in this post at no cost to you – I really appreciate your support!

Pajama Crafter Stamps products used:
Lovely Bouquet stamp set

Other products used:
CARDSTOCK/PAPER: Neenah Classic Crest 80# Solar White cardstock, Keep It Simple Ruby 12×12 Collection Pack
INK: Memento Tuxedo Black ink; Arteza alcohol markers- YG14/17/54, YR37, R03/05/12/24
ACCESSORIES: Fiskars 12″ ProCision Rotary Bypass Paper Trimmer, Elmer’s Craft Bond Tape Runner, Ranger Adhesive Strips, Bearly Art precision craft glue, MISTI stamp tool, small disc magnet, Ranger Distress Collage Medium, Buttons Galore & More Pitter Patter Doo Dadz Embellishments, 1/4″ double-sided foam strip
I hope you’ve enjoyed this project! Be sure to check out all the awesome stamps, dies and other goodies at Pajama Crafter Stamps which is the new home of the Prickley Pear Stamps brand and the Pajama Crafter Stamps line! Be sure to keep up with news and sales by following us on Facebook, Instagram and Pinterest, and join Pajama Crafter Stamps & Friends for lots of fun crafty ideas and to share your creativity! And finally, we’d love for you to visit the Pajama Crafter Stamps blog and sign up for our newsletter to stay in touch! Thanks so much for stopping by today – we’ll see you next time! ;)

Scrappy hugs,