Hi friends! Happy Monday! Today is Day 1 of the 2021 Cat Lovers Hop so I’ve popped in with my first project! Affiliate links are used in this post at no cost to you – I really appreciate your support! A huge congrats to Janis of Her Peaceful Garden who has coordinated The Cat Lovers Hop now for seven years! It’s going on until the 30th, so if you’re a fellow cat lover, come join us! There are lots of fun and games to join in every day, and Janis has been busy lining up some pretty awesome prizes to give away at the end!
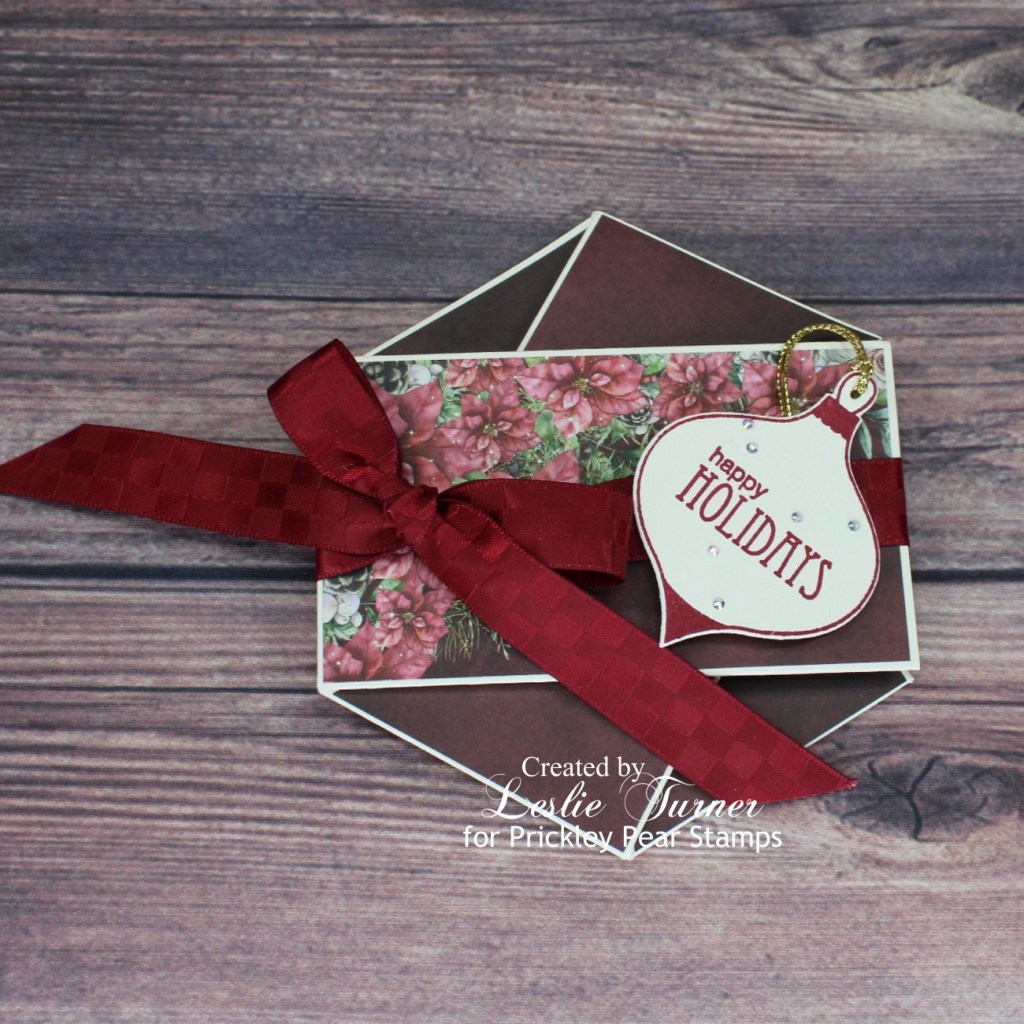
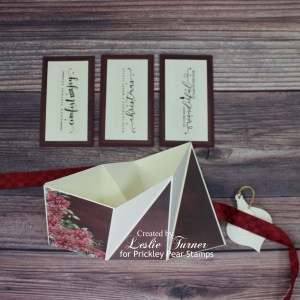
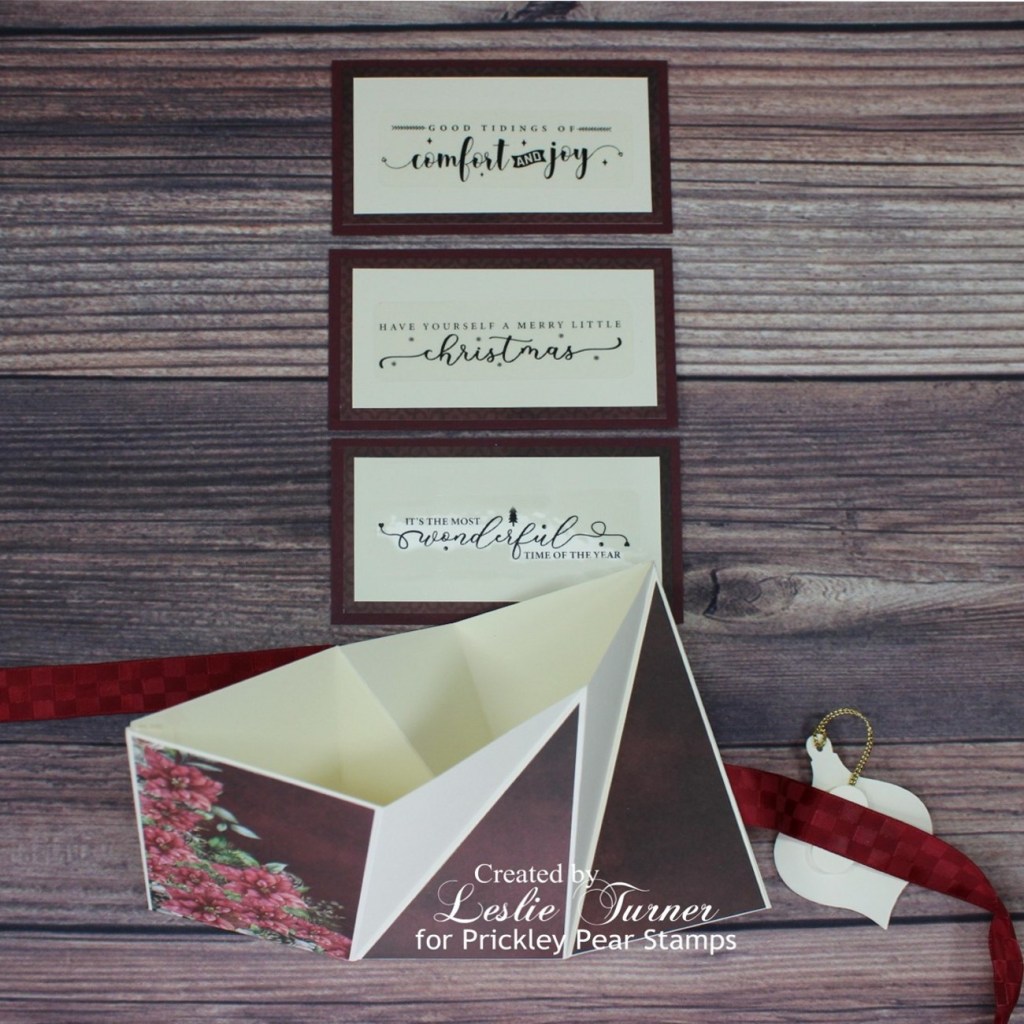
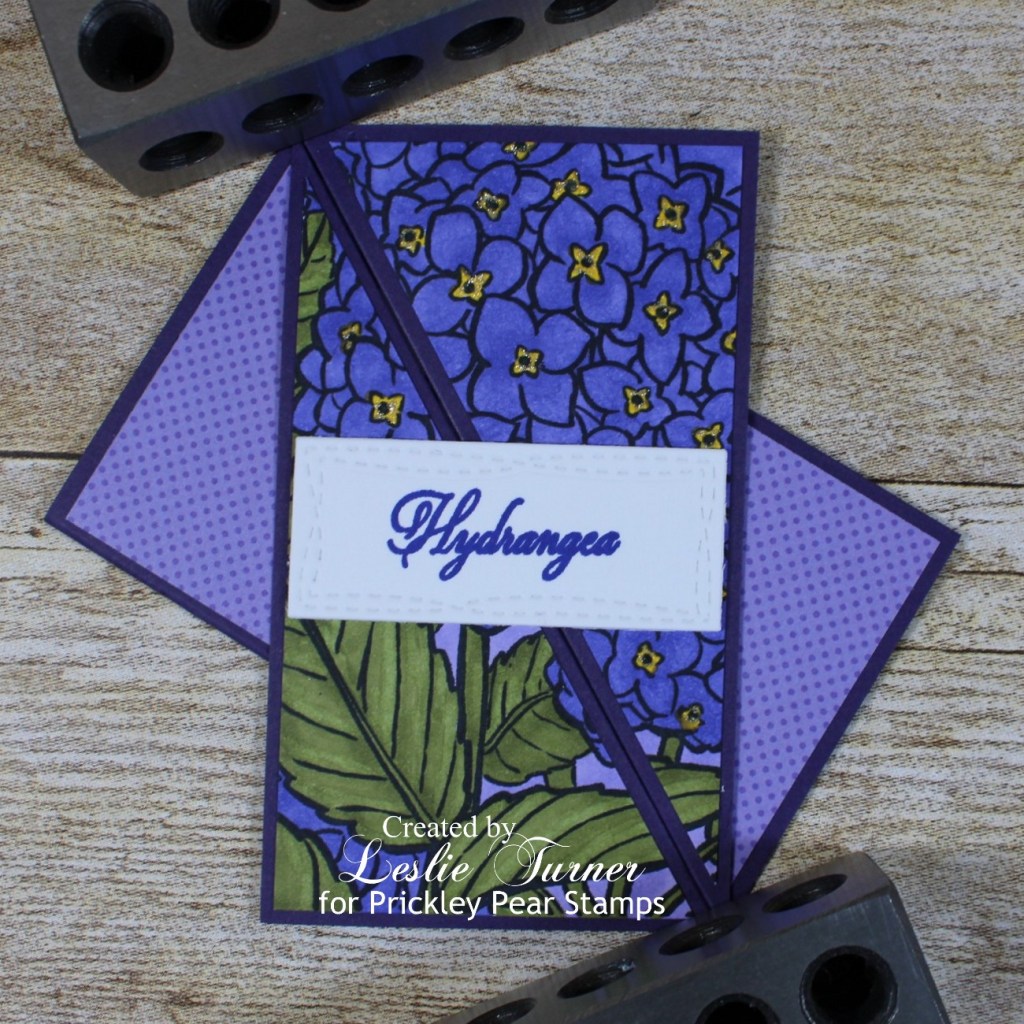
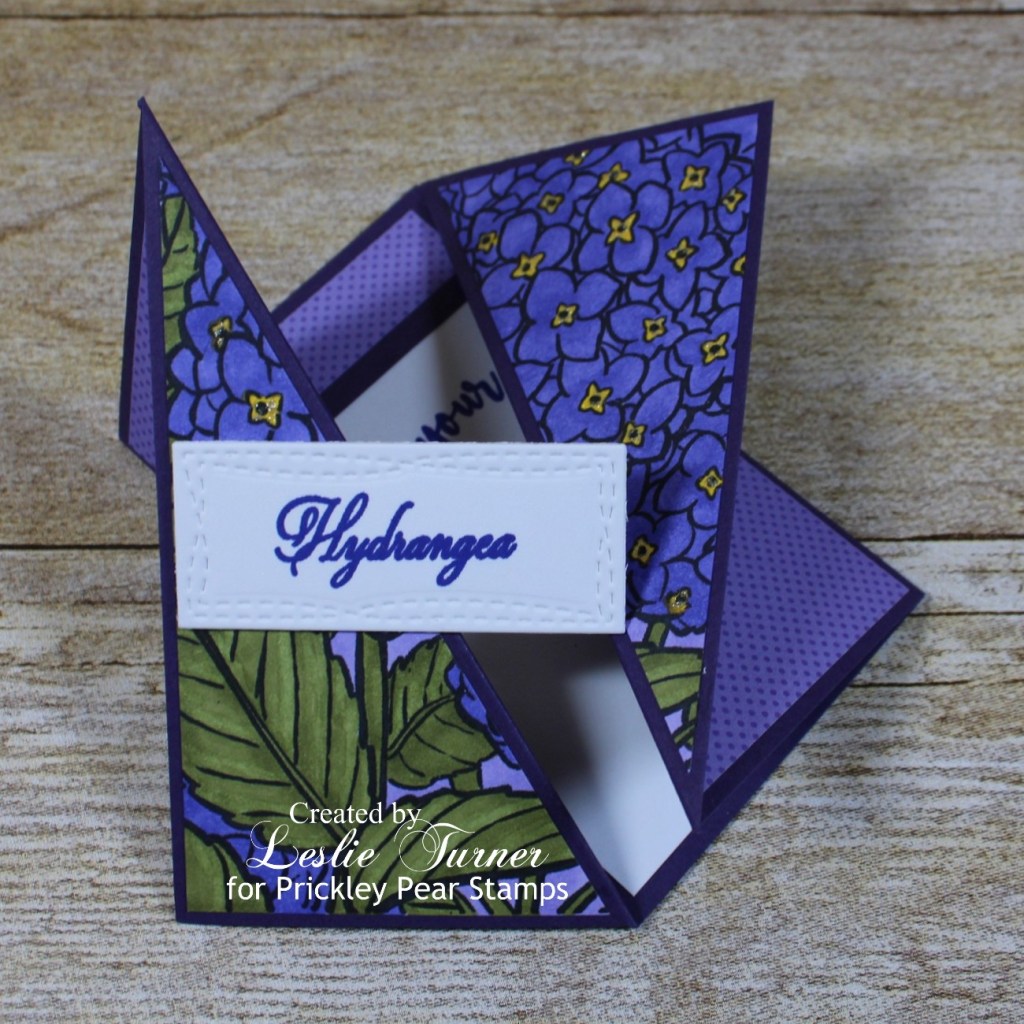
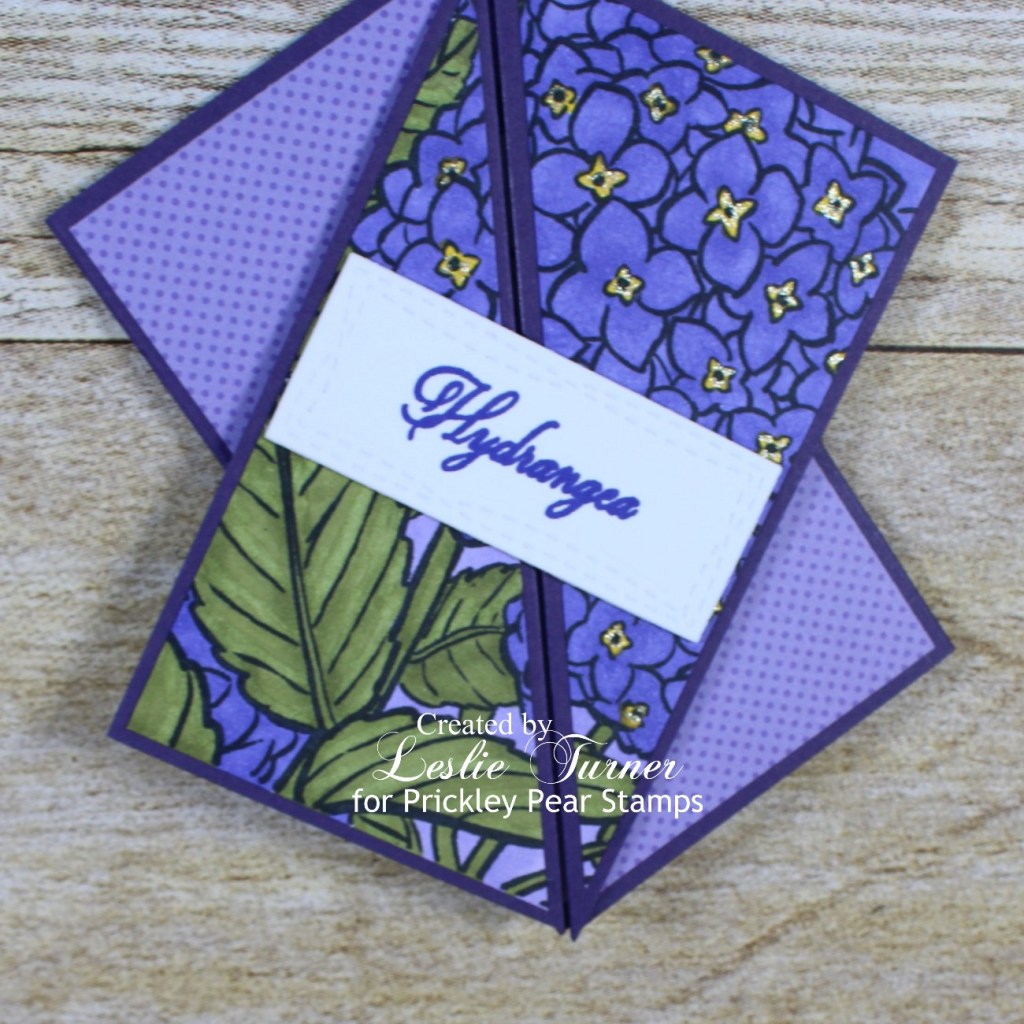
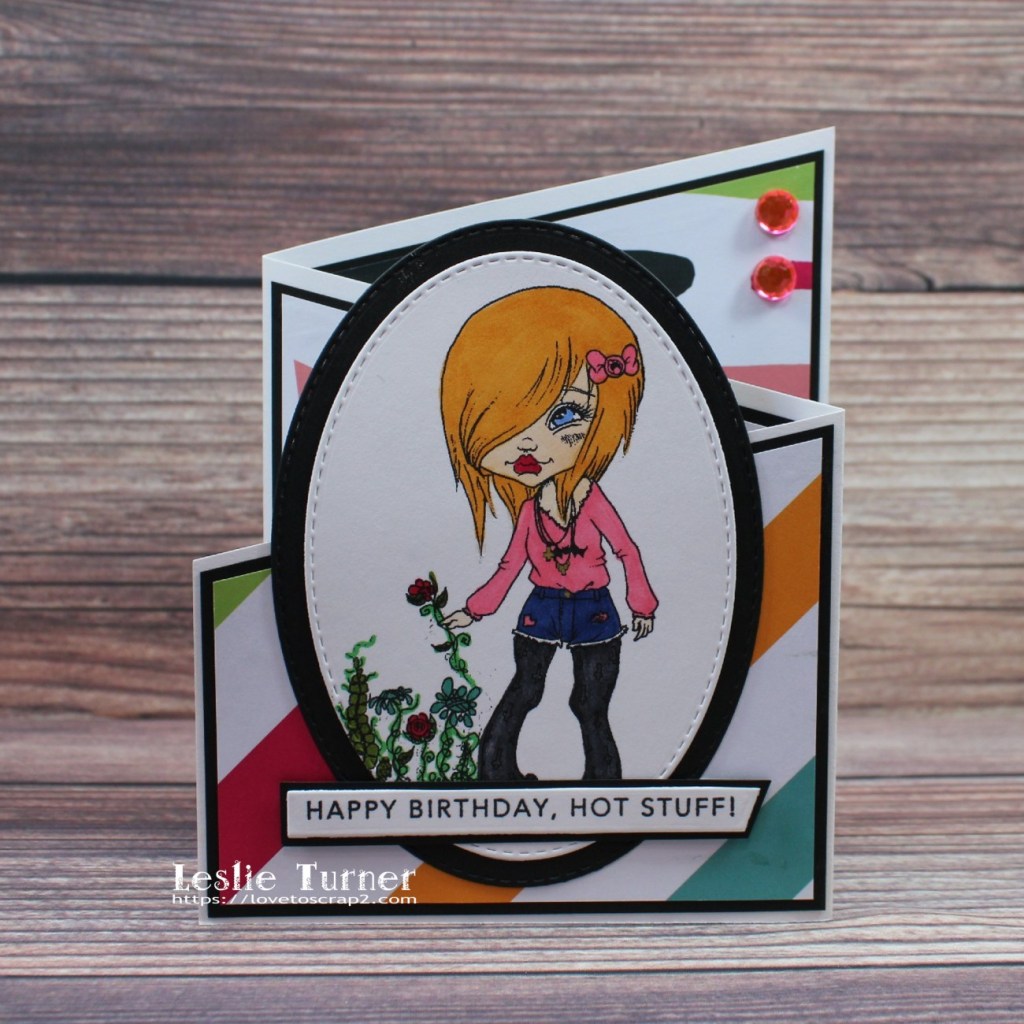
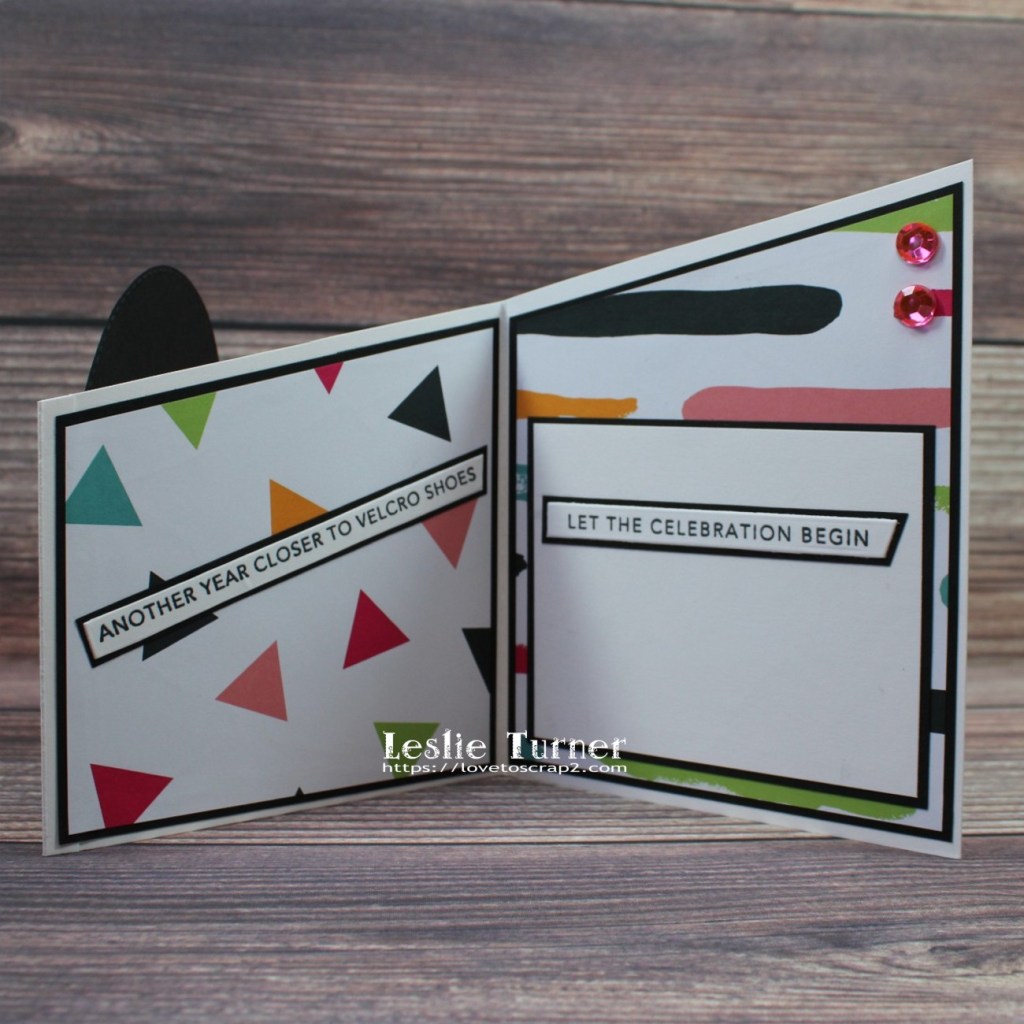
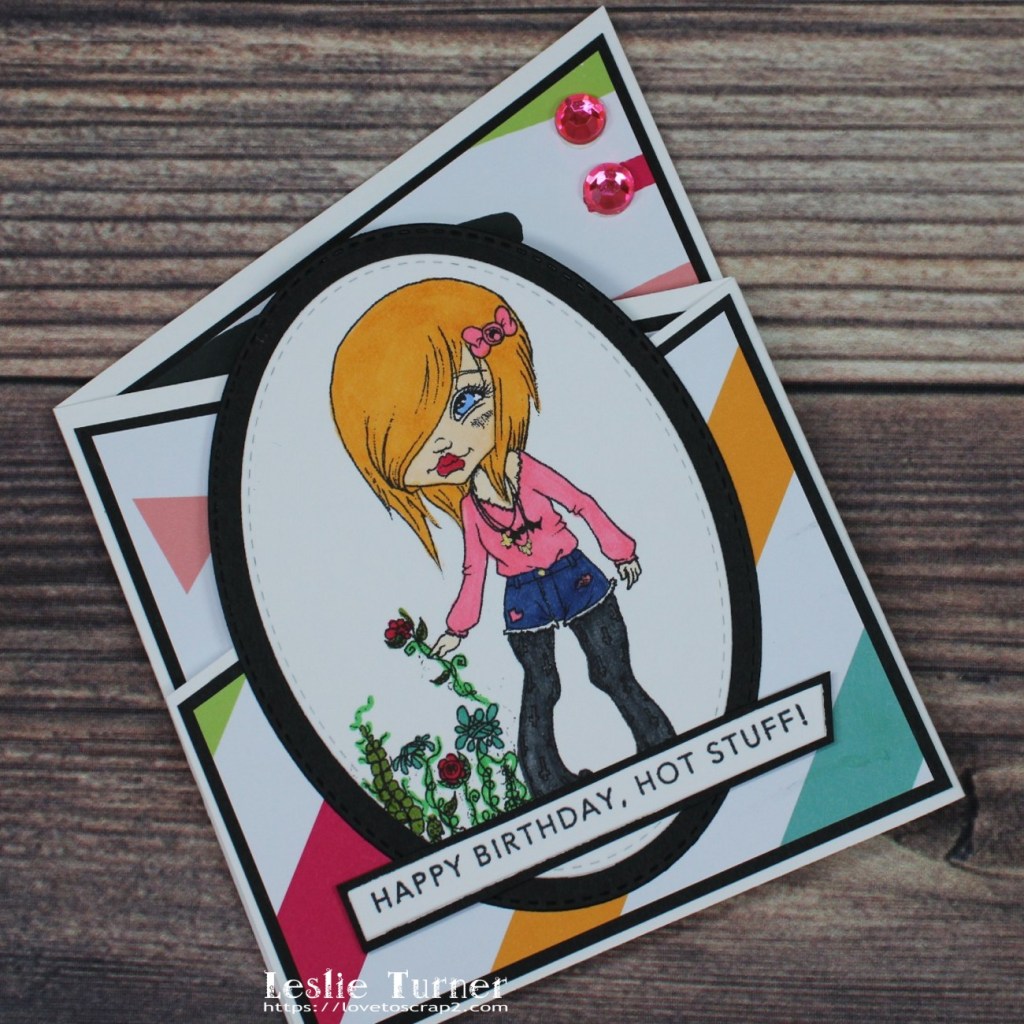
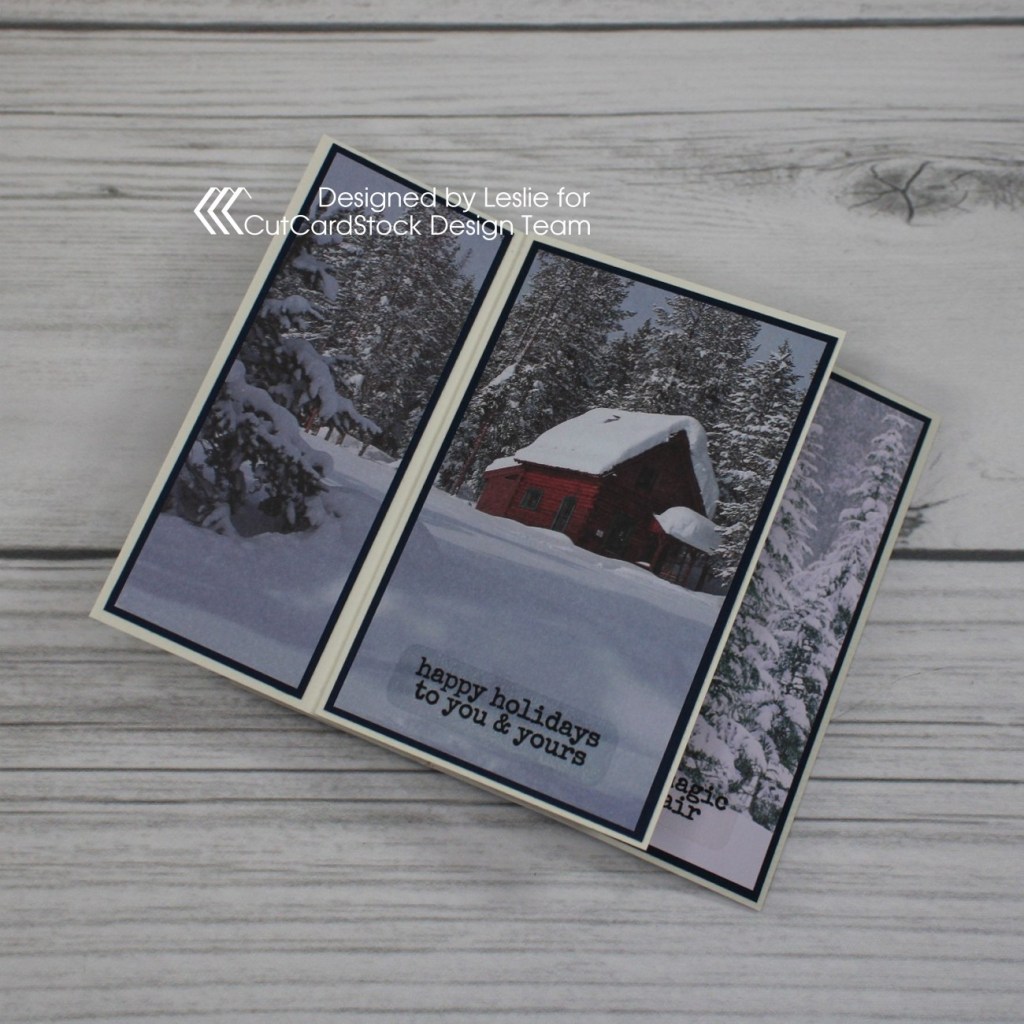
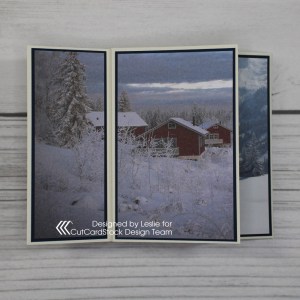
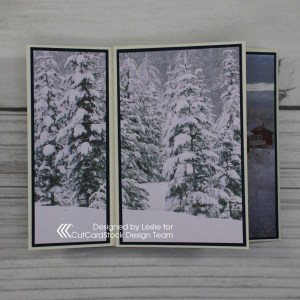
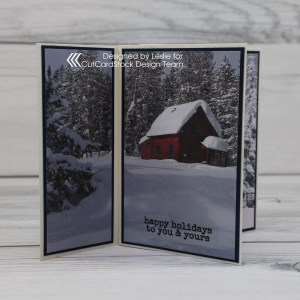
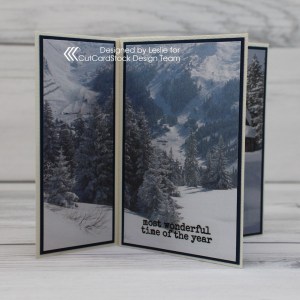
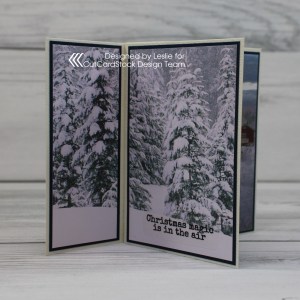
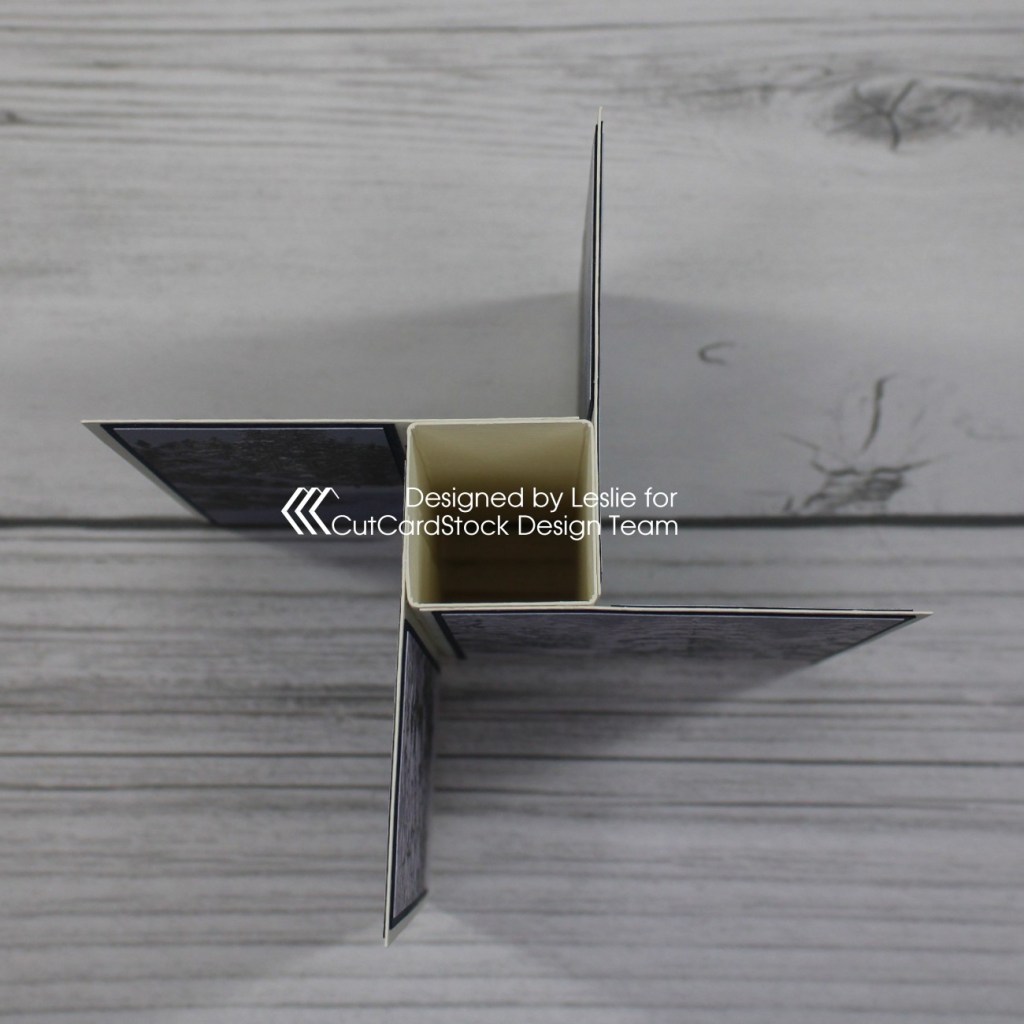
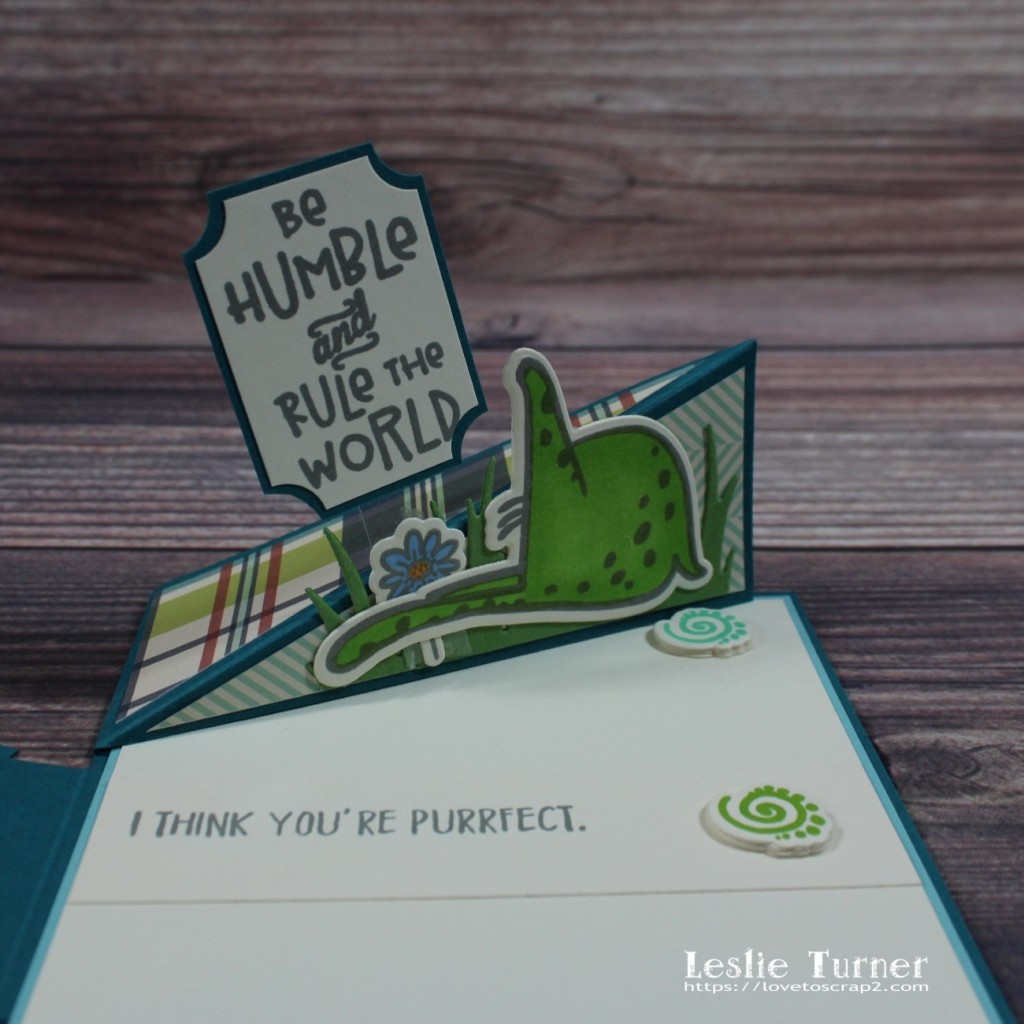
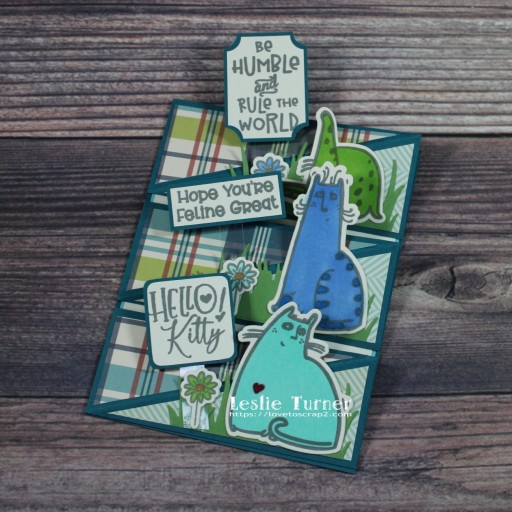
A new fun fold called a Triple Easel Panel was featured in a recent Splitcoast Stampers newsletter HERE and I just had to try it! Yep, you know me and fun folds… I’m such a fiend! As I typically do, I put my own twist on this one to make it mine. I used the Good Meowning stamp set from The Cat’s Pajamas, along with their Grassy Patches die set for the focal images on the front, and the Feline Good stamp set from The Project Bin for the inside sentiment. This was definitely a fun one that I’ll be making again!

I stamped the cats on Neenah Classic Crest Baronial Ivory cardstock, colored them with alcohol markers and cut them with the coordinating dies. I cut the card base and separate easel strips from CutCardStock Basis Teal cardstock, along with inside layers from Neenah Classic Crest Baronial Ivory cardstock and CutCardStock Basis Aqua cardstock, and the triangular layers from October Afternoon Campfire patterned paper. I adhered the layers and elements on each easel as I went, popping the sentiments up on strips of acetate. I stamped the inside sentiment on a strip of ivory and adhered it across the center.
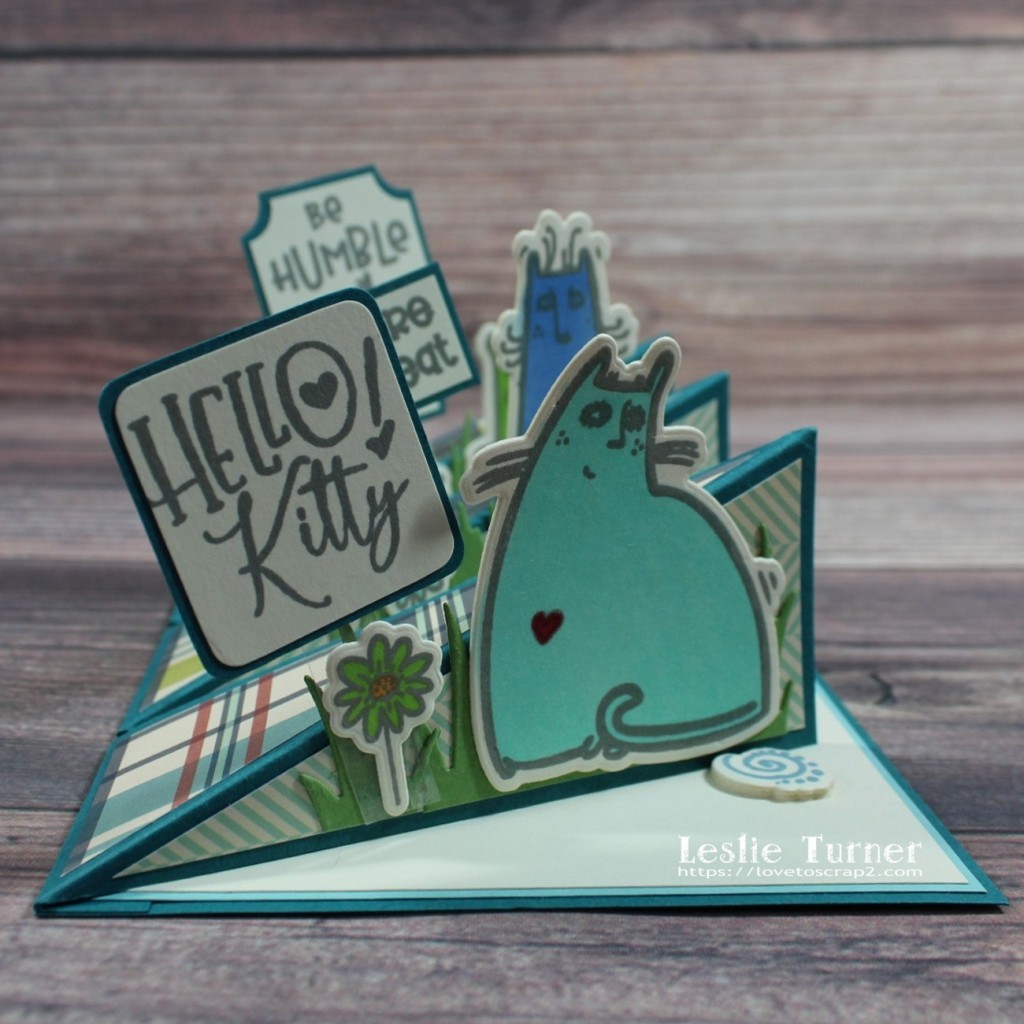
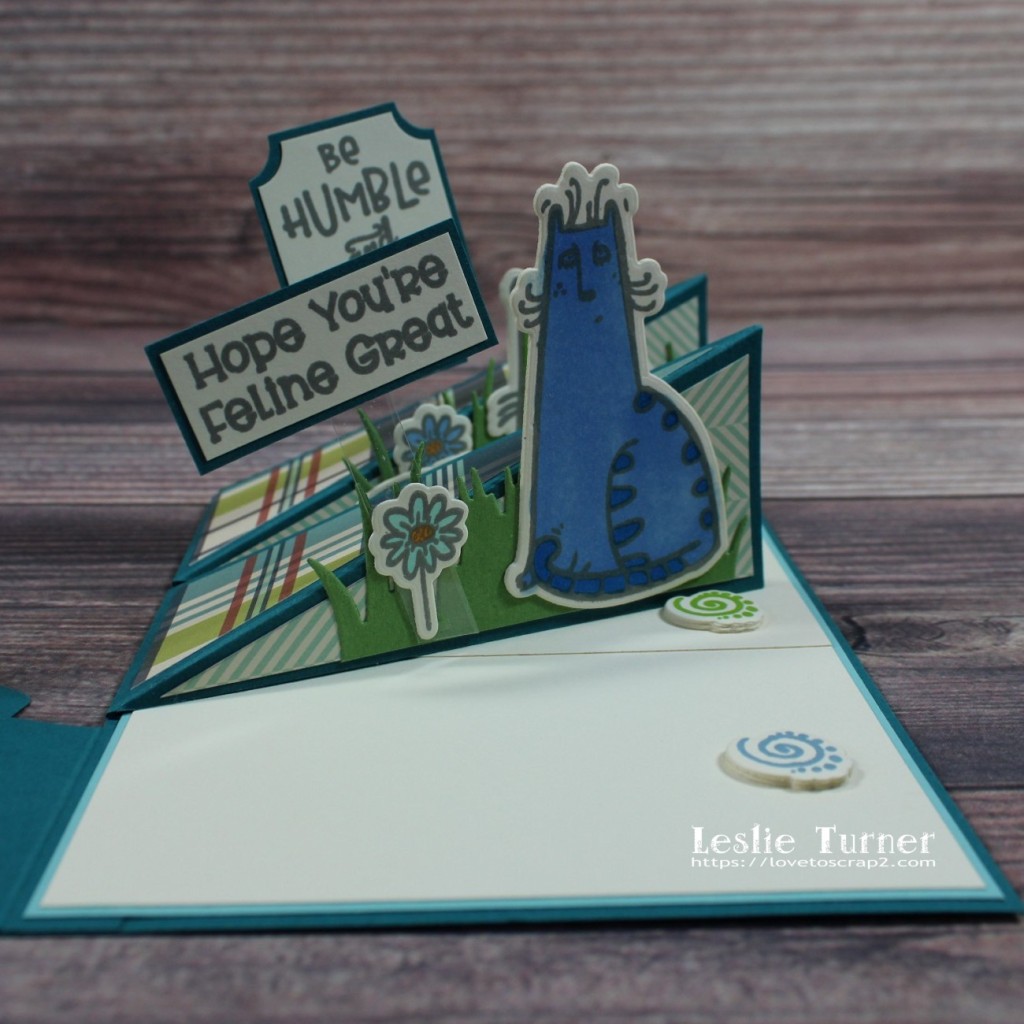
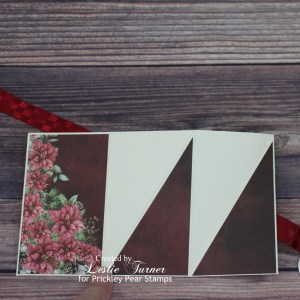
And one more look…. folded flat for mailing. So stinkin’ cute, I can’t stand it! LOVE this fold and these stamp sets!
Products used:
Cardstock/Paper: Neenah Classic Crest Baronial Ivory cardstock, CutCardStock Basis Teal cardstock, CutCardStock Basis Aqua cardstock, CutCardStock Pop-Tone Gumdrop Green cardstock, October Afternoon Campfire 6×6 papers
Stamps: The Cat’s Pajamas Good Meowning stamp set, The Project Bin Feline Good stamp set
Ink: Arteza alcohol markers- B14/37, YG06, BG19, R21, YR15; Catherine Pooler ink- Twilight, Stone Blue, In the Park, Lime Rickey
Dies/Punches: The Cat’s Pajamas Grassy Patches die set, Tonic corner punch
Accessories: Tonic Studios 12″ Guillotine Paper Trimmer, Bearly Art precision craft glue, Big Shot, MISTI stamp tool, Darice Hercules double-sided tape, Grafix Craft Plastic
I hope you’ve enjoyed today’s project and you’ll consider joining us! Pop over to the 2021 Cat Lovers Hop to get all the details! Thanks so much for stopping by today – we’ll see you next time! ;)
Scrappy hugs,