Christmas Double Pleated Fold

Hi friends! I hope it’s not too cold where you are… it’s technically not even Winter yet, lol! We woke up to 2 degrees a couple days ago and I believe it was 8 degrees yesterday morning! I’m delighted to be back to share another ScrapbookingStore DT inspiration project with you today, created with the amazing December 2022 Scrapbook Kit with Upgrades! I’m really loving all the Christmas-themed papers, coordinating stickers and upgrades in this month’s collection. I make Christmas cards all year long and already mailed out this year’s cards, so I have a head-start on next year’s! This card features a double pleated fold element on the front created from a houndstooth (on one side) and floral (on the other side) paper which I embellished with the chipboard doll from the upgrades!

I cut a standard A2 size side-folding landscape card base from CutCardStock Basis White cardstock along with a layering panel from CutCardStock Kale Green cardstock. I created the double pleated fold element using paper in the collection. I embellished it with Eyelet Outlet clear jewel brads and clear jewel bling strips and adhered it to the card front in a horizontal fashion. I added the chipboard doll from the upgrades to two layered die cut circles which I adhered to the center of the double pleated fold element. The finishing touch was adding a sentiment using a rub-on from the upgrades.

I cut the inside panel from Basis White cardstock and embellished it with strips of the patterned paper and kale green cardstock used on the front. I stamped a sentiment from the Stampin’ Up Oh What Fun stamp set and layered the panel on green cardstock.

Affiliate links are used in this post at no cost to you – I really appreciate your support!

ScrapbookingStore products used:
December 2022 Scrapbook Kit with Upgrades

Other products used:
Cardstock/Paper: CutCardStock Basis 80# White and Kale Green cardstock, Neenah Classic Crest 110# Solar White cardstock
Stamps: Stampin’ Up Oh What Fun stamp set
Ink: Catherine Pooler Deck the Halls ink
Dies/Punches: Spellbinders Standard Circles Large and Small dies
Accessories: Tonic Studios 12″ Guillotine Paper Trimmer, Bearly Art precision craft glue, MISTI stamping tool, Big Shot, Eyelet Outlet clear jewel brads and 3mm clear jewel bling strip

I hope you’ve enjoyed today’s project and you’re thinking about all the fun you could have with this month’s kit… you really ought to think about joining the Subscription Club! Be sure to Follow us on Facebook, Instagram, Pinterest and YouTube for lots of crafty inspiration! And if you do decide to join the Subscription Club, join our ScrapbookingStore Club Member Group on Facebook for more inspiration and to share your projects! Thanks so much for stopping by today – we’ll see you next time!

Scrappy hugs,

JOY double gate fold

Hey everybody! A big ol’ Happy Tuesday to you all! I hope your week has started off nicely! I’m stoked to be back with another Keep It Simple DT inspiration project created with products from the absolutely amazing Scandinavian Christmas Collection! And you know how I love me some fun folds, so this was definitely a ‘win-win’ kind of project! For this double gate fold, I used a buffalo plaid paper from the 6×9 Cardstock Pack, double-sided paper from the Back to Basics Ruby 12×12 Collection Pack, and an assortment of die cuts from the Die Cut Pieces Alphabits, Santa & Friends and Gnomes. This was definitely a fun one!

I created the card base using the double-sided buffalo plaid paper from the 6×9 Cardstock Pack. To create the front detail on the card base, I cut the top portion of each side of the gate fold off at an angle, flipped the pieces down, exposing the reverse side, and adhered them to the bottom of the gate fold flaps.

I created the JOY focal element by adhering die cuts from the Die Cut Pieces Alphabits, Santa & Friends and Gnomes to a circle die cut from Neenah Classic Crest Solar White cardstock, and adhered the element to the left side of the card front.

I cut the inside panel from 80# Solar White cardstock and embellished it with strips cut from a red paper in the Back To Basics Ruby 12×12 Collection Pack and a blue paper in the 6×9 Cardstock Pack along with a die cut from the Die Cut Pieces Santa & Friends. I stamped a sentiment from the Santa & Friends stamps in Catherine Pooler Stone Blue ink, and layered the panel on the blue paper.

Keep It Simple products used:
Scandinavian Christmas 6×9 Cardstock Pack
Back to Basics Ruby 12×12 Collection Pack
Scandinavian Christmas Die Cut Pieces Alphabits
Scandinavian Christmas Die Cut Pieces Santa & Friends
Scandinavian Christmas Die Cut Pieces Gnomes
Scandinavian Christmas Santa & Friends stamps

Affiliate links are used in this post at no cost to you – I really appreciate your support!

Other products used:
Cardstock/Paper: Neenah Classic Crest 110# and 80# Solar White cardstock
Ink: Catherine Pooler Stone Blue ink
Dies/Punches: Spellbinders Standard Circles Large die
Accessories: Tonic Studios 12″ Guillotine Paper Trimmer, Bearly Art precision craft glue, MISTI stamping tool, Big Shot, Stampin’ Up Mini Dimensionals

I hope you’ve loved seeing this project as much as I loved creating it, and you’re inspired to get crafty! Be sure to check out ALL the fun goodies in the Keep It Simple store such as paper, stamps, die cuts, ephemera, washi tape and enamel dots to name just a few! You’ll go cray-cray! Be sure to Follow us on Facebook, Instagram, and Pinterest for lots of crafty inspiration! Thanks so much for stopping by today – we’ll see you next time!

Scrappy hugs,

Christmas Church

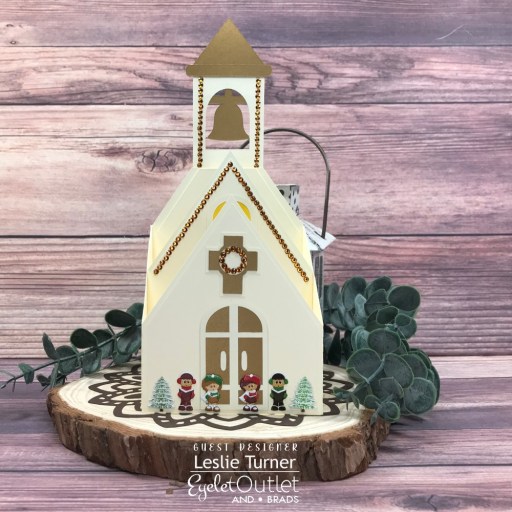
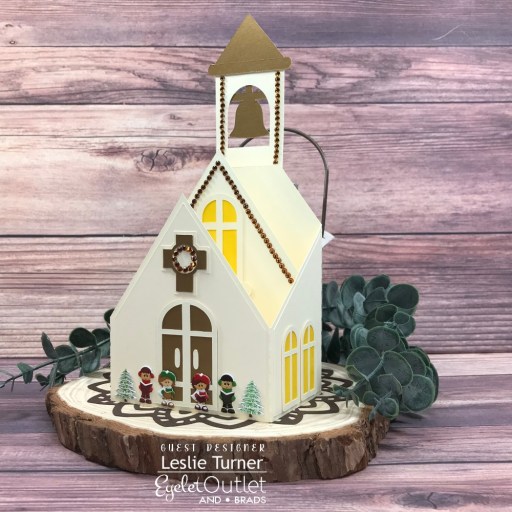
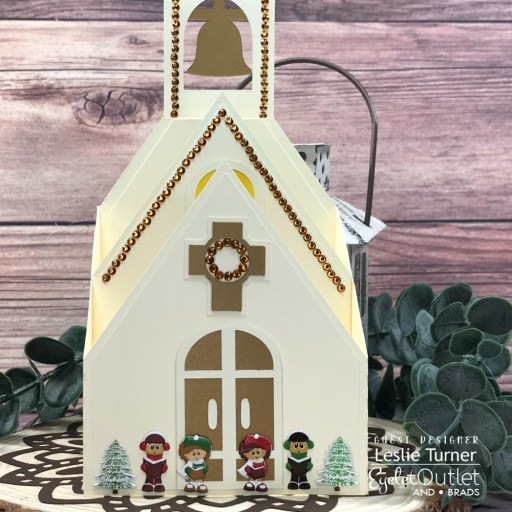
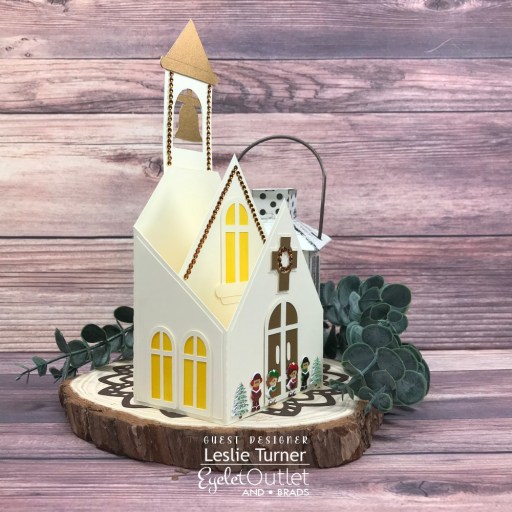
Hey everybody! Can you believe we’re almost a week into November already?! Happy Heavenly birthday to my crafty sister who would have been 74 today. I love her and miss her so much. I’m delighted to be back on the Eyelet Outlet blog today as a guest designer with my final inspiration project showcasing these new brads! This super cute Christmas Church box card features the Caroler Brads and Snow Tree Brads adorned with 3mm Champagne Jewel Bling Strip and a sentiment on the back created with Christmas Holly Washi Tape! And being a box card means it folds flat for mailing!

I cut all the pieces from Neenah Classic Crest Baronial Ivory and CutCardStock Stardream Metallic Antique Gold cardstock. I used a yellow alcohol marker to color the windows.

After assembling the church, I added the Caroler Brads and Snow Tree Brads, and then embellished all three sections with 3mm Champagne Jewel Bling Strips.

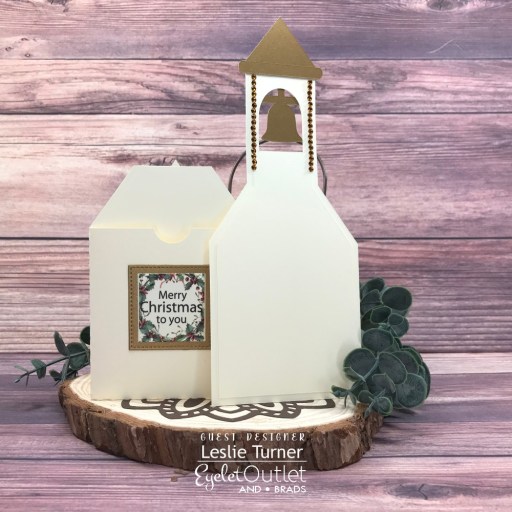
This box card has a pull-out element with plenty of room to write a custom message. The final touch was adding a sentiment on the back pocket created with a strip of Christmas Holly Washi Tape applied to a scrap of ivory cardstock, trimmed, and layered on antique gold cardstock.

Eyelet Outlet products used:
Caroler Brads
Snow Tree Brads
3mm Champagne Jewel Bling Strip
Christmas Holly Washi Tape

Affiliate links are used in this post at no cost to you – I really appreciate your support!

Other products used:
Cardstock/Paper: Neenah Classic Crest Baronial Ivory cardstock, CutCardStock Stardream Metallic Antique Gold cardstock
Ink: Arteza alcohol marker- Y02
Dies/Punches/Cut Files: My Scrap Chick Card in a Box Village House Church cut file
Accessories: Brother Scan N Cut, Bearly Art precision craft glue

I hope you’ve enjoyed today’s project! Be sure to check out all the fun goodies at Eyelet Outlet! Their products are so much fun! Be sure to ‘like’ and ‘follow’ Eyelet Outlet Facebook Page to keep up with news and sales, and while you’re at it, join the Eyelet Outlet Fans Facebook group for lots of creative inspiration! Thanks so much for stopping by today – we’ll see you next time! ;)

Scrappy hugs,

Happy Birthday Cake Card

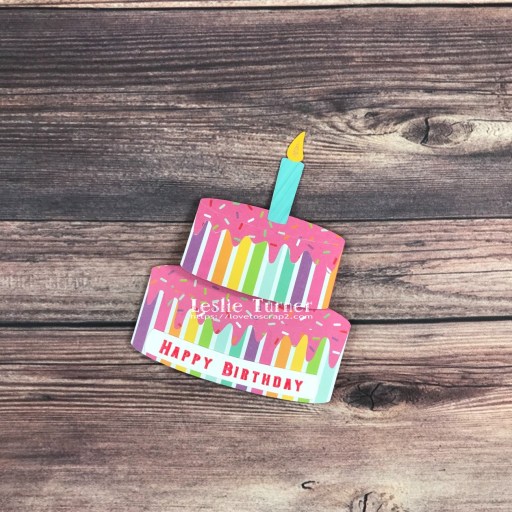
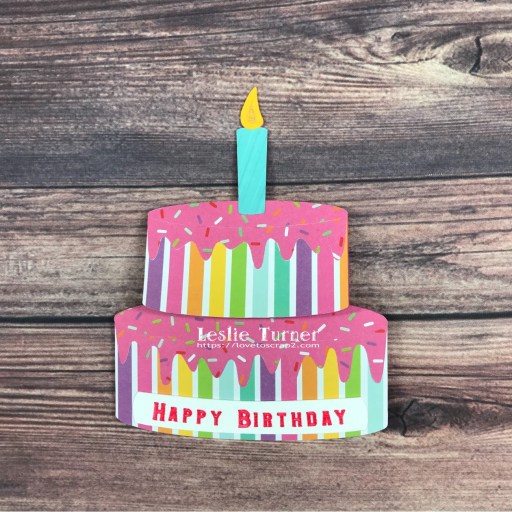
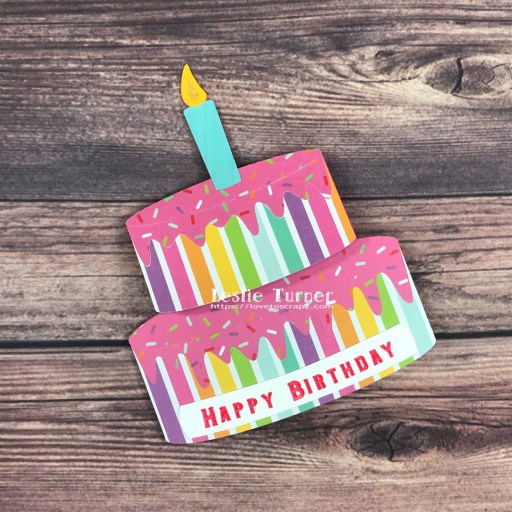
Hey, peeps! How’s the weather where you are… is it just a bit chilly, lol?! It is here and that’s how we like it! Our new challenge is live this morning over at Love To Craft Challenge Blog and I’m excited to share my DT inspiration project for LTCCB #71 – Anything Goes! I created a super cute fun fold birthday card using the Simply Crafty SVGs Birthday Cake Card cut file that I cut with my Scan N Cut. Back in January of this year I learned how to print sentiments using the draw function on my Scan N Cut, and have really enjoyed doing that on a few cards!

I cut the card base from CutCardStock Raspberry Ice cardstock, the cake elements from The Paper Studio Four Seasons and Everything In Between -2- paper pad, the candle elements from CutCardStock Basis Gold and CutCardStock Basis Aqua, and the front and inside sentiment banners from Neenah Classic Crest 80# Solar White which I printed using the draw function on my Scan N Cut prior to cutting them. As I assembled the card, I ran the candle through the Big Shot with the Cuttlebug Candy Cane Stripes Embossing Folder for a little texture and used some Sakura Clear Star shimmer on the flame.

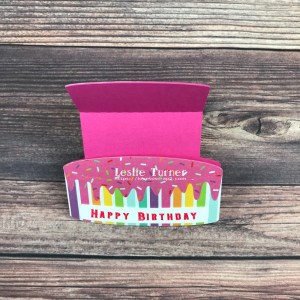
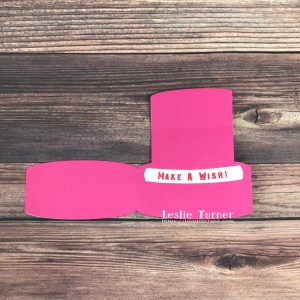
Here are a couple shots showing how the card opens.

And one more look… this was definitely a fun one and very birthday-themed with the fun pastel colors! I think it would be a great cut file to use for a wedding-themed card as well, so stay tuned! ;)

Affiliate links are used in this post at no cost to you – I really appreciate your support! 

Products used:
Cardstock/Paper: CutCardStock Raspberry Ice cardstock, CutCardStock Basis Gold, CutCardStock Basis Aqua, Neenah Classic Crest 80# Solar White cardstock, The Paper Studio Four Seasons and Everything In Between -2- paper pad
Dies/Punches/Cut Files: Simply Crafty SVGs Birthday Cake Card cut file
Ink: Scan N Cut Red Pen
Accessories: Brother Scan N Cut, Bearly Art precision craft glue, Cuttlebug Candy Cane Stripes Embossing Folder

I hope you’ve enjoyed seeing this cute birthday card and will consider linking up with us this time! Thanks so much for stopping by today – we’ll see you next time! ;)

Scrappy hugs,

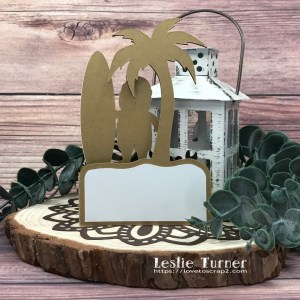
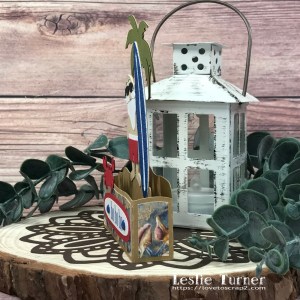
Surfin’ Santa with a ho ho ho

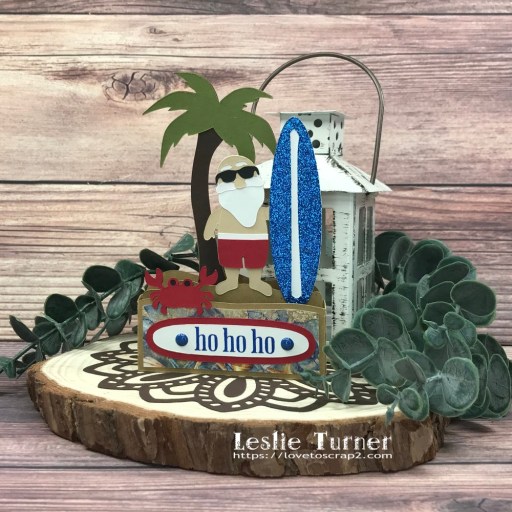
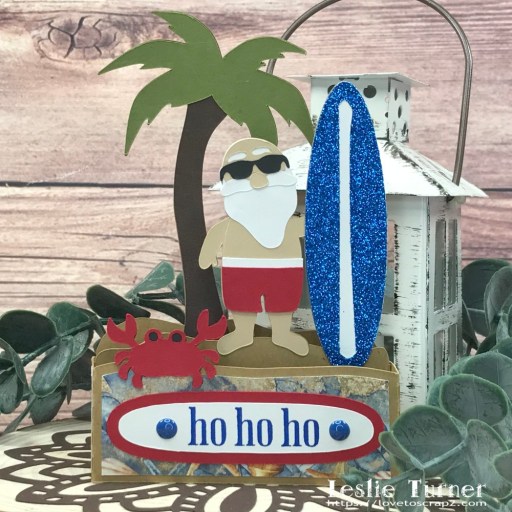
Hi friends! Happy Tuesday to you! Since it’s the first day of November, it’s busy here on my blog this morning, lol! Another one of my projects was in the Top 3 at Scrapping4fun Challenges several weeks ago and I was invited to guest for Challenge #218 – Summer/Winter, so here I am! I featured both Summer AND Winter in my DT inspiration project and just love how it turned out! You know I’m a huge fan of box cards, so I used the Surfing Santa Card cut file from Simply Crafty SVGs!

I cut the card base from Cardstock Warehouse Brown Box 100# Kraft cardstock, and the rest of the pieces from CutCardStock Pop Tone Black Licorice, Pop Tone Hot Fudge, Pop Tone Jellybean Green, Pop Tone Sweet Tooth, Pop Tone Wild Cherry, and Sandcastle cardstock, along with Hot Off The Press Seascapes & Sand 6×6 double-sided cardstock and Brutus Monroe blue glitter cardstock. I always say the most fun part is the assembly, and this one was no different! I love watching them come to life!

Here is a shot of the back showing the panel to write a custom message and signature and an angled side shot showing the construction. Box cards are so much fun!

Affiliate links are used in this post at no cost to you – I really appreciate your support! 

Products used:
Cardstock/Paper: Cardstock Warehouse Brown Box 100# Kraft cardstock; CutCardStock Pop Tone Black Licorice, Pop Tone Hot Fudge, Pop Tone Jellybean Green, Pop Tone Sweet Tooth, Pop Tone Wild Cherry, and Sandcastle cardstock; Hot Off The Press Seascapes & Sand 6×6 double-sided cardstock, Brutus Monroe blue glitter cardstock
Stamps: Paper Smooches Holiday Cheer stamp set
Ink: Catherine Pooler Suede Shoes ink
Dies/Punches/Cut Files: Simply Crafty SVGs Surfing Santa Card cut file
Accessories: Bearly Art precision craft glue, MISTI stamp tool, Eyelet Outlet blue Enamel Dots

I hope you’ve enjoyed seeing this project and will link up a Winter/Summer project with us this time – can be either/or or both like I did, lol! Thanks so much for stopping by today – we’ll see you next time! ;)

Scrappy hugs,

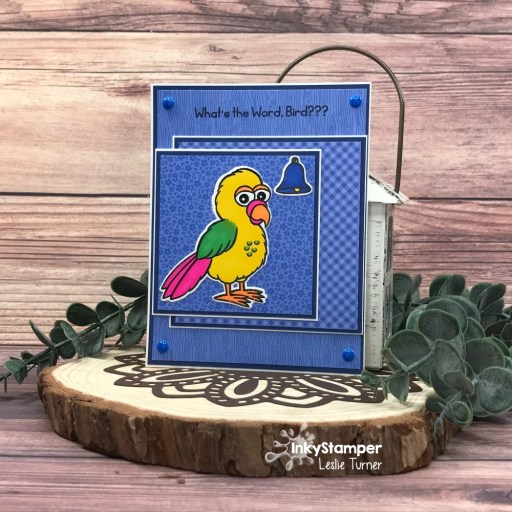
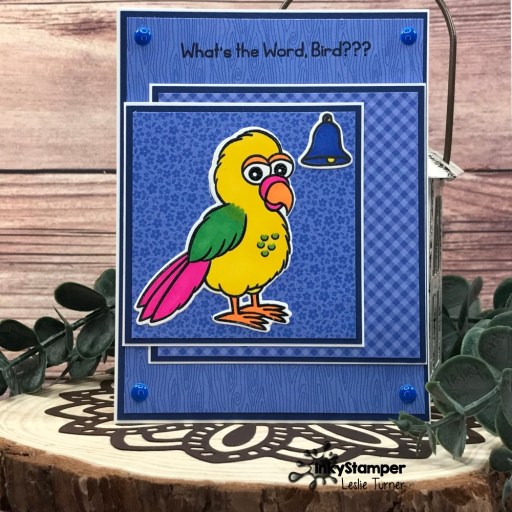
What’s the Word, Bird???

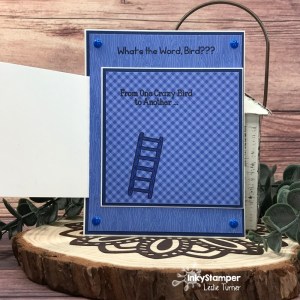
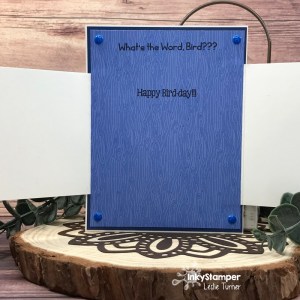
Howdy peeps! Yikes, it’s the last Wednesday in October and Christmas is going to be here in the blink of an eye! I’m delighted to be back with one more guest design project for InkyStamper and am kinda sad to see it come to an end! I’ve had a grand time playing with their stamps and dies! I created this double flap card with the super cute Bird stamps and die in various blue patterns from the Doodlebug Design Buffalo Check-Wood Grain, Gingham-Linen, and Floral-Graph Rainbow Petite Prints. This is such a fun fold and I’m thrilled with how it turned out!

I cut the card base from 110# Solar White cardstock and the left and right flaps from 80# Solar White along with layering panels from CutCardStock Basis Blue cardstock. Next, I cut panels from a variety of patterns in the Doodlebug Design Buffalo Check-Wood Grain, Gingham-Linen, and Floral-Graph Rainbow Petite Prints cardstock pads. I stamped the bird and bell in Memento Tuxedo Black ink on 110# Solar White cardstock, stamped again in Versamark, and heat embossed them with Hero Arts Clear Embossing Powder. I colored them with alcohol markers and cut them with the coordinating dies.

I stamped a sentiment and ladder on the middle panel, and two more sentiments on the back panel.

Sharing in the following challenges:
1. My Time To Craft Challenge Blog: #493 – Wings
2. Penny’s Paper-Crafty Challenge Blog: #533 – Anything Goes with Paper

InkyStamper products used:
Bird stamps and die
Doodlebug Design Buffalo Check-Wood Grain Rainbow Petite Prints 6×6 Double-Sided Cardstock
Doodlebug Design Gingham-Linen Rainbow Petite Prints 6×6 double-sided cardstock
Doodlebug Design Floral-Graph Rainbow Petite Prints 6×6 Double-Sided Cardstock

Affiliate links are used in this post at no cost to you – I really appreciate your support! 

Products used:
Cardstock/Paper: Neenah Classic Crest 110# and 80# Solar White cardstock, CutCardStock Basis Blue cardstock
Ink: Memento Tuxedo Black ink, Versamark; Arteza alcohol markers- Y02, YR04, RP04, B23, G15
Accessories: Tonic Studios 12″ Guillotine Paper Trimmer, Bearly Art precision craft glue, MISTI stamp tool, Big Shot, Hero Arts Clear Embossing Powder, Milwaukee Heat Tool, Eyelet Outlet Blue Enamel Dots

I hope you’ve enjoyed seeing my guest design projects for InkyStamper this month because I sure have enjoyed sharing them! Check out ALL the fun goodies in the InkyStamper store – not just stamps and dies but lots of other crafty products, too! Follow on Facebook, Instagram and YouTube for lots of crafty inspiration! Thanks so much for stopping by today – we’ll see you next time! ;)

Scrappy hugs,

friend

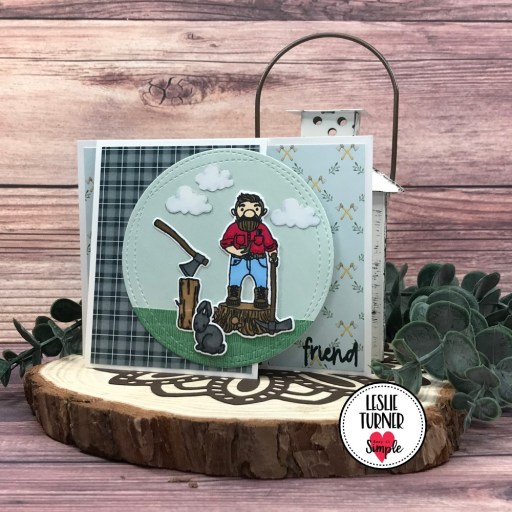
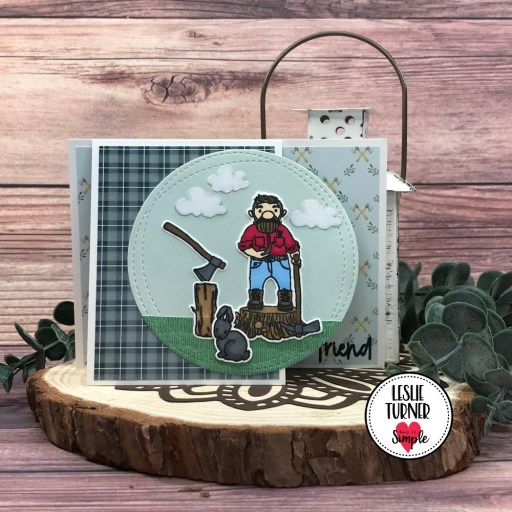
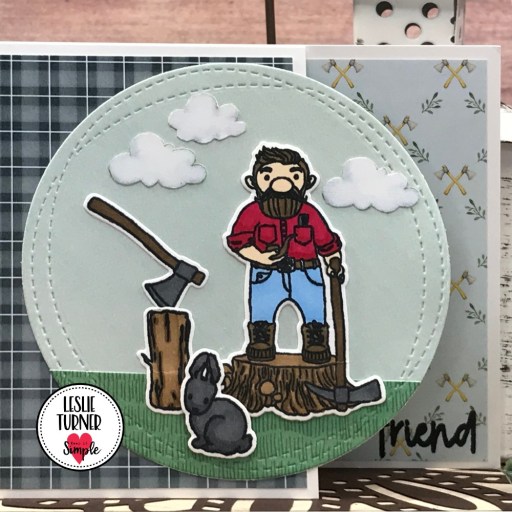
Howdy peeps! Dang, this month is flying by – hard to believe it’s already the 23rd! I’m excited to be back with another Keep It Simple DT inspiration project created with products in the new Lumberjack release! I love fun folds and create them quite regularly. ;) This one is a front flap thank you card created with the Collection Pack 12×12 Cardstock and Collection Pack 6×6 Cardstock, Lumberjack Stamps and Lumberjack Outline Dies, and Camping Stamps and Camping Outline Dies. I also used the Thank You Sentiments Stamp Set from my stash along with the Back To Basics Jade Collection Pack 12×12 Cardstock and Jade Collection Pack 6×6 Cardstock which are already in the store.

I cut the card base from Neenah Classic Crest 110# Solar White cardstock along with layering panels from prints in the Lumberjack Collection Pack 6×6 Cardstock, and stamped a sentiment in Memento Tuxedo Black ink from the Thank You Sentiments Stamp Set (from my stash) in the lower right corner. Using the My Favorite Things Wonky Stitched Circle STAX Die-namics, I die cut a circle from a print in the Back To Basics Jade Collection Pack 6×6 Cardstock.

I created a little scene with stamped, colored and die cut elements from the Lumberjack Stamp & Die Bundle and Lumberjack Camping Stamp & Die Bundle. I also used a grass print from the Back To Basics Jade Collection Pack 12×12 Cardstock and fussy cut clouds from a print in the Lumberjack Collection Pack 6×6 Cardstock.

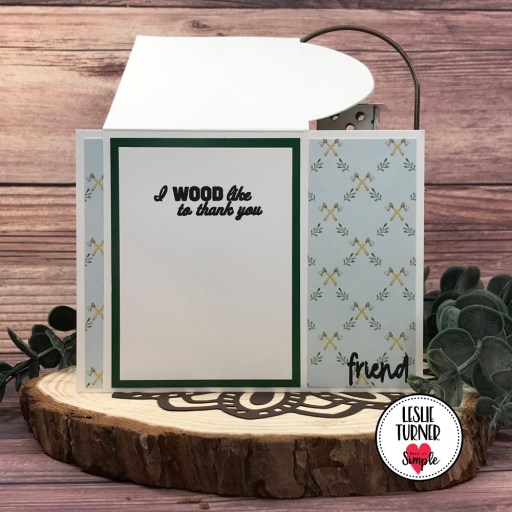
I cut the inside panel from 80# Solar White cardstock, stamped a sentiment in Tuxedo Black ink from the Lumberjack Stamps, and layered the panel on a print from the Back To Basics Jade Collection Pack 6×6 Cardstock.

Keep It Simple products used:
Lumberjack Collection Pack 12×12 Cardstock
Lumberjack Collection Pack 6×6 Cardstock
Lumberjack Stamps
Lumberjack Outline Dies
Lumberjack Camping Stamps
Lumberjack Camping Outline Dies
Thank You Sentiments Stamp Set
Back To Basics Jade Collection Pack 12×12 Cardstock
Back To Basics Jade Collection Pack 6×6 Cardstock

Sharing in the following challenges:
1. A Perfect Time To Craft Open Challenge: #10-2022 – Anything Goes
2. Classic Design Challenge: October #10 – Anything Goes
3. Crafty Catz: #611 – Anything Goes w/ optional Ribbon or Twine (no twist)
4. Paperbabe Stamps: #179 – Anything Goes
5. Penny’s Paper-Crafty Challenge Blog: #532 – Anything Goes with Paper
6. Use Your Stuff: #469 – Diecuts
7. World Wide Open Design Team Challenge: #10 – Anything Goes

Affiliate links are used in this post at no cost to you – I really appreciate your support!

Other products used:
Cardstock/Paper: Neenah Classic Crest 110# and 80# Solar White cardstock
Ink: Memento Tuxedo Black ink; Arteza alcohol markers- NG04, B28, BR28/82/84, R43
Dies/Punches: My Favorite Things Wonky Stitched Circle STAX Die-namics
Accessories: Tonic Studios 12″ Guillotine Paper Trimmer, Bearly Art precision craft glue, MISTI stamping tool, Big Shot, Stampin’ Up Mini Dimensionals

I hope you’ve loved seeing this project as much as I loved creating it, and you’re inspired to get crafty! Be sure to check out ALL the fun goodies in the Keep It Simple store such as paper, stamps, die cuts, ephemera, washi tape and enamel dots to name just a few! You’ll go cray-cray! Be sure to Follow us on Facebook, Instagram, and Pinterest for lots of crafty inspiration! Thanks so much for stopping by today – we’ll see you next time!

Scrappy hugs,

Take Time To Coast

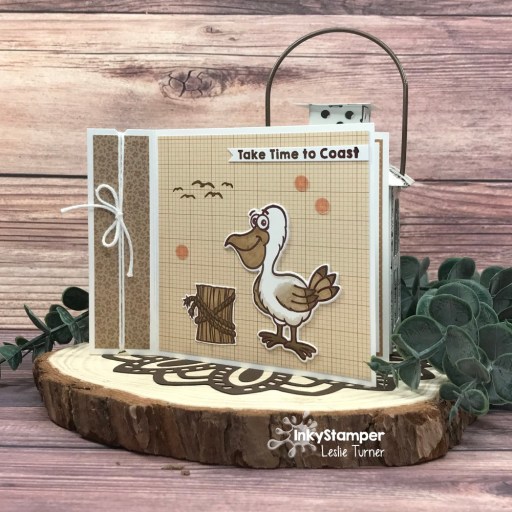
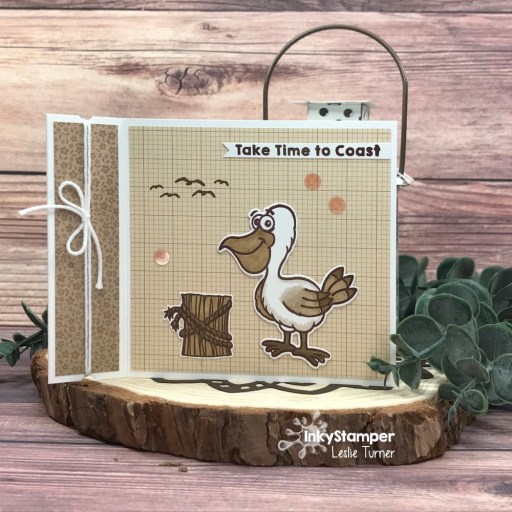
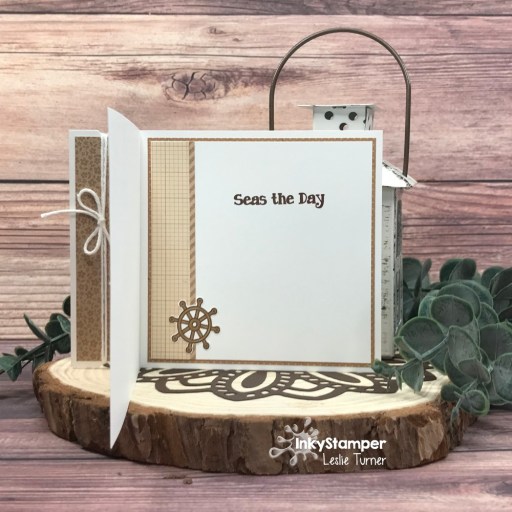
Howdy peeps! Dang, the time just seems to be going by at wicked fast speeds… we’re on the downslide to the end of October already! I’m stoked to be back with another guest design project for InkyStamper using the Pelican stamps and die! This inspirational side fold card (one of my favorites that is super easy) created with the pelican seemed like the perfect kind of card to create in varying tones of brown, and I love how it turned out!

I cut a side fold card base from 110# Solar White cardstock along with layering panels from Doodlebug Design Floral-Graph and Dot-Stripe Rainbow Petite Prints. I cut notches into the side panel and tied some Doodlebug Design Lily White Doodle Twine around it into a bow. I stamped the Pelican in Memento Rich Cocoa ink on 110# Solar White cardstock, colored it with alcohol markers, and cut it with the coordinating die. I also stamped the stump with rope in Rich Cocoa ink on Solar White cardstock, colored it with alcohol markers, and fussy cut it. I adhered the pelican and stump to the card front and then stamped the birds.

I stamped the sentiment on a scrap piece of Solar White cardstock, trimmed it, and adhered it toward the top of the card front. The finishing touch was adding several neutral colored sequins that I picked out of the Picket Fence Studios Spiked Cider Sequins.

I cut the inside panel from 80# Solar White cardstock, embellished it with the Doodlebug Design Floral-Graph print used on the front, and stamped the sentiment in Rich Cocoa ink.

Sharing in the following challenges:
1. A Perfect Time To Craft Open Challenge: #10-2022 – Anything Goes
2. Classic Design Challenge: October #10 – Anything Goes
3. QKR Stampede: #454 – Anything Goes
4. Through The Craft Room Door: Anything Goes October 11th
5. Use Your Stuff: #469 – Die Cuts
6. World Wide Open Design Team Challenge: #10 – Anything Goes

InkyStamper products used:
Pelican stamps and die
Doodlebug Design Floral-Graph Rainbow Petite Prints 6×6 Double-Sided Cardstock
Doodlebug Design Dot-Stripe Rainbow Petite Prints 6×6 Double-Sided Cardstock
Doodlebug Design Lily White Doodle Twine
Picket Fence Studios Spiked Cider Sequins

Affiliate links are used in this post at no cost to you – I really appreciate your support! 

Products used:
Cardstock/Paper: Neenah Classic Crest 110# and 80# Solar White cardstock
Ink: Memento Rich Cocoa ink; Arteza alcohol markers- WG08, BR82/84
Dies/Punches: EK Success 3/4″ Square Punch
Accessories: Tonic Studios 12″ Guillotine Paper Trimmer, Bearly Art precision craft glue, MISTI stamp tool, Big Shot

I hope you’ve enjoyed seeing this guest design project for InkyStamper! Check out ALL the fun goodies in the InkyStamper store – not just stamps and dies but lots of other crafty products, too! Follow on Facebook, Instagram and YouTube for lots of crafty inspiration! Thanks so much for stopping by today – we’ll see you next time! ;)

Scrappy hugs,

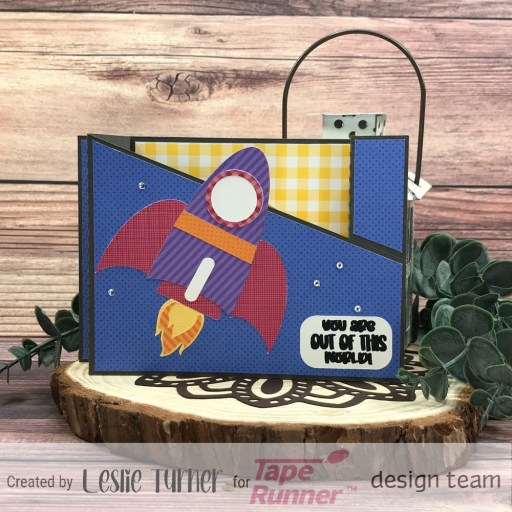
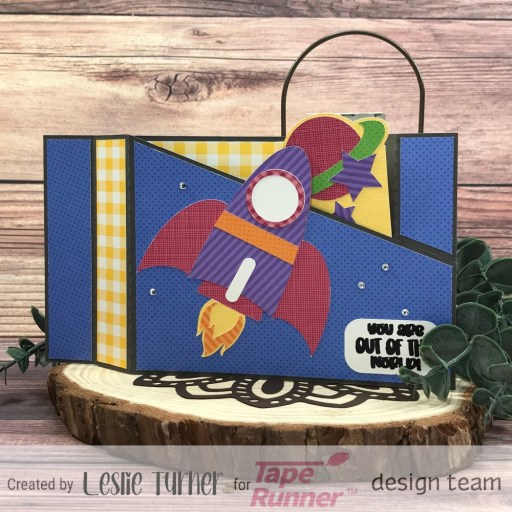
you are out of this world!

10/24/22 Top Pick at Make My Monday Challenge Blog

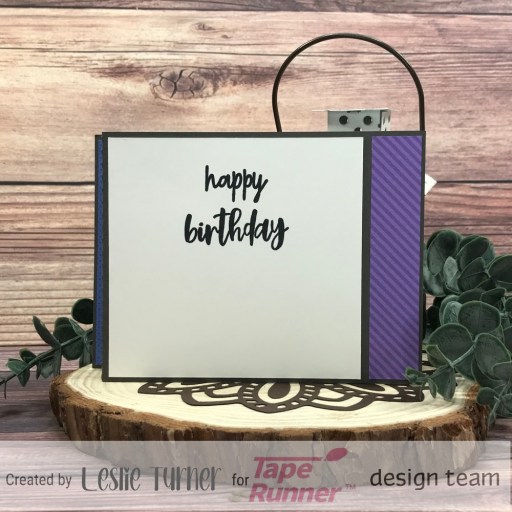
Hey everybody! Happy Hump Day! Brrr, it’s a bit chilly here this morning but that’s how we like it! I’ve popped in this morning to share an awesome Tape Runner DT inspiration project! I created the most adorable rocket wiper card for our youngest grandboy who turned two a few weeks ago, and his mom said he loved it! This is my first wiper card and I used an SVG file from My Scrap Chick. And all panels were adhered with Tape Runner!

I cut all the pieces from CutCardStock Basis Gray cardstock, Neenah Classic Crest 80# Solar White cardstock, and Doodlebug Design Dot-Stripe, Buffalo Check-Wood Grain and Gingham-Linen Rainbow Petite Prints. These prints from Doodlebug Design are some of my all-time favorites, and I wanted bright patterns for this card, so they definitely fit the bill! I used the Print and Cut function on my Scan N Cut for the sentiment, and I added several clear gemstones from an Eyelet Outlet 3mm clear Jewel Bling Strip. Here’s a shot of the wiper which appears when the sides are pulled out. So cute!

I used a sentiment from the Keep It Simple Birthday Sentiment Stamp Set, stamped in Memento Tuxedo Black ink.

Sharing in the following challenges:
1. A Perfect Time To Craft Open Challenge: #10-2022 – Anything Goes
2. AAA Birthday: #42 – A Favorite Technique (using SVG files)

3. A Place To Start – #102022 – Anything Goes w/ optional Circles and Squares (no twist)
4. Classic Design Challenge: October #10 – Anything Goes
5. Make My Monday: #185 – Birthday Wishes
6. QKR Stampede: #454 – Anything Goes
7. Use Your Stuff: #469 – Die Cuts

Tape Runner products used:
Tape Runner

Affiliate links are used in this post at no cost to you – I really appreciate your support!

Other products used:
Cardstock/Paper: CutCardStock Basis Gray cardstock, Neenah Classic Crest 80# Solar White cardstock, Doodlebug Design Dot-Stripe, Buffalo Check-Wood Grain and Gingham-Linen Rainbow Petite Prints
Stamps: Keep It Simple Birthday Sentiment Stamp Set
Ink: Memento Tuxedo Black ink
Dies/Punches/Cut File: My Scrap Chick Rocket Wiper Card cut file
Accessories: Brother Scan N Cut, Tonic Studios 12″ Guillotine Paper Trimmer, Bearly Art precision craft glue, MISTI stamping tool, Eyelet Outlet 3mm Clear Jewel Bling Strip

I hope you’ve enjoyed today’s project and you’re inspired to get your craft on! Be sure to check out the ah-mazing Tape Runner, Retractable Tape Runner and Highlight Tape Runner at TapeRunner.com! Be sure to Follow us on Facebook and Instagram! Thanks so much for stopping by today – we’ll see you next time!

Scrappy hugs,

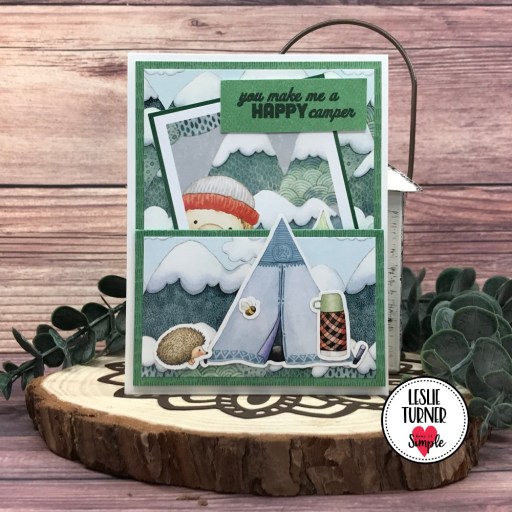
you make me a HAPPY camper

10/26/22 Top 3 at Through The Craft Room Door!

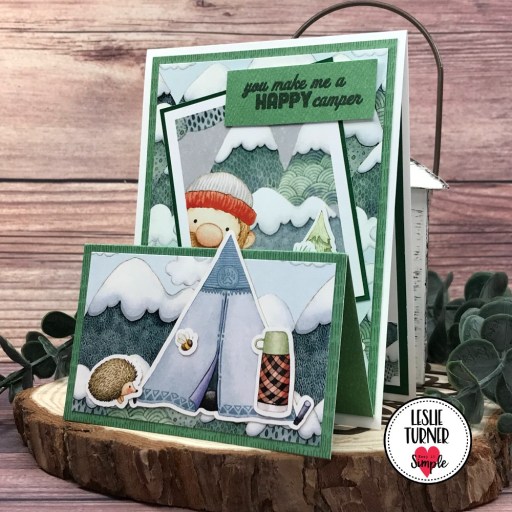
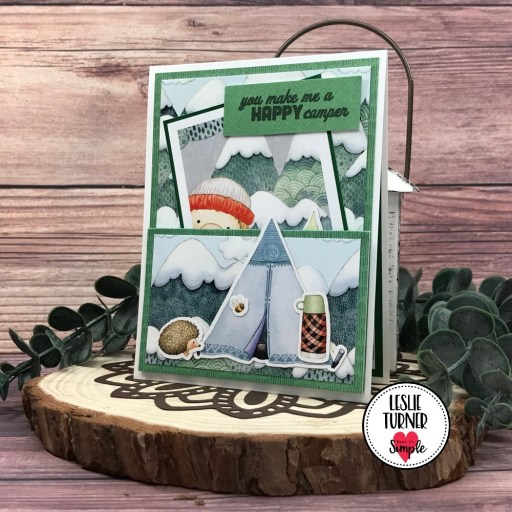
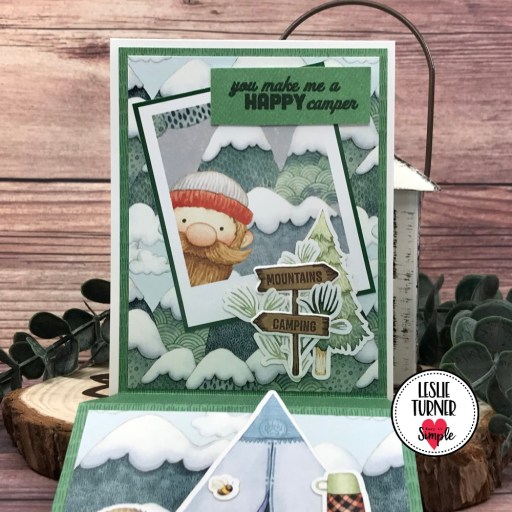
Hey everybody! Can you believe we’re in the middle of October already?! Christmas will be here before we know it! I’m stoked to be back with another Keep It Simple DT inspiration project to share! Lumberjack is their newest release and OMGoodness, you are in for a real treat! Cute, cute products that are must-haves for your crafty stash, lol! I created a double easel fold using Collection Pack 12×12 Cardstock and Collection Pack 6×6 Cardstock, Cards & Ephemera Die Cut Pieces, Die Cut Pieces, Camping Stamps and Camping Outline Dies. I also used Back To Basics Jade Collection Pack 12×12 Cardstock and Jade Collection Pack 6×6 Cardstock which are already in the store.
I cut a standard A2 size top-folding card base from Neenah Classic Crest 110# Solar White cardstock, and created the double easel fold element from a green pattern in the Back To Basics Jade Collection Pack 12×12 Cardstock. I cut layering panels from a print in the Lumberjack Collection Pack 12×12 Cardstock.

I added items from the Lumberjack Cards & Ephemera Die Cut Pieces and Lumberjack Die Cut Pieces to both background sections. I stamped, colored and die cut the wooden sign using the Lumberjack Camping Stamp & Die Bundle, and the sentiment is from the same stamp set. The photo-bombing lumberjack just cracks me up, by the way! Bahahaha!

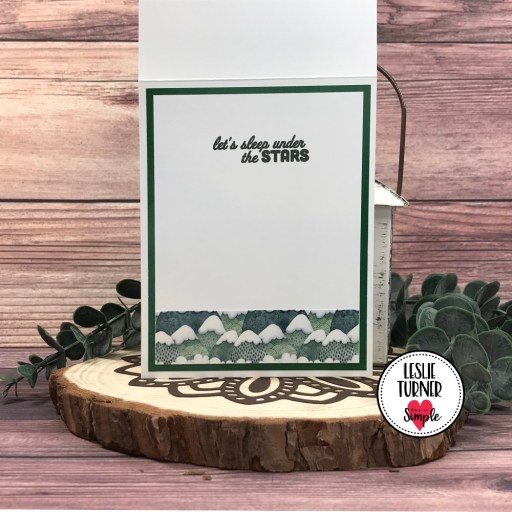
I cut the inside panel from 80# Solar White cardstock and embellished it with a print from the Lumberjack Collection Pack 6×6 Cardstock. I stamped the sentiment in Memento Northern Pine ink and layered the panel on a dark green print from the Back To Basics Jade Collection Pack 6×6 Cardstock.

Sharing in the following challenges:
1. A Perfect Time To Craft Open Challenge: #10-2022 – Anything Goes
2. A Place To Start – #102022 – Anything Goes w/ optional Circles and Squares (no twist)
3. Classic Design Challenge: October #10 – Anything Goes
4. QKR Stampede: #454 – Anything Goes
5. Through The Craft Room Door: Anything Goes October 11th

Keep It Simple products used:
Lumberjack Collection Pack 12×12 Cardstock
Lumberjack Collection Pack 6×6 Cardstock
Lumberjack Cards & Ephemera Die Cut Pieces
Lumberjack Die Cut Pieces
Lumberjack Camping Stamps
Lumberjack Camping Outline Dies
Back To Basics Jade Collection Pack 12×12 Cardstock
Back To Basics Jade Collection Pack 6×6 Cardstock

Affiliate links are used in this post at no cost to you – I really appreciate your support!

Other products used:
Cardstock/Paper: Neenah Classic Crest 110# and 80# Solar White cardstock
Ink: Memento Rich Cocoa ink, Memento Northern Pine ink; Arteza alcohol markers- BR82/84
Accessories: Tonic Studios 12″ Guillotine Paper Trimmer, Bearly Art precision craft glue, MISTI stamping tool

I hope you’ve loved seeing this project as much as I loved creating it, and you’re inspired to get crafty! Be sure to check out ALL the fun goodies in the Keep It Simple store such as paper, stamps, die cuts, ephemera, washi tape and enamel dots to name just a few! You’ll go cray-cray! Be sure to Follow us on Facebook, Instagram, and Pinterest for lots of crafty inspiration! Thanks so much for stopping by today – we’ll see you next time!

Scrappy hugs,