2/3/22 Top 3 at Penny’s Paper-Crafting Challenge Blog!
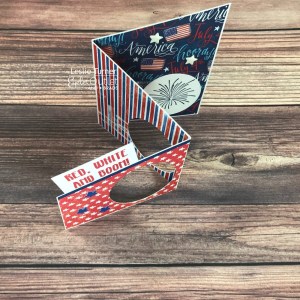
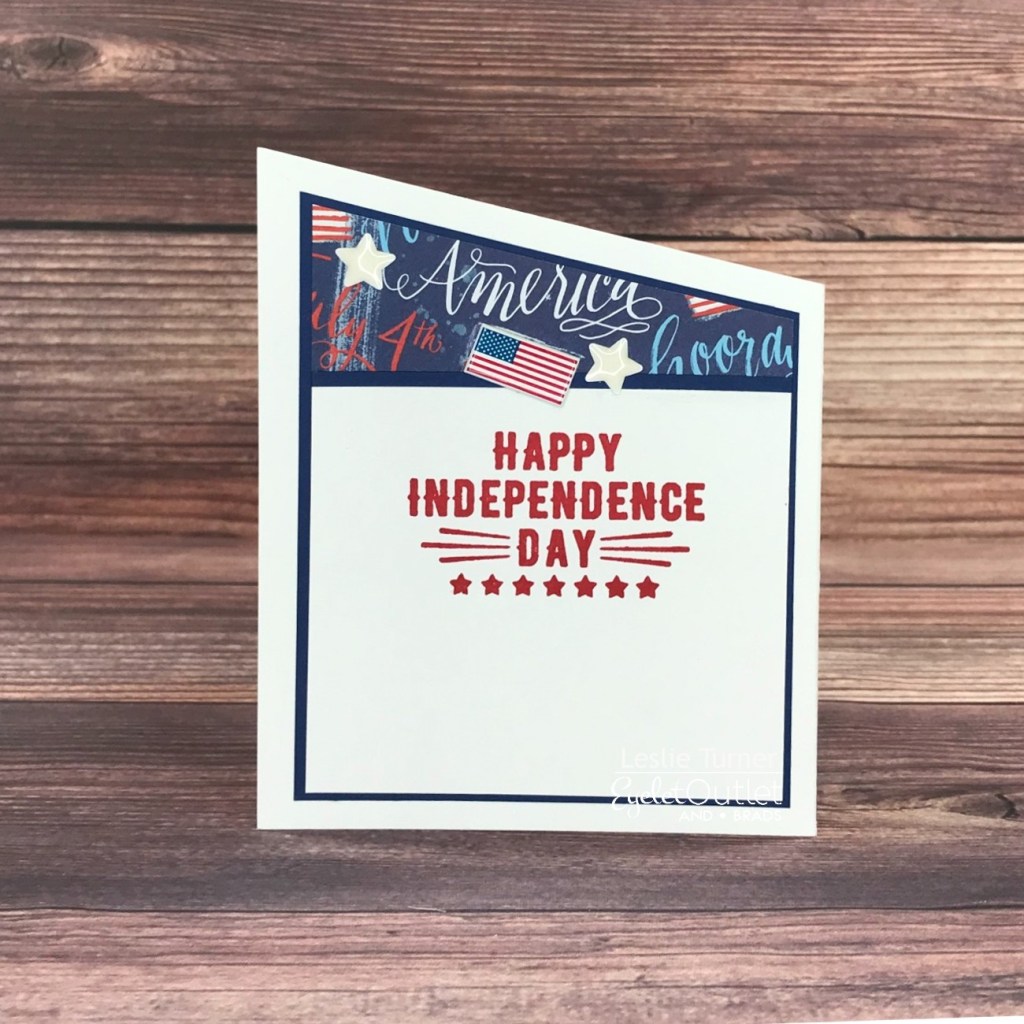
Hi everyone! A very Happy Saturday to you – I hope you’ve had a great week! Affiliate links are used in this post at no cost to you – I really appreciate your support! I’m thrilled to be back on the Eyelet Outlet blog today with another awesome DT inspiration project! I created a 4th of July card featuring our Flag & Hat Brads and Patriotic Enamel Stars! You know me and fun folds… I ran across my own zig-zag template while I was looking through my tutorial files for something else, and decided it would be perfect for this card! I went one step further on this one and die cut two round apertures to see the fireworks through, which I thought was a fun touch!
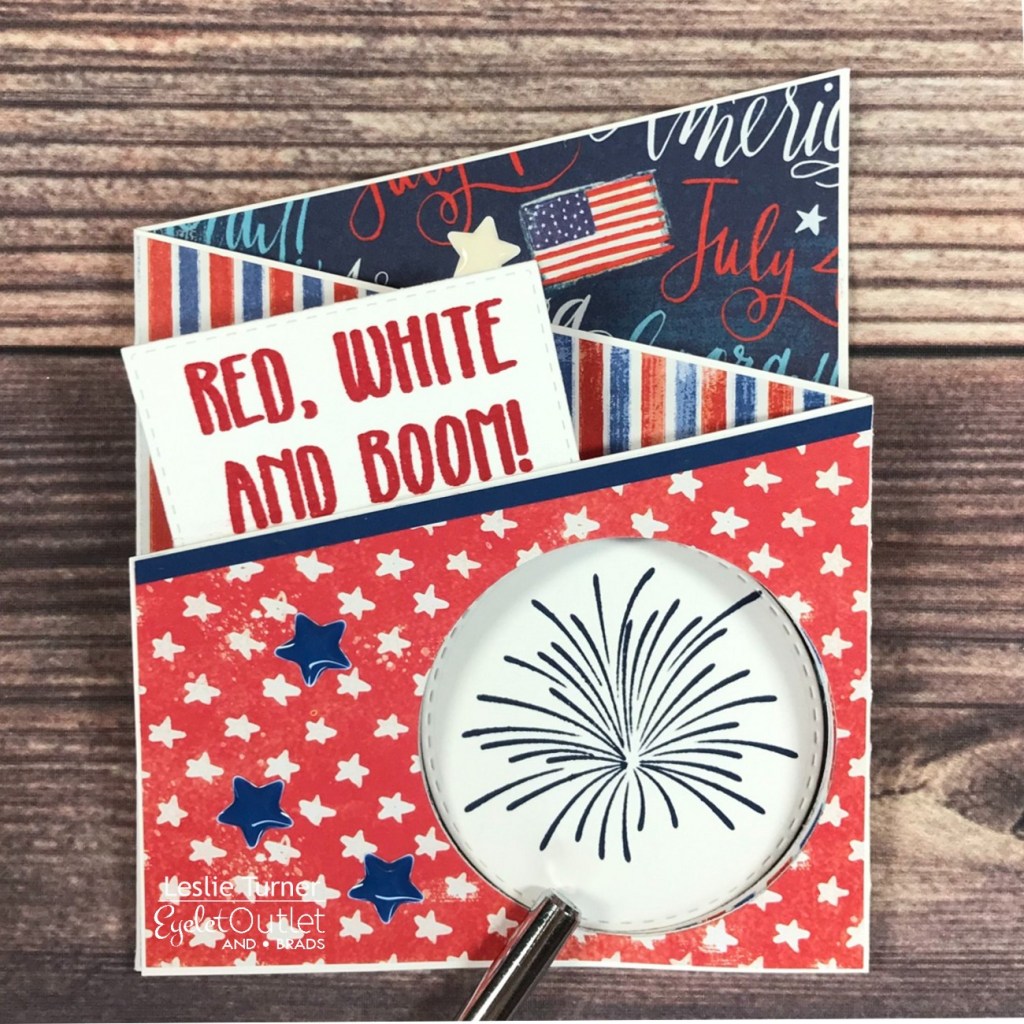
I cut the card base from Neenah Classic Crest Solar White 110# cardstock, two narrow embellishing strips from CutCardStock Basis Blue cardstock, and layering panels from assorted coordinated patriotic papers. Using a Memory Box Stitched Circle Layers die, I die cut circular apertures into the first and second sections. I stamped the fireworks on one of the negative space circular die cuts and adhered it to the third section to be seen through the apertures. I stamped the main sentiment in red ink on Neenah Classic Crest Solar White 80# cardstock, cut it with a Memory Box Stitched Rectangle Layers die and adhered it along the top of the first section.
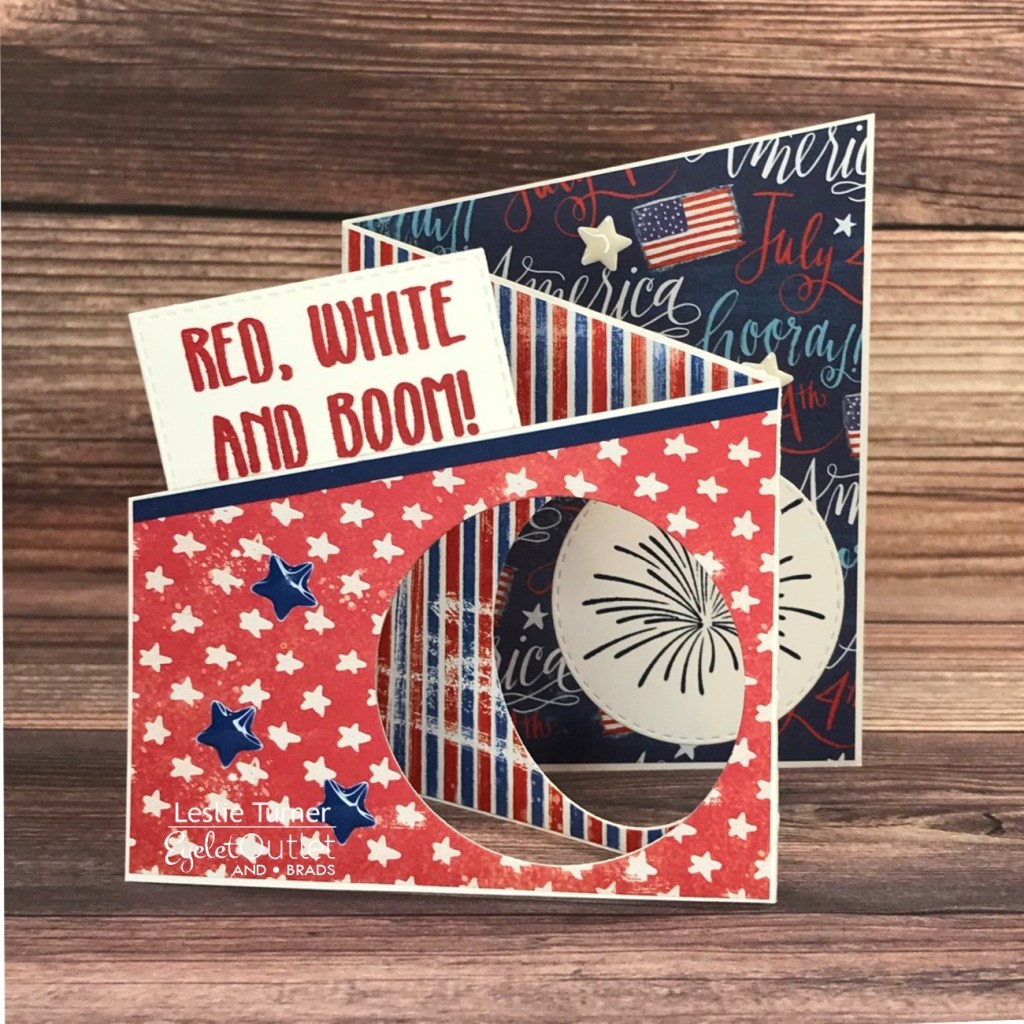
I used our blue and white Patriotic Enamel Stars to embellish all three inside sections. I affixed a hat from our Flag & Hat Brads to the second section adjacent to another stamped sentiment.
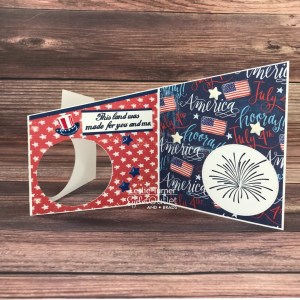
I cut the back panel from Neenah Classic Crest 80# Solar White cardstock and embellished it with a scrap from one of the patterned papers used on the front along with a narrow strip of CutCardStock Basis Blue cardstock. I stamped the sentiment in red ink, added a flag from our Flag & Hat Brads and some Patriotic Enamel Stars, and layered the panel on the blue cardstock.
And one more look… so smitten with this design! I totally love the enamel stars used with the hat and flag brads!

Sharing in the following challenges:
1. A Perfect Time To Craft Open Challenge: January #1-2022 – Anything Goes
2. Classic Design Challenge: January 2022-#1 – Anything Goes
3. Crafting Happiness Challenges: #119 – Anything Goes
4. Creative Creases: #24 – Anything Goes with a Fun Fold
5. Fab ‘n’ Funky Challenges: #543 – 2 or More Patterned Papers
6. Little Red Wagon: #637 – Make It Open
7. Penny’s Paper-Crafty Challenge Blog: #513 – Anything Goes with Paper
8. Wednesday’s Creative Inspirations Challenge Blog: January Anything Goes
Eyelet Outlet products used:
Flag & Hat Brads
Enamel Stars – Patriotic
Other products used:
Cardstock/Paper: Neenah Classic Crest 110# and 80# Solar White cardstock, CutCardStock Basis Blue cardstock, The Paper Studio Four Seasons and Everything in Between -2- paper pad
Stamps: The Project Bin Red, White & Boom! stamp set
Ink: Catherine Pooler Rockin’ Red and Juniper Mist inks
Dies/Punches: Memory Box Stitched Rectangle Layers, Memory Box Stitched Circle Layers
Accessories: Tonic Studios 12″ Guillotine Paper Trimmer, Bearly Art precision craft glue, MISTI stamp tool, Big Shot
I hope you’ve enjoyed today’s project! Be sure to check out all the fun goodies at Eyelet Outlet! I can already see you drooling, lol! Be sure to ‘like’ and ‘follow’ Eyelet Outlet Facebook Page to keep up with news and sales, and while you’re at it, join the Eyelet Outlet Fans Facebook group for lots of creative inspiration! Thanks so much for stopping by today – we’ll see you next time! ;)
Scrappy hugs,