Vintage Looks, Classic Style.

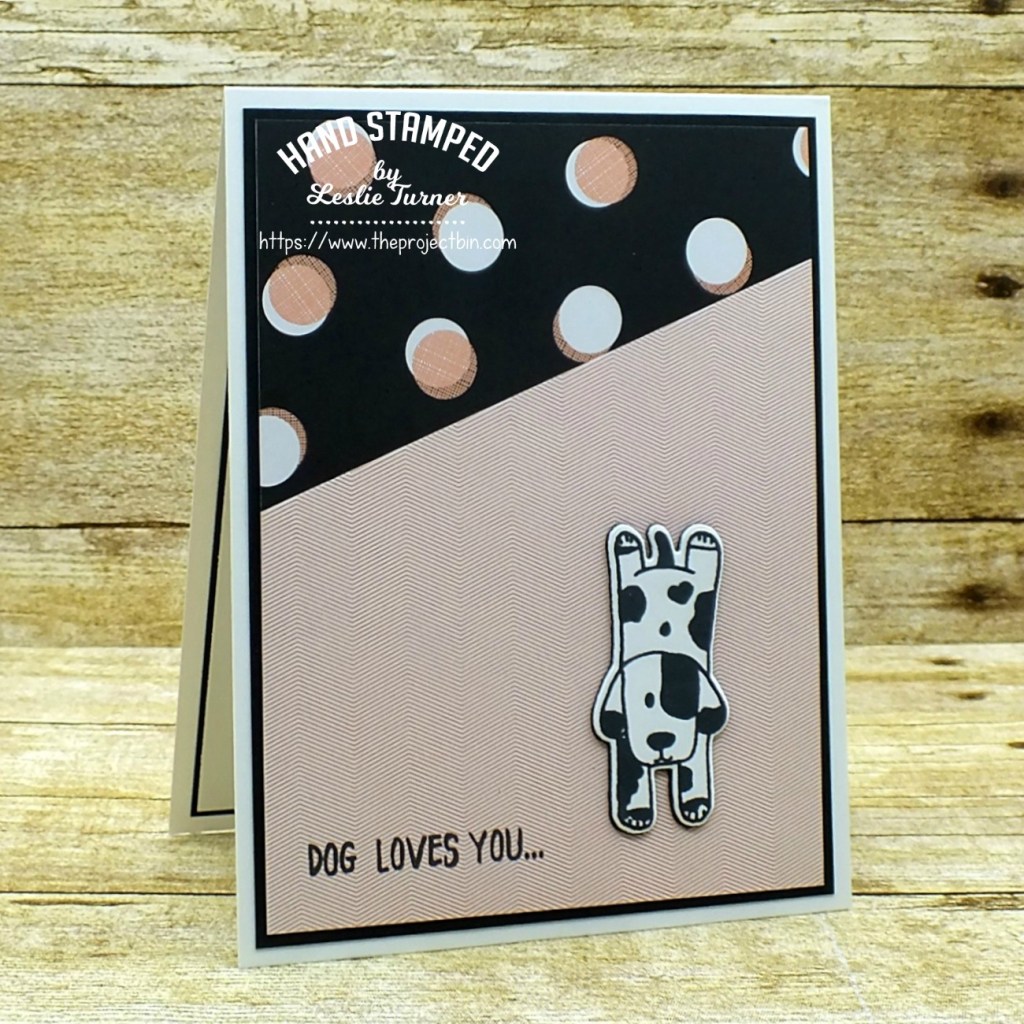
Happy Monday, friends! I’m stoked to be back on the CutCardStock blog today with an awesome DT inspiration project featuring Royal Sundance cardstock that was included in our Designer’s Pack! Affiliate links are used in this post at no cost to you. I really appreciate your support! I created a cool masculine card that would be great for Father’s Day or a male birthday!

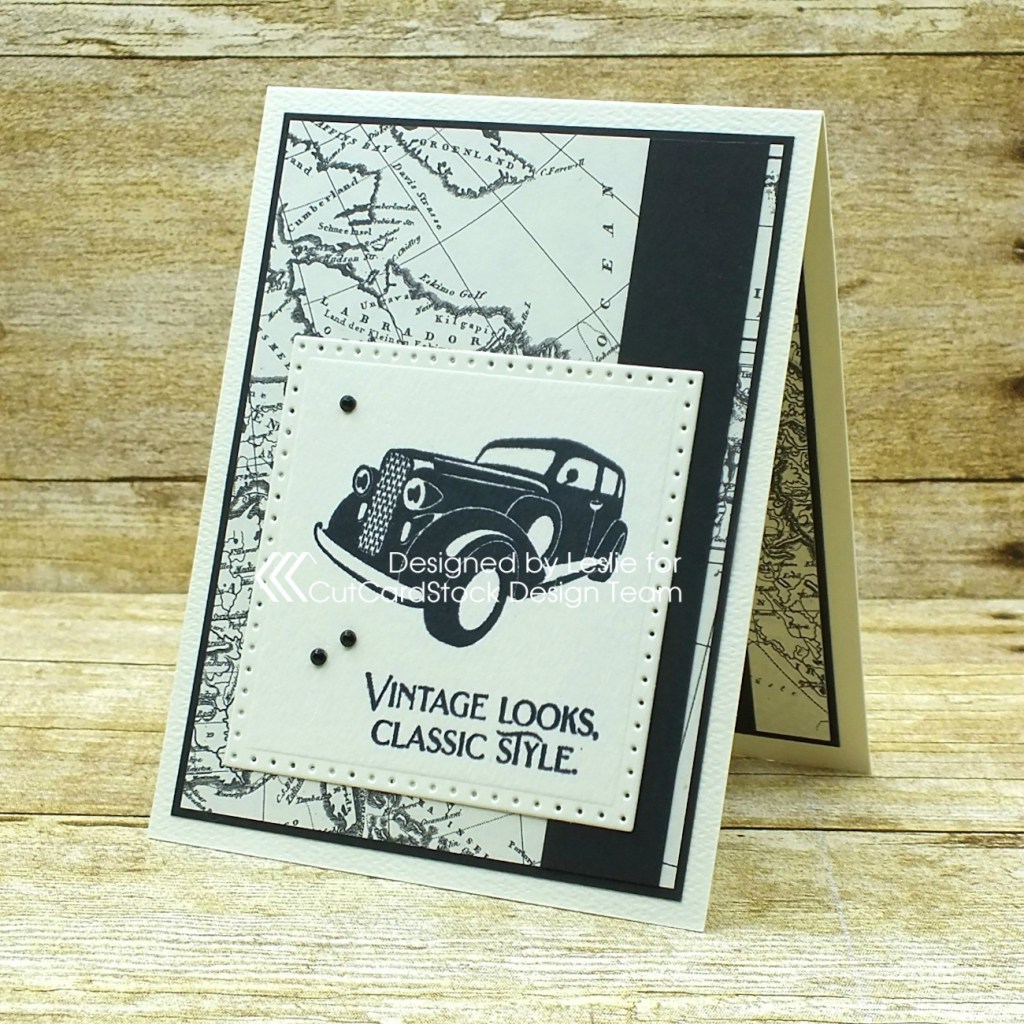
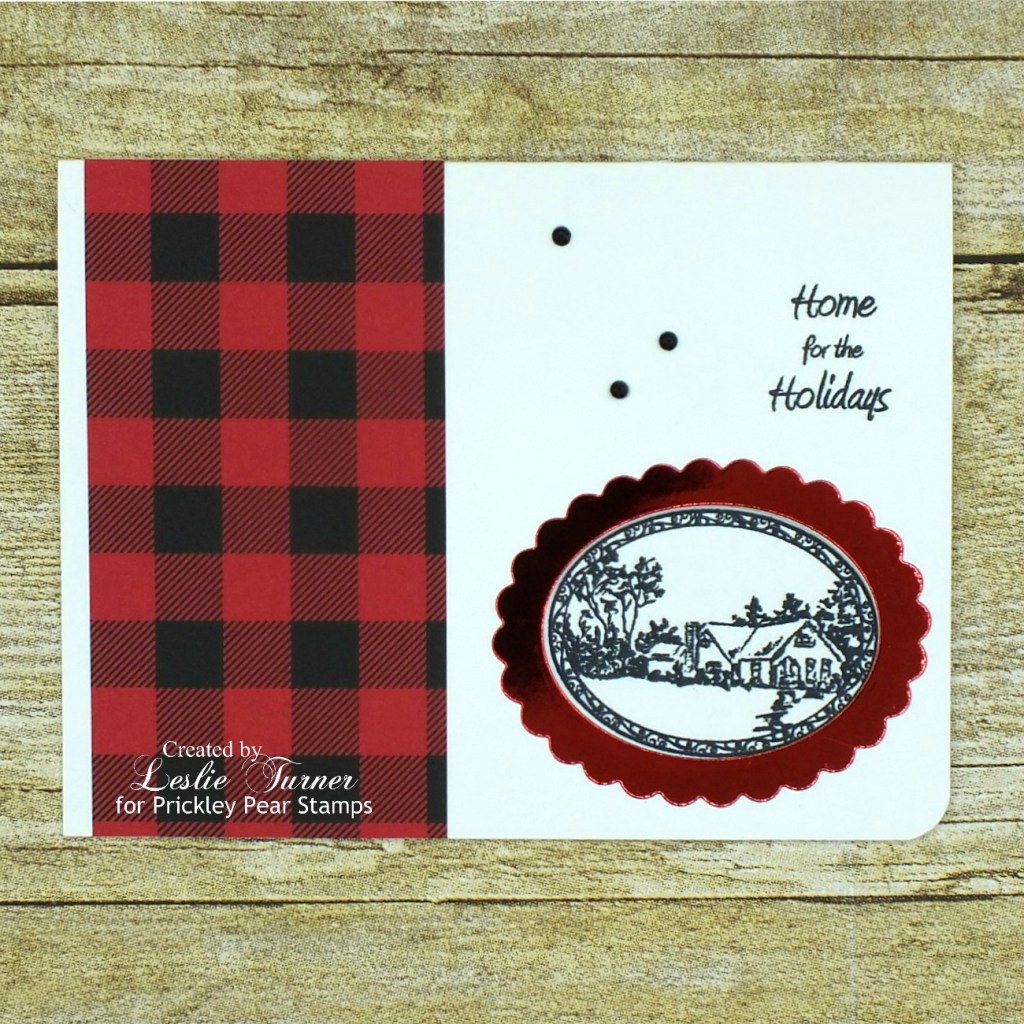
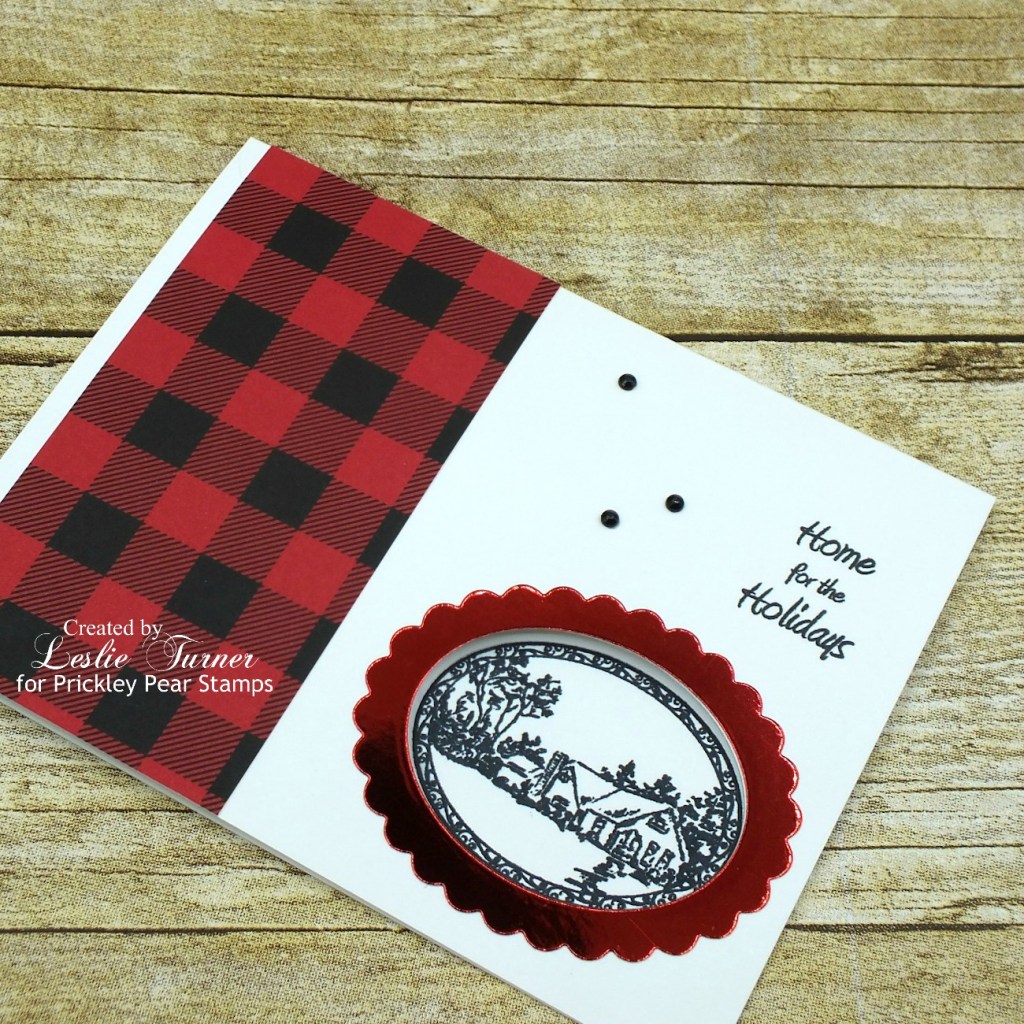
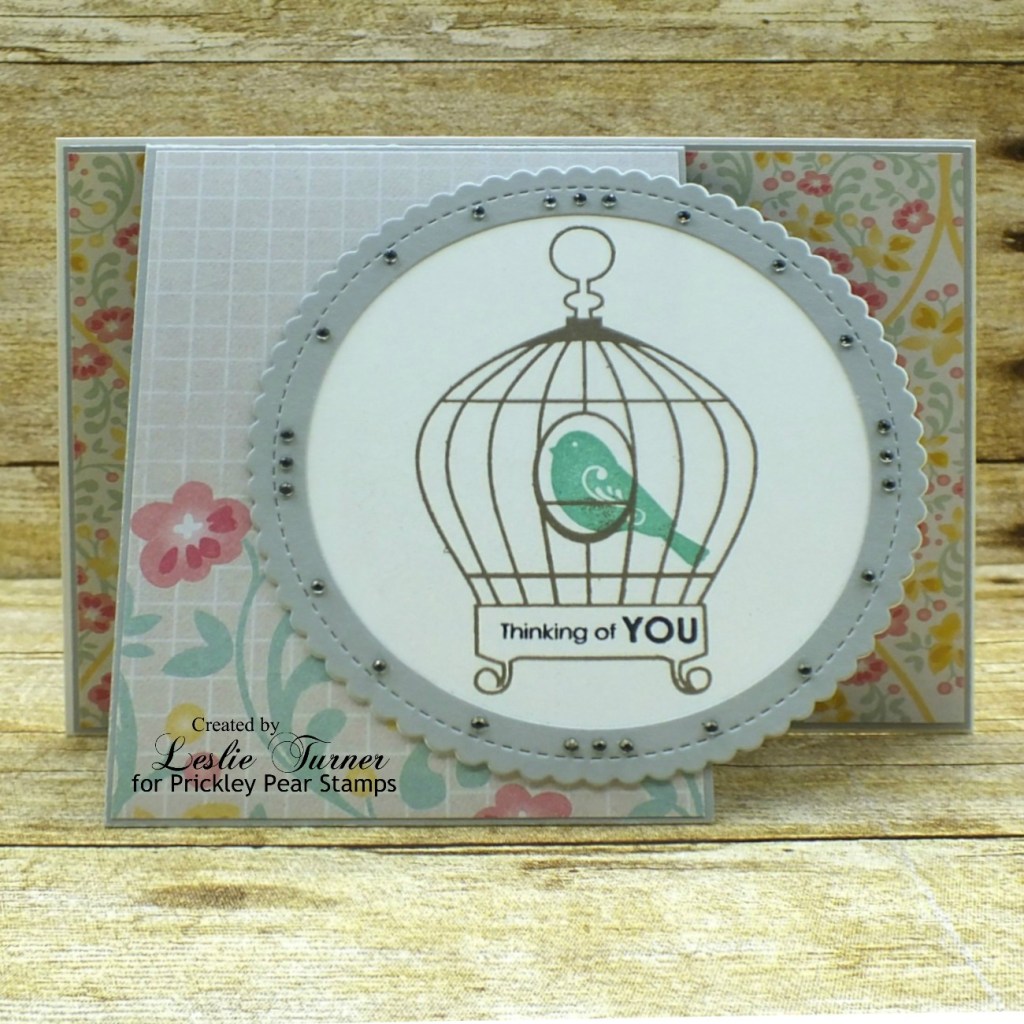
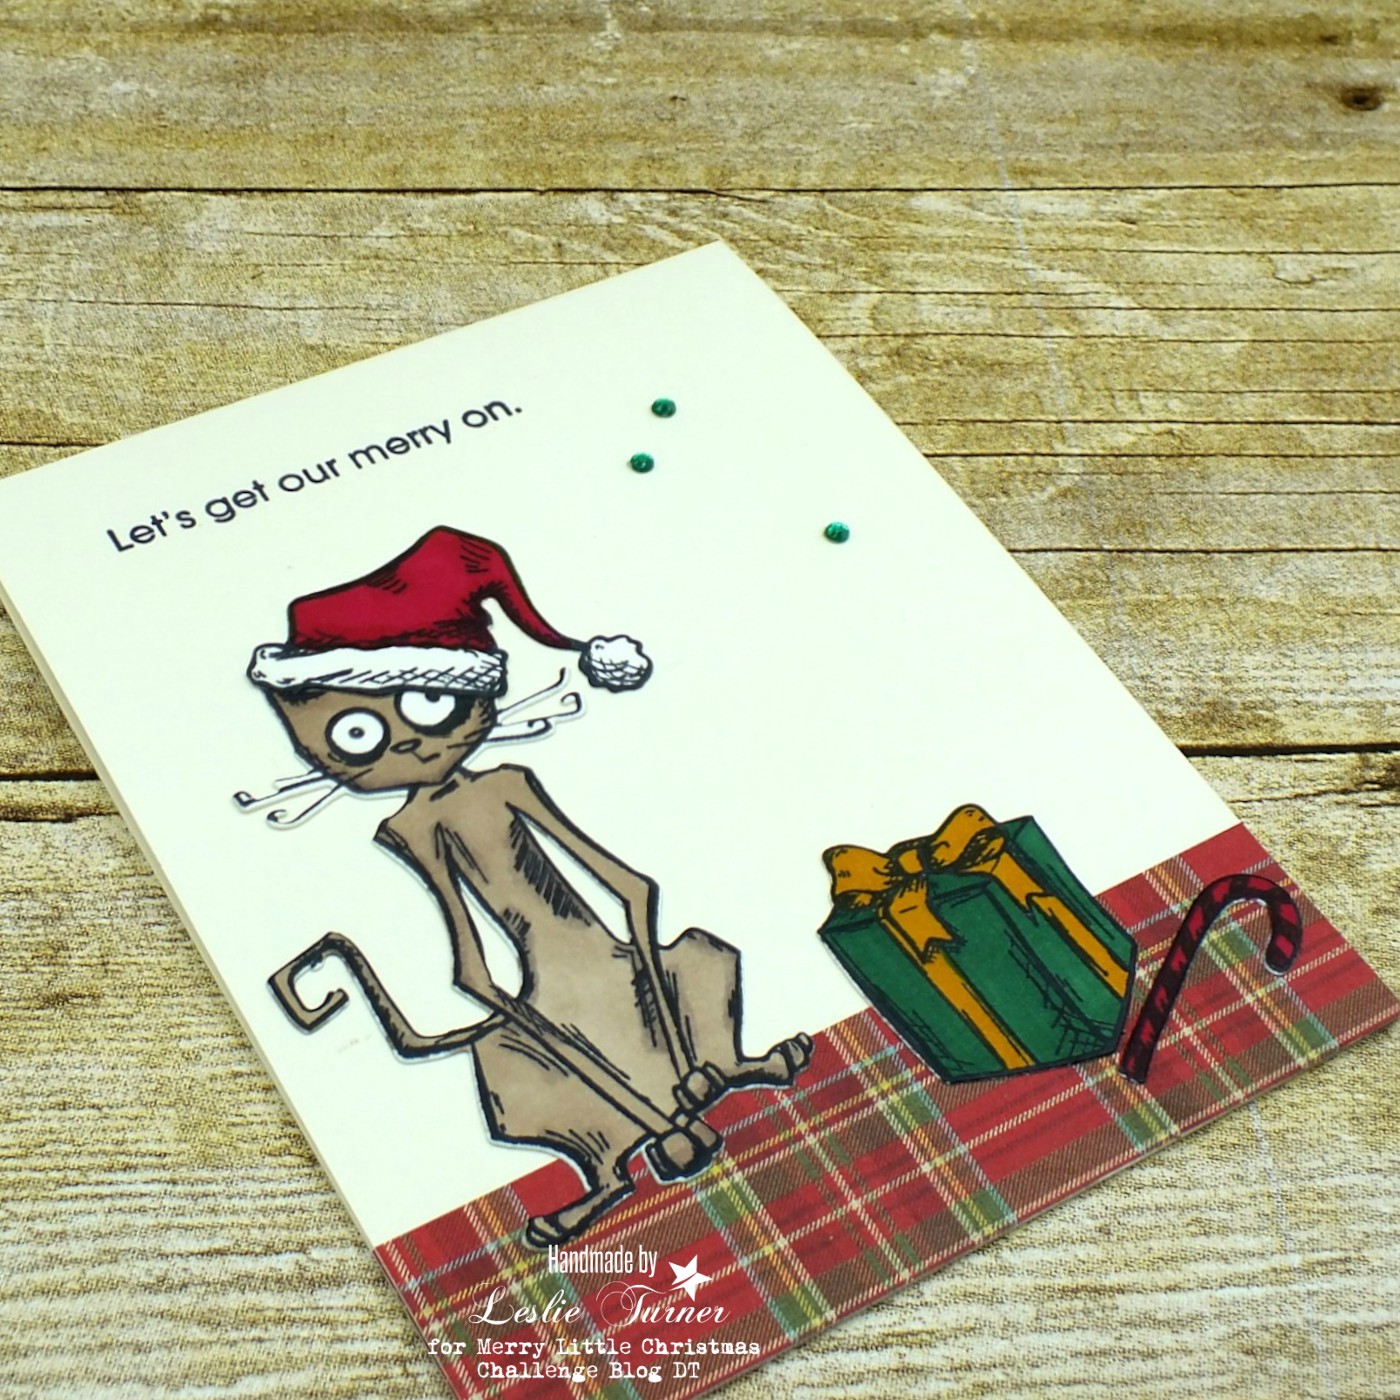
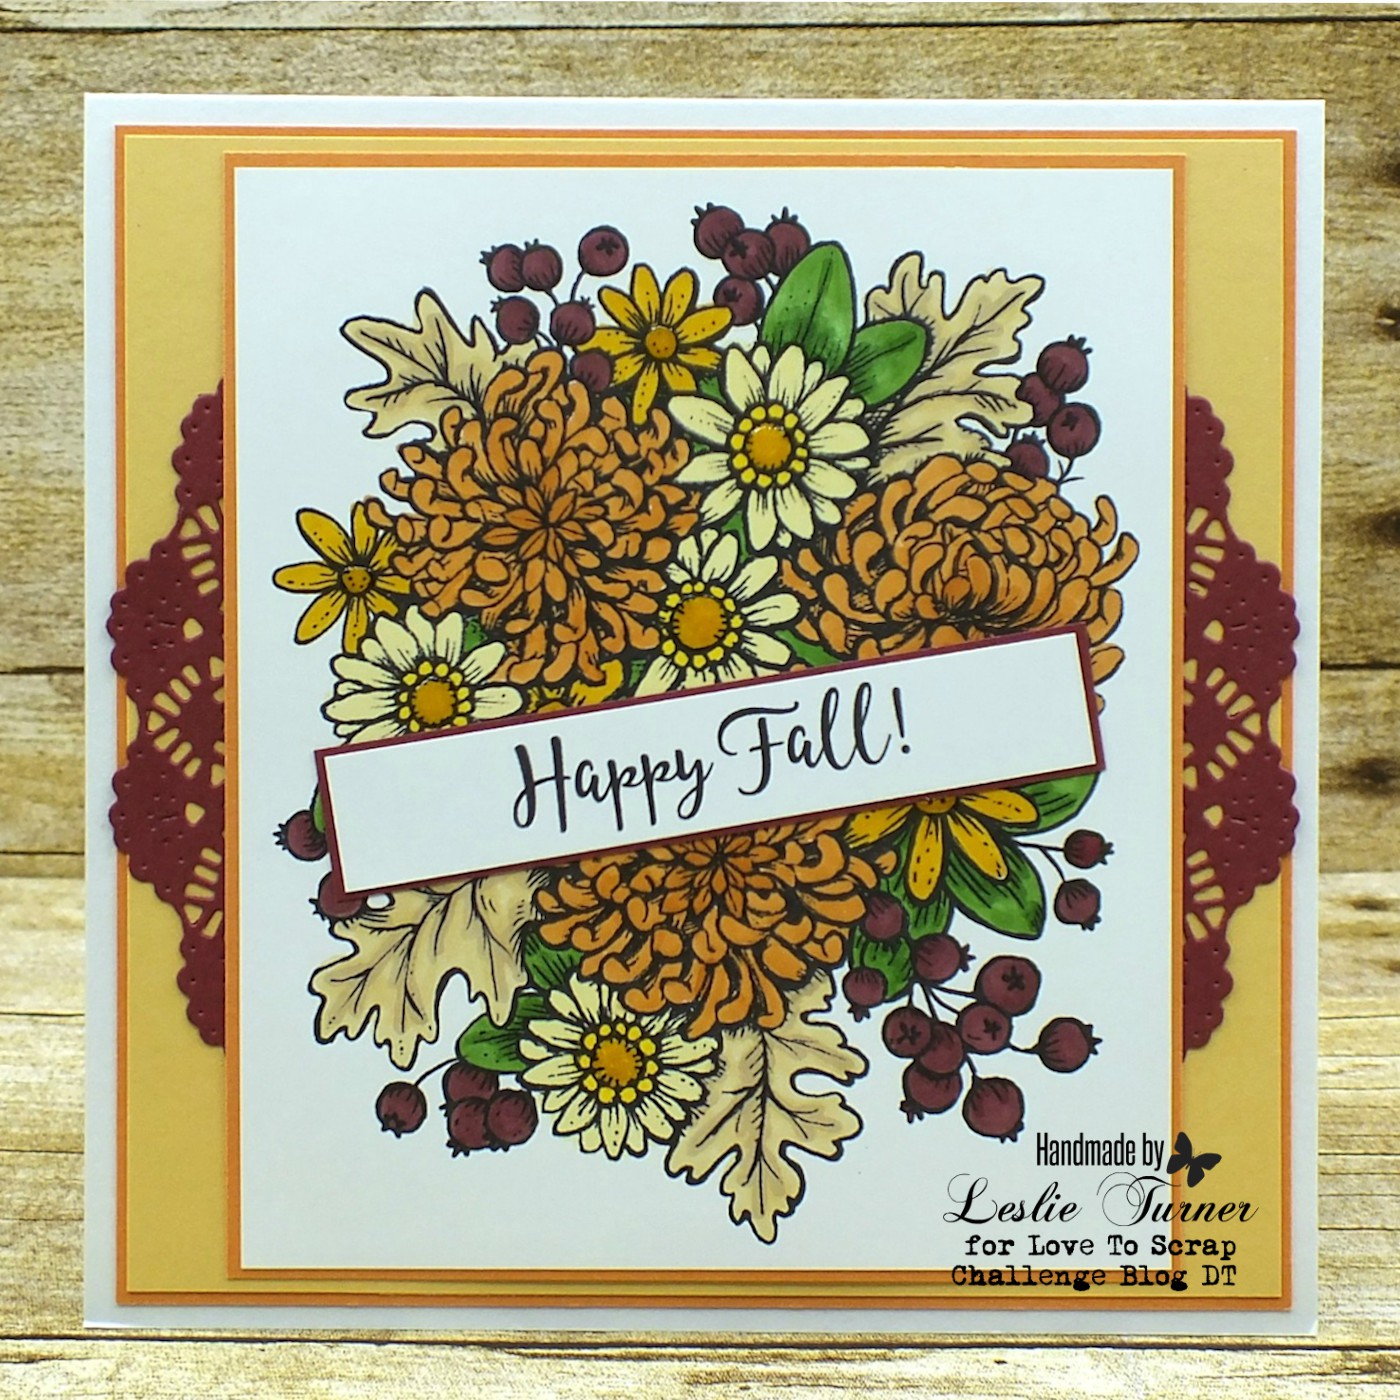
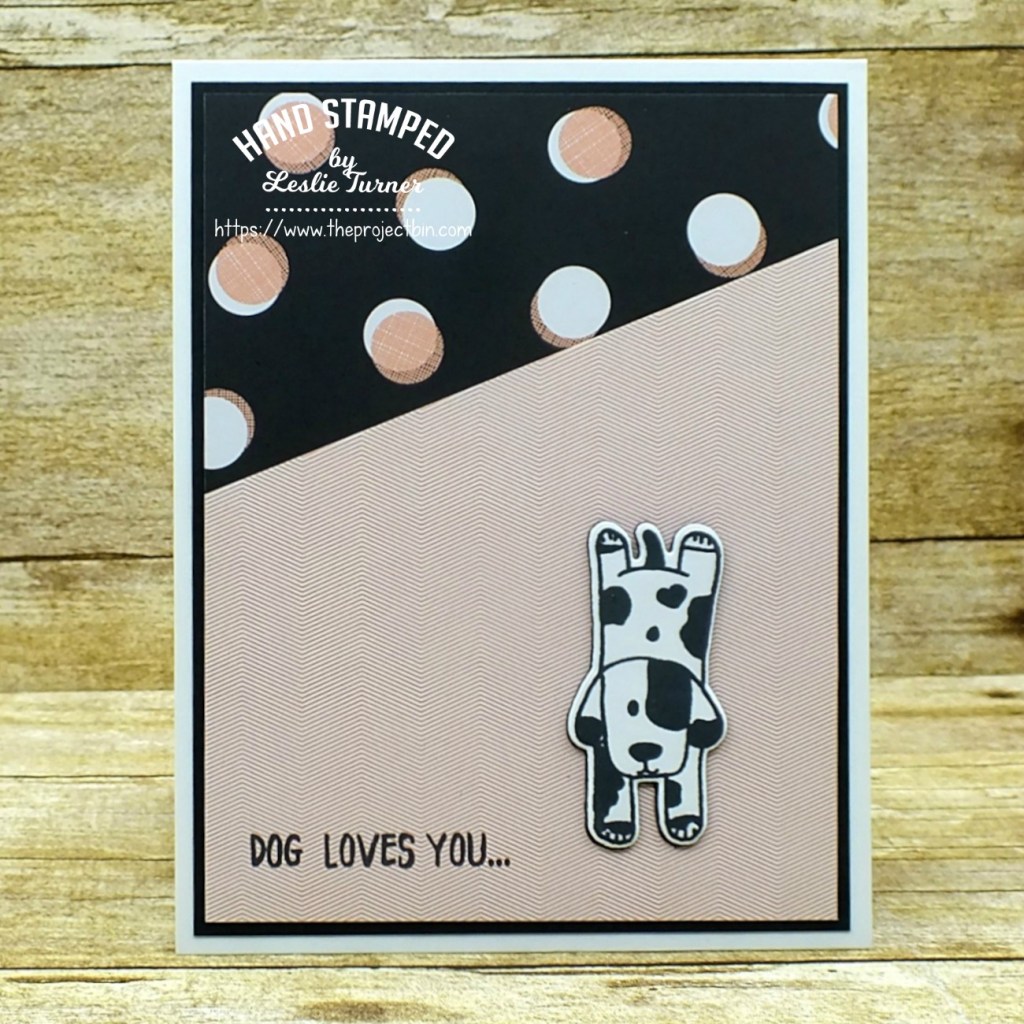
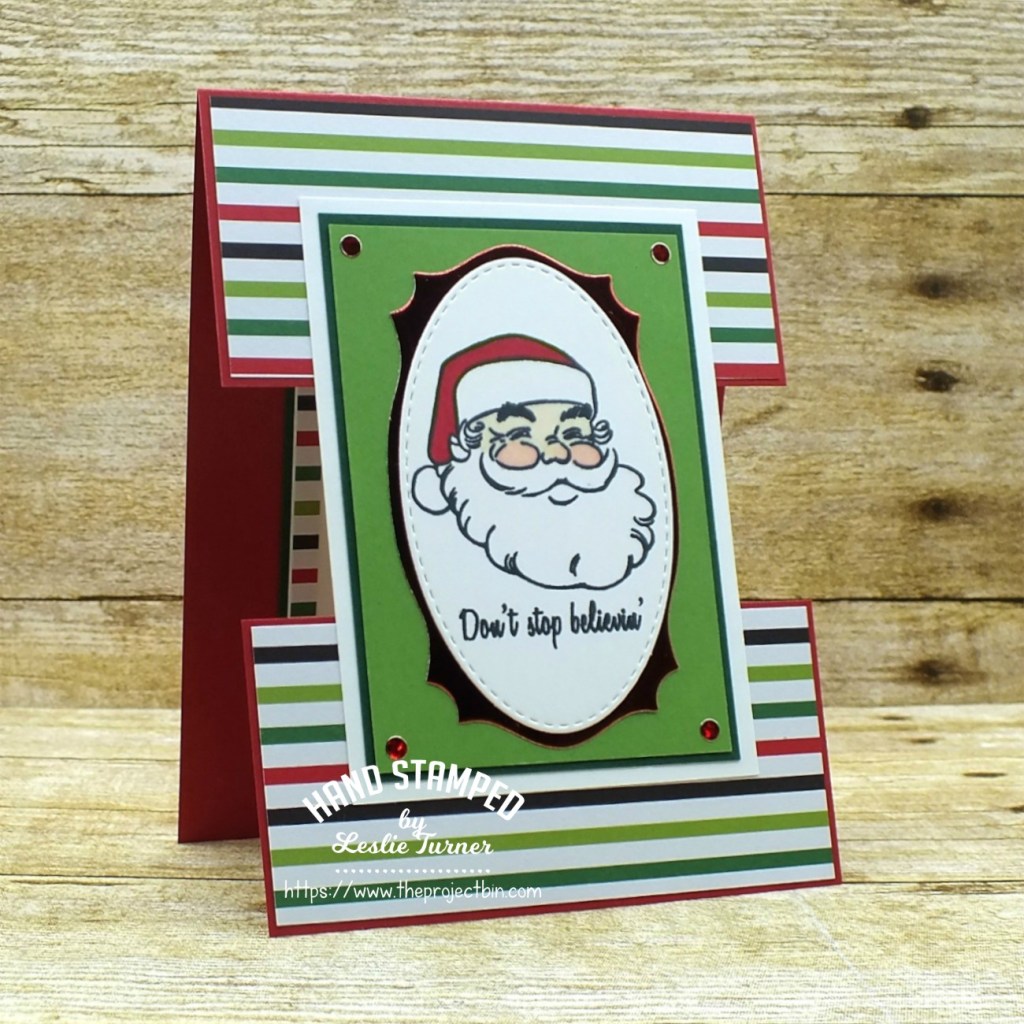
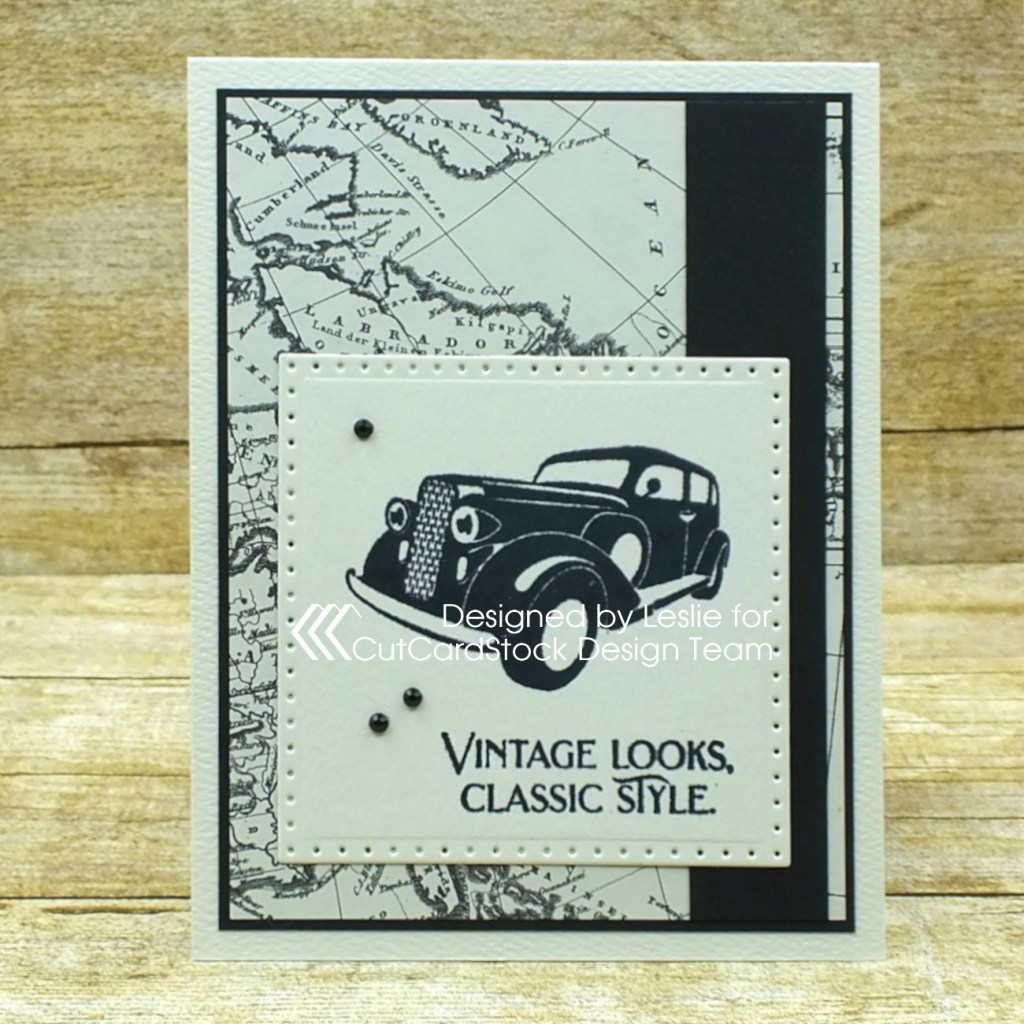
I created a standard A2 top folding card base from Royal Sundance Felt Natural cardstock with the textured side up. This cardstock is amazing – it’s sturdy and has a really nice texture on one side with a smoother texture on the other side. I cut a background panel from map paper along with a black layering panel and a wide strip from Pop-Tone Black Licorice cardstock. I created a dotted squares die cut with the smoother side up, stamped the classic car and sentiment in black ink, and adhered it to the background panel. The final touch was the addition of several small black gemstones.

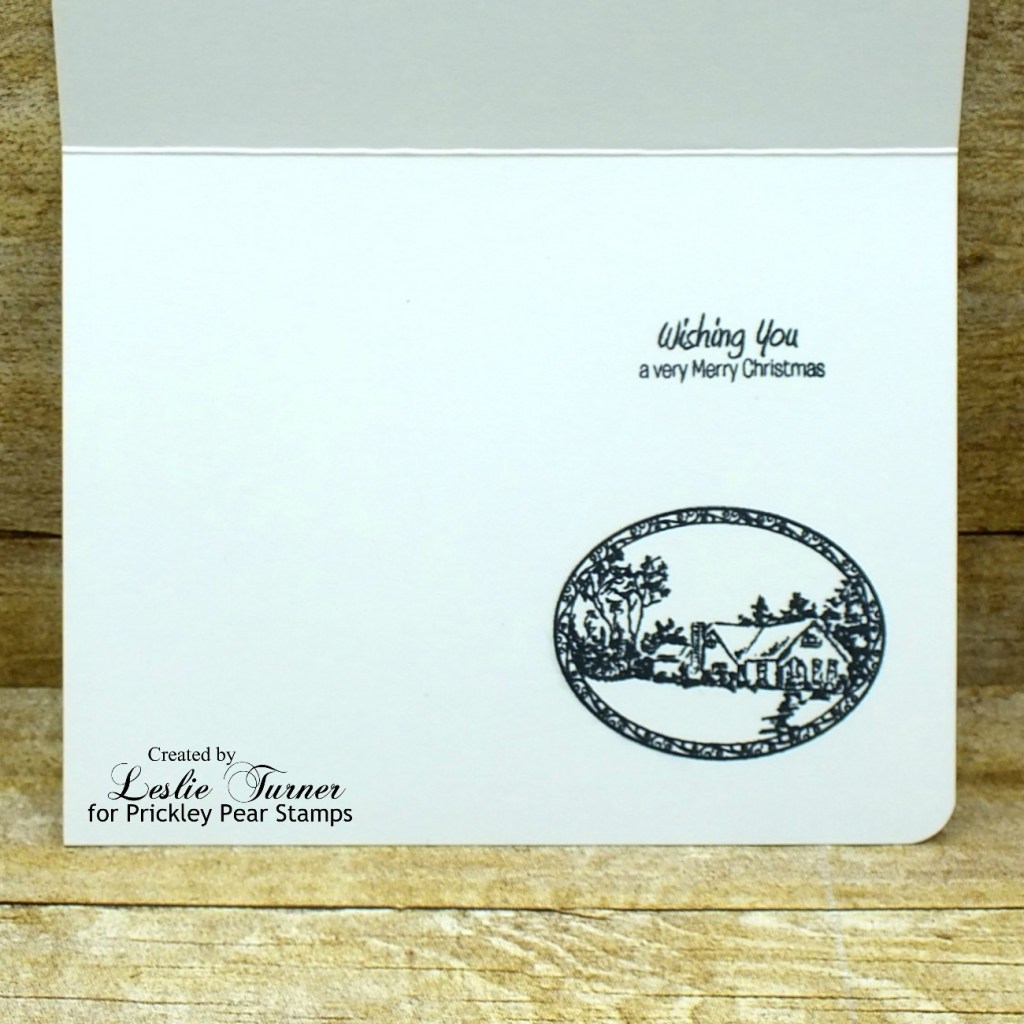
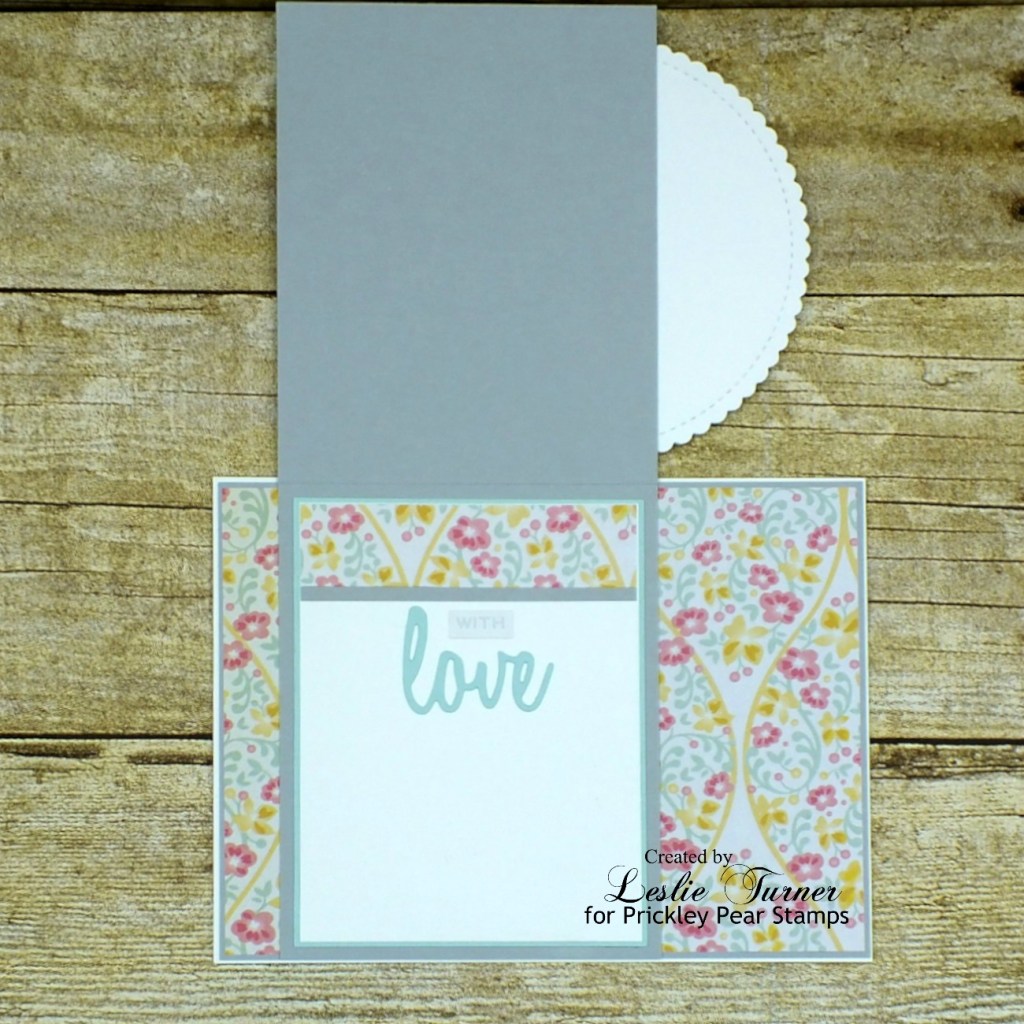
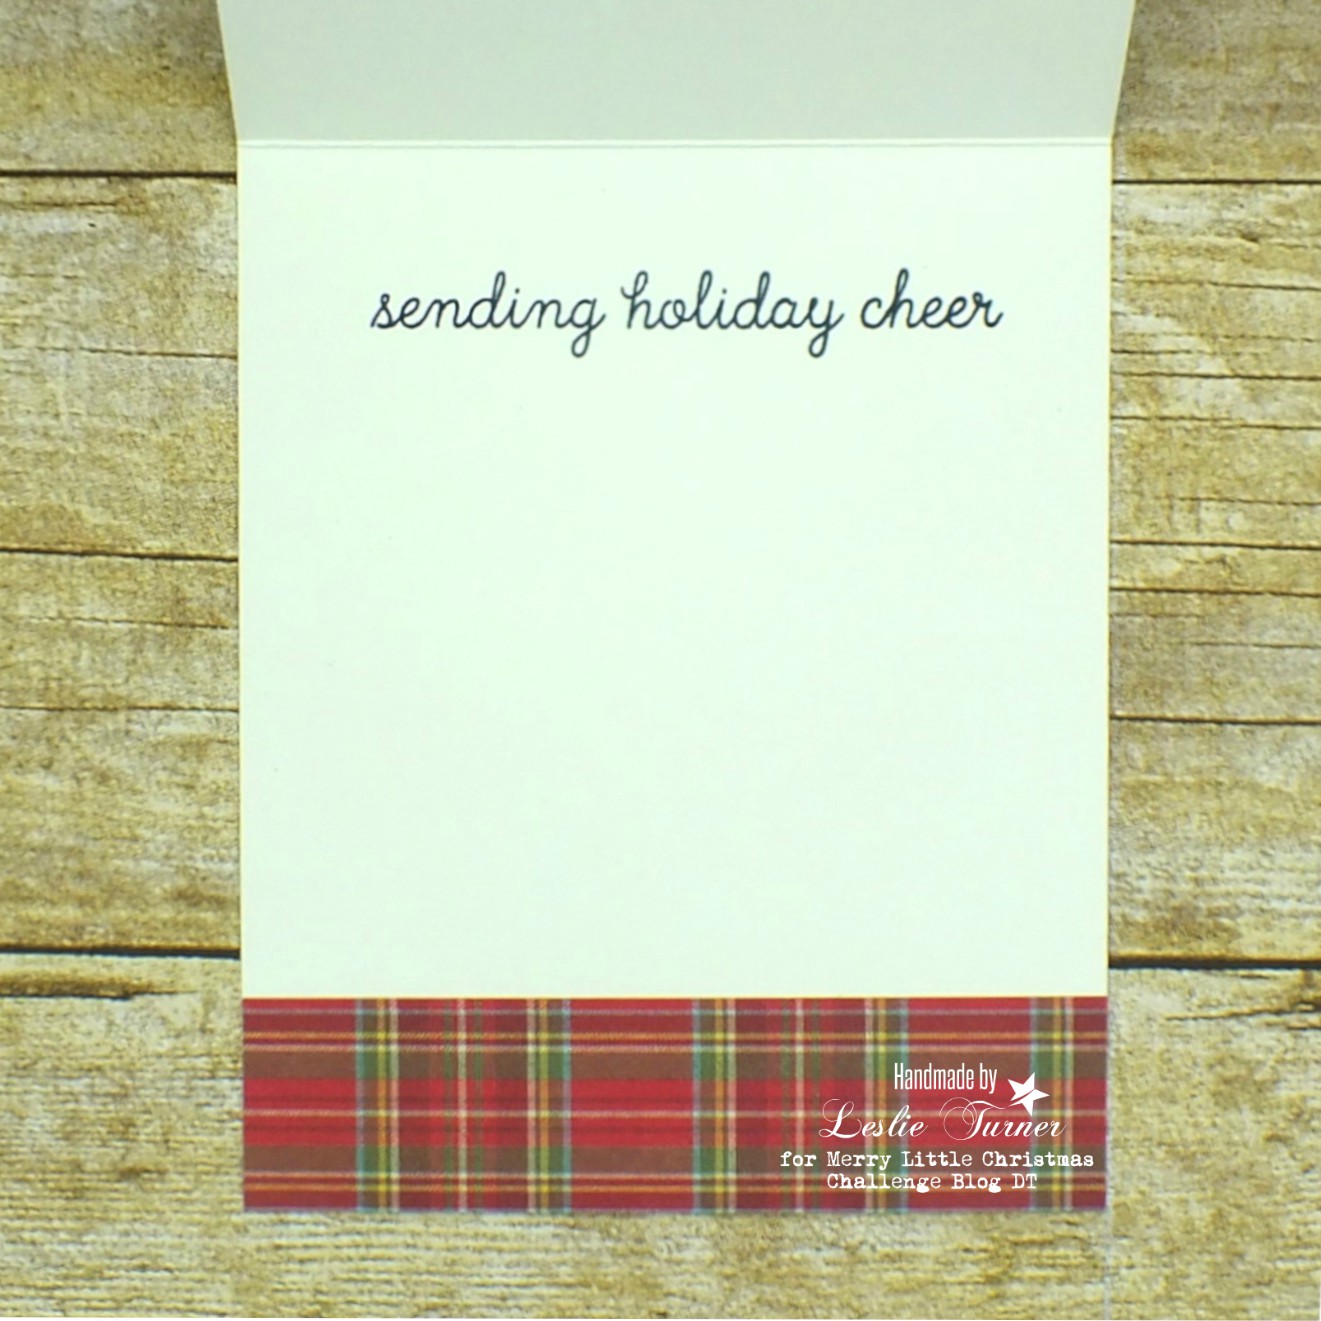
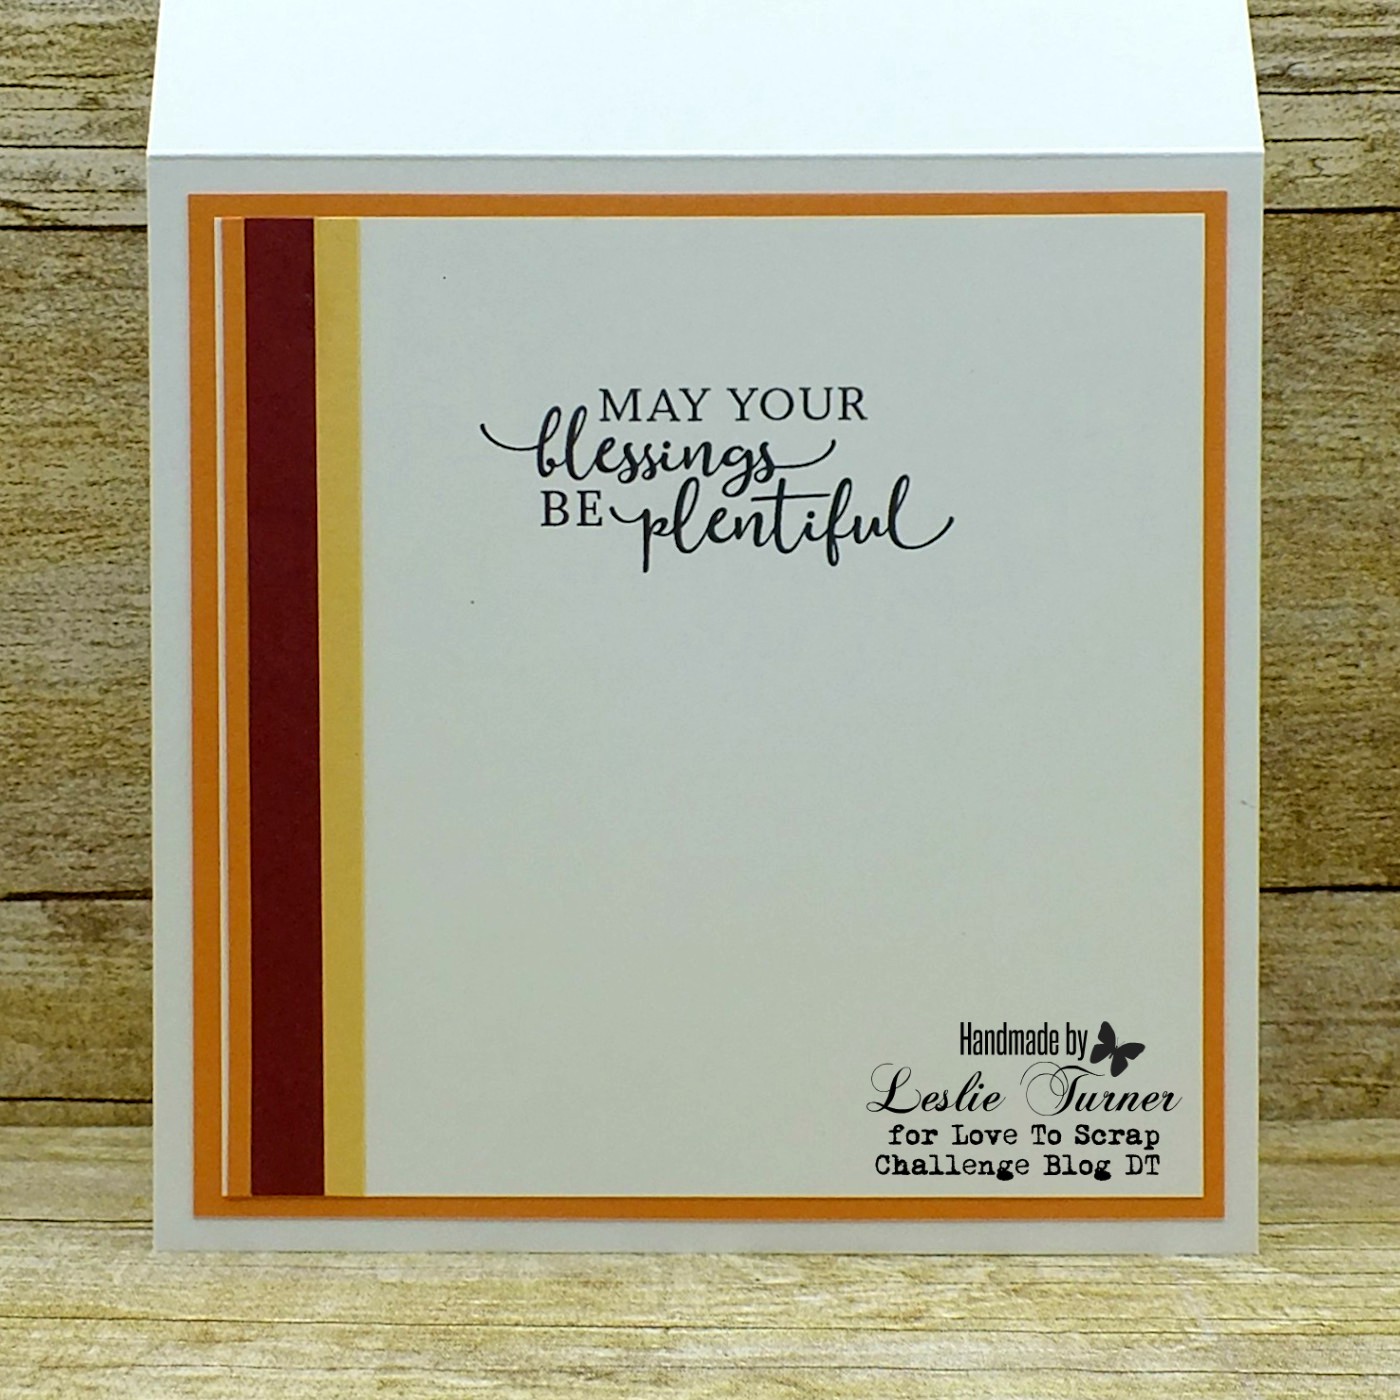
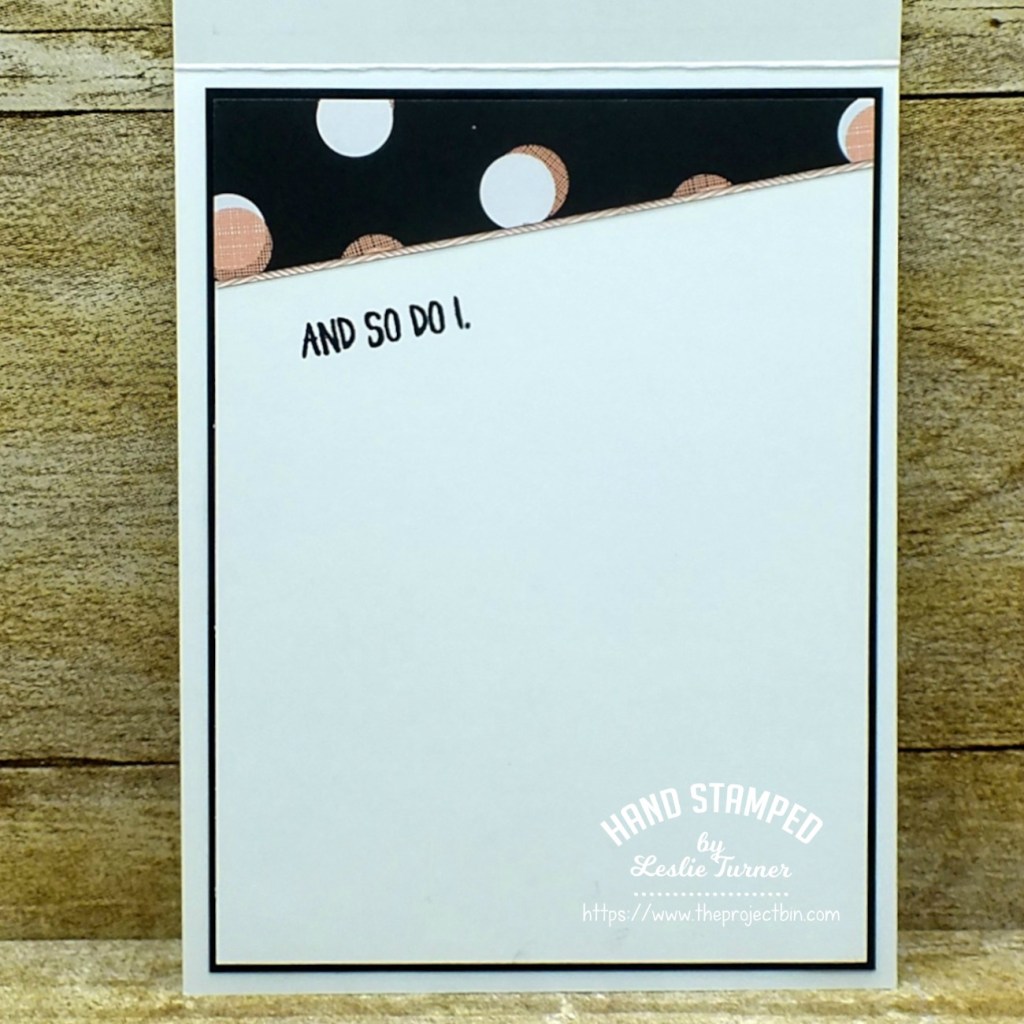
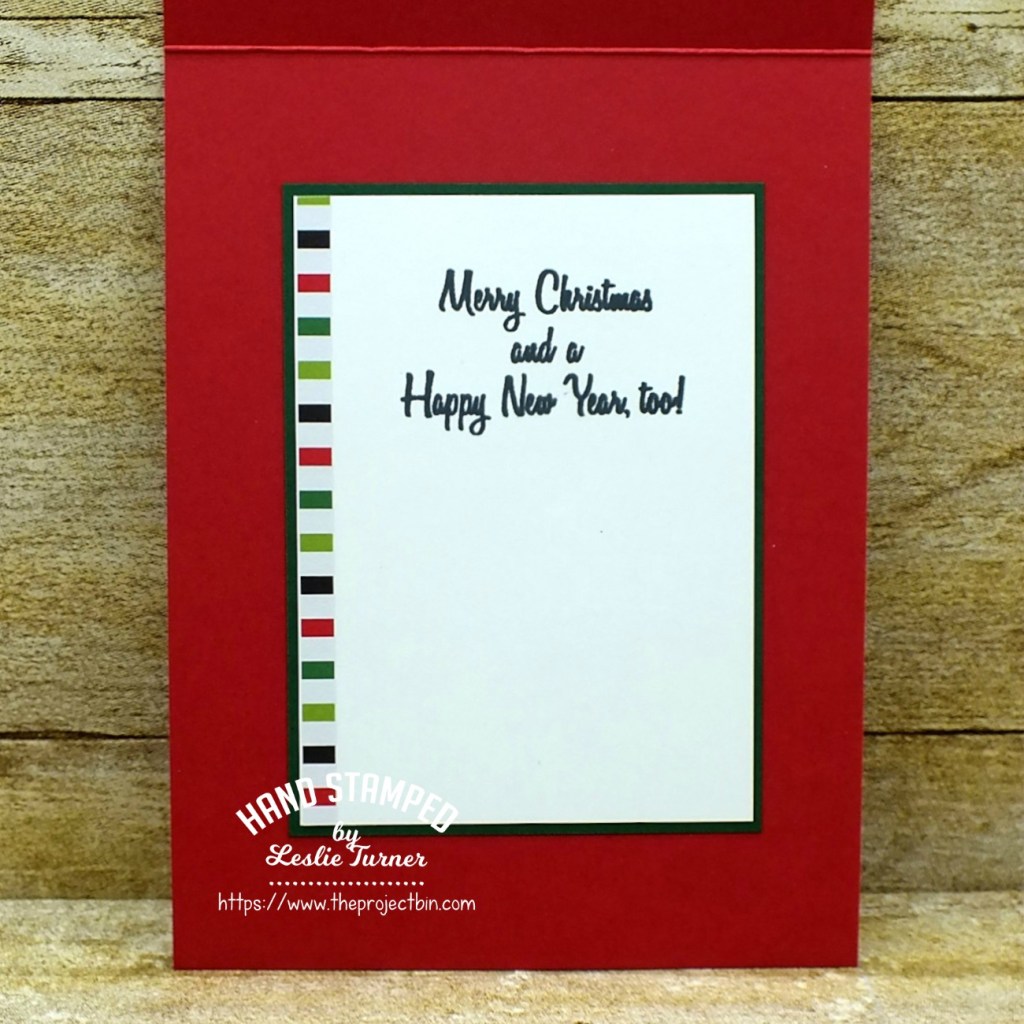
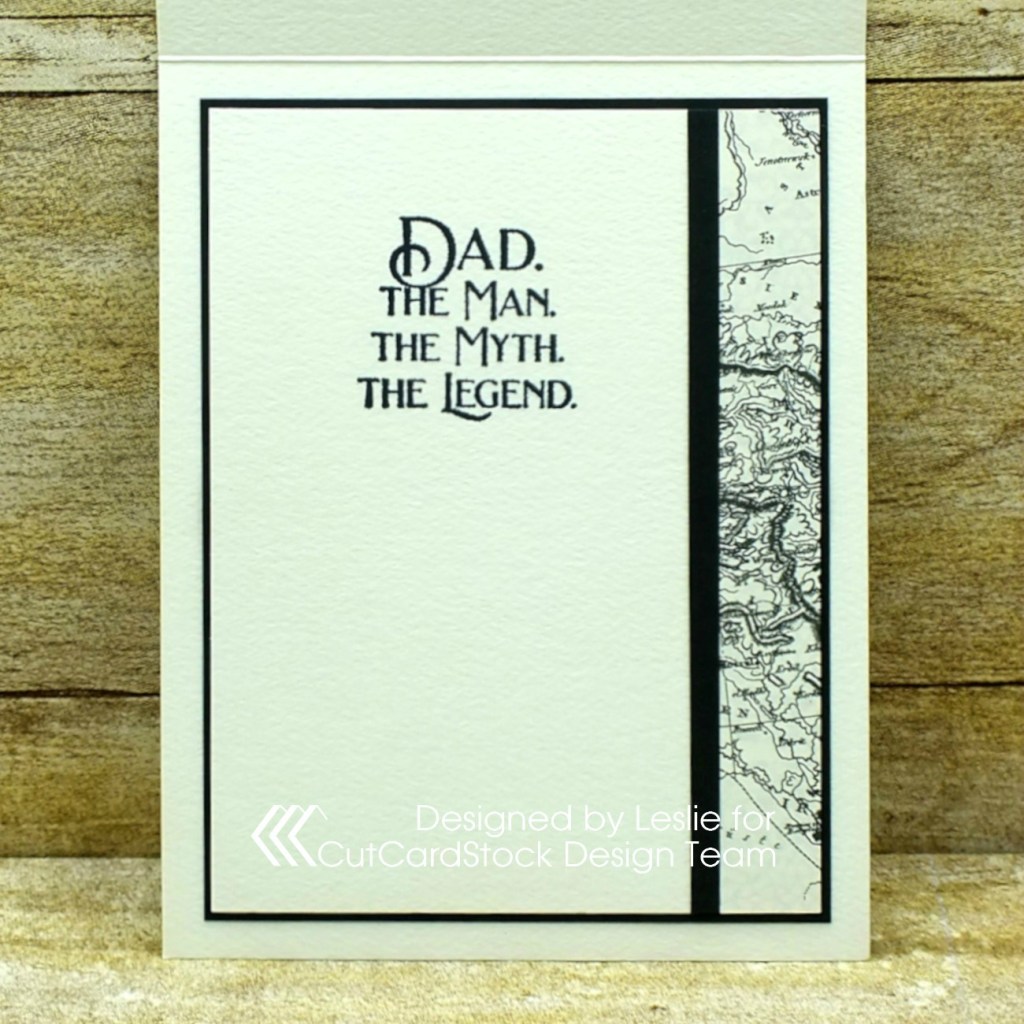
I cut the inside panel from Royal Sundance Felt Natural cardstock with the smoother side up, and embellished it with a strip of the map paper and thin strip of Pop-Tone Black Licorice cardstock. I stamped the sentiment in black ink and layered the panel on the Pop-Tone Black Licorice cardstock.

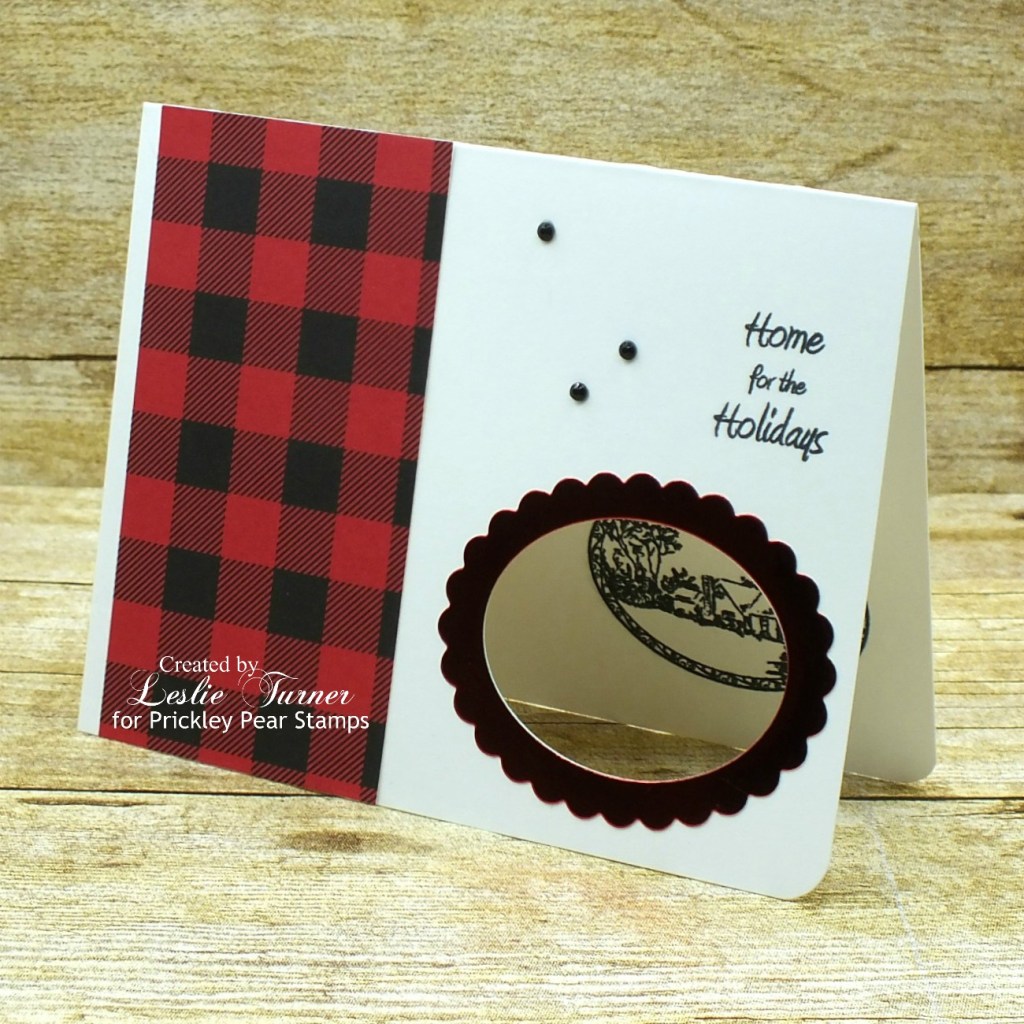
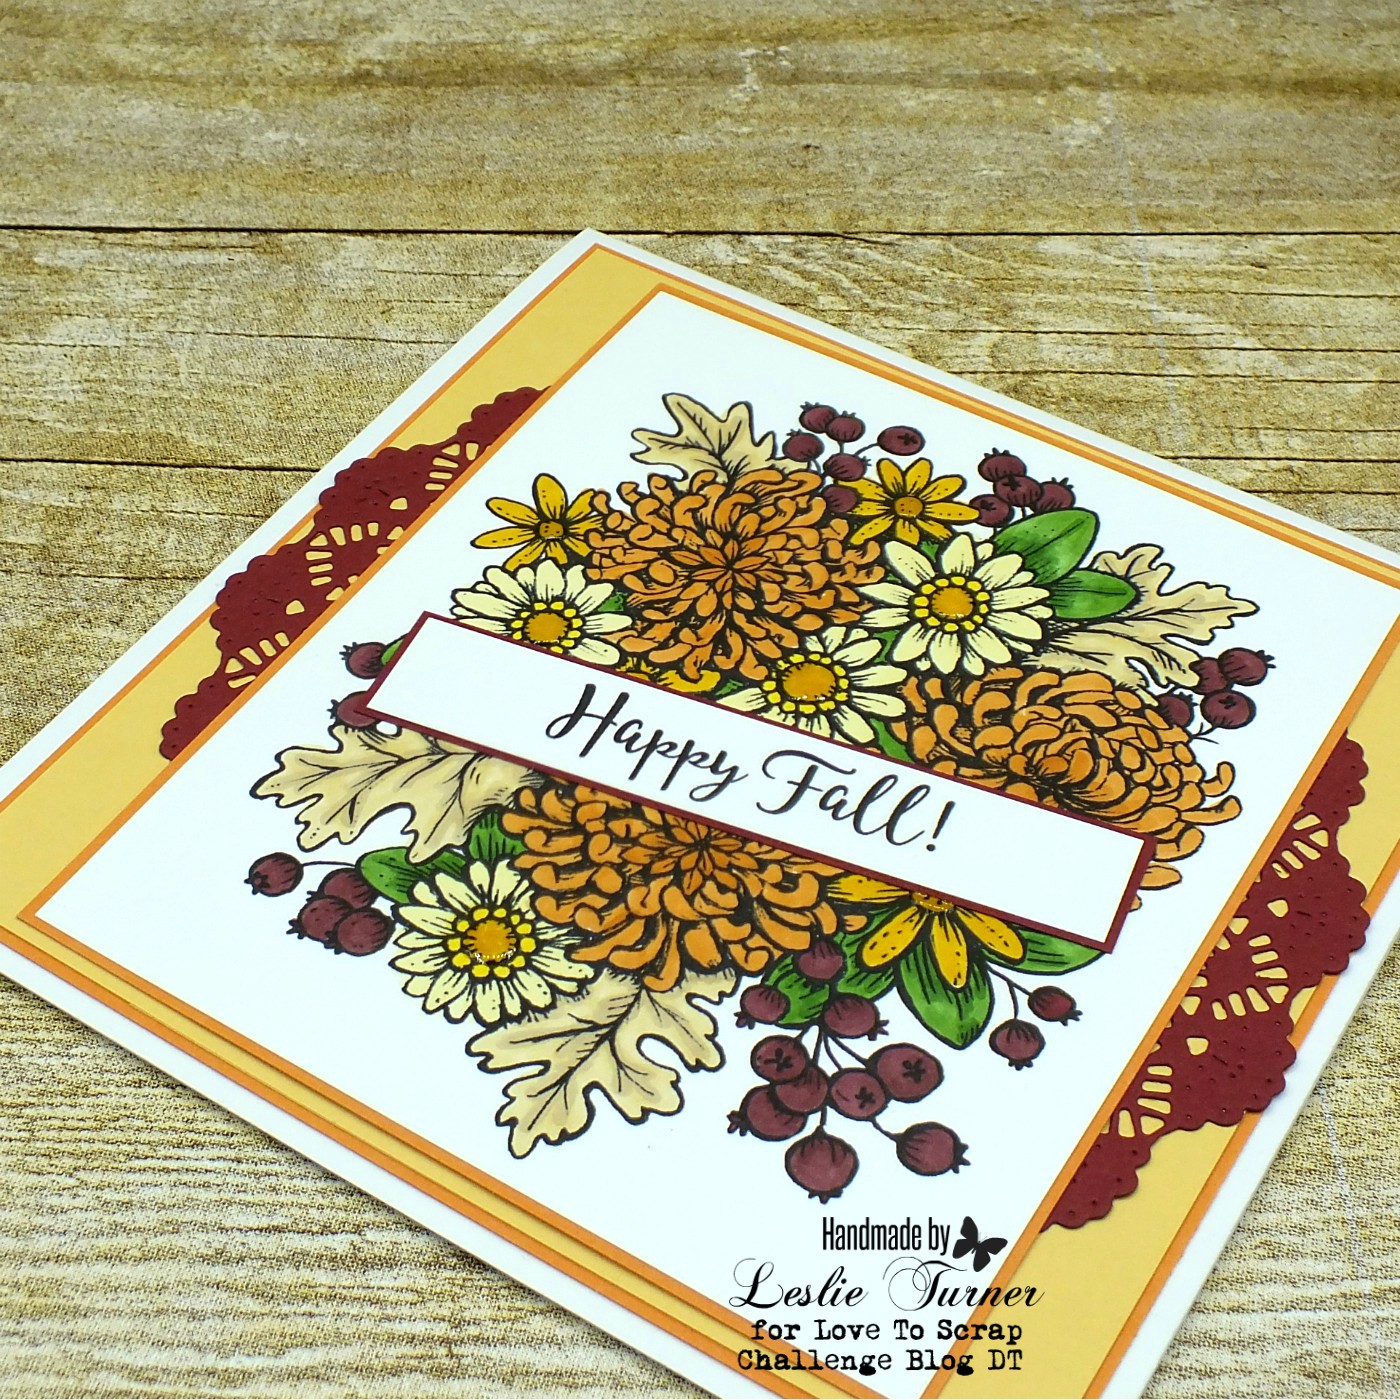
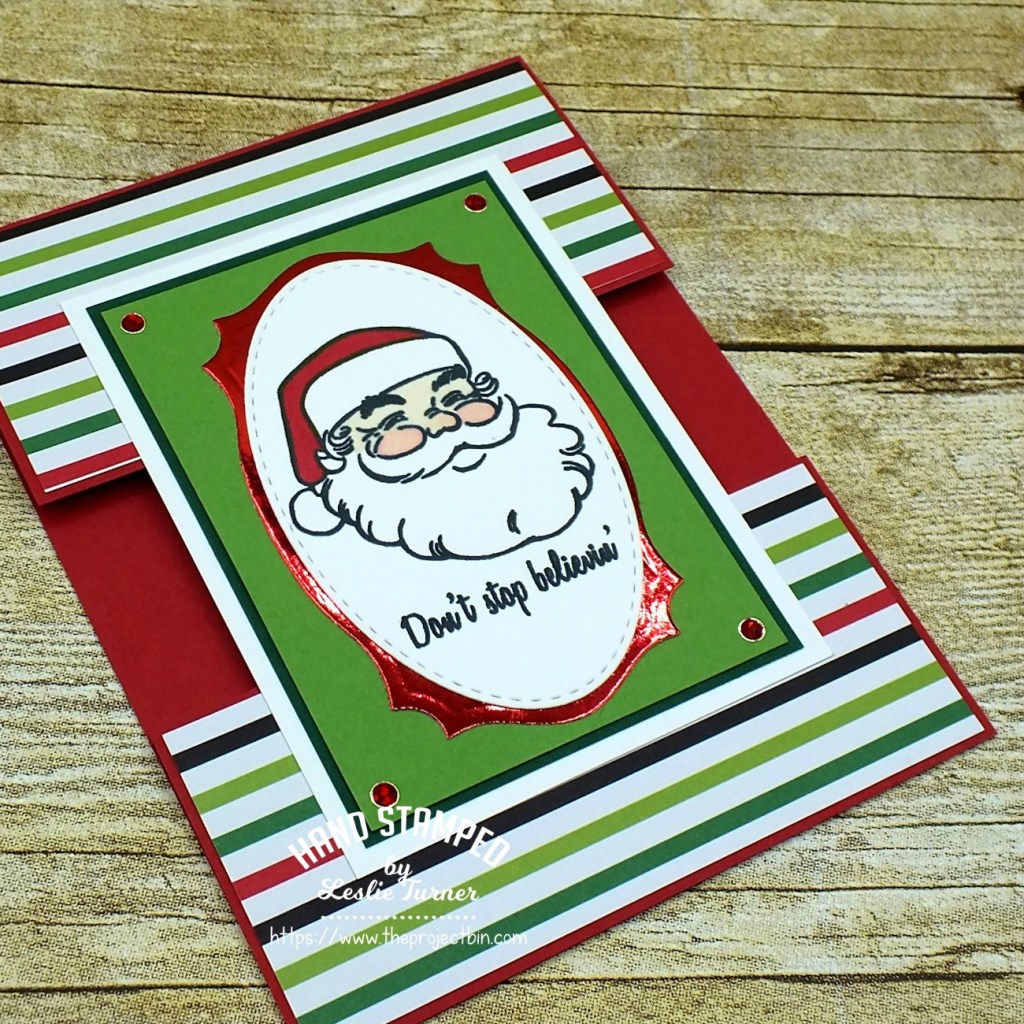
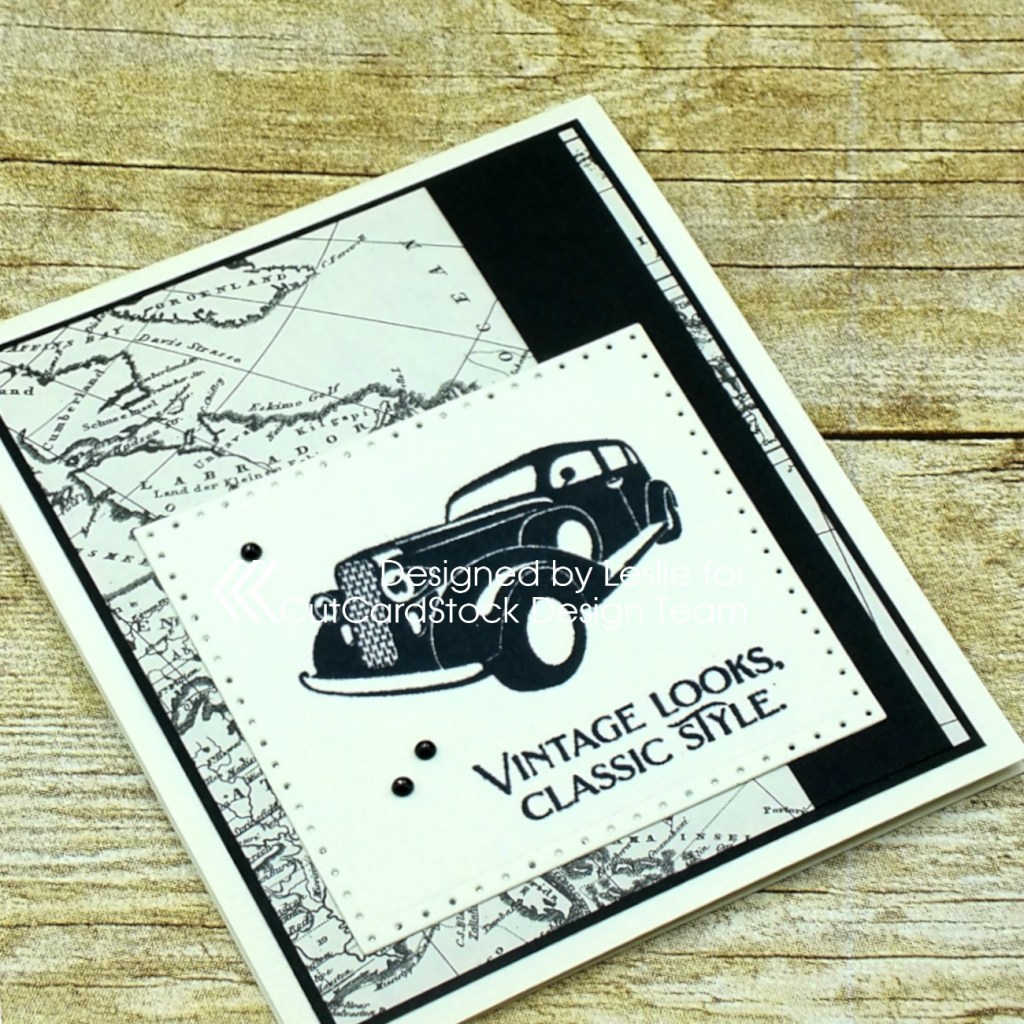
And one more peek… so loving how this turned out!

Sharing in the following challenges:
1. 613 Avenue Create: October Anything Goes w/ optional Winged Things (no twist)
2. A Perfect Time To Craft: #10-2020 – Anything Goes
3. Classic Design Challenge: #10 – Anything Goes
4. Cut It Up: #210 – World Cardmaking Day – Create A Card – Include A Die Cut
5. Jan’s Digi Stamps Challenge: October Anything Goes
6. Let’s Craft and Create: #164 – Anything Goes w/ optional Paper Strips Instead of Ribbon (playing twist)
7. Lil Patch of Crafty Friends: #143 – Anything Goes

CutCardStock products used:
Royal Sundance Felt Natural 110# cardstock
Pop-Tone Black Licorice 65# cardstock

Other products used:
Paper: Stampin’ Up Typeset Specialty DSP
Stamps: The Project Bin Classic Man stamp set
Ink: Memento Tuxedo Black ink
Dies/Punches: Sizzix Dotted Squares die
Accessories:  MISTI stamp tool, Big Shot, Tombow Mono permanent adhesive, Darice black gemstones

I hope you’ve enjoyed today’s project and you’re inspired to get crafty! Be sure to check out all the awesome cardstock and other goodies at CutCardStock (adhesives, labels, stickers, pens, watercolors and ribbon to name a few). And head on over to the CutCardStock Facebook Page for more inspiration! Thanks so much for stopping by today – we’ll see you next time!

Scrappy hugs,
lesliesig

Home for the Holidays

Happy Sunday, peeps! I’m back again today with another Prickley Pear Stamps card sample I created for the Hochanda show last month. As mentioned in my last post, I’ve fallen a little behind in sharing my samples so I’m going to earnestly try to catch up over the next week! This pretty Christmas card was created with the Scalloped Oval 3-Winter stamp set and Scallop Oval Nesting Dies, and features an oval aperture framed with shiny red foil.

I dug into one of my favorite Christmas 6×6 paper pads and landed on some red and black checked paper that screamed ‘warm and cozy flannel’ to me and thought it would be perfect for the front of this card. I cut the oval aperture and lightly traced around the perimeter with a pencil so I would know where to stamp the inside image.

Using the solid oval and the next larger scalloped oval, I cut a frame from red foil in the same Christmas paper pad. I stamped the sentiment and added several tiny black gemstones.

Using my light pencil marking, I stamped the oval image inside and a sentiment just above it. When I was sure the ink was dry, I erased the pencil mark. I’ve made that mistake before… not waiting quite long enough and smearing the ink while erasing. Ughhhh! But not this time, lol! ;)

And one more peek… absolutely loving how this one turned out! Gorgeous stamp set!

Finishing this post off with a screenshot of Alex holding up this card on the Hochanda show! What a thrill, lol! ;)

Sharing in the following challenges:
1. Crafts Galore Encore Challenges: #80 – Anything Goes
2. Just Us Girls Challenge: #556 Word Week “Plaid”

3. QKR Stampede: #405 – Anything Goes
4. Simon Says Stamp: Wednesday Challenge – Anything Goes

Products used:
Cardstock/Paper: Neenah Classic Crest Solar White cardstock, American Crafts Christmas 6×6 paper pad
Stamps: Prickley Pear Stamps Scalloped Oval 3-Winter clear stamp set
Ink: Memento Tuxedo Black ink
Dies/Punches: Prickley Pear Stamps Scallop Oval Nesting Dies, Kadomaru Pro corner rounder
Accessories:  Tombow Mono permanent adhesive, Bearly Art precision craft glue, MISTI stamp tool, Gemini Junior

I hope you’ve enjoyed this project! Be sure to check out all the awesome stamps and dies at Prickley Pear Stamps! If you’d like to save 10% on anything on the site when you shop at Prickley Pear Stamps, use the coupon code LESLIE10 at checkout! And be sure to ‘like’ and ‘follow’ the Prickley Pear Stamps Facebook page to keep up with news and sales, and join Prickley Pear Pals (the fan group) for lots of fun crafty ideas and to share your creativity! And finally, we’d love to see you visit the Prickley Pear Stamps blog that’s in the process of being revived and become a Follower! Hope to see you there! Thanks so much for stopping by today – we’ll see you next time! ;)

Scrappy hugs,
lesliesig

Thinking of YOU

Hi friends! I’ve fallen a little behind in sharing my Prickley Pear Stamps samples created for the Hochanda show in early September. We’ve been moving and thankfully we’re finally feeling like we’re getting settled in our house after being full-time RVers since March 2016. Moving is always hard, and the older we get the harder moving is on us, and we feel like we’ve made the right decision to sell the fifth wheel and settle down in a house.

I’ve popped in this morning to share a fun fold called a front flap card that I created with the gorgeous Birdcage and Birdcage Winter 2 stamp sets. If you know me, you know that I LOVE fun folds and I’m always on the hunt for new ones to try! ;)

My inspiration for this fun card fold came from a Splitcoast Stampers newsletter a few months ago, and the tutorial is HERE if you’re interested! I created the base from my favorite white cardstock and used coordinating papers from a pretty 12×12 paper pad in my stash which I layered on light gray and teal cardstock. For the focal image, I stamped the bird in teal ink, and then stamped the birdcage in Versamark, heat embossed it in platinum embossing powder, and cut it with a circle die. I adhered it beneath a frame created with a stitched mini scallop die and a slightly smaller plain circle die. I adhered the focal image piece to the flap and affixed tiny iridescent gemstones around it.

I embellished the inside panel with the floral and gray cardstock, created the sentiment with a partial silver metallic quotation sticker and a die cut sentiment, and layered the panel on the teal cardstock.

And one more peek… absolutely loving how this turned out! This is one of my favorite stamp sets!

In closing, here’s a screenshot of Alex holding this card up during the Hochanda show! What a rush seeing my samples on air, lol!

Sharing in the following challenges:
1. 2 Crafty Critter Crazies: #43 – Anything Goes
2. 613 Avenue Create: October Anything Goes w/ optional Winged Things (playing twist)
3. Moving Along With The Times: #123 – Animal(s) and/or Bird(s)

Cardstock/Paper: Neenah Classic Crest Solar White cardstock, CutCardStock Dolphin cardstock, Stampin’ Up Pool Party cardstock, Colorbok Delilah designer paper
Stamps: Prickley Pear Stamps Birdcage and Birdcage Winter 2 stamp sets
Ink: Versamark, Stampin’ Up Pool Party ink, Memento Tuxedo Black ink
Dies/Punches: My Favorite Things Die-namics Stitched Mini Scallop Circle STAX die, Memory Box Stitched Circle Layers die, Sizzix Celebration Words: Script die
Accessories: MISTI stamp tool, Gemini Junior, Tombow Mono permanent adhesive, Bearly Art precision craft glue, Ranger Liquid Platinum embossing powder, Tim Holtz Silver Metallic Quotation, Darice tiny smoke gemstones

I hope you’ve enjoyed this project! Be sure to check out all the awesome stamps and dies at Prickley Pear Stamps! If you’d like to save 10% on anything on the site when you shop at Prickley Pear Stamps, use the coupon code LESLIE10 at checkout! And be sure to ‘like’ and ‘follow’ the Prickley Pear Stamps Facebook page to keep up with news and sales, and join Prickley Pear Pals (the fan group) for lots of fun crafty ideas and to share your creativity! And finally, we’d love to see you visit the Prickley Pear Stamps blog that’s in the process of being revived and become a Follower! Hope to see you there! Thanks so much for stopping by today – we’ll see you next time! ;)

Scrappy hugs,
lesliesig

Artist Trading Cube

10/31/20 DT Favorite at Crafts Galore Encore Challenge Blog!
11/8/20 Winner at A Bit More Time To Craft Challenge!

Happy Saturday, friends! I’m happy to be back on the Eyelet Outlet blog today with another awesome DT inspiration project! Are you familiar with ATCs? And did you know there is an artist trading CUBE in the ATC family?! Yep, there is, and they can be any size! So I created a 2-1/2″ square cube featuring gorgeous floral washi tape and small pearl bling!

I created the 2-1/2″ square cube with 110# Neenah Solar White cardstock. I cut different colors of patterned paper and adhered one to each of the six sides. Then I covered six pieces of 80# Neenah Solar White cardstock with different sections of Flower Washi Tape Wide, cut each one with a mini scalloped die and adhered them to the six sides of the cube. I added a digital sentiment to each, and the final step was adhering eight tiny white pearls from a White Pearl Bling Strip to each side.

And one more peek at the cube… sure do love how this turned out and I will definitely be making more of these!

Sharing in the following challenges:
1. A Bit More Time To Craft Challenge: #125 – Anything Goes
2. A Bit More Time To Craft Extra Challenge: October Anything Goes
3. A Perfect Time To Craft Open Challenge: #10-2020 – Anything Goes
4. Classic Design Challenge: #10 – Anything Goes
5. Crafts Galore Encore Challenges: #80 – October Anything Goes
6. The Crafter’s Cafe: #252 – Anything Goes
7. Your Scrapbook Place – October Anything Goes

Eyelet Outlet products used:
Flower Washi Tape Wide
White Pearl Bling Strips

Other products used:
Cardstock/Paper: Neenah Classic Crest Solar White cardstock, The Paper Studio Tattered & Worn 12×12 paper pad
Stamps: Ephemoire Word Stripz 1 digital sentiments
Dies/Punches: My Favorite Things Die-namics Stitched Mini Scallop Square STAX die
Accessories: Tombow Mono permanent adhesive, Bearly Art precision craft glue

I hope you’ve enjoyed today’s project! Be sure to check out all the fun goodies at Eyelet Outlet! I can already see you drooling, lol! Be sure to ‘like’ and ‘follow’ Eyelet Outlet Facebook Page to keep up with news and sales, and while you’re at it, join the Eyelet Outlet Fans Facebook group for lots of creative inspiration! Thanks so much for stopping by today – we’ll see you next time! ;)

Scrappy hugs,
lesliesig

Let’s get our merry on.

Hi everyone! Well, can you believe we’re officially into October?! This month is super awesome for me because I’m officially retired! Woo-hoo! I’ve worked a long time to get to this point, lol! Our new challenge is live this morning over at Merry Little Christmas Challenge Blog and I’m super stoked to share my DT inspiration project for MLCCB #27 – October Anything Christmas Goes! I created a fun Christmas card to add to my stash. I sure do love me some Tim Holtz Crazy Cats and Paper Smooches!

2020_0127001a

This is a super simple design. I colored the stamped and die cut images with Spectrum Noir alcohol markers, and placed them on the ground created with plaid paper across the bottom of the card base. I then stamped the Paper Smooches sentiment and added a few tiny gemstones, and voila, we have a card! ;)

2020_0127002a

I kept the inside super simple also, just adding plaid paper across the bottom and stamping another Paper Smooches sentiment from the same stamp set.

2020_0127003a

And one more look… I’m so smitten! This guy is super adorable! ;)

2020_0127004a

Sharing in the following challenges:
1. 2 Crafty Critter Crazies: #43 – Anything Goes
2. A Bit More Time To Craft Challenge: #125 – Anything Goes
3. A Bit More Time To Craft Extra Challenge: October Anything Goes
4. A Perfect Time To Craft Open Challenge: #10-2020 – Anything Goes
5. Classic Design Challenge: #10 – Anything Goes
6. Moving Along With The Times: October Challenge – Animals or Birds
7. QKR Stampede: #405 – Anything Goes
8. Simon Says Stamp: Wednesday Challenge – Anything Goes
9. The Crafter’s Cafe: #252 – Anything Goes

Products used:
Cardstock/Paper: GKD Ivory cardstock, The Paper Studio Four Seasons and Everything In Between -2- paper pad
Stamps/Dies: Tim Holtz Crazy Cats and Crazy Things rubber stamps and dies sets; Paper Smooches Holiday Cheer stamp set
Ink: Spectrum Noir- BG5, BG6, DR5, GB6, JG5; Memento Tuxedo Black ink
Accessories:  Gemini Junior die cutting machine, MISTI stamp tool, ScraPerfect Best Glue Ever, Darice green gemstones

I hope you’ve enjoyed this card and will link up a Christmas project with us this month! We can’t wait to see what you create! Thanks so much for stopping by today – we’ll see you again soon! ;)

Scrappy hugs,
lesliesig

Snowflake Junk Journal

10/15/20 Top 3 at The Crafter’s Cafe Challenge Blog!
10/31/20 Spotlight Winner at A Perfect Time To Craft Open Challenge!
10/31/20 DT Favorite Winner at Classic Design Challenge Blog!
10/31/20 DT Favorite at Crafts Galore Encore Challenge Blog!

Hi everyone! A very Happy Thursday to you! A new challenge launched over at Mix It Up Challenge Blog this morning and I’m super stoked to share my DT inspiration project for MIUCB #42 – Anything Goes + Distressing. Remember, all of our projects are Anything Goes and we offer an optional twist each month just to inspire you! The twist is not required to play! I used the amazing Vectoria Designs Winter Junk Journal Kit from my stash to create my project this month. OMGoodness, it’s so gorgeous and was so much fun putting together!

2020_01190024a

As with most digital kits, you print the elements on good paper and then put it together. It couldn’t be any easier and the result is stunning! I inked the edges of the front and back cover, all the pages and all the tags with walnut stain distress ink and added a couple snowflake charms and some bling. Several of the pages have pockets and tags. :) Here are some close-ups:

2020_01190015a

2020_01190016a

2020_01190017a

2020_01190018a

2020_01190019a

2020_01190020a

2020_01190021a

2020_01190022a

And one more look… I’m so smitten!

2020_01190023a

Sharing in the following challenges:
1. A Bit More Time To Craft Challenge: #125 – Anything Goes
2. A Bit More Time To Craft Extra Challenge: October Anything Goes
3. A Perfect Time To Craft Open Challenge: #10-2020 – Anything Goes
4. Classic Design Challenge: #10 – Anything Goes
5. Crafts Galore Encore Challenges: #80 – October Anything Goes
6. Sparkles Christmas Challenge: #117 – Vintage Christmas
7. The Crafter’s Cafe: #252 – Anything Goes
8. Your Scrapbook Place – October Anything Goes
9. Word Art Wednesday: Weeks #458/459 – Anything Goes

Products used:
Cardstock/Paper: Vectoria Designs Winter Junk Journal Kit printed on 60# Hammermill copy paper
Ink: Ranger walnut stain distress ink
Accessories:  ScraPerfect Best Glue Ever, ScraPerfect Strap-N-Tap Perfect Crafting Pouch, Wild Orchid Crafts snowflake charms, Hemptique Bamboo Cord, Darice iridescent gemstones and white flat back pearls

I hope you’ve enjoyed today’s project and will link up with us this month – we can’t wait to see what you create! We know you love the ‘anything goes’ theme and it would be really awesome if you play the twist and create a project with some distressing, but the twist is not required to play! Thanks so much for stopping by today – we’ll see you next time! ;)

Scrappy hugs,
lesliesig

Happy Fall!

Hi everyone! Happy Thursday – hope you are looking forward to a great weekend… it’s almost here! Our new challenge is live over at Love To Scrap Challenge Blog and I’m thrilled to share my DT inspiration project for LTSCB #138 – Fall Back! I used a pretty Power Poppy digital image to create this Fall card.

2020_01160023a

I cut a yellow panel for the background and layered it on light orange cardstock. I colored the image with Spectrum Noir alcohol markers, trimmed it down and layered it on the light orange cardstock. I die cut a pretty doily, cut it in half and arranged each half behind the focal image. I used some Glossy Accents on the centers of most of the flowers. The Power Poppy digital image included two sentiments, so I used the ‘Happy Fall’ one on the front angled over the focal image.

2020_01160024a

I printed the inside sentiment on white cardstock, trimmed the panel and embellished it with leftover strips of the cardstock used on the front.

2020_01160025a

Here’s one more look… I’m really loving how this turned out!

2020_01160026a

Sharing in the following challenges:
1. A Bit More Time To Craft Challenge: #125 – Anything Goes
2. A Bit More Time To Craft Extra Challenge: October Anything Goes
3. A Perfect Time To Craft Open Challenge: #10-2020 – Anything Goes
4. Classic Design Challenge: #10 – Anything Goes
5. Aud Sentiments: #261 – Fall/Halloween Sentiment
6. Crafty Gals Corner: #211 – Fall Colors
7. International Art & Soul: #93 – Autumn Colors
8. QKR Stampede: #405 – Anything Goes
9. The Crafter’s Cafe: #252 – Anything Goes
10. Try It On Tuesday: Autumn Colors
11. Your Scrapbook Place – October Anything Goes

Products used:
Cardstock/Paper: Cardstock Warehouse Sweet Tooth cardstock; GKD Sweet Mango, Sweet Corn, Cranberry Tart and White cardstock
Stamps: Power Poppy Autumn’s Opulence digital image
Ink: Spectrum Noir- DR7, TN6, EB2, BG5, LY1, LY2, CG4, GB6, CT4
Dies/Punches: Cheery Lynn Designs English Tea Party die
Accessories:  ScraPerfect Best Glue Ever, Gemini Junior die cutting machine, Glossy Accents

I hope you’ve enjoyed today’s card and will link up a Fall project with us this month! We’d love to see what you create! Thanks so much for stopping by today – we’ll see you again soon! ;)

Scrappy hugs,
lesliesig

Hummingbird Food Cannister

Hello, crafty peeps! Happy Thursday – it’s almost the weekend! Our new challenge is live this morning over at Love To Craft Challenge Blog and I’m happy to share my DT inspiration project for LTCCB #51 – October Anything Goes! I recycled/upcycled an empty Coffee Mate container into a hummingbird food canister. It was a super easy project and kept that container out of the landfill! ;)

2019_0922019aa

I began by gathering my supplies – some pretty papers, botanical ephemera, alphabet letters and flat-back pearls. I covered the container in red woodgrain paper and added some Washi Tape to the sides. I then traced around the lid and fussy cut a circle from black paper slightly smaller that fit into the recess on the top of the lid. I added a large piece of botanical ephemera to the top of the lid and some flat-back pearls. I spelled out ‘hummingbird food’ on the canister with the alphabet letters and finished it up with a few more flat-back pearls.

Round objects are always hard to photograph, lol, so here are individual shots from different angles…

2019_0922016a
2019_0922017a
2019_0922018a
2019_0922019a
2019_0922015a

Sharing in the following challenges:
1. A Bit More Time To Craft Challenge: #125 – Anything Goes
2. A Bit More Time To Craft Extra Challenge: October Anything Goes
3. A Perfect Time To Craft Open Challenge: #10-2020 – Anything Goes
4. Classic Design Challenge: #10 – Anything Goes
5. The Crafter’s Cafe: #252 – Anything Goes

Products used:
Cardstock/Paper: Simple Stories Wood & Gingham Basics paper pad, The Paper Studio Tattered and Worn paper pad
Accessories:  Empty Coffee Mate container, Tim Holtz idea-ology botanical layers ephemera, American Crafts Memo Thickers, Carpe Diem Planner Washi Tape, Want2Scrap red and black flat-back pearls

I hope you’ve enjoyed this recycled/upcycled project and will link up an ‘anything goes’ project with us this month! We’d love to see what you’re working on! Thanks so much for stopping by today – we’ll see you again soon! ;)

Scrappy hugs,
lesliesig

dog loves you…

Hi friends! Happy Hump Day! I’m thrilled to be back on the blog again today over at The Project Bin with a super cute puppy love card! I created a fun card using the Kinda Pawsome stamps and dies from my stash that a guy could give a girl – or a girl could give a guy – just to let them know they are loved! I love a black and white color combo with just a pop of another color, and this one has a salmon-pink pop!

I kept with a simple design using two coordinating papers layered on black cardstock. I stamped the pup on white cardstock in black ink and cut it with the coordinating die. I then cut three more black die cuts and layered them all together for a little dimension. I stamped the sentiment in black and that completed the front! Super easy! ;)

I embellished the inside panel with leftover pieces of the diagonally cut papers used on the front, stamped the sentiment in black ink and layered the panel on black cardstock.

And one more peek… absolutely loving how this turned out! Super easy design!

Sharing in the following challenges:
1. Creative Inspirations: September Challenge – Spots &Dots or Inky Spats
2. Di’s Digi Challenge: Make It Masculine
3. Pammie’s Inky Pinkies Challenges: #2039 – Anything Goes
4. Simon Says Stamp: Wednesday Challenge – Anything Goes
5. Word Art Wednesday: Weeks #458/459 – Anything Goes

Products used:
Cardstock/Paper: Neenah Classic Crest Solar White cardstock, American Crafts Black cardstock, Stampin’ Up Stacked With Love DSP pack
Stamps: The Project Bin Kinda Pawsome stamp set
Ink: Memento Tuxedo Black ink
Dies/Punches: The Project Bin Kinda Pawsome die set (included with stamps)
Accessories:  Tombow Mono permanent adhesive, Bearly Art precision craft glue, MISTI stamp tool, Gemini Junior

I sure hope you’ve enjoyed this project! Be sure to check out all the awesome stamps and dies at The Project Bin, and while you’re at it, head on over to The Project Bin Facebook Page for more inspiration! Thanks so much for stopping by today – we’ll see you next time!

Scrappy hugs,
lesliesig

Don’t stop believin’

Hi friends! Hope your week has started off with a bang! I’m thrilled to be on the blog today over at The Project Bin with a cool Christmas card in traditional Christmas colors! I was provided the amazing Mid Century Christmas stamp set and created a split front panel card to add to my Christmas card stash! You know I love me some fun folds and I was thrilled to have found this one on Mary Marsh’s blog!

I cut a top-fold card base from red cardstock and complimented it with some pretty striped Christmas paper along with white and a couple shades of green cardstock. I stamped the Santa image and one of the sentiments in black ink on white cardstock and cut it with a stitched oval die. I colored the image and layered it on a red foil die cut which was in turn layered on green and white panels. I added some red Dot Sparklers to complete the focal image panel.

I embellished the inside panel with a leftover strip of the striped paper, stamped the sentiment in black ink and layered it on dark green cardstock, being sure to center it beneath the front focal panel so it wouldn’t show when the card is closed.

And one more peek… I’m so smitten with how this turned out! I see more of these in my future, lol!

Sharing in the following challenges:
1. Lemon Shortbread Challenge Blog: #129 – Anything Goes
2. Pammie’s Inky Pinkies Challenges: #2039 – Anything Goes
3. Word Art Wednesday: Weeks #458/459 – Anything Goes

Products used:
Cardstock/Paper: Papertrey Ink Pure Poppy and New Leaf cardstock, CutCardStock Basis Green cardstock, Neenah Classic Crest Solar White cardstock, American Crafts Christmas 6×6 paper pad
Stamps: The Project Bin Mid Century Christmas stamp set
Ink: Memento Tuxedo Black ink; Spectrum Noir alcohol markers- FS4, FS9; Nuvo alcohol marker- 379
Dies/Punches: Memory Box Stitched Oval Layers die, Spellbinders Labels Twenty-Five die
Accessories: MISTI stamp tool, Gemini Junior, Stampendous red Dot Sparklers

I sure hope you’ve enjoyed this project! Be sure to check out all the awesome stamps and dies at The Project Bin, and while you’re at it, head on over to The Project Bin Facebook Page for more inspiration! Thanks so much for stopping by today – we’ll see you next time!

Scrappy hugs,
lesliesig