Hey everybody, another wish for a happy Friday since this is my second post of the day! I hope you’re having a great week. I’m up on the CutCardStock blog today with a tutorial for making a super cute shirt card for Dad which is my own design. It’s super easy and really packs a punch. You can dress it up or down, and make it masculine, feminine or kid-friendly. I used Misty Blue and Navy Blue from our Lessebo line along with my studio staple Neenah Classic Crest Solar White. Be sure to pop over to the blog and see my tutorial if you’d like to learn how to make this fun card!

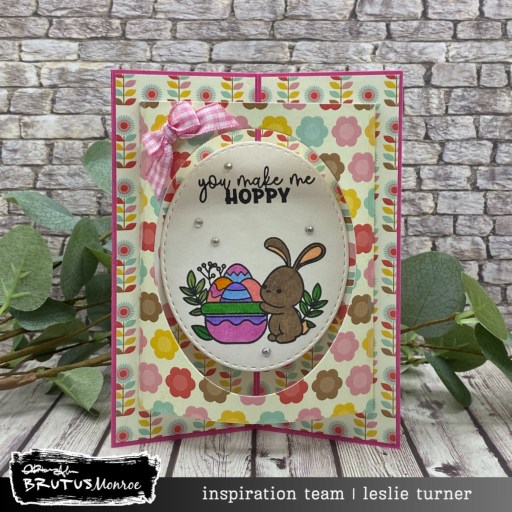
I cut the card base from Lessebo Misty Blue cardstock and then cut the pieces for the front, sleeve, collar and placket from a plaid print in the Craft Consortium Tartan paper pad. I totally LOVE plaids for masculine shirt cards! I added Keep It Simple Back To Basics Royal Enamel Dots for the buttons along with a sentiment from the Brutus Monroe Remote King stamp set which I stamped on a Misty Blue cardstock scrap in Catherine Pooler Juniper Mist ink. I cut it with a Love From Lizi Stitched Label Nested Cutting Die and layered it on a slightly larger label die cut which I cut from Lessebo Navy Blue cardstock.

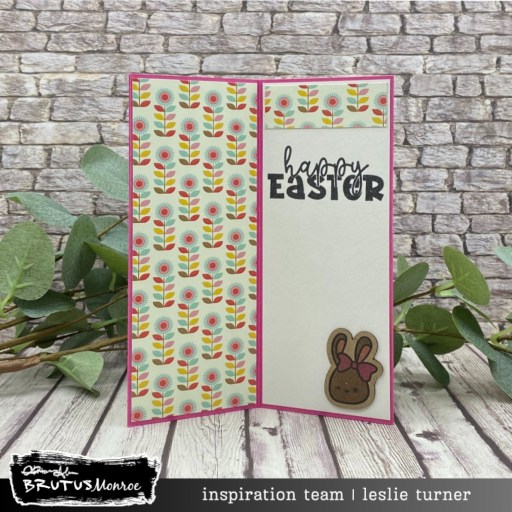
I cut the inside panel from Neenah Classic Crest 80# Solar White cardstock and embellished it with a leftover strip of the plaid paper used on the front. I stamped another Brutus Monroe sentiment from the Super Sentimental stamp set in the blue ink, and this completed the card.

Affiliate links are used in this post at no cost to you – I really appreciate your support!
CutCardStock products used:
Lessebo Misty Blue cardstock
Lessebo Navy Blue cardstock
Neenah Classic Crest 80# Solar White cardstock
Other products used:
PAPER: Craft Consortium Tartan 6×6 double-sided papers
STAMPS: Brutus Monroe Remote King stamp set and Super Sentimental stamp set
INK: Catherine Pooler Juniper Mist ink, Sharpie Fine Point White Paint Pen
DIES/PUNCHES: Love From Lizi Stitched Label Nested Cutting Dies
ACCESSORIES: Fiskars 12″ ProCision Rotary Bypass Paper Trimmer, Bearly Art precision craft glue, My Sweet Petunia Precision Glue Press, Mini MISTI, Big Shot, Spellbinders Best Ever Craft Tape 1/4″, Keep It Simple Back To Basics Royal Enamel Dots, Scrapbook Adhesives Thin 3D Foam Squares (black)
I hope you’ve enjoyed today’s project and you’re inspired to get crafty! Be sure to check out all the awesome cardstock and other goodies at CutCardStock (adhesives, labels, stickers, pens, watercolors and ribbon to name a few). And head on over to the CutCardStock Facebook Page and for more inspiration! Also, be sure to join our Creating with CutCardStock Facebook Group for even more crafty inspiration! Thanks so much for stopping by today – we’ll see you next time!
Scrappy hugs,