USA – Land that I Love

Hey everybody! Happy Wednesday – I hope you’re having a great week! Happy (almost) 4th of July to all my friends in the States. I’m up on the CutCardStock blog today with a tutorial for making a slide and lock fun fold. Yep, I squeezed one more July 4th project in. This is a fun card to make and I also have the written instructions in the Freebies section of my blog HERE if you’d like to learn how to make it. My inspiration came from Lisa Curcio’s blog originally but I ended up putting my own spin on it. And I couldn’t resist using Keep It Simple Sprinkles and items from the new Stars & Stripes Collection which really complimented the cardstock! ;)

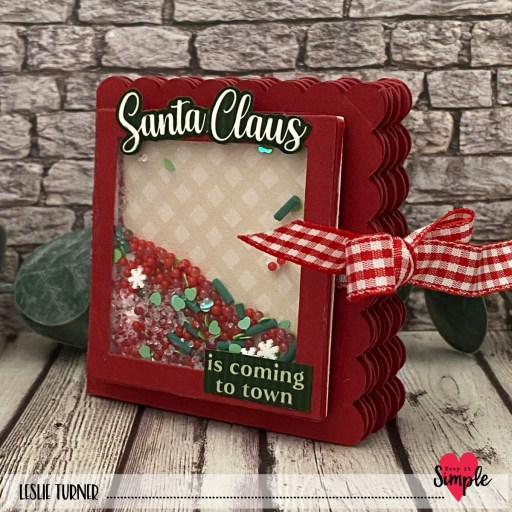
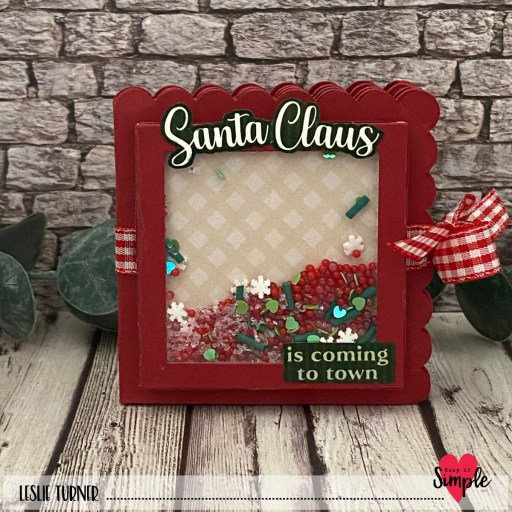
I cut the card base and a circle from Lessebo Misty Blue cardstock along with layering panels from coordinating prints in the Keep It Simple Stars & Stripes 12×12 Collection Pack. I gathered a couple die cuts from the KIS Stars & Stripes Die Cut Pieces and set everything aside to work on the shaker.

I made the shaker using Lessebo Misty Blue cardstock, a striped print in the KIS Stars & Stripes 12×12 Collection Pack, and the KIS Stitched Squares Nested Dies. The shaker mix consisted of five varieties of KIS Sprinkles. I stamped the girl gnome from the KIS Stars & Stripes Gnome of the Brave Collection Stamps on Neenah Classic Crest 110# Solar White cardstock, colored it with a variety of markers, and cut it with the coordinating Outline Die. I adhered the gnome to the shaker with 3D foam squares.

I cut the slide and lock track into the card base using my Fiskars SureCut paper trimmer. I affixed the shaker to the left side of the card base with 3D foam squares and the die cut circle on the back side. I added the two banner die cuts and a few enamel dots to the card front. The finishing touch was adding a couple small stars punched from Lessebo Dawn Maroon and Lessebo White cardstock.

I cut the inside panel from 80# Solar White and embellished it with a narrow strip of Lessebo Dawn Maroon cardstock and a leftover strip of the hearts and stars paper used on the front. I stamped a sentiment from the KIS Gnome of the Brave Collection Stamps in Memento Tuxedo Black ink. I added a couple stamped and colored hearts, and a star punched from Lessebo White cardstock.

Affiliate links are used in this post at no cost to you – I really appreciate your support!CutCardStock products used:
Neenah Classic Crest Solar White cardstock
Lessebo Misty Blue cardstock
Lessebo Dawn Maroon cardstock
Lessebo White cardstock

Other products used:
PAPER: Keep It Simple Stars & Stripes 12×12 Collection Pack
STAMPS: Keep It Simple Stars & Stripes Gnome of the Brave Collection Stamps
INK: Memento Tuxedo Black ink; Spectrum Noir Tri-Blends- AP2, FS6/7/8, TB3/4; Sharpie Ultra Fine Point Markers- light blue, medium blue, red and brown; Bic Mark-Its- Rambunctious Red and Honey Brown; Sakura Clear Star Gelly Roll Pen
DIES/PUNCHES: Keep It Simple Stitched Squares Nested Dies and Stars & Stripes Gnome of the Brave Outline Dies, Stampin’ Up Itty Bitty Star Punch
ACCESSORIES: Fiskars 12″ ProCision Rotary Bypass Paper Trimmer, Bearly Art precision craft glue, MISTI stamp tool, Big Shot, Grafix Crystal Clear Craft Plastic, 1/8″ red liner tape, GKD Shaker Strips; Keep It Simple Sprinkles- Polymer Clay American Flags, Polymer Clay Baby Blue Stars, Polymer Clay Coffee Sprinkles, Beads 2mm Matte Red, and Beads 2mm Caviar Glass Blue Mix; Keep It Simple Stars & Stripes Die Cut Pieces and Enamel Dots, Scrapbook Adhesives 3D Foam Squares (large black)

I hope you’ve enjoyed today’s project and you’re inspired to get crafty! Be sure to check out all the awesome cardstock and other goodies at CutCardStock (adhesives, labels, stickers, pens, watercolors and ribbon to name a few). And head on over to the CutCardStock Facebook Page and for more inspiration! Also, be sure to join our Creating with CutCardStock Facebook Group for even more crafty inspiration! Thanks so much for stopping by today – we’ll see you next time!

Scrappy hugs,

Have A Roarsome Birthday

Hey everybody! Happy Tuesday! Could you please tell me what happened to the month of June?! I’ve popped in with the LAST Pajama Crafter Stamps project in that humongous pile of projects I created prior to leaving the team at the end of February and hadn’t yet showcased. It took just barely over four months to share them all and I sure have enjoyed it. SO many awesome stamps and dies from Prickley Pear Stamps and the new Pajama Crafter Stamps! This adorable birthday card features the Dinosaur Pals stamps and dies from Prickley Pear Stamps and creating this little scene was a lot of fun.

I cut a standard A2 top-folding landscape card base and layering panel from CutCardStock Cougar Smooth White cardstock. I added wide Sky Washi Tape from Eyelet Outlet and then some hand-cut hills from CutCardStock Pop Tone Jellybean Green cardstock. I stamped all the elements from the Dinosaur Pals stamp set in Memento Tuxedo Black ink on Cougar Smooth White scraps, colored them with alcohol markers, and cut them with the coordinating Dinosaur Pals die set. The finishing touch was adding the sentiment (from the same stamp set) cut with a My Favorite Things Stitched Rectangle STAX and popped up on foam strips.

Affiliate links are used in this post at no cost to you – I really appreciate your support!

Pajama Crafter Stamps products used:
Prickley Pear Stamps Dinosaur Pals stamps
Prickley Pear Stamps Dinosaur Pals dies

Other products used:
Cardstock/Paper: CutCardStock Cougar Smooth 100# White, Cougar Smooth 80# White and Pop Tone Jellybean Green cardstock
Ink: Memento Tuxedo Black ink; Arteza alcohol markers- G08/09, NG04/06/08, R03, BR64, YG43/45/54/57, YR15/17/19/32/37
Dies/Punches: My Favorite Thinigs Stitched Rectangle STAX
Accessories: Tonic Studios 12″ Guillotine Paper Trimmer, CutCardStock Plus High Capacity adhesive, Art Glitter Dries Clear adhesive, MISTI stamp tool, Big Shot, Eyelet Outlet wide Sky Washi Tape, Darice double-sided foam strips

I hope you’ve enjoyed this project! Be sure to check out all the awesome stamps, dies and other goodies at Pajama Crafter Stamps which is the new home of the Prickley Pear Stamps brand and the Pajama Crafter Stamps line! Keep up with news and sales by following Pajama Crafter Stamps on Facebook, Instagram and Pinterest, and join Pajama Crafter Stamps & Friends for lots of fun crafty ideas and to share your creativity! And finally, be sure to visit the Pajama Crafter Stamps blog and sign up for the newsletter to stay in touch! Thanks so much for stopping by today – we’ll see you next time! ;)

Scrappy hugs,
Button Collector

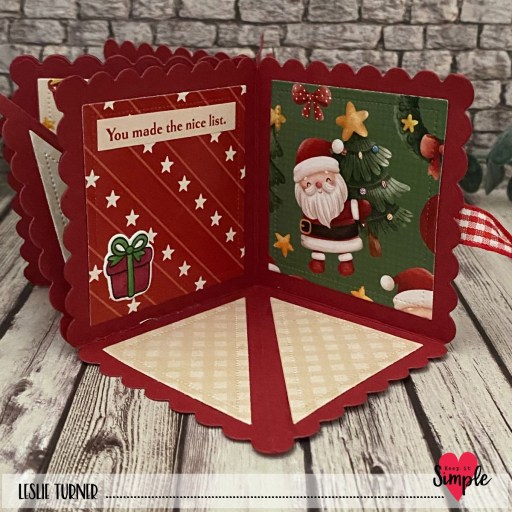
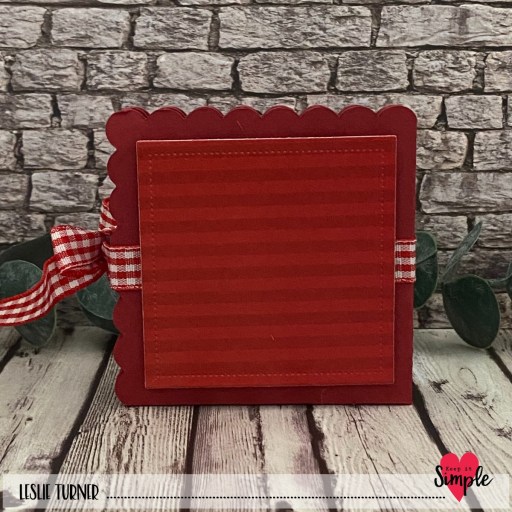
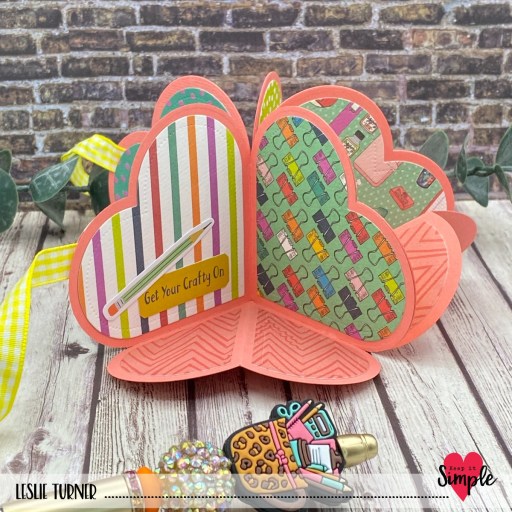
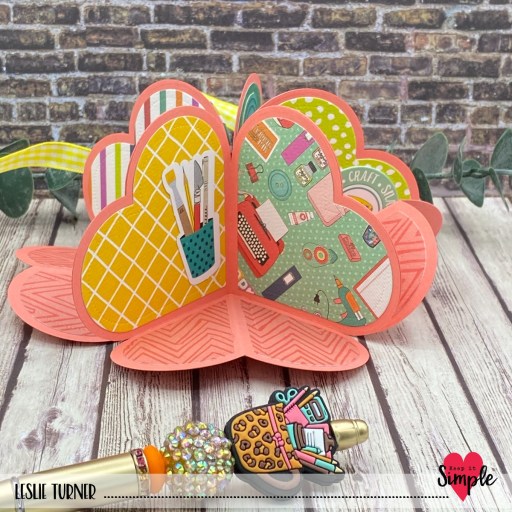
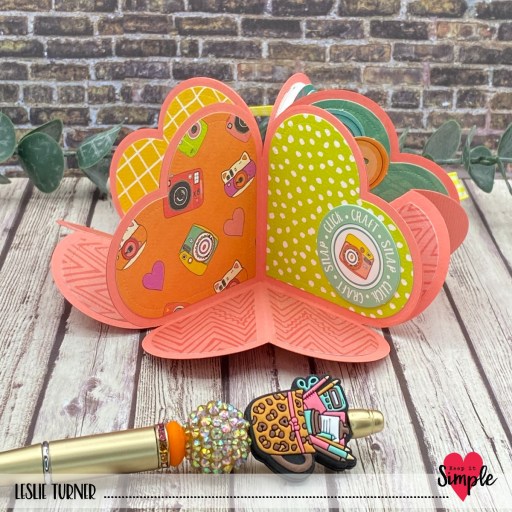
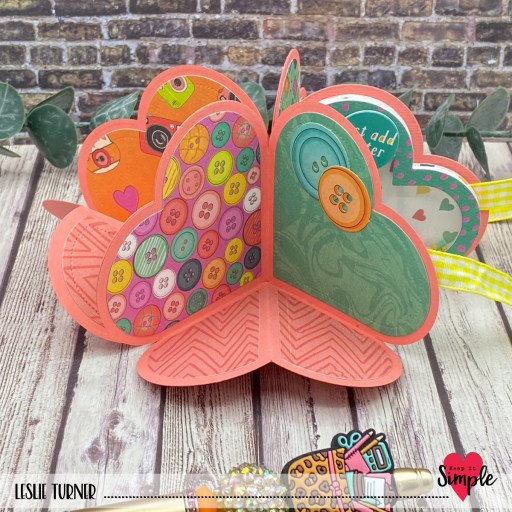
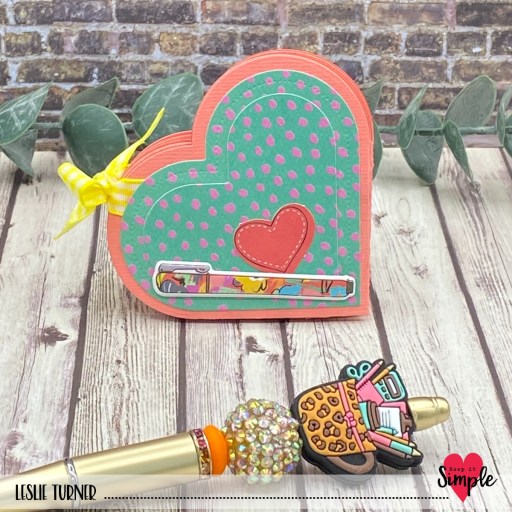
Hey everybody! Happy July 1st – can you believe half of the year has already passed us by?! Our new challenge is live this morning over at Mini Album Mania and I’m stoked to share my DT inspiration project for MAM #6 – Any Type of Mini Album Goes! This is our last challenge (due to poor participation) so I wanted to go out with a bang, lol! It’s been about five years since I created my first-ever squash book, also known as a reverse fold origami card. It was a 2-1/2″ foot long hanging one I made for my sister HERE if you’re interested in seeing it. I decided to revisit this fun fold and made a small one to turn into a mini album! So fun!

I chose several brightly colored double-sided papers from the Stamp & Scrapbook Expo Crafty Girls Flip Sides Pack, along with images and sentiments from the Beccy’s Place Button Collector digi set which I printed on CutCardStock Cougar Smooth 80# White cardstock. I cut the images with a Keep It Simple Back To Basics Stitched Squares Nested Die and layered them on CutCardStock Lessebo Pitch Black cardstock. I popped the front image up on double-sided foam strips so I could tuck the ribbon closure under it.

Here are shots of the three sections of the squash book opened up.

Affiliate links are used in this post at no cost to you – I really appreciate your support! 

Products used:
CARDSTOCK/PAPER: Stamp & Scrapbook Expo Crafty Girls Flip Sides Pack, CutCardStock Cougar Smooth 80# White and Lessebo Pitch Black cardstock
STAMPS: Beccy’s Place Button Collector digi set
DIES/PUNCHES: Keep It Simple Back To Basics Stitched Squares Nested Dies
ACCESSORIES: Cricut Paper Trimmer, Elmer’s Craft Bond Tape Runner, Bearly Art precision craft glue, Big Shot, 1″ double-sided foam strips, Keep It Simple Back To Basics Mango Ribbon

I hope you’ve enjoyed seeing this project and will link up with us this time! Thanks so much for stopping by today – we’ll see you next time! ;)

Scrappy hugs,

Happy Birthday triple fold

Hi friends! How is everybody?! Hopefully you are not scorching! I can’t believe how hot it is in some areas of the US – it’s really scary. Our new challenge is live this morning over at Christmas [or not] BINGO Challenges and I’m super stoked to share my DT inspiration project for CBC #8 – Anything Goes with Featured BINGO Card. I went with Column G this time and used pink, plaid/check/gingham, square and buttons on my birthday card. This is another version of the triple fold (there are several out there) and my inspiration came from THIS tutorial a few years back at Splitcoast Stampers.

I cut the card base and belly band from CutCardStock Basis Natural 80# cardstock along with layering panels from the Keep It Simple 6×9 Rose Collection Pack. Using the Spellbinders Lyrical Layered Florals stamp set, I stamped the image and sentiment on scrap pieces of Basis Natural in Catherine Pooler Garden Party, Sage, It’s A Girl, and Be Mine inks, and cut them with the coordinating Spellbinders Lyrical Layered Florals dies.

I added squares cut with the Spellbinders Classic Squares Large & Small dies along with Buttons Galore & More Pink Grapefruit buttons to satisfy those requirements on the BINGO card.

I cut the inside panel from Basis Natural also and embellished it with leftover strips of paper used on the front. I stamped a sentiment from the Stampin’ Up Birthday Blossoms stamp set and layered the panel on paper from the Rose collection pack.

Affiliate links are used in this post at no cost to you – I really appreciate your support! 

Products used:
CARDSTOCK/PAPER: CutCardStock Basis Natural 80# cardstock, Keep It Simple 6×9 Rose Collection Pack
STAMPS: Spellbinders Lyrical Layered Florals stamp set, Stampin’ Up Birthday Blossoms stamp set
INK: Catherine Pooler Garden Party, Sage, It’s A Girl, and Be Mine inks
DIES/PUNCHES: Spellbinders Lyrical Layered Florals die set, Spellbinders Classic Squares Large & Small
ACCESSORIES: Tonic Studios 12″ Guillotine Paper Trimmer, Tombow Mono Dots Adhesive, Bearly Art precision craft glue, MISTI stamp tool, Big Shot, Buttons Galore & More Pink Grapefruit buttons, 1/2″ double-sided foam strip, small Therm O Web Zots

I hope you’ve enjoyed seeing this project and will link up with us this time! Thanks so much for stopping by today – we’ll see you next time! ;)

Scrappy hugs,

THANKS note card

Hey everybody! I hope you had a great weekend and you’re looking forward to a short week with the July 4th holiday! Our new challenge is live this morning over at Birthstone Challenges and I’m thrilled to share my DT inspiration project for BSC #10 – Ruby & Peridot + optional Thank You! This 5″ square note card features some pretty Spellbinders paper and some of my favorite sentiment dies from STAMPlorations. Such an easy design that really packs a punch when you need to say thank you – and it would be an easy one to mass produce!

This 5″ square side-folding card base and embellishing strip were cut from Neenah Classic Crest 110# Solar White cardstock along with layering panels from a bold red print in the Spellbinders Flea Market Finds Floral 2 Palette paper pad. Using the Skinny Sentiments die set from STAMPlorations, I cut the sentiment letters from the red paper and the shadow from a Solar White scrap. The finishing touch was adding three buttons from the Buttons Galore & More Retro Christmas Buttons.

I added a vertical layered embellishing strip to the inside of the card, leaving the rest of flap blank for plenty of room to write a custom message.

Affiliate links are used in this post at no cost to you – I really appreciate your support! 

Products used:
CARDSTOCK/PAPER: Neenah Classic Crest 110# Solar White cardstock, Spellbinders Flea Market Finds Florals 2 Palette
DIES/PUNCHES: STAMPlorations Skinny Sentiments
ACCESSORIES: Tonic Studios 12″ Guillotine Paper Trimmer, Tombow Mono Dots Adhesive, Bearly Art precision craft glue, Big Shot, Buttons Galore & More Retro Christmas Buttons

I hope you’ve enjoyed seeing this project and will link up with us this time! Thanks so much for stopping by today – we’ll see you next time! ;)

Scrappy hugs,

joy & holiday cheer

Hi friends! Happy Monday – I hope you had a great weekend! Our new challenge is live this morning over at Merry Little Christmas Challenge Blog and I’m thrilled to share my DT inspiration project for MLCCB #57 – Anything Christmas Goes! I created a sweet front flap card featuring a feline (one of my favorite critters) from some older Paper Smooches stamps and dies. They are sadly out of business but their stamps and dies live on (and I have quite a few)!

I cut the card base from CutCardStock Basis Red cardstock along with layering panels from coordinating prints in The Paper Studio Four Seasons and Everything In Between -2- paper pad and CutCardStock Basis Dark Red and Basis Natural cardstock. I used the Keep It Simple Stitched Circles Nested Dies for the circles on the front.

I stamped the kitty from the Paper Smooches Feline Friends stamps in Memento Tuxedo Black ink and cut him with the coordinating Feline Friends die. I cut the front sentiment from Basis Natural cardstock using a Sizzix Script Holiday Words Thinlit. The finishing touch was adding red gemstones.

I cut the inside panel from Basis Natural and embellished it with a leftover plaid print and Basis Dark Red used on the front. I added a rectangle cut with the Keep It Simple Stitched Rectangles Nested Dies on which I stamped a sentiment from the Hero Arts Holiday Messages & Frames stamps in Memento Espresso Truffle ink. To finish the card, I added an ampersand die cut from Basis Dark Red using another die from the Sizzix Script Holiday Words Thinlits.

Affiliate links are used in this post at no cost to you – I really appreciate your support! 

Products used:
CARDSTOCK/PAPER: CutCardStock Basis Red, Basis Dark Red and Basis 110# Natural cardstock, The Paper Studio Four Seasons and Everything In Between -2- paper pad
STAMPS: Paper Smooches Feline Friends stamps, Hero Arts Holiday Messages & Frames stamps
INK: Catherine Pooler Black Jack ink, Memento Espresso Truffle ink
DIES/PUNCHES: Paper Smooches Feline Friends dies, Keep It Simple Stitched Circles Nested Dies and Stitched Rectangles Nested Dies, Sizzix Script Holiday Words Thinlits
ACCESSORIES: Tonic Studios 12″ Guillotine Paper Trimmer, Gina K Designs Adhesive Dot Runner, Bearly Art precision craft glue, MISTI stamp tool, Big Shot, red gemstones

I hope you’ve enjoyed seeing this project and will link up with us this time! Thanks so much for stopping by today – we’ll see you next time! ;)

Scrappy hugs,

Get Wild

Hey everybody! Happy July 1st! It’s a busy morning on my blog with all my challenge blogs going live with new challenges this morning! Our new challenge launched this morning over at Mix It Up Challenge Blog and I’m excited to share my DT inspiration project for MIUCB #72 – Anything Goes + optional Veggie Stamping! Yep, you read that right… veggie stamping! Have you ever done it?! It’s totally fun and you can stamp with lettuce, celery, beets, carrots, green beans and dried beans to name a few – whatever vegetables you can think of! I used sliced beets to stamp my background on this fun birthday card. I thought of it as kind of a ‘two-fer’ because the beets rendered stamping and pink coloring!

I cut a standard A2 size top-folding card base from Neenah Classic Crest 110# Solar White cardstock along with a layering panel from Tim Holtz distress watercolor cardstock. I opened a can of sliced beets and used a large one and a small one (with rubber gloves, of course, lol) and stamped a background on the watercolor panel. Once the panel was dry, I photocopied it and fussy cut the beet images to create a mask.

With the mask in place, I stamped large splotches from the Stampin’ Up Gorgeous Grunge stamp set in Catherine Pooler Lime Rickey ink randomly over the beet images and added some Spectrum Noir Crystal Clear Sparkle overlay marker to the splotches. I used another small speckle stamp from the same Gorgeous Grunge stamp set and stamped those randomly over the beet images in Concord & 9th Marmalade ink.

I stamped a sentiment from the My Favorite Things Sassy Pants Birthday Greetings 3 stamp set in Memento Tuxedo Black ink on the bottom center portion of the panel. Using the smallest die in the Spellbinders Standard Circles Large set, I die cut three circles into the panel, trimmed the panel, and adhered it to the card base. I added the die cut circles back into their negative spaces popped up on small pieces of double-sided foam strip for a little interest. The finishing touch was adding several iridescent gemstones.

I cut the inside panel from 80# Solar White cardstock and embellished it with a leftover strip cut from the front panel. I stamped a sentiment from the same MFT stamp set in black ink. Using the same small Spellbinders die, I cut a circle into another leftover strip cut from the front panel and added it to the inside panel to tie in the little circles on the front.

Affiliate links are used in this post at no cost to you – I really appreciate your support! 

Products used:
CARDSTOCK/PAPER: Neenah Classic Crest 110# and 80# Solar White cardstock, Tim Holtz distress watercolor cardstock
STAMPS: My Favorite Things Sassy Pants Birthday Greetings 3 stamp set, Stampin’ Up Gorgeous Grunge stamp set
INK: Memento Tuxedo Black ink, Concord & 9th Marmalade ink, Catherine Pooler Lime Rickey ink, Spectrum Noir Crystal Clear Sparkle overlay marker
DIES/PUNCHES: Spellbinders Standard Circles Large
ACCESSORIES: Tonic Studios 12″ Guillotine Paper Trimmer, GKD Adhesive Dot Runner, Bearly Art precision craft glue, Fiskars Stamp Press (small), can of sliced beets, 1/4″ double-sided foam strips, iridescent gemstones

I hope you’ve enjoyed seeing this project and will link up with us this time! Thanks so much for stopping by today – we’ll see you next time! ;)

Scrappy hugs,

Peace, Love & Sandy Feet

Hey, everybody! Happy Monday – I hope you had a great weekend! Our new challenge is live this morning over at Love To Craft Challenge Blog and I’m delighted to share my DT inspiration project for LTCCB #81 – Anything Goes! This adirondack chair is so stinkin’ cute, I can’t stand it! It was among the final large batch of SVG files I cut with my Scan N Cut prior to it dying a while back. I know I’ve mentioned before that over the years my cutting machines have lived in their boxes to keep dust off of them, and when I get them out to play, I cut a bunch files at once and then have a marathon session of putting them all together! This adorable beach chair features a pillow, a towel hanging on the back (with a sentiment), and an envelope. And it folds flat for mailing which I love!

Using the SVG Cuts Adirondack Chair SVG file and my Scan N Cut, I cut the chair from CutCardStock Twine and the pillow from a pattern in the Paper Studio Country Road 12×12 paper pad. I cut the flower from CutCardStock Pop Tone Cotton Candy and Pop Tone Spearmint, and the towel (hanging on the back) from CutCardStock Pop Tone Jellybean Green cardstock.

I stamped a sentiment on the towel from the Inspired By Stamping Seaside Sentiments stamp set in Memento Tuxedo Black ink. As I always say… the assembly is the most fun, and although there weren’t very many pieces to this project, I still enjoyed putting it together!

Affiliate links are used in this post at no cost to you – I really appreciate your support! 

Products used:
CARDSTOCK/PAPER: CutCardStock Twine 12×12, Pop Tone Jellybean Green, Pop Tone Cotton Candy, Pop Tone Spearmint cardstock; Neenah Classic Crest 80# Solar White cardstock, The Paper Studio Country Road 12×12 paper pad, Simple Stories Wood & Gingham Basics 12×12 paper pad
STAMPS: Inspired By Stamping Seaside Sentiments stamp set
INK: Memento Tuxedo Black ink
DIES/PUNCHES: SVG Cuts Adirondack Chair SVG cut file
ACCESSORIES: Brother Scan N Cut SDX 125e, Elmer’s Craft Bond Tape Runner, Bearly Art precision craft glue

I hope you’ve enjoyed seeing this project and will link up with us this time! Thanks so much for stopping by today – we’ll see you next time! ;)

Scrappy hugs,
Home Is Where The Heart Is

Hey everybody! Happy Monday! How did it get to be July 1st already?! LOL! Our new challenge has launched this morning over at Love To Scrap Challenge Blog and I’m super stoked to share my DT inspiration project for LTSCB #168 – Anything Goes! I created a family-themed slimline size step card using my own template HERE.

I cut the card base from CutCardStock Basis 80# White cardstock along with layering panels and embellishing strips from coordinating papers in the Keep It Simple Namaste Collection Pack. I die cut the sentiment from a journaling card in the collection using a Keep It Simple Stitched Ovals Nested Die. I added a couple hearts from the Keep It Simple Clementine Enamel Shapes as well as several pearls from the Clementine Pearls which completed the card front.

I cut the back panel from CutCardStock Basis White cardstock and embellished it with a strip cut from a patterned paper in the Keep It Simple Namaste Collection. I added a sentiment cut from a journaling card in the same collection, and layered the panel on Papertrey Inc. Chartreuse cardstock.

Affiliate links are used in this post at no cost to you – I really appreciate your support! 

Products used:
CARDSTOCK/PAPER: CutCardStock Basis 80# White cardstock, Papertrey Inc. Chartreuse cardstock, Keep It Simple Namaste Home Collection Pack
DIES/PUNCHES: Keep It Simple Stitched Ovals Nested Dies
ACCESSORIES: Tonic Studios 12″ Guillotine Paper Trimmer, Tombow Mono Dots adhesive, Bearly Art precision craft glue, Big Shot, Keep It Simple Clementine Enamel Shapes and Pearls, 1″ and 1/4″ double-sided foam strips

I hope you’ve enjoyed seeing this project and will link up with us this time! Thanks so much for stopping by today – we’ll see you next time! ;)

Scrappy hugs,
Sweet Treats for a Sweet You

Hey everybody, Happy Saturday – I sure hope you’re having beautiful weather like we are and you’re planning to do something fun this weekend! I have a sweet Pajama Crafter Stamps project to share today created with the yummy Prickley Pear Stamps Build A Cupcake-Christmas stamp set and coordinating Cupcake die. I’m almost down to the bottom of the pile of projects I created prior to leaving the team at the end of February and hadn’t yet showcased. One more card to go after this one, so stay tuned!

A standard A2 side-folding card base and embellishing strip were cut from CutCardStock Cougar Smooth White 100# cardstock along with a die cut circle using a Keep It Simple Stitched Circles Nesting Die. I cut a layering panel from a pink checkered patterned paper in the Carta Bella Country Kitchen Collection Kit along with a die cut circle from a green gingham patterned paper. I stamped the cupcake top and bottom (using the Build-A-Cupcake-Christmas stamp set) in Memento Tuxedo Black ink on a scrap piece of Cougar Smooth White, colored them with alcohol markers and cut them with the coordinating Cupcake die.

I added a piece of Eyelet Outlet skinny green and white washi tape to the embellishing strip before adhering it to the card front beneath the focal image. I stamped the sentiment from the same stamp set along the bottom of the card front and added several Eyelet Outlet white pearls.

I cut the inside panel from Cougar Smooth White and embellished it with a strip of the pink checkered paper used on the front and a strip of the skinny green and white washi tape. I stamped another sentiment from the same stamp set and layered the panel on CutCardStock Basis Pink cardstock.

Affiliate links are used in this post at no cost to you – I really appreciate your support!

Pajama Crafter Stamps products used:
Prickley Pear Stamps Build A Cupcake-Christmas stamp set
Prickley Pear Stamps Cupcake Die

Other products used:
CARDSTOCK/PAPER: CutCardStock Cougar Smooth 100# White, Cougar Smooth 80# White and Basis Pink cardstock, Carta Bella Country Kitchen Collection Kit
INK: Memento Tuxedo Black ink (pad and marker); Spectrum Noir Tri-Blends- DG1/2/3, JG5, PP1/2/3, DR1/3/4
DIES/PUNCHES: Keep It Simple Stitched Circles Nested Dies
ACCESSORIES: Fiskars 12″ ProCision Rotary Bypass Paper Trimmer, Elmer’s Craft Bond Tape Runner, Bearly Art precision craft glue, MISTI stamp tool, Big Shot, Eyelet Outlet 4mm White Pearls and Skinny Green & White Washi Tape, 1/2″ double-sided foam strip

I hope you’ve enjoyed this project! Be sure to check out all the awesome stamps, dies and other goodies at Pajama Crafter Stamps which is the new home of the Prickley Pear Stamps brand and the Pajama Crafter Stamps line! Keep up with news and sales by following Pajama Crafter Stamps on Facebook, Instagram and Pinterest, and join Pajama Crafter Stamps & Friends for lots of fun crafty ideas and to share your creativity! And finally, be sure to visit the Pajama Crafter Stamps blog and sign up for the newsletter to stay in touch! Thanks so much for stopping by today – we’ll see you next time! ;)
Scrappy hugs,