Enjoy The Journey diorama

Hey everybody! Happy Saturday! I hope you have something fun planned this weekend! I have another ScrapbookingStore DT inspiration project that I’m thrilled to share with you today created with the amazing August 2023 Scrapbook Kit with Upgrades! This travel-themed collection is so fun and the sky is the limit with what you can create! I absolutely love diorama cards and this one features papers and stickers along with chipboard accents, adhesive brads and ephemera from the upgrades. And the trio of postage stamp images on the inside are cute, cute, cute!

I cut the diorama card base from Neenah Classic Crest 80# Solar White cardstock and a layering panel from a patterned paper in the kit. I embellished the panel with stickers from the sticker sheet along with a chipboard element and adhesive brads from the upgrades.

I die cut the trio of apertures into the inside flap and layering panel using the Your Next Stamp Peek A Boo Trio die set. I embellished the panel with stickers from the sticker sheet. Using the Keep It Simple Stitched Squares Nesting Dies, I cut three faux stamps from a paper in the collection and adhered them beneath the apertures.

I cut the back panel from 80# Solar White cardstock and embellished it with a strip of patterned paper and some ephemera from the upgrades.

Sharing in the following challenges:
1. A Perfect Time To Craft Open Challenge: August #8-2023 – Anything Goes
2. A Place To Start: August 2023 – Anything Goes w/ optional Leaves and/or Trees
3. Classic Design Challenge: August #8 – Anything Goes
4. Make My Monday Challenge: #207 – Three Images of Anything
5. Penny’s Paper-Crafty Challenge Blog: #553 – Anything Goes with Paper

Affiliate links are used in this post at no cost to you – I really appreciate your support!

ScrapbookingStore products used:
August 2023 Scrapbook Kit with Upgrades

Other products used:
CARDSTOCK/PAPER: Neenah Classic Crest 80# Solar White cardstock
DIES/PUNCHES: Your Next Stamp Peek A Boo Trio Die Set, Keep It Simple Stitched Squares Nested Dies
ACCESSORIES: Tonic Studios 12″ Guillotine Paper Trimmer, Tombow Mono Dots adhesive, Bearly Art precision craft glue, Big Shot

I hope you’ve enjoyed today’s project and you’re thinking about all the fun you could have with this month’s kit… you really ought to think about joining the Subscription Club! Be sure to Follow us on Facebook, Instagram, Pinterest and YouTube for lots of crafty inspiration! And if you do decide to join the Subscription Club, join our ScrapbookingStore Club Member Group on Facebook for more inspiration and to share your projects! Thanks so much for stopping by today – we’ll see you next time!

Scrappy hugs,

Life Is An Adventure

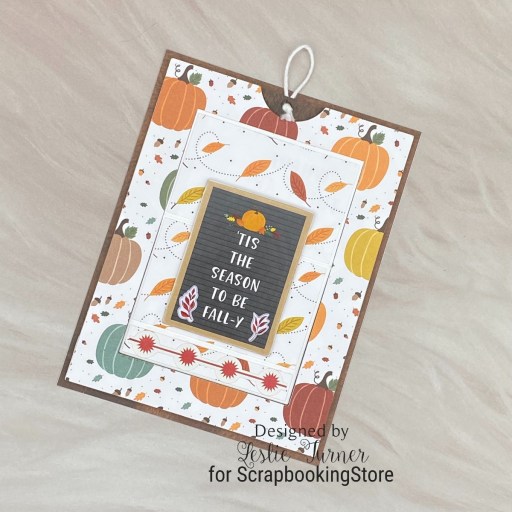
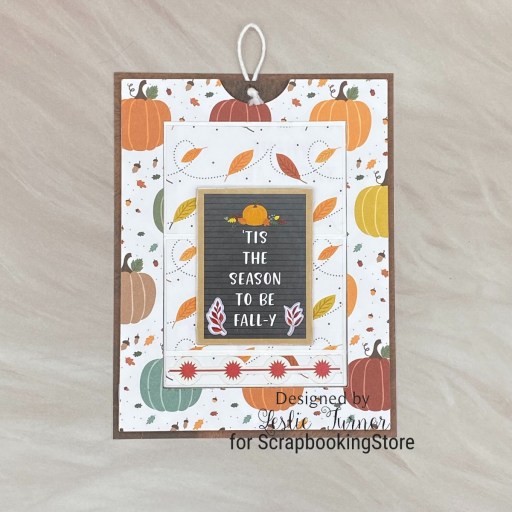
Hi everyone! I hope you’re having a great week – it’s rapidly coming to an end, lol! I’m thrilled to be back to share another ScrapbookingStore DT inspiration project with you today created with the amazing August 2023 Scrapbook Kit with Upgrades! This super cute travel-themed fold out panel card features papers and stickers along with ephemera and adhesive brads from the upgrades. I totally LOVE this collection, and this fun fold is a great way to showcase the products in it! It’s been a few years since I made one of these (October 2018 to be exact, lol) and you can see it HERE if you’re interested in looking. I reversed the fold out panel on this one to switch it up a bit. ;)

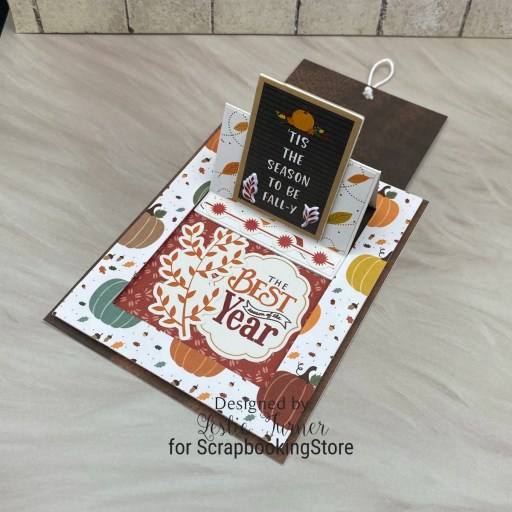
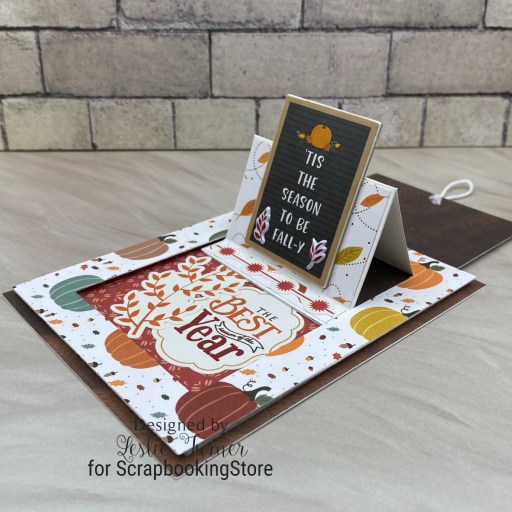
I cut the card base and a layering panel from CutCardStock Stardream Metallic Azalea cardstock. I cut the fold out panel from Neenah Classic Crest 80# Solar White cardstock and embellished it with panels cut from an assortment of patterned paper in the kit, stickers from the sticker sheet, and ephemera from the upgrades. I die cut a stitched square using the Keep it Simple Stitched Squares Nested Dies for the focal element on the front, and adhered a sentiment from the ephemera pack and a chipboard element. The finishing touch was adding several adhesive brads from the upgrades.

Here’s a shot of the fold out panel opened up.

I cut the back panel from 80# Solar White cardstock and embellished it with a trimmed journaling card layered on a stitched square die cut.

Sharing in the following challenges:
1. A Perfect Time To Craft Open Challenge: August #8-2023 – Anything Goes
2. A Place To Start: August 2023 – Anything Goes w/ optional Leaves and/or Trees
3. Classic Design Challenge: August #8 – Anything Goes
4. Penny’s Paper-Crafty Challenge Blog: #553 – Anything Goes with Paper
5. Scrapping4fun Challenges: #226 – Polka Dots

Affiliate links are used in this post at no cost to you – I really appreciate your support!

ScrapbookingStore products used:
August 2023 Scrapbook Kit with Upgrades

Other products used:
CARDSTOCK/PAPER: Neenah Classic Crest 80# Solar White cardstock, CutCardStock Stardream Metallic Azalea cardstock
DIES/PUNCHES: Keep It Simple Stitched Squares Nested Dies
ACCESSORIES: Tonic Studios 12″ Guillotine Paper Trimmer, Tombow Mono Dots adhesive, Bearly Art precision craft glue, Big Shot

I hope you’ve enjoyed today’s project and you’re thinking about all the fun you could have with this month’s kit… you really ought to think about joining the Subscription Club! Be sure to Follow us on Facebook, Instagram, Pinterest and YouTube for lots of crafty inspiration! And if you do decide to join the Subscription Club, join our ScrapbookingStore Club Member Group on Facebook for more inspiration and to share your projects! Thanks so much for stopping by today – we’ll see you next time!

Scrappy hugs,

Travel Mini Album

Hey everybody, Happy Thursday! Another year term starts this month with ScrapbookingStore design team and I couldn’t be happier! Such an amazing company to design for! The awesome travel-themed August 2023 Scrapbook Kit with Upgrades is here and I’ve popped in this morning to share my first project created with it! I’m totally loving everything included in this collection! I created a fun travel mini album from eight journaling cards included in the paper pack and embellished all the pages with coordinating papers, stickers, chipboard accents, adhesive brads and ephemera! So fun!

I trimmed up eight of the 3×4 journaling cards along with eight pieces of patterned paper, rounded the corners, and adhered them to Neenah Classic Crest Double Thick 165# Solar White cardstock pages cut to 3-1/8” x 4-1/8”. I embellished the back side of each page with stickers from the sticker sheet, die cut rectangles created with the Keep It Simple Stitched Rectangles Nested Dies, and ephemera from the upgrades, leaving plenty of room for photos and journaling. I used a chipboard accent and adhesive brad from the upgrades to embellish the front. I punched a hole in the top left corner of all the pages with my WRMK Crop A Dile Big Bite and affixed a ball chain with clasp from my stash. I cut several pieces of pink, teal and yellow ribbon and tied them around the clasp with a white twine bow.

Sharing in the following challenges:
1. A Perfect Time To Craft Open Challenge: August #8-2023 – Anything Goes
2. Classic Design Challenge: August #8 – Anything Goes
3. Penny’s Paper-Crafty Challenge Blog: #553 – Anything Goes with Paper

Affiliate links are used in this post at no cost to you – I really appreciate your support!

ScrapbookingStore products used:
August 2023 Scrapbook Kit with Upgrades

Other products used:
CARDSTOCK/PAPER: Neenah Classic Crest Double Thick 165# Solar White cardstock, Neenah Classic Crest 80# Solar White cardstock
DIES/PUNCHES: Kadomaru Pro Corner Rounder, My Favorite Things Stitched Rectangle STAX
ACCESSORIES: Tonic Studios 12″ Guillotine Paper Trimmer, Tombow Mono Dots adhesive, Bearly Art precision craft glue, Big Shot, We R Memory Keepers Crop-A-Dile Big Bite, ball chain and clasp, assorted ribbon pieces, Doodlebug Design Lily White Doodle Twine

I hope you’ve enjoyed today’s project and you’re thinking about all the fun you could have with this month’s kit… you really ought to think about joining the Subscription Club! Be sure to Follow us on Facebook, Instagram, Pinterest and YouTube for lots of crafty inspiration! And if you do decide to join the Subscription Club, join our ScrapbookingStore Club Member Group on Facebook for more inspiration and to share your projects! Thanks so much for stopping by today – we’ll see you next time!

Scrappy hugs,

Inner Sparkle

Hey everybody! Well, another new week has rolled around and here we are in the middle of August! I’m stoked to be back with another Keep It Simple DT inspiration project to share created with papers, die cut pieces and enamel dots in the amazing new Craft Mode Collection! I created a quilt block card featuring lots of bold bright colors. I just can’t get enough of these colors and the super adorable die cut pieces! Oh, and matching enamel dots… my favorite embellishment!

I cut a standard A2 size top-folding card base from CutCardStock Cougar Smooth 100# White cardstock along with a layering panel and embellishing strips from patterned papers in the Craft Mode 6×9 Collection Pack. Using the Stitched Squares Nesting Dies, I cut four squares from different colors of paper in the Craft Mode 6×9 Cardstock Pack and arranged them along with the embellishing strips on the card front. I added a sentiment from the Craft Mode Die Cut Pieces along with matching Craft Mode Enamel Dots, which completed the card front.

I cut the inside panel from CutCardStock Cougar Smooth 80# White cardstock and embellished it with a strip of patterned paper from the Craft Mode 6×9 Collection Pack used on the front. I added another sentiment from the Craft Mode Die Cut Pieces and layered the panel on a blue paper from the Craft Mode 6×9 Cardstock Pack.

Sharing in the following challenges:
1. 613 Avenue Create: August 2023 – Anything Goes w/ optional CAS
2. A Perfect Time To Craft Open Challenge: August #8-2023 – Anything Goes
3. Classic Design Challenge: August #8 – Anything Goes

Keep It Simple products used:
Craft Mode 6×9 Collection Pack
Craft Mode 6×9 Cardstock Pack
Craft Mode Die Cut Pieces
Craft Mode Enamel Dots
Stitched Square Nested Dies

Affiliate links are used in this post at no cost to you – I really appreciate your support!

Other products used:
CARDSTOCK/PAPER: CutCardStock Cougar Smooth 100# White and Cougar Smooth 80# White cardstock
ACCESSORIES: Tonic Studios 12″ Guillotine Paper Trimmer, CutCardStock Plus High Capacity adhesive, Bearly Art precision craft glue, Big Shot, 1″ double-sided foam strip

I hope you’ve loved seeing this project as much as I loved creating it, and you’re inspired to get crafty! Be sure to check out ALL the fun goodies in the Keep It Simple store such as paper, stamps, die cuts, ephemera, washi tape and enamel dots to name just a few! You’ll go cray-cray! Be sure to Follow us on Facebook, Instagram, and Pinterest for lots of crafty inspiration! Thanks so much for stopping by today – we’ll see you next time!

Scrappy hugs,

Doggone Cool

Hi everyone! A big ol’ Happy Tuesday to you! I’m up on the Prickley Pear Stamps blog today with an inspiration project featuring the NEW Doggone Good Friends stamps with coordinating Doggone Good Friends dies! These are such fun products, I can’t even begin to tell you how much I enjoyed creating this friendship card!

I cut a standard A2 size side-folding card base and layering panel from CutCardStock Cougar Smooth 80# White cardstock. I applied strips of Eyelet Outlet wide road and grass washi tape on the layering panel to create the background. I stamped the image from the Doggone Good Friends stamp set in Memento Tuxedo Black ink on Cougar White cardstock, colored it and cut it with the coordinating Doggone Good Friends die set. I added the stamped sentiment which completed the card.

Sharing in the following challenges:
1. A Perfect Time To Craft Open Challenge: August #8-2023 – Anything Goes
2. A Place To Start: August 2023 – Anything Goes w/ optional Leaves and/or Trees
3. Classic Design Challenge: August #8 – Anything Goes

Affiliate links are used in this post at no cost to you – I really appreciate your support!

Prickley Pear Stamps products used:
Doggone Good Friends stamp set
Doggone Good Friends die set

Other products used:
CARDSTOCK/PAPER: CutCardStock Cougar Smooth 80# White cardstock
INK: Memento Tuxedo Black ink; Arteza alcohol markers- B28/29/37, Y31, YR25/27, R43, WG04/06/08; Marvy Uchida DecoColor Liquid Silver paint marker, Copic black 0.3 multi-liner pen, Sakura White Gelly Roll pen
ACCESSORIES: Tonic Studios 12″ Guillotine Paper Trimmer, Bearly Art precision craft glue, MISTI stamp tool, Big Shot, Eyelet Outlet wide Road and Grass washi tape, 1/2″ double-sided foam strip

I hope you’ve enjoyed this project! Be sure to check out all the awesome stamps and dies at Prickley Pear Stamps! Save 10% on anything on the site when you shop at Prickley Pear Stamps by using coupon code LESLIE10 at checkout! And be sure to ‘like’ and ‘follow’ the Prickley Pear Stamps Facebook page to keep up with news and sales, and join Prickley Pear Pals (the fan group) for lots of fun crafty ideas and to share your creativity! And finally, we’d love to see you visit the Prickley Pear Stamps blog and become a Follower! Hope to see you there! Thanks so much for stopping by today – we’ll see you next time! ;)

Scrappy hugs,

Fully Rely On God

Happy Saturday, everybody! I hope you’re having a good one! I’m up on the Prickley Pear Stamps blog today with an inspiration project featuring the new ‘F.R.O.G. – Fully Rely On God’ stamp set. It’s a small 3×3 stamp set but sure packs a big punch… I totally love our little Ramona! I made a simple tag that could easily be used for a bookmark.

I cut two tag/bookmark bases from CutCardStock Cougar Smooth 80# White cardstock and stamped the Ramona image from the F.R.O.G. – Fully Rely On God stamp set on one of them. I colored it with an assortment of markers, and added three strips of skinny MAMBI washi tape and several green Stampendous Dot Sparklers. I adhered the second tag to the back of the first one for a clean finish, and added hole reinforcements that I created with 1/2″ and 1/4″ Stampin’ Up circle punches and a scrap piece of CutCardStock Kale Green cardstock. I looped three pieces of ribbon through the hole and secured it with a Doodlebug Design Lily White Doodle Twine bow.

Sharing in the following challenges:
1. A Perfect Time To Craft Open Challenge: August #8-2023 – Anything Goes
2. Classic Design Challenge: August #8 – Anything Goes
3. Once Upon A Time Challenges: #13 – It Feels Good To Be Yourself (totally feels good to rely on God on a daily basis!)

Affiliate links are used in this post at no cost to you – I really appreciate your support!

Prickley Pear Stamps products used:
F.R.O.G. – Fully Rely On God stamp set

Other products used:
CARDSTOCK/PAPER: CutCardStock Cougar Smooth 80# White and Kale Green cardstock
INK: Memento Tuxedo Black ink; Arteza alcohol markers- YG25/26, RP09, GS09, PB25; Bic Mark-It Fine Point markers- Hot Aqua, Summer Melon, Sunset Orange, Key Lime and Yellow Blaze; Sharpie Ultra Fine Point markers- Lime Green, Aqua, Light Pink and Brown; Faber Castell Orange Glaze Pitt Artist Pen
DIES/PUNCHES: Stampin’ Up 1/2″ and 1/4″ Circle Punches
ACCESSORIES: Tonic Studios 12″ Guillotine Paper Trimmer, Tombow Mono Dots adhesive, Bearly Art precision craft glue, MISTI stamp tool, Me & My Big Ideas skinny washi tape, Stampendous Green Dot Sparklers, assorted ribbons from stash, Doodlebug Design Lily White Doodle Twine

I hope you’ve enjoyed this project! Be sure to check out all the awesome stamps and dies at Prickley Pear Stamps! Save 10% on anything on the site when you shop at Prickley Pear Stamps by using coupon code LESLIE10 at checkout! And be sure to ‘like’ and ‘follow’ the Prickley Pear Stamps Facebook page to keep up with news and sales, and join Prickley Pear Pals (the fan group) for lots of fun crafty ideas and to share your creativity! And finally, we’d love to see you visit the Prickley Pear Stamps blog and become a Follower! Hope to see you there! Thanks so much for stopping by today – we’ll see you next time! ;)

Scrappy hugs,
Lake by the Mountains paper sculpture

Hey everybody! Happy Friday – it’s almost the weekend! The weekends sure are rolling around mighty quickly these days, lol! I’m delighted to be guest designing once again for Cut It Up Challenges! The theme for Challenge #284 is Create A Scene, and I created a paper sculpture for Ed’s birthday that fit perfectly into this challenge! You know how much I love my Scan N Cut, and I used the amazing Father’s Day Paper Sculpture cut file from Dreaming Tree to create this beautiful scene.

I cut all the pieces from Clear Path Paper white cardstock; American Crafts Dandelion, Kale, Crimson, Grass, Key Lime, Plum, Marine, Sunflower and Leaf cardstock; and DCWV Textured Double Sided cardstock. I always say the assembly of these kinds of projects is the most fun! I assembled it with liquid glue and foam strips (some cut into smaller pieces), giving it tons of dimension. The dimensional layers on this really bring it to life. So happy with how it turned out, and the hubs loved it too! And I do apologize for the slight glare on front of the shadowbox… the acrylic was hard to photograph!

Sharing in the following challenges:
1. 613 Avenue Create: August 2023 – Anything Goes w/ optional CAS
2. A Perfect Time To Craft Open Challenge: August #8-2023 – Anything Goes
3. A Place To Start: August 2023 – Anything Goes w/ optional Leaves and/or Trees
4. Classic Design Challenge: August #8 – Anything Goes
5. Jan’s Digi Stamps Challenges: August Anything Goes
6. Once Upon A Time Challenges: #13 – It Feels Good To Be Yourself (totally feels good as a nature lover to get away to a cabin in the mountains by the lake!)
7. Outlawz Tuesday Color Challenge: Use 3 of the 4 Colors w/ optional Make It Summer

Affiliate links are used in this post at no cost to you – I really appreciate your support! 

Products used:
Cardstock/Paper: Clear Path Paper white cardstock; American Crafts Dandelion, Kale, Crimson, Grass, Key Lime, Plum, Marine, Sunflower and Leaf cardstock; DCWV Textured Double Sided cardstock
Dies/Punches: Dreaming Tree Father’s Day Paper Sculpture cut file
Accessories: Brother Scan N Cut machine, Art Glitter Dries Clear adhesive, 1/4″ double-sided foam strips, white shadowbox

I hope you’ve enjoyed seeing this project and will link up with us this time! Thanks so much for stopping by today – we’ll see you next time! ;)

Scrappy hugs,
So Much Fun

Hey everybody! Not sure where this year has gone but the months just continue to fly right on by! I’m delighted to be back with another Keep It Simple DT inspiration project created with papers, stamps and dies in the new Craft Mode Collection! This fun slimline shaker card features stamped and die cut craft supplies included in the shaker mix! How fun is that?!

I cut a 3-3/4″ x 9″ slimline card base from Neenah Classic Crest 80# Solar White cardstock. I then cut a layering panel from a pink print in the Craft Mode 12×12 Collection Pack. Using the Wavy Slimline Die, I cut a shaker panel for the front from a green print in the Craft Mode 12×12 Collection Pack, reserving the negative spaces to use on the shaker, along with an acetate panel.

I stamped the scissors, tape, washi tape and glitter elements from the Craft Mode Stamps in Memento Tuxedo Black ink on Solar White cardstock. I colored them with fine point markers and cut them with the coordinating Craft Mode Outline Dies. I added Kat Scrappiness Crystal Clear Pinwheel Sequin Mix and Pearl Glass Dots along with the die cut craft supplies to the shaker and sealed it up. I stamped a sentiment from the same Craft Mode Stamps, trimmed it and adhered it to the top right corner of the shaker.

I cut the inside panel from Solar White cardstock and embellished it with the green patterned paper used on the front. I stamped a sentiment from the At The Expo Stamps in Memento Tuxedo Black ink and layered the panel on the pink patterned paper used on the front.

Sharing in the following challenges:
1. 613 Avenue Create: August 2023 – Anything Goes w/ optional CAS (no twist)
2. A Perfect Time To Craft Open Challenge: August #8-2023 – Anything Goes
3. Classic Design Challenge: August #8 – Anything Goes
4. Jan’s Digi Stamps Challenges: August Anything Goes
5. Once Upon A Time Challenges: #13 – It Feels Good To Be Yourself (a die-hard crafter!)

Keep It Simple products used:
Craft Mode 12×12 Collection Pack
Craft Mode Stamps
Craft Mode Outline Dies
At The Expo Stamps
Wavy Slimline Die

Affiliate links are used in this post at no cost to you – I really appreciate your support!

Other products used:
CARDSTOCK/PAPER: Neenah Classic Crest 80# Solar White cardstock
INK: Memento Tuxedo Black ink; Bic Mark-It Fine Point markers- Fandango Pink, Petal Pink, Polynesian Purple, Misty Blue, Oceanview Blue, Cloud Nine Grey, Summer Melon, Tiki Hut Tan; Sakura Clear Star Gelly Roll pen
ACCESSORIES: Tonic Studios 12″ Guillotine Paper Trimmer, CutCardStock Plus High Capacity adhesive, Bearly Art precision craft glue, MISTI stamping tool, Big Shot, Grafix Crystal Clear Craft Plastic; Kat Scrappiness Crystal Clear Pinwheel Sequin Mix and Pearl Glass Dots; 1″ double-sided foam strips

I hope you’ve loved seeing this project as much as I loved creating it, and you’re inspired to get crafty! Be sure to check out ALL the fun goodies in the Keep It Simple store such as paper, stamps, die cuts, ephemera, washi tape and enamel dots to name just a few! You’ll go crazy! Be sure to Follow us on Facebook, Instagram, and Pinterest for lots of crafty inspiration! Thanks so much for stopping by today – we’ll see you next time!

Scrappy hugs,

Sending Hugs

Hey everybody! I hope you’re having a FABulous week! Our new challenge is live this morning over at Ally’s Angels and I’m super stoked to share my DT inspiration project for Challenge #73! All of our challenges are Anything Goes and we’d love for you to link up with us this month! I created a pretty front flap card (which seems to have become one of my most favorite fun folds) employing the random inking technique which really yields an amazing result!

I cut the front flap card base from Neenah Classic Crest 110# Solar White cardstock along with layering panels from Keep It Simple Ruby 12×12 Collection Pack. I stamped the image from the Stampin’ Up Eden’s Garden stamp set in Ranger mowed lawn, fired brick, pine needles and frayed burlap distress inks. I stamped the sentiment (from the same Stampin’ Up stamp set) in Memento Espresso Truffle ink, cut it with a Spellbinders Classic Ovals Small die, and layered it on a slightly larger oval cut with a Spellbinders Classic Ovals Large die. The finishing touch was the addition of several Taylored Expressions Silver Drip Drops.

I embellished the inside of the front flap with a coordinating strip of paper from the Keep It Simple Ruby 12×12 Collection Pack, and stamped the sentiment (also from the Stampin’ Up Eden’s Garden stamp set) in Memento Espresso Truffle ink.

Sharing in the following challenges:
1. A Perfect Time To Craft Open Challenge: August #8-2023 – Anything Goes
2. A Place To Start: August 2023 – Anything Goes w/ optional Leaves and/or Trees (playing twist)
3. Beautiful Blossoms Challenge: #7 – Anything Goes Flowers w/ optional Mood Board
4. Classic Design Challenge: August #8 – Anything Goes
5. Jan’s Digi Stamps Challenges: August Anything Goes

Affiliate links are used in this post at no cost to you – I really appreciate your support! 

Products used:
CARDSTOCK/PAPER: Neenah Classic Crest 110# Solar White cardstock, Keep It Simple Ruby 12×12 Collection Pack
STAMPS: Stampin’ Up Eden’s Garden stamp set
INK: Ranger distress inks- mowed lawn, fired brick, pine needles and frayed burlap; Memento Espresso Truffle ink
DIES/PUNCHES: Spellbinders Classic Ovals Large and Small dies
ACCESSORIES: Tonic Studios 12″ Guillotine Paper Trimmer, Tombow Mono permanent adhesive, Art Glitter Dries Clear adhesive, MISTI stamp tool, Big Shot, 1″ double-sided foam strip, Taylored Expressions Silver Drip Drops

I hope you’ve enjoyed seeing this project and will link up with us this month! We’d love to see what you create! Thanks so much for stopping by today – we’ll see you next time! ;)

Scrappy hugs,
Merry Christmas & Hoppy New Year

Hey everybody! I hope you’re having a great week! I’m up on the Prickley Pear Stamps blog with an inspiration project featuring the NEW Christmas with Spinach and Ramona stamp set! I created a slimline card in a pale pink and green color combo, and OMGoodness, talk about totally adorable! These two couldn’t be any cuter!
I cut a 3-3/4″ x 9″ slimline card base from CutCardStock Basis 80# White cardstock along with layering panels from pale pink, pale green and dark green papers in the Keep It Simple Ruby and Jade 12×12 Collection Packs. I stamped the image from the Christmas with Spinach and Ramona stamp set in Memento Tuxedo Black ink on Basis White cardstock, colored it with alcohol markers, and then fussy cut it. I adhered the image to the card front and stamped the sentiment (from the same stamp set) in Memento Northern Pine ink. The finishing touch was adding several pink gemstones.
Sharing in the following challenges:
1. A Perfect Time To Craft Open Challenge: August #8-2023 – Anything Goes
2. A Place To Start: August 2023 – Anything Goes w/ optional Leaves and/or Trees (playing twist)
3. Classic Design Challenge: August #8 – Anything Goes

Affiliate links are used in this post at no cost to you – I really appreciate your support!

Prickley Pear Stamps products used:
Christmas with Spinach and Ramona stamp set

Other products used:
CARDSTOCK/PAPER: CutCardStock Basis 80# White cardstock, Keep It Simple Ruby and Jade 12×12 Collection Packs
INK: Memento Tuxedo Black and Northern Pine inks; Arteza alcohol markers- RP01/06/09, R18/36, YG04/24/42/43, G17, BR52/95
ACCESSORIES: Tonic Studios 12″ Guillotine Paper Trimmer, Tombow Mono Dots adhesive, Bearly Art precision craft glue, MISTI stamp tool, pink gemstones

I hope you’ve enjoyed this project! Be sure to check out all the awesome stamps and dies at Prickley Pear Stamps! Save 10% on anything on the site when you shop at Prickley Pear Stamps by using coupon code LESLIE10 at checkout! And be sure to ‘like’ and ‘follow’ the Prickley Pear Stamps Facebook page to keep up with news and sales, and join Prickley Pear Pals (the fan group) for lots of fun crafty ideas and to share your creativity! And finally, we’d love to see you visit the Prickley Pear Stamps blog and become a Follower! Hope to see you there! Thanks so much for stopping by today – we’ll see you next time! ;)

Scrappy hugs,