Merry Christmas Wallet for CutCardStock Paper Crafted Christmas Gifts Blog Hop!

Hey everybody! A big giant WELCOME to the CutCardStock Paper Crafted Christmas Gifts Blog Hop going on for the next week, starting at 9:00 AM Eastern Time today and ending on Friday, November 18th at 11:59 PM Eastern Time! This is going to be tons of fun with lots of crafty Christmas gift inspiration, so COME HOP WITH US!

AND there are $25 and $15 CutCardStock gift cards up for grabs! The winners will be randomly selected and then posted on the CutCardStock Facebook and Instagram pages on Saturday, November 19th at 2:00 PM Eastern Time.

To be entered into the random drawing, you must go to either the CutCardStock Facebook or Instagram page and (1) Like the Paper Crafted Christmas Gifts post, (2) Comment with your favorite idea from the blog links listed, AND (3) Share the post with your paper crafting friends!

=  =  =  =  =  =  =  =  =  =  =  =  =  =  =  =

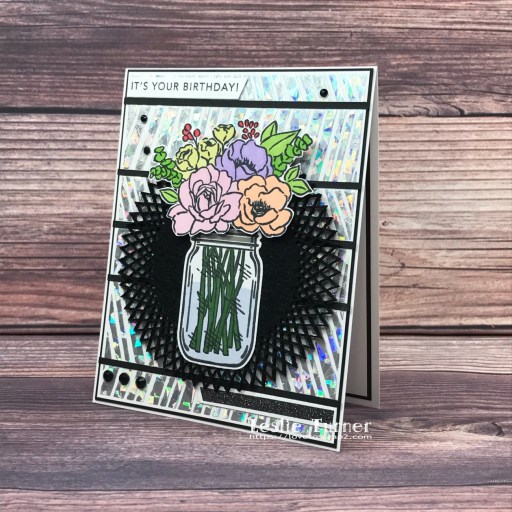
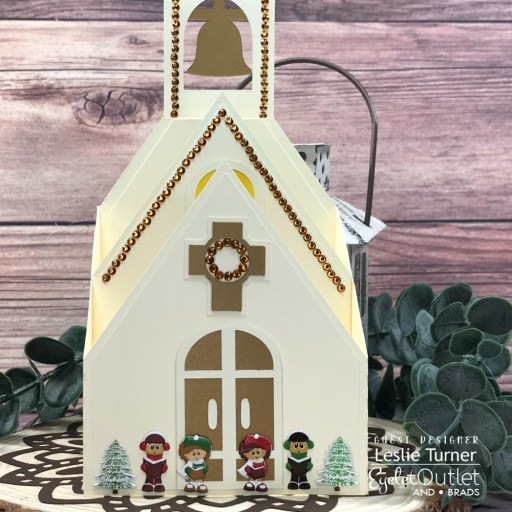
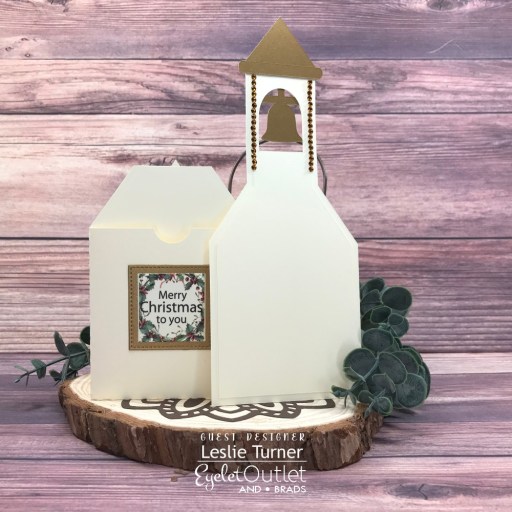
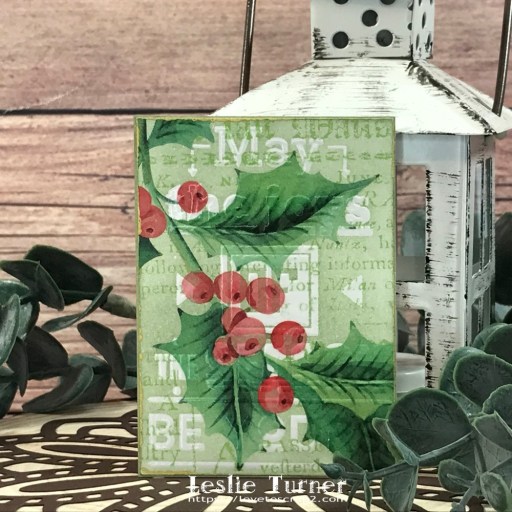
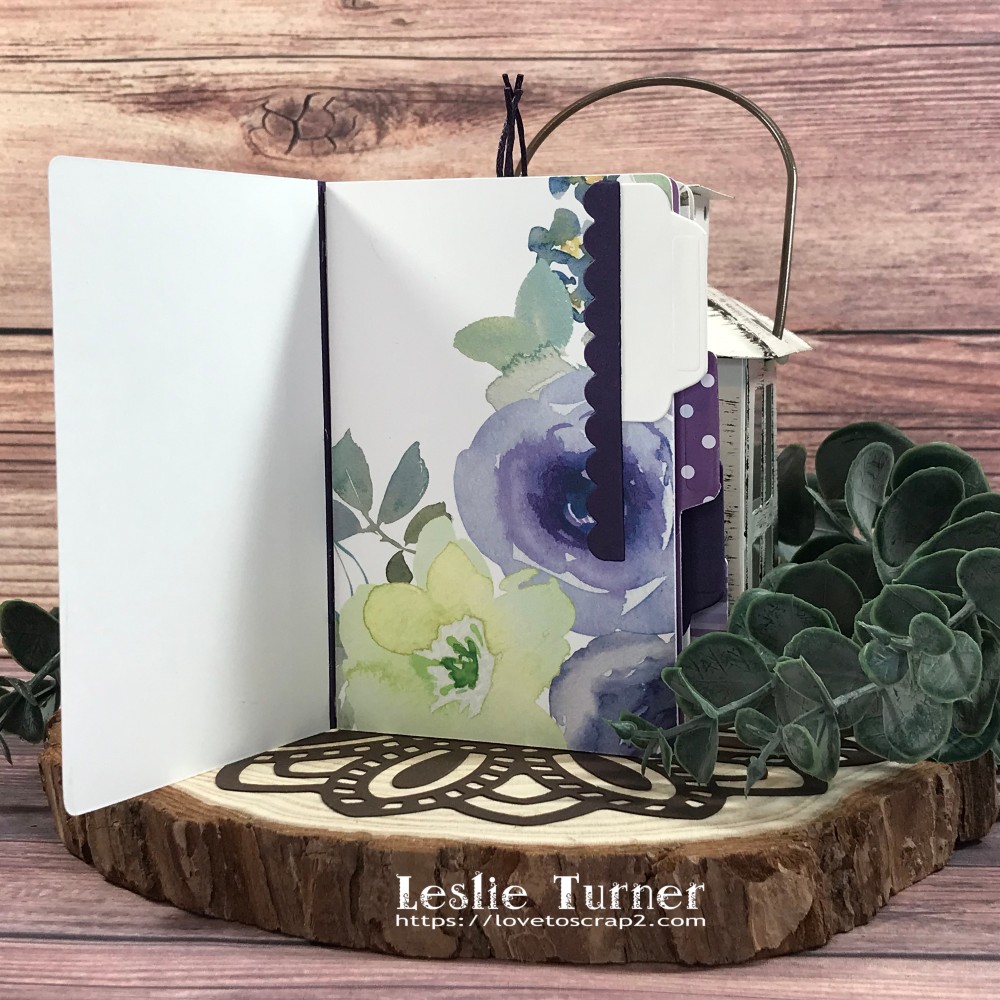
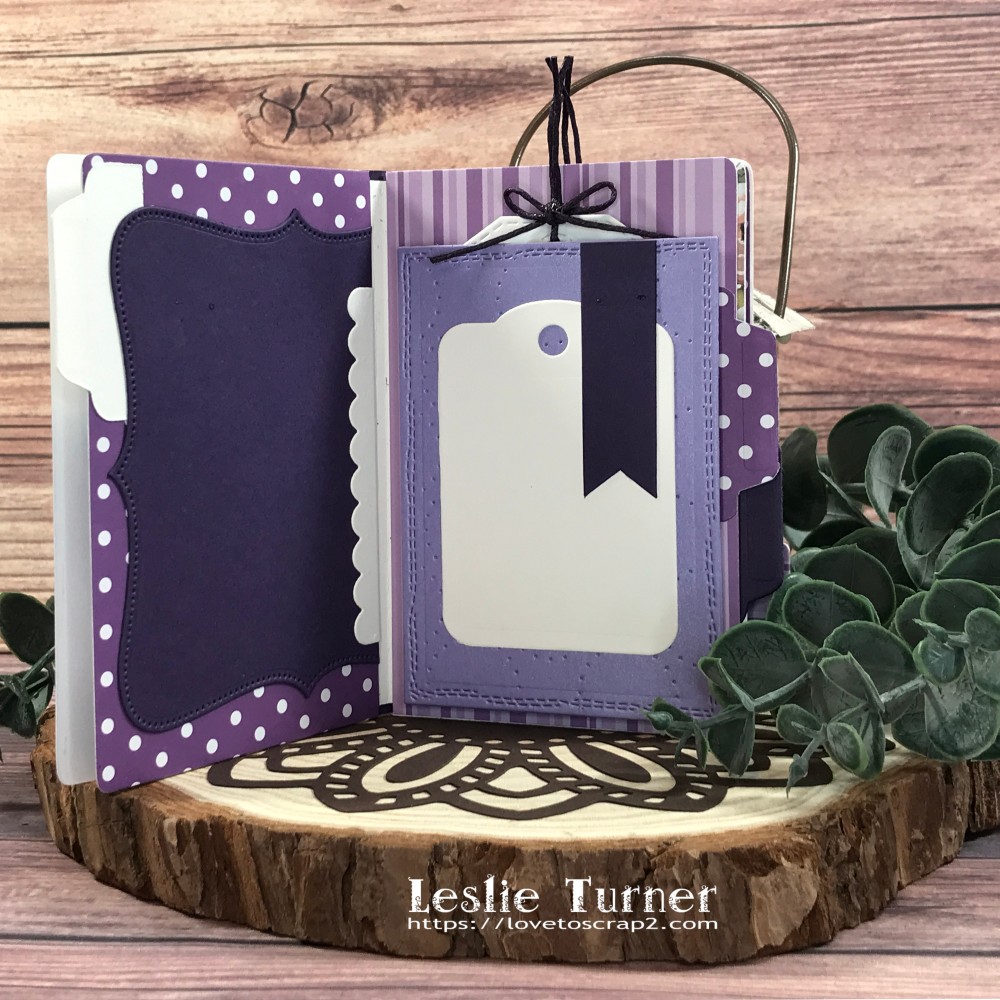
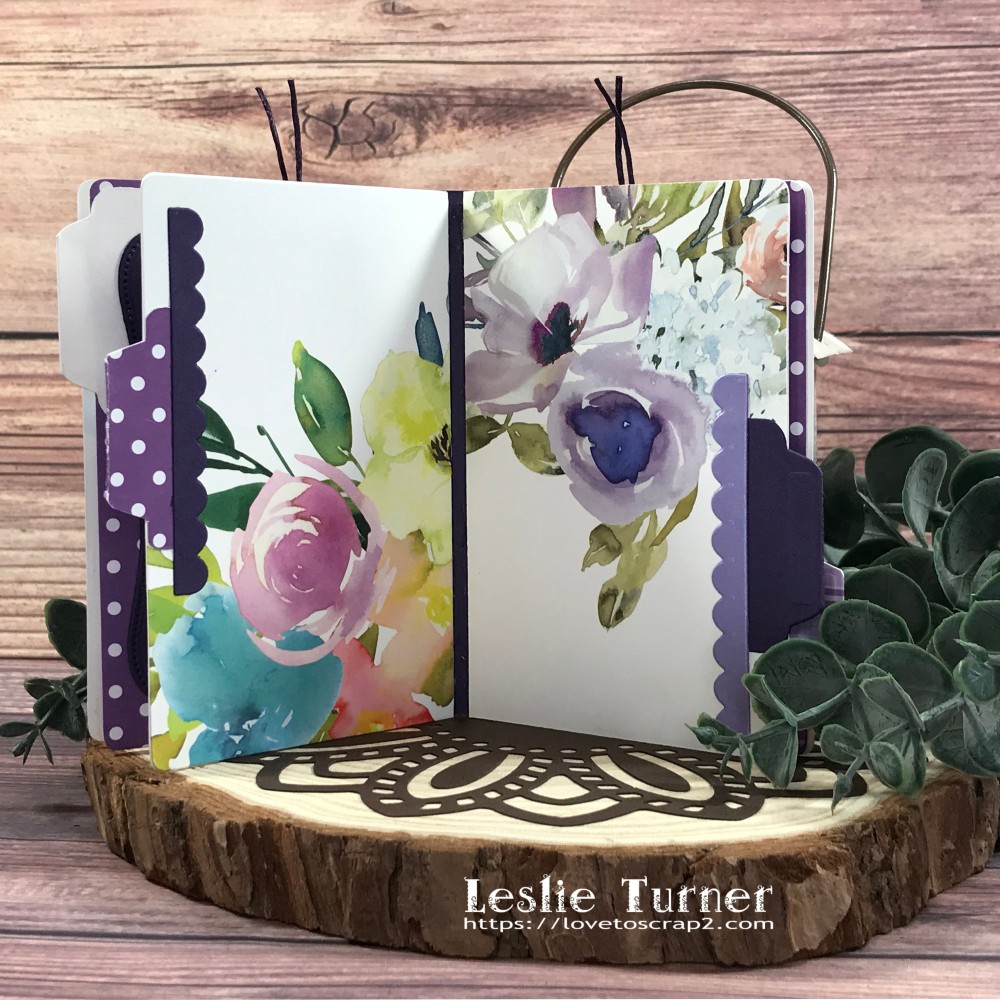
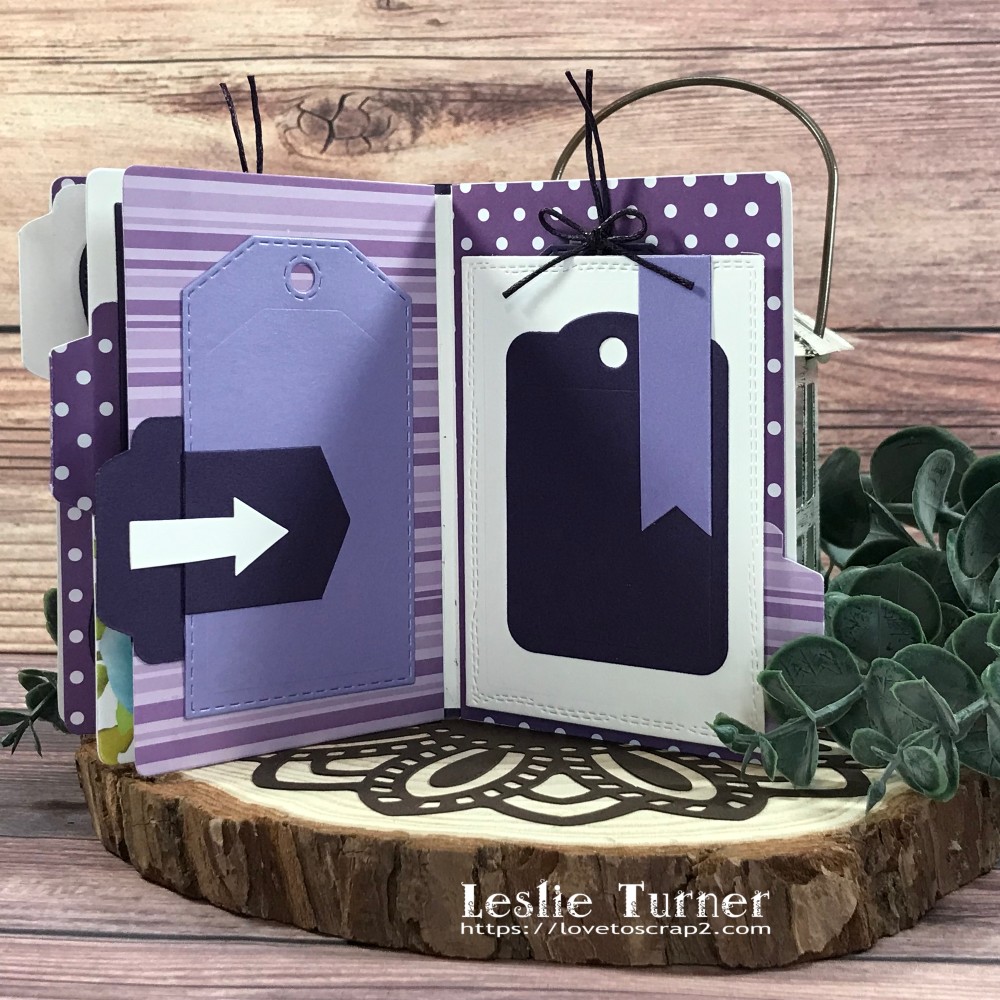
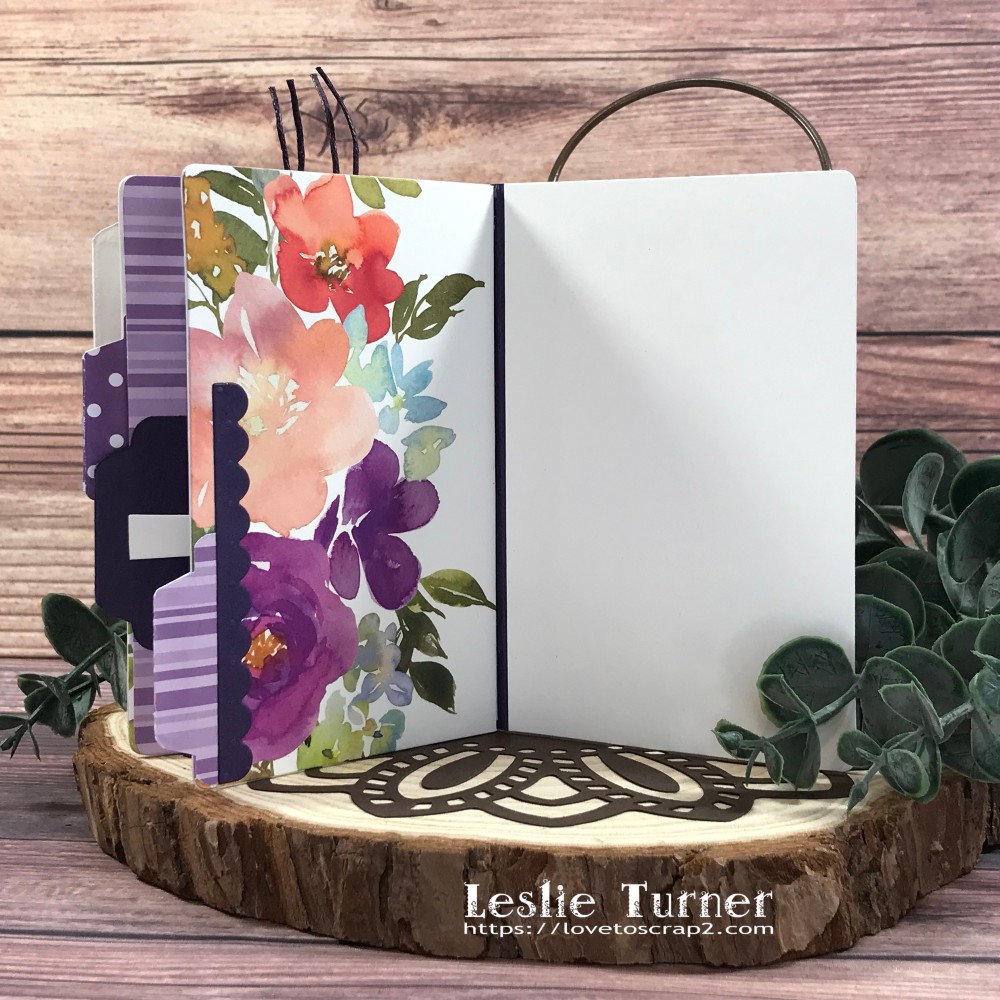
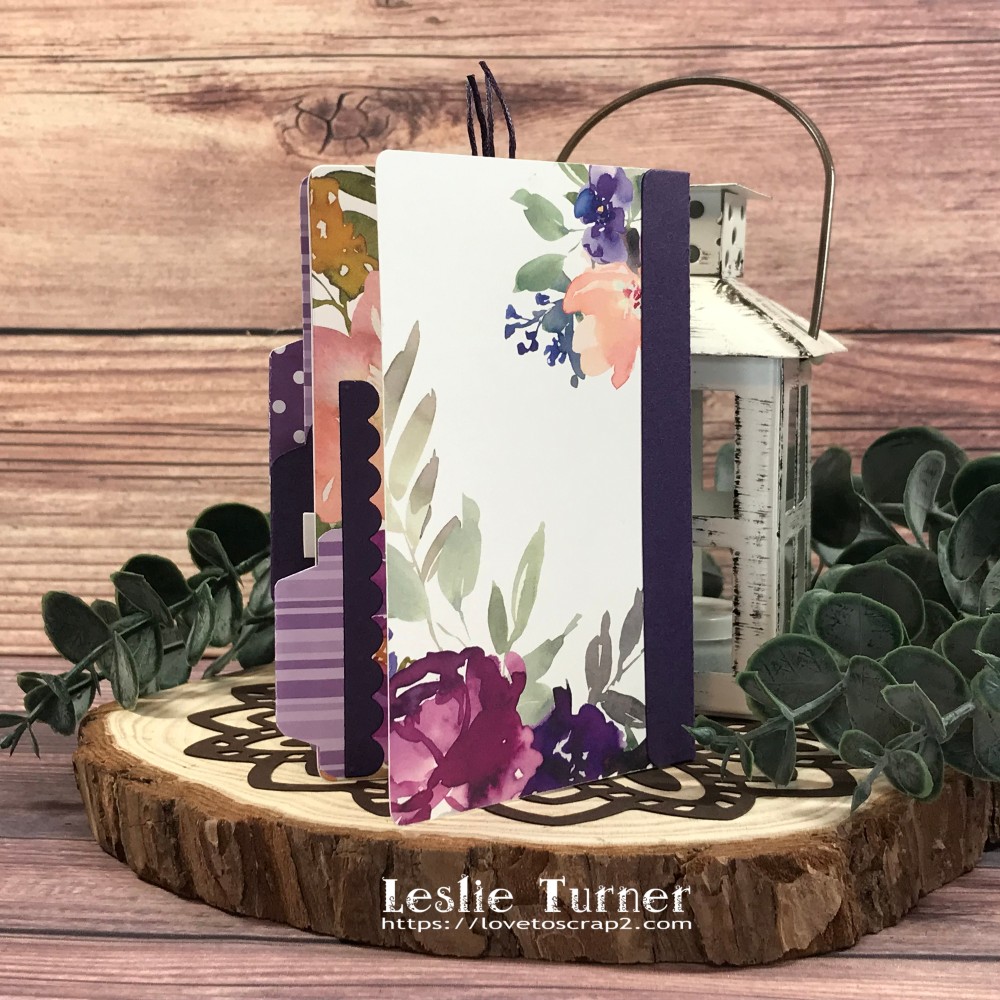
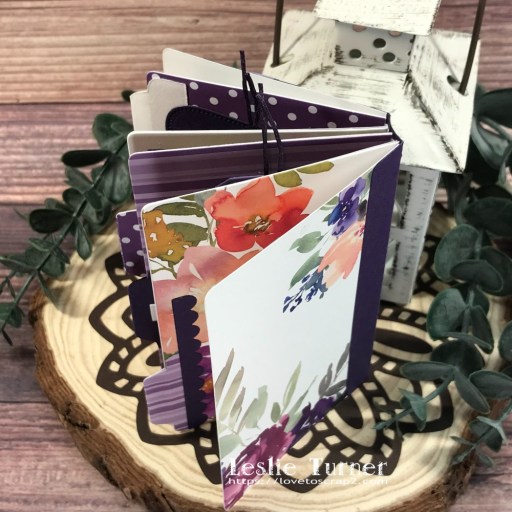
Now, let me side-track you for a minute or three to share my Merry Christmas Wallet! This wallet features pockets on the inside with a pull-out Christmas card, and holds either cash or a gift card. It’s made from Neenah Classic Crest Solar White and beautiful Flamingo cardstock! I LOVE a Christmas project in non-traditional colors!

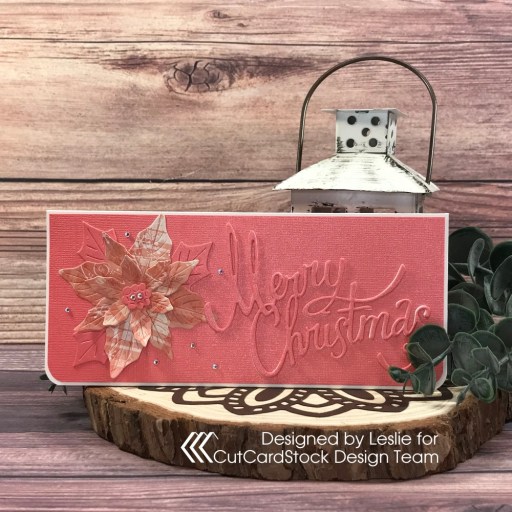
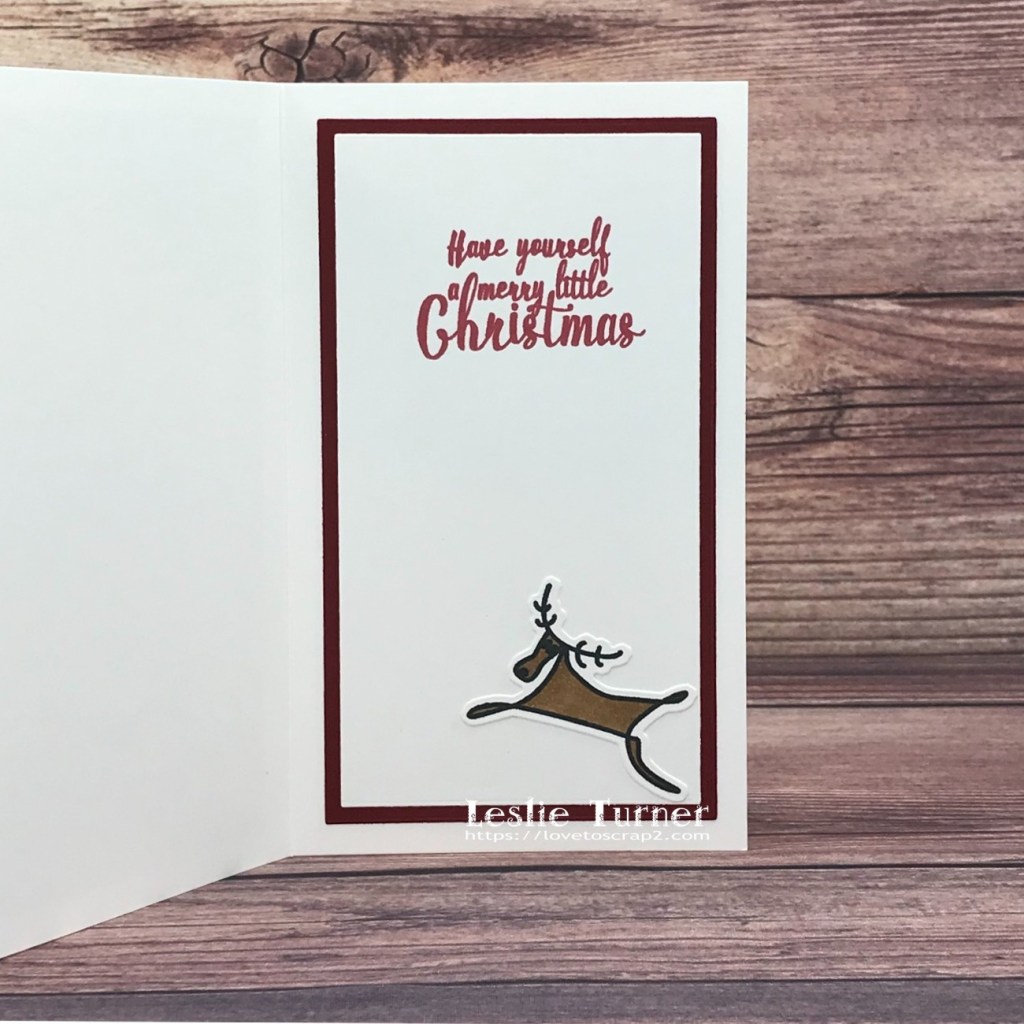
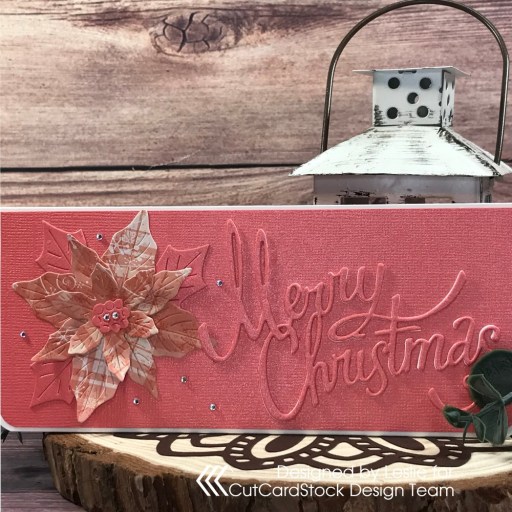
I fashioned the wallet base from Neenah Classic Crest Solar White cardstock and layering panels from Flamingo cardstock, and rounded the bottom corners. I die cut the sentiment from Solar White and Flamingo cardstock which I layered for dimension, and then die cut the Poinsettia from Flamingo cardstock and some patterned paper in my stash. The finishing touch was adding some tiny iridescent gemstones.

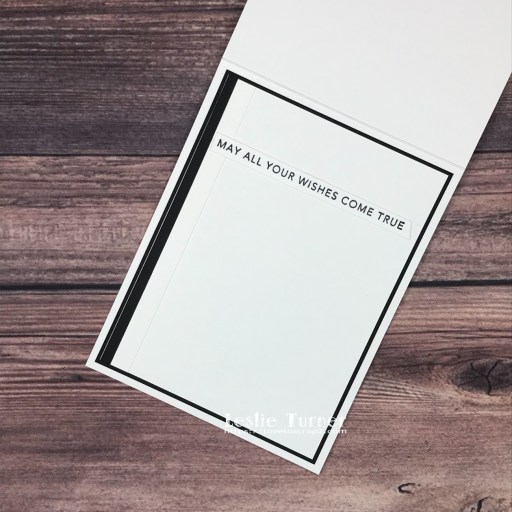
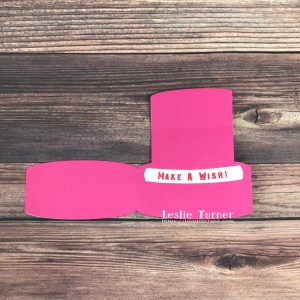
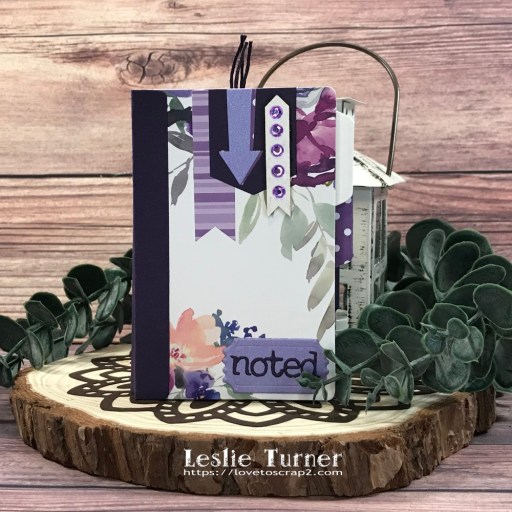
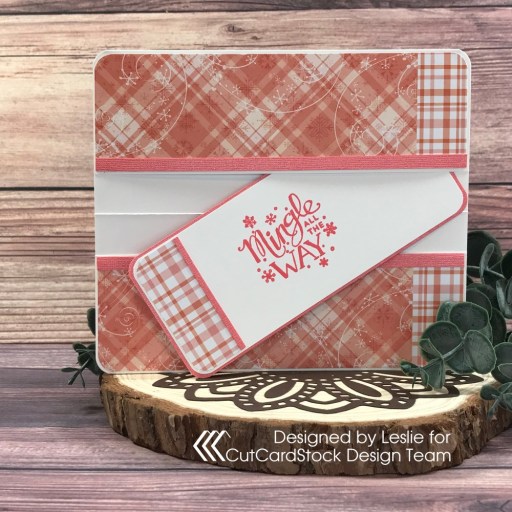
I cut the inside panels for the pockets from two coordinating prints and added embellishing strips cut from Flamingo cardstock. I created a pull-out Christmas card embellished with a matching patterned paper and stamped a sentiment to tuck into the top pocket.

Affiliate links are used in this post at no cost to you – I really appreciate your support!

CutCardStock products used:
Neenah Classic Crest 80# Solar White cardstock
Flamingo cardstock

Other products used:
Paper: Hot Off The Press Joyful Christmas 6×6 papers
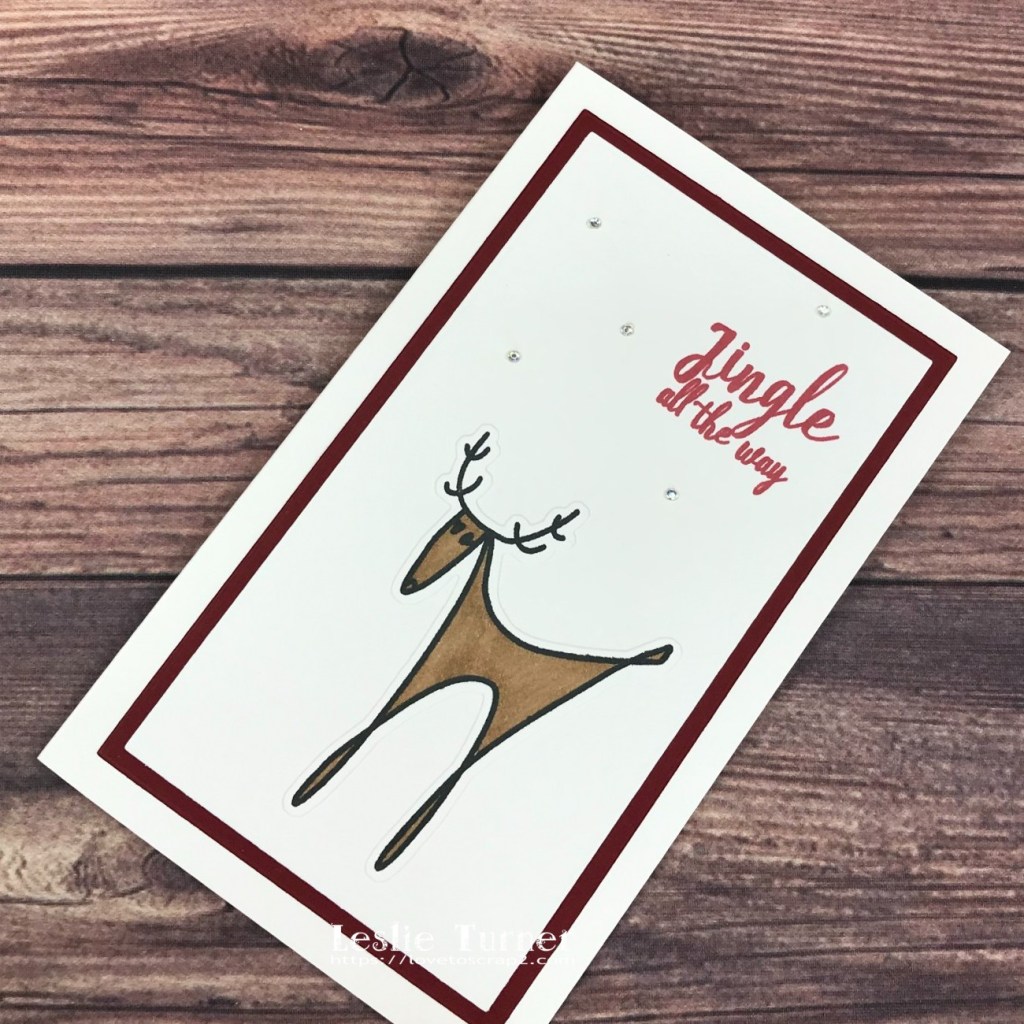
Stamps: Stampin’ Up Mingle All The Way stamp set
Ink: Catherine Pooler Coral Cabana ink
Dies/Punches: Sizzix Christmas Ribbon Thinlits, Hero Arts Paper Layering Poinsettia dies, Kadomaru Pro corner rounder
Accessories: Tonic Studios 12″ Guillotine Paper Trimmer, Bearly Art precision craft glue, Big Shot, MISTI stamping tool, Darice tiny iridescent gemstones

In closing, I hope you’ve enjoyed seeing my Merry Christmas Wallet! I also hope you’re inspired to get crafty and you’ll hop with us! You will definitely find some inspiration to create a paper crafted Christmas gift or two! Be sure to check out all the awesome cardstock and other goodies at CutCardStock (adhesives, labels, stickers, pens, watercolors and ribbon to name a few). And head on over to the CutCardStock Facebook Page for more inspiration! Thanks so much for stopping by today – we’ll see you next time!

Scrappy hugs,

It’s Your Birthday!

Hey everybody! Happy Thursday – I hope you’re having a great week! Our new challenge is live this morning over at Ally’s Angels and I’m super stoked to share my DT inspiration project for Challenge #64! I created a birthday card featuring a pretty jar of flowers against a felt doily and a foiled background!

I cut a standard A2 size top-folding card base from 110# Solar White cardstock along with layering panels from CutCardStock Royal Sundance Linen Eclipse Black cardstock and 80# Solar White. Using the Hero Arts Zig Zag Pattern stencil, DecoFoil Transfer Gel Duo and Spellbinders Silver Holographic Facets Glimmer Foil with my laminator, I created the background on the white layering panel. I embellished it with very narrow black linen cardstock strips and adhered it to the black linen panel.

Using the Stampin’ Up Jar of Flowers stamp set, I stamped the images in Memento Tuxedo Black ink on Solar White cardstock, colored the flowers with alcohol markers and fussy cut them, and punched the jar with the coordinating punch. I adhered a Brutus Monroe Charcoal Felt Doily to the card front and then affixed the jar of flowers. I stamped a Taylored Expressions Simple Strips-Birthday sentiment in black ink, cut it with the coordinating die, and adhered it to the top left of the card base. I created a coordinating element from a scrap of white cardstock and a strip of Eyelet Outlet skinny black glitter washi tape, and adhered it to the bottom right. The finishing touch was adding several Darice black gemstones.

I cut the inside panel from 80# Solar White cardstock and embellished it with a strip of CutCardStock Royal Sundance Linen Eclipse Black cardstock used on the front. I added another Taylored Expressions Simple Strips-Birthday sentiment stamped in black ink, and layered the panel on black linen cardstock.

Affiliate links are used in this post at no cost to you – I really appreciate your support! 

Products used:
Cardstock/Paper: Neenah Classic Crest 110# and 80# Solar White cardstock, CutCardStock Royal Sundance Linen Eclipse Black cardstock
Stamps: Stampin’ Up Jar of Flowers stamp set, Taylored Expressions Simple Strips-Birthday
Ink: Memento Tuxedo Black ink; Catherine Pooler Tranquil and Twilight inks; Arteza alcohol markers- YG02/05/06, Y07, R23/25, RP09, YR37
Dies/Punches: Stampin’ Up Jar Punch, Taylored Expressions Simple Strips-Asymmetrical Die
Accessories: Tonic Studios 12″ Guillotine Paper Trimmer, Bearly Art precision craft glue, MISTI stamp tool, Big Shot, DecoFoil Stencil Pal, DecoFoil Transfer Gel Duo, Hero Arts Zig Zag Pattern stencil, Spellbinders Silver Holographic Facets Glimmer Foil, Scotch Laminator, Brutus Monroe Charcoal Felt Doily, Stampin’ Up Dimensionals and Mini Dimensionals, Eyelet Outlet skinny black glitter washi tape, Darice black gemstones

I hope you’ve enjoyed seeing this project and will link up with us this time! Thanks so much for stopping by today – we’ll see you next time! ;)

Scrappy hugs,

Holiday Wishes To You & Yours

Hey everybody! I hope your week has started off nicely and it’s not too cold where you are! It’s snowed a couple times here and it’s pretty chilly! I have an awesome CutCardStock DT inspiration project to share with you today featuring our Basis Green, Basis Red, Bright Gold Foil and Neenah Classic Crest 80# Solar White cardstock which I paired with some digital Christmas papers in my stash. You know how I love fun folds and this Pop-Up Presents Card can be tailored to any occasion with the use of different patterned papers on the presents!

I cut a standard A2 size side-folding card base and a layering panel from Basis Green, along with layering panels from Neenah Classic Crest Solar White and digital Christmas papers, and adhered them all together. I created presents using red cardstock and digital Christmas paper, and embellished them with gold foil strips and snowflake red bling. I stamped the sentiment in Catherine Pooler Rockin’ Red ink and added an additional snowflake which completed the front.

I cut the pop-up layer for the inside from Solar White, scored it down the middle, and made four horizontal cuts and six vertical score lines for the presents. I folded the layer in half creating mountain folds on the vertical score lines. I adhered red cardstock and two patterns in the digital Christmas papers to the presents, and embellished them with gold foil strips and snowflake red bling. I stamped the sentiment in Catherine Pooler Rockin’ Red ink on a scrap piece of Solar white cardstock, cut it with a Kat Scrappiness Mini Slimline Postage Stamp Edge die, and layered it on a scrap piece of green cardstock. The finishing touch was adding several more snowflakes.

Affiliate links are used in this post at no cost to you – I really appreciate your support!

CutCardStock products used:
Basis Green
Basis Red
Bright Gold Foil
Neenah Classic Crest 80# Solar White cardstock

Other products used:
Cardstock/Paper: Chantalia Design Christmas Carols digital papers
Stamps: CAS-ual Friday Stamps Snowy Sayings stamp set
Ink: Catherine Pooler Rockin’ Red ink
Dies/Punches: Kat Scrappiness Mini Slimline Postage Stamp Edge Dies
Accessories: Tonic Studios 12″ Guillotine Paper Trimmer, Tonic Studios/Tim Holtz 8.5” Comfort Trimmer, Big Shot, MISTI stamp tool, Tape Runner, Bearly Art precision craft glue, Eyelet Outlet Snowflake Red Bling

I hope you’ve enjoyed today’s project and you’re inspired to get crafty! Be sure to check out all the awesome cardstock and other goodies at CutCardStock (adhesives, labels, stickers, pens, watercolors and ribbon to name a few). And head on over to the CutCardStock Facebook Page for more inspiration! Thanks so much for stopping by today – we’ll see you next time!

Scrappy hugs,

Christmas Church

Hey everybody! Can you believe we’re almost a week into November already?! Happy Heavenly birthday to my crafty sister who would have been 74 today. I love her and miss her so much. I’m delighted to be back on the Eyelet Outlet blog today as a guest designer with my final inspiration project showcasing these new brads! This super cute Christmas Church box card features the Caroler Brads and Snow Tree Brads adorned with 3mm Champagne Jewel Bling Strip and a sentiment on the back created with Christmas Holly Washi Tape! And being a box card means it folds flat for mailing!

I cut all the pieces from Neenah Classic Crest Baronial Ivory and CutCardStock Stardream Metallic Antique Gold cardstock. I used a yellow alcohol marker to color the windows.

After assembling the church, I added the Caroler Brads and Snow Tree Brads, and then embellished all three sections with 3mm Champagne Jewel Bling Strips.

This box card has a pull-out element with plenty of room to write a custom message. The final touch was adding a sentiment on the back pocket created with a strip of Christmas Holly Washi Tape applied to a scrap of ivory cardstock, trimmed, and layered on antique gold cardstock.

Eyelet Outlet products used:
Caroler Brads
Snow Tree Brads
3mm Champagne Jewel Bling Strip
Christmas Holly Washi Tape

Affiliate links are used in this post at no cost to you – I really appreciate your support!

Other products used:
Cardstock/Paper: Neenah Classic Crest Baronial Ivory cardstock, CutCardStock Stardream Metallic Antique Gold cardstock
Ink: Arteza alcohol marker- Y02
Dies/Punches/Cut Files: My Scrap Chick Card in a Box Village House Church cut file
Accessories: Brother Scan N Cut, Bearly Art precision craft glue

I hope you’ve enjoyed today’s project! Be sure to check out all the fun goodies at Eyelet Outlet! Their products are so much fun! Be sure to ‘like’ and ‘follow’ Eyelet Outlet Facebook Page to keep up with news and sales, and while you’re at it, join the Eyelet Outlet Fans Facebook group for lots of creative inspiration! Thanks so much for stopping by today – we’ll see you next time! ;)

Scrappy hugs,

Sending Birthday Wishes

Hi friends! Happy Happy Friday! I hope you’ve had a good week and have something fun planned for this weekend! I won a challenge over at Creative Artiste Challenge Blog back in April and was invited to guest for an upcoming challenge, so here I am! I created a pretty birthday card for Challenge #88 – Anything Mixed Media Goes featuring Ranger speckled egg distress ink on a masked panel with water droplets, stamping and paint splatters as the main course with added die cuts, rub-ons and gemstones!

I cut a standard A2 size top-folding card base from CutCardStock Basis 110# White cardstock along with a layering panel cut from CutCardStock Basis 80# White cardstock. I taped the panel to my epicurean board and masked a rectangle with blue masking tape. Using a blending brush, I applied Ranger speckled egg distress ink, going just a tad heavier around the outside edges. I dropped water from my Tim Holtz distress sprayer onto my fingers and flicked it over the inked panel, rolled a roll of paper towels across the panel to dry the water droplets, and then hit it very briefly with my heat tool.

I carefully removed the blue masking tape from the sides and top of the panel (leaving the bottom tape on the panel), took it off the epicurean board and put it in the MISTI. I stamped the floral silhouette image in Memento Tuxedo Black ink and gave it a minute to dry. I put the panel back on the epicurean board and re-taped the sides and top with blue masking tape. I laid flower and stem die cuts (using the Stampin’ Up Sending die set) over stamped image and splattered white acrylic paint mixed with a tiny bit of water over the panel with a brush. I hit the panel once more very briefly with my heat tool, trimmed it, and adhered it to the card base.

Using the same die set, I die cut the sentiment three times from CutCardStock Royal Sundance Linen Eclipse cardstock, adhered them on top of one another, and then to the top of the panel. I stamped a sentiment from the Stampin’ Up Sending Smiles stamp set, cut it with a coordinating die from the same die set, and adhered it beneath the die cut portion of the sentiment. I applied some black text from a 49 and Market Curators Botanical Rub-On and a few iridescent gemstones which completed the card front.

I cut the inside panel from CutCardStock Basis 80# White cardstock and embellished it with strips cut from CutCardStock Stardream Metallic Aquamarine cardstock and a scrap of Basis 80# White cardstock. I stamped the sentiment from the same stamp set in black ink and layered the panel on Aquamarine cardstock.

And one more peek… this was such a fun card to create! Silhouette stamping looks so elegant on an inked panel, and the water droplets and paint splatters give it that extra ‘umph’ along with the die cuts, rub-ons and gemstones. Mixed media seems to get more fun all the time! I LOVE how this turned out!

Affiliate links are used in this post at no cost to you – I really appreciate your support! 

Products used:
Cardstock/Paper: CutCardStock Basis 110# White, Basis 80# White, Royal Sundance Linen Eclipse, and Stardream Metallic Aquamarine cardstock
Stamps: Stampin’ Up Sending Smiles stamp set
Ink: Ranger speckled egg distress ink, Memento Tuxedo Black ink
Dies/Punches: Stampin’ Up Sending die set
Accessories: We R Memory Keepers Large Guillotine Paper Trimmer, We R Memory Keepers Mini Guillotine Paper Trimmer, epicurean board, blending brush, Tim Holtz distress sprayer, Milwaukee heat tool, Liquitex white acrylic paint, Bearly Art precision craft glue, retractable Tape Runner, MISTI stamp tool, Big Shot, 49 and Market Curators Botanical Rub-Ons, Darice iridescent gemstones

I hope you’ve enjoyed seeing this project and will link up a mixed media project with us this month! Thanks so much for stopping by today – we’ll see you next time! ;)

Scrappy hugs,

Joys of the Season ATC

Hi everybody! I hope you had a nice weekend and your week has started off nicely! Are you in the Christmas spirit yet?! I’m always in the Christmas spirit, lol! Our new challenge is live this morning over at Mix It Up Challenge Blog and I’m delighted to share my DT inspiration project for MIUCB #62 – Anything Goes + optional Open Technique! Use whatever technique you’d like to use on your projects this time but please mention in your blog post what technique you employed! And as always, the optional technique is not required to play in our challenges. I created a festive Christmas ATC using the holly design from the STAMPlorations Christmas Backgrounds ATC #2 employing the emboss resist technique.

I trimmed the holly design from the STAMPlorations Christmas Backgrounds ATC #2 which was part of a Paper Goods Sampler that Shery tucked into one of my past orders. Using the STAMPlorations Typografia Christmas Joys of the Season stamp and Versamark, I stamped the sentiment in the center of the ATC and heat embossed it with Hero Arts clear embossing powder. Using a Ranger mini ink blending tool and Ranger bundled sage distress ink, I lightly inked the surface of the entire ATC and then wiped it with a clean paper towel to remove any excess ink. This revealed a nicely ‘ghosted’ stamped impression. The final touch was running a Posca Gold Paint Pen loosely around the edges of the ATC for a little interest.

And one more look… such a fun technique that typically yields a great result! I thoroughly enjoyed this challenge! ;)

Affiliate links are used in this post at no cost to you – I really appreciate your support! 

Products used:
Stamps: STAMPlorations Typografia Christmas Joys of the Season stamp
Ink: Versamark, Ranger bundled sage distress ink, Posca Gold Paint Pen
Accessories: We R Memory Keepers Mini Guillotine Paper Trimmer, STAMPlorations Christmas Backgrounds ATC #2, Hero Arts clear embossing powder, Milwaukee heat tool, Ranger mini ink blending tool

I hope you’ve enjoyed seeing this Christmas ATC and will link up with us this time! You are welcome to create either an ‘anything goes’ project or play the twist and employ some sort of fun technique – just let us know what you did! Thanks so much for stopping by today – we’ll see you next time! ;)

Scrappy hugs,

Happy Birthday Cake Card

Hey, peeps! How’s the weather where you are… is it just a bit chilly, lol?! It is here and that’s how we like it! Our new challenge is live this morning over at Love To Craft Challenge Blog and I’m excited to share my DT inspiration project for LTCCB #71 – Anything Goes! I created a super cute fun fold birthday card using the Simply Crafty SVGs Birthday Cake Card cut file that I cut with my Scan N Cut. Back in January of this year I learned how to print sentiments using the draw function on my Scan N Cut, and have really enjoyed doing that on a few cards!

I cut the card base from CutCardStock Raspberry Ice cardstock, the cake elements from The Paper Studio Four Seasons and Everything In Between -2- paper pad, the candle elements from CutCardStock Basis Gold and CutCardStock Basis Aqua, and the front and inside sentiment banners from Neenah Classic Crest 80# Solar White which I printed using the draw function on my Scan N Cut prior to cutting them. As I assembled the card, I ran the candle through the Big Shot with the Cuttlebug Candy Cane Stripes Embossing Folder for a little texture and used some Sakura Clear Star shimmer on the flame.

Here are a couple shots showing how the card opens.

And one more look… this was definitely a fun one and very birthday-themed with the fun pastel colors! I think it would be a great cut file to use for a wedding-themed card as well, so stay tuned! ;)

Affiliate links are used in this post at no cost to you – I really appreciate your support! 

Products used:
Cardstock/Paper: CutCardStock Raspberry Ice cardstock, CutCardStock Basis Gold, CutCardStock Basis Aqua, Neenah Classic Crest 80# Solar White cardstock, The Paper Studio Four Seasons and Everything In Between -2- paper pad
Dies/Punches/Cut Files: Simply Crafty SVGs Birthday Cake Card cut file
Ink: Scan N Cut Red Pen
Accessories: Brother Scan N Cut, Bearly Art precision craft glue, Cuttlebug Candy Cane Stripes Embossing Folder

I hope you’ve enjoyed seeing this cute birthday card and will consider linking up with us this time! Thanks so much for stopping by today – we’ll see you next time! ;)

Scrappy hugs,

Floral Mini Album

Hi friends! Happy Tuesday to you all! I hope you are having a great week so far! Our new challenge is live this morning over at Love To Scrap Challenge Blog and I’m super stoked to share my DT inspiration project for LTSCB #158 – Anything Goes! You know how I love me some mini albums, and I created this pretty floral one using the Sizzix Bigz Mini Album and Sizzix Mini Album Thinlits. As I always say with projects like this – the assembly is the most fun part! ;)

I die cut the album and pages from STAMPlorations Spring Florals A2 Card Fronts and Darice Dots and Stripes cardstock. Using a variety of Sizzix and CUTplorations dies, I die cut elements from Solar White cardstock, CutCardStock Stardream Metallic Amethyst cardstock, CutCardStock Basis Dark Purple cardstock and Darice Dots and Stripes cardstock to embellish the pages. Several of the pages inside have pull-up tags. I added an arrow and gemstones to the front which completed the album.

And one more overhead angled peek… I sure do love how this turned out! There is plenty of room for photos and journaling!

Affiliate links are used in this post at no cost to you – I really appreciate your support! 

Products used:
Cardstock/Paper: Neenah Classic Crest Solar White cardstock, CutCardStock Stardream Metallic Amethyst cardstock, CutCardStock Basis Dark Purple cardstock, Darice Dots and Stripes cardstock, STAMPlorations Spring Florals A2 Card Fronts
Ink: Posca Gold Paint Pen
Dies/Punches: CUTplorations Pierced Curly Frames/Tags Nesting Dies, CUTplorations Crazy Running Double Stitch Nesting Dies, CUTplorations Stitched Tags Nesting Dies, CUTplorations Circles All Over Texture Cover Plate, Sizzix Bigz Mini Album, Sizzix Mini Album Thinlits, Sizzix Alphanumeric Tiny Type Lower Thinlits
Accessories: We R Memory Keepers Large Guillotine Paper Trimmer, Big Shot, Bearly Art precision craft glue, CRAFTplorations Funky Arrows #2, Darice Purple Gemstones, purple crafting cord, Darice Double-Sided Adhesive Foam Strips

I hope you’ve enjoyed seeing this mini album and you’ll link up with us this time! Thanks so much for stopping by today – we’ll see you next time! ;)

Scrappy hugs,

Jingle all the way

Hi friends! It’s November 1st already… have you started your Christmas card stash yet?! Christmas will be here before we know it, lol! Our new challenge is live this morning over at Merry Little Christmas Challenge Blog and I’m happy to share my DT inspiration project for MLCCB #47- Anything Christmas Goes. This CAS mini slimline features the STAMPlorations Christmas Reindeer stamps and dies, some of the cutest in my stash!

I cut a 3-1/2″ x 6″ mini slim card base from 110# Solar White cardstock along with layering panels from CutCardStock Basis Dark Red cardstock and 80# Solar White cardstock using the Waffle Flower Mini Slimline Layers Dies which I adhered together and then to the card base. Using the super adorable STAMPlorations Christmas Reindeer stamp set, I stamped two reindeer on a scrap piece of Solar White cardstock and colored them with alcohol markers. I cut them with the coordinating CUTplorations Christmas Reindeer die set and adhered the larger one to the card front. I stamped the sentiment in Memento Rhubarb Stalk ink. You can’t see them in the photo, but I stamped snowflakes (from the same stamp set) in Memento Luxe Wedding Dress ink on the background and embellished them with tiny iridescent gemstones.

I cut the inside panels from Neenah Classic Crest 80# Solar White cardstock and CutCardStock Basis Dark Red cardstock. I stamped the inside sentiment in red ink and adhered the other reindeer toward the bottom. I adhered the panels together and then to the inside of the card base.

And one more look… I do believe this is right up there on my list of all-time CAS Christmas favs and it’s so simple! ;)

Affiliate links are used in this post at no cost to you – I really appreciate your support! 

Products used:
Cardstock/Paper: Neenah Classic Crest Solar White cardstock, CutCardStock Basis Dark Red cardstock
Stamps: STAMPlorations Christmas Reindeer stamp set
Ink: Memento Tuxedo Black ink, Arteza BR84 alcohol marker, Memento Rhubarb Stalk ink, Memento Luxe Wedding Dress ink
Dies/Punches: CUTplorations Christmas Reindeer die set, Waffle Flower Mini Slimline Layers Dies
Accessories: We R Memory Keepers Large Guillotine Paper Trimmer, MISTI stamp tool, Big Shot, Bearly Art precision craft glue, Darice iridescent gemstones, Trinity Pick Up Stick

I hope you’ve enjoyed seeing this Christmas card and will link up with us this time! Hopefully you got a chance to visit the challenge blog in January to see our new challenge structure and increased length of time to play! Thanks so much for stopping by today – we’ll see you next time! ;)

Scrappy hugs,

Surfin’ Santa with a ho ho ho

Hi friends! Happy Tuesday to you! Since it’s the first day of November, it’s busy here on my blog this morning, lol! Another one of my projects was in the Top 3 at Scrapping4fun Challenges several weeks ago and I was invited to guest for Challenge #218 – Summer/Winter, so here I am! I featured both Summer AND Winter in my DT inspiration project and just love how it turned out! You know I’m a huge fan of box cards, so I used the Surfing Santa Card cut file from Simply Crafty SVGs!

I cut the card base from Cardstock Warehouse Brown Box 100# Kraft cardstock, and the rest of the pieces from CutCardStock Pop Tone Black Licorice, Pop Tone Hot Fudge, Pop Tone Jellybean Green, Pop Tone Sweet Tooth, Pop Tone Wild Cherry, and Sandcastle cardstock, along with Hot Off The Press Seascapes & Sand 6×6 double-sided cardstock and Brutus Monroe blue glitter cardstock. I always say the most fun part is the assembly, and this one was no different! I love watching them come to life!

Here is a shot of the back showing the panel to write a custom message and signature and an angled side shot showing the construction. Box cards are so much fun!

Affiliate links are used in this post at no cost to you – I really appreciate your support! 

Products used:
Cardstock/Paper: Cardstock Warehouse Brown Box 100# Kraft cardstock; CutCardStock Pop Tone Black Licorice, Pop Tone Hot Fudge, Pop Tone Jellybean Green, Pop Tone Sweet Tooth, Pop Tone Wild Cherry, and Sandcastle cardstock; Hot Off The Press Seascapes & Sand 6×6 double-sided cardstock, Brutus Monroe blue glitter cardstock
Stamps: Paper Smooches Holiday Cheer stamp set
Ink: Catherine Pooler Suede Shoes ink
Dies/Punches/Cut Files: Simply Crafty SVGs Surfing Santa Card cut file
Accessories: Bearly Art precision craft glue, MISTI stamp tool, Eyelet Outlet blue Enamel Dots

I hope you’ve enjoyed seeing this project and will link up a Winter/Summer project with us this time – can be either/or or both like I did, lol! Thanks so much for stopping by today – we’ll see you next time! ;)

Scrappy hugs,