Season’s Greetings To You & Yours

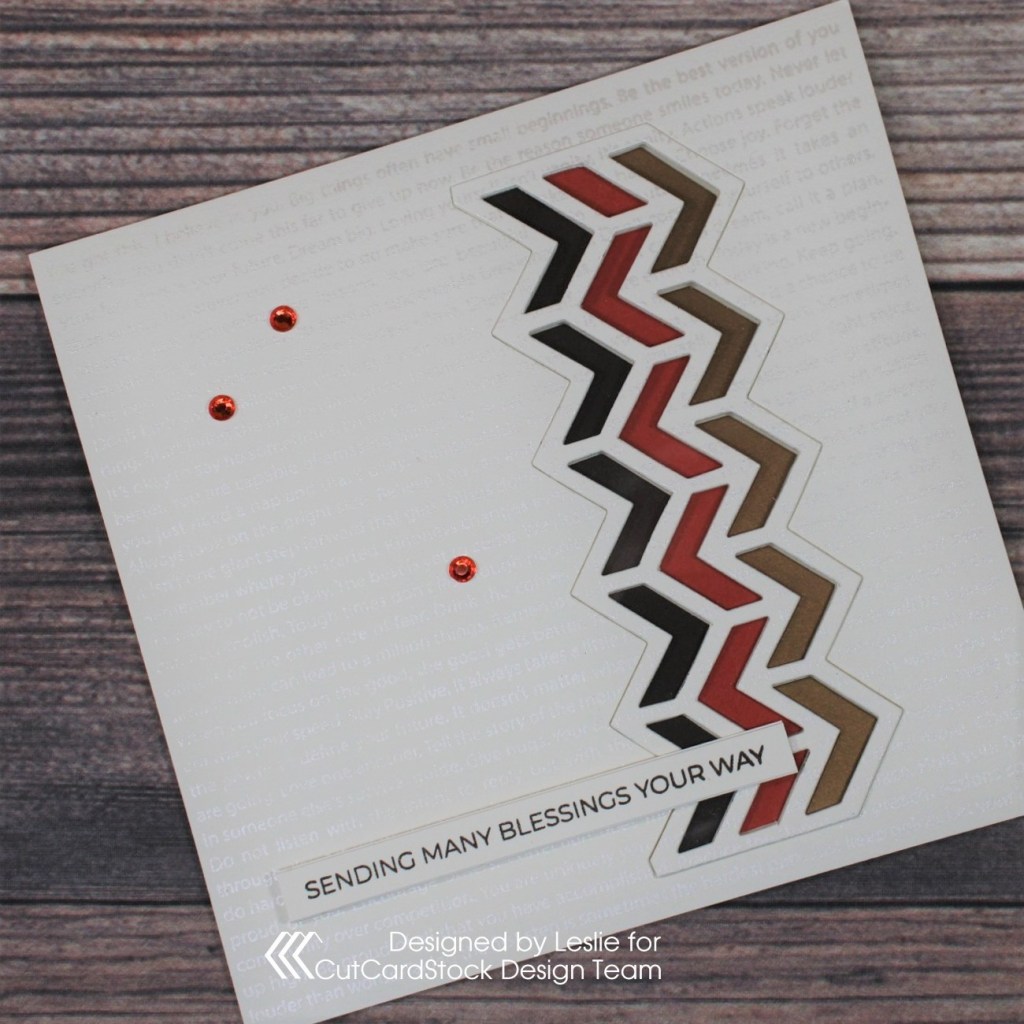
12/5/21 Top 5 at Jan’s Digi Stamps Challenges!

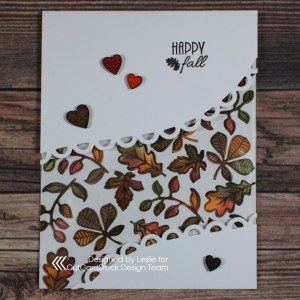
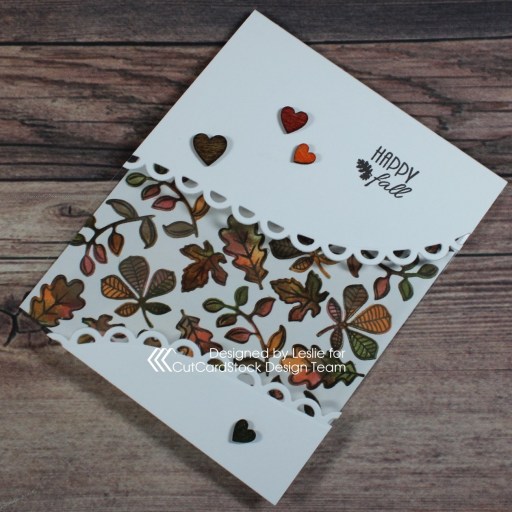
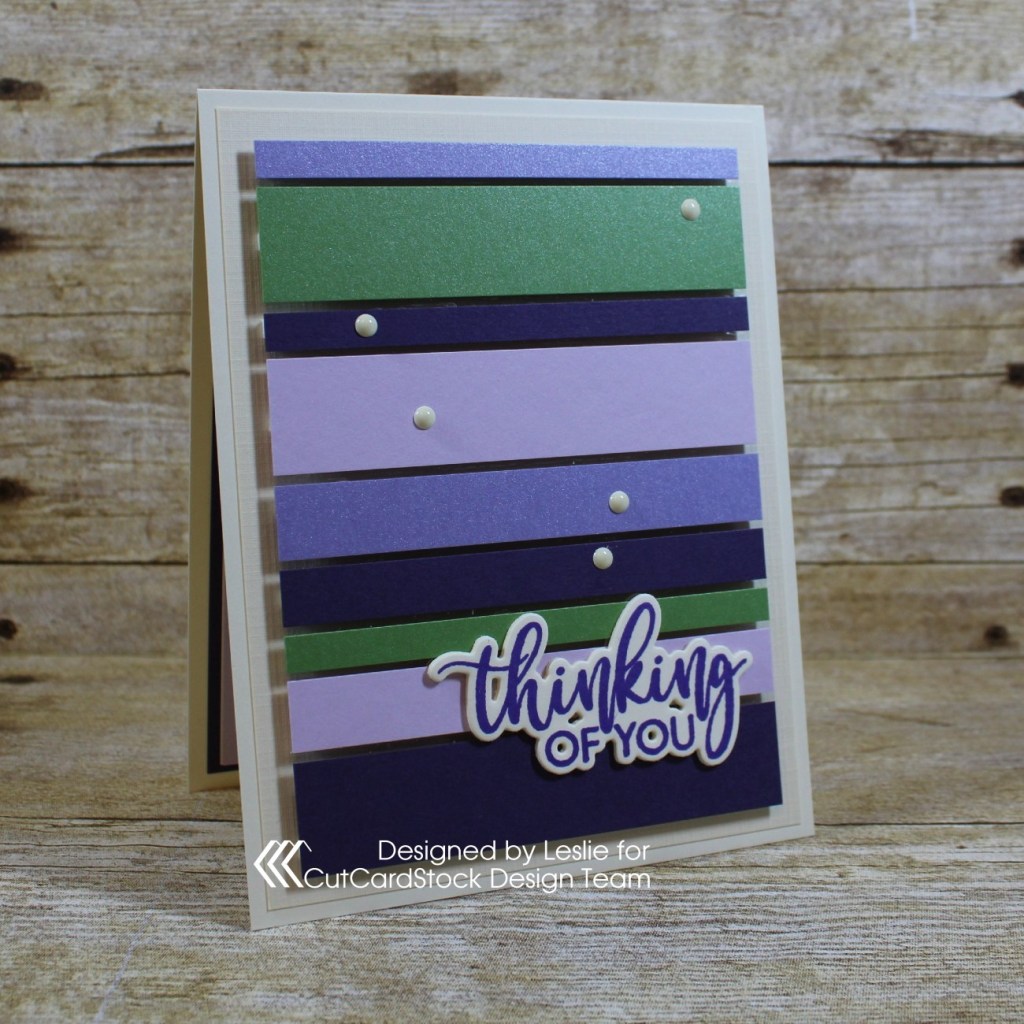
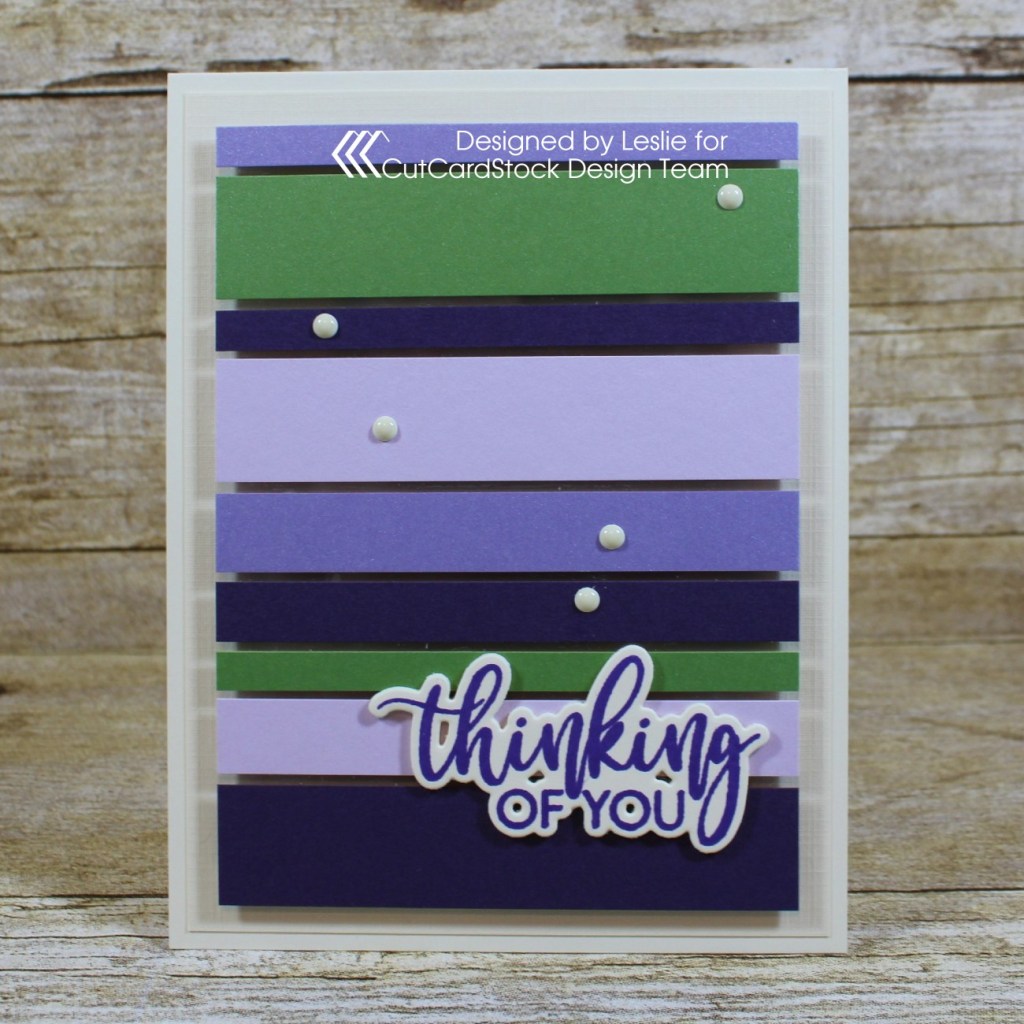
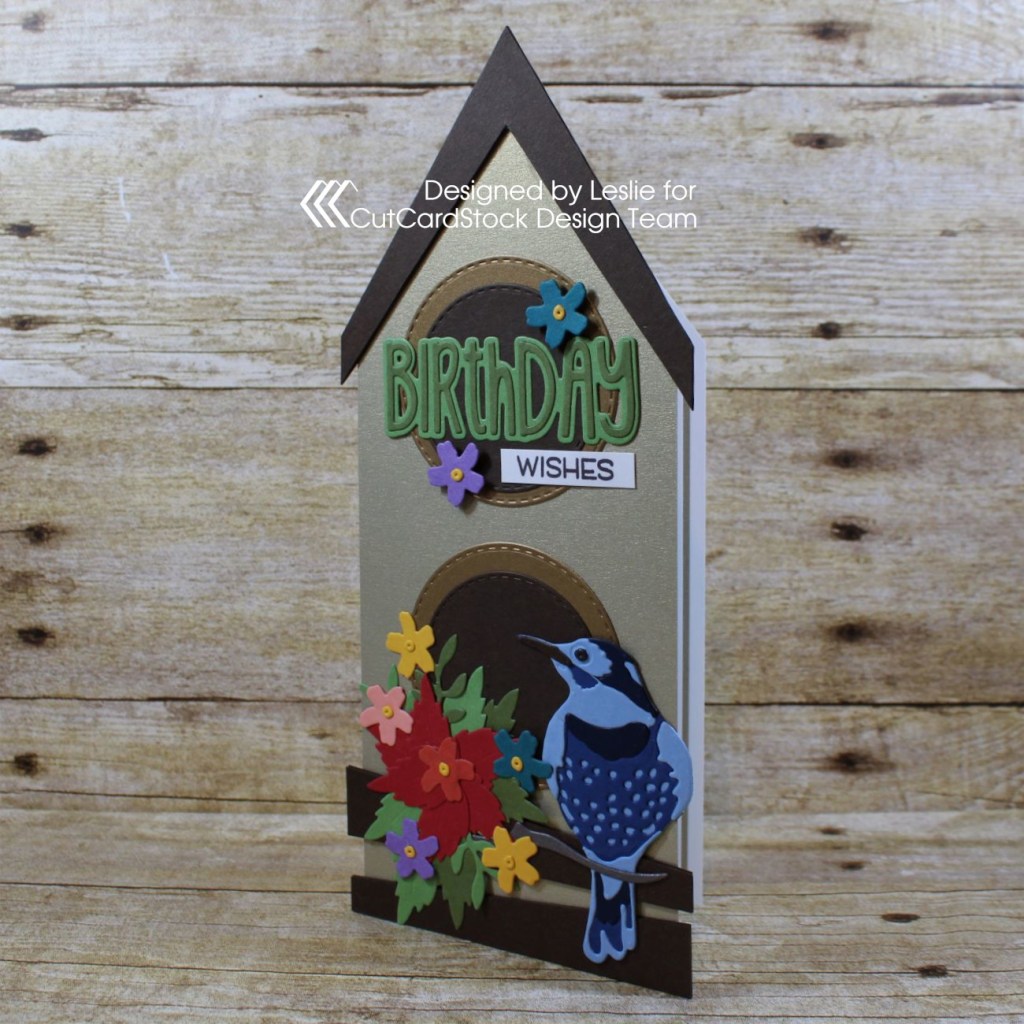
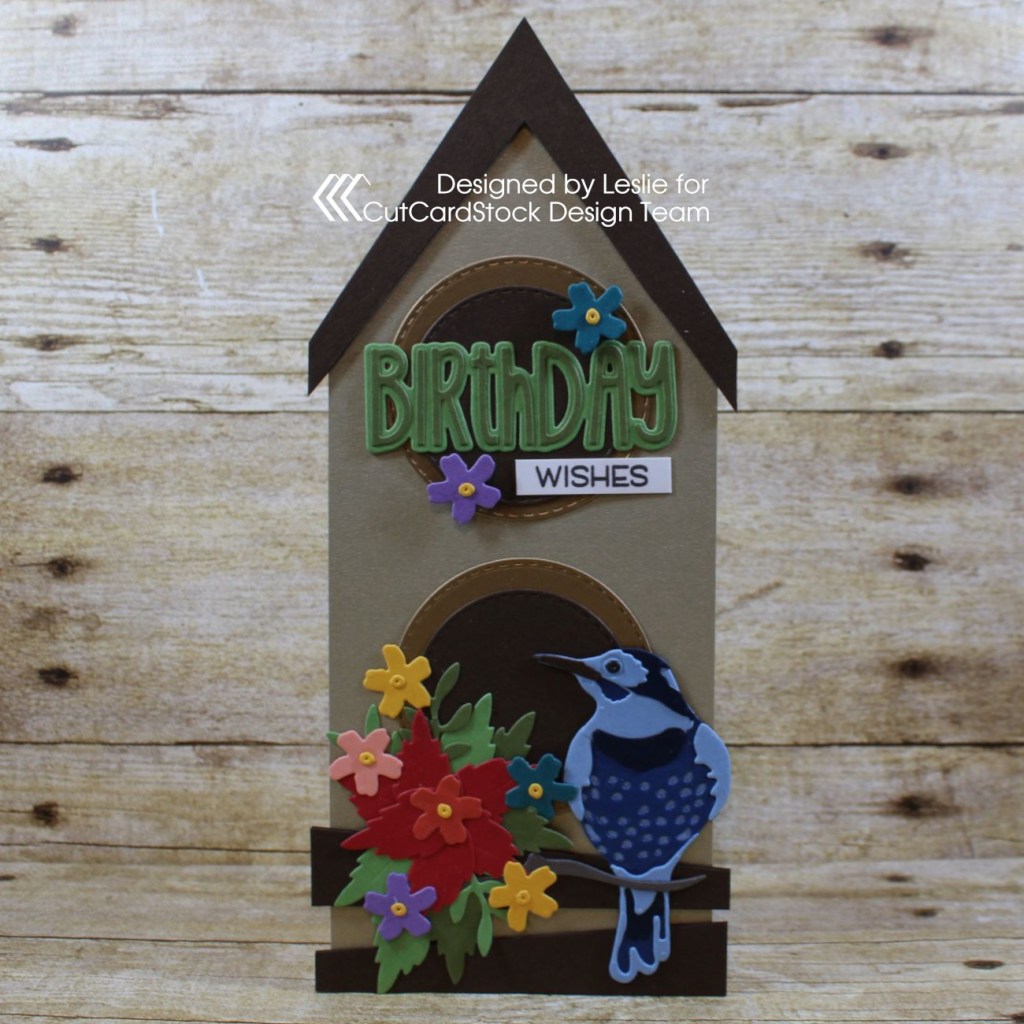
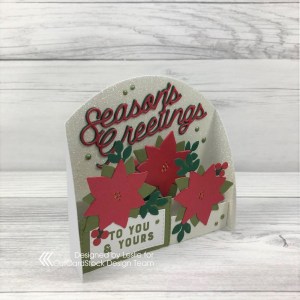
Happy Hump Day, y’all! I hope you’re having a wonderful week! I’m thrilled to be back on the CutCardStock blog today with an awesome DT inspiration project featuring red, white and green cardstock which is all on sale this month so be sure to stock up for your holiday crafting! Affiliate links are used in this post at no cost to you – I really appreciate your support! I have one of the easiest card designs ever to share with you today using Stardream Metallic Jupiter cardstock, Basis Red cardstock, Silk Glitter Opulent Opal cardstock, Neenah Classic Crest Solar White 80# cardstock, Basis Green cardstock and Pop-Tone Jellybean Green cardstock! While I used a die set with a different name for this design team project, I found handwritten measurements for an ‘open box card’ (with angled sides) in my tutorial arsenal and typed up a tutorial that I’ll share. The only differences between the die set and my handwritten instructions are the shape and the width of the box layer strips. And, of course, the sky is the limit with regard to occasion, embellishments and sentiments. ;)

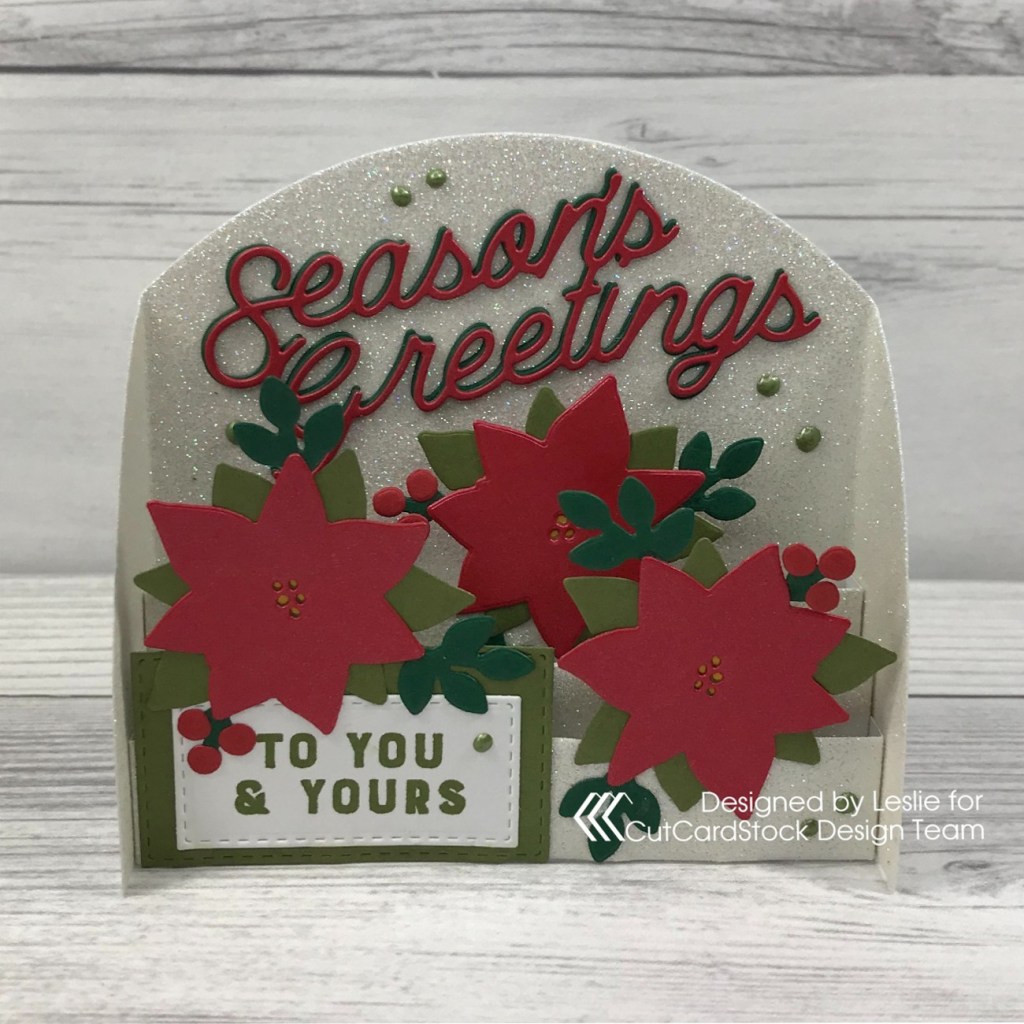
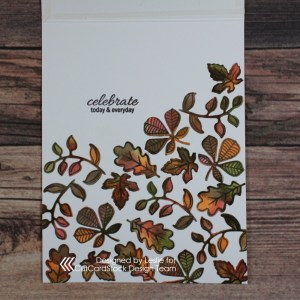
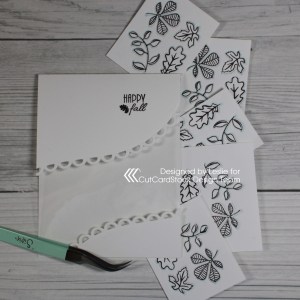
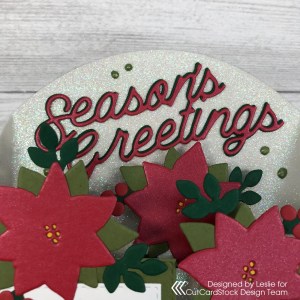
I die cut the card base and box layer strips from Silk Glitter Opulent Opal cardstock and assembled the card. This is where the lightbulb came on… this assembled piece looked familiar so I sat down with my tutorial files (about 6″ worth) and looked through most of the files until I found measurements I had written down (who knows how long ago) for the open box card. If you’re interested, I’ve added the open box card tutorial HERE. Bear in mind that the box layer strips on this project using the die set are slightly narrower but achieve the same result, and the shape is different. I die cut the three poinsettia flowers from Stardream Metallic Jupiter cardstock, the poinsettia leaves from Pop-Tone Jellybean Green cardstock, the greenery and berries from Basis Red cardstock and Basis Green cardstock, and the flower centers from Basis Gold cardstock. I assembled the poinsettias and set them aside. I die cut the sentiment from Stardream Metallic Jupiter cardstock and again from Basis Green cardstock and layered them together with just a tad bit of the dark green showing beneath the red. I stamped the sentiment in green ink on a Neenah Classic Crest Solar White 80# cardstock scrap and die cut it with a stitched rectangle die, and layered it on a slightly larger stitched rectangle die cut from Pop-Tone Jellybean Green cardstock. I adhered one of the poinsettias on the top of the sentiment and adhered the piece to the left side, the second poinsettia to the right side and the third poinsettia in the middle.

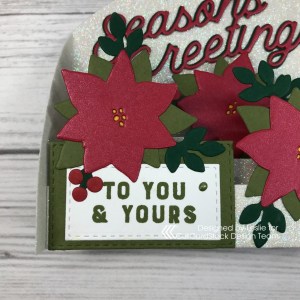
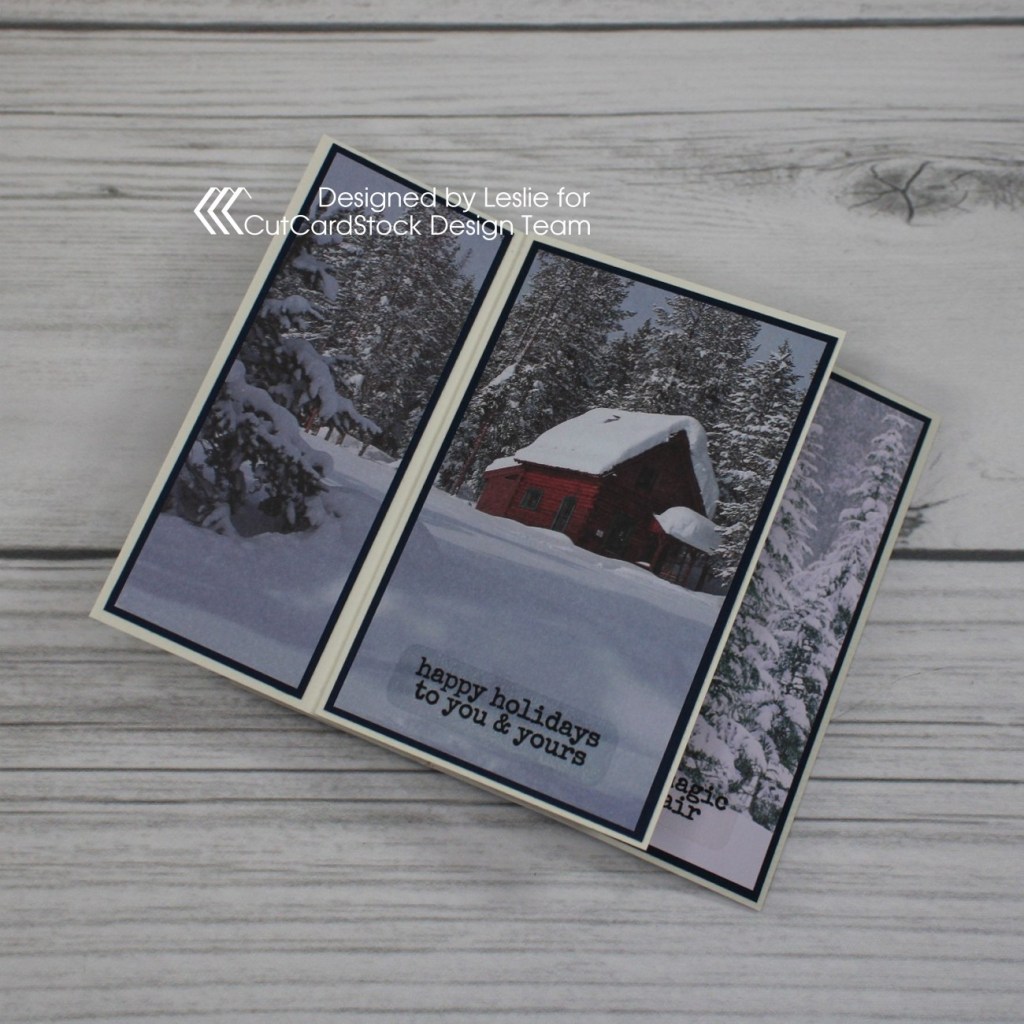
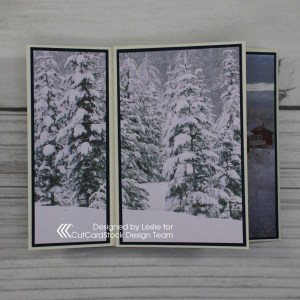
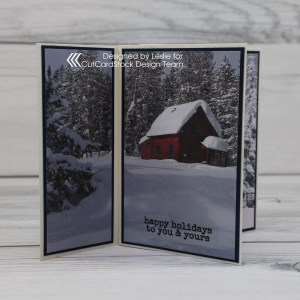
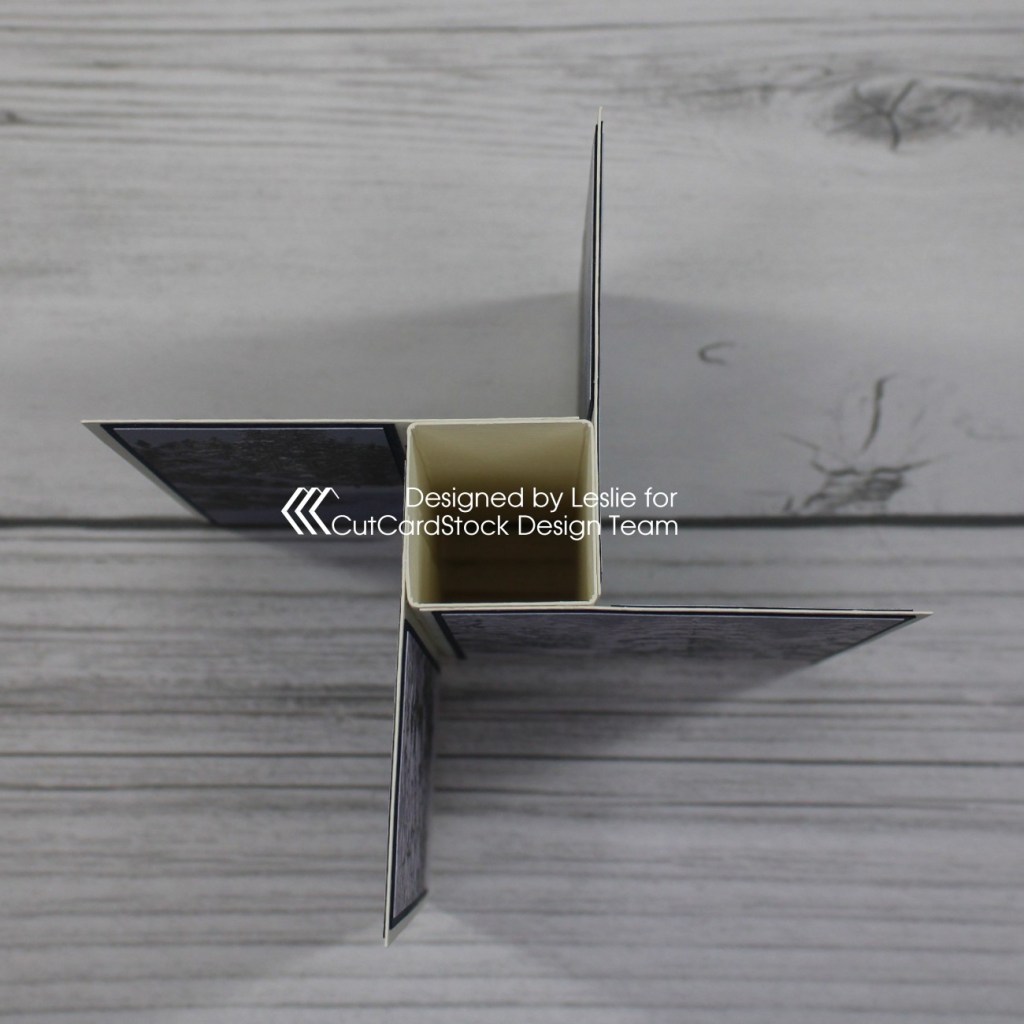
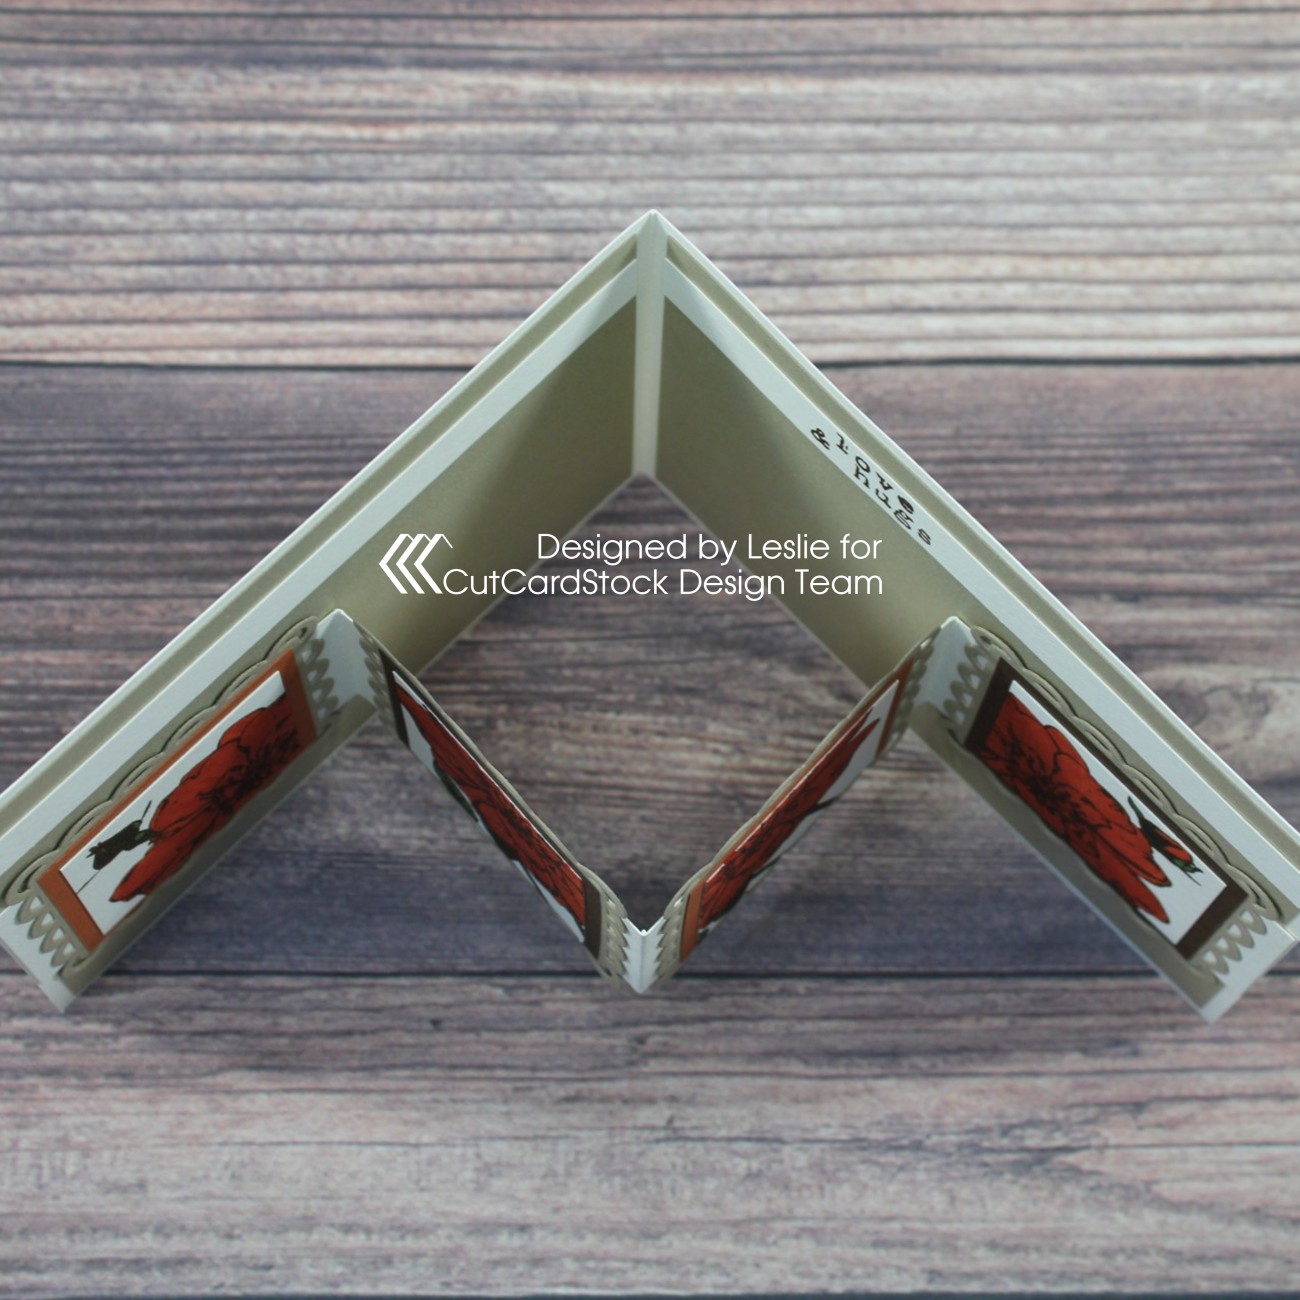
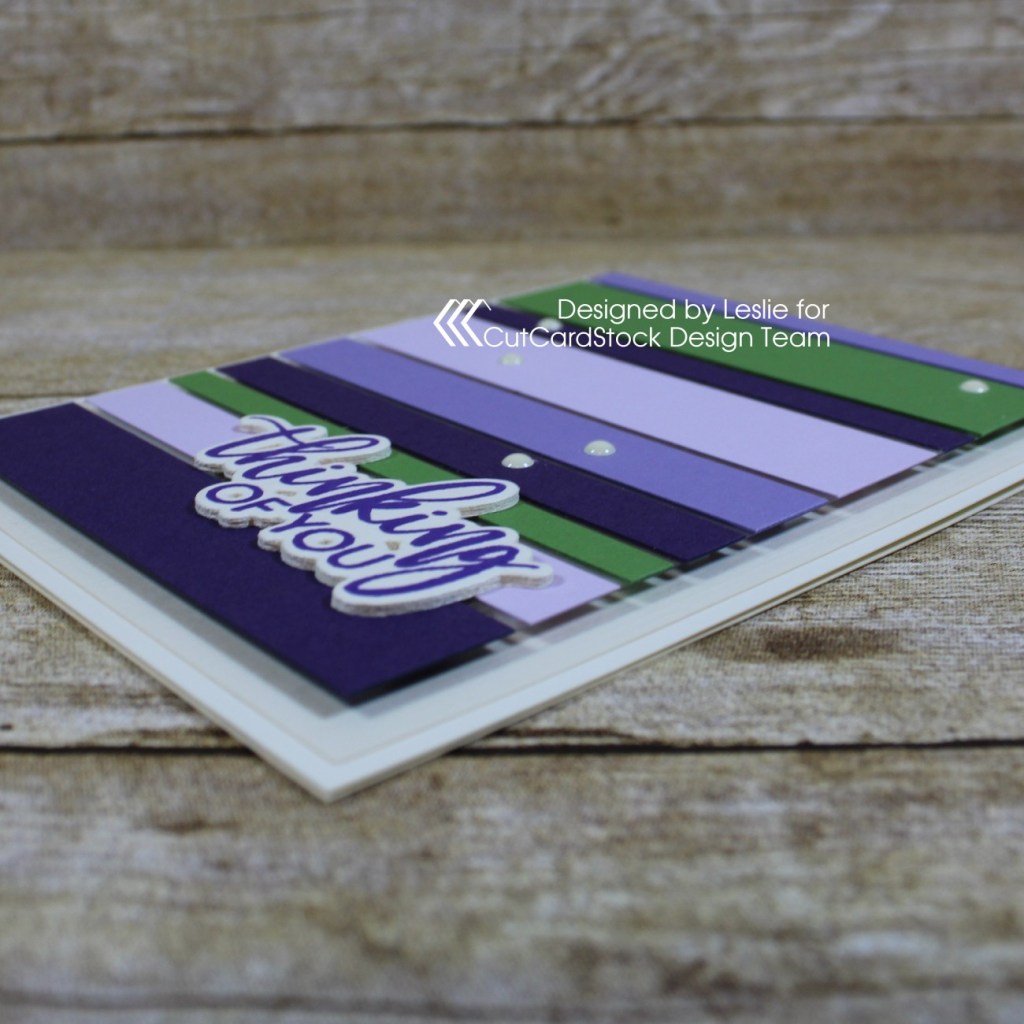
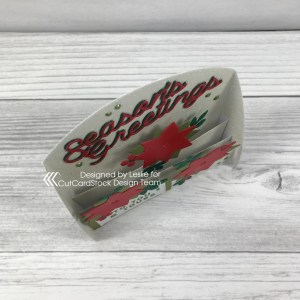
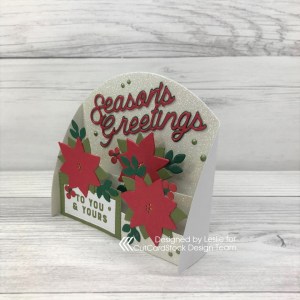
Here is a shot from overhead so you can see the construction (which, as mentioned above, is the same as the typical box card but with an open front), and another shot of the card folded flat for mailing in a standard A2 size envelope.

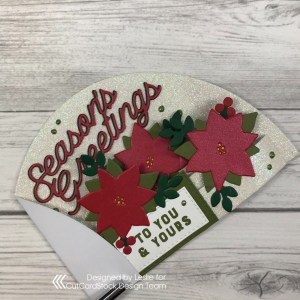
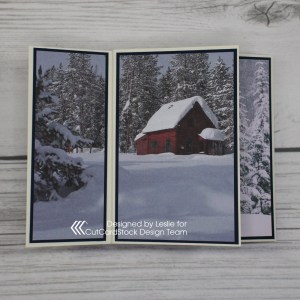
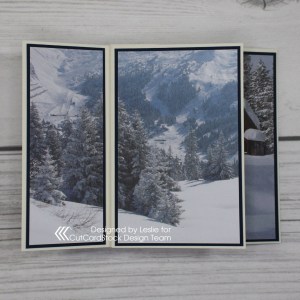
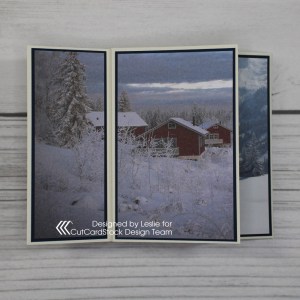
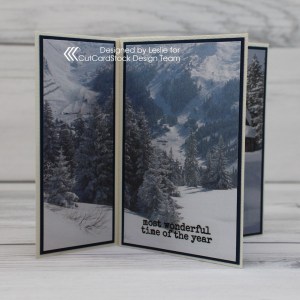
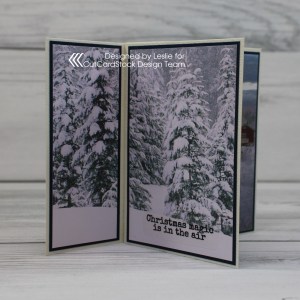
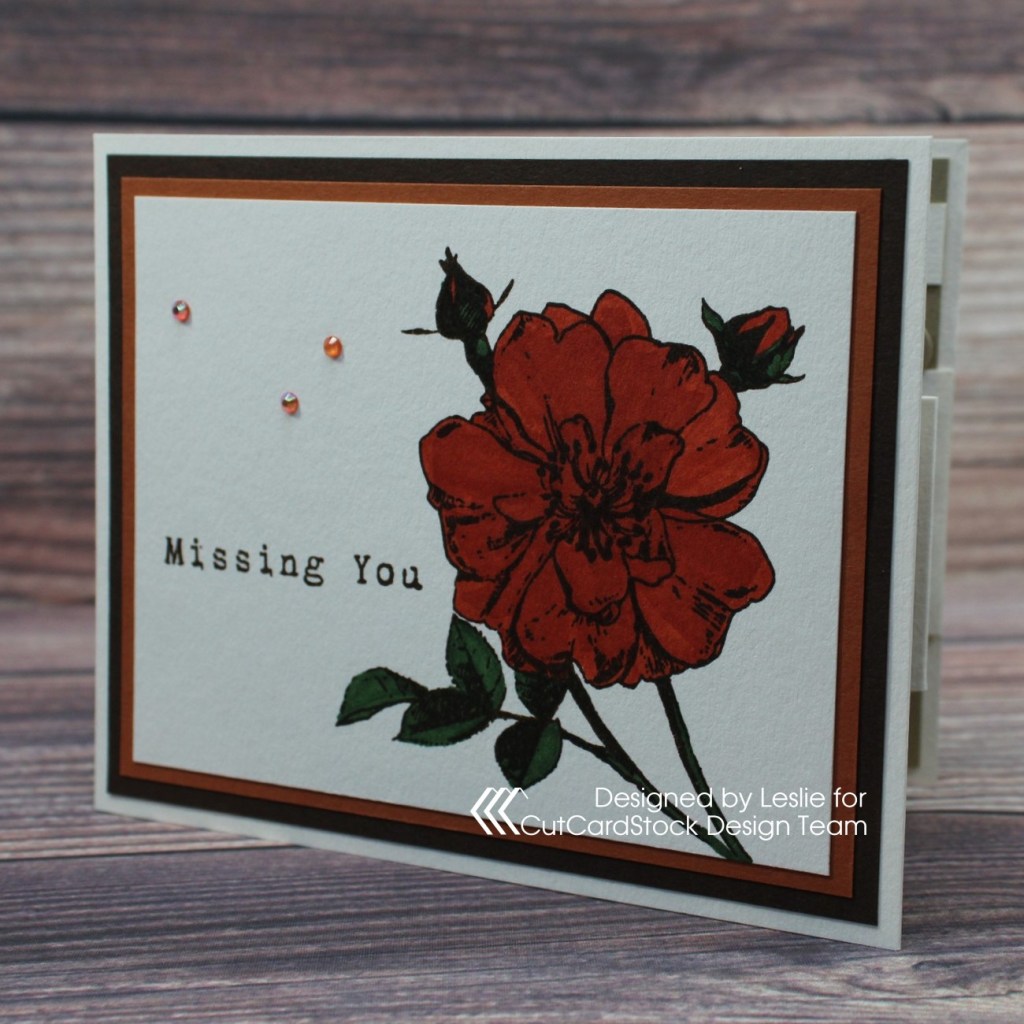
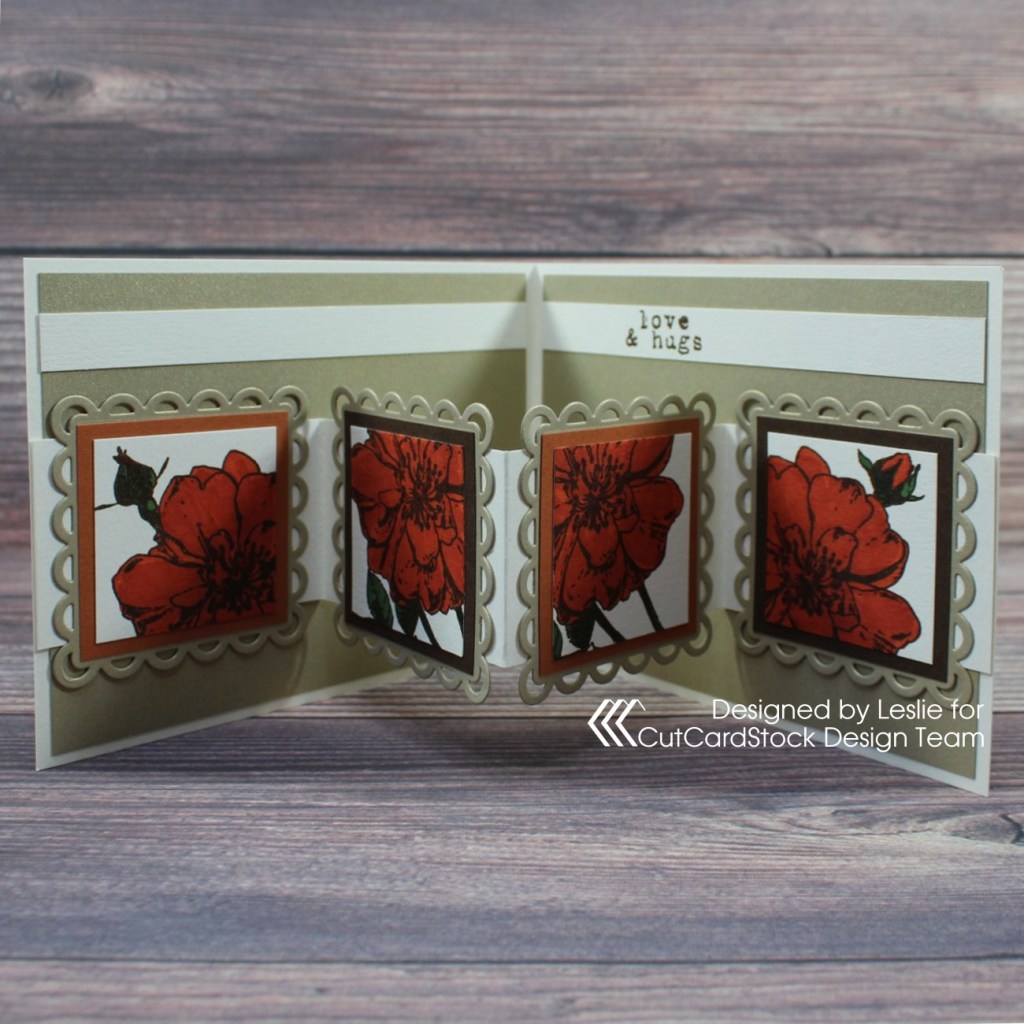
And a few more peeks of the finished project… so loving how this turned out! Let me know if you end up making an open box card using my measurements! This is definitely a fun one! I’ve made several over the years but didn’t use any of them as design team projects so they didn’t get posted on my blog. This design makes beautiful sympathy, birthday, anniversary, and of course Christmas cards!

Sharing in the following challenges:
1. A Perfect Time To Craft Challenge: #11 November – Anything Goes
2. Christmas Crafts All Year ‘Round: November – Something that starts with U, V and/or W (Winter)
3. Classic Design Challenge Blog: #11 November – Anything Goes
4. Crafts Galore Encore Challenge Blog: #93 – Anything Goes
5. Creative Inspirations Challenge Blog: November – Wonderful Winter/Feeling Festive
6. Jan’s Digi Stamps Challenges: November – Anything Goes
7. Your Scrapbook Place: November – Anything Goes

CutCardStock products used:
Silk Glitter Opulent Opal cardstock
Stardream Metallic Jupiter cardstock
Basis Red cardstock
Basis Green cardstock
Pop-Tone Jellybean Green cardstock
Basis Gold cardstock
Neenah Classic Crest Solar White 80# cardstock

Other products used:
Stamps: Concord & 9th Poinsettia Fill-In stamp set
Ink: Catherine Pooler Eucalyptus ink
Dies/Punches: Concord & 9th Card Stacks base dies, Concord & 9th Poinsettia Fill-In dies, Memory Box Stitched Rectangle Layers
Accessories: Tonic Studios 12″ Guillotine Paper Trimmer, Big Shot, MISTI stamp tool, Bearly Art precision craft glue, Ranger Distress Collage Medium, Nuvo Bottle Green Crystal Drops

I hope you’ve enjoyed today’s project and you’re inspired to get crafty! Be sure to check out all the awesome cardstock and other goodies at CutCardStock (adhesives, labels, stickers, pens, watercolors and ribbon to name a few). And head on over to the CutCardStock Facebook Page for more inspiration! Thanks so much for stopping by today – we’ll see you next time!

Scrappy hugs,
lesliesig

With Love at Christmastime

Hi everyone! I hope you had a fantastic weekend and your Monday is off to a great start! I’m stoked to be back on the CutCardStock blog today with an awesome DT inspiration project featuring more of our Royal Sundance cardstock that’s on sale this month so be sure to stock up! The colors, weights and textures in this cardstock line are amazing! Affiliate links are used in this post at no cost to you. I really appreciate your support! I created a pretty Christmas card with an ink blended starry Winter sky!

Using stormy sky, chipped sapphire and dusty concord distress inks, I ink blended a watercolor panel for the background, splattered water over it with a fan brush and rolled a roll of paper towels across it to blot the water splatters. Then I trimmed the piece. I cut a standard A2 size top-folding card base from Royal Sundance Felt Natural cardstock along with an inside layering panel and embellishing strip from Royal Sundance Linen Eclipse Black cardstock. I stamped the winter village (free with TE order) and Santa with reindeer (thank you gift in last TE order) in black ink on the inked background piece and adhered it to the black cardstock panel and then to the card base. I stamped and die cut the sentiment on Neenah Classic Crest Baronial Ivory cardstock and adhered it to the card front along with several randomly-placed tiny iridescent gemstones.

I cut the inside panel from Neenah Classic Crest Baronial Ivory cardstock, adhered embellishing strips down the left side and adhered it to the black cardstock panel and then to the card base. I added another stamped and die cut sentiment to complete the card.

And one more look… I love the look that ink blending gives a card and I’m super happy with how this turned out! And of course I absolutely love the Royal Sundance cardstock line!

CutCardStock products used:
Royal Sundance Felt Natural cardstock
Royal Sundance Linen Eclipse Black cardstock
Neenah Classic Crest Baronial Ivory cardstock

Other products used:
Cardstock/Paper: Ranger Distress Watercolor cardstock
Stamps: Taylored Expressions Simple Strips – Christmas stamp set, Taylored Expressions Winter Village background stamp, Taylored Expressions Santa with Reindeer
Ink: Ranger distress inks- stormy sky, chipped sapphire, dusty concord; Catherine Pooler Midnight ink, Memento Paris Dusk ink
Dies/Punches: Taylored Expressions Simple Strips – Asymmetrical die set
Accessories: Tonic Studios 12″ Guillotine Paper Trimmer, fan brush, Bearly Art precision craft glue, ScraPerfect iridescent gemstones

I hope you’ve enjoyed today’s project and you’re inspired to get crafty! Be sure to check out all the awesome cardstock and other goodies at CutCardStock (adhesives, labels, stickers, pens, watercolors and ribbon to name a few). And head on over to the CutCardStock Facebook Page for more inspiration! Thanks so much for stopping by today – we’ll see you next time!

Scrappy hugs,
lesliesig

Snowy Scenes Fun Fold

Happy Friday, everybody! I hope you’ve had an amazing week! We only had one appointment (for two felines) this week so I’ve gotten quite a bit of crafting in… and that makes me happy! I’m stoked to be back on the CutCardStock blog today with an awesome DT inspiration project featuring our Royal Sundance cardstock that’s on sale this month, so be sure to stock up! Affiliate links are used in this post at no cost to you. I really appreciate your support! I’ve been on a pinwheel twist card ‘kick’ for the last couple weeks (I have made four, lol) and this is the first one I’ve posted. I absolutely love making these… you know me and fun folds! I used Royal Sundance Felt Natural cardstock, Royal Sundance Linen Midnight Blue cardstock and Winter Wonderland 6×6 Cardstock Pad with just a few other items in my studio, so a very short list of supplies is needed!

This card folds flat to fit in a standard A2 size envelope, however, you could easily alter the dimensions to make it as large or as small as you want. I cut the card base and three extra panels from Royal Sundance Felt Natural cardstock. I cut layering panels from Royal Sundance Linen Midnight Blue cardstock. I picked the four scenes I wanted to use from the Winter Wonderland 6×6 Cardstock Pad and cut panels from each. The scenic panels were adhered to the blue layering panels and then adhered to the Natural felt panels.

I added a sentiment to each panel using the STAMPplorations Merry Everything Clear Stickers.

Here’s a shot from above so you can see the construction. It really is pretty simple and straight-forward. Be sure to check out my tutorial on the CutCardStock blog!

CutCardStock products used:
Royal Sundance Felt Natural cardstock
Royal Sundance Linen Midnight Blue cardstock
Winter Wonderland 6×6 Cardstock Pad

Other products used:
Accessories: Tonic Studios 12″ Guillotine Paper Trimmer, Bearly Art precision craft glue, STAMPplorations Merry Everything Clear Stickers

I hope you’ve enjoyed today’s project and you’re inspired to get crafty! Be sure to check out all the awesome cardstock and other goodies at CutCardStock (adhesives, labels, stickers, pens, watercolors and ribbon to name a few). And head on over to the CutCardStock Facebook Page for more inspiration! Thanks so much for stopping by today – we’ll see you next time!

Scrappy hugs,
lesliesig

Missing You

Hey everybody! Happy Tuesday – I hope your week has started off very nicely! We are enjoying some glorious temperatures out here in Colorado so that makes me happy! I’m stoked to be back on the CutCardStock blog today with an awesome DT inspiration project featuring more of our Autumn cardstock in brown, orange and gold colors, which is on sale this month so be sure to get some! I paired these beautiful colors with Natural cardstock. Affiliate links are used in this post at no cost to you. I really appreciate your support! You know how I love fun folds, and I’ve had this ‘M fold’ (also called a ‘W fold’) in my arsenal for some time so I thought I’d try it out. Of course, it was a fun one! :D

I cut the card base and strips for the inside from Basis Natural 110# cardstock, along with layering panels for the front from Basis Brown 80# cardstock, Basis Dark Orange 80# cardstock and Basis Natural 110# cardstock which I adhered together. I stamped the rose and sentiment in brown ink and colored the rose with alcohol markers. The finishing touch to the front of the card was the addition of several gemstones.

I cut layering panels and four small lacy squares for the inside from Curious Metallic Gold Leaf 92# cardstock, along with small layering squares from Basis Brown 80# cardstock, Basis Dark Orange 80# cardstock and Basis Natural 110# cardstock. I stamped different areas of the rose on the four natural squares and colored them with the same alcohol markers used on the front. I assembled the squares and adhered them to the scored strip. I adhered narrow strips across the top and stamped the inside sentiment in brown ink… my own twist I added to the design to make it mine. ;)

Here are shots showing the ‘M fold’ and inside of the card opened completely up.

And one more peek… totally loving how this turned out! These cardstock colors are ah-maaaazing!

CutCardStock products used:
Basis Natural 110# cardstock
Basis Brown 80# cardstock
Basis Dark Orange 80# cardstock
Curious Metallic Gold Leaf 92# cardstock

Other products used:
Stamps: Hero Florals Rose Stem stamp set
Ink: Catherine Pooler Icing On The Cake ink; Arteza alcohol markers- YR00, YG01
Dies/Punches: Spellbinders Lacy Squares die
Accessories: Tonic Studios 12″ Guillotine Paper Trimmer, MISTI stamp tool, Big Shot, Bearly Art precision craft glue, Trinity Stamps Topaz Twinkle Embellishment Mix, Trinity Stamps Pick Up Stick

I hope you’ve enjoyed today’s project and you’re inspired to get crafty! Be sure to check out all the awesome cardstock and other goodies at CutCardStock (adhesives, labels, stickers, pens, watercolors and ribbon to name a few). And head on over to the CutCardStock Facebook Page for more inspiration! Thanks so much for stopping by today – we’ll see you next time!

Scrappy hugs,
lesliesig

HAPPY fall for CutCardStock Fall-oween Blog Hop!

Hi friends! A big giant WELCOME to the CutCardStock blog‘s Fall-oween Blog Hop going on this weekend (September 18th and 19th), starting at 7:00 AM Central Time today and ending at 11:55 PM Central Time tomorrow! Affiliate links are used in this post at no cost to you. I really appreciate your support! This is going to be fun, so COME HOP WITH US!

AND there is a $40 CutCardStock gift card up for grabs! Woo-hoo!

The winner will be randomly selected via number generator and announced on Monday, September 20th, on the CutCardstock blog and Facebook page! To be eligible for the $40 gift card, you must comment at each stop along the hop (good for ONE gift card entry) or upload a Fall or Halloween project using CutCardStock products (good for TWO gift card entries). We would absolutely LOVE IT if you link up a project with us, PLUS it will increase your chances to win the gift card! ;)

=  =  =  =  =  =  =  =  =  =  =  =  =  =  =  =

Now, let me side-track you for a minute or three to share my pretty Fall card featuring a Neenah Classic Crest Solar White 110# cardstock card base with an acetate panel. Both the 110# and 80# weight Neenah Classic Solar White cardstock are staples in my studio. I create most of my projects with this amazing cardstock and don’t ever see myself without it!

Acetate panel cards are so fun to create and this was a super easy one. All those leaves seen through the acetate were cut from Neenah Classic Crest Solar White 110# cardstock as well, and adhered directly to the inside of the card base.

Here is a quick tutorial showing you my process for making this card. All you need is a good sturdy card base cut from Neenah Classic Crest Solar White 110# cardstock, a piece of acetate, and an edge die – which can be curved or straight, plain or scalloped. Doesn’t get much easier! ;)

Cut a section out of the front flap of the card base with the edge die, adhere the acetate to the back side of the flap and adhere the bottom portion of the front flap to the front of the acetate. Stamp the front and inside sentiments in brown ink. Using the Prickley Pear Stamps Fall Leaves Stamp Set and coordinating Prickley Pear Stamps Leaf Die Set, stamp several sets of leaves in brown ink and die cut them, keeping the leaves in the negative spaces by putting small strips of washi tape on the back side of the panels.

Ink the leaves with carved pumpkin, fired brick, forest moss, walnut stain distress inks. Once dry, remove the washi tape from the back side of the panels and remove the die cuts.

Adhere the die cuts randomly to the inside of the card base being sure to cover all areas visible through the acetate.

Ink several wood veneer heart embellishments with the same distress ink colors and adhere to the front of the card base.

CutCardStock products used:
Neenah Classic Crest Solar White 110# cardstock

Other products used:
Stamps: Prickley Pear Stamps Fall Leaves Stamp Set
Ink: Memento Espresso Truffle ink; Ranger distress ink- carved pumpkin, fired brick, forest moss, walnut stain
Dies/Punches: Your Next Stamp Curved Scallop Edge Die, Prickley Pear Stamps Leaf Die Set
Accessories: Bearly Art precision craft glue, MISTI stamp tool, Big Shot, Spiegelmom Scraps Wood Veneer Rustic Hearts

=  =  =  =  =  =  =  =  =  =  =  =  =  =  =  =

Okay, let’s get back to the hop! Here is the complete list of stops:

  1. CutCardStock
  2. Janet Trieschman
  3. Janet Axtman
  4. Maureen Ruangchamneil
  5. Jennifer Kotas
  6. Leslie Turner –>you’re here!<–
  7. Judy VanZandt
  8. Judy Markowitz
  9. CutCardStock – C’mon, you know you want to link up! The linky tool is at the end of the post on the CutCardstock blog so that’s where you’ll want to head to link up your project – each upload is worth two entries for the gift card! Two entries per person!

You should have arrived here from Jennifer’s blog and your next stop is Judy V’s blog! I hope you are enjoying the hop and seeing all the fun Halloween projects! If you get lost along the way or if you landed here in the middle of the hop somehow and want to join in the fun, be sure to head on over to the CutCardstock blog to read all the details and start from the beginning!

In closing, I hope you’ve enjoyed seeing my Halloween card and you’re inspired to get crafty AND hop with us AND link up a Halloween-themed project! Be sure to check out all the awesome cardstock and other goodies at CutCardStock (adhesives, labels, stickers, pens, watercolors and ribbon to name a few). And head on over to the CutCardStock Facebook Page for lots of crafty inspiration! Thanks so much for stopping by today – we’ll see you next time!

Scrappy hugs,
lesliesig

Sending many blessings your way

Hi everyone! A very Happy Friday to you – I hope you have something fun planned this weekend! Last Sunday Ed and I went to Four Corners which is the only spot in the United States where you can literally stand in four states at once – Utah, Colorado, Arizona and New Mexico. This was on my bucket list and not very far from where we live, so we made the trip and had a great time! I’m stoked to be back on the CutCardStock blog today with an awesome DT inspiration project featuring our Autumn cardstock (brown, orange and gold) which is on sale this month so be sure to stock up! I paired these gorgeous colors with our Basis Natural which is a good sturdy 110# weight and makes great card bases. Affiliate links are used in this post at no cost to you. I really appreciate your support! I created a pretty Thanksgiving card featuring a clear acetate panel on the front with chevron elements die cut from Basis Brown 80# cardstock, Pop-Tone Tangy Orange 65# cardstock and Stardream Metallic Antique Gold 105# cardstock showing through the acetate.

I cut the card base from Basis Natural 110# cardstock, stamped the background in white ink using the Trinity Stamps Encouragement Text 6×6 background stamp, and then die cut the chevron into the card base, reserving the frame. I die cut an extra chevron from the natural cardstock, adhered it beneath the reserved stamped frame with spray adhesive, and set it aside. I die cut three more chevrons from Basis Brown 80# cardstock, Pop-Tone Tangy Orange 65# cardstock and Stardream Metallic Antique Gold 105# cardstock, reserving one column of die cut elements from each of the colors to adhere back into the negative space on the inside of the card.

I adhered a piece of acetate beneath the aperture on the inside of the card base using double-sided tape, and then adhered the stacked frames on top with spray adhesive for some slight dimension. Using the Trinity Stamps A Sentiment For (Almost) Anything stamp set, I stamped the sentiment in brown ink on the natural cardstock, trimmed it and stacked it on three more pieces of cardstock, and adhered it to the bottom portion of the card. The finishing touch on the front was adding several orange gemstones.

I embellished the inside left with strips cut from Basis Brown 80# cardstock, Pop-Tone Tangy Orange 65# cardstock, Stardream Metallic Antique Gold 105# cardstock and Basis Natural 110# cardstock. I adhered the reserved die cut elements from the three colors back into the negative spaces of the chevron without the frame (to be seen on the front through the acetate), and stamped a sentiment from the same Trinity Stamps A Sentiment For (Almost) Anything stamp set in brown ink.

And one more peek of that up-close shot… totally loving how this turned out! These autumn cardstock colors are so beautiful and make absolutely gorgeous cards!

CutCardStock products used:
Basis Natural 110# cardstock
Basis Brown 80# cardstock
Pop-Tone Tangy Orange 65# cardstock
Stardream Metallic Antique Gold 105# cardstock

Other products used:
Stamps: Trinity Stamps Encouragement Text 6×6 background stamp, Trinity Stamps A Sentiment For (Almost) Anything stamp set
Ink: Delicata White Shimmer ink, Catherine Pooler Icing On The Cake ink
Dies/Punches: Sizzix Alterations Chevron Frameworks die
Accessories: Tonic Studios 12″ Guillotine Paper Trimmer, Grafix Craft Plastic, Elmer’s Craft Bond Spray Adhesive, Bearly Art precision craft glue, Big Shot, MISTI stamp tool, Darice Hercules double-sided tape, 1mm thick adhesive foam pads, Darice orange gemstones

I hope you’ve enjoyed today’s project and you’re inspired to get crafty! Be sure to check out all the awesome cardstock and other goodies at CutCardStock (adhesives, labels, stickers, pens, watercolors and ribbon to name a few). And head on over to the CutCardStock Facebook Page for more inspiration! Thanks so much for stopping by today – we’ll see you next time!

Scrappy hugs,
lesliesig

Happy Summer Days

Hi everyone! Happy Thursday – I hope you’re having a wonderful week! Hard to believe we’ve surpassed the middle of August already but I have to admit that I’m so ready for Fall and Winter to get here! I’m stoked to be back on the CutCardStock blog today with an awesome DT inspiration project featuring white cardstock, which is on sale this month (along with ivory – so be sure to stock up!) that I paired with red and green cardstock and a little bit of washi tape. Affiliate links are used in this post at no cost to you. I really appreciate your support! I created a super fun CAS Summer card boasting a picnic table with some handmade watermelon slices. I have several watermelon slice dies but they were too small for this card so I created my own with circle dies and a black marker… and what picnic is complete without little ants?!

I cut a standard A2 size top-folding card base from Neenah Classic Crest Solar White 110# cardstock along with a strip for the bottom from Neenah Classic Crest Solar White 80# cardstock which I covered in some red heart washi tape and made into a picnic table. I did my ‘thing’ of rounding the bottom right corner. I die cut green and red circles from CutCardStock Basis Red cardstock and CutCardStock Bonsai Green cardstock and layered them together, then cut them in half and cut one of the halves in half to make three slices of watermelon. I think I’ve forgotten to mention that I had to replace my Big Shot about six weeks ago because I wore the old one slam out! Have you ever heard of wearing out a Big Shot?! I guess after 11 years I got my money’s worth out of it, lol! The new one cuts like a dream. I had gotten several Magic Mats a while back and they make such a difference in cutting, plus they save a ton in cutting plates! Okay, back to the card… I added watermelon seeds with a black Flair marker, added ant brads to each slice, and adhered two of them to the picnic table. I stamped the sentiment in black ink, and the finishing touch was adding several red gemstones.

I cut the inside panel from Neenah Classic Crest Solar White 80# cardstock and embellished it with the red heart washi tape and a narrow strip of CutCardStock Basis Red cardstock, stamped the sentiment and added the remaining slice of watermelon, and layered the panel on the red cardstock.

And one more look… super happy with how this turned out! What a great Summer card created with amazing cardstock, and it was so easy to put together!

CutCardStock products used:
Neenah Classic Crest Solar White 110# and 80# cardstock
CutCardStock Basis Red cardstock
CutCardStock Bonsai Green cardstock

Other products used:
Stamps: Great Impressions Happy Summer Days sentiment stamp, Waffle Flower Sentiment Additions stamp set
Ink: PaperMate Flair Black medium point pen, Memento Tuxedo Black ink
Dies/Punches: Kadomaru Pro corner rounder, Spellbinders Standard Circles dies
Accessories: Tonic Studios 12″ Guillotine Paper Trimmer, MISTI stamp tool, Gemini Junior, Bearly Arts precision craft glue, Eyelet Outlet Mini Ant Brads, Eyelet Outlet Heart Washi Tape, Eyelet Outlet red jewel bling

I hope you’ve enjoyed today’s project and you’re inspired to get crafty! Be sure to check out all the awesome cardstock and other goodies at CutCardStock (adhesives, labels, stickers, pens, watercolors and ribbon to name a few). And head on over to the CutCardStock Facebook Page for more inspiration! Thanks so much for stopping by today – we’ll see you next time!

Scrappy hugs,
lesliesig

thinking of you

Hi everyone! Happy Tuesday and a few days into another month! My sister’s birthday is in another few days and I’ve always said that once her birthday hits, it’s no time before Christmas is here! I’m stoked to be back on the CutCardStock blog today with an awesome DT inspiration project featuring ivory cardstock that’s on sale this month (along with white cardstock), so be sure to stock up! It’s timeless and a staple in my studio. I paired the ivory with some gorgeous shades of purple and a pop of green… one of my favorite color combos. Affiliate links are used in this post at no cost to you. I really appreciate your support! I created a pretty thinking of you card using the floating strips technique. I saw this technique done quite some time ago and had never tried it. I saw it in a recent Splitcoast Stampers newsletter HERE and was inspired to move it way up on the ‘to do’ list and give it a go. Not sure what I had been waiting for… it was so fun and yielded such a beautiful result!

I cut a standard A2 size top-folding card base from Neenah Classic Crest Baronial Ivory cardstock along with a layering panel from Royal Sundance Linen Ivory cardstock. I cut a slightly smaller panel from acetate along with strips from Pop-Tone Grapesicle cardstock, Stardream Metallic Amethyst, Stardream Metallic Fairway cardstock and Basis Dark Purple cardstock in varying widths which I adhered to the acetate, leaving a small space between each strip. I adhered the acetate panel to the front layering panel with adhesive foam strips and then adhered the piece to the card base. I stamped the sentiment from the Waffle Flower Essential Sentiments stamp set in purple ink and cut it with the coordinating Waffle Flower Essential Sentiments die, and layered it on several additional die cuts for some dimension. I adhered it to the bottom of the panel and added several ivory enamel dots to finish the front.

Here’s an angled view showing all the dimension of this floating strips technique. It’s very cool and I’ll definitely be making some more cards like this!

I cut the inside panel from Neenah Classic Crest Baronial Ivory cardstock and embellished it with strips cut from Stardream Metallic Amethyst, Stardream Metallic Fairway cardstock and Pop-Tone Grapesicle cardstock. I stamped the sentiment from the same Waffle Flower Essential Sentiments stamp set in purple ink and layered the panel on Basis Dark Purple cardstock.

And one more peek… I’m really loving how this turned out and I can’t wait to do this technique again! ;)

CutCardStock products used:
Neenah Classic Crest Baronial Ivory cardstock
Royal Sundance Linen Ivory cardstock
Pop-Tone Grapesicle cardstock
Stardream Metallic Amethyst
Stardream Metallic Fairway cardstock
Basis Dark Purple cardstock

Other products used:
Stamps: Waffle Flower Essential Sentiments stamp set
Ink: Catherine Pooler Grape Crush ink
Dies/Punches: Waffle Flower Essential Sentiments die set
Accessories: Tonic Studios 12″ Guillotine Paper Trimmer, Grafix Craft Plastic, Bearly Art precision craft glue, MISTI stamp tool, Gemini Junior, Darice Double-Sided Adhesive Foam Strips, Eyelet Outlet Ivory Enamel Dots

I hope you’ve enjoyed today’s project and you’re inspired to get crafty! Be sure to check out all the awesome cardstock and other goodies at CutCardStock (adhesives, labels, stickers, pens, watercolors and ribbon to name a few). And head on over to the CutCardStock Facebook Page for more inspiration! Thanks so much for stopping by today – we’ll see you next time!

Scrappy hugs,
lesliesig

‘thanks’ pinwheel card

Hi everyone! A very Happy Tuesday to you – here’s hoping it’s not too hot where you are! We have little to no humidity out here in Colorado so the hot and cold temps are a little easier to tolerate. But I won’t lie… I’m SO ready for Fall and Winter! I’m stoked to be back on the CutCardStock blog today with an awesome DT inspiration project featuring gorgeous silver cardstock which is on sale this month. I paired the silver with black cardstock and some very cool chalkboard cardstock (which is also on sale). Be sure to grab some silver cardstock while it’s on sale though, as it would make a wonderful addition to your cardstock stash! Affiliate links are used in this post at no cost to you. I really appreciate your support! I created a fun ‘thanks’ pinwheel card. I finally got around to making my first pinwheel card a couple months ago and I couldn’t believe how easy and fast it worked up – and couldn’t wait to make another one!

I cut a square top-folding card base from Neenah Classic Crest Solar White 110# cardstock along with a layering panel from CutCardStock Stardream Metallic 105# Silver cardstock which I adhered to the card base, four squares for the pinwheel and a narrow embellishing strip for the bottom of the front panel. I also punched two 3/4″ circles and four 1/2″ circles which I layered to create the element in the center of the pinwheel. Next, I cut four floral squares for the pinwheel and two strips for the bottom of the front panel from the We R Memory Keepers Chalkboard 6×6 paper pad. And finally I cut eight slightly larger squares from CutCardStock Basis Black cardstock to layer beneath the chalkboard and silver squares. I adhered the squares together to form the pinwheel and affixed the punched circles in the center, then adhered the two chalkboard strips and the narrow silver embellishing strip to the bottom. Using the CUTplorations Skinny Sentiments, I die cut the sentiment from CutCardStock Basis Black cardstock and CutCardStock Stardream Metallic 105# Silver cardstock and adhered it at the bottom on the right side of the strips.

I cut the inside panel from Neenah Classic Crest Solar White 80# cardstock and embellished it with chalkboard strips and a narrow silver cardstock strip, added a stamped and die cut sentiment (using the Waffle Flower Sentiment Additions stamp set with coordinating Waffle Flower Sentiment Additions die set) and layered the panel on silver cardstock.

And one more peek… so loving how this turned out! Pinwheel cards are so much fun, and the right cardstock will definitely do them justice! ;)

CutCardStock products used:
Neenah Classic Crest Solar White 110# and 80# cardstock
CutCardStock Stardream Metallic 105# Silver cardstock
CutCardStock Basis Black cardstock
We R Memory Keepers Chalkboard 6×6 paper pad

Other products used:
Stamps: Waffle Flower Sentiment Additions stamp set
Ink: Delicata Silvery Shimmer ink
Dies/Punches: Stampin’ Up 3/4″ and 1/2″ Circle Punches, CUTplorations Skinny Sentiments, Waffle Flower Sentiment Additions die set
Accessories: Tonic Studios 12″ Guillotine Paper Trimmer, Gemini Junior, MISTI stamp tool, Bearly Arts precision craft glue

I hope you’ve enjoyed today’s project and you’re inspired to get crafty! Be sure to check out all the awesome cardstock and other goodies at CutCardStock (adhesives, labels, stickers, pens, watercolors and ribbon to name a few). And head on over to the CutCardStock Facebook Page for more inspiration! Thanks so much for stopping by today – we’ll see you next time!

Scrappy hugs,
lesliesig

Birthday Wishes slimline

Hi everyone! It’s Tuesday and I hope your week has started off nicely! Life is good here and I have absolutely no complaints! I’m stoked to be back on the CutCardStock blog today with an awesome DT inspiration project featuring some pretty gold cardstock (which is on sale this month so be sure to get some!) that I paired with lots of other cardstock. Affiliate links are used in this post at no cost to you. I really appreciate your support! I created a slimline birthday card featuring a gold two-story bird house with a blue bird and lots of colorful flowers!

This is my own design and I really didn’t measure anything… I just cut the dimensions of the bird house that fit my normal 9″ x 3-3/4″ slimline card base. So that means don’t get out your micrometer, lol! I cut the card base from Neenah Classic Crest Solar White 80# cardstock and a layering panel from Curious Metallic 92# Gold Leaf cardstock. I cut the roof and perches from Basis 80# Brown cardstock. Using Memory Box Stitched Circle Layers, I die cut the entrance holes from Stardream Metallic 105# Antique Gold cardstock and Basis 80# Brown cardstock. Using the set of Sizzix Bird Scene Thinlits, I die cut the bird from Basis 80# Navy cardstock, Basis 80# Medium Blue cardstock, Basis 80# Blue cardstock and Curious Metallic 111# Night cardstock, the branch from Curious Metallic 111# Chestnut cardstock, and the flowers and leaves from Basis 80# Coral Cardstock, Basis 80# Gold cardstock, Basis 80# Teal cardstock, Basis 80# Red cardstock, Pop-Tone 65# Tangy Orange cardstock, Pop-Tone 65# Gumdrop Green cardstock, Pop-Tone 65# Jellybean Green cardstock andPop-Tone 65# Grape Jelly cardstock. Using the CUTplorations Skinny Sentiments, I die cut the large portion of the sentiment from Pop-Tone 65# Gumdrop Green cardstock, Pop-Tone 65# Jellybean Green cardstock and stamped the remaining one word in brown ink, trimmed it and adhered it just beneath the die cut portion. I had several leftover flowers and adhered two of them with the sentiment.

I hand-cut the inside panel from Neenah Classic Crest Solar White 80# cardstock as well, embellished it with leftover strips of Pop-Tone 65# Jellybean Green cardstock and Curious Metallic 92# Gold Leaf cardstock, and layered it on the gold leaf cardstock (also hand-cut). I die cut the sentiment from a scrap piece of Stardream Metallic 105# Antique Gold cardstock and adhered the two remaining flowers to the bottom of the panel.

And one more peek… I’m so smitten I can’t stand it! I absolutely love the way this turned out, and having all these gorgeous colors of cardstock sure does help! I’ve had the Bird Scene Thinlits in my stash for a while and I knew they’d come in handy for just the right project! ;)

Sharing in the following challenges:
1. The Outlawz Saturday Paper A La Mode Challenge: Fur, Feathers or Fins

CutCardStock products used:
Curious Metallic 92# Gold Leaf cardstock
Neenah Classic Crest Solar White 80# cardstock
Basis 80# Brown cardstock
Stardream Metallic 105# Antique Gold cardstock
Basis 80# Navy cardstock
Basis 80# Medium Blue cardstock
Basis 80# Blue cardstock
Curious Metallic 111# Night cardstock
Curious Metallic 111# Chestnut cardstock
Basis 80# Coral Cardstock
Basis 80# Gold cardstock
Basis 80# Teal cardstock
Basis 80# Red cardstock
Pop-Tone 65# Tangy Orange cardstock
Pop-Tone 65# Gumdrop Green cardstock
Pop-Tone 65# Jellybean Green cardstock
Pop-Tone 65# Grape Jelly cardstock

Other products used:
Stamps: Lawn Fawn Happy Happy Happy stamp set
Ink: Memento Espresso Truffle ink
Dies/Punches: Memory Box Stitched Circle Layers, CUTplorations Skinny Sentiments, Sizzix Bird Scene Thinlits, Scrapbook.com Celebrate Word Die
Accessories: Tonic Studios 12″ Guillotine Paper Trimmer, Gemini Junior, MISTI stamp tool, Bearly Arts precision craft glue, Scrapbook.com 1/4″ Double-Sided Adhesive Roll, Darice Adhesive Foam Circles

I hope you’ve enjoyed today’s project and you’re inspired to get crafty! Be sure to check out all the awesome cardstock and other goodies at CutCardStock (adhesives, labels, stickers, pens, watercolors and ribbon to name a few). And head on over to the CutCardStock Facebook Page for more inspiration! Thanks so much for stopping by today – we’ll see you next time!

Scrappy hugs,
lesliesig