04/04/26 Weekly Favorite at Splitcoast Stampers!
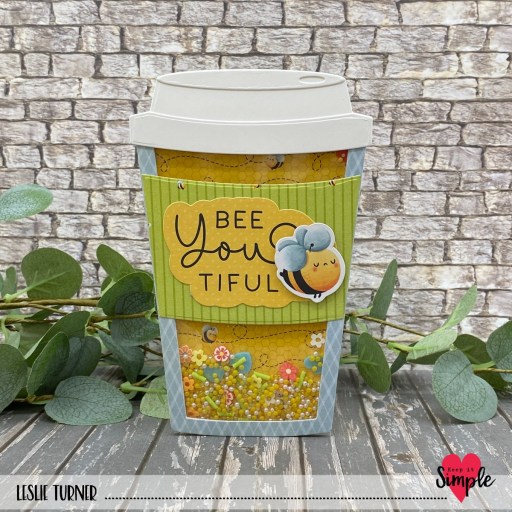
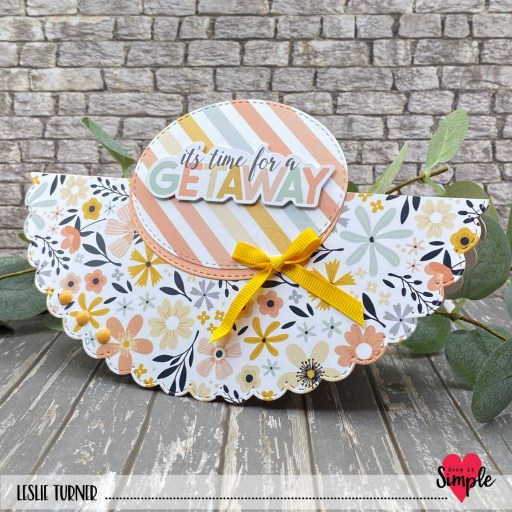
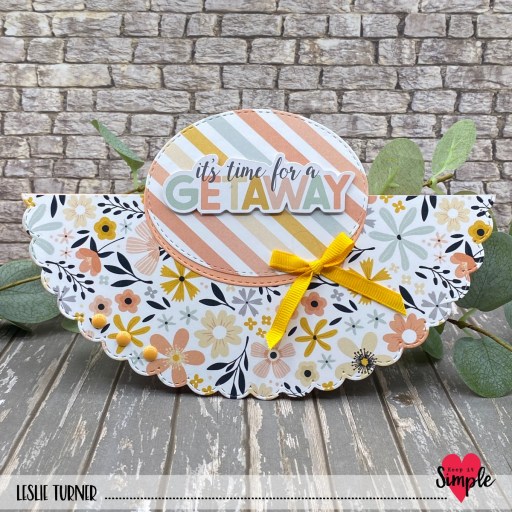
Howdy peeps, happy Friday! I hope you have something fun planned this weekend! I’m delighted to share a Keep It Simple DT inspiration project with you today featuring our new KIS Cuts Nested Stitched Scallop Squares and KIS Cuts Nested Stitched Scallop Rectangles. I also used papers, stamps and dies from our Happy Birthday collection and a variety of shaker bits from our Sprinkles line to make this super cute birthday shaker! I mean, come on, who doesn’t love a shaker card?!
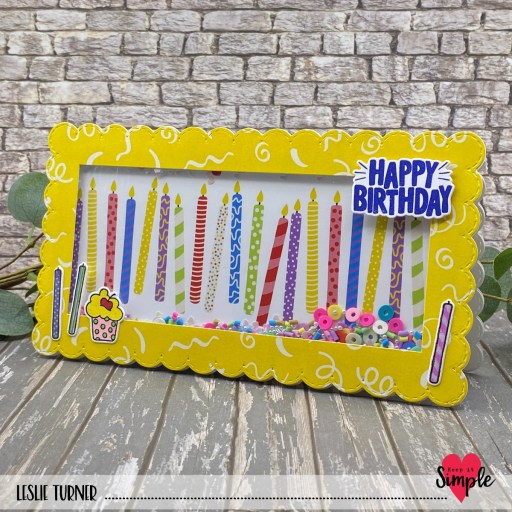
Our new nested stitched scallop dies are large, so I pulled out my oversized die cutting machine and cut a large scallop square (from the KIS Cuts Nested Stitched Scallop Squares) from Solar White cardstock, scored it, and folded it in half. I grabbed a scallop rectangle die from the KIS Cuts Nested Stitched Scallop Rectangles and cut two from coordinating prints in the Happy Birthday collection. I cut a rectangular aperture in the yellow one with a Back To Basics Nested Stitched Rectangles Die and made a shaker.
I used acetate and foam strips from our Back To Basics line along with Polymer Clay Mini Pastel Confetti, Polymer Clay Rainbow Mix Hollow Circles, Sequins Arctic Hearts, and 2mm Beads Pearls for the shaker mix. I stamped a sentiment and several images from the Happy Birthday Collection Stamps, colored the images with a variety of markers, and cut them with the coordinating Outline Dies.
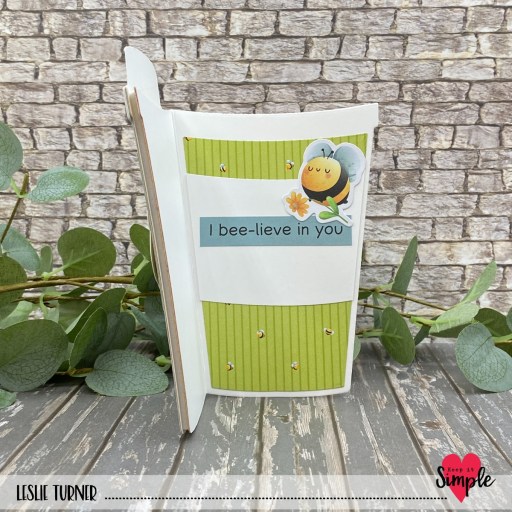
I cut the inside panels from Solar White and the same yellow print used on the front, and added stamped and die cut sentiments and an image colored with markers. Such a fun card to make!

Sharing in the following challenges:
1. https://cutitupchallenges.blogspot.com/2026/04/cut-it-up-challenge-353-for-babies-or.html
2. https://cardsgalorechallenges.blogspot.com/2026/04/april-2026-challenge-146-crafts-galore.html
3. https://mixitupchallenge.blogspot.com/2026/03/miucb-82-anything-goes-optional-die.html
4. https://paper-rocks-scissors.blogspot.com/2026/04/april-15-challenge.html (paper and cardstock + scissors to cut foam tape for shaker)
5. https://tuesdaytaggers.blogspot.com/2026/03/make-it-cute.html
Keep It Simple products used:
KIS Cuts Nested Stitched Scallop Squares
KIS Cuts Nested Stitched Scallop Rectangles
Back To Basics Nested Stitched Rectangles Dies
Happy Birthday 12×12 Collection Pack
Happy Birthday Collection Stamps
Happy Birthday Outline Dies
Back To Basics Shaker Basics Acetate & Foam Sheets
Back To Basics Adhesive Basics Squares & Strips
Sprinkles- Polymer Clay Mini Pastel Confetti
Sprinkles- Polymer Clay Rainbow Mix Hollow Circles
Sprinkles- Sequins Arctic Hearts
Sprinkles- 2mm Beads Pearls
Affiliate links are used in this post at no cost to you – I really appreciate your support!
Other products used:
CARDSTOCK/PAPER: Classic Crest 80# Solar White cardstock
INK: Catherine Pooler Suede Shoes Ink, Memento Tuxedo Black Ink, Versafine Onyx Black Ink, White Sharpie Paint Pen; Copic Ciao Alcohol Markers- R29, RV21; Copic Kirarina Wink Purple, Orange, White Pearl, Sky Blue, Lime Green, Violet, Dandelion
ACCESSORIES: Fiskars 12″ ProCision Rotary Bypass Paper Trimmer, Spellbinders 12×12 Scoring Board, My Sweet Petunia Precision Glue Press, Bearly Art Precision Craft Glue, Mini MISTI, Big Shot, Vevor Large Die Cutting Machine, Scrapbook Adhesives E-Z Runner Permanent Strips
I hope you’ve loved seeing this project as much as I loved creating it and you’re inspired to get crafty! Be sure to check out ALL the fun goodies in the Keep It Simple online store! Save 10% on your entire order when you shop online using code LoveToScrap2 at checkout! There is no minimum purchase requirement and no usage limits, AND it combines with product, order, and shipping discounts! Is that cool, or what?! Be sure to Follow us on Facebook, Instagram, and Pinterest for lots of crafty inspiration! Thanks so much for stopping by today – we’ll see you next time!
Scrappy hugs,