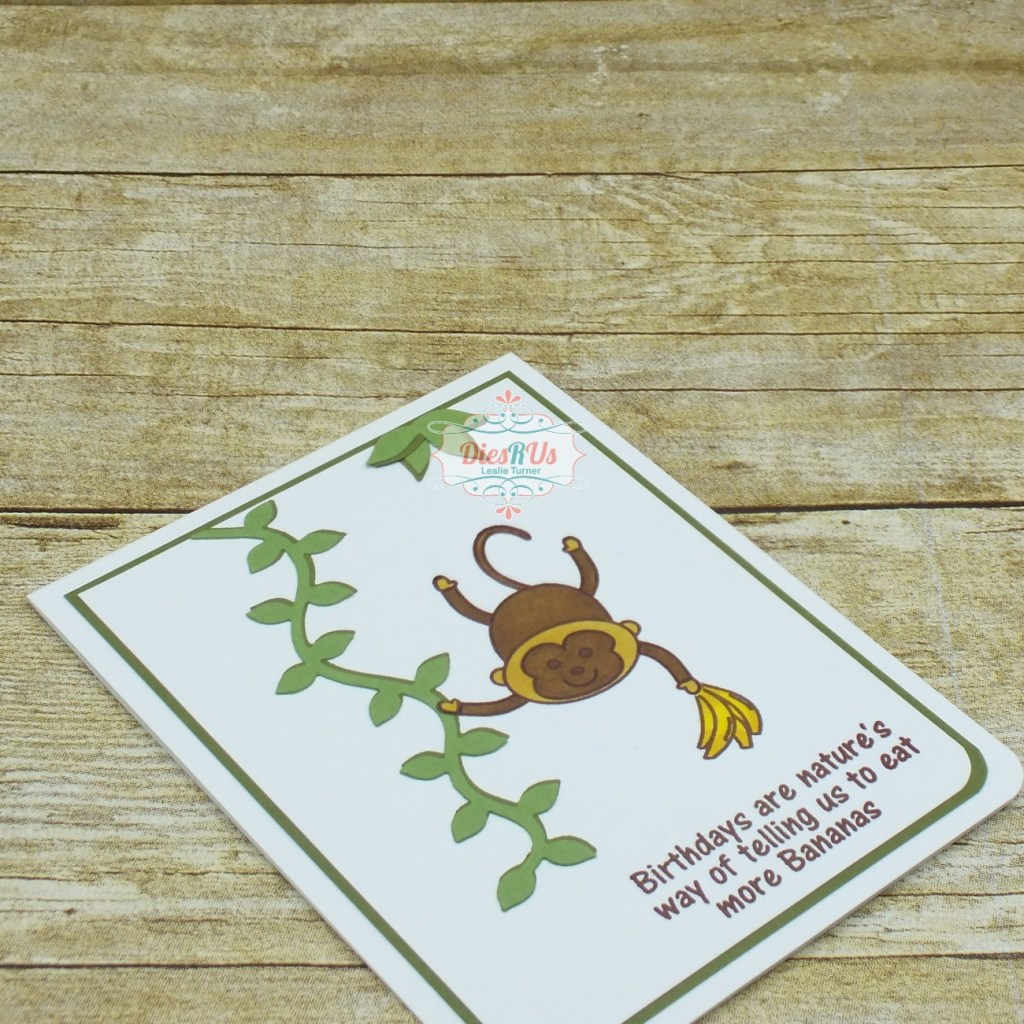
Hi everyone! A big ol’ Happy Friday to you! I hope you’ve had an exceptional week! Can you believe we’re headed into August already?! Affiliate links are used in this post at no cost to you. I really appreciate your support! I’m delighted to be back on the Dies R Us Inspiration Blog today with another awesome DT inspiration project! I created an adorable clean and simple birthday card featuring the super cute Elizabeth Crafts Jungle Leaves die set carried in the store. I originally thought child birthday (specifically one of our youngest grands) but I know some adults who would love it, too! ;)
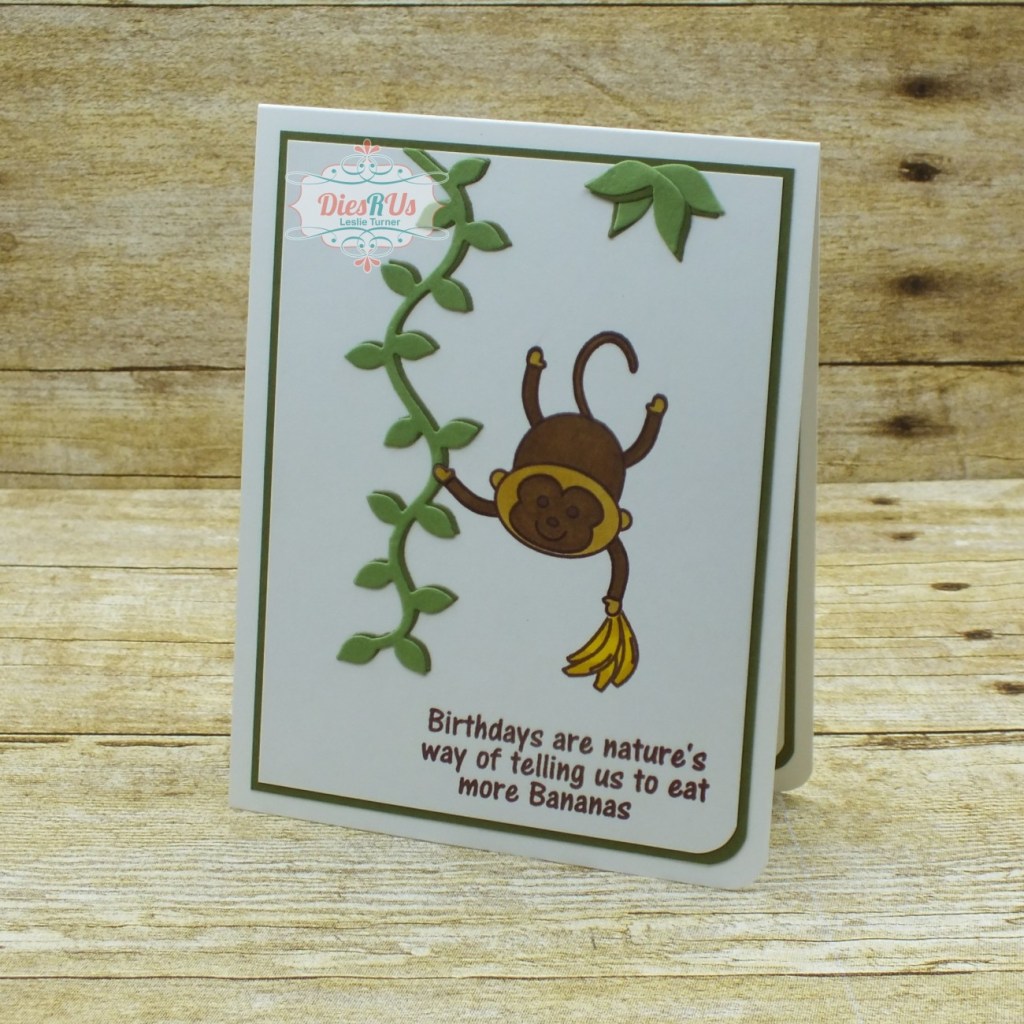
I cut a standard A2 size top-folding card base from Neenah Classic Crest 110# Solar White cardstock, layering panel from Neenah Classic Crest 80# Solar White cardstock and a slightly larger layering panel from CutCardStock Pop-Tone Jellybean Green cardstock, and rounded the bottom right corner on all the pieces. I stamped that adorable little monkey, his bananas, and the sentiment in brown ink on the layering panel, colored them with alcohol markers and adhered the panels to the card base. I stamped his right hand a second time on a scrap piece of white cardstock, colored it, fussy cut it, and set it aside to later paper-piece onto the vine. Using the Elizabeth Craft Designs Jungle Leaves die set, I die cut vines and leaves from CutCardStock Pop-Tone Gumdrop Green cardstock and CutCardStock Pop-Tone Jellybean Green cardstock, layered them together for a little dimension, and adhered them to the card front. The finishing touch was paper-piecing that tiny little fussy-cut hand onto the vine with the Crystal Katana Pick-Up & Glue Tool. I LOVE this tool for maneuvering small paper-pieced items into place!

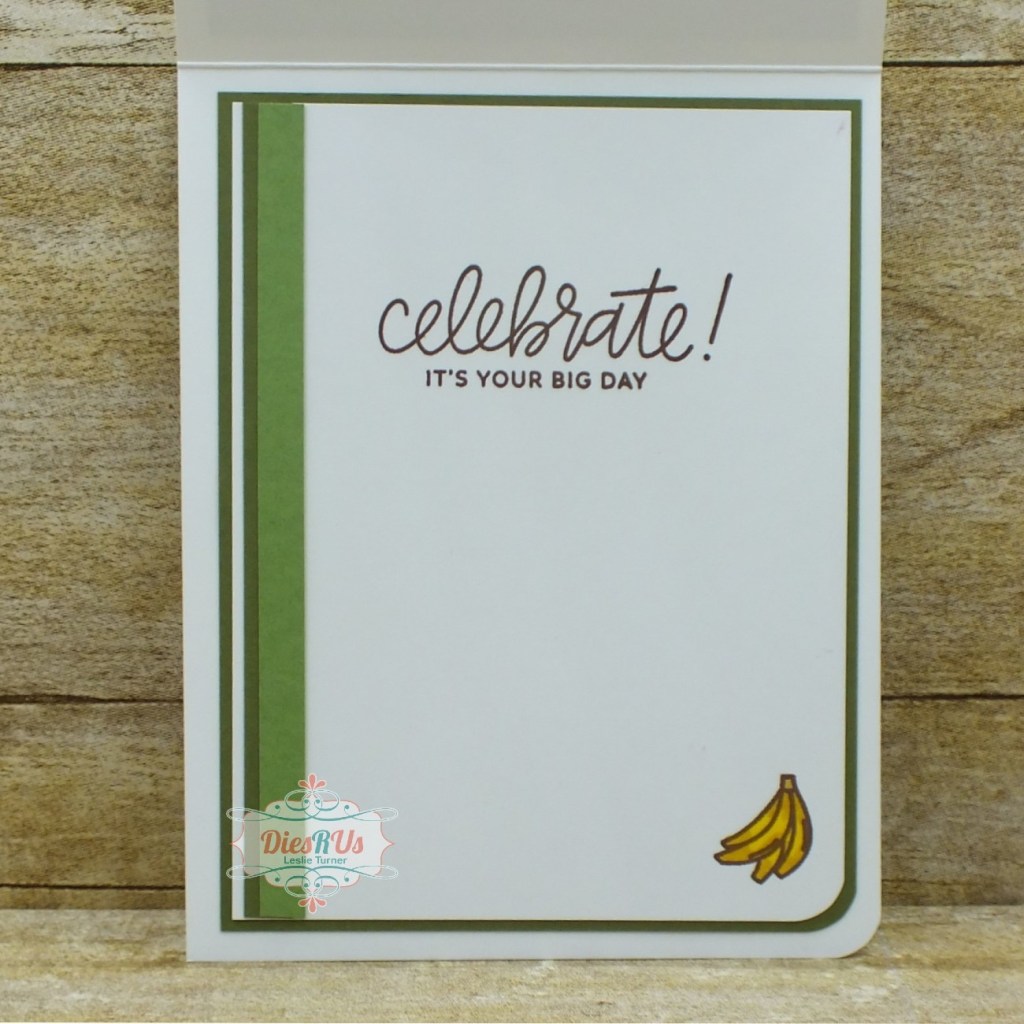
I cut the inside panel from Neenah Classic Crest 80# Solar White cardstock and embellished it with strips of the green cardstock, stamped the sentiment in green ink and layered the panel on CutCardStock Pop-Tone Jellybean Green cardstock.
And one more peek… what an adorable card! The die cut jungle leaves worked perfectly with this stamp set! Love it when that happens!
Dies R Us products used:
Elizabeth Craft Designs Jungle Leaves die set
Crystal Katana Pick-Up & Glue Tool
Other products used:
Cardstock/Paper: Neenah Classic Crest Solar White cardstock, CutCardStock Pop-Tone Gumdrop Green cardstock, CutCardStock Pop-Tone Jellybean Green cardstock
Stamps: STAMPlorations Chikoo Goes Bananas stamp set, Pretty Pink Posh Everyday Greetings stamp set
Ink: Memento Rich Cocoa ink; Nuvo alcohol markers- 405, 461, 466
Dies/Punches: Kadomaru Pro corner rounder
Accessories: Big Shot, MISTI stamp tool, Tonic Studios 12″ Guillotine Paper Trimmer, Bearly Art precision craft glue, Tombow Mono permanent adhesive,
I hope you’ve enjoyed today’s project! Be sure to check out all the fun goodies at the Dies R Us store! They not only sell dies… they also carry stamps, embossing tools and supplies, all kinds of craft supplies, slimline products and even Yupo paper! Be sure to join in the fun going on over at the Dies R Us Challenge Blog – there’s a new challenge theme posted on the 1st and 15th of each month and one lucky random winner will receive a gift voucher prize to the Dies R Us store! And be sure to ‘like’ and ‘follow’ Dies R Us Facebook Page for lots of creative inspiration and to keep up with the latest news! Thanks so much for stopping by today – we’ll see you next time! ;)
Scrappy hugs,