Hi friends! Top of the week to you! Well, another Tuesday has rolled around and at the rate we’re going, Christmas will be here before we know it! LOL, I see you rolling your eyes! ;) Affiliate links are used in this post at no cost to you. I really appreciate your support! A new Color Wheel challenge has started today over at The Outlawz Tuesday Color Challenge and our sponsor is Free Pretty Things For You so be sure to come on over and play! I created a pair of birthday cards using sponsor papers Girl Boss Black and White Floral Digital Delight Papers gifted to me, and OMGosh, these papers are beyond gorgeous! I see lots of projects using these in my future, lol!
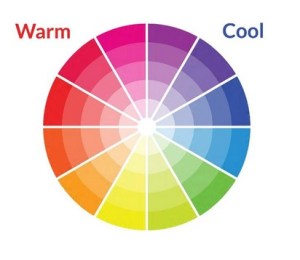
For the Color Wheel challenge this fortnight, we are to choose one warm color and two cool colors from the color wheel below for our project, and there is no twist this time. I used pink from the warm side and purple and blue from the cool side for my cards.
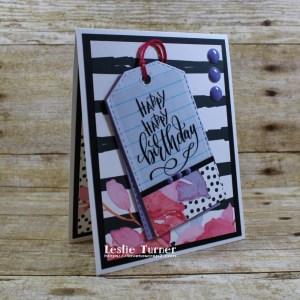
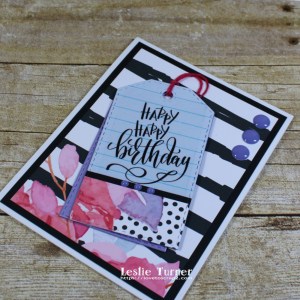
Let’s look at the card with the tag first. I cut a standard A2 size top-folding card base from Neenah Classic Crest Solar White 110# cardstock along with a CutCardStock Basis 80# Black cardstock layer and a FPTFY Girl Boss Black and White Floral Digital Delight Paper layer which I adhered together and then adhered to the card base. I affixed a CRAFTplorations Happy Happy Clear Sticker to a sheet pulled from a light blue lined writing pad and used the CUTplorations Stitched Tags Nesting Dies to cut the first tag. I cut a second tag from CutCardStock Stardream Metallic 105# Amethyst cardstock and adhered it beneath the first one in a staggered fashion. I embellished the light blue tag with a strip of the digital paper and a narrow strip of the black cardstock, and added three small purple enamel dots. I dyed a piece of bamboo cord using Catherine Pooler Party Dress ink and once dry, I threaded it through the hole in the top of the tag and glued the ends to the back of the tag. I adhered the tag to the card front and added three more larger purple enamel dots.
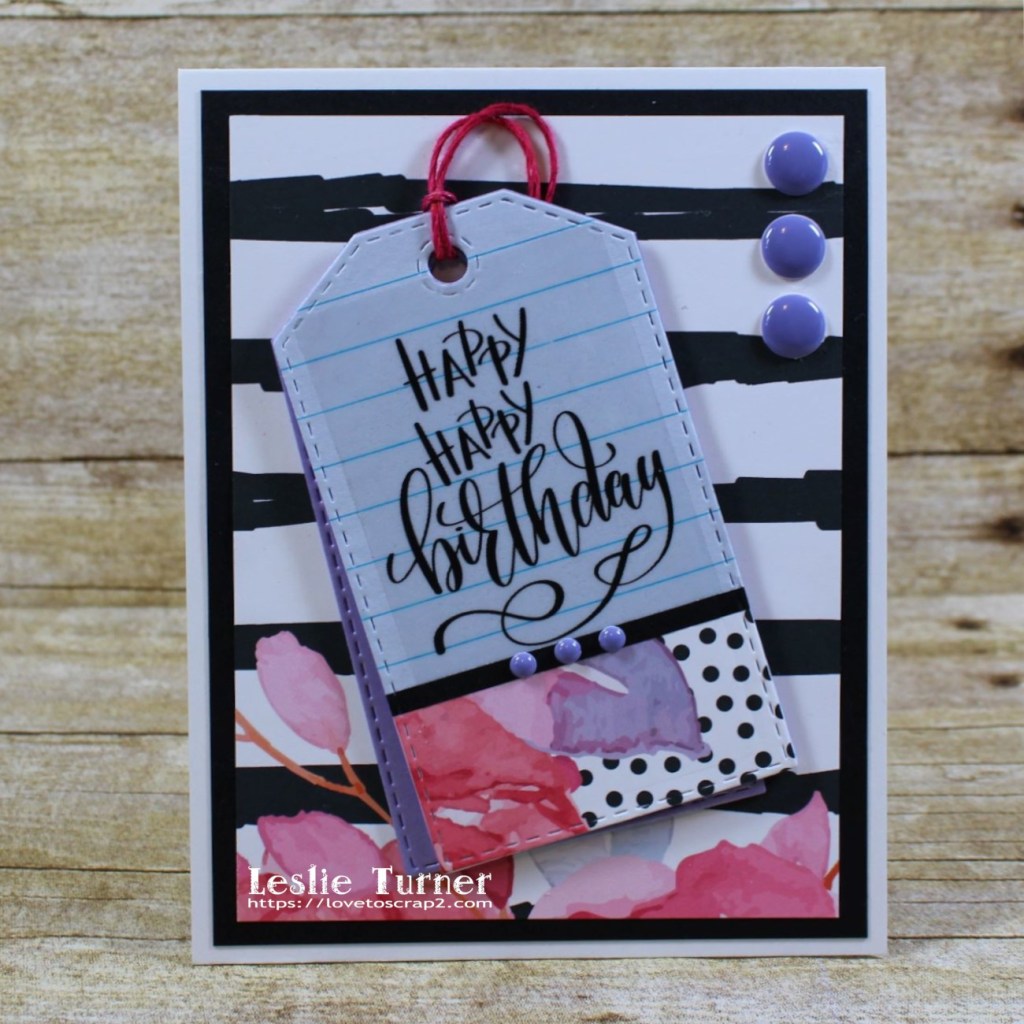
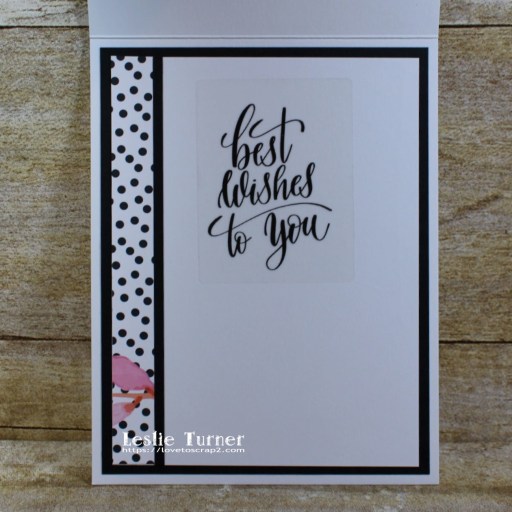
I cut the inside panel from Neenah Classic Crest 80# Solar White cardstock and embellished it with strips of the digital paper and the black cardstock, added an additional CRAFTplorations Happy Happy Clear Sticker sentiment, and layered the panel on the black cardstock.
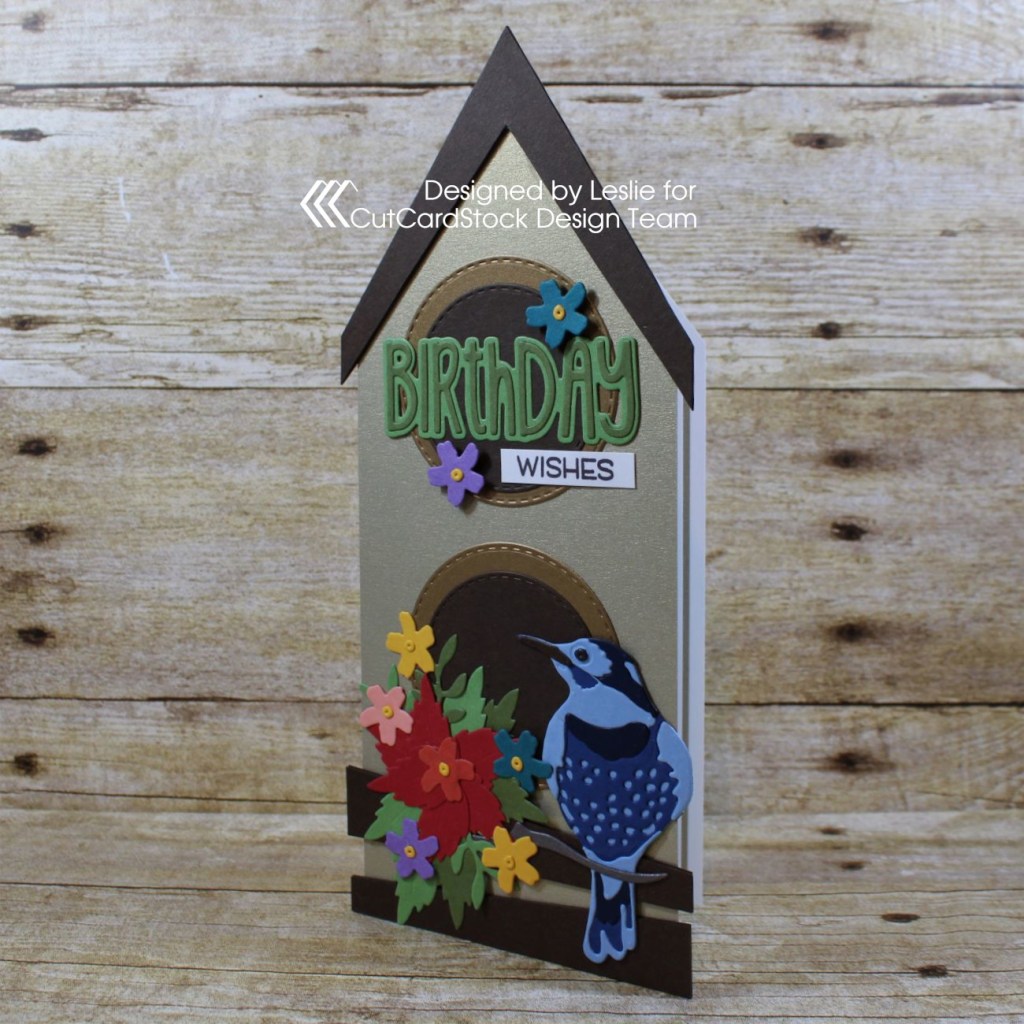
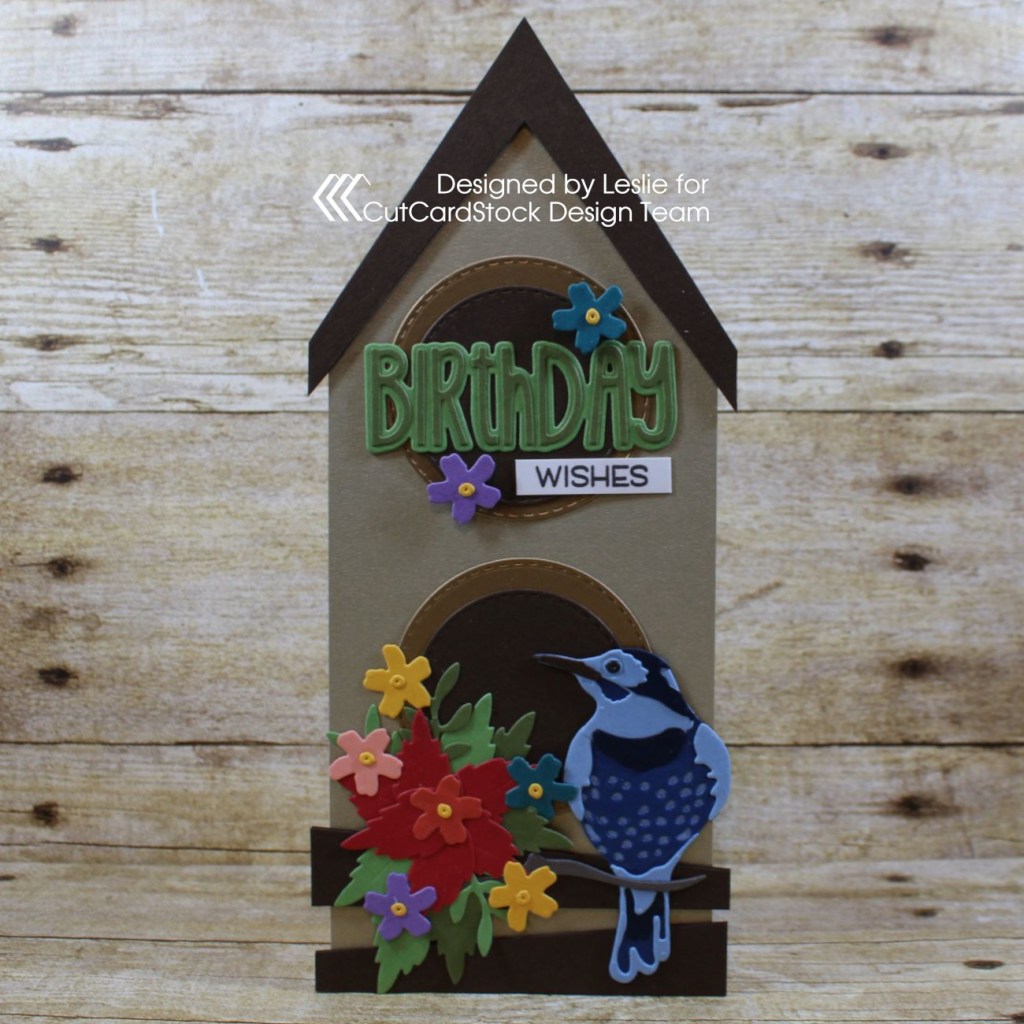
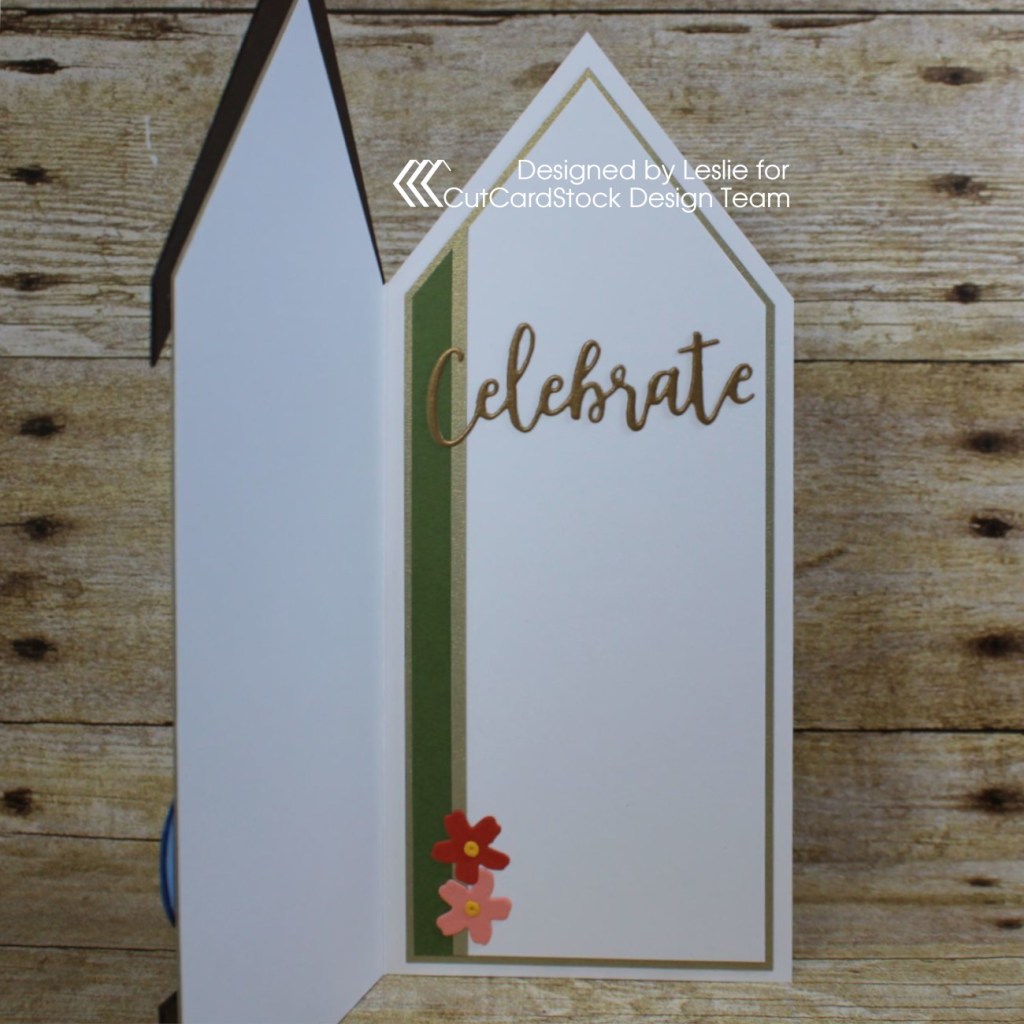
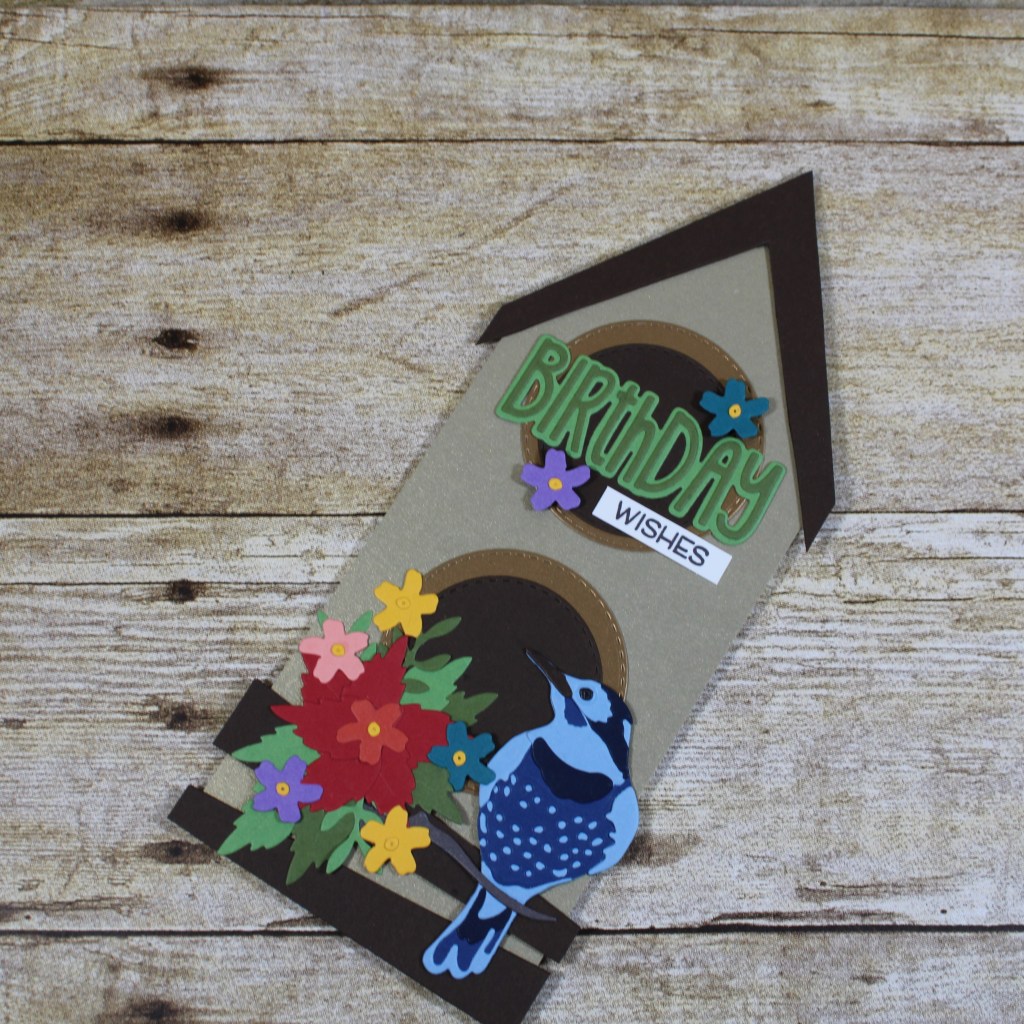
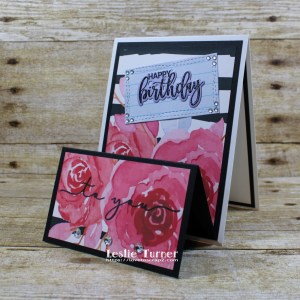
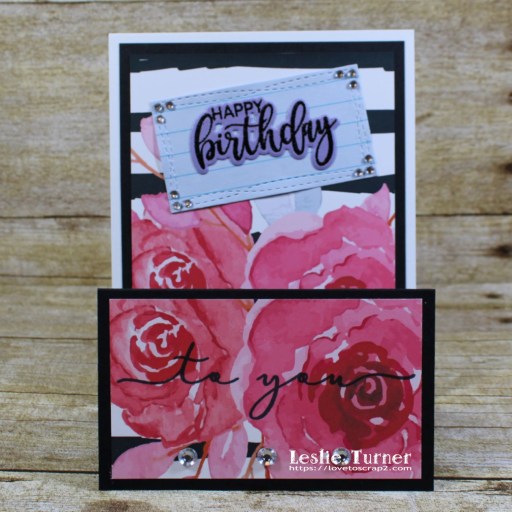
Okay, now let’s look at the double easel fun fold! I really do love this fold and it’s definitely up there in my top five favs! I cut a standard A2 size top-folding card base from Neenah Classic Crest Solar White 110# cardstock along with an additional A2 size folded panel from CutCardStock Basis 80# Black cardstock and two FPTFY Girl Boss Black and White Floral Digital Delight Paper layers, and adhered them together. Using the My Favorite Things Wonky Stitched Rectangle STAX Die-namics, I cut a rectangle and adhered it to the card front at an angle. I stamped a sentiment from the Waffle Flower Essential Sentiments stamp set in black ink, cut it with the coordinating Waffle Flower Essential Sentiments die set and adhered it to the light blue die cut. I added three tiny clear jewels to the corners of the die cut to complete that panel. On the bottom panel, I stamped the sentiment from the Waffle Flower Sentiment Additions stamp set in black ink and added several larger clear jewels to complete that panel.
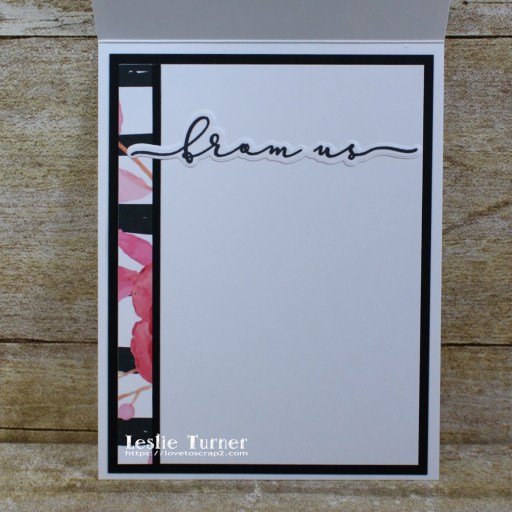
I cut the inside panel for this card from Neenah Classic Crest 80# Solar White cardstock and embellished it with strips of the digital paper and the black cardstock, added a sentiment stamped from the Waffle Flower Sentiment Additions stamp set and cut with the coordinating Waffle Flower Sentiment Additions die set, and layered the panel on the black cardstock.
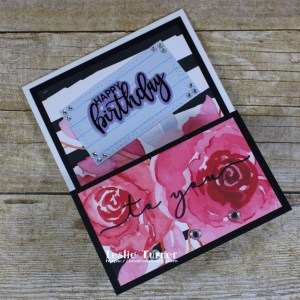
And one more look at the pair… I’m so smitten with this digital paper! Love, love, love!
Products used:
Cardstock/Paper: Neenah Classic Crest 110# and 80# Solar White cardstock, CutCardStock Basis 80# Black cardstock, CutCardStock Stardream Metallic 105# Amethyst cardstock, Free Pretty Things For You Girl Boss Black and White Floral Digital Delight Papers, light blue lined writing pad
Stamps: Waffle Flower Sentiment Additions stamp set, Waffle Flower Essential Sentiments stamp set
Ink: Catherine Pooler Party Dress ink, Memento Tuxedo Black ink
Dies/Punches: CUTplorations Stitched Tags Nesting Dies, Waffle Flower Sentiment Additions die set, Waffle Flower Essential Sentiments die set, My Favorite Things Wonky Stitched Rectangle STAX Die-namics
Accessories: Tonic Studios 12″ Guillotine Paper Trimmer, Bearly Art precision craft glue, CRAFTplorations Happy Happy Clear Stickers, Hemptique Bamboo Cord, Eyelet Outlet Purple Enamel Dots, MISTI stamp tool, Gemini Junior, Eyelet Outlet Clear Jewel Bling
I hope you’ve enjoyed this project and will come over and join in all the fun at The Outlawz Challenges! I hope you’ll link up a project this fortnight – we’d love to see what you do with this color challenge! And be sure to check out all the fun digital goodies over at Free Pretty Things For You! Thanks so much for stopping by – we’ll see you next time! ;)
Scrappy hugs,