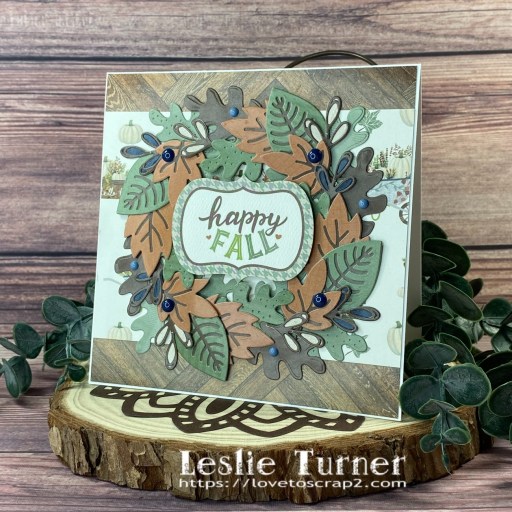
EEK!

Hi friends! Happy Tuesday – the weeks sure are flying by! I have a fun ScrapbookingStore DT inspiration project to share with you today created with the awesome October 2024 Scrapbook Kit with Upgrades. The papers and coordinating spooky elements in this collection are some of the best! I’ve had handwritten instructions for a triple easel card in my arsenal for quite some time and decided it was (finally) time to make one. So fun, and I sure love how it turned out!

I cut the three easel card bases from CutCardStock Lessebo Amethyst along with layering panels from Lessebo Pitch Black and two purple coordinating prints in this month’s kit. I embellished each easel with papers and stickers from the collection, stickers from two of the upgrades, and gemstones from my stash. I created a ‘stopper’ on the front easel with a Keep It Simple Crafty Girls button and a tiny bow tied from Doodlebug Design Lily White Doodle Twine.

Here’s a shot of the card folded up flat, ready to mail. I love it!

Affiliate links are used in this post at no cost to you – I really appreciate your support!

ScrapbookingStore products used:
October 2024 Scrapbook Kit with Upgrades:
Echo Park Halloween Magic Collection Kit
Upgrades: Brianna Nicole Designz Spooky Realm Stickers
The Paper Studio Pumpkin Stick-A-Bilities
Recollections Black Alpha Stickers

Other products used:
CARDSTOCK/PAPER: CutCardStock Lessebo Amethyst and Lessebo Pitch Black cardstock
ACCESSORIES: Fiskars 12″ ProCision Rotary Bypass Paper Trimmer, My Sweet Petunia Precision Glue Press, Nuvo Deluxe Adhesive, Keep It Simple Crafty Girls Buttons, Doodlebug Design Lily White Doodle Twine, cordless glue gun, Darice orange and purple gemstones

I hope you’ve enjoyed today’s project and you’re thinking about all the fun you could have with this month’s kit… you really ought to think about joining the Subscription Club! Be sure to Follow us on Facebook, Instagram, Pinterest and YouTube for lots of crafty inspiration! And if you do decide to join the Subscription Club, join our ScrapbookingStore Club Member Group on Facebook for more inspiration and to share your projects! Thanks so much for stopping by today – we’ll see you next time!

Scrappy hugs,

Meet me at the pumpkin patch

Hey everybody! Happy Thursday – the weeks are just FLYING by! We’ve had a busy week with doctor appointments. All is well… just check-ups and lab work, and even got some good news. I’m delighted to share a Keep It Simple DT inspiration project with you today featuring our new KIS Cuts Pumpkin Builder that was released last week. Talk about a whole lotta fun for Autumn/Fall and Halloween projects! I took a quick break from Halloween and created a Fall-themed split panel fold. I have a pet peeve about stuff hanging off the edges of an A2 card but I couldn’t help myself on this one… just gonna have to use a larger envelope.

Using my own instructions for the vertical split panel fold HERE (which I turned horizontally) I cut the card base from Neenah Classic Crest 110# Solar White cardstock along with layering panels from coordinating prints in the Mango 12×12 Collection Pack. I cut the pumpkin from a couple more coordinating prints in the same paper pack using the Pumpkin Builder dies. I inked the stem, tendrels and leaf with Catherine Pooler Over Coffee and Spruce inks. I stamped the sentiment from the Autumn Charm Autumn Sentiments Stamps in Spruce ink and cut it with the coordinating Autumn Sentiments Outline Dies. I added some small disc magnets to keep the card closed, and the finishing touch was adding a few orange gemstones.

I cut the inside panel fron 80# Solar White cardstock and embellished it with a leftover strip of paper from the same paper pack. I stamped the sentiment from the same stamp set in the Over Coffee and Spruce inks.

Keep It Simple products used:
Mango 12×12 Collection Pack
KIS Cuts Pumpkin Builder
Autumn Charm Sentiments Stamps
Autumn Charm Sentiments Outline Dies

Affiliate links are used in this post at no cost to you – I really appreciate your support!

Other products used:
CARDSTOCK/PAPER: Neenah Classic Crest 110# Solar White cardstock
INK: Catherine Pooler Over Coffee and Spruce inks
ACCESSORIES: Fiskars 12″ ProCision Rotary Bypass Paper Trimmer, My Sweet Petunia Precision Glue Press, Nuvo Deluxe Adhesive, MISTI stamp tool, Big Shot, Ranger Distress Collage Medium, small disc magnets, orange gemstones

I hope you’ve loved seeing this project as much as I loved creating it and you’re inspired to get crafty! Be sure to check out ALL the fun goodies in the Keep It Simple online store! Save 10% on your entire order when you shop online using code LoveToScrap2 at checkout! There is no minimum purchase requirement and no usage limits, AND it combines with product, order, and shipping discounts! Is that cool, or what?! Be sure to Follow us on Facebook, Instagram, and Pinterest for lots of crafty inspiration! Thanks so much for stopping by today – we’ll see you next time!

Scrappy hugs,

Creepy Halloween

Hi friends, Happy Tuesday! I hope your week has started off nicely! Our new challenge is live this morning over at Ally’s Angels and I’m super stoked to share my DT inspiration project for Challenge #87. Our challenges are always ‘anything goes’ so come on over and play! I’ve been going through my SVG cut files and picking out some that I’ve never used, and came up with this fun cauldron from My Scrap Chick that’s perfect for Halloween! Don’t you agree?!

I cut the card base and pupil from Stampin’ Up 12×12 Basic Black, the iris from CutCardStock Basis Blue; the sclera, bones and stitched circle for the back from Neenah Classic Crest 80# Solar White cardstock; and the bubbly gunk from American Crafts Cricket Glitter Paper. I always enjoy the assembly the most, and added several green gemstones to finish it off.

I stamped a sentiment on the back from The Project Bin Creepy Halloween stamp set. The Project Bin has sadly gone out of business but her awesome stamps live on! ;)

Affiliate links are used in this post at no cost to you – I really appreciate your support! 

Products used:
CARDSTOCK/PAPER: Stampin’ Up 12×12 Basic Black, CutCardStock Basis Blue, Neenah Classic Crest 80# Solar White cardstock, American Crafts Cricket Glitter Paper
STAMPS: The Project Bin Creepy Halloween stamp set
INK: Memento Tuxedo Black ink
DIES/PUNCHES: My Scrap Chick Cauldron Box Card SVG Cut File, Memory Box Stitched Circle Layers
ACCESSORIES: Cricut Explore Air 2, Bearly Art precision craft glue, Scrapbook Adhesives E-Z Runner, MISTI stamp tool, green gemstones

I hope you’ve enjoyed seeing this project and will link up with us this time! Thanks so much for stopping by today – we’ll see you next time! ;)

Scrappy hugs,

Haunted House hidden compartment book

Hey everybody! It’s Thursday already and I hope you’re having a great week! I’m up on the CutCardStock blog today with a tutorial for making a fun Halloween-themed hidden compartment book. I used the Lori Whitlock Hidden Compartment Book Box SVG cut file with my Cricut, and cut the pieces from our Twine, Pop Tone Black Licorice, Stardream Metallic Antique Gold and Basis Dark Orange. I love a good 3D project and this was a fun one! There are all kinds of fun goodies that can be hidden inside. ;)

Using my Cricut Explore Air 2 and Lori Whitlock’s Hidden Compartment Book Box SVG cut file, I cut the box from Twine, the spine from Pop Tone Black Licorice, the front and back cover from a buffalo check print in the Echo Park Spooky Collection Kit, the frame for the inside hidden compartment from Basis Dark Orange, and the ‘pages’ from Stardream Metallic Antique Gold cardstock. I decorated the front and spine with stickers, chipboard and enamel dots from Echo Park and Carta Bella.

Here’s one additional shot of the hidden compartment inside. I added two small disc magnets to keep the book closed. The Basis Dark Orange cardstock I used for the frame is no longer in stock but there are other orange cardstock colors that could be used instead.

Affiliate links are used in this post at no cost to you – I really appreciate your support!

CutCardStock products used:
Twine cardstock
Pop Tone Black Licorice cardstock
Stardream Metallic Antique Gold cardstock
Basis Dark Orange cardstock (no longer in stock)

Other products used:
PAPER: Echo Park Spooky Collection Kit (papers and stickers)
DIES/PUNCHES: Lori Whitlock Hidden Compartment Book Box SVG Cut File
ACCESSORIES: Cricut Explore Air 2, My Sweet Petunia Precision Glue Press, Nuvo Deluxe Adhesive, Scrapbook Adhesives 3D Foam Squares (large black), Echo Park Spooky Frames & Tags Ephemera, Carta Bella Halloween Chipboard Accents and Enamel Dots, Ranger Distress Collage Medium, small disc magnets

I hope you’ve enjoyed today’s project and you’re inspired to get crafty! Be sure to check out all the awesome cardstock and other goodies at CutCardStock (adhesives, labels, stickers, pens, watercolors and ribbon to name a few). And head on over to the CutCardStock Facebook Page and for more inspiration! Also, be sure to join our Creating with CutCardStock Facebook Group for even more crafty inspiration! Thanks so much for stopping by today – we’ll see you next time!

Scrappy hugs,

I {heart} School

Hey everybody! I hope you’re having a fabulous week! First of all, prayers going out to friends and family in Florida (where I grew up) and actually to everyone in the path of Hurrcane Milton. May God be with you. I’m delighted to be back with another Keep It Simple DT inspiration project to share today. This slimline shaker card was created with papers, stamps, dies and die cut pieces from our Love To Learn Collection that was released in August. I used our new KIS Slimline Cuts Stitched Square die for the shaker frame and quite a variety of our Sprinkles for the shaker bits. And I even threw a few stamped and die cut images in with the shaker bits for a little interest.

I cut my go-to 3-3/4″ x 9″ slimline card base from Neenah Classic Crest 110# Solar White cardstock along with layering panels from CutCardStock Pop Tone Black Licorice and coordinating papers in the Love To Learn 12×12 Collection Pack. I used acetate and 4-mm adhesive foam from our Back To Basics Shaker Basics along with our new KIS Slimline Cuts Stitched Squares die to create the shaker. I stamped a few images from the Collection Stamps, colored them with alcohol markers, and cut them with the Outline Dies. I filled the shaker with these die cuts and a variety of our Sprinkles. The finishing touch was adding a few blue and white enamel stars from the Stars & Stripes Enamel Stars along with a stamped sentiment that I fussy cut.

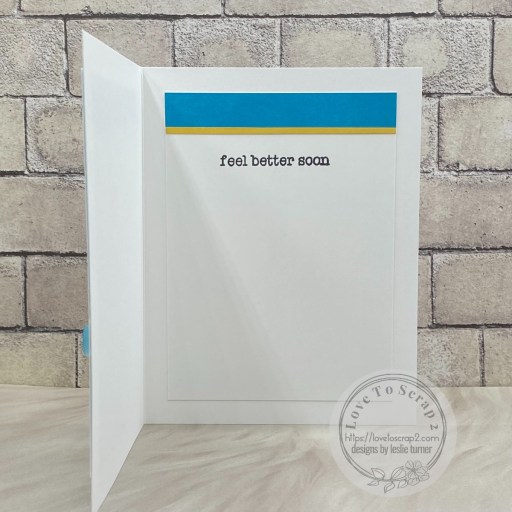
I cut the inside panel from 80# Solar White and embellished it with leftover pieces of the papers used on the front. I added some stars from the Die Cut Pieces along with a stamped sentiment, and layered the panel on CutCardStock Lessebo Misty Blue cardstock.

Keep It Simple products used:
Love To Learn 12×12 Collection Pack
Love To Learn Collection Stamps
Love To Learn Outline Dies
Love To Learn Die Cut Pieces
KIS Slimline Cuts Stitched Squares
Back To Basics Stars & Stripes Enamel Stars
Back To Basics Shaker Basics
Sprinkles – Beads-2mm Green Caviar Glass
Sprinkles – Beads-2mm Light Blue Caviar Glass
Sprinkles – Beads-2mm White Pearls
Sprinkles – Beads- 2mm Matte Red
Sprinkles – Beads-2mm Matte Green
Sprinkles – Polymer Clay-Yellow Dots
Sprinkles – Polymer Clay-Back To School Mix
Sprinkles – Polymer Clay-Baby Blue Hearts
Sprinkles – Polymer Clay-Grass Green Sprinkles
Sprinkles – Polymer Clay-Numbers

Affiliate links are used in this post at no cost to you – I really appreciate your support!

Other products used:
CARDSTOCK/PAPER: Neenah Classic Crest 110# and 80# Solar White cardstock, CutCardStock Lessebo Misty Blue and Pop Tone Black Licorice cardstock
INK: Memento Tuxedo Black ink; Spectrum Noir Tri-Blends- JG1/2/3/5, DR1/3/4, IG2/4/5, BT3/4/5, CT1/2/3
ACCESSORIES: Fiskars 12″ ProCision Rotary Bypass Paper Trimmer, Bearly Art precision craft glue, MISTI stamp tool, Big Shot, thin 1-mm foam adhesive squares, red liner tape

I hope you’ve loved seeing this project as much as I loved creating it and you’re inspired to get crafty! Be sure to check out ALL the fun goodies in the Keep It Simple online store! Save 10% on your entire order when you shop online using code LoveToScrap2 at checkout! There is no minimum purchase requirement and no usage limits, AND it combines with product, order, and shipping discounts! Is that cool, or what?! Be sure to Follow us on Facebook, Instagram, and Pinterest for lots of crafty inspiration! Thanks so much for stopping by today – we’ll see you next time!

Scrappy hugs,

Freshly Brewed shaker cards

Hey everybody! Happy Wednesday – I hope you’re having a great week! I have a super cute Keep It Simple DT inspiration project to share. You may remember that our new Shaker Kits debuted on the website back in early August. And as you know, this past Saturday was World Card Making Day and our design team organized a Facebook Live craft-along to demonstrate the assembly of our Life Is Sweet and Freshly Brewed kits. Barry and Maureen were phenomenal on the videos which you can watch HERE and HERE! Several weeks ago I shared two cards I made using the Life Is Sweet kit, and today I’m sharing the cards I made using the Freshly Brewed kit. These kits are fantastic because everything you need to create the cards is included except the adhesive. How cool is that?!

The card bases, adhesive foam, acetate, frames, ephemera, and shaker bits are all included in the kit. As with the other cards, I made mine a little different than the samples on the package. I totally love shaking things up! Here is my first card.

And here is my second card. I cut the cup sleeve on this one from a patterned paper in the Nuts About Fall 6×9 Collection Pack using the sleeve die in the KIS Cuts Freshly Brewed dies. It’s very cool that the dies are the same size and work with the items in this kit!

Keep It Simple products used:
Freshly Brewed Shaker Kit
KIS Cuts Freshly Brewed
Nuts About Fall 6×9 Collection Pack

Affiliate links are used in this post at no cost to you – I really appreciate your support!

Other products used:
CARDSTOCK/PAPER: Neenah Classic Crest 110# Solar White cardstock, Cougar Smooth 100# White cardstock, Cougar Smooth 80# White cardstock
ACCESSORIES: My Sweet Petunia Precision Glue Press, Nuvo Deluxe Adhesive, Scrapbook.com Double-Sided Adhesive foam Squares, red liner tape

I hope you’ve loved seeing this project as much as I loved creating it and you’re inspired to get crafty! Be sure to check out ALL the fun goodies in the Keep It Simple online store! Save 10% on your entire order when you shop online using code LoveToScrap2 at checkout! There is no minimum purchase requirement and no usage limits, AND it combines with product, order, and shipping discounts! Is that cool, or what?! Be sure to Follow us on Facebook, Instagram, and Pinterest for lots of crafty inspiration! Thanks so much for stopping by today – we’ll see you next time!

Scrappy hugs,

Boo! Halloween Shadowbox

Hey everybody, I hope you’re having a fabulous day! I’m up on the CutCardStock blog today with a tutorial for making a Halloween shadowbox. The actual shadowbox portion was cut with my Cricut in addition to the layered panels that make up the scene! So stinkin’ fun! I literally have thousands of SVG cut files (almost 13,000 to be exact) and I’ve been trying to pick random ones that I’ve never made before. This Halloween shadowbox is one in a bundle from Lori Whitlock and features our Brick Orange, Flame Orange, Sunset Orange and Pitch Black (all from the Lessebo line), along with our Basis Gray and Cougar Smooth White cardstock.

Using my Cricut Explore Air 2 and Lori Whitlock’s 8×8 Halloween Shadowbox SVG cut file, I cut the shadowbox pieces and the ghost layer from 12×12 Cougar Smooth 100# White. Next I cut the two black layers from Lessebo Pitch Black, the gray layer from Basis Gray, and the orange layers from Lessebo Brick Orange, Lessebo Flame Orange and Lessebo Sunset Orange.

I used Scrapbook.com double-sided adhesive foam squares for a little dimension between the layers. I die cut the BOO! sentiment from the Stampin’ Up Boo To You Framelits from a scrap piece of the Cougar Smooth White cardstock. The final touch was adding strips of Basis Gray around the opening and Keep It Simple Back To Basics Mango Enamel Dots along the mitered edge in each corner. I am totally in love with this project and will soon be making the other two shadowboxes in the bundle! ;)

Affiliate links are used in this post at no cost to you – I really appreciate your support!

CutCardStock products used:
Cougar Smooth 100# White 12×12 cardstock
Lessebo Pitch Black cardstock
Lessebo Brick Orange cardstock
Lessebo Flame Orange cardstock
Lessebo Sunset Orange cardstock
Basis Gray cardstock

Other products used:
DIES/PUNCHES: Lori Whitlock 8×8 Halloween Shadowbox SVG Cut File, Stampin’ Up Boo To You Framelits
ACCESSORIES: Cricut Explore Air 2, My Sweet Petunia Precision Glue Press, Nuvo Deluxe Adhesive, Big Shot, Scrapbook.com Double-Sided Adhesive Foam Squares, Keep It Simple Back To Basics Mango Enamel Dots

I hope you’ve enjoyed today’s project and you’re inspired to get crafty! Be sure to check out all the awesome cardstock and other goodies at CutCardStock (adhesives, labels, stickers, pens, watercolors and ribbon to name a few). And head on over to the CutCardStock Facebook Page and for more inspiration! Also, be sure to join our Creating with CutCardStock Facebook Group for even more crafty inspiration! Thanks so much for stopping by today – we’ll see you next time!

Scrappy hugs,

Here Comes Santa Claus

Hey everybody! Happy last Saturday in September… can you believe it?! I’m absolutely delighted to share a Keep It Simple DT inspiration project with you today. I created a double flap fun fold with items in the Here Comes Santa Claus Collection that was just released yesterday. Such a FUN collection – I think this is one of my all-time favorites! And this version of the double flap fun fold is one of my all-time favorites as well, and I’ve made quite a few of them over the years. I just realized that I haven’t shared instructions for this fun fold, so stay tuned and I’ll get them added to the Freebies section. ;)

I cut the card base and flaps from CutCardStock Lessebo Moss Green cardstock along with layering panels cut from coordinating papers in the 12×12 Collection Pack. I cut a tag for the focal image on the front using the KIS Cuts Tags #1 dies and two more papers in the Collection, and added some Back To Basics Jade Ribbon tied with white twine. I stamped the tree from the Collection Stamps, colored it with a variety of markers and cut it with the coordinating Outline Die. I adhered some Sprinkles Polymer Clay Dots for the ornaments and then adhered the tree to the tag. I stamped a couple sentiments and a Santa image (from the same stamp set) which I colored with the same markers. I cut the Santa image with a Stitched Rectangles Nested Die and adhered it to the inside. Oh, I do love this fold!

Keep It Simple products used:
Here Comes Santa Claus 12×12 Collection Pack
Here Comes Santa Claus Collection Stamps
Here Comes Santa Claus Outline Dies
KIS Cuts Tags #1
Back To Basics Jade Ribbon
Back To Basics Stitched Rectangles Nested Dies
Sprinkles- Polymer Clay Dots in assorted colors

Affiliate links are used in this post at no cost to you – I really appreciate your support!

Other products used:
CARDSTOCK/PAPER: CutCardStock Lessebo Moss Green cardstock, Neenah Classic Crest #80 Solar White cardstock
INK: Memento Tuxedo Black ink; Bic Mark-It fine point markers- Yellow Blaze, Rambunctious Red, Forest Green, Honey Brown and Tuxedo Black; Spectrum Noir Tri-Blends- IG2, FS6/7/8
ACCESSORIES: Fiskars 12″ ProCision Rotary Bypass Paper Trimmer, Bearly Art precision craft glue, MISTI stamp tool, Big Shot, Scrapbook.com Double-Sided Foam Adhesive Squares, Dooblebug Design Lily White Doodle Twine

I hope you’ve loved seeing this project as much as I loved creating it and you’re inspired to get crafty! Be sure to check out ALL the fun goodies in the Keep It Simple online store! Save 10% on your entire order when you shop online using code LoveToScrap2 at checkout! There is no minimum purchase requirement and no usage limits, AND it combines with product, order, and shipping discounts! Is that cool, or what?! Be sure to Follow us on Facebook, Instagram, and Pinterest for lots of crafty inspiration! Thanks so much for stopping by today – we’ll see you next time!

Scrappy hugs,

A little birdie told me…

Hey everybody! Happy Friday – I hope you’re having a great week! I have some wonderful news to share this morning – I’ve been invited to guest design again for Creative Creases Challenge! Debbie knows how much I love fun folds, so of course, my answer was a big YES! I used the Birdhouse Box Card SVG cut file from My Scrap Chick to make this adorable ‘bird-day’ card for Challenge #92. Box cards definitely fall under the fun fold category and this one was way fun! Be sure to come over and play with us – you know you love some fun folds!

Cyndy G is my favorite MSC designer (I have quite a few of her cut files) and her assembly video for this card is HERE. I wanted to mention that My Scrap Chick often includes a PDF to use to print on cardstock or patterned paper and then fussy cut the pieces. This is a nice option for those who don’t use a cutting machine or for those crafting with children.

Using my Cricut Explore Air 2 and the My Scrap Chick Birdhouse Box Card SVG cut file, I cut all the pieces with a variety of cardstock from CutCardStock. I used Amazon Dark Teal, Sunflower Yellow, Coffee Bean, Pitch Black, Moss Green, Bubble Gum Pink, Cherry Red, Granite Gray and White, all from the Lessebo line. I used the Keep It Simple Build-A-Birdhouse stamp set for the sentiment. The final touch was adding Eyelet Outlet yellow enamel dots to the flower centers.

I stamped another sentiment from the KIS Stamps Build-A-Birdhouse on the back, which completed the project. How stinkin’ cute is this?!

Affiliate links are used in this post at no cost to you – I really appreciate your support! 

Products used:
CARDSTOCK/PAPER: CutCardStock Lessebo Amazon Dark Teal, Lessebo Sunflower Yellow, Lessebo Coffee Bean, Lessebo Pitch Black, Lessebo Moss Green, Lessebo Bubble Gum Pink, Lessebo Cherry Red, Lessebo Granite Gray and Lessebo White cardstock
STAMPS: Keep It Simple Build-A-Birdhouse stamp set
INK: Memento Tuxedo Black ink
DIES/PUNCHES: My Scrap Chick Birdhouse Box Card SVG Cut File
ACCESSORIES: Cricut Explore Air 2, Bearly Art precision craft glue, MISTI stamp tool, Scrapbook Adhesives 3D Foam Squares, Eyelet Outlet Yellow Enamel Dots

I hope you’ve enjoyed seeing this project and will link up with us this time! Thanks so much for stopping by today – we’ll see you next time! ;)

Scrappy hugs,

Mini Handbag Favor Boxes

Howdy peeps! I hope everyone is healthy and enjoying some beautiful Fall-ish weather! I have a super adorable ScrapbookingStore DT inspiration project to share with you today, created with the September 2024 Scrapbook Kit with Upgrades. I’ve thoroughly enjoyed playing with the fun papers and elements in this collection. These mini handbag favor/treat boxes each feature double-sided paper from the collection and a clear sticker from the upgrades. I photographed these with several mini Hershey bars but other kinds of candy or even jewelry or rolled up money could be put in them. And think about all the different occasions they could be used for… the sky is the limit! I saw these cuties on Pinterest (tracked down the video HERE ) and knew I wanted to make some. I did make the flap closure on mine a little different than Trish did.

I picked out two coordinating patterned papers from the collection for each favor box – one for the base and one for the flap. I used Keep It Simple Stitched Rectangles Nested Dies and Stitched Ovals Nested Dies for the flaps and added clear stickers from the upgrades. I used velcro circles for the closures and embellished the base of the straps with Keep It Simple Back To Basics Rose and Lemon Enamel Dots. How stinkin’ cute!

Affiliate links are used in this post at no cost to you – I really appreciate your support!

ScrapbookingStore products used:
September 2024 Scrapbook Kit with Upgrades:
Simple Stories Boho Sunshine 12×12 Collection Kit
Upgrades: The Paper Studio Stick-A-Bilities
The Paper Studio Die Cuts
Dear Lizzy Rub-Ons

Other products used:
DIES/PUNCHES: Keep It Simple Back To Basics Stitched Rectangles Nested Dies and Stitched Ovals Nested Dies
ACCESSORIES: Fiskars 12″ ProCision Rotary Bypass Paper Trimmer, Elmer’s Craft Bond Tape Runner, My Sweet Petunia Precision Glue Press, Nuvo Deluxe Adhesive, Big Shot, InkyStamper Papercrafting Velcro, Keep It Simple Back To Basics Rose and Lemon Enamel Dots

I hope you’ve enjoyed today’s project and you’re thinking about all the fun you could have with this month’s kit… you really ought to think about joining the Subscription Club! Be sure to Follow us on Facebook, Instagram, Pinterest and YouTube for lots of crafty inspiration! And if you do decide to join the Subscription Club, join our ScrapbookingStore Club Member Group on Facebook for more inspiration and to share your projects! Thanks so much for stopping by today – we’ll see you next time!

Scrappy hugs,