3/23/24 Weekly Favorite at Splitcoast Stampers!
3/28/24 Lucky Random Winner at Art Impressions!
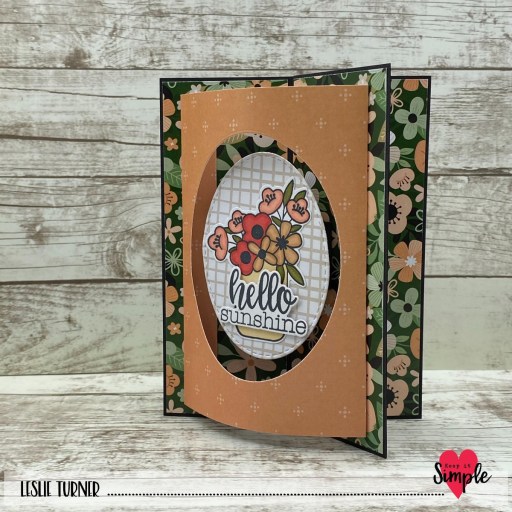
Hi friends! I hope you’re having a great Saturday! I’m back with another post today to share a card I created to enter into the Art Impressions Color Challenge #373! I have an extensive collection of Art Impressions stamps (many in the Windows To The World collection) so I pulled out the First Bloom Window stamp to create a card using all five colors for the challenge.

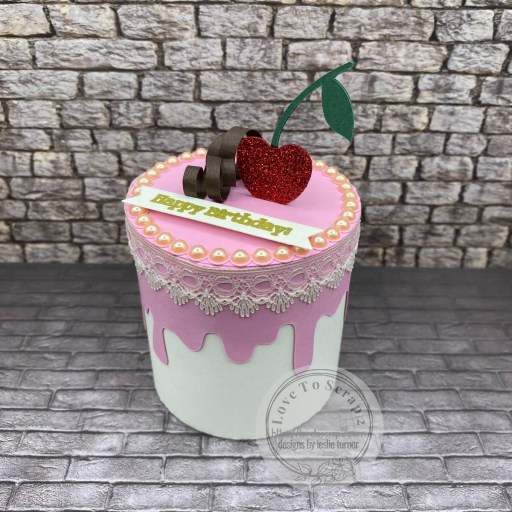
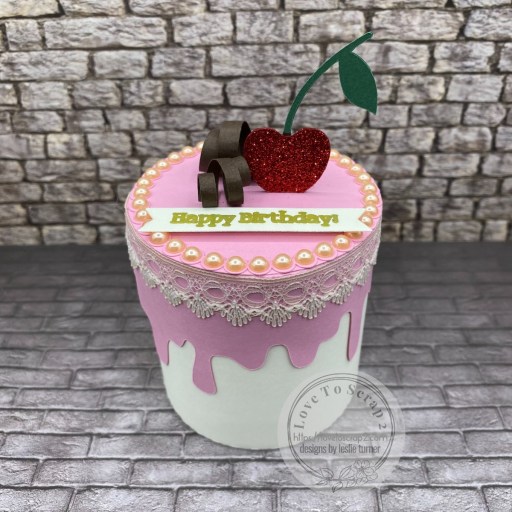
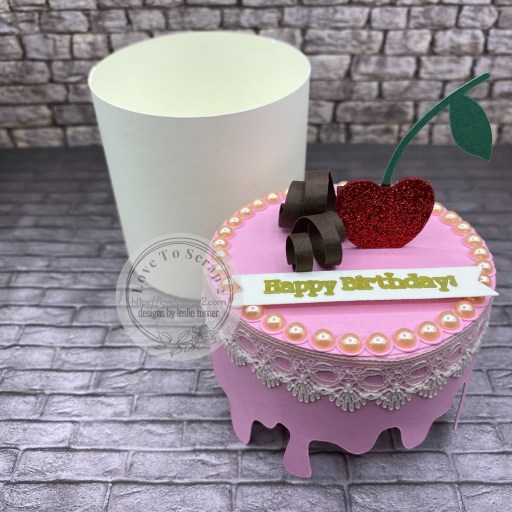
I initially couldn’t decide if I wanted to make an actual window card and by the time I stamped the image, colored it, and selected my papers and dies, I had decided on a square card with a raised focal image. I like how it turned out!

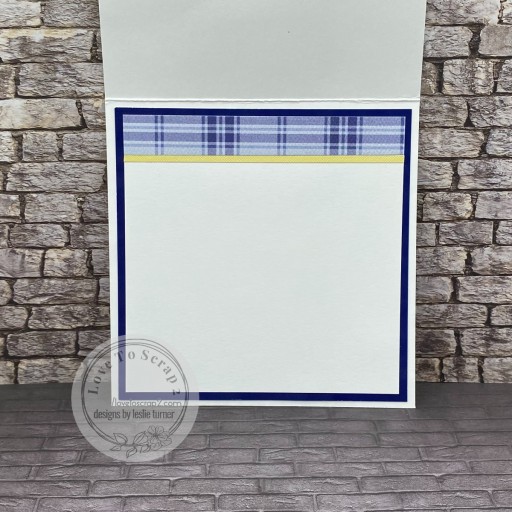
I cut a top-folding square card base from 110# Solar White along with a layering panel from a plaid print in the Keep It Simple Royal 12×12 Collection Pack. I cut a smaller panel from a pretty yellow in the DCWV Pastels Textured Adhesive Mat Stack and die cut a blue panel from the Keep it Simple Royal 6×9 Collection Pack using a slightly larger die from the Keep It Simple Stitched Squares Nested Dies.
I stamped the image on Neenah Classic Crest 80# Solar White cardstock in Memento Tuxedo Black ink, colored it with alcohol markers and cut it with a My Favorite Things Mini Scallop Squares Die-namics. I wanted the image raised, so I cut the actual image with a Keep It Simple Stitched Squares Nested Die and adhered it to three additional die cut squares to get the dimension I wanted. The finishing touch was adding Nuvo Morning Dew Crystal Drops to the center of each flower.

I cut the inside panel from 80# Solar White and embellished it with leftover strips of the papers used on the front. Since it’s a note card, I left the inside blank with plenty of room to write a custom message.
Sharing in these additional challenges:
1. https://hereisaplacetostart.blogspot.com/2024/03/march-2024-anything-goes-woptional.html
2. https://craftycatzweeklychallenge.blogspot.com/2024/03/crafty-catz-challenge-668.html
3. http://disdigidesignschallenge.blogspot.com/2024/03/welcome-spring-challenge.html
4. https://lilredwagon.blogspot.com/2024/03/challenge-748-florals.html
5. https://mytimetocraftchallenge.blogspot.com/2024/03/mttc-530-theme-is-multi-colored-florals.html
Affiliate links are used in this post at no cost to you – I really appreciate your support!
Products used:
CARDSTOCK/PAPER: Neenah Classic Crest 110# and 80# Solar White cardstock, Keep It Simple Royal 12×12 and 6×9 Collection Packs, DCWV Pastels Textured Adhesive Mat Stack
STAMPS: Art Impressions Windows To The World Collection-First Bloom Window
INK: Memento Tuxedo Black ink; Spectrum Noir Tri-Blends- TB2/3/4/5/6/9, LG1/3/5, DG1/2/3, JG4/5/7, BG2/3/4, LY1/2/3, TN1/2/4, IG2/4/5
DIES/PUNCHES: My Favorite Things Stitched Mini Scallop Squares Die-namics, Keep It Simple Stitched Squares Nested Dies
ACCESSORIES: Fiskars 12″ ProCision Rotary Bypass Paper Trimmer, Elmer’s Craft Bond Tape Runner, Bearly Art precision craft glue, MISTI stamp tool, Big Shot, Nuvo Morning Dew Crystal Drops
I hope you’ve enjoyed seeing this pretty note card created for the Art Impressions challenge! Thanks so much for stopping by – we’ll see you next time! ;)
Scrappy hugs,