Crazy cat lady and crafting junkie! We care for 15 feline rescues and just added a Forkie pup to the tribe (Frenchie + Yorkie)! I’m addicted to stamping and love making cards, ATCs, and 3-D projects (especially paper shoes, paper purses and mini albums). I also dabble in mixed media, art journaling, altered art and custom jewelry. If you’re looking for me, I’ll either be in my studio or getting some kitty or puppy lovins! ;)
Okay, we were told the new DT would be announced on September 1st and this graphic was shared in our DT group this morning, so I’m blabbing! I hate keeping secrets, lol! I’ve joined the Keep It Simple Design Team and I couldn’t be more stoked! Lots of fun in store with some new releases coming, so stay tuned for my project shares starting in a couple days! ;)
Be sure to stop by the Keep It Simple store and check out all the fun goodies like paper, stamps, enamel dots, ephemera, die cuts and washi tape to name just a few! You’ll go cray-cray! Follow us on Facebook, Instagram and Pinterest for lots of crafty inspiration! Thanks so much for stopping by today – we’ll see you again soon!
9/30/22 Top 3 Creation at Scrapping4fun Challenges
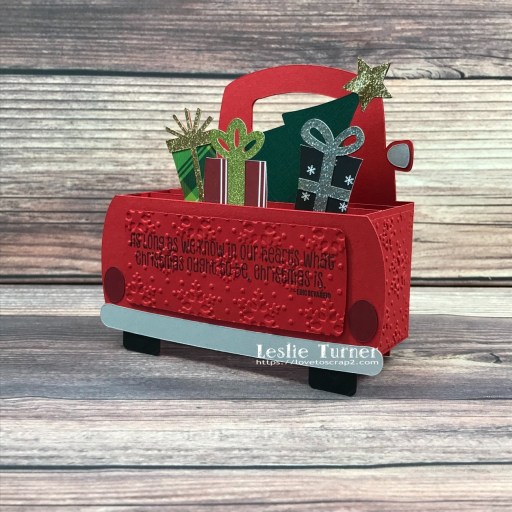
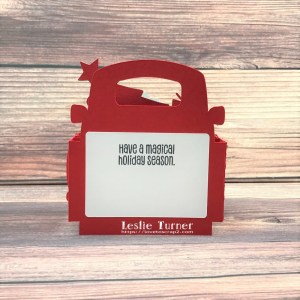
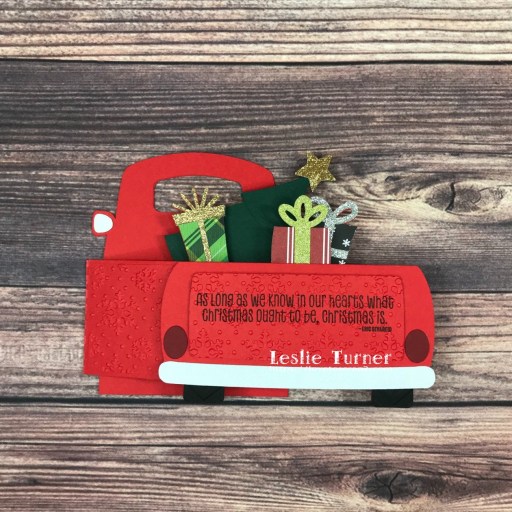
Hi everybody! I hope you’re having a great week and not working too hard! We are loving life out here in our happy place with gorgeous scenery and weather! Our new challenge launched this morning over at Merry Little Christmas Challenge Blog and I’m happy to share my DT inspiration project for MLCCB #46 – Anything Christmas Goes! I am a certified Scan N Cut fiend and can’t seem to get enough of my machine, lol! I have made SO many fun 3-D projects this year and this box card created with the Simply Crafty SVGs Christmas Presents Truck Card cut file is one of them. How stinkin’ cute is this?!
I cut all the pieces from American Crafts Crimson cardstock, Neenah Classic Crest 80# Solar White cardstock; CutCardStock Gold Glitter, Silver Glitter, Basis Brown, Basis Dark Red, Basis Black, Stardream Metallic Silver, and Royal Sundance Linen Emerald cardstock; POW Cricket Glitter cardstock, Basic Holiday 6×6 Cardstock Pad, and Christmas Holiday Print 6×6 Cardstock Pad. I stamped sentiments in black ink on the tailgate panel and back sentiment panel using the STAMPlorations Warm Hands Warm Hearts stamp set. I ran the side and tailgate panels through the Big Shot with a Sizzix Texture Fades Snowflake Pattern Embossing Folder for some fun texture. Then the major fun began… the assembly! I always love assembling 3-D projects and watching them come to life!
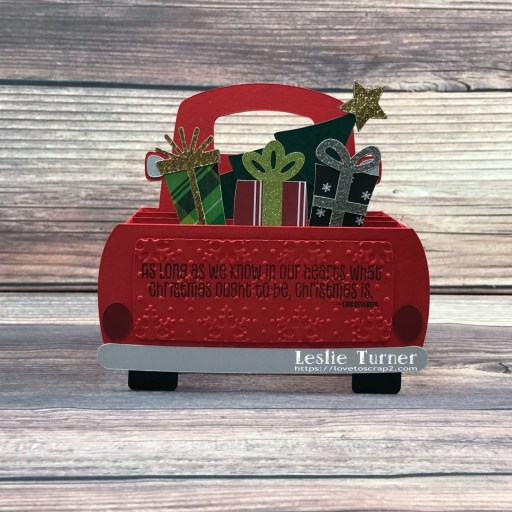
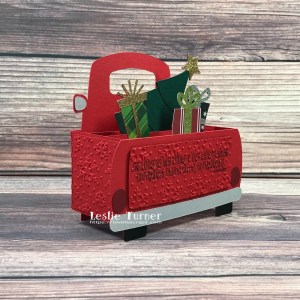
Here are angled and back shots.
And one more look… folded flat and ready to mail! This was a blast and could be taylored for any occasion by tweaking the elements a little bit (for example, omitting the tree and using birthday or anniversary papers for the presents)! So fun!
I hope you’ve enjoyed seeing this fun box card and you’ll consider linking up with us this time! We’d love to see what you create! Thanks so much for stopping by today – we’ll see you next time! ;)
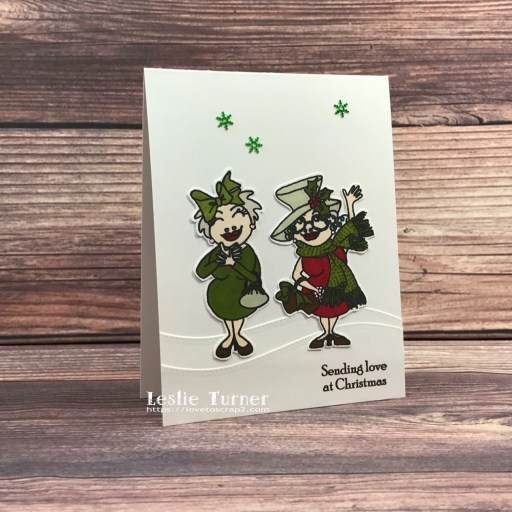
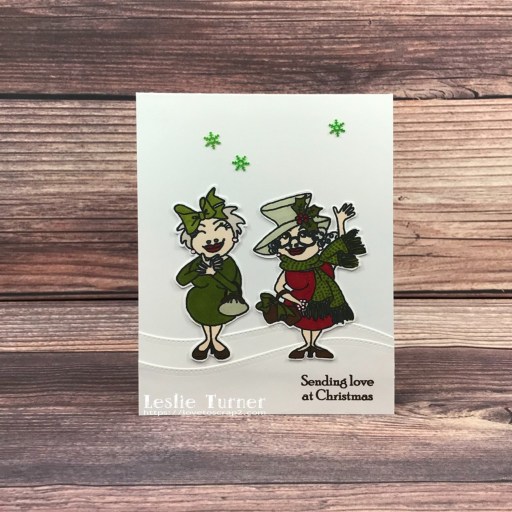
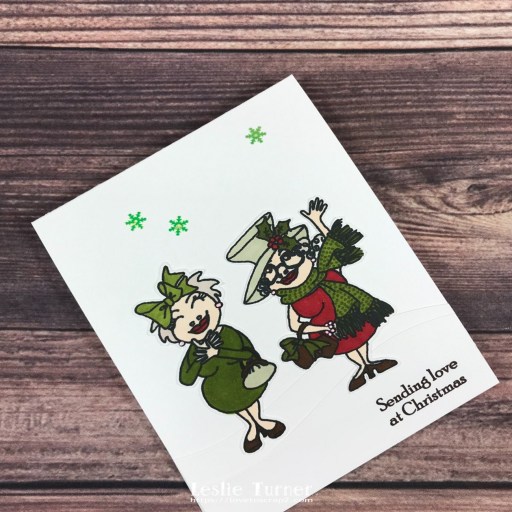
Hi friends! Happy Thursday to you all! Well, we’re another couple months closer to Christmas! Are you closer to being ready for that round jolly man to appear?! Our new challenge is live this morning over at Love To Craft Challenge Blog and I’m super stoked to share my DT inspiration project for LTCCB #70 – Anything Goes! I’ve created a Christmas card for this challenge using the adorable Prickley Pear Stamps Two Snow Ladies stamp set and these two lady birds have it going on! This was a fun card to color and put together! Green is my favorite color so I went with varying shades of green with a pop of red!
I cut a standard A2 top-folding card base from Neenah Classic Crest 110# Solar White cardstock along with two snow drifts cut from Neenah Classic Crest 80# Solar White cardstock using a die in the Prickley Pear Stamps Stitched Scalloped Border die set. I adhered the snow drifts together and then to the bottom of the card base with Retractable Tape Runner. I stamped the birds from the Prickley Pear Stamps Two Snow Ladies stamp set in Catherine Pooler Midnight ink on solar white cardstock, colored them with alcohol markers and fussy cut them, and then adhered them on the snow drifts. The finishing touch was adding several Eyelet Outlet Snowflake Sequins.
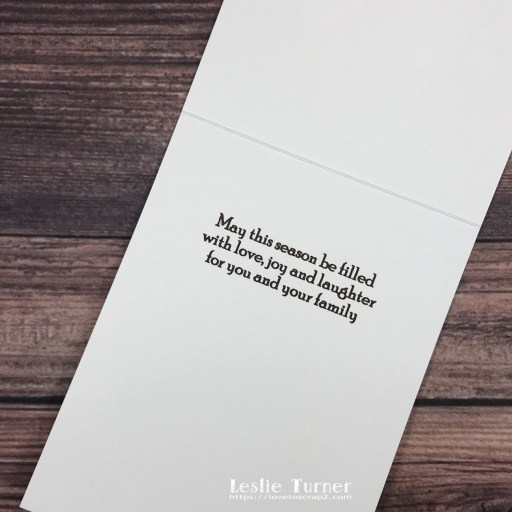
I stamped the inside sentiment from the same Prickley Pear Stamps Two Snow Ladies stamp set in Catherine Poole Icing on the Cake ink, and this completed the card.
And one more look… super happy with how this turned out and I’ve already earmarked it for a certain somebody this Christmas! ;)
I hope you’ve enjoyed seeing this card and will link up an ‘anything goes’ project with us this time! We can’t wait to see what you create! Thanks so much for stopping by today – we’ll see you next time! ;)
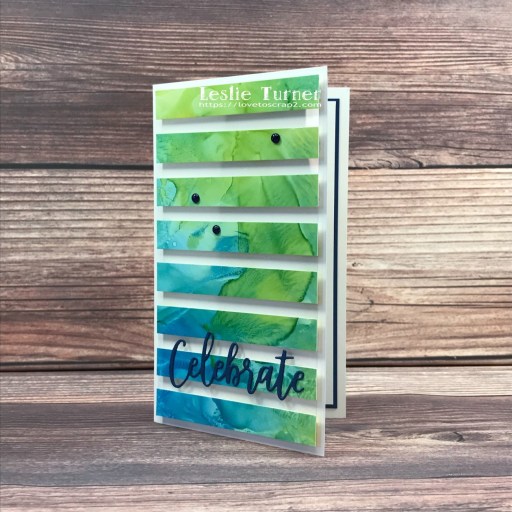
Hi friends! Happy Thursday and happy 1st day of September! Dang, it sure got here fast! Our new challenge launched this morning over at Mix It Up Challenge Blog and I’m stoked to share my DT inspiration project for MIUCB #61 – Anything Goes + optional Smooshing featuring floating strips with the smooshing! The technique twist is never mandatory to play in our challenges, but I sure hope you try the smooshing technique if you’ve never tried it before – it’s so much fun! Most of the time it’s done with distress inks and water on watercolor paper, but I tried it with alcohol inks and blending solution on Yupo paper and it turned out so cool! Just be sure to wear gloves, lol!
I created the smooshed panel using lemonade, citrus and sailboat blue alcohol inks, Ranger alcohol blending solution and Ranger Yupo paper a couple days before I created the card. I like to wait at least 24 hours before playing with an alcohol ink panel just to be sure it’s good and dry. I cut a 3-1/2″ x 6″ mini slimline card base from Neenah Classic Crest 110# Solar White cardstock along with an acetate panel cut from Grafix Craft Plastic. I trimmed the smooshed panel into strips, adhered them to the acetate with Retractable Tape Runner, and trimmed the panel to be slightly smaller than the card base. I applied Darice double-sided adhesive foam strips to the back of the panel and adhered it to the card base. I die cut the sentiment from CutCardStock Basis Blue cardstock and adhered it to the next to the last strip with Bearly Art precision craft glue. I added several YNS navy blue Glitter Gumdrops to complete the front.
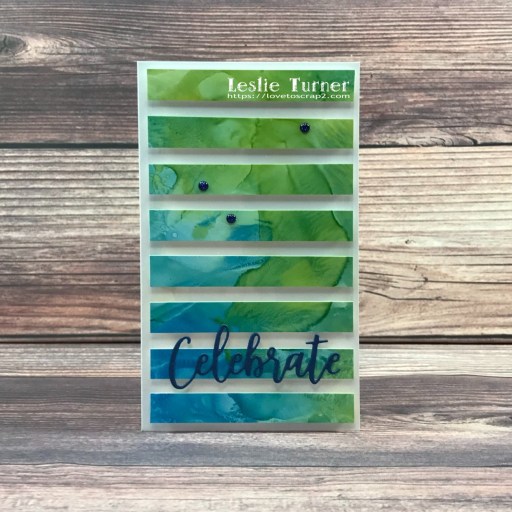
I cut the inside panel from Neenah Classic Crest 80# Solar White cardstock and embellished it with a strip trimmed off the front panel and a narrow strip of CutCardStock Basis Blue cardstock. I affixed a CRAFTplorations Happy Happy Clear Sticker and adhered the panel to blue cardstock.
And one more look… this alcohol ink smooshed panel is amazing! And of course the sky is the limit with regard to colors and the random patterns you get! Fun play! ;)
I hope you’ve enjoyed seeing this card featuring the smooshing technique on floating strips! Thanks so much for stopping by today – we’ll see you next time! ;)
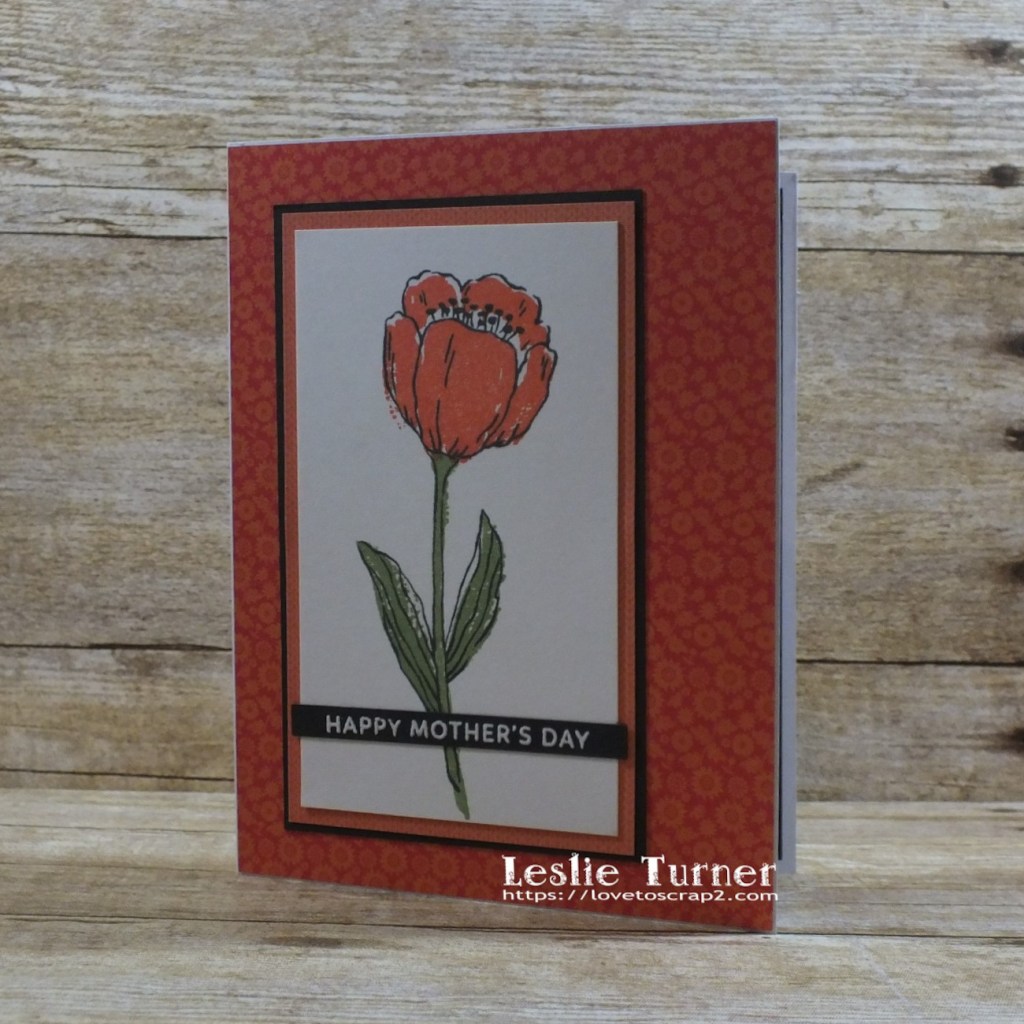
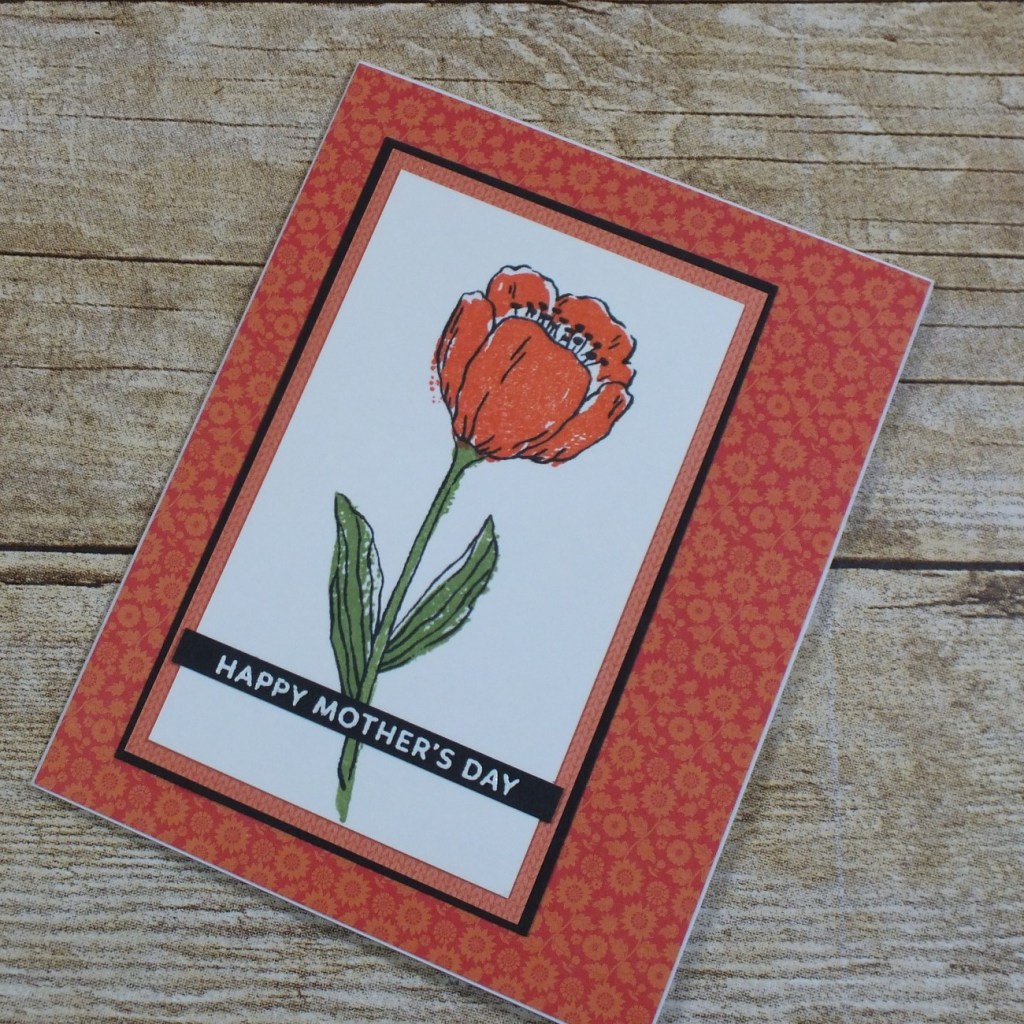
Hi friends! Happy Thursday to you all! I hope you’re having a wonderful week and your weather is starting to cool down a bit. One thing that attracted us to Colorado 5-1/2 years ago is the gorgeous weather year-round! We don’t have much humidity here, so the summers and winters are bearable – typically not too hot and not too cold – but I have to say that we felt the heat slightly more this summer. Our new challenge is live this morning over at Love To Scrap Challenge Blog and I’m super stoked to share my DT inspiration project for LTSCB #157 – Anything Goes! I’m sharing another Mother’s Day card that turned out so pretty in a nontraditional orangey-pink with black color palette. I think I’ve mention previously that if there was ever an award for ‘most Mother’s Day cards shared on a blog’, I’d probably be a recipient! I am commissioned every year to make Mother’s Day cards, so I always have an abundance to share!
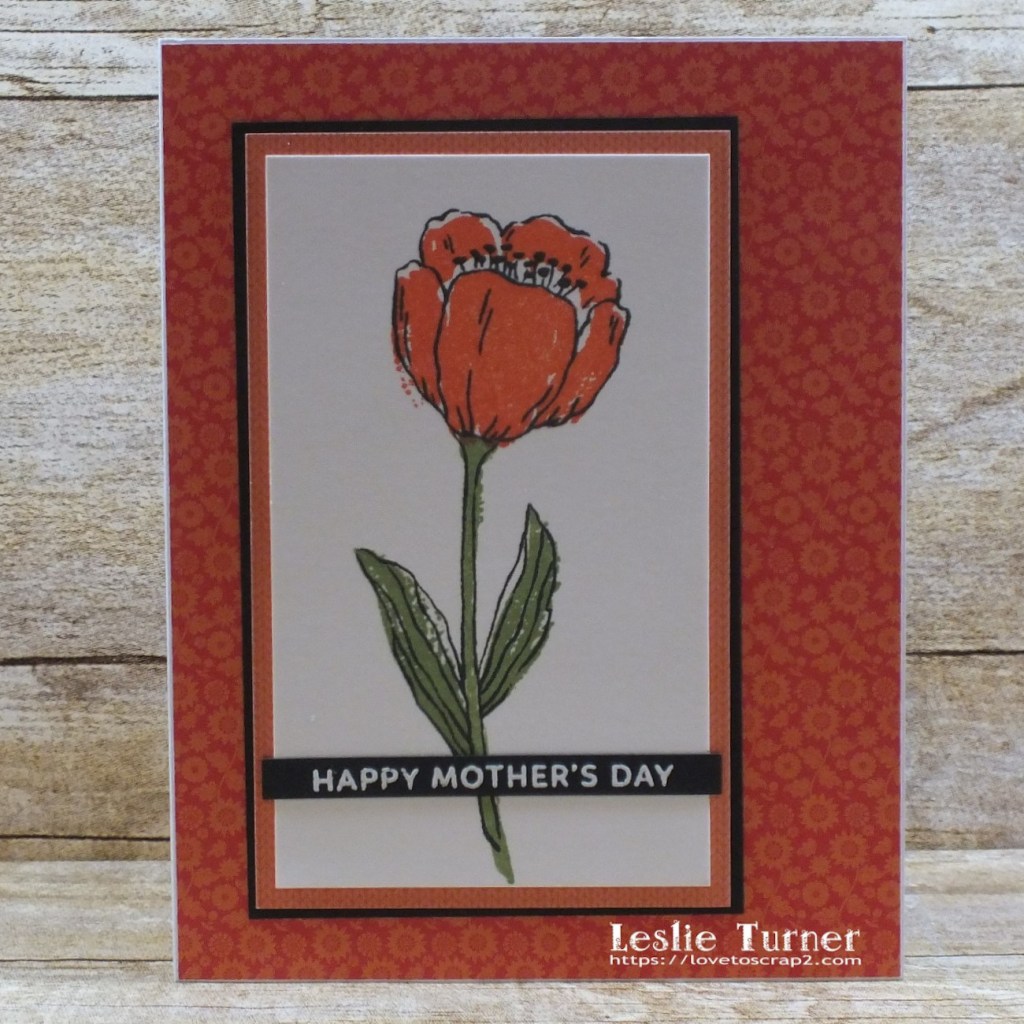
I cut a standard A2 size side-folding card base from American Crafts White cardstock, along with layering panels from CutCardStock Pop-Tone Black Licorice cardstock, Stampin’ Up Sweater Weather DSP, and Crafter’s Companion Verity Rose 6×6 paper pad, which I layered together and adhered to the card base. I stamped the tulip from the Concord & 9th Painted Tulip stamp set in Memento Tuxedo Black, Morocco and Bamboo Leaves inks on a white cardstock panel, and adhered the panel to the card front. I heat embossed the front sentiment in Hero Arts white embossing powder on black cardstock, trimmed it, and adhered it to the front.
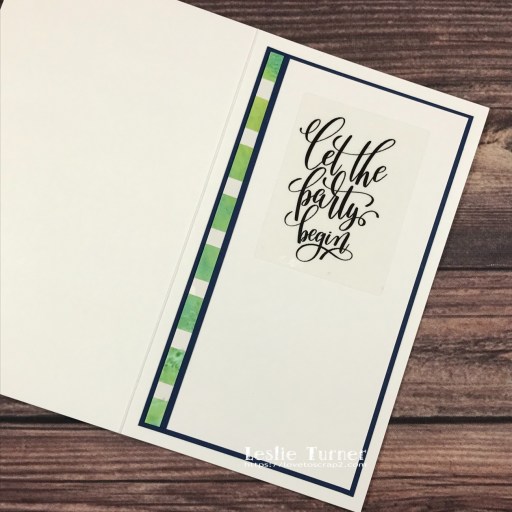
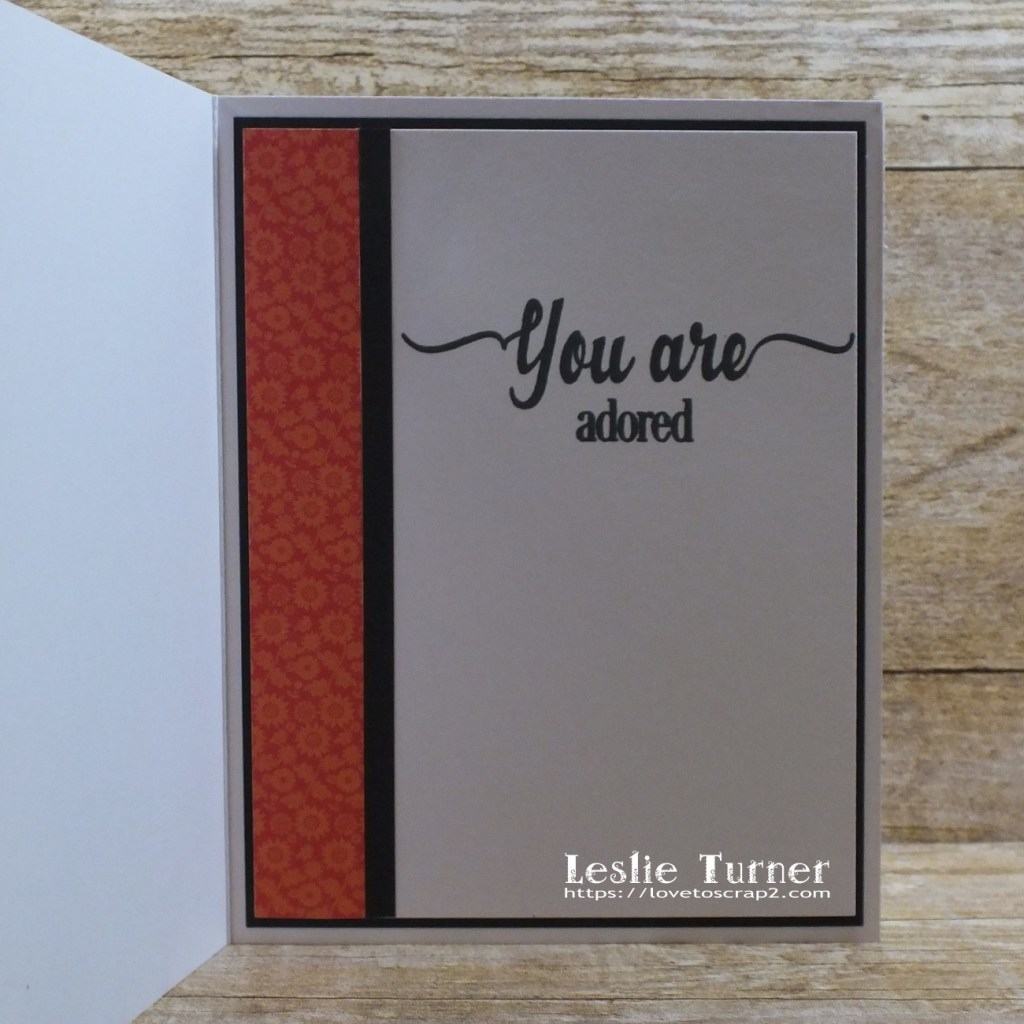
I cut the inside panel from American Crafts White cardstock and embellished it with a strip of the Verity Rose patterned paper used on the front and a narrow strip of CutCardStock Pop-Tone Black Licorice cardstock. I stamped the sentiment from the Inspired By Stamping You Are stamp set in black ink and layered the panel on black cardstock.
And one more peek… I’m very pleased with this design! This was one that I created in multiples because it was so easy. And it was well received – they were purchased rather quickly, lol!
Affiliate links are used in this post at no cost to you – I really appreciate your support!
Products used: Cardstock/Paper: American Crafts White cardstock, CutCardStock Pop-Tone Black Licorice cardstock, Stampin’ Up Sweater Weather DSP, Crafter’s Companion Verity Rose 6×6 paper pad Stamps: Concord & 9th Painted Tulip stamp set, Inspired By Stamping You Are stamp set Ink: Memento Tuxedo Black, Morocco and Bamboo Leaves inks; Versamark Accessories: Tonic Studios 12″ Guillotine Paper Trimmer, MISTI stamp tool, Tombow Mono permanent adhesive, Hero Arts white embossing powder
I hope you’ve enjoyed seeing this Mother’s Day card and will link up with us this time! We’d love to see what you create! Thanks so much for stopping by today – we’ll see you next time! ;)
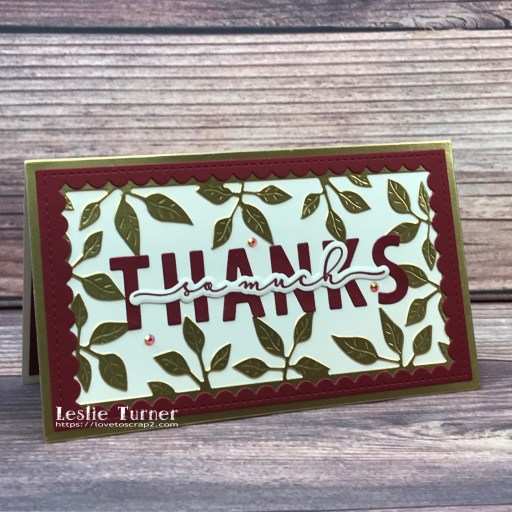
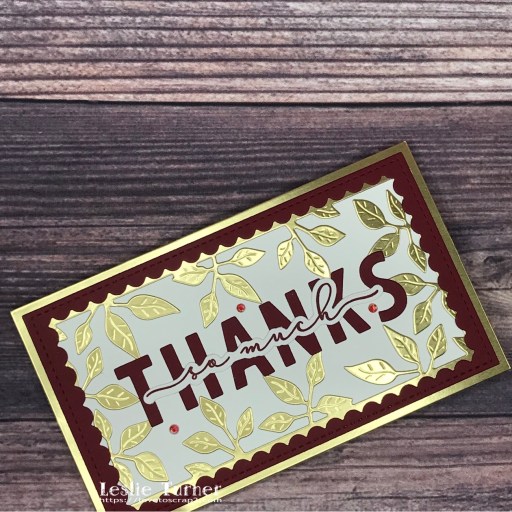
Howdy, friends! Happy Fri-YAY! I hope you have a good weekend planned and will be doing something fun! I have a pretty Tape Runner DT inspiration project to share with you today featuring some of my favorite dies, and of course, all panels were adhered with Tape Runner. I used the Kat Scrappiness Mini Slimline Foliage Frame die and Reversed Scallop Mini Slimline dies which look amazing together. For the sentiment, I used Waffle Flower Bold Alpha dies along with the Waffle Flower Sentiment Additions stamps and dies which also look amazing together. I think I love this card, lol!
As mentioned above, all panels were adhered with Tape Runner. Wet glue was used only to adhere the sentiment, leaves and gemstones. I cut a mini slimline card base from CutCardStock Basis 110# Natural cardstock. Next, I die cut the foliage frame from CutCardStock Bright Gold cardstock using the Kat Scrappiness Mini Slimline Foliage Frame die and a reversed scallop frame from Basis Dark Red cardstock using the Kat Scrappiness Reversed Scallop Mini Slimline dies which I adhered to the card base.
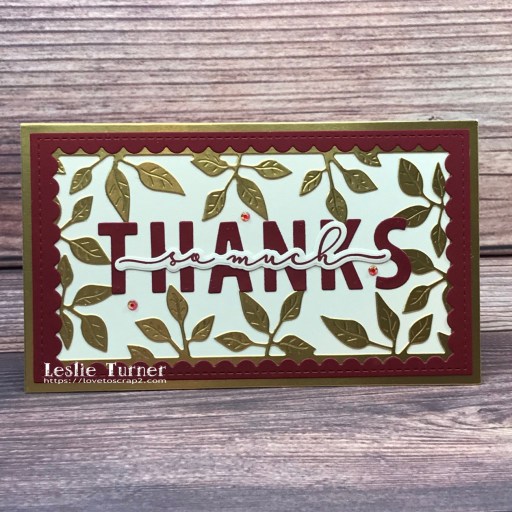
I die cut the thanks sentiment from Basis Dark Red using the Waffle Flower Bold Alpha dies and adhered it to the card front. Using the Waffle Flower Sentiment Additions stamps, I stamped the second portion of the sentiment in Catherine Pooler Cranberry Fizz ink on Neenah Classic Crest Baronial Ivory cardstock, die cut it with the coordinating Waffle Flower Sentiment Additions die, and adhered it to the card front across the large thanks sentiment. The finishing touch was adding several gemstones from the Trinity Stamps Ruby Radiance Embellishment Mix using my Trinity Pick Up Stick.
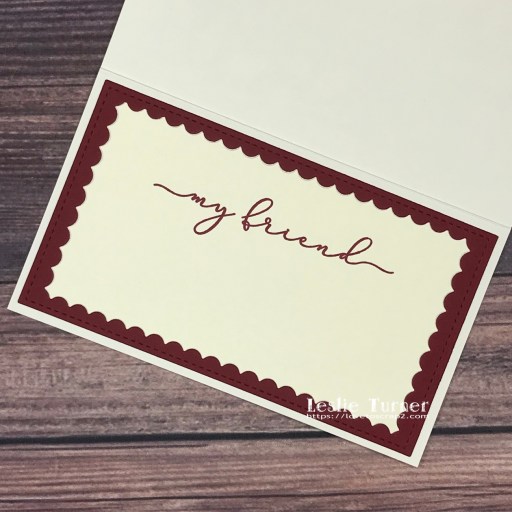
I cut the inside panel from Baronial Ivory cardstock and embellished it with a die cut reversed scallop frame cut from CutCardStock Basis Dark Red cardstock using the Kat Scrappiness Reversed Scallop Mini Slimline dies. I stamped the sentiment in Catherine Pooler Cranberry Fizz ink and adhered the panel to the inside of the card base.
And one more look… really loving how this card turned out! OMGoodness, I love it when a card turns out exactly the way I envisioned it! And, of course, it’s held together with the best adhesive, Tape Runner!
I hope you’ve enjoyed today’s project and you’re inspired to get your craft on! Be sure to check out the ah-mazing Tape Runner, Retractable Tape Runner and Highlight Tape Runner at TapeRunner.com! Be sure to Follow us on Facebook and Instagram! Thanks so much for stopping by today – we’ll see you next time!
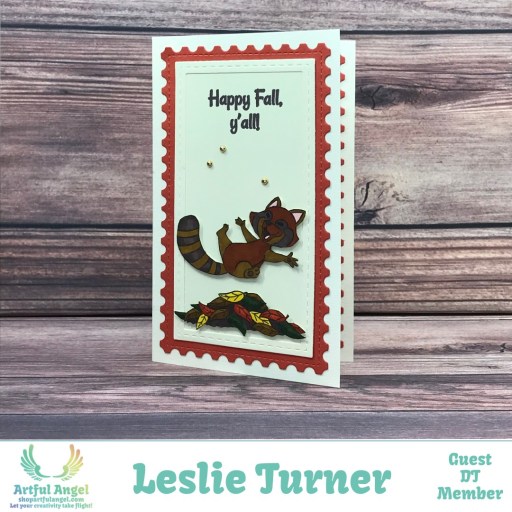
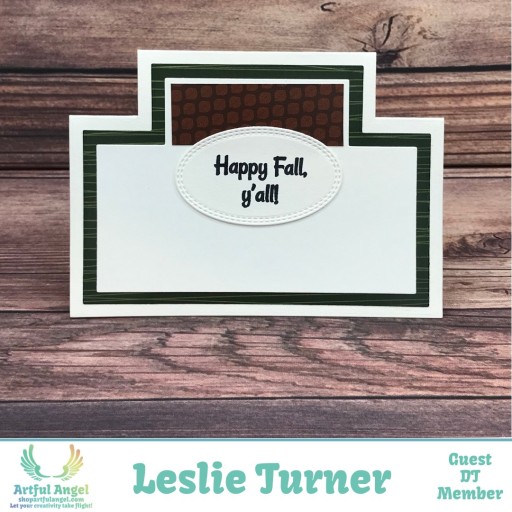
Hi friends! A big ol’ Happy Thursday to you all! I hope your week is going nicely and you’re looking forward to a great weekend! I’m back this morning with my second inspiration project for the Artful Angel August new release! I’ve had a good play with the Fall Fun stamp set and have created a mini slimline note card featuring another one of the super adorable little red pandas getting ready to land butt-first into a pile of fall leaves! This card also features some new favorite mini slimline dies from Kat Scrappiness! ;)
I cut a 3-1/2″ x 6″ mini slimline card base from CutCardStock Basis 110# Natural cardstock along with a layering panel from Neenah Classic Crest Baronial Ivory cardstock. Using the Kat Scrappiness Mini Slimline Postage Stamp Edge Dies, I die cut a layering panel from CutCardStock Pop Tone Tangy Orange cardstock, and using the Kat Scrappiness Mini Slimline Tri-Frame Dies, I die cut a frame from Neenah Classic Crest Baronial Ivory cardstock and layered them together with the Baronial Ivory layering panel sandwiched between them. I stamped the sentiment on the layering panel in Memento Rich Cocoa ink. I stamped the panda and leaves images in Memento Espresso Truffle ink on a Baronial Ivory scrap, colored them with alcohol markers, and fussy cut them. I ran a Memento Rich Cocoa marker around the edges of the images for a more finished look, and adhered them to the panel on 1mm thick foam squares. I finished the card front with a few randomly placed Kat Scrappiness gold pearls.
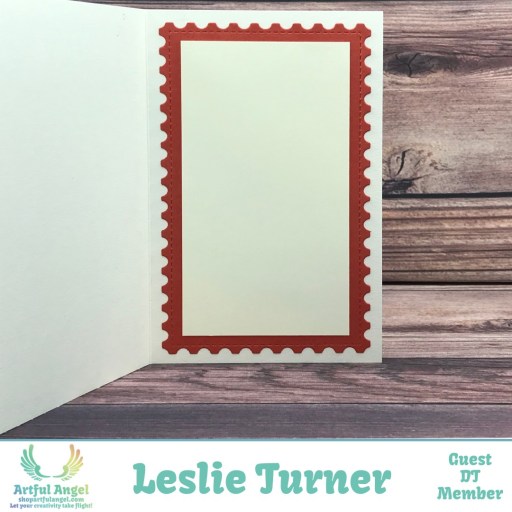
I die cut the inside panel from Pop Tone Tangy Orange cardstock using the postage stamp edge mini slimline die and adhered a Baronial Ivory cardstock layering panel to it. Since it’s a note card, I left the panel blank with plenty of room to write a custom message.
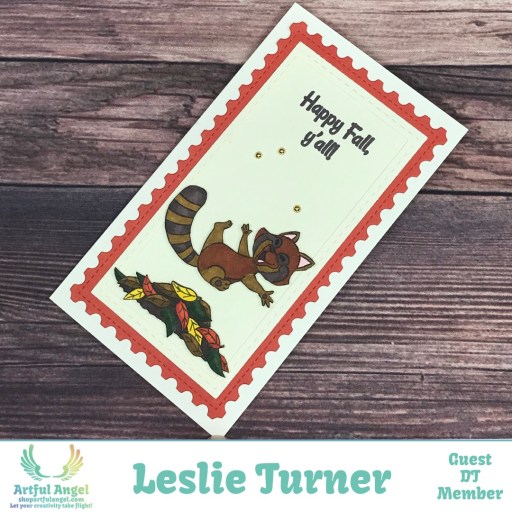
And one more peek… so loving how this turned out! I just can’t get over how stinkin’ cute this stamp set is! AND I’m delighted to have gotten to use these awesome mini slimline dies! ;)
I hope you’ve enjoyed seeing this project and you’re inspired to get crafty! Be sure to participate in the Insta Hop today – you could just win a prize! And stay tuned for one more project reveal from me week after next! Thanks so much for stopping by today – we’ll see you next time! ;)
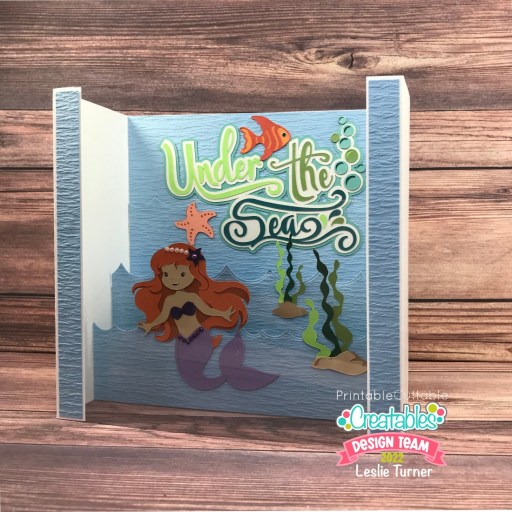
Hi everyone! Happy Thursday – I hope you’re having a great week! I’m stoked to be back on the Printable Cuttable Creatables blog today with another awesome DT inspiration project! Have you ever seen a paper aquarium?! I never have so I made one featuring the Under the Sea Cutting File Scrapbook Title, Cute Mermaid SVG File and Seaweed SVG File! It’s a lot like a box card but 8″ square when standing, has acetate across the front, and it folds flat for mailing if desired!
I started by constructing the aquarium (with two inside strips) from Neenah Classic Crest 110# Solar White cardstock. I cut layering panels for the inside and outside along with die cut waves (using the My Favorite Things Slimline Ocean Motion Die-namics) from The Paper Cut Blue Crinkle Paper, and adhered them in place.
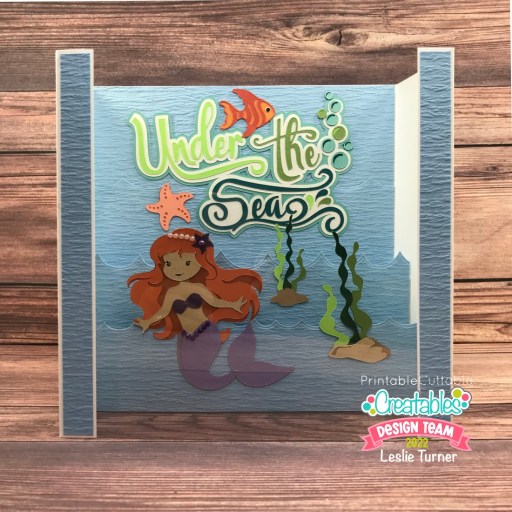
I cut the pieces in the Under the Sea title, assembled it, and adhered it to the back wall of the aquarium. I moved the small seaweed down to the middle wave panel. I then cut the pieces in the Cute Mermaid SVG file after flipping the file, assembled her, and adhered her on the bottom wave panel. I embellished her with pearls and gemstones. Then finally I cut the pieces for one of the options in the Seaweed SVG file, assembled it and adhered it on the bottom wave panel. The final step was adhering a panel of acetate across the front. Acetate is very hard to photograph but this close-up photo actually came out pretty cool-looking because it yields a rippled effect which is somewhat realistic of an underwater scene! I can assure you that all the elements are actually flat! ;)
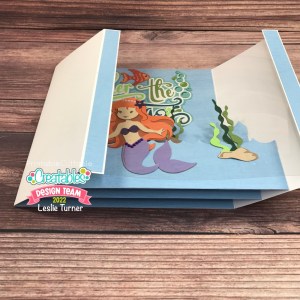
Here is an overhead shot so you can see the simple box card type construction, and a shot of it folding flat for mailing if desired.
I hope you’ve enjoyed today’s project and you’re inspired to get out that electronic cutting machine! Be sure to check out all the fun goodies in the Printable Cuttable Creatables store – you’ll have a blast and there are tons of freebies to get started! Save 15% off your order at Printable Cuttable Creatables by using coupon code love2scrap15 at checkout! Be sure to Follow us on Facebook, Instagram, Pinterest, Twitter and YouTube for lots of crafty inspiration! And while you’re at it, join our Crafting with Printable Cuttable Creatables Facebook Group for more inspiration and to share your projects! Thanks so much for stopping by today – we’ll see you next time!
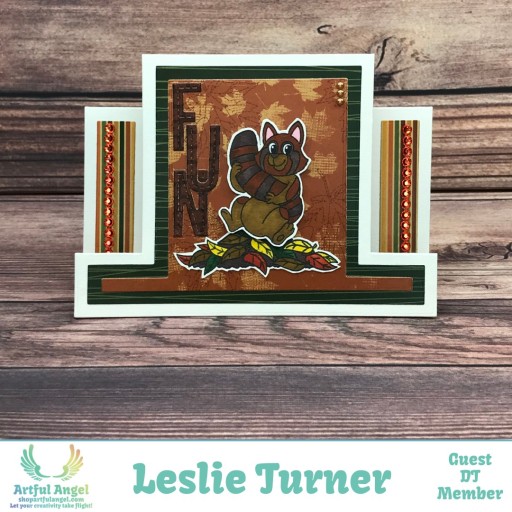
Hey everybody! Happy Tuesday – I hope your week has started off nicely! I’m back this morning with the full reveal of the sneak peek I shared on Sunday! The August new release over at Artful Angel consists of Fall Fun, F is For and Extra Chromie stamp sets, and gosh they are all amazing! I was sent Fall Fun to play with and had the best time creating three projects with the cutest little red pandas you’ll ever see! My first inspiration project is a center easel card featuring a super cute little guy playing in the fall leaves!
Using the Creative Craft Products High Center Stepper Card die set, I cut the card base from CutCardStock Basis 110# White cardstock along with layering panels (using the same die set) from coordinating Stamp Anniething Autumn Life 6×6 Double-Sided Papers, and adhered them to the card base. I stamped the panda and leaves images in Memento Tuxedo Black ink on Basis White cardstock, colored them with alcohol markers, and fussy cut them. Using the My Favorite Things In Stitches Alphabet Die-namics, I die cut the F-U-N letters from another patterned paper in the Autumn Life paper pack, and then adhered the letters and the images to the card front. I added Eyelet Outlet 3mm brown pearls and 4mm orange jewels, which completed the card front.
I die cut the back panels from patterned paper from the Autumn Life paper pack and Basis White cardstock, and adhered them to the card base. I stamped the sentiment from the Fall Fun stamp set in black ink, cut it with a double-stitched oval die, and adhered it to the panel.
And one more peek from the side so you can see the construction. Easel cards are so fun, especially with such an adorable stamp set, and I love how this turned out!
Affiliate links are used in this post at no cost to you – I really appreciate your support!
Products used: Cardstock/Paper: CutCardStock Basis 110# White cardstock, Stamp Anniething Autumn Life 6×6 Double-Sided Papers Ink: Memento Tuxedo Black ink; Arteza alcohol markers- Y02/31, YR00, RP09, G01, BR92 Dies/Punches: Creative Craft Products High Center Stepper Card die set, My Favorite Things In Stitches Alphabet Die-namics, Cottage Cutz Double-Sided Oval die set Accessories: Tonic Studios 12″ Guillotine Paper Trimmer, Bearly Art precision craft glue, MISTI stamp tool, Big Shot, Eyelet Outlet 3mm brown pearl bling strip and 4mm orange jewel bling strip
I hope you’ve enjoyed seeing this project and you’re inspired to get crafty! Stay tuned for another project reveal and an Insta Hop in a couple days! Thanks so much for stopping by today – we’ll see you next time! ;)
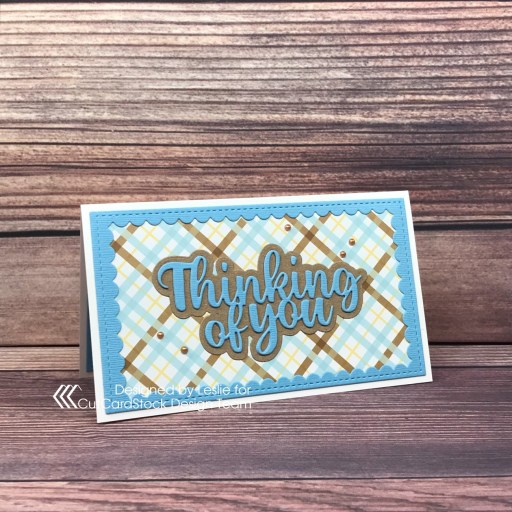
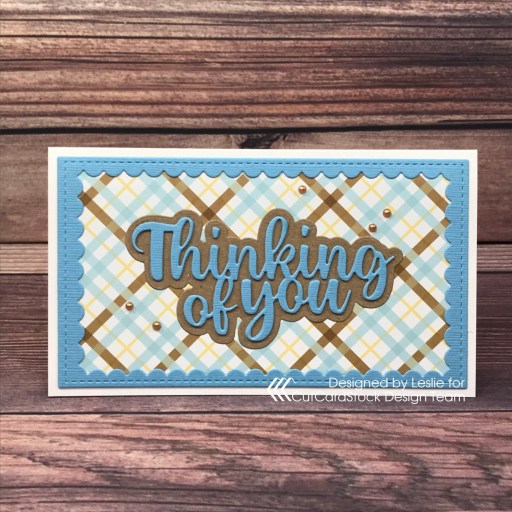
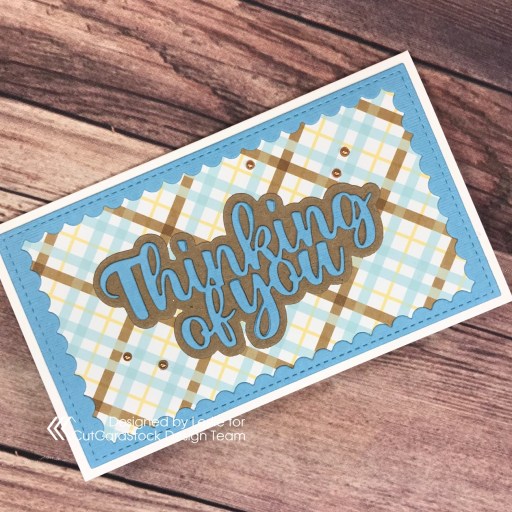
Hey everybody, Happy Tuesday! I hope you had a great weekend! I just can’t believe how fast the days are zipping by… so hard to believe we’re on the downslide to the end of August already! I have an awesome CutCardStock DT inspiration project to share with you today featuring my favorite Neenah Classic Crest Solar White cardstock that I paired with our textured Blue Hydrangea cardstock, Brown Bag Kraft paper and Beach Side Prints cardstock. I love a blue and brown color combo, and even with a few brown pearls, this card has a masculine feel.
I cut a 3-1/2″ x 6″ mini slimline card base from Neenah Classic Crest 110# Solar White cardstock along with a layering panel from Beach Side Prints cardstock and a reversed scallop frame from Blue Hydrangea cardstock using the Kat Scrappiness Mini Slimline Reversed Scallop Dies. Using the Kat Scrappiness Thinking of You Word Die with Shadow, I cut the sentiment from Blue Hydrangea cardstock and the shadow from Brown Bag Kraft Paper and adhered them together. I adhered the frame to the panel and adhered them to the card base, and then added the sentiment. The finishing touch was adding several Eyelet Outlet 3mm brown pearls.
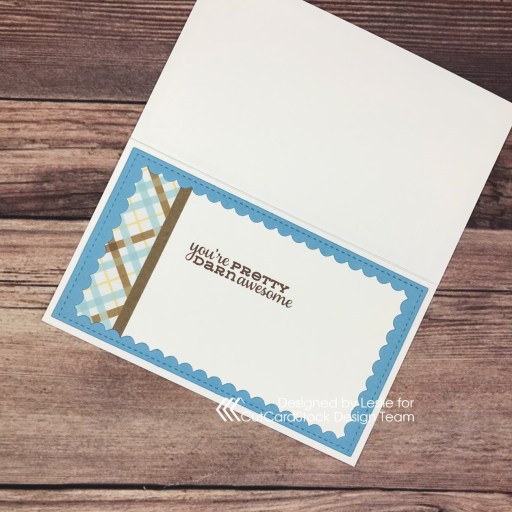
I cut the inside panel from Neenah Classic Crest 80# Solar White cardstock and embellished it with strips cut from the Beach Side Prints cardstock and Brown Bag Kraft Paper. I cut another reversed scallop frame from Blue Hydrangea cardstock using the Kat Scrappiness Mini Slimline Reversed Scallop Dies and adhered it to the panel. I stamped the sentiment from the Paper Smooches Lovely Thoughts stamp set in Catherine Pooler Over Coffee ink, and adhered the panel to the inside of the card base.
And one more look… what a great color combo along with amazing cardstock and dies! Love how this one turned out!
I hope you’ve enjoyed today’s project and you’re inspired to get crafty! Be sure to check out all the awesome cardstock and other goodies at CutCardStock (adhesives, labels, stickers, pens, watercolors and ribbon to name a few). And head on over to the CutCardStock Facebook Page for more inspiration! Thanks so much for stopping by today – we’ll see you next time!