Crazy cat lady and crafting junkie! We care for 15 feline rescues and just added a Forkie pup to the tribe (Frenchie + Yorkie)! I’m addicted to stamping and love making cards, ATCs, and 3-D projects (especially paper shoes, paper purses and mini albums). I also dabble in mixed media, art journaling, altered art and custom jewelry. If you’re looking for me, I’ll either be in my studio or getting some kitty or puppy lovins! ;)
Hey everybody! I’ve got some of the best news ever… I can’t even begin to tell you how stoked I am to have been invited to join the Splitcoast Stampers Dirty Dozen DT! We were starting to pack up our house to move to the cabin when the invite came in October. Of course I accepted but with a delayed start date that turned out to be December 1st. Yeah, I know, I’m a bit late with my announcement, lol!
My term is for six months and it’s such a unique team to be on! Our inspiration projects are uploaded to member-only galleries for Fan Club members! That means I’m not blogging my projects or posting them on social media… so if you’re interested in seeing our Dirty Dozen DT inspiration projects each month, we invite you to join the Fan Club!
The Fan Club subscription doesn’t cost much and members get TONS of perks in addition to access to all the other free content on the Splitcoast Stampers website. I joined SCS back in 2011 and use the site quite regularly these days. You’ve undoubtedly noticed that over the years I’ve frequently referenced Splitcoast Stampers tutorials where I find inspiration! So, c’mon and join – start 2023 off right! It’s less than $25 for an entire year! Yes, you read that right! ;)
Thanks for stopping by today – we’ll see you next time!
Hi friends! It’s January 1st and a somewhat busy day on my blog with new challenges launching! Our new challenge is live this morning over at Mix It Up Challenge Blog and I’m excited to share my DT inspiration project for MIUCB #63 – Anything Goes + optional No Stamping! Come on over and play, and remember, the technique twist is only optional and not required to play! I love me some ATCs so I created a set of six floral artist trading cards with motivational sentiments. I used Grabie clear stickers and Tim Holtz sentiment stickers… and no stamping as per the optional challenge criteria.
I cut the ATC blanks from CutCardStock Basis 110# Natural cardstock and rounded the corners. I added either Grabie Old Time Garden or Flowers and Poems stickers, along with Tim Holtz idea-ology Small Talk sentiment stickers. The finishing touch was adding some gemstones from several of the Trinity Stamps Embellishment Mixes to each one. Doesn’t get much easier than this and I love how they turned out!
I hope you’ve enjoyed seeing this project and will link up with us this time! We’d love to see your anything goes project with or without the optional ‘no stamping’ technique twist! Thanks so much for stopping by today – we’ll see you next time! ;)
Hey everybody! Happy Sunday and Happy New Year! Can you believe 2023 is here already?! Our very first challenge is live this morning over at Birthstone Challenges and I’m super stoked to share my DT inspiration project for BSC #1 – Anything Goes with Garnet and Amethyst Colors! We’re so excited to bring this new challenge to blogland since so many others have closed, and we hope you’ll come over and play with us! We’d love to see your ‘anything goes’ project using one (or both) of the featured birthstone colors predominantly in your project! I used the Whimsy Stamps Old Geezer stamp set that I’ve had in my stash for some time but haven’t used yet, so I thought it only fitting to break it out for the hubster’s birthday card! Bahahaha! He’ll love it!
I cut a standard A2 size top-folding card base from CutCardStock Basis 110# White cardstock along with a layering panel (wall) from a red striped patterned paper from Polly’s Paper Studio which I adhered to the card base. I created the floor with Eyelet Outlet wood washi tape and the base board with a scrap strip of CutCardStock Stardream Metallic Eris cardstock. The rug was die cut from CutCardStock Basis Dark Red cardstock using a Spellbinders Classic Scalloped Ovals die and cut in half. Using the Art Impressions Matchbook Wall Accessories stamps, I stamped the wall lights and clock on Basis White cardstock, colored them with alcohol markers, and cut them with the coordinating dies. Finally, I stamped the old geezer (LOL) on Basis White cardstock, colored him with alcohol markers and fussy cut him, then added him to the scene. I stamped the sentiment on a scrap of Solar White cardstock, trimmed it and added it to the scene (along with it’s companion sentiment) in Memento Tuxedo Black ink, which completed the card front.
I cut the inside panel from Solar White cardstock and embellished it with strips of the striped pattern paper and Basis Dark Red cardstock used on the front. I stamped the sentiment from the Stampin’ Up Something to Say stamp set in black ink, trimmed it and embellished it with hand-cut flags.
I hope you’ve enjoyed seeing this project and will link up with us in our first challenge! We can’t wait to see your project using one or both of the colors of the featured birthstones! Thanks so much for stopping by today – we’ll see you next time! ;)
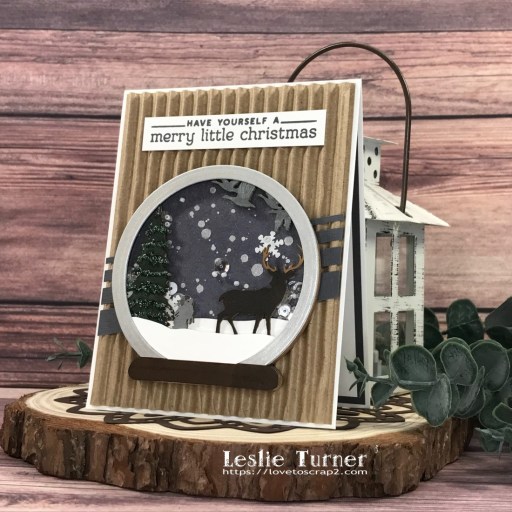
Hi friends! Welcome 2023! Sure can’t believe it’s here already… seems like we just rung in 2022! Our new challenge is live this morning over at Merry Little Christmas Challenge Blog and I’m excited to share my DT inspiration project for MLCCB #48 – Anything Christmas Goes! I used the Hot Off The Press Forest Snow Globe Chipboard Kit as the focal element on this adorable shaker card done in neutrals. I typically don’t use tan and gray together, but this totally works!
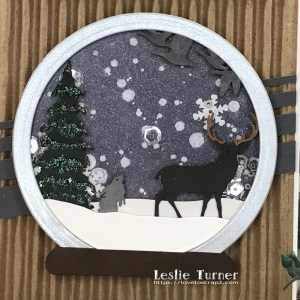
I cut a standard A2 size top-folding card base from Neenah Classic Crest 110# Solar White cardstock, a layering panel from kraft corrugated paper and four strips of CutCardStock Shadow Gray cardstock in varying widths. I created the focal shaker element using the Hot Off The Press Forest Snow Globe Chipboard Kit, and enhanced the globe with a layered circle frame cut from CutCardStock Stardream Metallic Silver cardstock. I colored the tree, rabbit, deer, geese and base with alcohol markers. I sprayed the background with Tattered Angels Pewter Color Wash and flicked silver paint from a Posca silver paint pen over it. Finally, I created snowbanks with layers of Solar White cardstock. I assembled the snow globe and added a pinch of homemade snow mix consisting of Stampin’ Up Snowflake sequins, Neat & Tangled sequins, Spiegelmom Snowy Fields sequins, and Pretty Pink Posh Marshmallow Seed Beads. The final step was adding a sentiment from the Concord & 9th Tiny Trees Turnabout Stamp Set stamped in Catherine Pooler Black Jack ink.
I cut the inside panel from Solar White cardstock and embellished it with strips of CutCardStock Stardream Metallic Silver and Shadow Gray cardstock used on the front. I stamped a sentiment from the Concord & 9th Home for the Holidays stamp set in Catherine Pooler Black Jack ink.
I hope you’ve enjoyed seeing this project and will link up with us this time! We’d love to see your Christmas project! Thanks so much for stopping by today – we’ll see you next time! ;)
1/7/23 Top Rocker at 613 Avenue Create! 1/14/23 DT Favorite Winner and Best Technique Winner at World Wide Open Design Team Challenge Blog! 1/31/23 Best Technique Winner at Classic Design Challenge Blog! 2/28/23 January DT Favorite Winner at A Perfect Time To Craft!
Hey everybody! Are you as amazed as I am at how quickly 2023 got here?! Dang! Our new challenge is live this morning over at Love To Craft Challenge Blog and I’m super stoked to share my DT inspiration project for LTCCB #72 – Anything Goes! The hubs and I are vintage (LOL) so I created a fun vintage TV box card for our anniversary using the SVG Cuts Vintage TV Box Card cut file. The photo I used was taken on one of our first dates to a motorcycle club meeting… look how young we were! And, it goes without saying that avocado and orange are some of the best vintage colors around! Bahahaha!
Using my Scan N Cut, I cut the box card base from Cardstock Warehouse Brown Box 100# cardstock, the decorative elements and trim from CutCardStock Pop Tone Jellybean Green and Pebbles Inc. Basics 6×6 paper pad, and the antenna from CutCardStock Bright Silver Foil cardstock.
Like I always say, the most fun is the assembly. I used the Cuttlebug Swiss Dots Embossing Folder for the speaker cover and Eyelet Outlet orange 8mm Cut Jewels for the knobs. ;)
I stamped the sentiment from The Cat’s Pajamas Simply Stacked Sentiments stamp set in Memento Tuxedo Black ink on the back panel which completed the card.
Affiliate links are used in this post at no cost to you – I really appreciate your support!
Products used: Cardstock/Paper: Cardstock Warehouse Brown Box 100# cardstock, CutCardStock Pop Tone Jellybean Green and Bright Silver Foil cardstock, Pebbles Inc. Basics 6×6 paper pad Stamps: The Cat’s Pajamas Simply Stacked Sentiments stamp set Ink: Memento Tuxedo Black ink Dies/Punches/Cut Files: SVG Cuts Vintage TV Box Card cut file Accessories: Brother Scan N Cut, Bearly Art precision craft glue, MISTI stamp tool, Cuttlebug Swiss Dots Embossing Folder, Eyelet Outlet orange 8mm Cut Jewels
I hope you’ve enjoyed seeing this project and will link up with us this time! We’d love to see what you’re working on! Thanks so much for stopping by today – we’ll see you next time! ;)
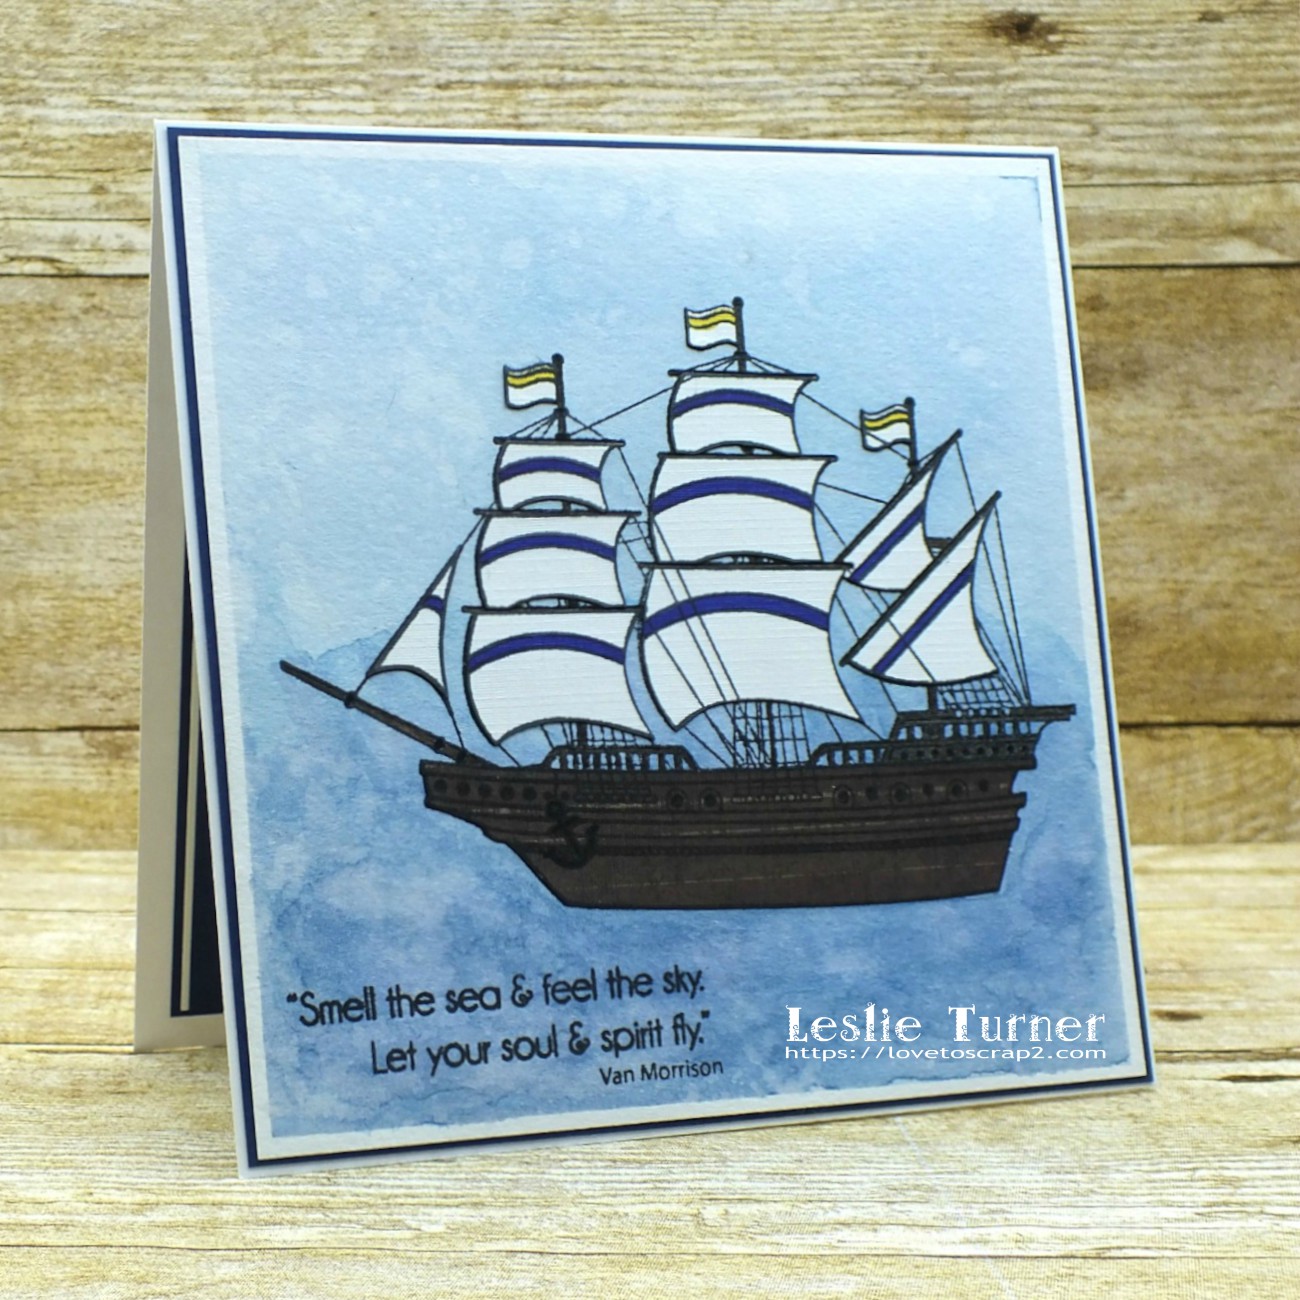
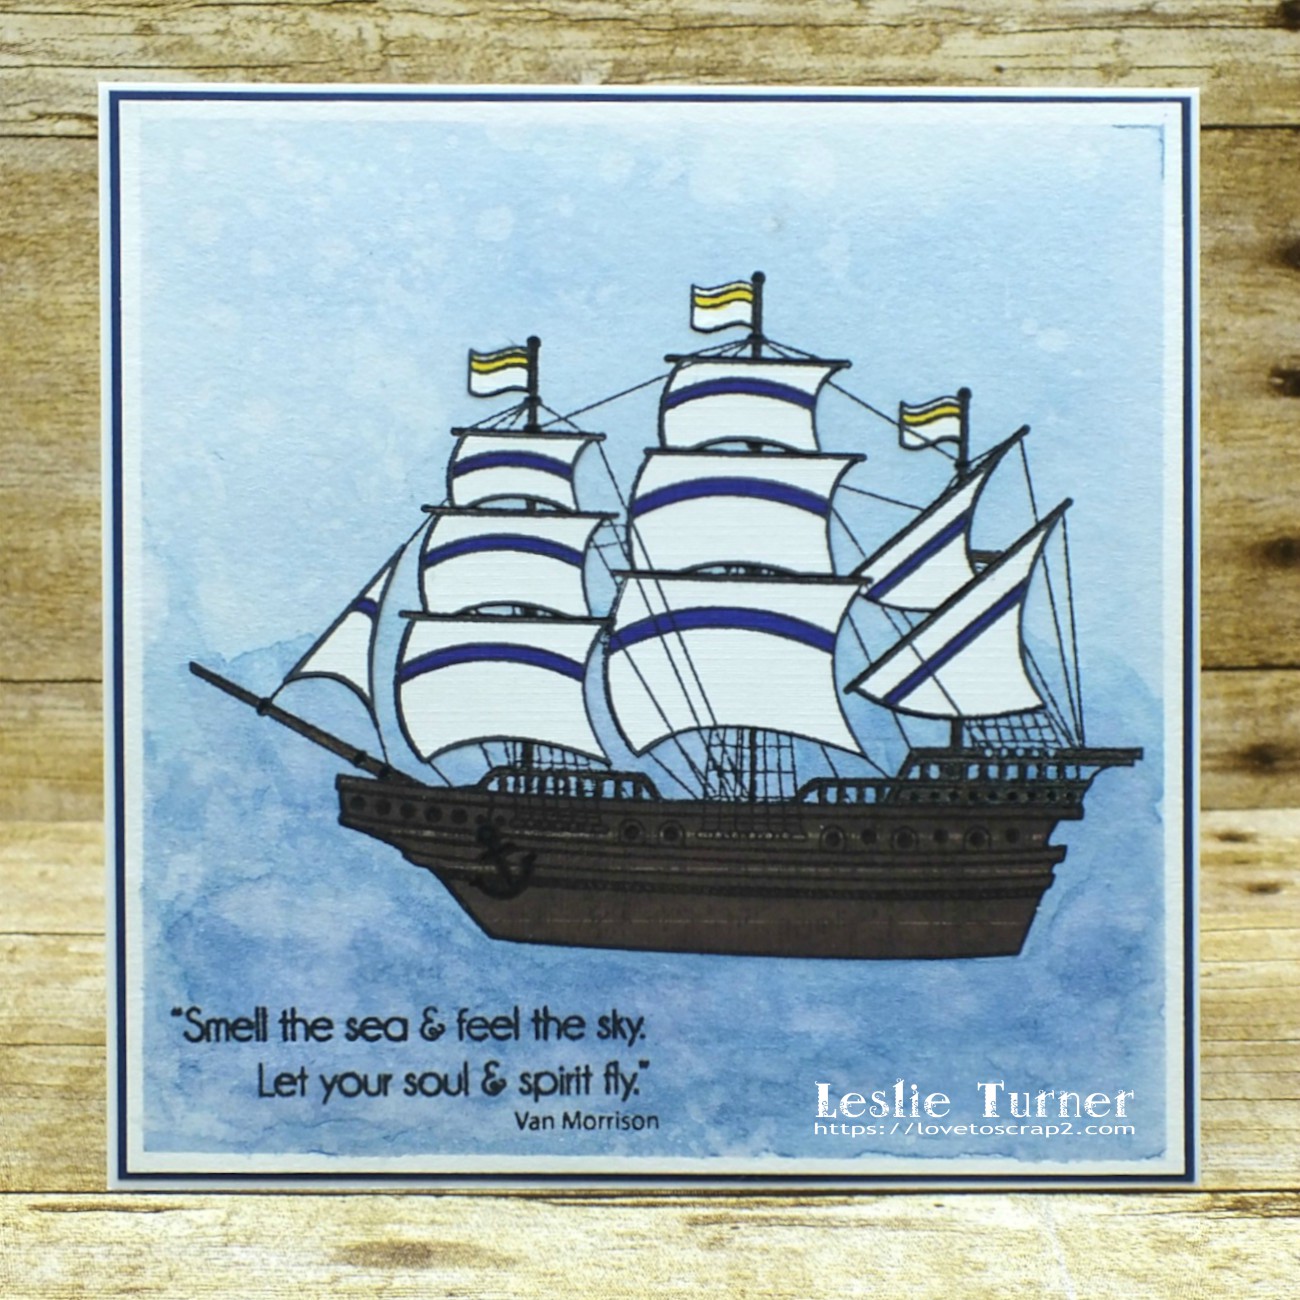
Hi everyone! A very Happy New Year to you! Can’t believe 2023 is here already! Let’s make it a good one! Our first challenge of the year is live over at Love To Scrap Challenge Blog and I’m thrilled to share my project for LTSCB #159 – Anything Goes! I created a nautical-themed mixed media card using Stamplistic’s Galleon rubber stamp and some paper piecing. Love how it turned out!
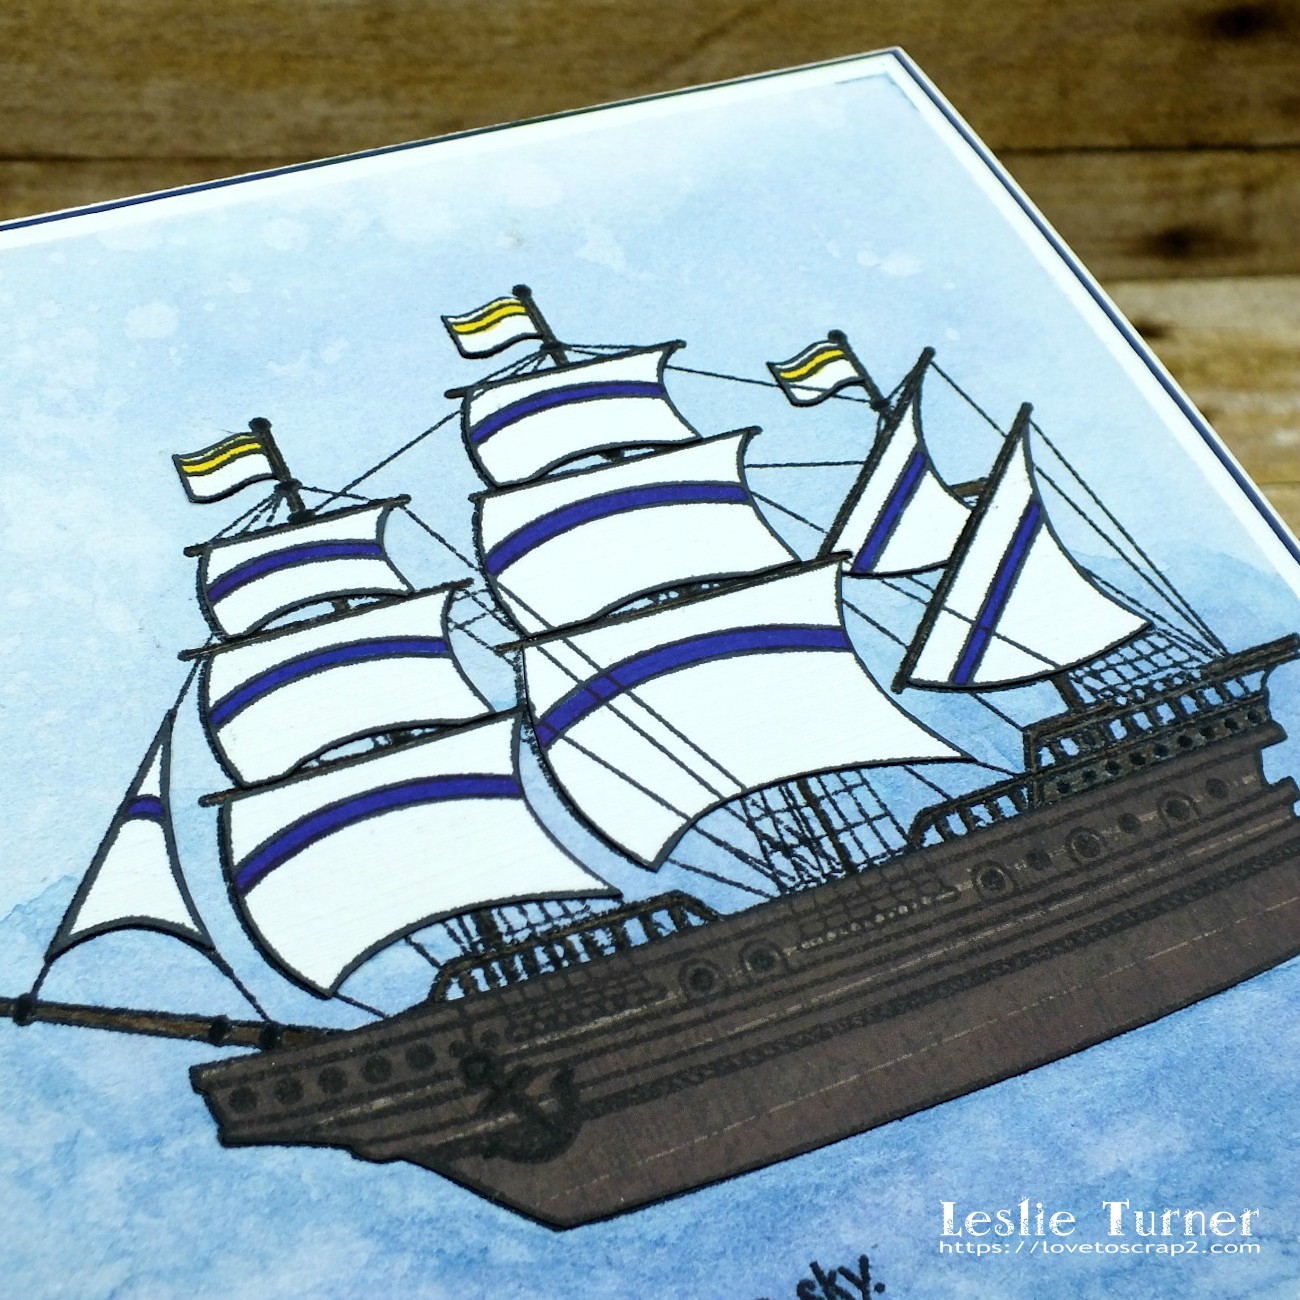
I started by cutting a panel of Canson Cold Press Watercolor paper, taping the edges to my epicurean board, and inking the sky and sea with water and Ranger faded jeans distress ink. Once dry, I stamped the Galleon image in Memento Tuxedo Black ink and then again on a Stampin’ Up Whisper White cardstock scrap and a brown patterned paper scrap. I fussy cut the sails and flags from the white cardstock and and ran a Memento Tuxedo Black marker around the outside edges of each. Similarly, I fussy cut the ship body from the brown patterned paper and ran a Memento Rich Cocoa marker around the outside edges.
I paper pieced the ship body and all the sails and flags, adding a bit of color with yellow and blue alcohol markers. I stamped the sentiment from the Inspired By Stamping Seaside Sentiments stamp set and layered the panel on Stampin’ Up Night of Navy, which completed the card front.
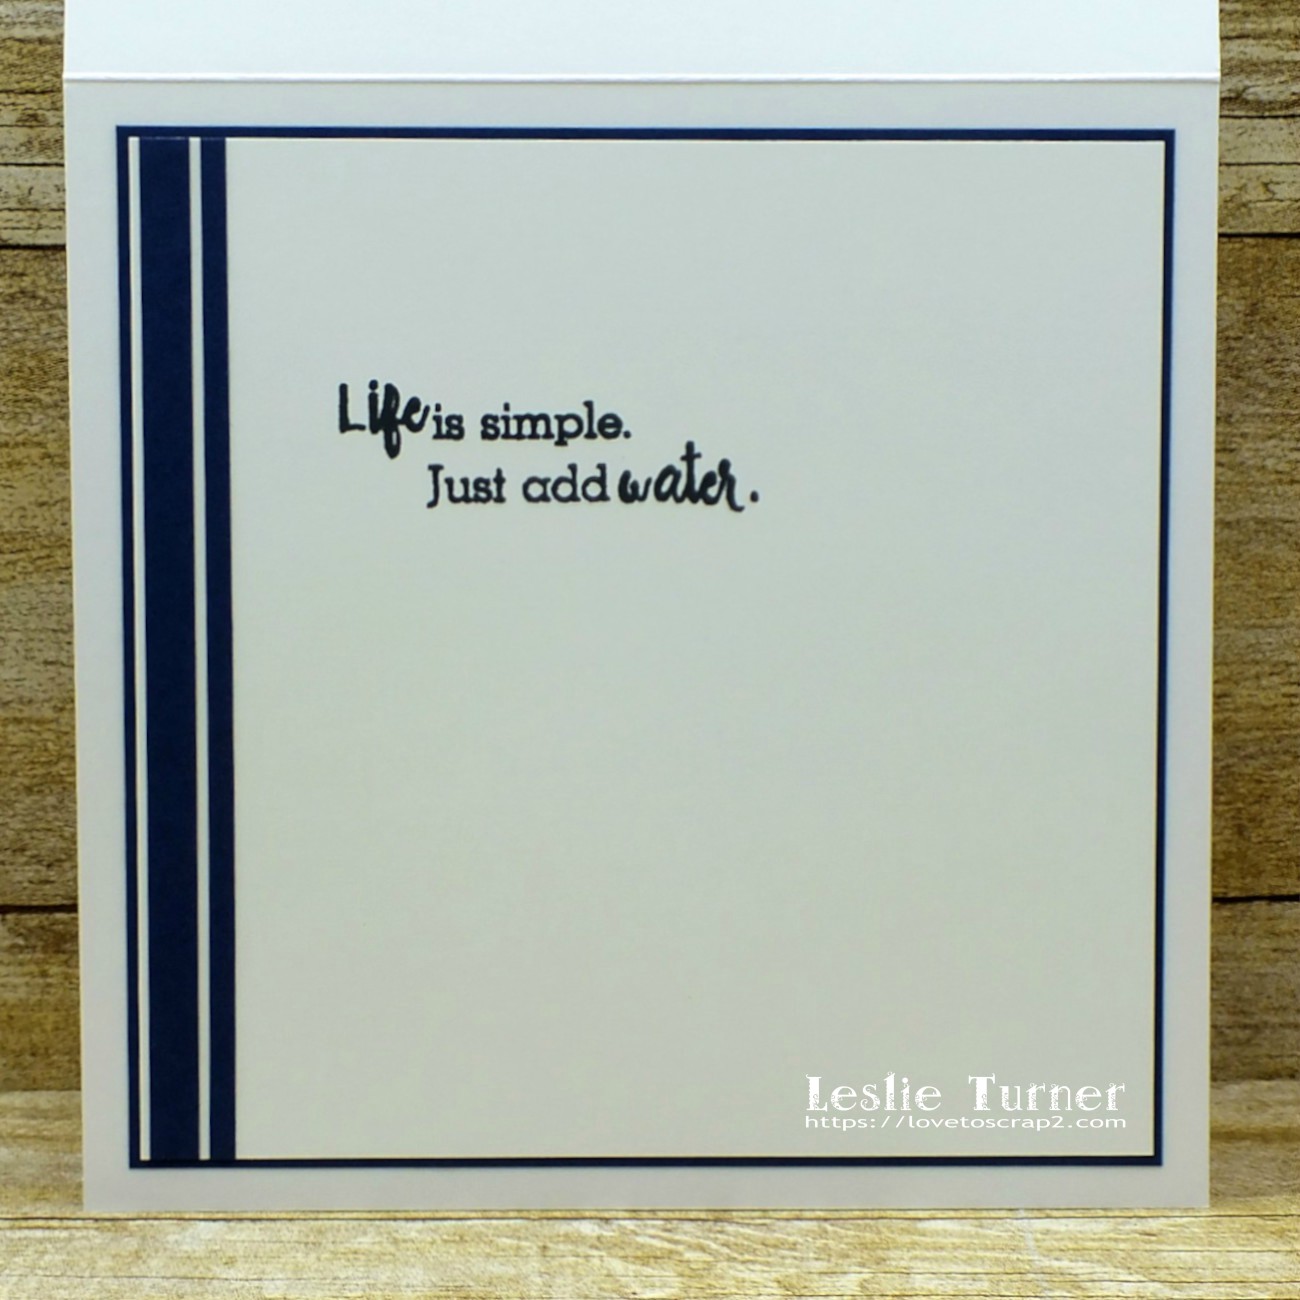
I cut the inside panel from Stampin’ Up Whisper White and embellished it with strips cut from Stampin’ Up Night of Navy. I stamped another sentiment from the Inspired By Stamping Seaside Sentiments stamp set and layered the panel on Night of Navy cardstock.
Affiliate links are used in this post at no cost to you – I really appreciate your support!
Products used: Cardstock/Paper: Canson Cold Press Watercolor paper, Neenah Classic Crest 110# Solar White cardstock, Stampin’ Up Night of Navy and Whisper White cardstock, Polly’s Paper Studio brown patterned paper Stamps: Stamplistic Galleon rubber stamp, Inspired By Stamping Seaside Sentiments stamp set Ink: Ranger faded jeans distress ink, Memento Tuxedo Black ink (pad and marker), Memento Rich Cocoa marker; Spectrum Noir alcohol markers- TB7, CT2 Accessories: Tonic Studios 12″ Guillotine Paper Trimmer, Epicurean board, MISTI stamp tool, Tombow Mono permanent adhesive, Tombow Mono multi liquid glue
I hope you’ve enjoyed today’s project and will link up with us this time! We’d love to see what you create! Thanks so much for stopping by today – we’ll see you next time! ;)
Hi everyone! Happy Saturday – I hope you had a wonderful Christmas and you’re looking forward to a happy, healthy and prosperous New Year! I can’t believe how quickly 2022 flew by! I’m thrilled to be back on the Eyelet Outlet blog today sharing my three favorite projects created this year with Eyelet Outlet products! This is a different kind of post because all three of these projects have already been showcased on my blog – we’re continuing a fun tradition that the owner and DT leader started late last year! I’m a periodic guest designer these days (since May) and was delighted to have been asked to participate.
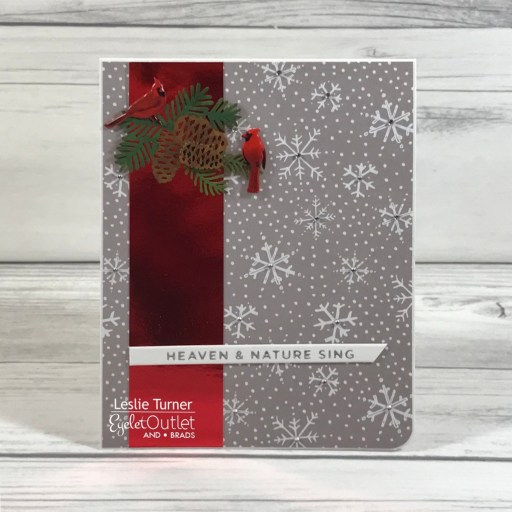
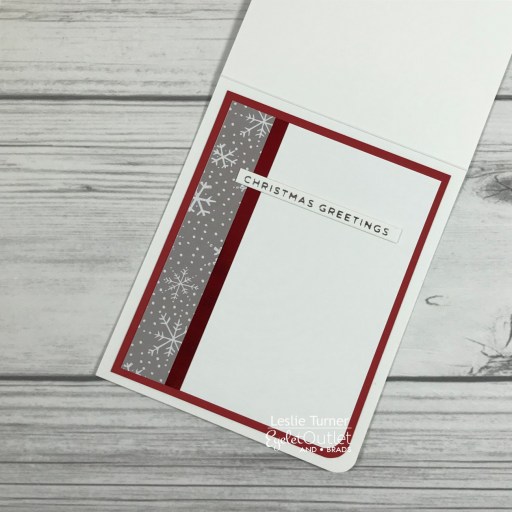
I love fun folds and Christmas is my favorite holiday, so it’s no surprise that two of my three projects are Christmas cards and two are fun folds created with my Scan N Cut! The first fav in the line-up is my Merry Christmas Cardinals card featuring our Cardinal Brads, Cardinal Profile Brads, Female Cardinal Brads and Clear Jewel Bling Strips.
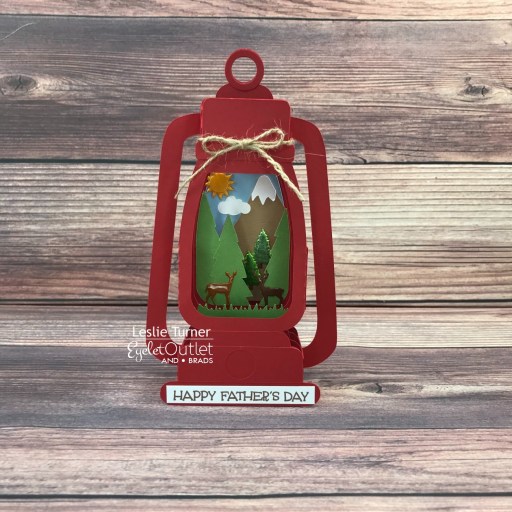
The card in the number two spot is my Happy Father’s Day Lantern. This box card folds flat for mailing and features our Deer Brads, Pine Tree Brads and Sun/Cloud Brads.
I hope you’ve enjoyed today’s post even though it’s a bit different than usual. Be sure to check out all the fun goodies at Eyelet Outlet and be sure to ‘like’ and ‘follow’ Eyelet Outlet Facebook Page to keep up with news and sales, and while you’re at it, join the Eyelet Outlet Fans Facebook group for lots of creative inspiration! Thanks so much for stopping by today – we’ll see you next time! ;)
Hi everyone! Happy Thursday to everybody! I’m still shaking my head at how fast this year has flown by! Mom always said “the older you get the faster the time flies” and she sure was right. I hope you all had a wonderful Christmas and you’re embracing the start of a new year! I’m stoked to be back on the Printable Cuttable Creatables blog today with another awesome DT inspiration project! I created a pretty but simple new year’s note card featuring the Buffalo Plaid Digital Paper Pack, Happy New Year Title SVG File & Clipart, and Champagne Glasses SVG File! This is my final project and I’d like to thank Kristin and the gang for having me along this term – I’ve definitely enjoyed myself!
I printed a black and white diamond buffalo plaid print from the Buffalo Plaid Digital Paper Pack on 65# Hammermill copy paper and trimmed a panel for the front which I layered on CutCardStock Basis Gold cardstock. Next, I printed the new year title from the PNG Clipart file in the Happy New Year Title SVG File & Clipart and cut it on my Scan N Cut. Then finally, I cut the champagne glasses (bottom layer only) from CutCardStock Dolphin cardstock. I adhered the elements to the card front and added a wooden arrow embellished with light gray pearls. The finishing touch was adding a few tiny clear gemstones at the top of the glasses for the bubbles.
I embellished the inside panel with leftover strips of the diamond buffalo plaid and Basis Gold cardstock used on the front, and left the panel blank to write a custom message.
Affiliate links are used in this post at no cost to you – I really appreciate your support!
I hope you’ve enjoyed today’s project and you’re inspired to get out that electronic cutting machine! Be sure to check out all the fun goodies in the Printable Cuttable Creatables store – you’ll have a blast and there are tons of freebies to get started! Save 15% off your order at Printable Cuttable Creatables by using coupon code love2scrap15 at checkout! Be sure to Follow us on Facebook, Instagram, Pinterest, Twitter and YouTube for lots of crafty inspiration! And while you’re at it, join our Crafting with Printable Cuttable Creatables Facebook Group for more inspiration and to share your projects! Thanks so much for stopping by today – we’ll see you next time!
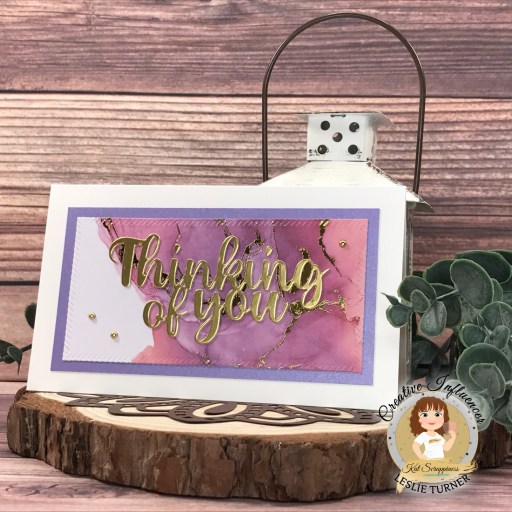
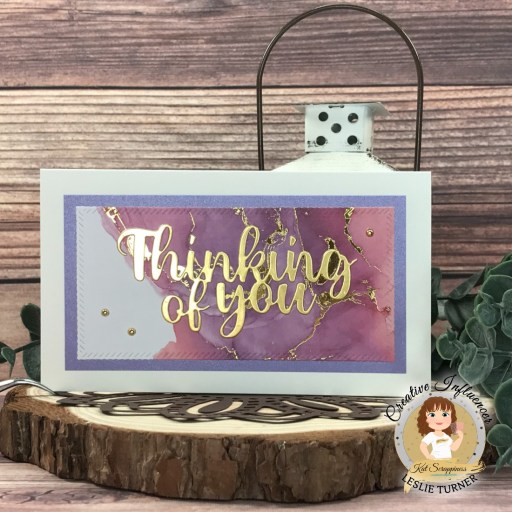
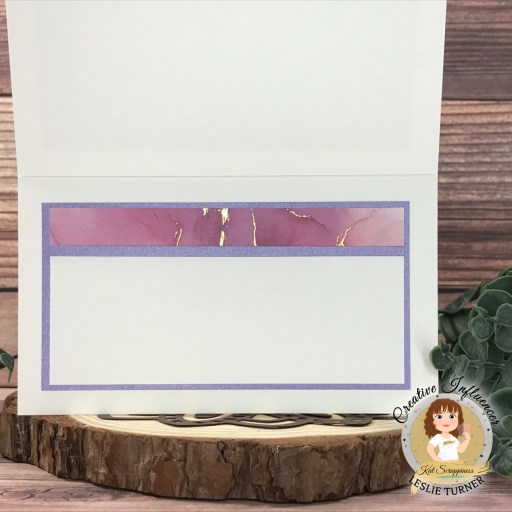
Hey everybody! Happy Monday – I hope everyone had a wonderful Christmas and you’re staying warm and cozy throughout this crazy arctic blast. So weird and scary. I’ve popped in this morning to share another Kat Scrappiness Creative Influencer inspiration project with you! By now, you know that I totally love mini slimline cards, so I created a mini slim note card featuring several Kat Scrappiness products. I did something I haven’t done in a while… I upcycled! I used the bottom half of a store-bought pink and purple note card with gold veining that I recently received in the mail. There was nothing written on the inside of this note card (which contained an unmounted rubber stamp I won) and it was just too pretty to throw away. It was time to create my second Creative Influencer project for December, so I pulled out my Kat Scrappiness Mini Slimline Stitched Rope dies, Thinking of You Word Die (without the Shadow) and Gold Pearl Mix, and got busy!
I cut my go-to 3-1/2″ x 6″ size mini slimline card base from Neenah Classic Crest 110# Solar White cardstock along with a layering panel from CutCardStock Stardream Metallic Amethyst cardstock. I die cut a rectangle from half of the ready-made note card using a Mini Slimline Stitched Rope die. I then die cut the sentiment (using the Thinking of You Word Die without the Shadow) twice from CutCardStock Bright Gold Foil cardstock and layered them together. The finishing touch was adding several pearls from the Gold Pearl Mix. I’m so annoyed because foil is hard to photograph and I couldn’t get a good frontal shot without glare.
I cut the inside panel from 80# Solar White cardstock and embellished it with strips cut from the ready-made note card and the amethyst cardstock used on the front. I left the panel blank to write a custom message.
Affiliate links are used in this post at no cost to you – I really appreciate your support!
I hope you’ve enjoyed this project and I’ve inspired you to get crafty! Be sure to check out all the amazing stuff in the Kat Scrappiness store… there’s some of just about everything you’ll need to get your craft on, I promise! Be sure to Follow us on Facebook, Instagram, Pinterest and YouTube for tons of crafty inspiration! And we’d love it if you’d join the Kat Scrappiness Insiders and Stamping Enablers Facebook Groups for lots of fun crafty ideas and to share your creativity! Thanks so much for stopping by today – we’ll see you next time!
Hi everyone! OMGosh, St. Nick will be here tonight… are you ready?! He’s coming regardless, lol! I have an awesome CutCardStock DT inspiration project to share with you today featuring more of our Stardream Metallic cardstock! This cardstock has the softest shimmer and is some of the prettiest I’ve ever seen! I’ve used Stardream Metallic Fairway cardstock and Stardream Metallic Jupiter cardstock on this mini slimline card, and I love how it turned out!
I cut my favorite mini slimline card size of 3-1/2″ x 6″ from Neenah Classic Crest 110# Solar White cardstock. Using the Kat Scrappiness Mini Slimline Foliage Frame die, I cut the frame from CutCardStock Stardream Metallic Fairway cardstsock, and adhered it to the card base. Next, using the Sizzix Script Holiday Words Thinlits, I die cut the sentiment three times from CutCardStock Stardream Metallic Jupiter cardstock and layered them together for a little dimension. I clipped the prongs off of four Eyelet Outlet Poinsettia Flower Brads (didn’t want the bulk under the frame) and adhered them with Ranger Distress Collage Medium. The finishing touch was adding several Darice tiny clear gemstones.
Using the Waffle Flower Mini Slimline Layers dies, I cut the inside panels from the Stardream Metallic Fairway cardstock and Neenah Classic Crest 80# Solar White cardstock, and adhered them together. I stamped a sentiment from the CAS-ual Friday Stamps Snowy Sayings stamp set in Catherine Pooler Rouge ink.
Affiliate links are used in this post at no cost to you – I really appreciate your support!
I hope you’ve enjoyed today’s project and you’re inspired to get crafty! Be sure to check out all the awesome cardstock and other goodies at CutCardStock (adhesives, labels, stickers, pens, watercolors and ribbon to name a few). And head on over to the CutCardStock Facebook Page for more inspiration! Thanks so much for stopping by today – we’ll see you next time!