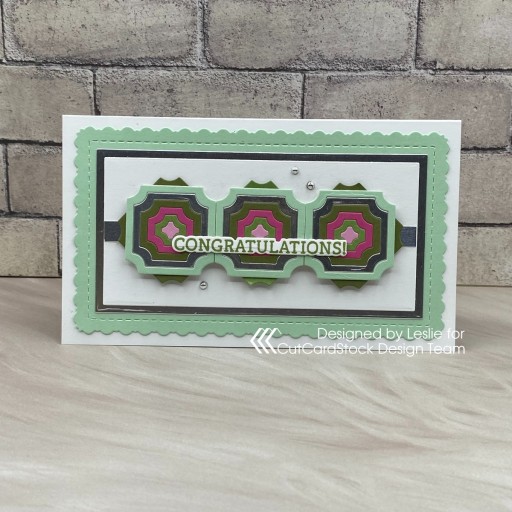
Hi everyone! Happy Wednesday – I hope you’re having a fabulous week so far! I’m up on the CutCardStock blog today with a tutorial for making a tiled Congratulations mini slimline. I used several colors of our Pop Tone cardstock along with Silver Foil and Solar White cardstock. I’ve had the Spellbinders Color Block Mini Inverted Squares dies in my stash for a minute and decided it was time to use them!
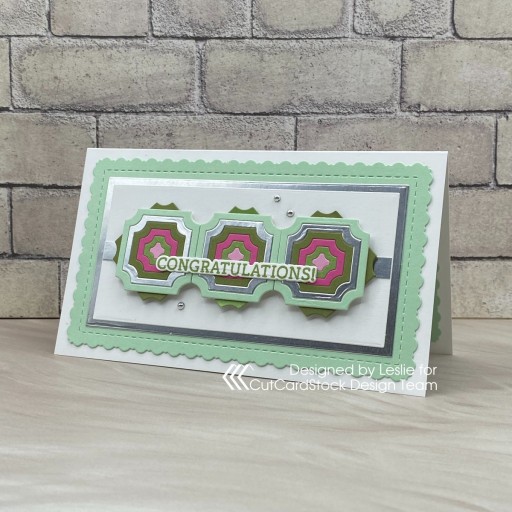
My mini slimline size is 3-1/2″ x 6″ and the card base was cut from Neenah Classic Crest 80# Solar White. I used the Kat Scrappiness Mini Slimline Fancy Scalloped Dies along with the Waffle Flower Mini Slimline Layers for the layering panels.
The tiles were created with the Spellbinders Color Block Mini Inverted Squares dies, cut from Pop Tone Spearmint, Gumdrop Green, Jellybean Green, Cotton Candy and Razzleberry along with Bright Silver Foil. The sentiment is from Stampin’ Up Charming Sentiments stamps, stamped in Memento Bamboo Leaves ink, and cut with the coordinating Stampin’ Up Sentiment Silhouettes dies. The embellishments are from Kat Scrappiness Silver Pearl Mix.
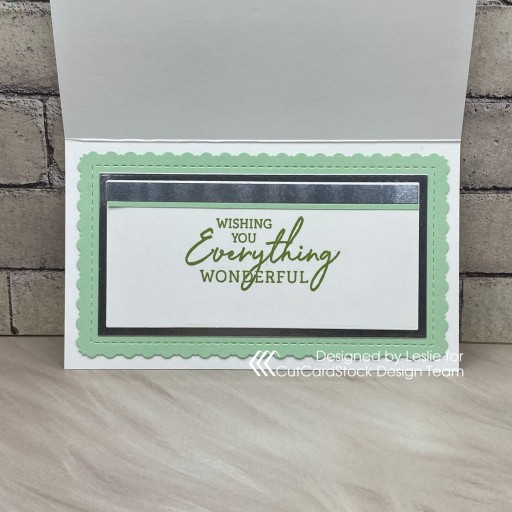
The inside is pretty similar to the front with another sentiment from the Stampin’ Up Charming Sentiments stamps.
Sharing in the following challenges:
1. A Perfect Time To Craft Open Challenge: #11-2023 – Anything Goes
2. A Place To Start: November 2023 – Anything Goes w/ optional Something for a Child
3. Classic Design Challenge: November #11 – Anything Goes
4. Crafty Catz: #659 – Anything Goes w/ optional 3 Favorite Colors
Affiliate links are used in this post at no cost to you – I really appreciate your support!
CutCardStock products used:
Neenah Classic Crest 80# Solar White cardstock
Pop Tone Spearmint cardstock
Pop Tone Gumdrop Green cardstock
Pop Tone Jellybean Green cardstock
Pop Tone Cotton Candy cardstock
Pop Tone Razzleberry cardstock
Bright Silver Foil cardstock
Neenah Classic Crest DTC 165# Solar White cardstock
Other products used:
STAMPS: Stampin’ Up Charming Sentiments stamps
INK: Memento Bamboo Leaves ink
DIES/PUNCHES: Kat Scrappiness Mini Slimline Fancy Scalloped Dies, Waffle Flower Mini Slimline Layers, Spellbinders Color Block Mini Inverted Squares dies, Stampin’ Up Sentiment Silhouettes dies
ACCESSORIES: Tonic Studios 12″ Guillotine Paper Trimmer, Gina K Designs Adhesive Dot Runner, Bearly Art precision craft glue, MISTI stamp tool, Big Shot, Kat Scrappiness Silver Pearl Mix, 1/2″ double-sided foam strip
I hope you’ve enjoyed today’s project and you’re inspired to get crafty! Be sure to check out all the awesome cardstock and other goodies at CutCardStock (adhesives, labels, stickers, pens, watercolors and ribbon to name a few). And head on over to the CutCardStock Facebook Page and for more inspiration! Also, be sure to join our Creating with Card Stock Facebook Group for even more crafty inspiration! Thanks so much for stopping by today – we’ll see you next time!
Scrappy hugs,