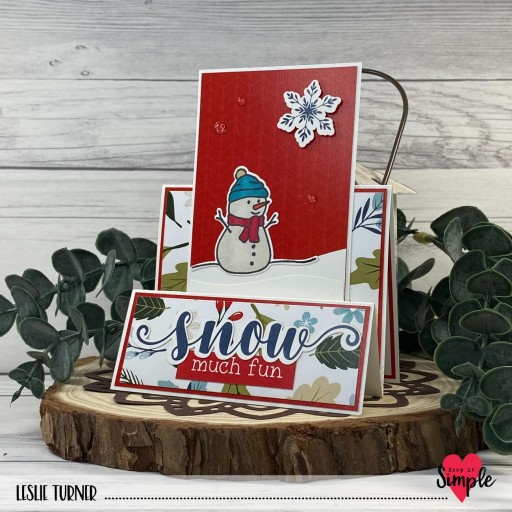
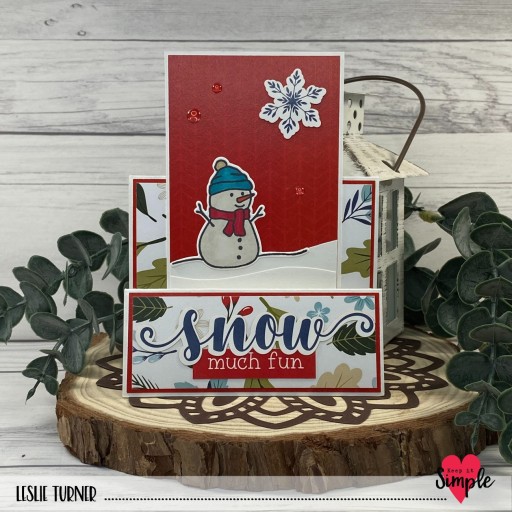
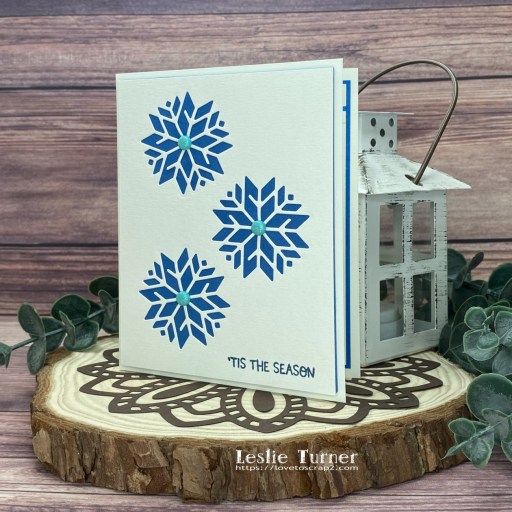
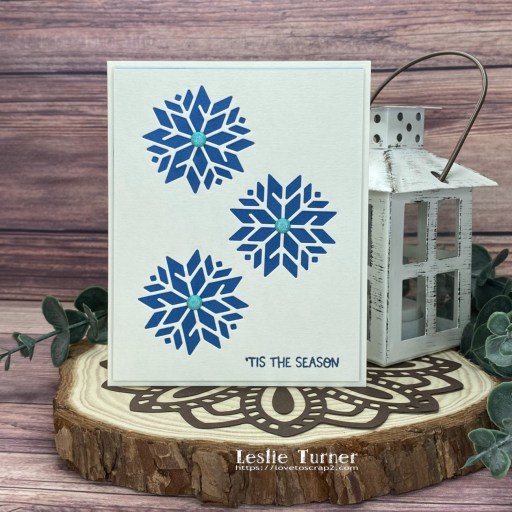
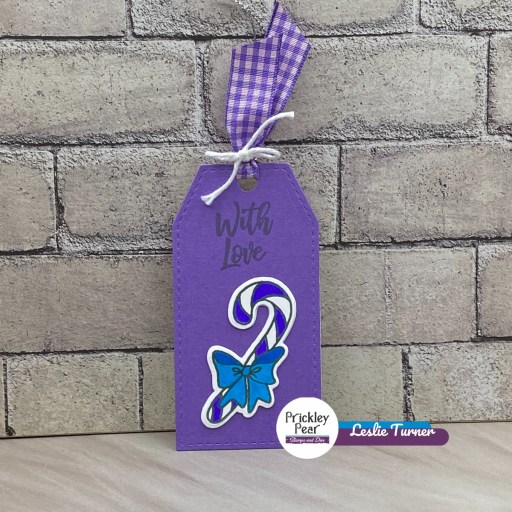
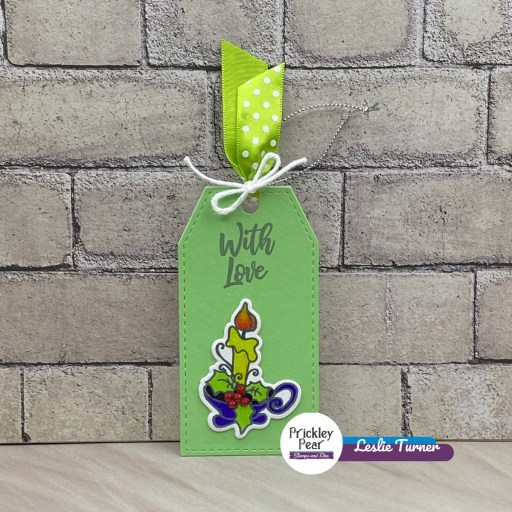
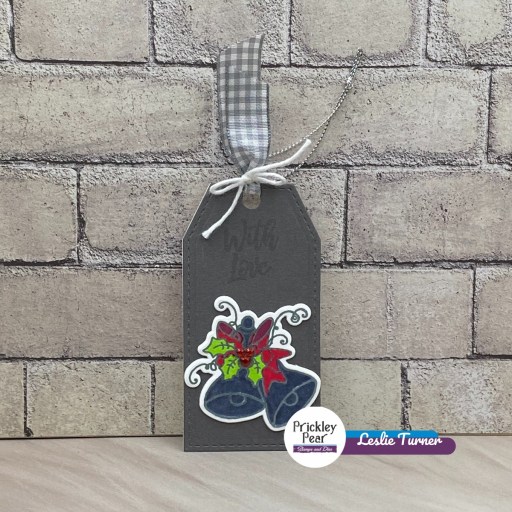
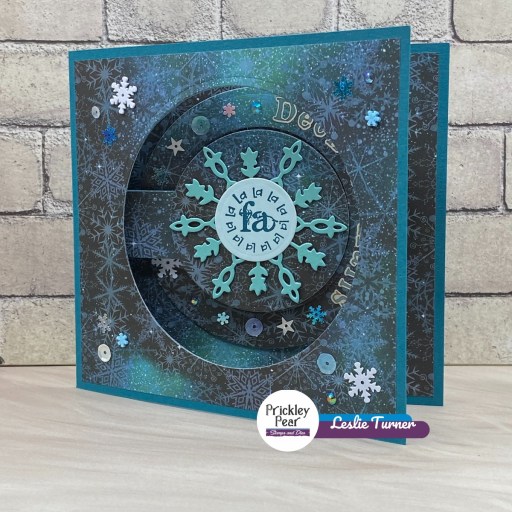
You’re Awesome

Hey everybody! Happy Tuesday – I hope your week is off to a nice start! I’m delighted to share that the Keep It Simple design team has embarked on a new adventure called Technique Tuesday and I’m the first one to have a go at it! On the third Tuesday of every month our DT members will take turns showcasing a project featuring some sort of fun technique they’ve employed using Keep It Simple products of their choice, and will do a mini tutorial on it.

I created a slimline thank you card featuring the phantom die cutting technique which I absolutely love. I used papers from the Farmhouse Fall collection, Belle Outline Dies and Thank You Sentiments Stamp Set. And the best part is that I upcycled a piece of an empty tissue box. Don’t throw them away when they’re empty because they make the prettiest cards! This one goes perfectly with the green Farmhouse Fall papers!

(1) Using the Belle Outline Dies, die cut the sentiment into the card panel (upcycled tissue box).
(2) Die cut the same letters from white craft foam.
(3) Adhere the card panel to a patterned paper layer cut from a green paper in the Farmhouse Fall 12×12 Cardstock Pack.

Adhere the foam letters into the negative spaces.

Adhere the original letters cut from the card panel on top of the foam letters.

This is an angled view of the ‘phantom’ die cut letters.

This is the completed card front. The smaller stamped portion of the sentiment is from the Thank You Sentiments Stamp Set, stamped on a scrap piece of the green paper used for the layering panel, heat embossed in white, and layered on a scrap piece of Solar White cardstock. Two small Jade enamel dots were added for a little interest.

This is the completed card inside. The embellishing strip was cut from a paper in the 6×9 Cardstock Pack and the layering panel was cut from a paper in the 12×12 Cardstock Pack. The stamped sentiment is from the Thank You Sentiments Stamp Set.

Sharing in the following challenges:
1. Classic Design Challenge: October #10 – Anything Goes

Keep It Simple products used:
Farmhouse Fall 12×12 Cardstock Pack (front and inside layering panels)
Farmhouse Fall 6×9 Cardstock Pack (inside embellishing strip)
Belle Outline Dies
Thank You Sentiments Stamp Set
Jade Enamel Dots

Affiliate links are used in this post at no cost to you – I really appreciate your support!

Other products used:
CARDSTOCK/PAPER: Neenah Classic Crest 110# and 80# Solar White cardstock
INK: Memento Olive Grove ink, Versamark
ACCESSORIES: Tonic Studios 12″ Guillotine Paper Trimmer, Tombow Mono Dots adhesive, Bearly Art precision craft glue, empty tissue box, MISTI stamp tool, Big Shot, Hero Arts white embossing powder, Milwaukee heat tool, ScraPerfect Perfect Pouch, Darice Foamies white craft foam

I hope you’ve loved seeing this project as much as I loved creating it, and you’re inspired to get crafty! Be sure to check out ALL the fun goodies in the Keep It Simple store such as paper, stamps, die cuts, ephemera, washi tape and enamel dots to name just a few! You’ll go cray-cray! Be sure to Follow us on Facebook, Instagram, and Pinterest for lots of crafty inspiration! Thanks so much for stopping by today – we’ll see you next time!

Scrappy hugs,

boo fun fold

Hey everybody! It’s Saturday and I hope you have a fun weekend planned! Has the weather cooled off any where you are? Our nights are down in the upper 30s/low 40s and our days are in the mid to high 60s which makes us happy! I’ve popped in this morning to share another Syncopation Design inspiration project created with the super cool Code Orange stamp set! *Minor profanity alert!* OMGoodness, I totally love these stamps because there are so many options for fun Halloween cards! The card I made is yet another version of the double flap fun fold! I have quite a few double flap fun folds in my tutorial arsenal and each one is just as fun as the next! ;)

I started by inking the Solar White panel for the smaller flap. I used The Crafter’s Workshop Mini Bricks stencil with Ranger antique linen distress ink and a blending brush across the bottom. I masked that off and used Ranger stormy sky distress ink and a blending brush for the sky. I mixed a tiny bit of Judi-Kins Iridescent Sparkle embossing powder in some DreamWeaver Translucent embossing paste and applied it through the Keep It Simple Starry Skies stencil. This was a total experiment… I wasn’t sure mixing embossing powder and embossing paste would even work, but it actually turned out pretty cool looking with translucent sparkly stars!

So, while the stars were drying, I cut the card base and all the layering panels from CutCardStock Pop Tone Orange Fizz, Pop Tone Tangy Orange and Pop Tone Black Licorice, along with coordinating Halloween papers from The Paper Studio Four Seasons and Everything In Between -2- paper pad. I stamped the kitty, moon, candy and one-word sentiment on a scrap piece of Solar White cardstock, colored the images with alcohol markers, and fussy cut them. I popped the kitty up on foam pads and adhered the moon, candy and sentiment flat on the panel.

Here’s a shot of the smaller panel opened up revealing the slightly larger panel.

And here’s a shot of the slightly larger panel opened revealing the hilarious inside sentiment. Gotta love Jennifer’s sense of humor! :D

Sharing in the following challenges:
1. A Perfect Time To Craft Open Challenge: October #10-2023 – Anything Goes
2. Critter Crazy Challenge Blog: #79 – Anything Goes with a Featured Critter

Syncopation Design products used:
Code Orange stamp set

Affiliate links are used in this post at no cost to you – I really appreciate your support!

Other products used:
CARDSTOCK/PAPER: CutCardStock Pop Tone Orange Fizz, Pop Tone Tangy Orange, and Pop Tone Black Licorice cardstock, Neenah Classic Crest 80# Solar White cardstock, The Paper Studio Four Seasons and Everything In Between -2- paper pad
INK: Memento Tuxedo Black ink; Arteza alcohol markers- Y02/32, YR33, YG05, RP09, GB08; Ranger antique linen and stormy sky distress inks
ACCESSORIES: Tonic Studios 12″ Guillotine Paper Trimmer, Tombow Mono Dots adhesive, Bearly Art precision craft glue, MISTI stamp tool, The Crafter’s Workshop Mini Bricks stencil, Keep It Simple Starry Skies Stencil, blending brushes, DreamWeaver Translucent embossing paste, Judi-Kins Iridescent Sparkle embossing powder, Stampin’ Up Dimensionals

I hope you’ve enjoyed this project and are inspired to get crafty! Be sure to check out all the fun digital papers, pocket cards, elements, cut files, bundles and scrap kits, as well as clear stamps in the Syncopation Design Etsy store! And be sure to Follow on Instagram and Facebook for crafty inspiration! Thanks so much for stopping by today – we’ll see you next time!

Scrappy hugs,

Black Cats and Furry Bats fun fold

Hey everybody! Are you working on Halloween cards or are you more of an Autumn/Fall-themed card maker? I have to admit that I typically don’t send out many Halloween cards but I’ve made quite a few this year! I have an awesome ScrapbookingStore DT inspiration project to share with you today, created with the October 2023 Scrapbook Kit with Upgrades. I love that every item coordinates beautifully with the next, and the neutral color palette really lends itself to some spooky crafting! This accordion center panel design made a most awesome Halloween card featuring papers and stickers along with chipboard accents and enamel dots from this month’s kit. I’ve once again found some inspiration from Lisa Curcio, SU demonstrator, who posted this awesome design on Instagram.

I cut the card base and folded center panel from CutCardStock Basis Dark Orange cardstock and embellished them with CutCardStock Basis Black cardstock and coordinating papers from the kit. The focal is a chipboard element from the upgrades which I adhered to the folded center panel along with several stickers from the sticker sheet. The finishing touch was adding a few enamel dots from the upgrades.

I cut the inside panel of the center folded element from Neenah Classic Crest Solar White cardstock and embellished it with strips of coordinating paper from the kit and Basis Black cardstock. I added a sentiment sticker from the sticker sheet which completed the card.

Sharing in the following challenges:
1. A Perfect Time To Craft Open Challenge: October #10-2023 – Anything Goes
2. A Place To Start: October 2023 – Anything Goes
3. Di’s Digi Stamps Challenge: Halloween or Thankful/Thanks
4. Penny’s Paper-Crafty Challenge Blog: #557 – Anything Goes with Paper

Affiliate links are used in this post at no cost to you – I really appreciate your support!

ScrapbookingStore products used:
October 2023 Scrapbook Kit with Upgrades

Other products used:
CARDSTOCK/PAPER: CutCardStock Basis Dark Orange and Basis Black cardstock, Neenah Classic Crest 110# and 80# Solar White cardstock
DIES/PUNCHES: Kadomaru Pro Corner Rounder
ACCESSORIES: Tonic Studios 12″ Guillotine Paper Trimmer, Tombow Mono Dots adhesive, Bearly Art precision craft glue

I hope you’ve enjoyed today’s project and you’re thinking about all the fun you could have with this month’s kit… you really ought to think about joining the Subscription Club! Be sure to Follow us on Facebook, Instagram, Pinterest and YouTube for lots of crafty inspiration! And if you do decide to join the Subscription Club, join our ScrapbookingStore Club Member Group on Facebook for more inspiration and to share your projects! Thanks so much for stopping by today – we’ll see you next time!

Scrappy hugs,

Very Merry Christmas

Hey everybody! Wishing you all the happiest of weekends! Life is good… the weather has turned cool, Ed and I are both enjoying our hobbies, and we have no doctor appointments until the first week of November (lol)! I have another cat-themed Christmas card to share that I made for the 2023 Cat Lovers Christmas Challenge. This card is in non-traditional Christmas colors of pink and teal, and features the cats in The Cat’s Pajamas Good Meowning stamp set.

On a side note, I’m trying out some new backdrops for my card photos and I’ve gotten my light box back out which I haven’t used in ages. Even though I’ve gotten a lot of really nice compliments on the wood slice, lantern and eucalyptus that I’ve been using for staging, I feel like I need something different. I love change and I love trying new things – and you’ll be seeing some different colored backgrounds, too – so let me know what you think! Of course, you’ll still be seeing lots of photos with the old style of staging because I work ahead and the photos have already been taken.

I cut a standard A2 size side-folding card base from Neenah Classic Crest 110# Solar White cardstock along with a layering panel from CutCardStock Basis Teal cardstock. I cut a background panel from CutCardStock Raspberry Ice using the Kat Scrappiness Buffalo Plaid Background Die and layered it on the teal panel. I stamped the three cats from The Cat’s Pajamas Good Meowning stamp set in Memento Tuxedo Black ink on Solar White cardstock and colored two of them with alcohol markers. I cut them with the coordinating Good Meowning die set and adhered them to the card front, popping the white one (doing the thing that only cats do, lol) up on foam strips. I stamped a sentiment from The Cat’s Pajamas Christmas Seals stamp set in black ink, trimmed it, and adhered it to the card front. The finishing touch was adding some sparkle using iridescent gemstones.

I cut the inside panel from Solar White cardstock and embellished it with strips of Basis Teal and Raspberry Ice cardstock used on the front. I stamped a sentiment from the Hero Arts Christmas Messages stamp set and layered the panel on raspberry cardstock.

Sharing in the following challenges:
1. A Perfect Time To Craft Open Challenge: October #10-2023 – Anything Goes
2. A Place To Start: October 2023 – Anything Goes
3. Critter Crazy Challenge Blog: #79 – Anything Goes with a Featured Critter

Affiliate links are used in this post at no cost to you – I really appreciate your support! 

Products used:
CARDSTOCK/PAPER: Neenah Classic Crest 110# and 80# Solar White cardstock, CutCardStock Raspberry Ice and Basis Teal cardstock
STAMPS: The Cat’s Pajamas Good Meowning stamp set, The Cat’s Pajamas Christmas Seals stamp set, Hero Arts Christmas Messages stamp set
INK: Memento Tuxedo Black ink; Arteza alcohol markers- R20, BR42, WG06/08
DIES/PUNCHES: Kat Scrappiness Buffalo Plaid Background Die, The Cat’s Pajamas Good Meowning die set
ACCESSORIES: Tonic Studios 12″ Guillotine Paper Trimmer, Tombow Mono Dots adhesive, Bearly Art precision craft glue, MISTI stamp tool, Big Shot, 1/2″ double-sided foam strips, iridescent gemstones

I hope you’ve enjoyed seeing this project and will link up with us in this fun Cat Lovers Christmas challenge honoring Janis! Thanks so much for stopping by today – we’ll see you next time! ;)

Scrappy hugs,

‘Hairy Scary’ Matchbook

Hey everybody! I’m back with another fun post today and I hope you aren’t getting sick of me yet, lol! I just HAD to post this Hairy Scary Matchbook that I created with the Art Impressions Halloween Matchbook stamps and dies! The Give Us A Fright Challenge #362 over at Art Impressions started yesterday and I’m all in! I love nothing more than an Ai Matchbook and it doesn’t matter to me what the occasion is!

For some reason I always reach for Polly’s Paper Studio double-sided papers to cut the Matchbook template from. I then stamped all the Halloween elements on CutCardStock Basis White cardstock and colored them with alcohol markers. The fun part of these Matchbooks is always the assembly! I LOVE watching them come to life!

Here are a few more angled shots and one with the teeny tiny envelope! So stinkin’ cute, I can’t stand it!

Sharing in these additional challenges:
1. 613 Avenue Create: October 2023 – Anything Goes w/ optional Autumn Colors
2. A Perfect Time To Craft Open Challenge: October #10-2023 – Anything Goes
3. Creative Creases Challenges: #68 – Anything Goes with a Fun Fold
4. Di’s Digi Stamps Challenge: Halloween or Thankful/Thanks
5. Penny’s Paper-Crafty Challenge Blog: #557 – Anything Goes with Paper

Affiliate links are used in this post at no cost to you – I really appreciate your support! 

Products used:
CARDSTOCK/PAPER: CutCardStock Basis White cardstock, Polly’s Paper Studio double-sided papers
STAMPS: Art Impressions Halloween Matchbook Stamps
INK: Catherine Pooler Black Jack ink; Arteza alcohol markers- YR32/33/39, PB09/14, GS05/07/09, Y02/07/25/31; Pentel Slicci Gold Pen
DIES/PUNCHES: Art Impressions Halloween Matchbook Dies, Matchbook Template Die and Matchbook Envelope Dies
ACCESSORIES: Tonic Studios 12″ Guillotine Paper Trimmer, Bearly Art precision craft glue, MISTI stamp tool, Big Shot

I hope you’ve enjoyed seeing this super adorable Hairy Scary Matchbook! Thanks so much for stopping by today – we’ll see you next time! ;)

Scrappy hugs,

Ghoul Gang

Hey everybody! HaPpY fRiDaY to you! I’ve popped in this morning to share a Syncopation Design inspiration project created with the awesome Code Orange stamp set! I used quite a few stamps in this set for my card and I absolutely love how it turned out! What better day than Friday the 13th to share this cool ghoul W-fold design! I’ve made a few these in the past and always chuckle because it really should be called an M-fold! Regardless, it’s a fun one to put together! I’ve had the handwritten instructions for this in my arsenal for a number of years and don’t remember who to give credit to, but there are many tutorials out there by searching for a W-fold.

I cut the card base and inside strip and panels from CutCardStock Basis Black cardstock along with front and inside layering panels from coordinating prints in the American Crafts Halloween 6×6 paper pad. I stamped the focal image for the front in Memento Tuxedo Black ink on Solar White cardstock, colored it with alcohol markers, and cut it with an oval die from the Keep It Simple Stitched Ovals Nested Dies. I also cut a slightly larger oval from the Basis Black to layer beneath the focal image. I added a strip of patterned paper and two strips of MAMBI skinny washi tape to the top of the front panel which completed the card front.

I stamped the images for the inside on Solar White cardstock, colored them with alcohol markers and cut them with an oval die from the Keep It Simple stitched oval dies. I assembled the panels and adhered them to the strip. Such a fun, fun design!

Sharing in the following challenges:
1. 613 Avenue Create: October 2023 – Anything Goes w/ optional Autumn Colors
2. A Perfect Time To Craft Open Challenge: October #10-2023 – Anything Goes
3. Crafty Gals Corner: #248 – Halloween Colors
4. Creative Creases Challenges: #68 – Anything Goes with a Fun Fold
5. Di’s Digi Stamps Challenge: Halloween or Thankful/Thanks
5. Penny’s Paper-Crafty Challenge Blog: #557 – Anything Goes with Paper

Syncopation Design products used:
Code Orange stamp set

Affiliate links are used in this post at no cost to you – I really appreciate your support!

Other products used:
CARDSTOCK/PAPER: CutCardStock Basis Black cardstock, Neenah Classic Crest 80# Solar White cardstock, American Crafts Halloween 6×6 paper pad
INK: Memento Tuxedo Black ink; Arteza alcohol markers- YG54/57, YR32, Y02/32, P34, RP09, NG06/08, BR52/68
DIES/PUNCHES: Keep It Simple Stitched Ovals Nested Dies
ACCESSORIES: Tonic Studios 12″ Guillotine Paper Trimmer, Tombow Mono Dots adhesive, Bearly Art precision craft glue, MISTI stamp tool, Big Shot, Me & My Big Ideas yellow/gold and black/white skinny washi tape

I hope you’ve enjoyed this project and are inspired to get crafty! Be sure to check out all the fun digital papers, pocket cards, elements, cut files, bundles and scrap kits, as well as clear stamps in the Syncopation Design Etsy store! And be sure to Follow on Instagram and Facebook for crafty inspiration! Thanks so much for stopping by today – we’ll see you next time!

Scrappy hugs,

Boo Crew box card

Howdy peeps! I hope you’re ready for the weekend and have something fun planned! I have a great ScrapbookingStore DT inspiration project to share with you today, created with the awesome October 2023 Scrapbook Kit with Upgrades! You know I’m a huge fan of fun folds and the awesome assortment of products in this month’s collection have my head spinning with ideas! This floating elements box card features coordinating papers and ghoulish character stickers along with enamel dots and a tag from the upgrades! My inspiration for this fun fold came from Sam Calcott over at Mixed Up Craft. I totally love her designs!

I cut the card base from CutCardStock 12×12 Twine cardstock and embellished it with CutCardStock Pop Tone Hot Fudge cardstock and patterned papers (on the front and inside) from the collection. I adhered five character stickers from the sticker sheet to small scraps of CutCardStock Basis White cardstock and fussy cut them. I cut a circle in the card base using the Keep It Simple Stitched Circles Nested Dies and added the ghoulish cuties across the aperture, anchoring them to an acetate strip to create the appearance of floating. I used more stickers from the sticker sheet and enamel dots from the upgrades to finish embellishing the card front.

I cut the back panel from Basis White cardstock and embellished it with a strip of coordinating paper from the kit. I added a sentiment from the Frames & Tags in the upgrades and layered the panel on Pop Tone Hot Fudge cardstock.

Sharing in the following challenges:
1. 613 Avenue Create: October 2023 – Anything Goes w/ optional Autumn Colors
2. A Perfect Time To Craft Open Challenge: October #10-2023 – Anything Goes
3. Crafty Gals Corner: #248 – Halloween Colors
4. Halloween Crafts All Year ‘Round: #8 – Anything Halloween Goes
5. Wednesday’s Creative Inspirations Challenge Blog: Autumn or Halloween

Affiliate links are used in this post at no cost to you – I really appreciate your support!

ScrapbookingStore products used:
October 2023 Scrapbook Kit with Upgrades

Other products used:
CARDSTOCK/PAPER: CutCardStock 12×12 Twine, Pop Tone Hot Fudge and Basis White cardstock
DIES/PUNCHES: Keep It Simple Stitched Circles Nested Dies, Kadomaru Pro Corner Rounder
ACCESSORIES: Tonic Studios 12″ Guillotine Paper Trimmer, Tombow Mono Dots adhesive, Bearly Art precision craft glue, Big Shot, Grafix Crystal Clear Craft Plastic, 1/2″ double-sided foam strips

I hope you’ve enjoyed today’s project and you’re thinking about all the fun you could have with this month’s kit… you really ought to think about joining the Subscription Club! Be sure to Follow us on Facebook, Instagram, Pinterest and YouTube for lots of crafty inspiration! And if you do decide to join the Subscription Club, join our ScrapbookingStore Club Member Group on Facebook for more inspiration and to share your projects! Thanks so much for stopping by today – we’ll see you next time!

Scrappy hugs,

‘Tis The Season To Be Jolly

Hi friends! I hope your week is winding down nicely and you’re having some great Fall weather! I have another fun cat-themed Christmas card to share today for the 2023 Cat Lovers Christmas Challenge to honor our dear friend, Janis Woolbright, who organized the Cat Lovers Hops for eight years. I employed the ‘floating strips’ technique for this adorable card featuring the Lost Coast Designs Happy Cat rubber stamp which was the prize I won in last year’s Cat Lovers Hop a couple months before Janis passed away in January. So, as you can imagine, this stamp is rather special to me.

To add to the fun, there’s an additional game I’m playing in with this card called Let’s Play Tic-Tac-Toe with Gail which involves a tic-tac-toe board that Gail made from some of her favorite cards Janis made over the years using various techniques. As with a typical tic-tac-toe board, the options are up, down, across and diagonal. I went up and down, and chose the third column of patterned papers, scraps and stamp. All six of the Christmas patterned papers I used were scraps and I paired them with the Happy Cat rubber stamp.

The floating strips technique is really simple and makes for some awesome detail on cards. I cut a standard A2 size top-folding card base from Neenah Classic Crest 110# Solar White cardstock along with six strips (of varying widths) from patterned paper scraps in the PhotoPlay Here Comes Santa Collection Pack. I adhered them to a piece of acetate with Scor-Tape, leaving about the same amount of space between each strip. I trimmed the panel, added foam strips to the back (being sure they couldn’t be seen through the acetate in the front), and adhered the panel to the card base.

I stamped the Happy Cat in Memento Tuxedo Black ink on Solar White cardstock, fussy cut him and set him aside. I wrapped some GKD gold cording around the panel (between the foam strips), made a couple loops, and added three Eyelet Outlet Holiday Light Brads (prongs removed) with foam squares. I added a sentiment sticker from the PhotoPlay collection and several red gemstones.

I cut the inside panel from Solar White cardstock and embellished it with strips of patterned paper and CutCardStock Basis Black cardstock. I added another sentiment sticker and layered the panel on black cardstock.

Sharing in the following challenges:
1. 2023 Cat Lovers Christmas Challenge
2. 2023 Cat Lovers Tic-Tac-Toe Challenge
3. A Perfect Time To Craft Open Challenge: October #10-2023 – Anything Goes
4. A Place To Start: October 2023 – Anything Goes
5. ABC Christmas Challenge: U & V are for? (U for use it up – scraps)

Affiliate links are used in this post at no cost to you – I really appreciate your support! 

Products used:
CARDSTOCK/PAPER: Neenah Classic Crest 110# and 80# Solar White cardstock, CutCardStock Basis Black cardstock, PhotoPlay Here Comes Santa Collection Pack
STAMPS: Lost Coast Designs Happy Cat rubber stamp
INK: Memento Tuxedo Black ink
ACCESSORIES: Tonic Studios 12″ Guillotine Paper Trimmer, Tombow Mono Dots adhesive, MISTI stamp tool, Grafix Crystal Clear Craft Plastic, 1/4″ Scor-Tape, Gina K Designs gold cording, Eyelet Outlet Holiday Light Brads, Thermoweb medium Zots, 1/4″ double-sided foam strips, Scrapbook Adhesives 3D Foam Squares Variety Pack (small white), red gemstones

I hope you’ve enjoyed seeing this project and if you’re so inclined, we’d love to see your cat-themed Christmas project using the tic-tac-toe board! Thanks so much for stopping by today – we’ll see you next time! ;)

Scrappy hugs,

Dream Big fun fold

Hey everybody! Happy Thursday – it’s almost the weekend! I’ve popped in this morning to share another Syncopation Design inspiration project created with the super adorable and way amazing Cat Therapy stamp set! I can’t get enough of these kitties! And this stamp set has SO MUCH to offer with over 50 stamps in it! Dang! I created a bay window fold to show off this little guy (or gal) on a rainbow! This is a new-to-me fold that was showcased in a recent Splitcoast Stampers newsletter HERE. You know I’m always on the lookout to try new ones and this one is super easy and really packs a punch!

I cut the card base from Neenah Classic Crest Solar white cardstock and layering panels from Papertrey Ink Sweet Blush cardstock and assorted prints from the Echo Park My Favorite Summer Collection Kit. I stamped the sentiment and kitty on a scrap piece of Solar White cardstock, trimmed the sentiment and colored the image with alcohol markers. I cut the image with a Keep It Simple Stitched Circles Nested Die and a slightly larger circle from a coordinating print in the Summer collection. I added some Cosmic Shimmer Fluffy Stuff to the little clouds after adhering the circular panel to the card front. The final touch was stamping swirls (from the same stamp set) down both sides of the card front for a little interest.

I cut the inside panels from Solar White and Sweet Blush cardstock, added a couple stickers from the Summer collection to the inside, leaving it blank with plenty of room to write a custom message. The fun part is that this card folds completely flat for mailing!

Sharing in the following challenges:
1. A Perfect Time To Craft Open Challenge: October #10-2023 – Anything Goes
2. A Place To Start: October 2023 – Anything Goes
3. Fab ‘n’ Funky Challenges: #581 – Show Us Some Coloring
4. Use Your Stuff: #494 – Small Type

Syncopation Design products used:
Cat Therapy stamp set

Affiliate links are used in this post at no cost to you – I really appreciate your support!

Other products used:
CARDSTOCK/PAPER: Neenah Classic Crest 80# Solar White cardstock, Papertrey Ink Sweet Blush cardstock, Echo Park My Favorite Summer Collection Kit
INK: Memento Tuxedo Black ink; Arteza alcohol markers- GG00/02, RP09, Y27, YG16; Sharpie fine point white paint pen
DIES/PUNCHES: Keep It Simple Stitched Circles Nesting Dies
ACCESSORIES: Tonic Studios 12″ Guillotine Paper Trimmer, Tombow Mono Dots adhesive, Bearly Art precision craft glue, MISTI stamp tool, Big Shot, Cosmic Shimmer Puffy Stuff, Milwaukee heat tool, Stampin’ Up Mini Dimensionals

I hope you’ve enjoyed this project and are inspired to get crafty! Be sure to check out all the fun digital papers, pocket cards, elements, cut files, bundles and scrap kits, as well as clear stamps in the Syncopation Design Etsy store! And be sure to Follow on Instagram and Facebook for crafty inspiration! Thanks so much for stopping by today – we’ll see you next time!

Scrappy hugs,

Haunting mini slimline

Hey everybody! I hope you’re having an amazing week! I have a super cool ScrapbookingStore DT inspiration project to share with you today, created with the awesome October 2023 Scrapbook Kit with Upgrades! I have been having a great time creating projects with all the coordinating products in this month’s collection. Mini slimline cards are my jam these days and I created a hauntingly fun scene on this one which features papers and stickers along with a chipboard accent from the upgrades.

I cut the card base and layered frame (using the Kat Scrappiness Mini Slimline Tri-Frame Dies) from Neenah Classic Crest Solar White cardstock, and the background panel from a paper in the collection. I adhered the two houses and the truck stickers from the sticker sheet to small scraps of CutCardStock Basis White for slight dimension and fussy cut them. I built the scene with several more stickers from the sticker sheet and a chipboard bat from the upgrades, popping the truck up on a foam strip.

I cut the inside panel from Solar White cardstock and embellished it with strips of coordinating paper from the kit and a scrap of Basis White. I added a sentiment sticker from the sticker sheet and layered the panel on CutCardStock Basis Black cardstock.

Sharing in the following challenges:
1. A Perfect Time To Craft Open Challenge: October #10-2023 – Anything Goes
2. A Place To Start: October 2023 – Anything Goes
3. Crafty Gals Corner: #248 – Halloween Colors
4. Halloween Crafts All Year ‘Round: #8 – Anything Halloween Goes
5. If You Give A Crafter A Cookie: #185 – October-Black
6. Wednesday’s Creative Inspirations Challenge Blog: Autumn or Halloween

Affiliate links are used in this post at no cost to you – I really appreciate your support!

ScrapbookingStore products used:
October 2023 Scrapbook Kit with Upgrades

Other products used:
CARDSTOCK/PAPER: CutCardStock Basis Black and Basis White cardstock, Neenah Classic Crest 80# Solar White cardstock
DIES/PUNCHES: Kat Scrappiness Mini Slimline Tri-Frame Dies
ACCESSORIES: Tonic Studios 12″ Guillotine Paper Trimmer, Tombow Mono Dots adhesive, Bearly Art precision craft glue, Big Shot, 1/2″ double-sided foam strips

I hope you’ve enjoyed today’s project and you’re thinking about all the fun you could have with this month’s kit… you really ought to think about joining the Subscription Club! Be sure to Follow us on Facebook, Instagram, Pinterest and YouTube for lots of crafty inspiration! And if you do decide to join the Subscription Club, join our ScrapbookingStore Club Member Group on Facebook for more inspiration and to share your projects! Thanks so much for stopping by today – we’ll see you next time!

Scrappy hugs,