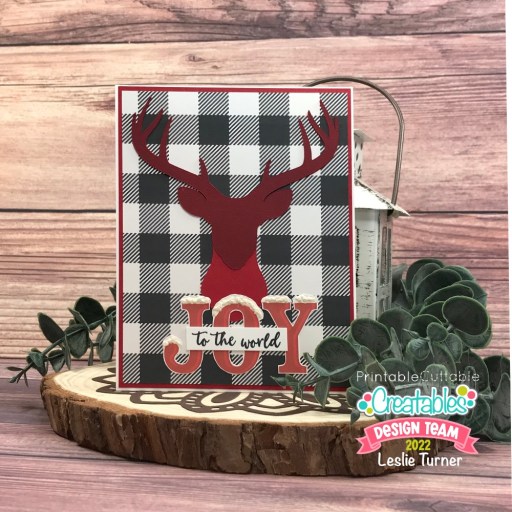
Hi everyone! I hope you’re having a beautiful weekend! Thanksgiving is almost upon us and we have so much to be thankful for! We just moved into our cabin and although it nearly did us old folks in (bahahaha!) we are finally moved and it feels great. The cabin isn’t completely finished because we were trying to beat the snow so we’ll finish it in the Spring when the snow is gone. We didn’t beat the snow, by the way… it snowed twice, bringing everything to a screeching halt and causing some delays. I’m stoked to be back on the Printable Cuttable Creatables blog today with another awesome DT inspiration project! I created another Christmas card to add to the pile featuring background paper from the Buffalo Plaid Digital Paper Pack along with the Deer Head Silhouette Free SVG Cut File and Snow Covered Christmas Alphabet Set SVG Cutting Files & Clipart!
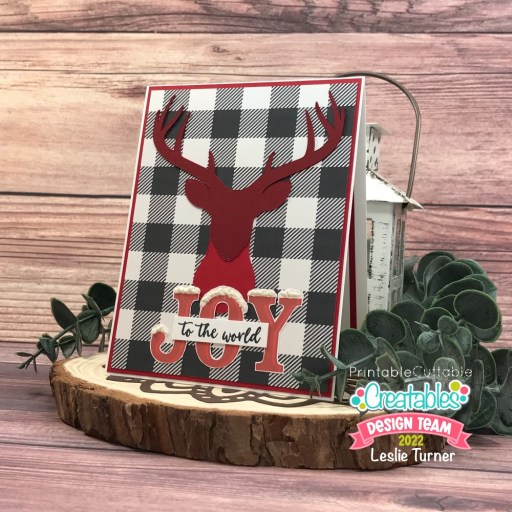
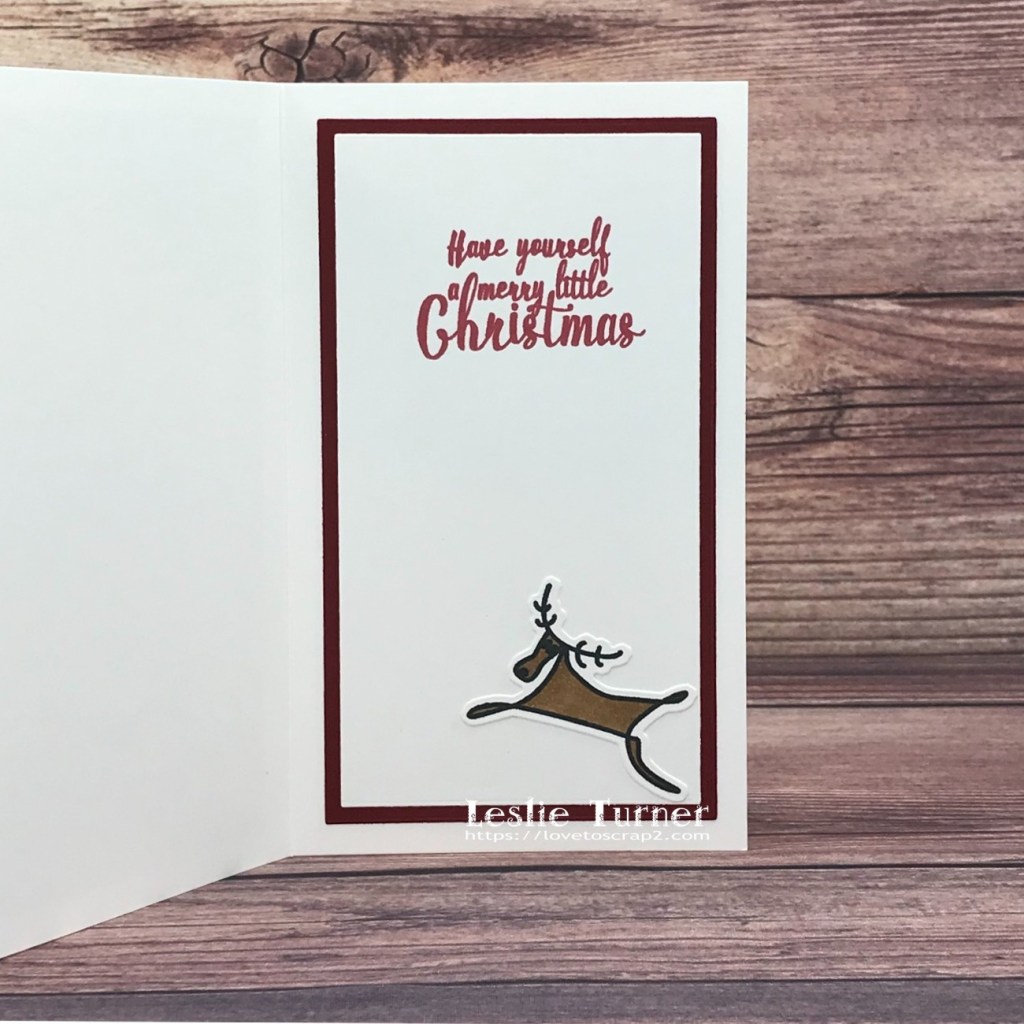
I cut a standard A2 size top-folding card base from Neenah Classic Crest 110# Solar White cardstock. I printed black and white buffalo plaid digital paper from the Buffalo Plaid Digital Paper Pack on 65# Hammermill copy paper, trimmed it for the front panel, and adhered it to a layering panel cut from CutCardStock Pop Tone Wild Cherry cardstock. I used my Scan N Cut and the Deer Head Silhouette Free SVG Cut File to cut the deer head from CutCardStock Pop Tone Wild Cherry and Basis Dark Red cardstock, assembled it, and adhered it to the front panel. I printed the J, O and Y from the PNG Clipart file in the Snow Covered Christmas Alphabet Set SVG Cutting Files & Clipart, fussy cut them, and added faux snow with my Marvy Uchida Snow Marker and heat tool. I stamped the sentiment from the STAMPlorations Joy stamp set in Memento Tuxedo Black ink on a scrap piece of Solar White cardstock, trimmed it, and adhered it to the center of the JOY letters.
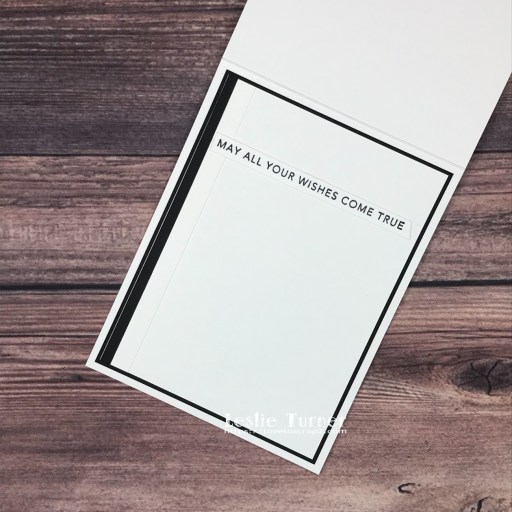
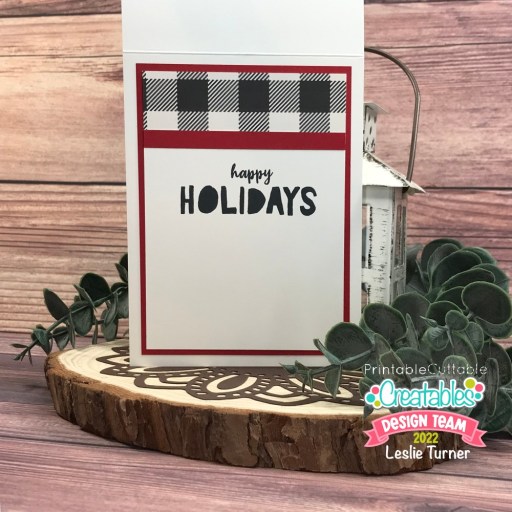
I cut the inside panel from 80# Solar White cardstock and embellished it with the buffalo plaid digital paper and Pop Tone Wild Cherry cardstock used on the front. I stamped the sentiment (also from the STAMPlorations Joy stamp set) in black ink and layered the panel on Wild Cherry cardstock.
Affiliate links are used in this post at no cost to you – I really appreciate your support!
Printable Cuttable Creatables products used:
Buffalo Plaid Digital Paper Pack
Deer Head Silhouette Free SVG Cut File
Snow Covered Christmas Alphabet Set SVG Cutting Files & Clipart
Other products used:
Cardstock/Paper: 65# Hammermill copy paper, Neenah Classic Crest 110# and 80# Solar White cardstock, CutCardStock Pop Tone Wild Cherry and Basis Dark Red cardstock
Stamps: STAMPlorations Joy stamp set
Ink: Memento Tuxedo Black ink
Accessories: Brother Scan N Cut, Tonic Studios 12″ Guillotine Paper Trimmer, Bearly Art precision craft glue, Marvy Uchida Snow Marker, MISTI stamping tool
I hope you’ve enjoyed today’s project and you’re inspired to get out that electronic cutting machine! Be sure to check out all the fun goodies in the Printable Cuttable Creatables store – you’ll have a blast and there are tons of freebies to get started! Save 15% off your order at Printable Cuttable Creatables by using coupon code love2scrap15 at checkout! Be sure to Follow us on Facebook, Instagram, Pinterest, Twitter and YouTube for lots of crafty inspiration! And while you’re at it, join our Crafting with Printable Cuttable Creatables Facebook Group for more inspiration and to share your projects! Thanks so much for stopping by today – we’ll see you next time!
Scrappy hugs,