Thanks

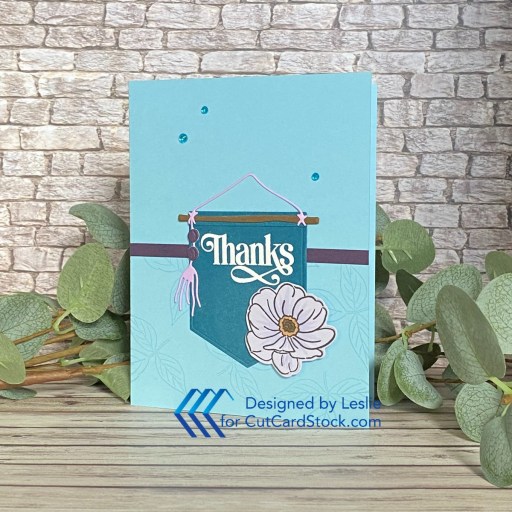
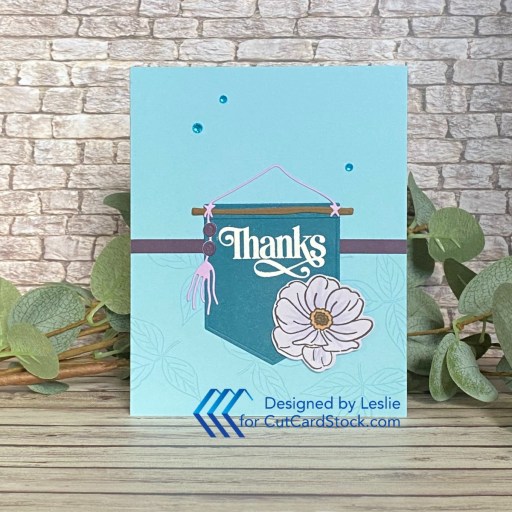
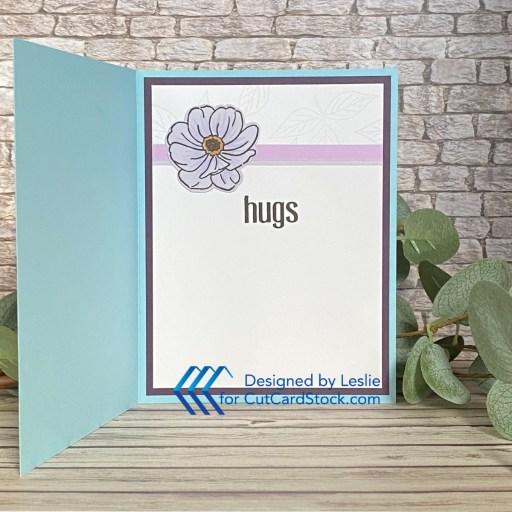
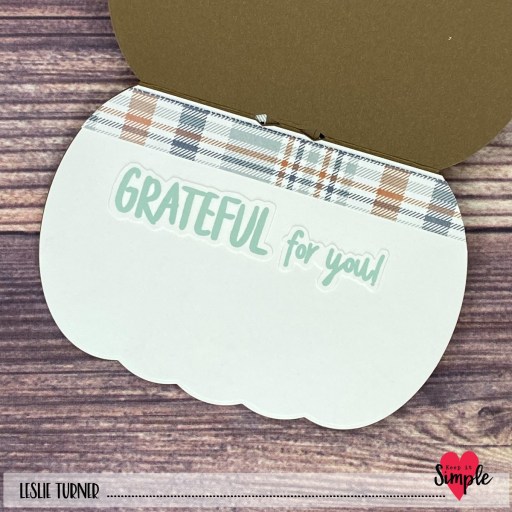
Hey everybody, happy Friday! If you’re in the States, I hope you’re having a wonderful July 4th holiday and you’re looking forward to lots of fun this long weekend! Our new challenge is live this morning over at Creative Creases Challenge and I’m delighted to share my DT inspiration project for Challenge #105. I am an absolute FIEND when it comes to fun folds. What’s wrong with me?! I don’t even care about making a normal A2 card anymore. This tri-fold hidden door fun fold is a delight to make and really packs a punch. This is the second one of these I’ve made – I saw it on Pinterest a while back and it led me to several different videos so it’s an easy one to find.

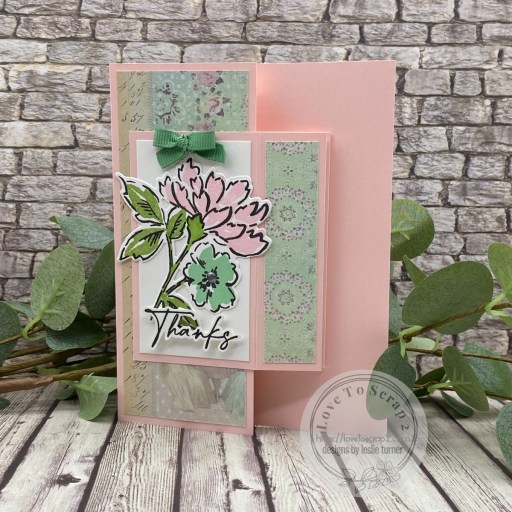
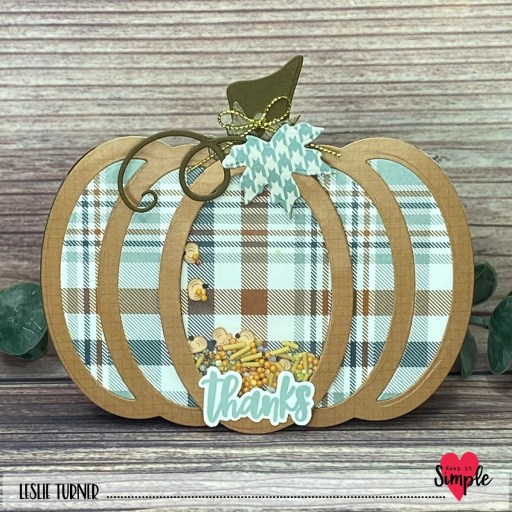
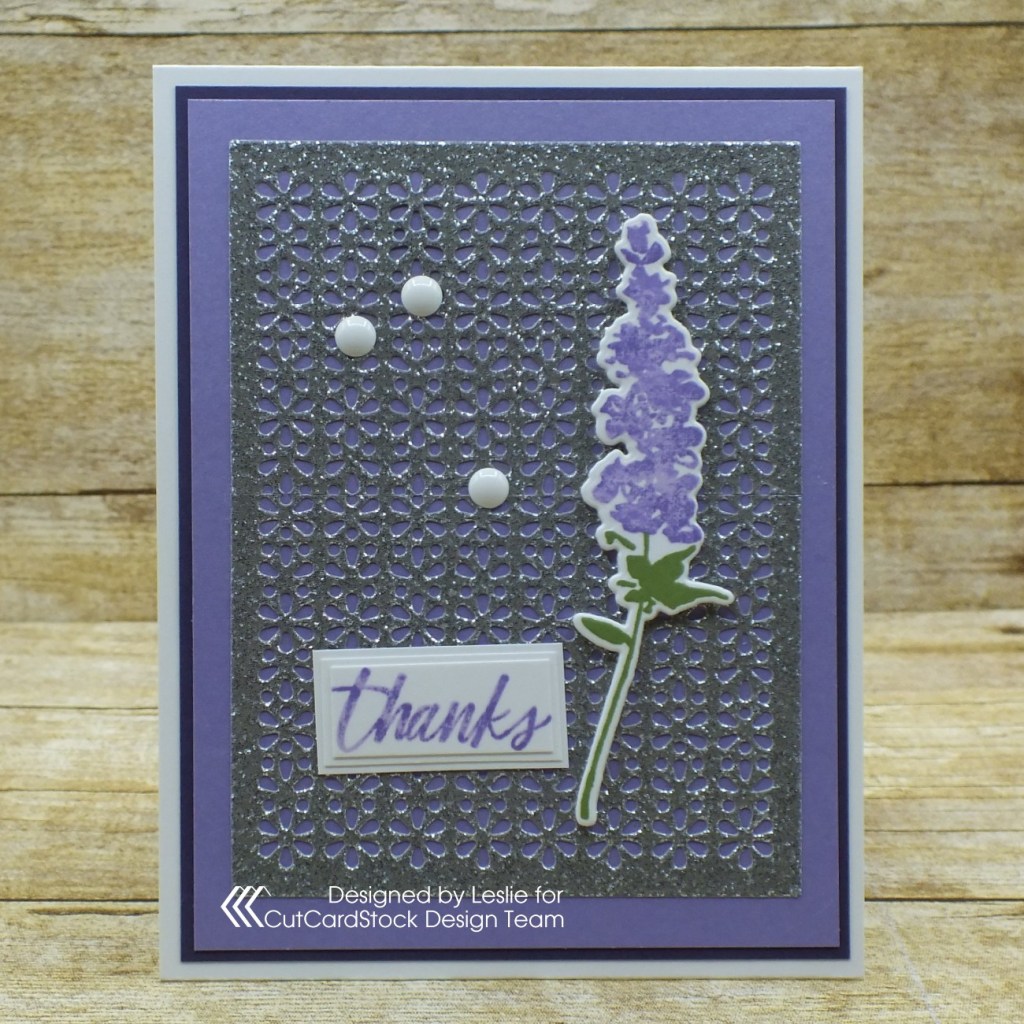
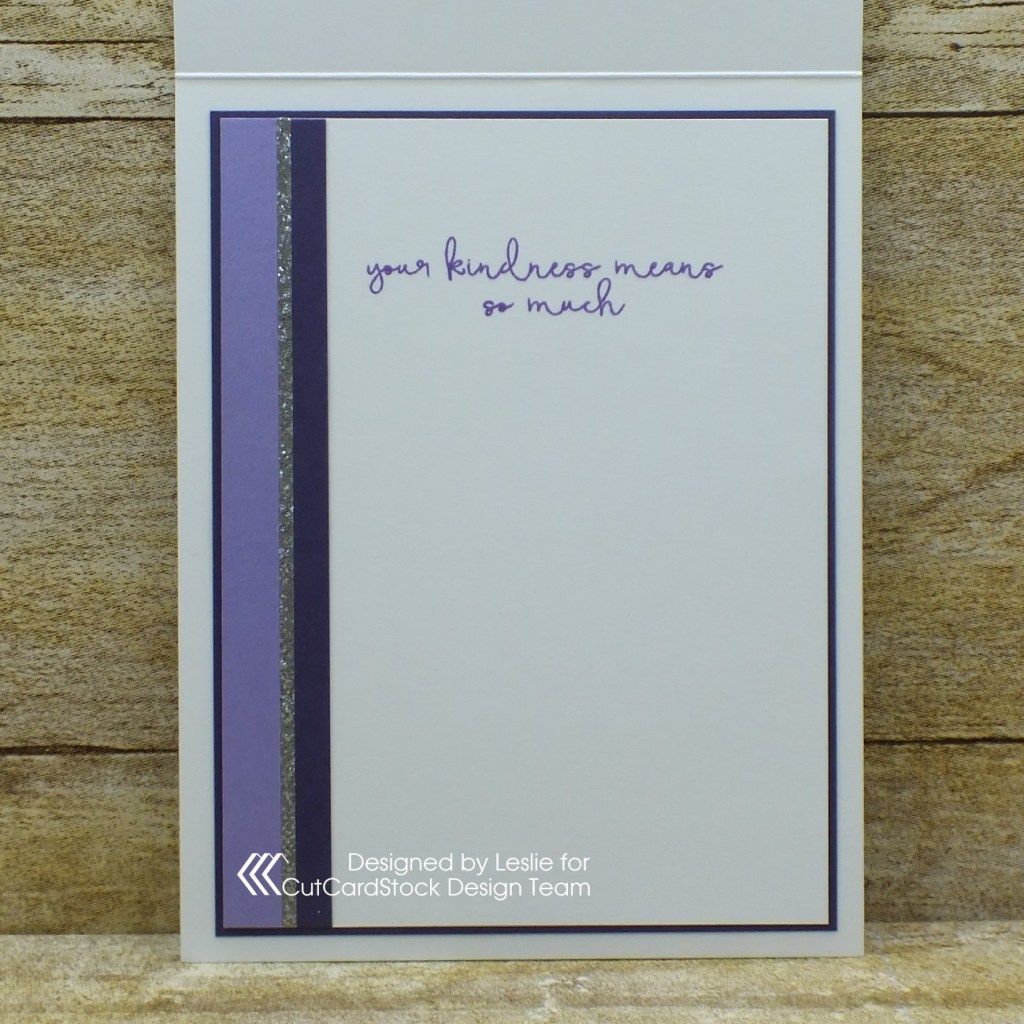
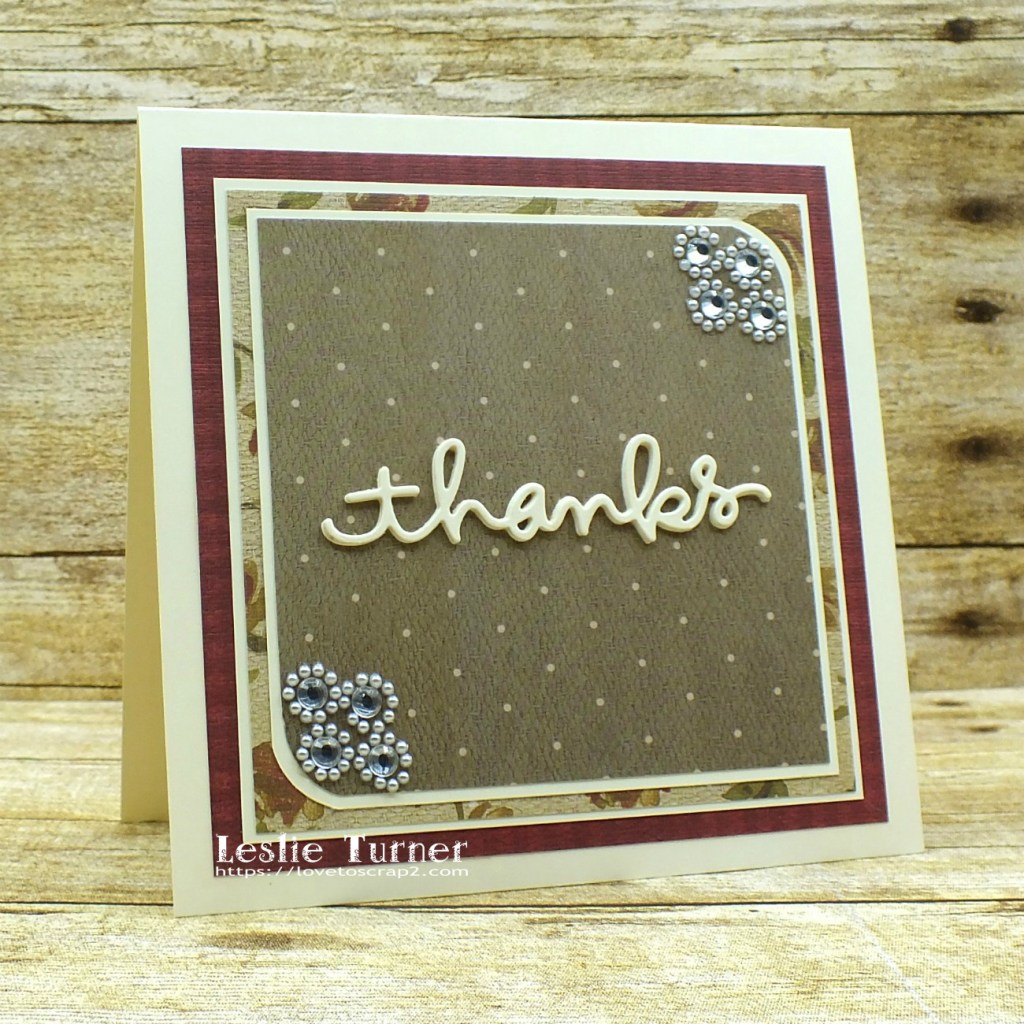
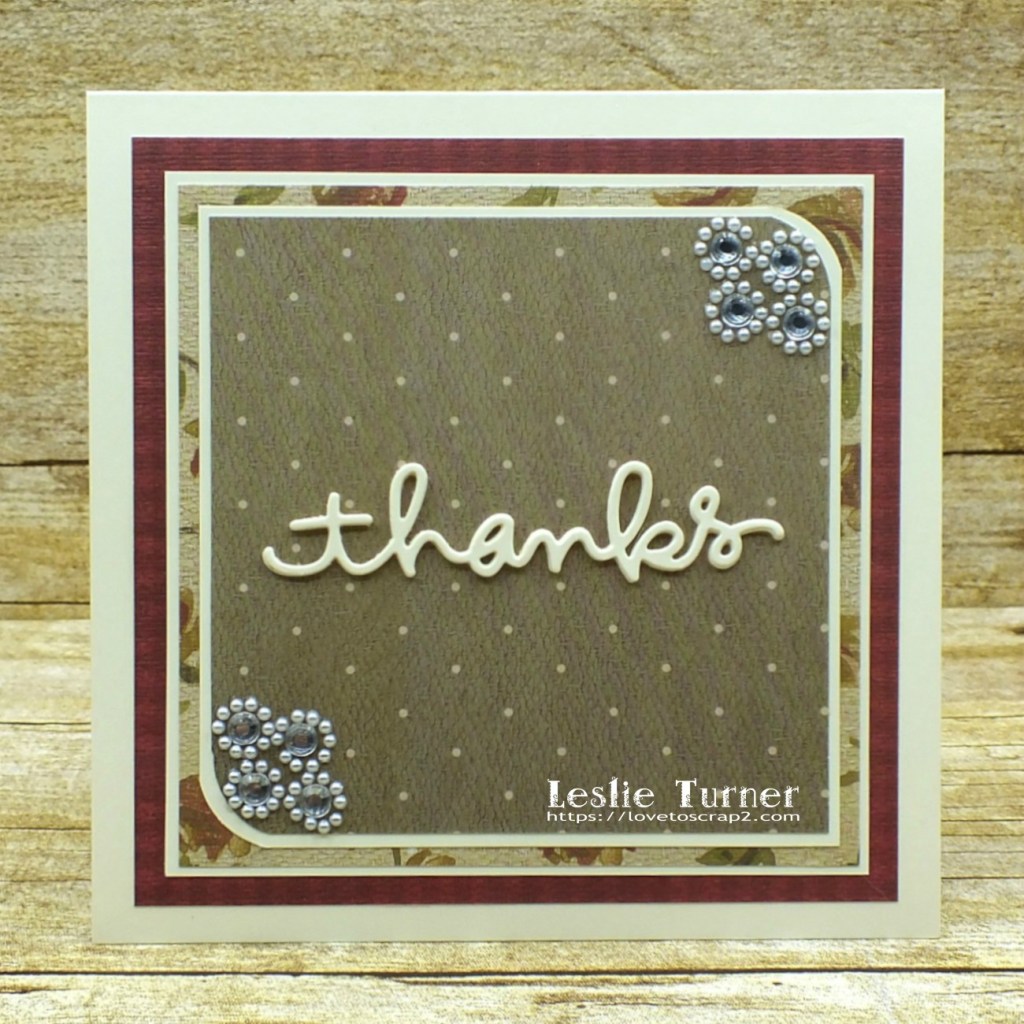
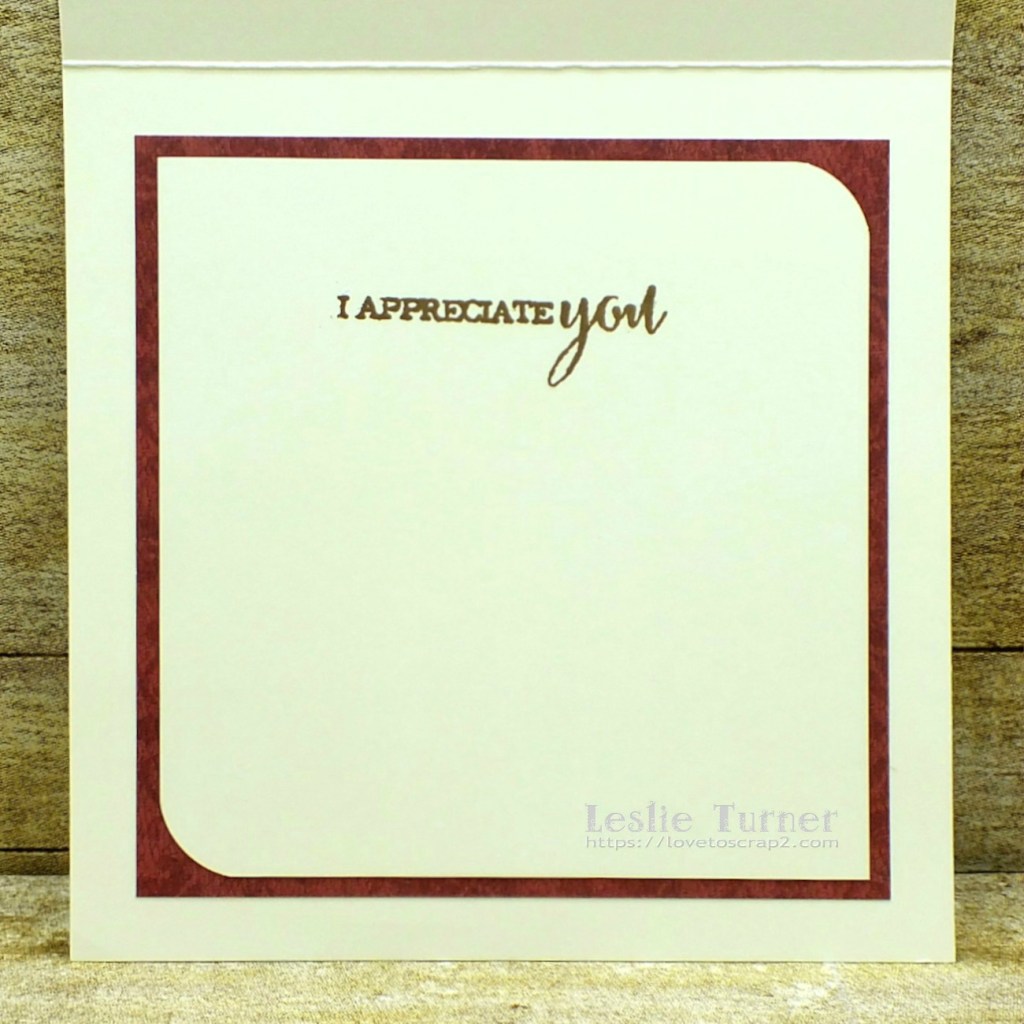
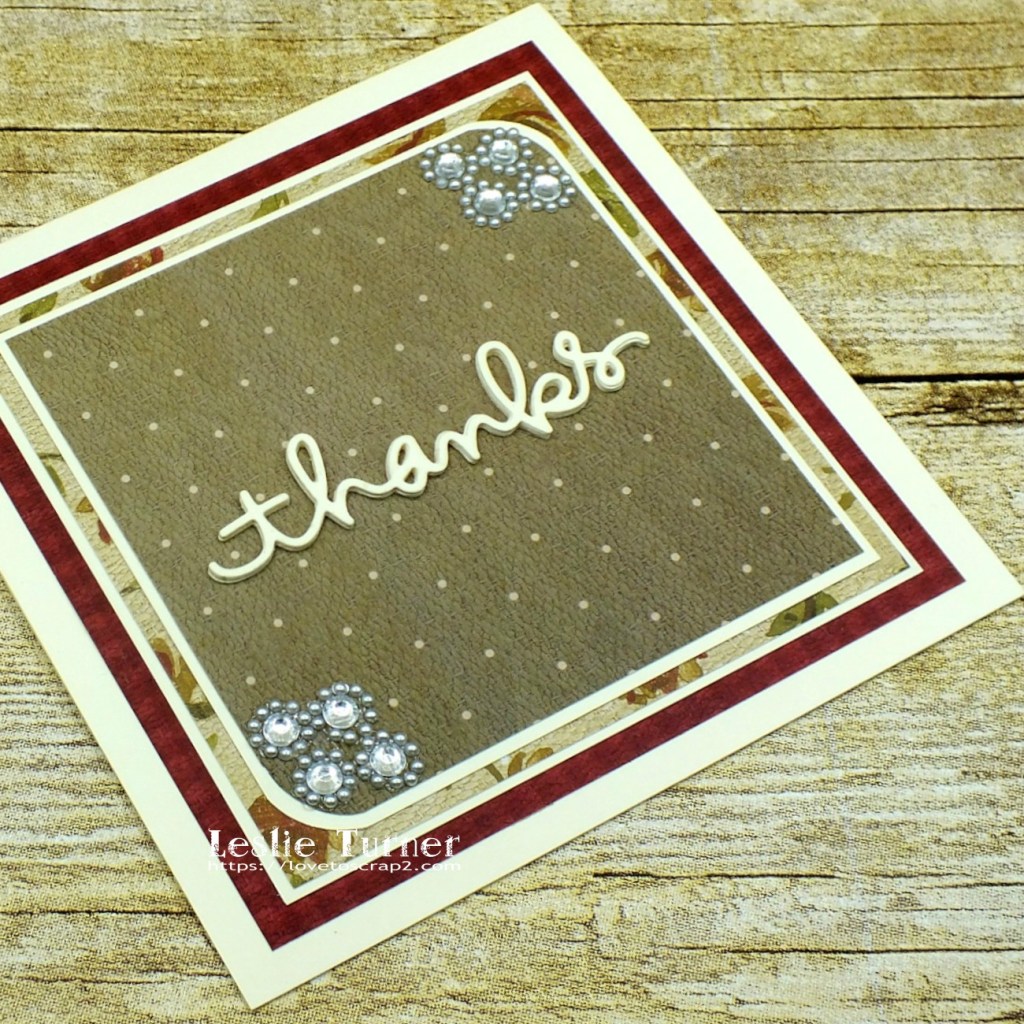
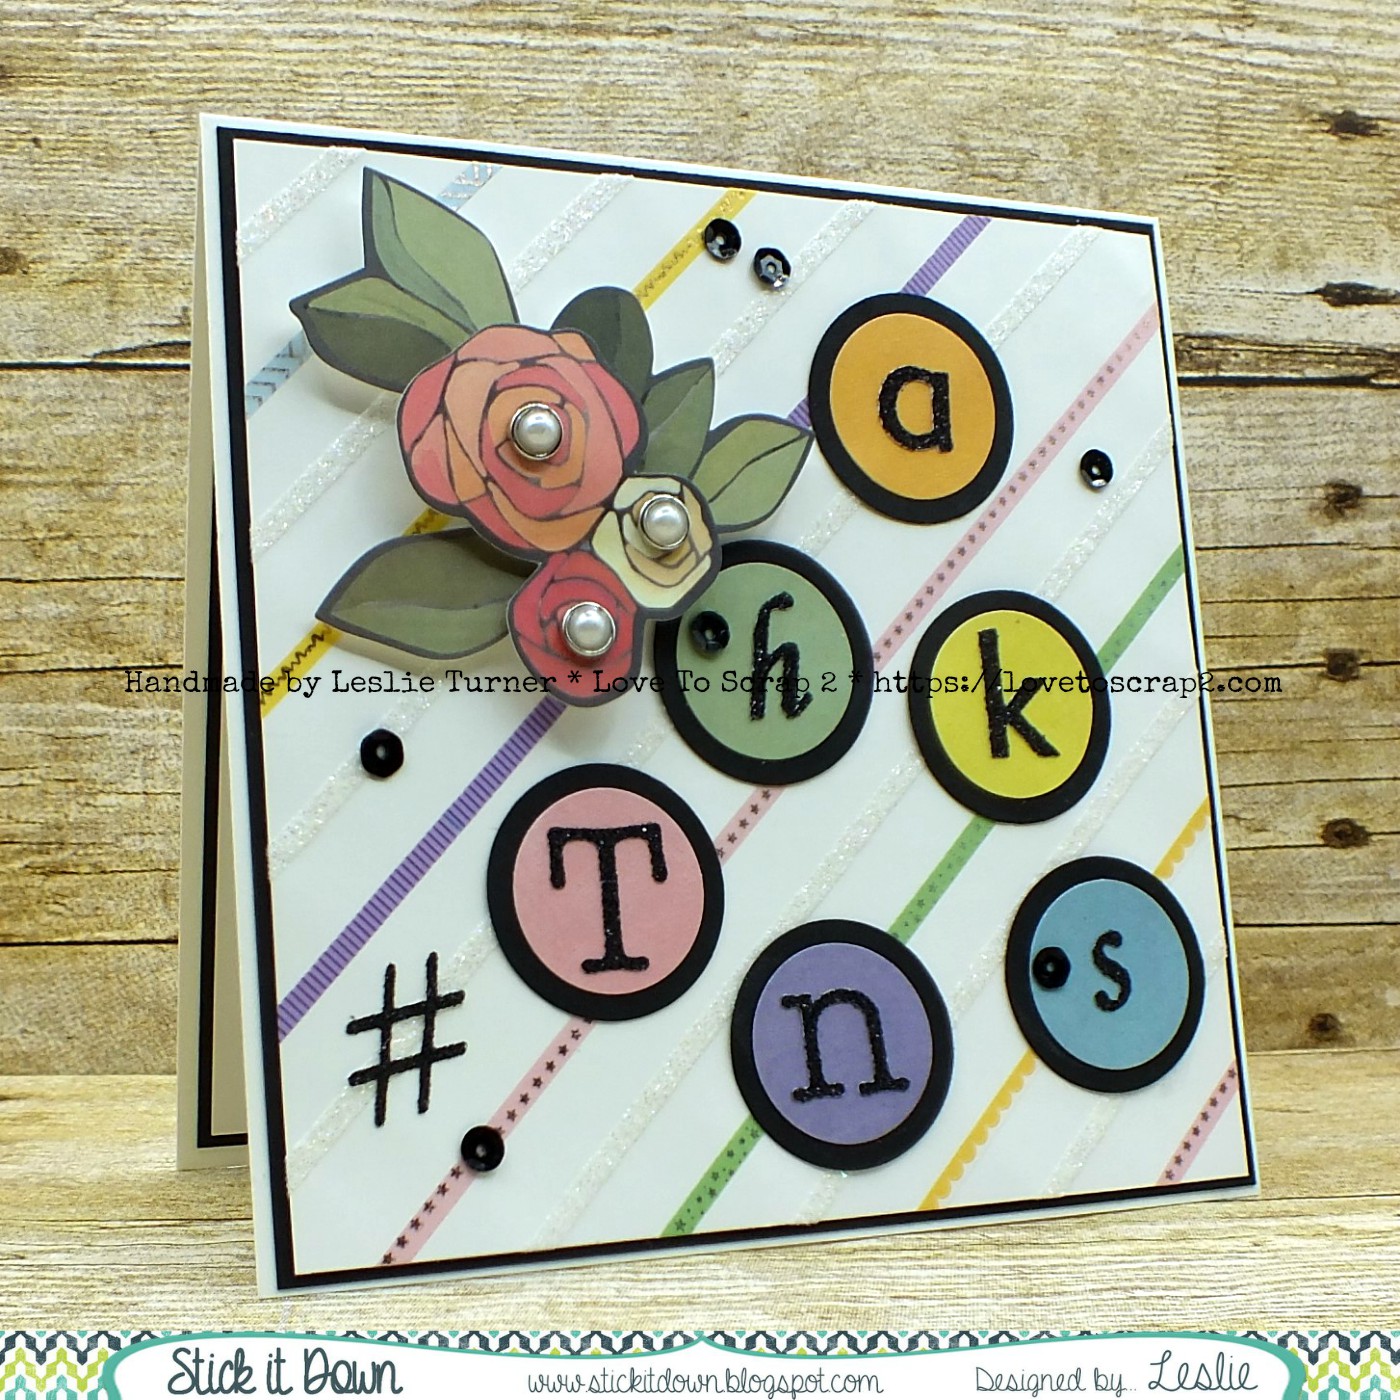
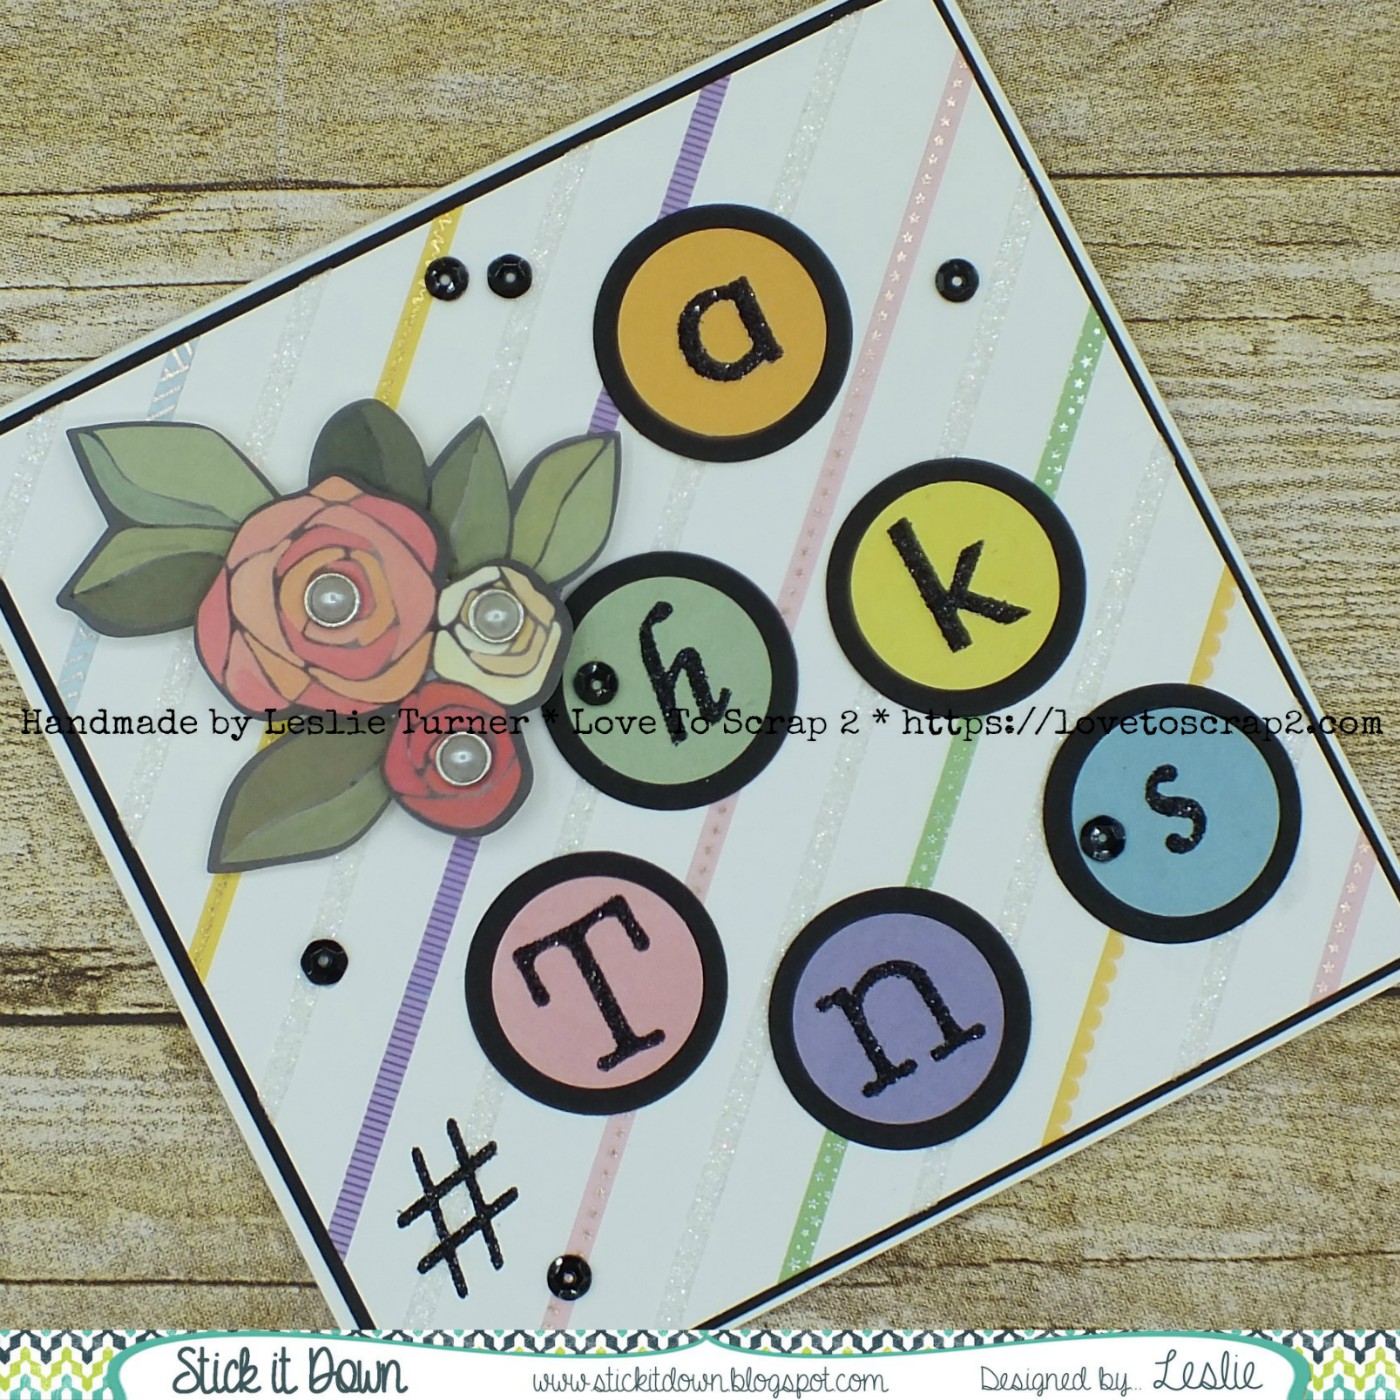
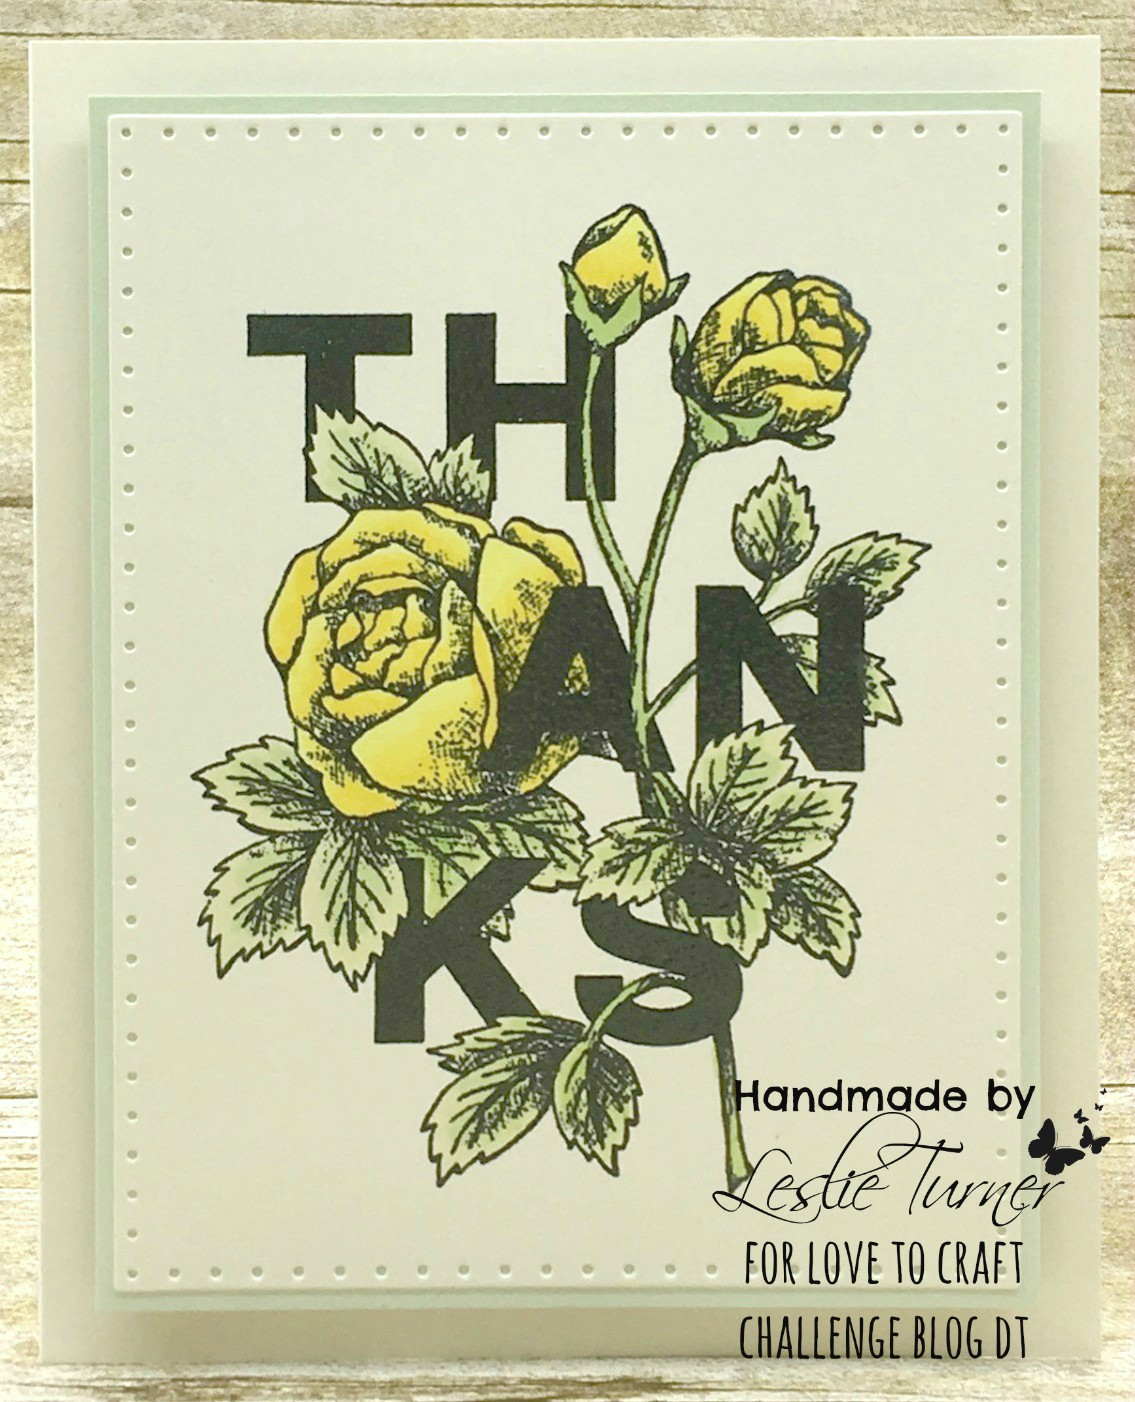
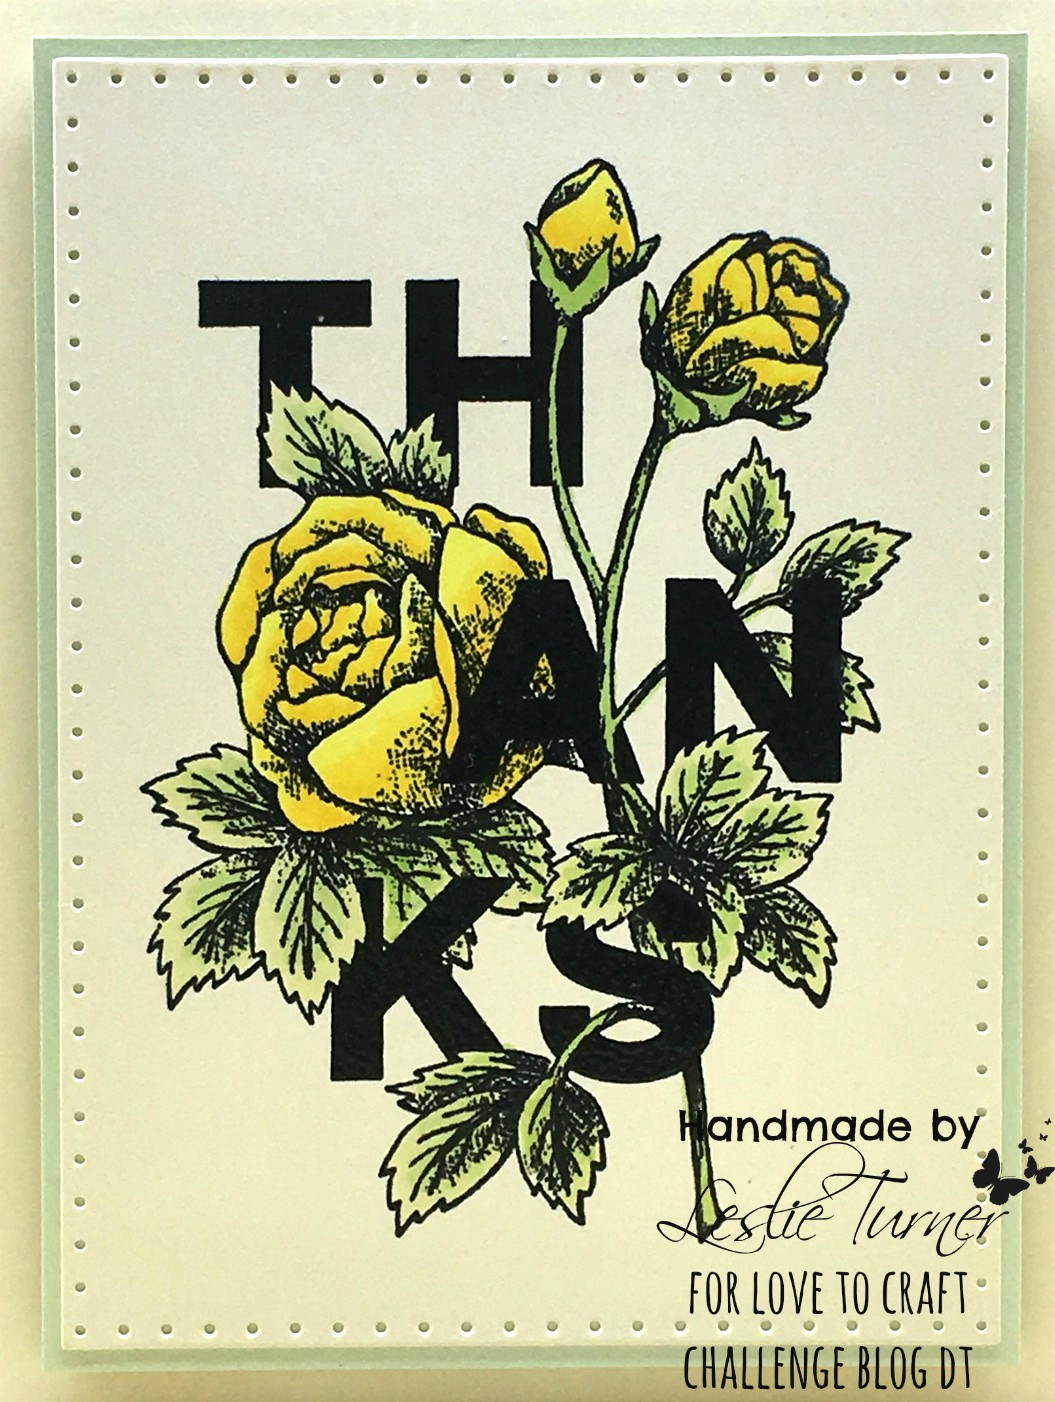
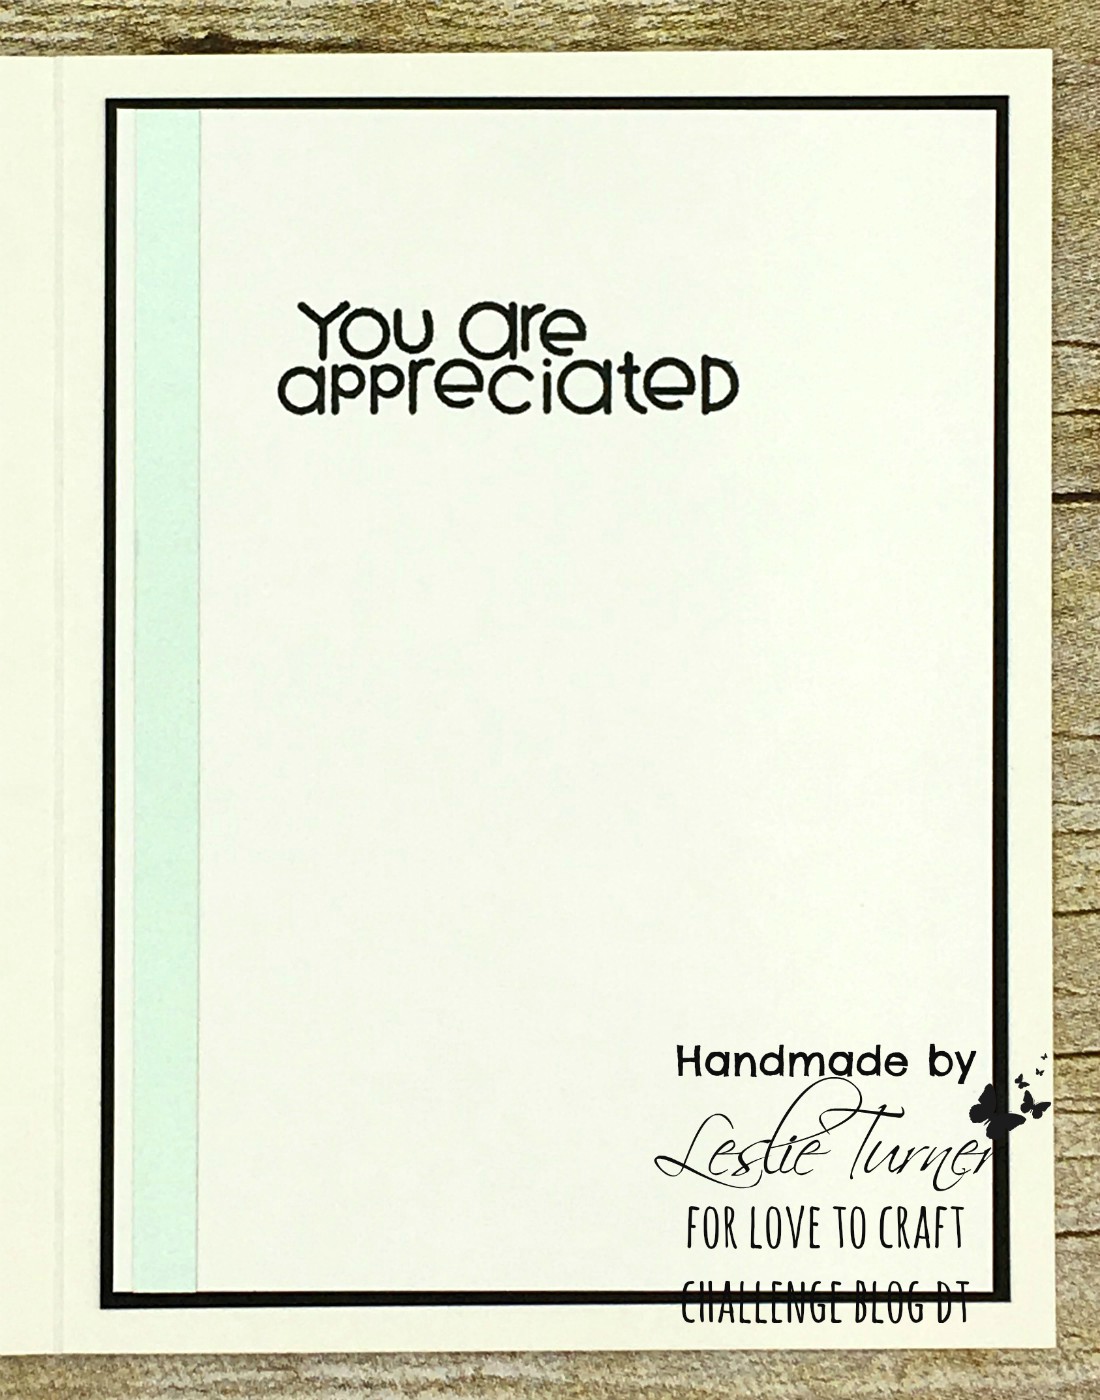
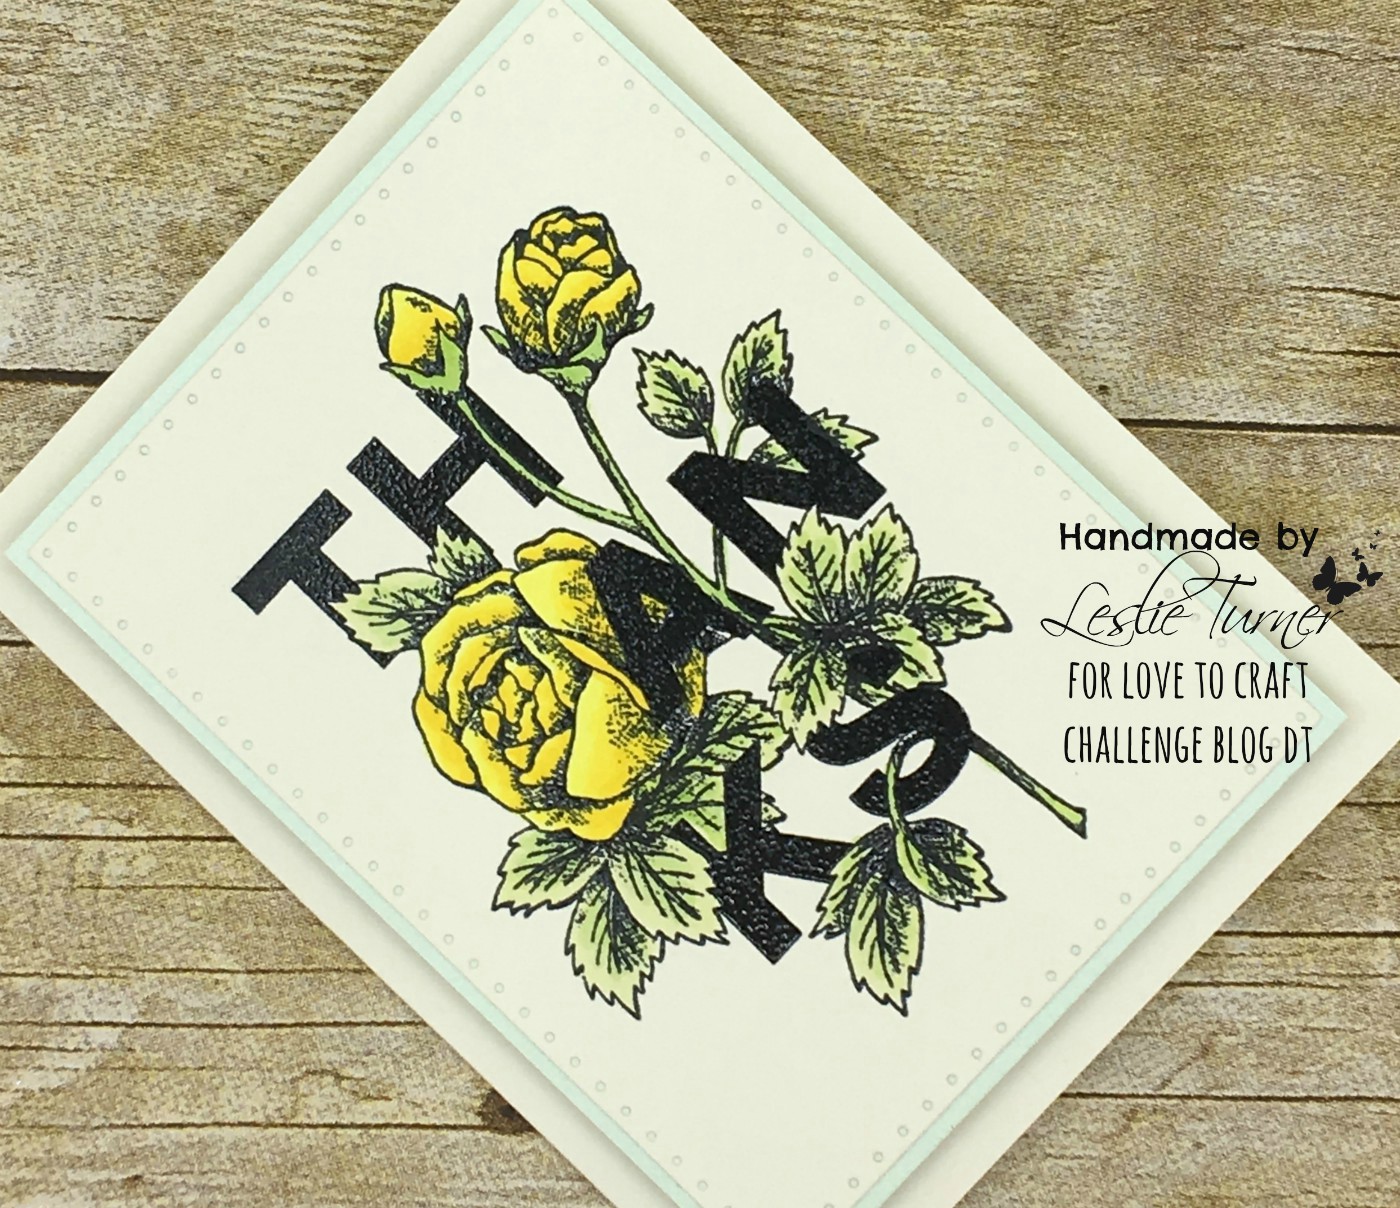
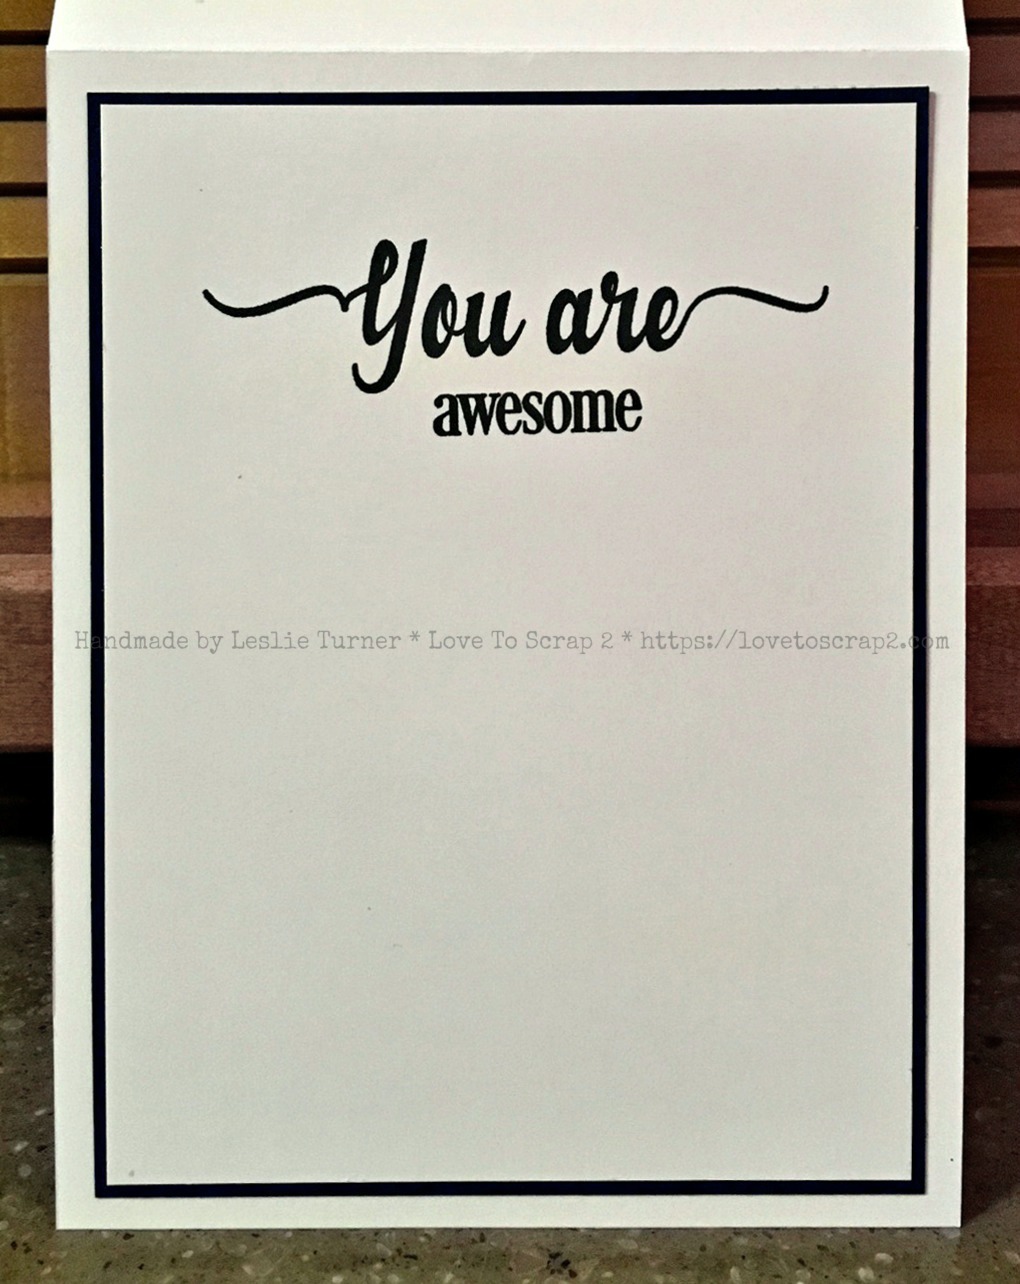
I cut the card base and flaps from CutCardStock Lessebo Blossom Pink cardstock along with layering panels from coordinating prints in the Melissa Frances 5th Avenue 6×6 paper pad and Neenah Classic Crest Solar White cardstock. I used stamps from the Stampin’ Up Hand-Penned Petals and Charming Sentiments stamp sets along with the coordinating dies. These images and sentiments were stamped in Versafine Onyx Black ink, Catherine Poole Mint To Be and Pixie Dust inks, and Memento Angel Pink and Bamboo Leaves inks. I added a little bow made from Keep It Simple Back To Basics Jade Ribbon, tied with my little wooden bow maker.

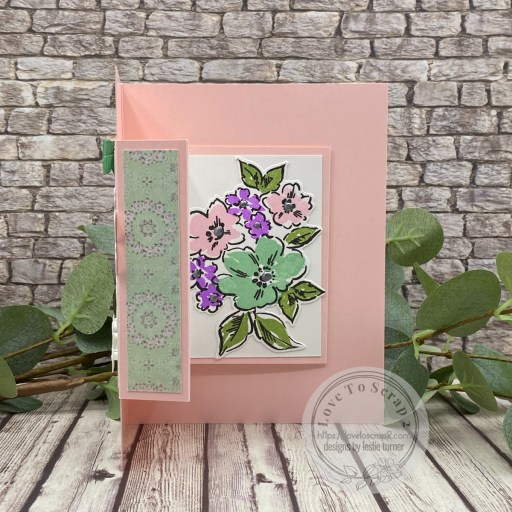
I embellished all the panels with either stamped or die cut florals. Totally LOVE how this turned out! It’s a fun one that you know you need to try! ;)

Affiliate links are used in this post at no cost to you – I really appreciate your support! 

Products used:
CARDSTOCK/PAPER: CutCardStock Lessebo Blossom Pink cardstock, Neenah Classic Crest Solar White cardstock, Melissa Frances 5th Avenue 6×6 paper pad
STAMPS: Stampin’ Up Hand-Penned Petals stamp set, Stampin’ Up Charming Sentiments stamp set
INK: Versafine Onyx Black ink; Catherine Poole Mint To Be and Pixie Dust inks; Memento Angel Pink and Bamboo Leaves inks; Bic Mark-It Fine Point marker- Margarita Green
DIES/PUNCHES: Stampin’ Up Penned Flowers dies, Stampin’ Up Sentiment Silhouettes dies
ACCESSORIES: Fiskars 12″ ProCision Rotary Bypass Paper Trimmer, Bearly Art precision craft glue, My Sweet Petunia Precision Glue Press, Mini MISTI, Big Shot, Scrapbook Adhesives 3D Foam Squares, Scrapbook Adhesives E-Z Runner Permanent Strips, Keep It Simple Back To Basics Jade Ribbon, small wooden bow maker, Nuvo Crystal Drops Liquid Mercury

I hope you’ve enjoyed seeing this project and will link up with us this time! We would love to see what kind of fun folds you’re working on! Thanks so much for stopping by today – we’ll see you next time! ;)

Scrappy hugs,

Thanks

Hi everyone! Happy Wednesday – I hope you’re having a great week! I’m up on the CutCardStock blog today with a tutorial for making a pretty watermarked thank you card. Our Lessebo cardstock is on sale this month and I used Salt Water Blue, Amazon Dark Teal, Coffee Bean, Aubergine, Lilac and Amethyst from that line, along with Neenah Classic Crest Solar White, to make this card. I’ve mentioned previously that Lessebo is my favorite cardstock. It replaced the Basis line last year, and the weight and colors are glorious. It makes THE best cards! I love a teal and purple color combo, so that’s the direction I went. I also did a little Versamark watermarking on the front and inside – a detail that’s really subtle but sure adds to the ‘wow’ factor!

I cut a standard A2 side-folding card base from Lessebo Salt Water Blue. I masked off the top portion of the front of the card base and stamped a leaf image from the Altenew Mini Delight: Celebratory Banner stamp set in Versamark ink randomly over the bottom portion. I know that Versamark is a watermark ink but in all the years I’ve been crafting, I’ve never used it for watermarking! I’m serious… can you imagine?! I added a narrow strip of Lessebo Aubergine cardstock across the top of the watermarked portion.

Next, I die cut the banner and floral elements from Lessebo Amazon Dark Teal, Lessebo Coffee Bean, Lessebo Lilac and Lessebo Amethyst cardstock. I heat embossed the Thanks sentiment (from the same stamp set) in Hero Arts White Embossing Powder. I gave the flowers some highlights with a BV31 Pale Lavendar Copic Ciao alcohol marker, assembled the banner, and adhered it to the card front. The finishing touch was adding a few small teal gemstones.

I cut the inside panel from Neenah Classic Crest 80# Solar White cardstock, masked off the bottom three-quarters of the panel. and stamped the same leaf image on the top portion of the panel. I added two narrow strips of Lessebo Lilac and Lessebo Amethyst cardstock, and then another flower. I had the Altenew Mini Delight: Watering Daisies stamps and dies out on my desk from another project, and used the ‘hugs’ stamp for the inside sentiment on this card. I layered the panel on Lessebo Aubergine cardstock, which completed the card.

Affiliate links are used in this post at no cost to you – I really appreciate your support!

CutCardStock products used:
Lessebo Salt Water Blue cardstock
Lessebo Amazon Dark Teal cardstock
Lessebo Coffee Bean cardstock
Lessebo Aubergine cardstock
Lessebo Lilac cardstock
Lessebo Amethyst cardstock
Neenah Classic Crest 80# Solar White cardstock

Other products used:
STAMPS: Altenew Mini Delight: Celebratory Banner Stamps; Altenew Mini Delight: Watering Daisies
INK: Versamark, Versafine Onyx Black ink; Copic Ciao- BV31 Pale Lavender, E33 Sand , E35 Chamois
DIES/PUNCHES: Altenew Mini Delight: Celebratory Banner Dies
ACCESSORIES: Fiskars 12″ ProCision Rotary Bypass Paper Trimmer, Bearly Art precision craft glue, My Sweet Petunia Precision Glue Press, Mini MISTI, Big Shot, Hero Arts White Embossing Powder, Milwaukee Heat Tool, Scrapbook Adhesives 3D Foam Squares, small teal gemstones

I hope you’ve enjoyed today’s project and you’re inspired to get crafty! Be sure to check out all the awesome cardstock and other goodies at CutCardStock (adhesives, labels, stickers, pens, watercolors and ribbon to name a few). And head on over to the CutCardStock Facebook Page and for more inspiration! Also, be sure to join our Creating with CutCardStock Facebook Group for even more crafty inspiration! Thanks so much for stopping by today – we’ll see you next time!

Scrappy hugs,

thanks

Hey everybody, Happy Tuesday! I’m stoked to share a Keep It Simple DT inspiration project with you today, created with our new KIS Cuts Pumpkin dies. This is THE most fun set of dies – I created a shaped card with a shaker in the middle portion, and I think it turned out so cute! Shaped cards are always a hit and the shaker portion just adds to the Fun Factor!

Using the KIS Cuts Pumpkin dies, I cut the pumpkin layers and leaves from coordinating prints in the Farmhouse Fall 6×9 Collection and Cardstock Packs, along with the card base, vine and stem from CutCardStock Lessebo Coffee Bean cardstock. I created a shaker in the center portion of the pumpkin using Polymer Clay Coffee Sprinkles, Polymer Clay Light Brown Pumpkins, 2mm Matte Orange Beads, and 2mm Caviar Glass Fall Change beads (all from the Sprinkles line). The Fall Change Caviar Glass beads haven’t hit the store yet, so stay tuned for those. I added a sentiment (from the Back To Basics Thank You Sentiments stamp set) stamped in Catherine Pooler Hot Tube ink which I fussy cut. The finishing touch on the front was adding a gold cord bow.

Using the same dies, I cut the inside panel from Solar White cardstock and embellished it with a scrap piece of the plaid paper used on the front. I stamped another sentiment from the same Thank You Sentiments stamp set in the Hot Tub ink, fussy cut it and added it to the inside.

Keep It Simple products used:
KIS Cuts Pumpkin dies
Farmhouse Fall 6×9 Collection Pack
Farmhouse Fall 6×9 Cardstock Pack
Back To Basics Thank You Sentiments stamp set
Back To Basics Shaker Basics – Foam and Acetate Pack
Sprinkles – Polymer Clay Coffee Sprinkles
Sprinkles – Polymer Clay Light Brown Pumpkins
Sprinkles – Beads 2mm Matte Orange
Sprinkles – Beads 2mm Caviar Glass Fall Change (coming soon)

Affiliate links are used in this post at no cost to you – I really appreciate your support!

Other products used:
CARDSTOCK/PAPER: CutCardStock Lessebo Coffee Bean cardstock, Neenah Classic Crest 80# Solar White cardstock
INK: Catherine Pooler Hot Tub ink
ACCESSORIES: Fiskars 12″ ProCision Rotary Bypass Paper Trimmer, My Sweet Petunia Precision Glue Press, Nuvo Deluxe Adhesive, MISTI stamp tool, Big Shot, 1/8″ red liner tape, GKD gold cording, small wooden bow maker, cordless glue gun

I hope you’ve loved seeing this project as much as I loved creating it and you’re inspired to get crafty! Be sure to check out ALL the fun goodies in the Keep It Simple online store! Save 10% on your entire order when you shop online using code LoveToScrap2 at checkout! There is no minimum purchase requirement and no usage limits, AND it combines with product, order, and shipping discounts! Is that cool, or what?! Be sure to Follow us on Facebook, Instagram, and Pinterest for lots of crafty inspiration! Thanks so much for stopping by today – we’ll see you next time!

Scrappy hugs,

Thanks

Happy Friday, friends! I’m thrilled to be back on the CutCardStock blog today with an awesome DT inspiration project featuring more of the amazing Glitter cardstock that’s on sale this month so be sure to get some! Affiliate links are used in this post at no cost to you. I really appreciate your support! I created a pretty thank you card featuring a lacy glittery panel with a single lavender bud.

I cut a standard A2 size top-folding card base from Neenah Classic Crest Solar White 110# cardstock along with layering panels from Stardream Metallic Amethyst cardstock and Basis Dark Purple cardstock which I adhered together. I die cut two lacy panels from Silver Glitter cardstock, trimmed the ends off of each and butted them together to make one longer panel. I stamped and die cut the lavender bud and layered it on three more plain die cuts for some dimension. I stamped the sentiment and layered it, then added three white enamel dots to finish the front.

I cut the inside panel from Neenah Classic Crest 80# Solar White cardstock and embellished it with strips of the amethyst, silver glitter and dark purple cardstock, stamped the sentiment in purple ink and layered the panel on the dark purple cardstock.

And one more look… super happy with how this turned out! These purples are so pretty, and that silver glitter cardstock is amazing!

Sharing in the following challenges:
1. 613 Avenue Create: #4 – Anything Goes w/ optional In The Garden
2. A Perfect Time To Craft Open Challenge: #4-2021 – Anything Goes
3. A Place To Start: #4 – Anything Goes / Make It Elegant
4. Classic Design Challenge: #4 April Birthday Challenge – Anything Goes
5. Crafty Calendar Challenge: April Challenge – Easter or Spring
6. Creative Moments: #213 – Anything Goes
7. Lemon Shortbread Challenge Blog: #144 – Anything Goes
8. Let’s Craft and Create: #170 – Anything Goes + Add Flowers
9. Sparkles Monthly Challenges: #139 – April Showers Bring…
10. The Crafter’s Cafe Challenge Blog: #264 – Flowers
11. The Outlawz Twisted Thursday Challenge: Anything Goes w/ optional Twist of Signs of Spring

CutCardStock products used:
Neenah Classic Crest 110# and 80# Solar White cardstock
Silver Glitter cardstock
Stardream Metallic Amethyst cardstock
Basis Dark Purple cardstock

Other products used:
Stamps: Altenew Lavender Bud stamp set and Build-A-Flower Hibiscus stamp set
Ink: Memento Bamboo Leaves, Lulu Lavender and Grape Jelly ink
Dies/Punches: Altenew Lavender Bud die and Lacy Panel die
Accessories: Bearly Art precision craft glue, Tombow Mono permanent adhesive, Eyelet Outlet White Enamel Dots

I hope you’ve enjoyed today’s project and you’re inspired to get crafty! Be sure to check out all the awesome cardstock and other goodies at CutCardStock (adhesives, labels, stickers, pens, watercolors and ribbon to name a few). And head on over to the CutCardStock Facebook Page for more inspiration! Thanks so much for stopping by today – we’ll see you next time!

Scrappy hugs,
lesliesig

thanks

Hello again, peeps! Sending lots of smiles your way! I’m back with another card I created for The Outlawz Challenges – this one is for the Wednesday Sketch Challenge and we were given this beautifully simple sketch to follow!

Leigh SB Designs is our sponsor this month so come on over and play! I created a pretty thank you card – I always say one can never have too many of these on hand! This one was a lot of fun! Sketches, in general, are a lot of fun because they take most of the guess-work out of designing, and we can all use that occasionally!

I pulled out one of my favorite cardstock stacks to use for the layers on this card. Every print in the stack coordinates so you always have a beautiful card when using this cardstock! I cut an ivory card base, layered all the printed pieces on ivory cardstock, and created a stacked die cut sentiment from ivory cardstock to pull it all together. I finished off the front with some bling I’ve had in my stash forever that’s never seen the light of day!

I cut the inside panel to match the front, stamped the sentiment, and layered it on some of the red print used on the front.

And one more peek… I’m absolutely loving how this turned out! Such an amazing sketch!

Sharing in these additional challenges:
1. A Perfect Time To Craft Open Challenge: #6-2020 – Anything Goes
2. Classic Design Challenge: #6-2020 – Anything Goes
3. Crafty Catz Challenge: #509 – Anything Goes w/optional CAS
4. Let’s Craft and Create: #160 – Anything Goes w/optional Punch It (playing twist- corner rounder)
5. Through The Purple Haze: #168 – Wedding, Anniversary or Anything Goes

Products used:
Cardstock/Paper: Neenah Classic Crest Baronial Ivory cardstock, The Paper Studio Mirabelle cardstock
Stamps: Clearly Besotted One In A Million stamp set
Ink: Ranger vintage photo archival ink
Dies/Punches: Fiskars corner rounder, Simon Says Stamp thanks die
Accessories:  Tombow Mono permanent adhesive, MISTI stamp tool, Gemini Junior, Webster’s Pages dazzle-me-Gems

I hope you’ve enjoyed this project and will come join us in The Outlawz Challenges! Lots of fun going on! Thanks so much for stopping by – we’ll see you next time!

Scrappy hugs,
lesliesig

#Thanks

11/27/19 Top 3 at Aud Sentiments Challenge Blog!
12/5/19 Winner at Let’s Craft and Create!

Hi everyone! Happy Monday – just a mere six weeks until the jolly man in the red suit visits! My favorite time of the year! Our new sketch challenges this month are live over at Stick It Down and I’ve popped in this morning to share my Card Team inspiration project! Come on over and play for the chance to win a prize package from Stick It Down! The card team is showcasing projects today on the blog and this is our super awesome card sketch this month, created by Laura:

nov 2019


How about that sketch?! I love it! Seems like I’ve been creating a lot of thank you cards lately which I know will be put to good use! One can never have too many of these in their stash.

2019_0706001a

This was a fun card to put together. I created a simple background with skinny washi tape and layered the panel on black cardstock. Sans the black glitter alpha stickers, the rest of the elements are from pieces and parts of a petite kit from The Wild Hare Kits. What fun… you take a survey, and they hand-pick all the items for your kit based on your likes, and I must say they hit this one right out of the park!

2019_0706002a

The elements used on the inside (except for the black glitter alpha sticker) are also from the kit. So easy! ;)

2019_0706003a

Another look… loving how this turned out! Lots of sparkle!

2019_0706004a

Wanted to include one more image – a close-up of the white glitter washi tape in between each of the colors which you can’t see very well in the other photos.

2019_0706005a

Proud to enter this card into the following challenges:
A Bit More Time To Craft Challenge: #104 – Anything Goes
A Perfect Time To Craft Open Challenge: #11 – November Anything Goes
Aud Sentiments Challenge Blog: #240 – Thank You Sentiment
Classic Design Team Challenge Blog: #11 – Anything Goes
Let’s Craft and Create: #153 – Anything Goes + option Thank You
Lil Patch of Crafty Friends: #118 – Anything Goes
Not Just Cards: November Anything  Goes
The Creative Crafters: #22 – Anything Goes
The Paper Funday Challenges: #11 – Anything Goes with twist of Thanksgiving
World Wide Open Design Team Monthly Challenge: #11 – Anything Goes

Products used:
Cardstock/Paper: Stampin’ Up thick and regular Whisper White cardstock, Stampin’ Up Basic Black cardstock, Carta Bella Flower Market 2×2 Squares and Embroidery Hoop 12×12 papers, American Crafts Saturday Afternoon Rainbows & Ice Cream 12×12 paper
Dies/Punches: Stampin’ Up 1-14″ and 1″ circle punches
Accessories:  Me & My Big Ideas Skinny Washi Tape, spiegelmom scraps Elegant Winter sequins, American Crafts Saturday Afternoon One Canoe Two layered stickers, Darice black glittered alphabet stickers

I hope you’ve enjoyed today’s project and will link up with us! Feel free to play along with the double page or single page sketch if you’re a scrapbook layout designer, or the card sketch if you’re a card maker! You have until the end of the month to play and we’d love to see what you create! Remember, a randomly selected participant will receive a prize package from Stick It Down! Thanks so much for stopping by today – we’ll see you next time! ;)

Scrappy hugs,
lesliesig

thanks

Hello, crafty peeps! Happy February 1st! Today would have been my parents’ 71st wedding anniversary – I know they are celebrating in Heaven! It’s time for another fun challenge over at Love To Craft Challenge Blog and I’m stoked to share my DT inspiration project for LTCCB #31 – February Anything Goes! I was commissioned by a co-worker a to create a thank you card and this is what I came up with. She loved it!

2018_08230001a

I heat embossed this large image in black and colored it with Spectrum Noir markers, keeping it very simple with just shades of yellow and green. I cut the image with a dotted rectangle die and layered it on pastel green pearlized cardstock and then on thick black foam for dimension.

2018_08230002a

I embellished the inside panel with a strip of the pearlized cardstock, layered it on black cardstock and stamped a simple greeting.

2018_08230003a

And here’s one final look… love this image as it sure packs a powerful punch!

2018_08230004a

Products used:
Cardstock/Paper: Stampin’ Up thick and regular Very Vanilla cardstock, Stampin’ Up Basic Black cardstock, Paper Accents Pearlized Pastels cardstock
Stamps: Stampin’ Up Floral Statements stamp set, Paper Smooches Word Salad stamp set
Ink: Memento Tuxedo Black ink; Versamark Dazzle; Spectrum Noir- CT1, CT2, CT4 ,LG1, LG3
Dies/Punches: Sizzix Dotted Rectangles die
Accessories:  Tim Holtz Stamp Platform, Hero Arts Clear Embossing Powder, thick black foam

I hope you’ve enjoyed today’s project and will link something up with us this month! We can’t wait to see what you’re working on! Thanks so much for stopping by today and we’ll see you very soon! ;)

Scrappy hugs,
lesliesig

thanks

Hello, my crafty friends! I’m very happy to share that I’m guest designing over at Scrapping4fun Challenges again! One of my cards was featured a few weeks back and the lovely Rachelle asked me to be a guest designer in an upcoming challenge, so here I am! And I’m stoked to share my GD project for Challenge #103 – Winter Wonderland!

My inspiration came from the the gorgeous shades of blue in the inspiration photo. I immediately thought of “Winter Blues” and created a glittery blue thank you card. One can never have too many thank you cards in their stash, especially around the holidays. The shoe image I used is called Christmas Heels from Bugaboo Digi Stamps and I’ve had it in my stash for several years. I have a (slightly huge) shoe fetish and I have just about every one of Jodie’s shoe images, lol! I love them!

2017_10280004a

I colored the shoe with Spectrum Noir markers and fussy cut it. I cut a piece of blue glitter paper the size of the card base and cut the bottom off with a stitched scallop edge die to expose the white card base beneath. I used some Inspired by Stamping stamp sets for the front and inside. I stamped the front sentiment in the lower right corner of the card base and added some very light blue Crystal Drops. Super easy and super fun! :D

2017_10280005a

I kept the inside fairly simple with just a stamped sentiment on a layered panel. I’m really diggin’ how this turned out, lol!

2017_10280006a

Products used:
Cardstock/Paper: Stampin’ Up Whisper White and Night of Navy cardstock, DCWV Glitzy Glitter cardstock
Stamps: Inspired by Stamping Teeny Tiny Greetings and You Are stamp sets
Ink: Spectrum Noir- JG1, JG5, DR5, TB2, TB3, TB4, TB5; Spectrum Noir Crystal Clear Sparkle Overlay Marker, Memento Tuxedo Black ink
Dies/Punches: My Favorite Things Stitched Scallop Basic Edges die
Accessories:  Tim Holtz Stamp Platform, Nuvo Duck Egg Blue Crystal Drops, Glossy Accents

I hope you’ve enjoyed today’s project and will link up a Winter Wonderland project with us this time! We’d love to see what you create! Thanks so much for stopping by today and we’ll see you next time! ;)

Scrappy hugs,
lesliesig