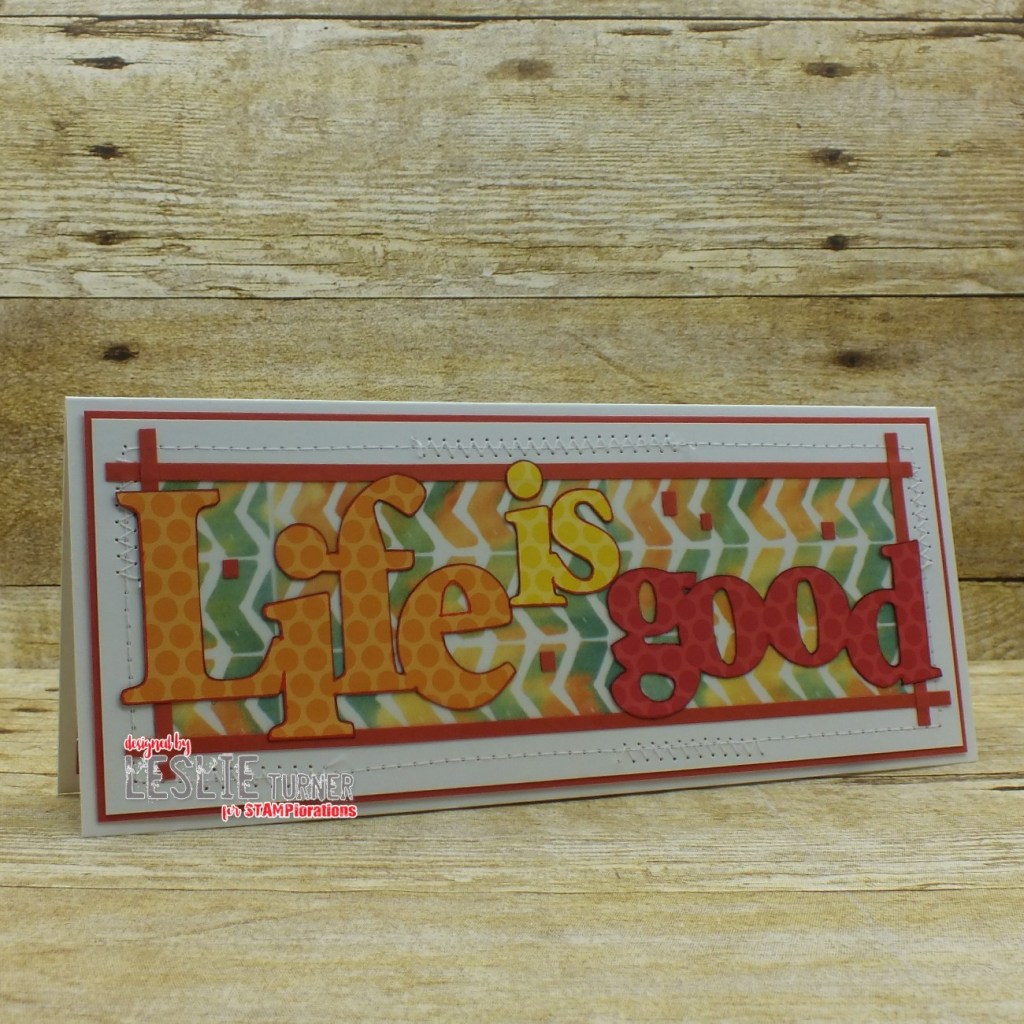
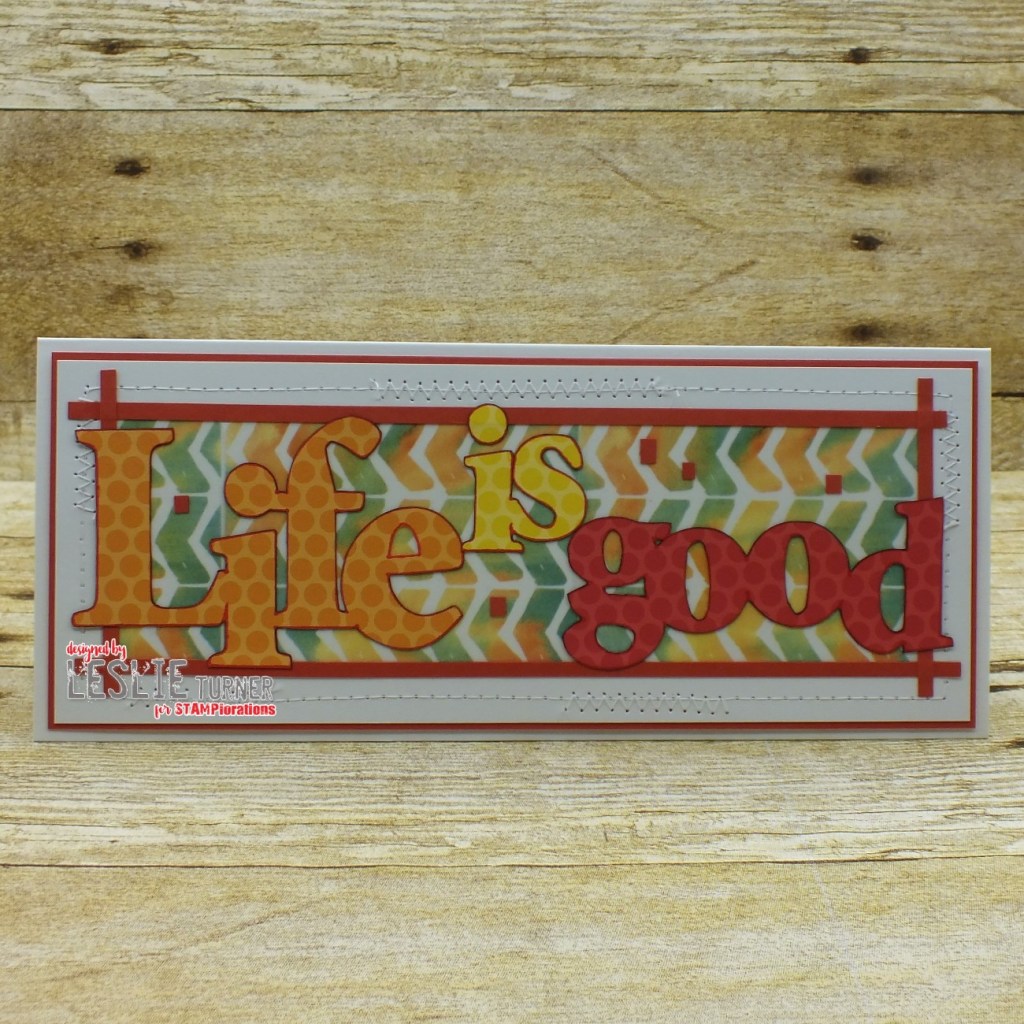
Hi everyone! Happy Sunday – I hope you’re having a fabulous weekend! I’m into my third month as guest designer for STAMPlorations Stencil Sunday and I can’t say enough how much I have enjoyed this gig! Affiliate links are used in this post at no cost to you. I really appreciate your support! For my third feature, I have three projects to share, and as I have done for my previous two features, I’ll showcase the projects individually so I can enjoy sharing them in some challenges. All three projects feature ARTplorations Stencils and Masks along with other products available in the store. My first project is a fun friendship card featuring the very cool ARTplorations Life Is Good mask using the very old and elementary technique of tracing! I don’t believe I’ve done this since I was a child, lol! My first thought was to ink around it, and after thinking about it overnight I decided to trace it, fussy cut it and make a slimline out of it! Mission accomplished!

I created a top-folding slimline card base measuring 9″ x 3-3/4″ from Neenah Classic Crest Solar White 110# cardstock along with a layering panel from CutCardStock Pop-Tone Tangy Orange cardstock. I still had my sewing machine out from hemming some jeans for the hubs, so I thought I’d sew around the outside edge of my card panel. It’s been ages since I’ve done any sewing on card panels so what the heck… that’ll tie right in with the tracing, lol! I did straight stitching and went back did some zig-zag in a few areas, and adhered the panel to the card base. I added roughly two and a third CRAFTplorations Artsy Geometric Backgrounds Clear Stickers in the center of the panel which I outlined with narrow strips of the CutCardStock Pop-Tone Tangy Orange cardstock. I traced around the entire mask with a red fine point marker using orange, yellow and red dotted paper for each word, and then fussy cut the three words and ran a black marker around the edges for definition. I adhered the words to the background panel and then added some tiny snips of leftover orange cardstock strips for a little interest.
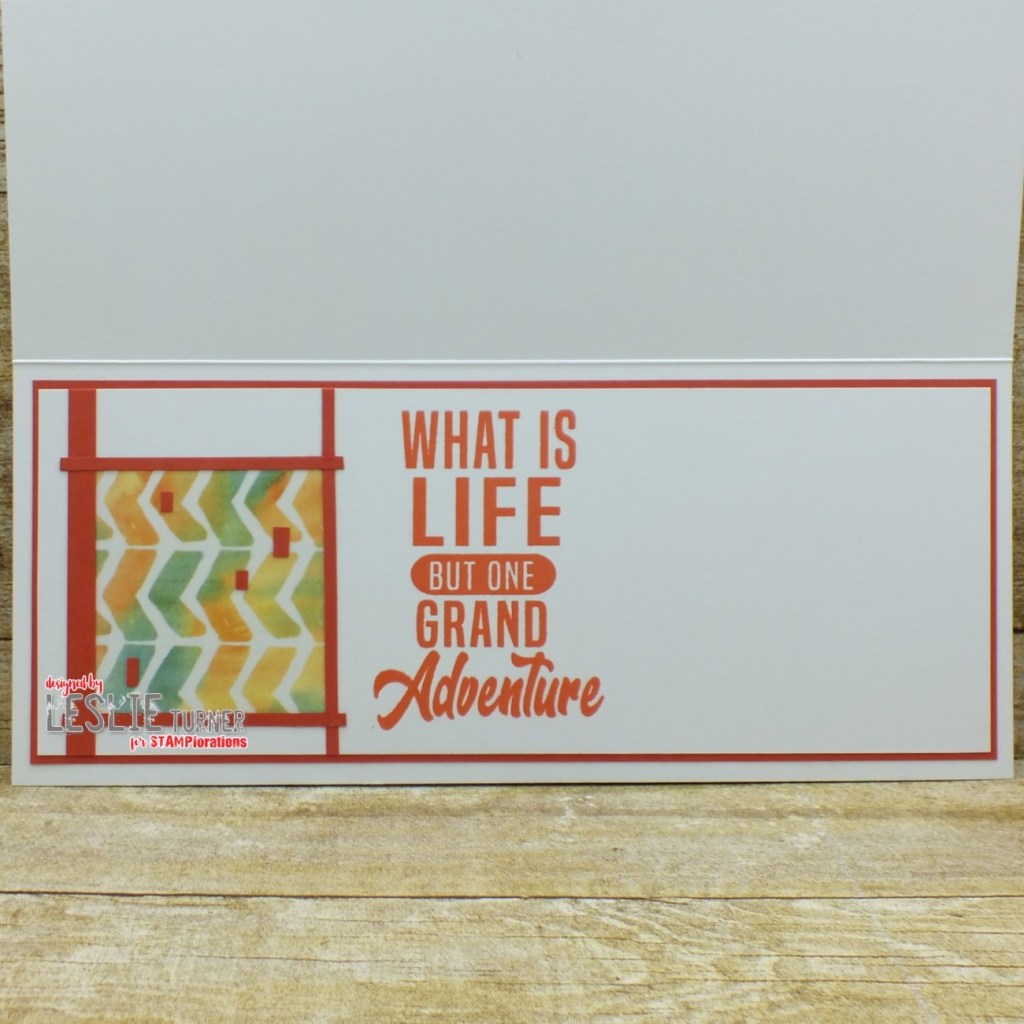
I cut the inside panel from Neenah Classic Crest 80# Solar White cardstock and embellished it with the remaining two-thirds(ish) of a CRAFTplorations Artsy Geometric Backgrounds Clear Sticker and leftover strips of the CutCardStock Pop-Tone Tangy Orange cardstock. I stamped the STAMPlorations Grand Adventure sentiment in orange ink and layered the panel on orange cardstock. I added a few more snips of leftover orange cardstock strips.
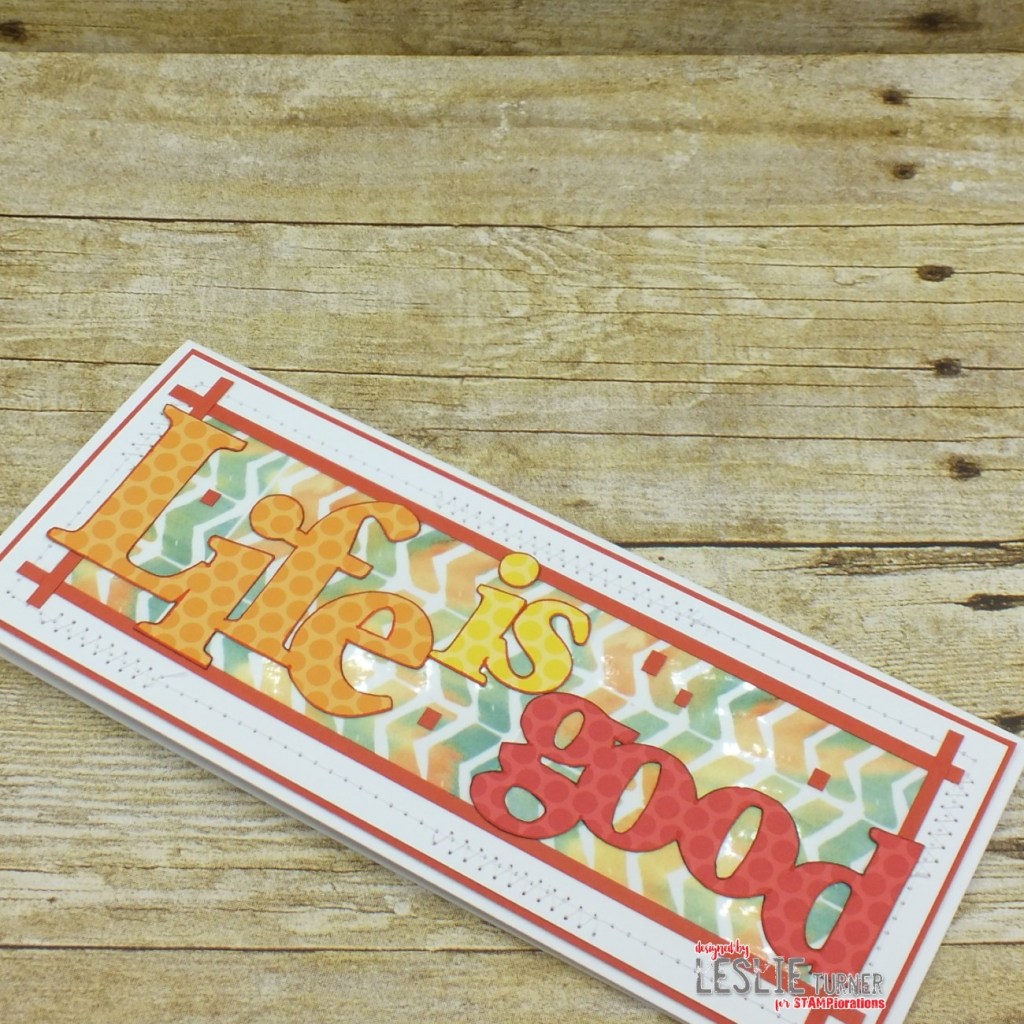
And one more peek… I bet no one uses tracing in their crafts anymore… so I feel good about bringing back an old-time technique! I sure like how this turned out!
STAMPlorations products used:
ARTplorations Life Is Good mask
CRAFTplorations Artsy Geometric Backgrounds Clear Stickers
STAMPlorations Grand Adventure stamp
Other products used:
Cardstock/Paper: Neenah Classic Crest 110# and 80# Solar White cardstock, CutCardStock Pop-Tone Tangy Orange cardstock, Sunny Studio Polka-dot Parade 6×6 papers
Ink: Bic Mark-It Ultra Fine Point Rambunctious Red marker, Memento Tuxedo Black marker, Memento Morocco ink
Accessories: Tonic Studios 12″ Guillotine Paper Trimmer, Tombow Mono permanent adhesive, Bearly Art precision craft glue, Singer sewing machine, Coats white thread
I hope you’ve enjoyed these projects and you’re inspired to grab some of your stencils and play! Be sure to check out all the amazing stamps, dies, stencils, digis and other crafty goodies at the STAMPlorations main, outlet and digital stores! Use code STAMPGIRLLESLIE for a 20% discount on your orders in the store (with unlimited uses)! And there is A LOT going on over at the STAMPlorations blog – tons of creative inspiration, tutorials, promotions and giveaways – all month long! If you’ve never visited, you are definitely in for a good time! When you do visit, be sure to leave comments on the posts! Every month Shery draws seven random winners from all the posts published during the month, so the more posts you comment on, the more chances you have to win! And be sure to Follow STAMPlorations on Facebook, Instagram and Pinterest for more creative inspiration! Thanks so much for stopping by today – we’ll see you next time! ;)
Scrappy hugs,