Let’s get our merry on.

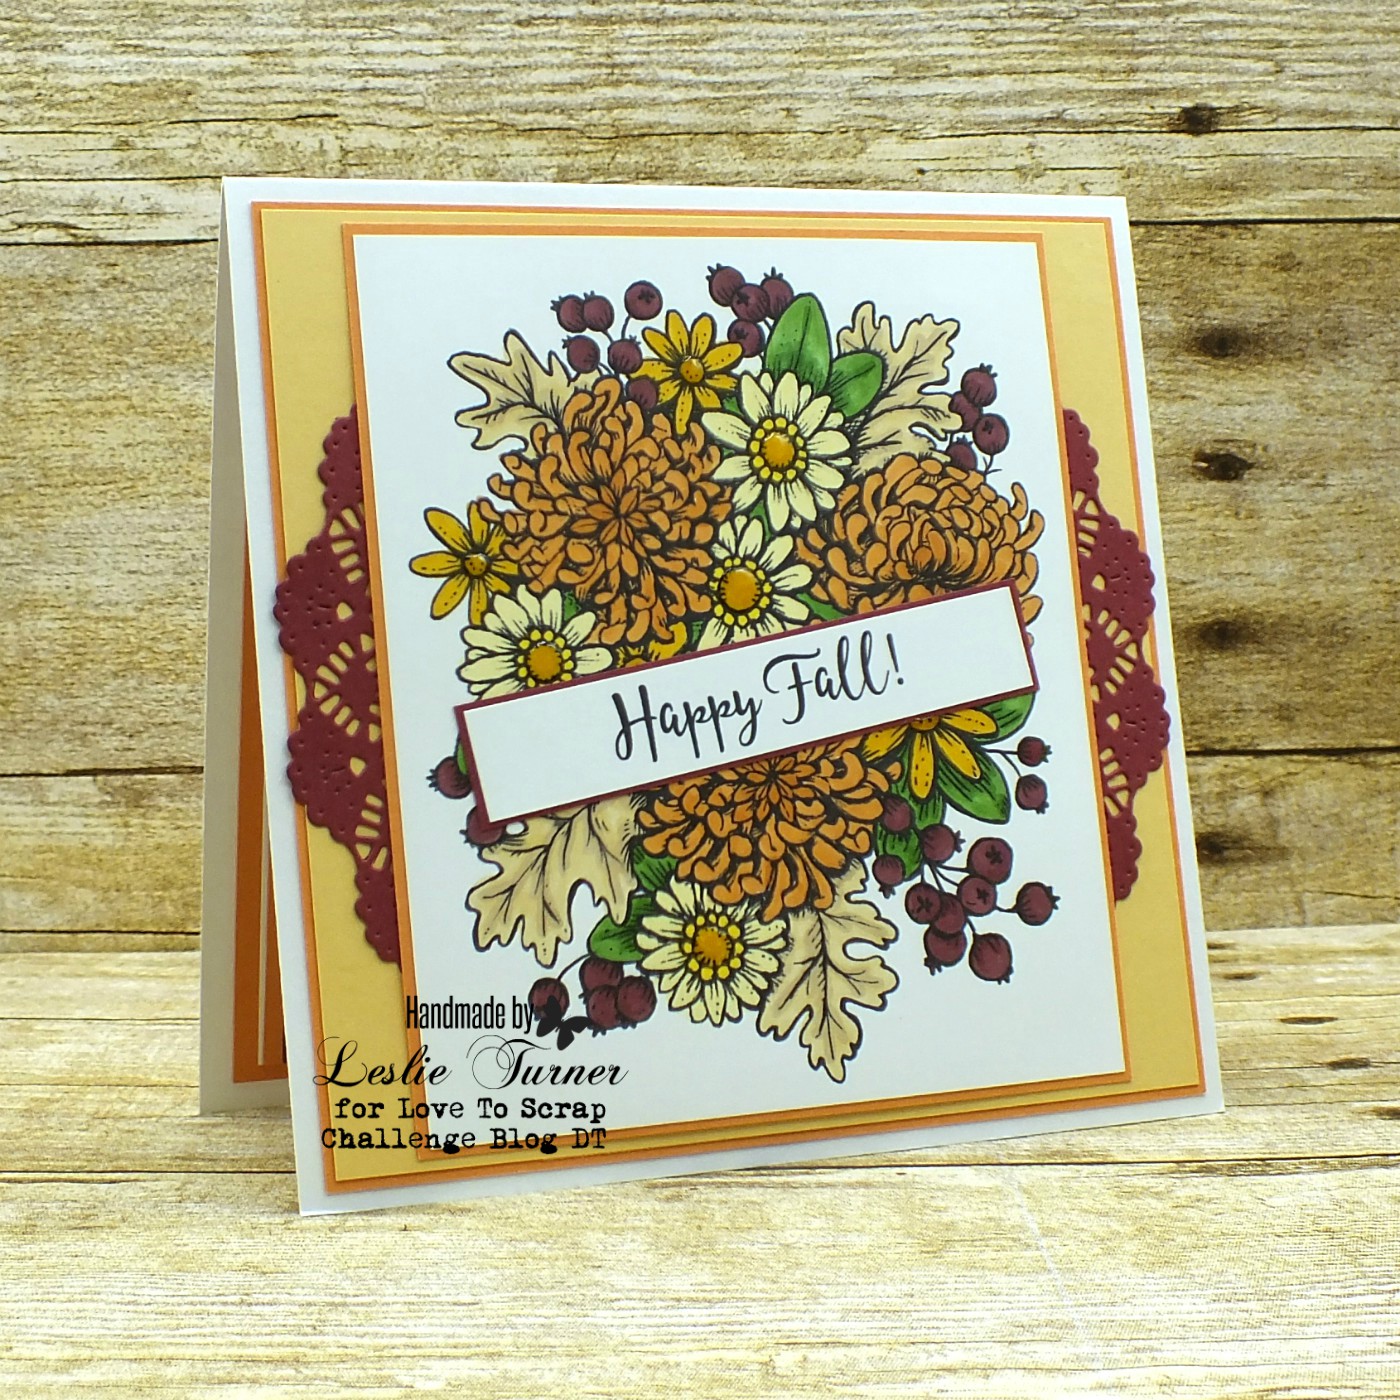
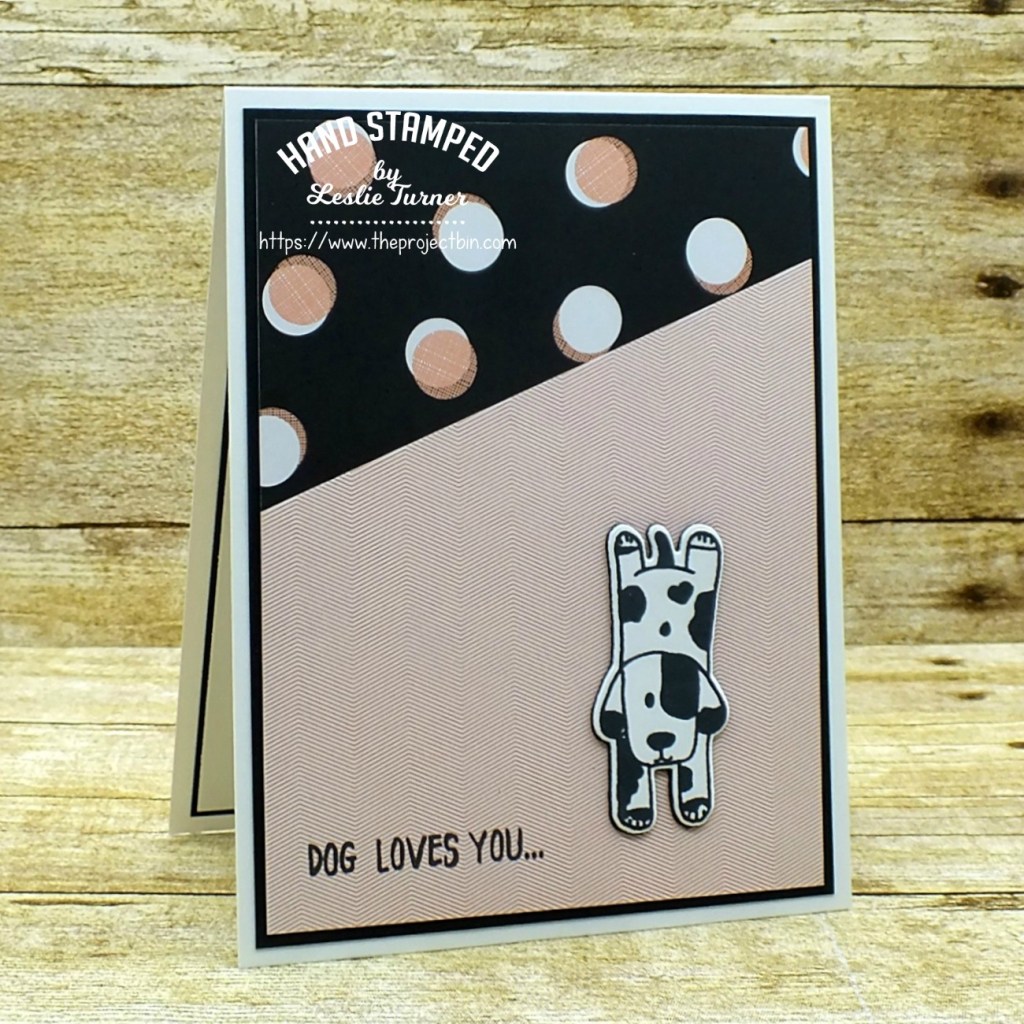
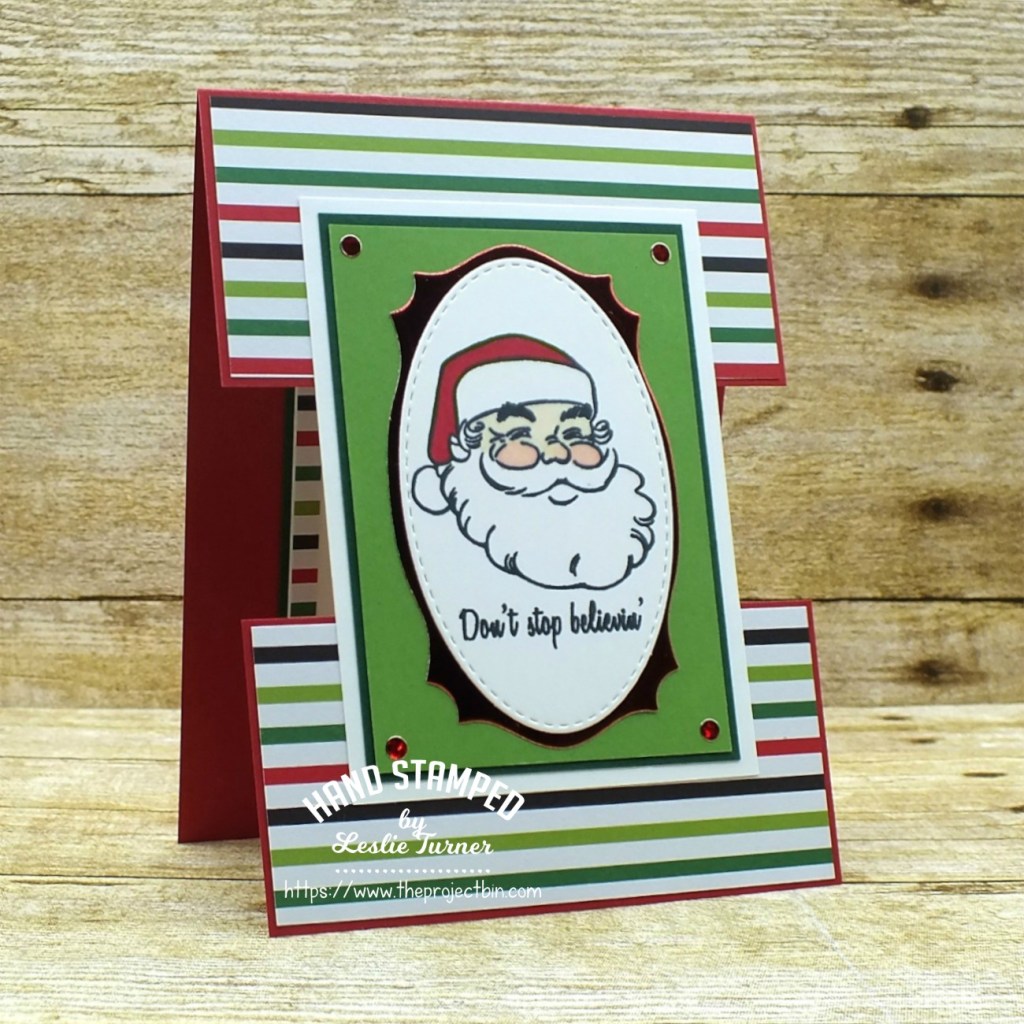
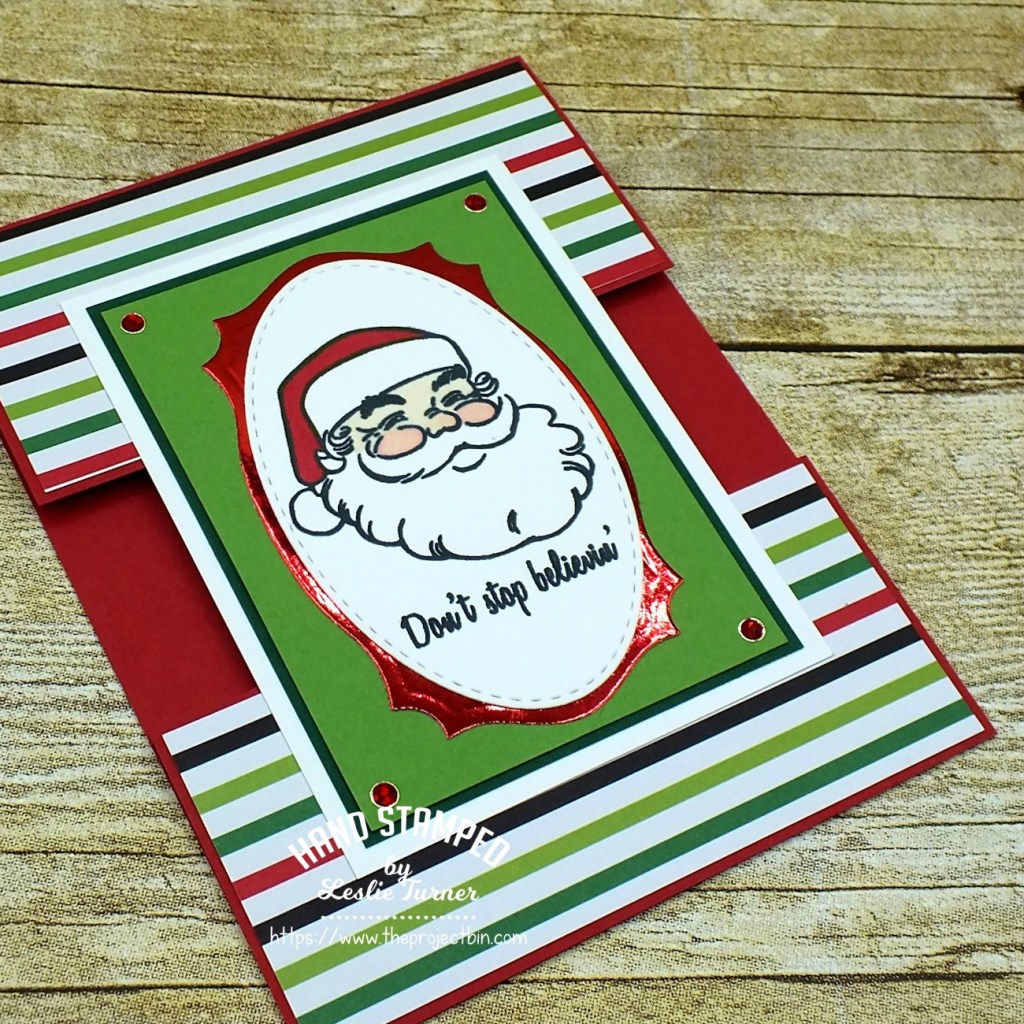
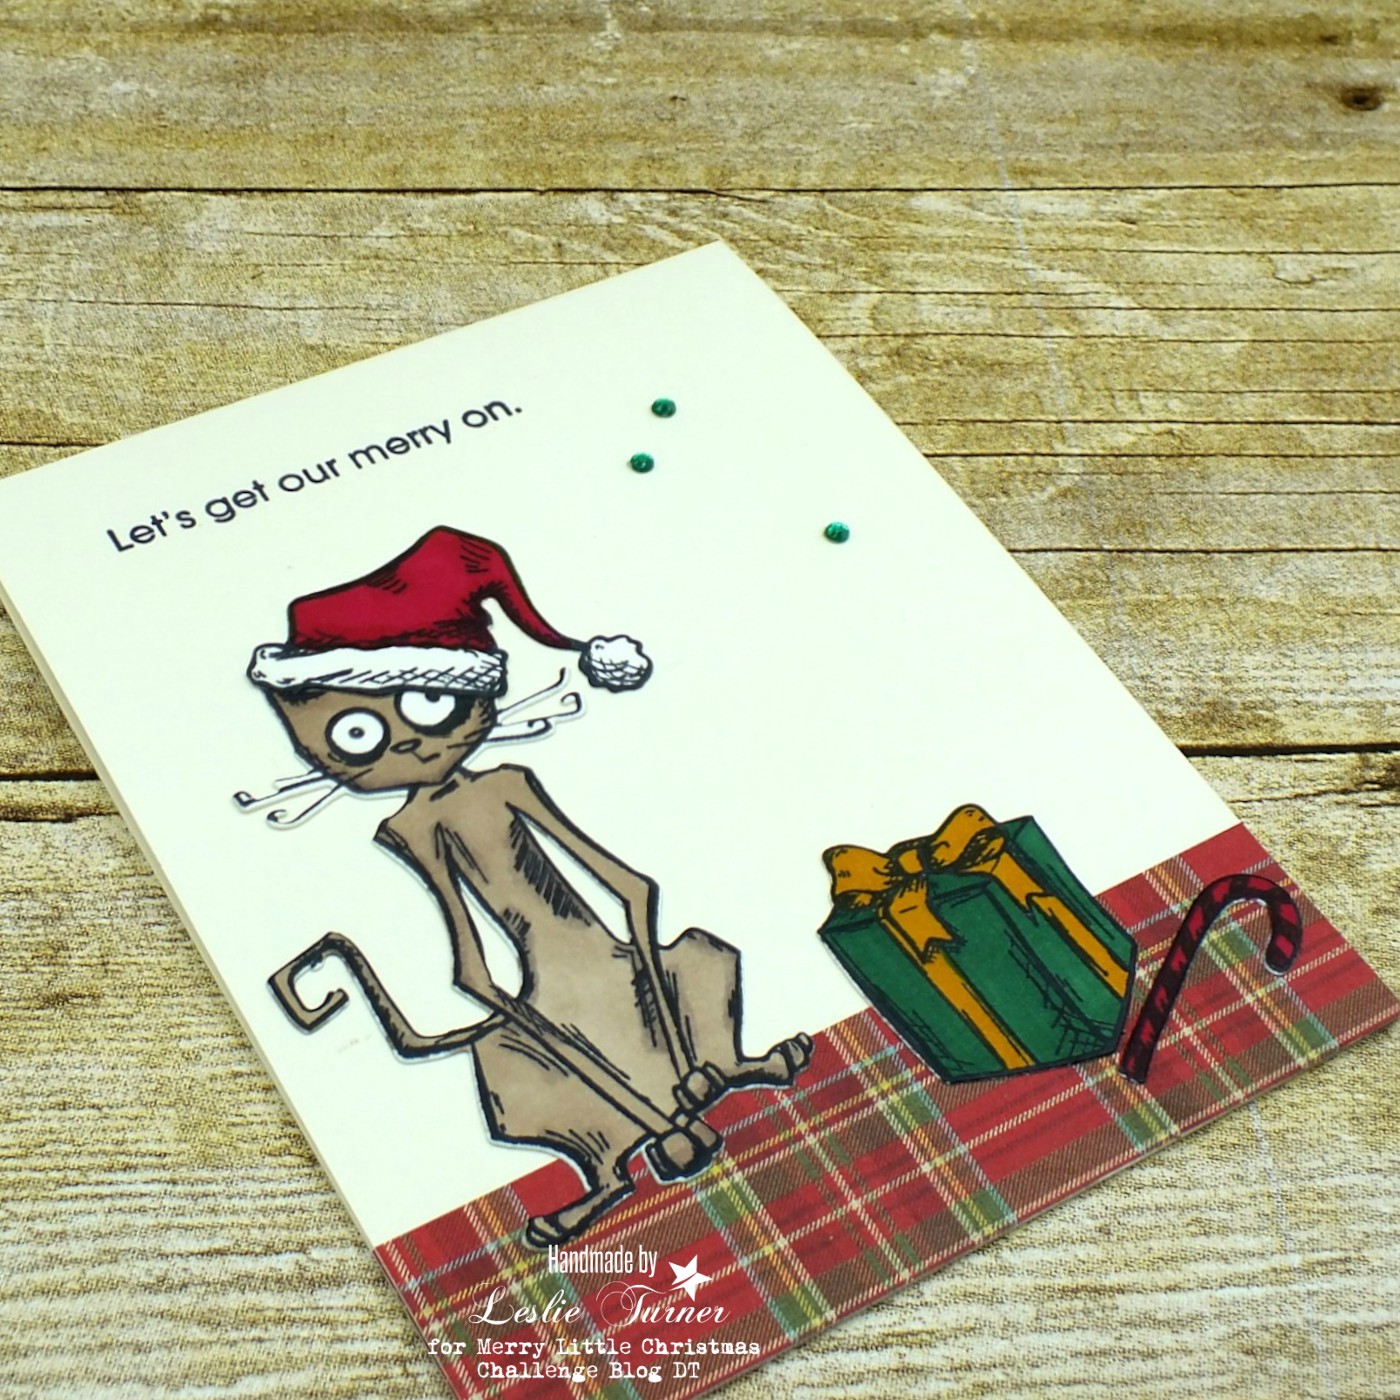
Hi everyone! Well, can you believe we’re officially into October?! This month is super awesome for me because I’m officially retired! Woo-hoo! I’ve worked a long time to get to this point, lol! Our new challenge is live this morning over at Merry Little Christmas Challenge Blog and I’m super stoked to share my DT inspiration project for MLCCB #27 – October Anything Christmas Goes! I created a fun Christmas card to add to my stash. I sure do love me some Tim Holtz Crazy Cats and Paper Smooches!

2020_0127001a

This is a super simple design. I colored the stamped and die cut images with Spectrum Noir alcohol markers, and placed them on the ground created with plaid paper across the bottom of the card base. I then stamped the Paper Smooches sentiment and added a few tiny gemstones, and voila, we have a card! ;)

2020_0127002a

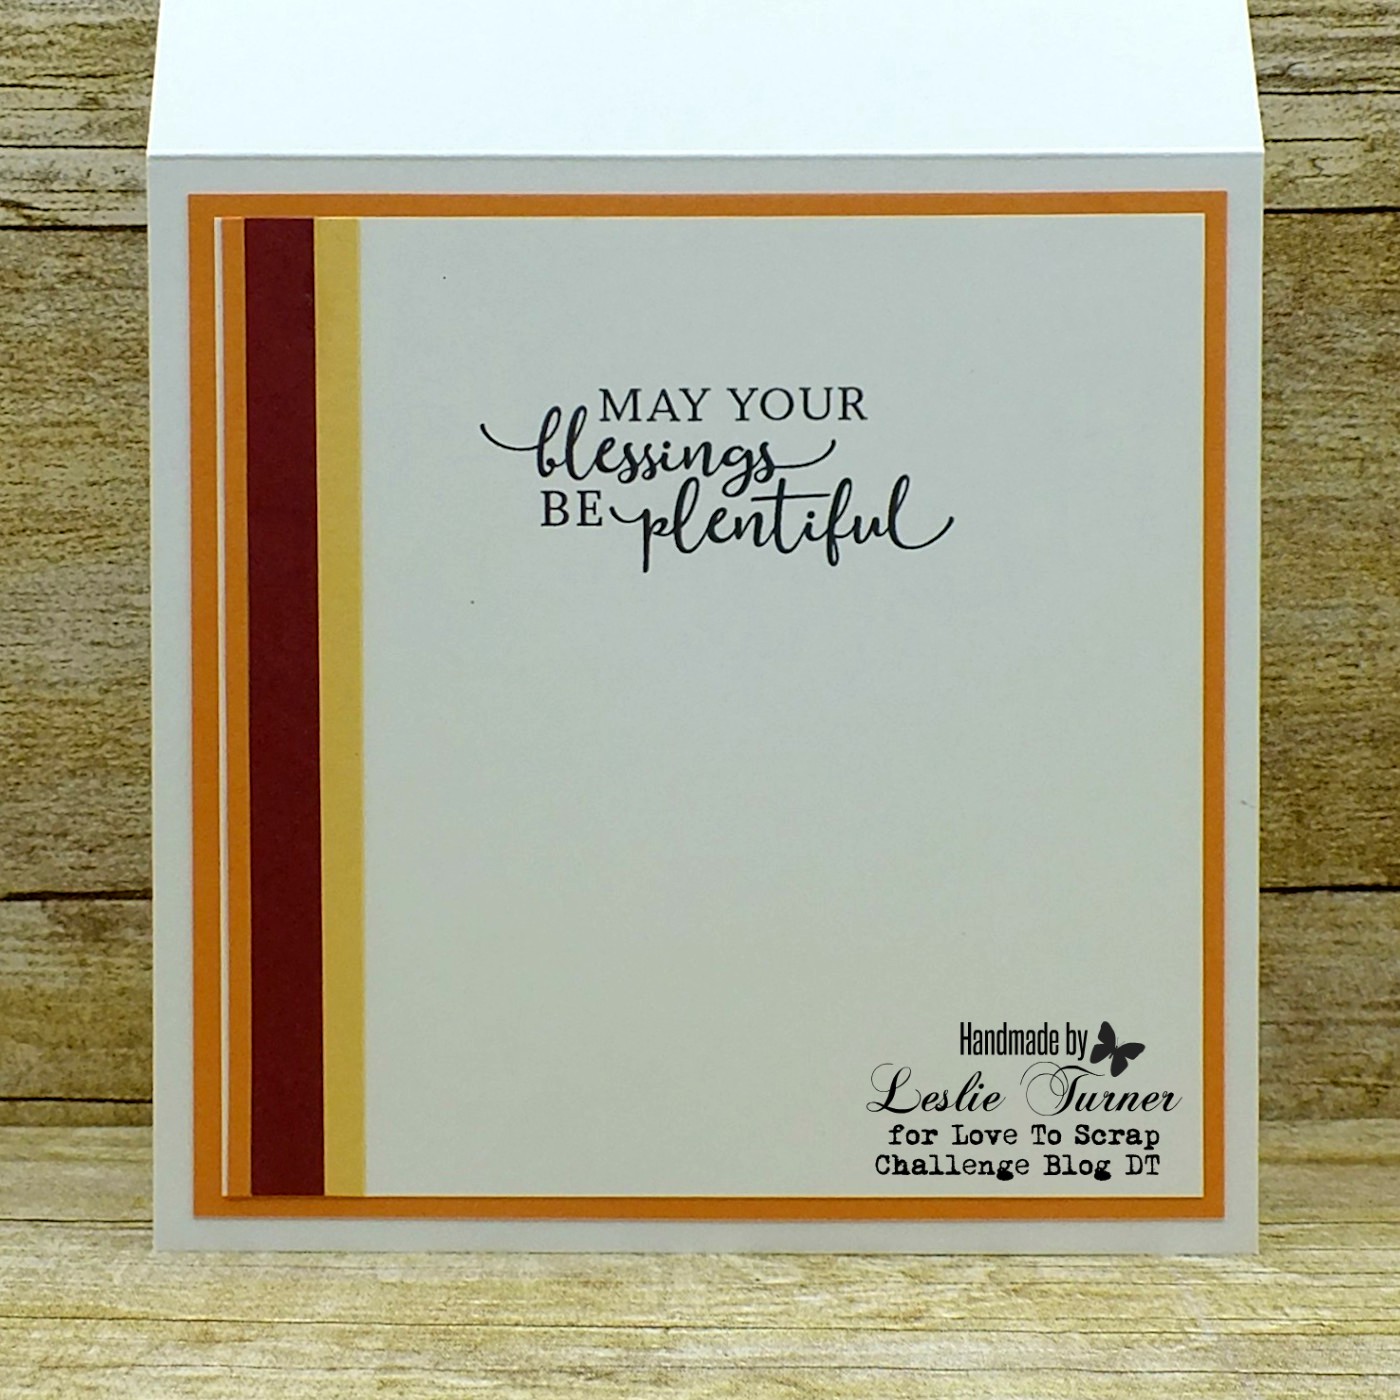
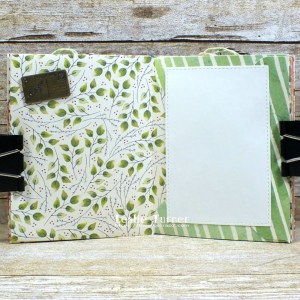
I kept the inside super simple also, just adding plaid paper across the bottom and stamping another Paper Smooches sentiment from the same stamp set.

2020_0127003a

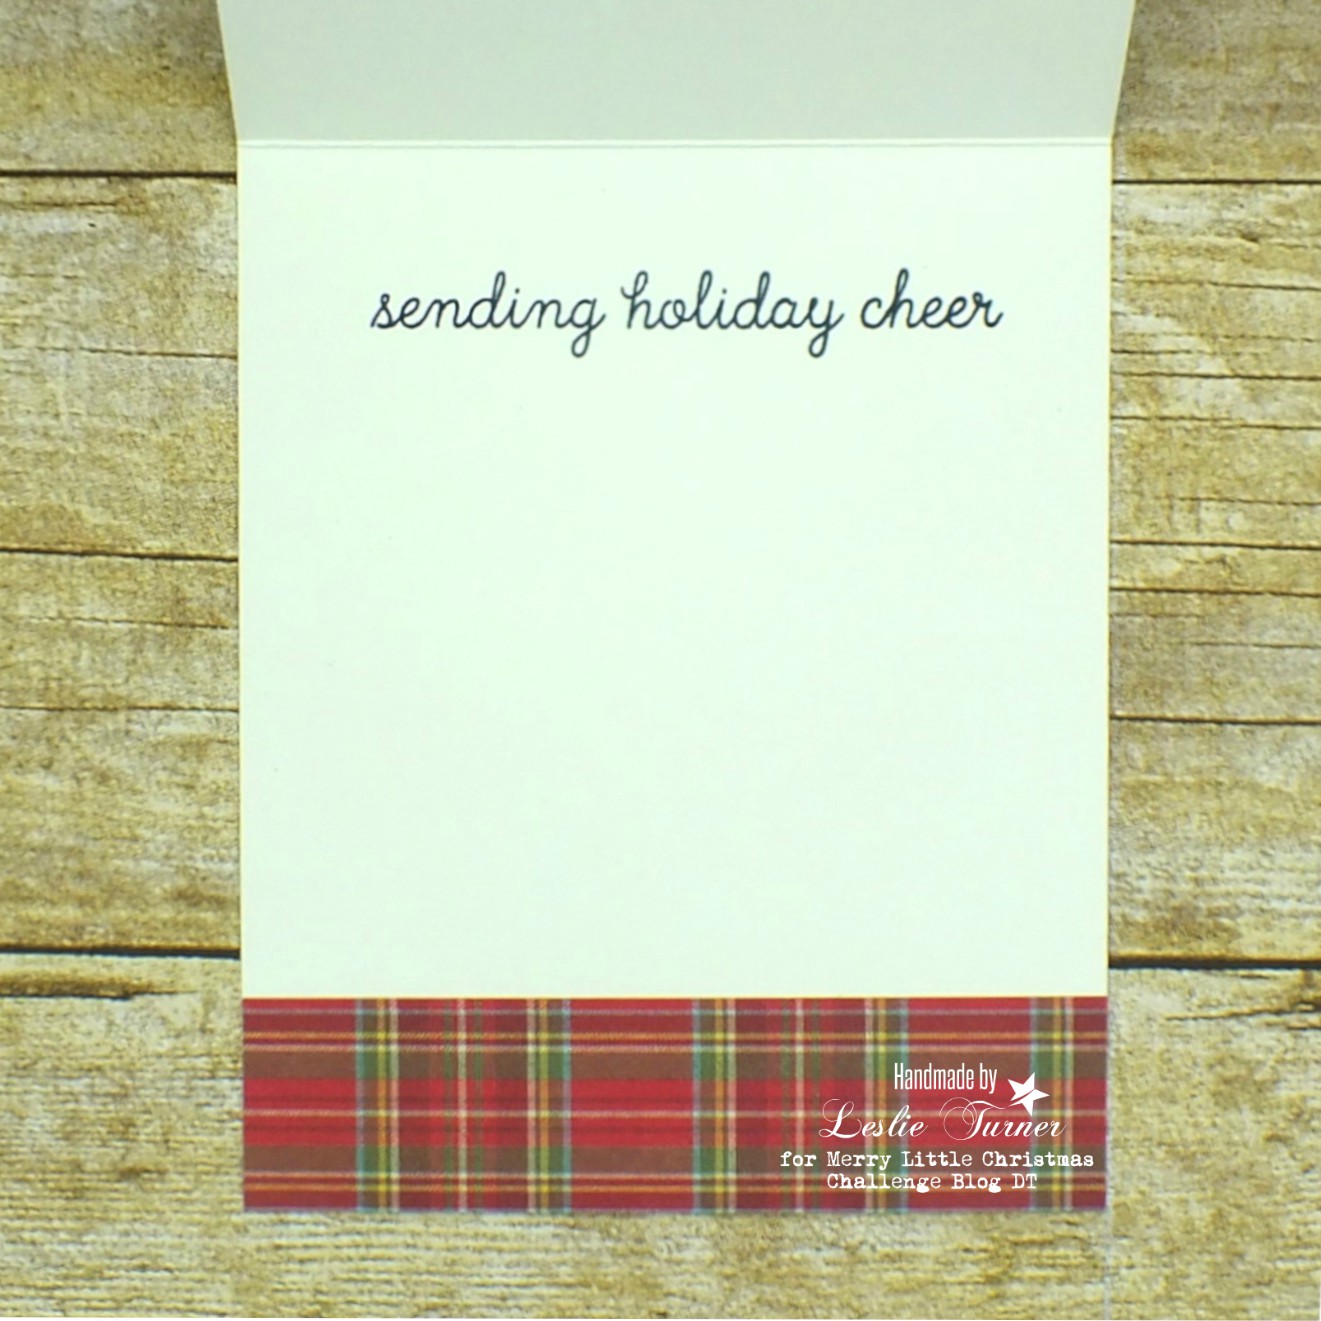
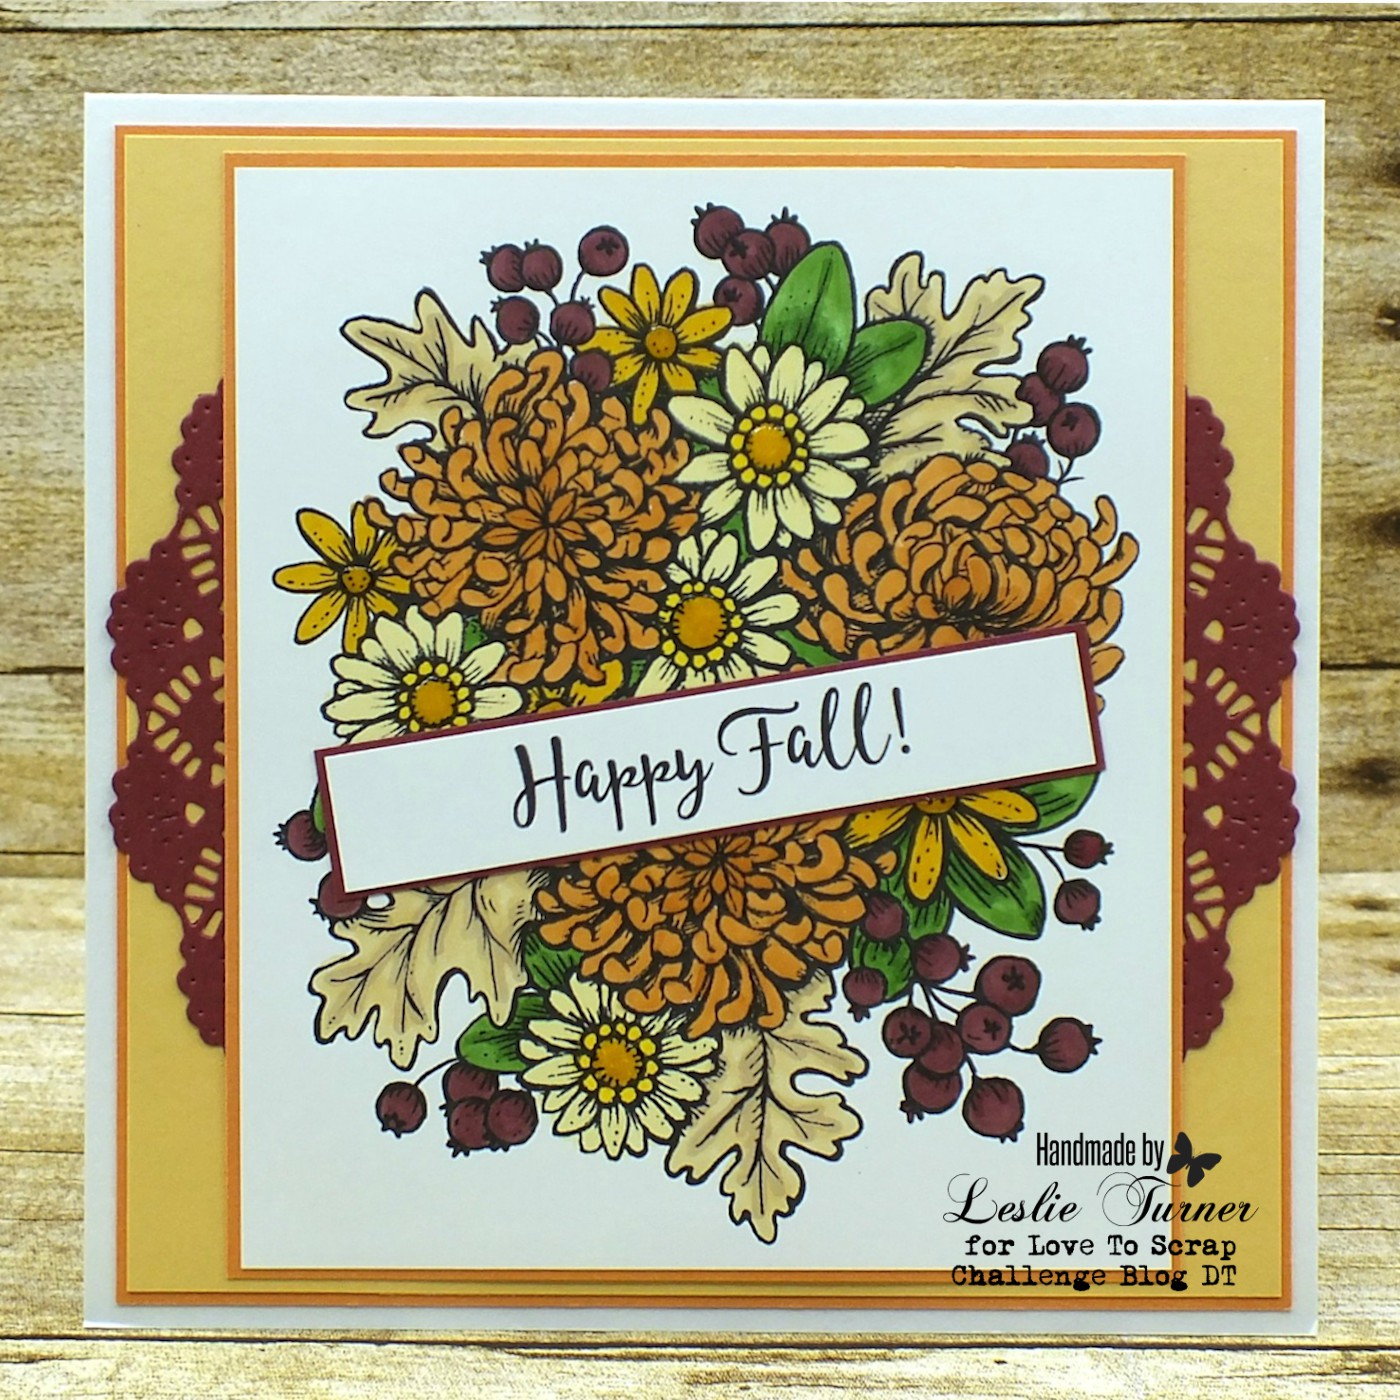
And one more look… I’m so smitten! This guy is super adorable! ;)

2020_0127004a

Sharing in the following challenges:
1. 2 Crafty Critter Crazies: #43 – Anything Goes
2. A Bit More Time To Craft Challenge: #125 – Anything Goes
3. A Bit More Time To Craft Extra Challenge: October Anything Goes
4. A Perfect Time To Craft Open Challenge: #10-2020 – Anything Goes
5. Classic Design Challenge: #10 – Anything Goes
6. Moving Along With The Times: October Challenge – Animals or Birds
7. QKR Stampede: #405 – Anything Goes
8. Simon Says Stamp: Wednesday Challenge – Anything Goes
9. The Crafter’s Cafe: #252 – Anything Goes

Products used:
Cardstock/Paper: GKD Ivory cardstock, The Paper Studio Four Seasons and Everything In Between -2- paper pad
Stamps/Dies: Tim Holtz Crazy Cats and Crazy Things rubber stamps and dies sets; Paper Smooches Holiday Cheer stamp set
Ink: Spectrum Noir- BG5, BG6, DR5, GB6, JG5; Memento Tuxedo Black ink
Accessories:  Gemini Junior die cutting machine, MISTI stamp tool, ScraPerfect Best Glue Ever, Darice green gemstones

I hope you’ve enjoyed this card and will link up a Christmas project with us this month! We can’t wait to see what you create! Thanks so much for stopping by today – we’ll see you again soon! ;)

Scrappy hugs,
lesliesig

Snowflake Junk Journal

10/15/20 Top 3 at The Crafter’s Cafe Challenge Blog!
10/31/20 Spotlight Winner at A Perfect Time To Craft Open Challenge!
10/31/20 DT Favorite Winner at Classic Design Challenge Blog!
10/31/20 DT Favorite at Crafts Galore Encore Challenge Blog!

Hi everyone! A very Happy Thursday to you! A new challenge launched over at Mix It Up Challenge Blog this morning and I’m super stoked to share my DT inspiration project for MIUCB #42 – Anything Goes + Distressing. Remember, all of our projects are Anything Goes and we offer an optional twist each month just to inspire you! The twist is not required to play! I used the amazing Vectoria Designs Winter Junk Journal Kit from my stash to create my project this month. OMGoodness, it’s so gorgeous and was so much fun putting together!

2020_01190024a

As with most digital kits, you print the elements on good paper and then put it together. It couldn’t be any easier and the result is stunning! I inked the edges of the front and back cover, all the pages and all the tags with walnut stain distress ink and added a couple snowflake charms and some bling. Several of the pages have pockets and tags. :) Here are some close-ups:

2020_01190015a

2020_01190016a

2020_01190017a

2020_01190018a

2020_01190019a

2020_01190020a

2020_01190021a

2020_01190022a

And one more look… I’m so smitten!

2020_01190023a

Sharing in the following challenges:
1. A Bit More Time To Craft Challenge: #125 – Anything Goes
2. A Bit More Time To Craft Extra Challenge: October Anything Goes
3. A Perfect Time To Craft Open Challenge: #10-2020 – Anything Goes
4. Classic Design Challenge: #10 – Anything Goes
5. Crafts Galore Encore Challenges: #80 – October Anything Goes
6. Sparkles Christmas Challenge: #117 – Vintage Christmas
7. The Crafter’s Cafe: #252 – Anything Goes
8. Your Scrapbook Place – October Anything Goes
9. Word Art Wednesday: Weeks #458/459 – Anything Goes

Products used:
Cardstock/Paper: Vectoria Designs Winter Junk Journal Kit printed on 60# Hammermill copy paper
Ink: Ranger walnut stain distress ink
Accessories:  ScraPerfect Best Glue Ever, ScraPerfect Strap-N-Tap Perfect Crafting Pouch, Wild Orchid Crafts snowflake charms, Hemptique Bamboo Cord, Darice iridescent gemstones and white flat back pearls

I hope you’ve enjoyed today’s project and will link up with us this month – we can’t wait to see what you create! We know you love the ‘anything goes’ theme and it would be really awesome if you play the twist and create a project with some distressing, but the twist is not required to play! Thanks so much for stopping by today – we’ll see you next time! ;)

Scrappy hugs,
lesliesig

Happy Fall!

Hi everyone! Happy Thursday – hope you are looking forward to a great weekend… it’s almost here! Our new challenge is live over at Love To Scrap Challenge Blog and I’m thrilled to share my DT inspiration project for LTSCB #138 – Fall Back! I used a pretty Power Poppy digital image to create this Fall card.

2020_01160023a

I cut a yellow panel for the background and layered it on light orange cardstock. I colored the image with Spectrum Noir alcohol markers, trimmed it down and layered it on the light orange cardstock. I die cut a pretty doily, cut it in half and arranged each half behind the focal image. I used some Glossy Accents on the centers of most of the flowers. The Power Poppy digital image included two sentiments, so I used the ‘Happy Fall’ one on the front angled over the focal image.

2020_01160024a

I printed the inside sentiment on white cardstock, trimmed the panel and embellished it with leftover strips of the cardstock used on the front.

2020_01160025a

Here’s one more look… I’m really loving how this turned out!

2020_01160026a

Sharing in the following challenges:
1. A Bit More Time To Craft Challenge: #125 – Anything Goes
2. A Bit More Time To Craft Extra Challenge: October Anything Goes
3. A Perfect Time To Craft Open Challenge: #10-2020 – Anything Goes
4. Classic Design Challenge: #10 – Anything Goes
5. Aud Sentiments: #261 – Fall/Halloween Sentiment
6. Crafty Gals Corner: #211 – Fall Colors
7. International Art & Soul: #93 – Autumn Colors
8. QKR Stampede: #405 – Anything Goes
9. The Crafter’s Cafe: #252 – Anything Goes
10. Try It On Tuesday: Autumn Colors
11. Your Scrapbook Place – October Anything Goes

Products used:
Cardstock/Paper: Cardstock Warehouse Sweet Tooth cardstock; GKD Sweet Mango, Sweet Corn, Cranberry Tart and White cardstock
Stamps: Power Poppy Autumn’s Opulence digital image
Ink: Spectrum Noir- DR7, TN6, EB2, BG5, LY1, LY2, CG4, GB6, CT4
Dies/Punches: Cheery Lynn Designs English Tea Party die
Accessories:  ScraPerfect Best Glue Ever, Gemini Junior die cutting machine, Glossy Accents

I hope you’ve enjoyed today’s card and will link up a Fall project with us this month! We’d love to see what you create! Thanks so much for stopping by today – we’ll see you again soon! ;)

Scrappy hugs,
lesliesig

Hummingbird Food Cannister

Hello, crafty peeps! Happy Thursday – it’s almost the weekend! Our new challenge is live this morning over at Love To Craft Challenge Blog and I’m happy to share my DT inspiration project for LTCCB #51 – October Anything Goes! I recycled/upcycled an empty Coffee Mate container into a hummingbird food canister. It was a super easy project and kept that container out of the landfill! ;)

2019_0922019aa

I began by gathering my supplies – some pretty papers, botanical ephemera, alphabet letters and flat-back pearls. I covered the container in red woodgrain paper and added some Washi Tape to the sides. I then traced around the lid and fussy cut a circle from black paper slightly smaller that fit into the recess on the top of the lid. I added a large piece of botanical ephemera to the top of the lid and some flat-back pearls. I spelled out ‘hummingbird food’ on the canister with the alphabet letters and finished it up with a few more flat-back pearls.

Round objects are always hard to photograph, lol, so here are individual shots from different angles…

2019_0922016a
2019_0922017a
2019_0922018a
2019_0922019a
2019_0922015a

Sharing in the following challenges:
1. A Bit More Time To Craft Challenge: #125 – Anything Goes
2. A Bit More Time To Craft Extra Challenge: October Anything Goes
3. A Perfect Time To Craft Open Challenge: #10-2020 – Anything Goes
4. Classic Design Challenge: #10 – Anything Goes
5. The Crafter’s Cafe: #252 – Anything Goes

Products used:
Cardstock/Paper: Simple Stories Wood & Gingham Basics paper pad, The Paper Studio Tattered and Worn paper pad
Accessories:  Empty Coffee Mate container, Tim Holtz idea-ology botanical layers ephemera, American Crafts Memo Thickers, Carpe Diem Planner Washi Tape, Want2Scrap red and black flat-back pearls

I hope you’ve enjoyed this recycled/upcycled project and will link up an ‘anything goes’ project with us this month! We’d love to see what you’re working on! Thanks so much for stopping by today – we’ll see you again soon! ;)

Scrappy hugs,
lesliesig

dog loves you…

Hi friends! Happy Hump Day! I’m thrilled to be back on the blog again today over at The Project Bin with a super cute puppy love card! I created a fun card using the Kinda Pawsome stamps and dies from my stash that a guy could give a girl – or a girl could give a guy – just to let them know they are loved! I love a black and white color combo with just a pop of another color, and this one has a salmon-pink pop!

I kept with a simple design using two coordinating papers layered on black cardstock. I stamped the pup on white cardstock in black ink and cut it with the coordinating die. I then cut three more black die cuts and layered them all together for a little dimension. I stamped the sentiment in black and that completed the front! Super easy! ;)

I embellished the inside panel with leftover pieces of the diagonally cut papers used on the front, stamped the sentiment in black ink and layered the panel on black cardstock.

And one more peek… absolutely loving how this turned out! Super easy design!

Sharing in the following challenges:
1. Creative Inspirations: September Challenge – Spots &Dots or Inky Spats
2. Di’s Digi Challenge: Make It Masculine
3. Pammie’s Inky Pinkies Challenges: #2039 – Anything Goes
4. Simon Says Stamp: Wednesday Challenge – Anything Goes
5. Word Art Wednesday: Weeks #458/459 – Anything Goes

Products used:
Cardstock/Paper: Neenah Classic Crest Solar White cardstock, American Crafts Black cardstock, Stampin’ Up Stacked With Love DSP pack
Stamps: The Project Bin Kinda Pawsome stamp set
Ink: Memento Tuxedo Black ink
Dies/Punches: The Project Bin Kinda Pawsome die set (included with stamps)
Accessories:  Tombow Mono permanent adhesive, Bearly Art precision craft glue, MISTI stamp tool, Gemini Junior

I sure hope you’ve enjoyed this project! Be sure to check out all the awesome stamps and dies at The Project Bin, and while you’re at it, head on over to The Project Bin Facebook Page for more inspiration! Thanks so much for stopping by today – we’ll see you next time!

Scrappy hugs,
lesliesig

Don’t stop believin’

Hi friends! Hope your week has started off with a bang! I’m thrilled to be on the blog today over at The Project Bin with a cool Christmas card in traditional Christmas colors! I was provided the amazing Mid Century Christmas stamp set and created a split front panel card to add to my Christmas card stash! You know I love me some fun folds and I was thrilled to have found this one on Mary Marsh’s blog!

I cut a top-fold card base from red cardstock and complimented it with some pretty striped Christmas paper along with white and a couple shades of green cardstock. I stamped the Santa image and one of the sentiments in black ink on white cardstock and cut it with a stitched oval die. I colored the image and layered it on a red foil die cut which was in turn layered on green and white panels. I added some red Dot Sparklers to complete the focal image panel.

I embellished the inside panel with a leftover strip of the striped paper, stamped the sentiment in black ink and layered it on dark green cardstock, being sure to center it beneath the front focal panel so it wouldn’t show when the card is closed.

And one more peek… I’m so smitten with how this turned out! I see more of these in my future, lol!

Sharing in the following challenges:
1. Lemon Shortbread Challenge Blog: #129 – Anything Goes
2. Pammie’s Inky Pinkies Challenges: #2039 – Anything Goes
3. Word Art Wednesday: Weeks #458/459 – Anything Goes

Products used:
Cardstock/Paper: Papertrey Ink Pure Poppy and New Leaf cardstock, CutCardStock Basis Green cardstock, Neenah Classic Crest Solar White cardstock, American Crafts Christmas 6×6 paper pad
Stamps: The Project Bin Mid Century Christmas stamp set
Ink: Memento Tuxedo Black ink; Spectrum Noir alcohol markers- FS4, FS9; Nuvo alcohol marker- 379
Dies/Punches: Memory Box Stitched Oval Layers die, Spellbinders Labels Twenty-Five die
Accessories: MISTI stamp tool, Gemini Junior, Stampendous red Dot Sparklers

I sure hope you’ve enjoyed this project! Be sure to check out all the awesome stamps and dies at The Project Bin, and while you’re at it, head on over to The Project Bin Facebook Page for more inspiration! Thanks so much for stopping by today – we’ll see you next time!

Scrappy hugs,
lesliesig

Happy Fall Y’all mini album

Hi friends! Sorry I’ve been rather MIA over the past couple weeks – we’ve been moving back into a house from our fifth wheel. Hubby and I have been full-time RVers since March 2016 when we sold our house in Florida. We’ve lived in some cool places and have met some awesome people, and even bought a house a few years ago thinking maybe it was time to settle down. But nope, we weren’t ready for that so we sold the house and moved back into the fifth wheel to continue our adventure. We really love the little town we moved to last year so we decided to make it permanent. We’re selling the fifth wheel and hope this will be our last move. We’ve made some wonderful memories over the last 4-1/2 years!

Now on to some awesome news I have to share… one of my mini album projects is being featured today on the Scrapbook & Cards Today blog! Needless to say, I’m super stoked to be a guest designer for SCT! But yep, this adorable Fall mini album was created with 12 envelopes I made with my WRMK Envelope Punch Board. You could also use pre-made envelopes if you want, but I thought handmade envelopes using double-sided papers would be fun! I made my envelopes 3″ x 4″ but there again, you could use any size you want and any number of envelopes you want depending upon the desired thickness.

There is so much to look at – we’ll start with a look around the outside and then go into a little more detail.

Besides the envelopes, I created notched pockets to use on the front and on various pages throughout the album, along with stitched oval and rectangle die cuts, punched acorns and die cut leaves to embellish the front and inside pages. The notched pockets hold little tags to use for journaling or photos. I tied small lengths of Baker’s Twine to the top of the tags.

I affixed charms to a couple of the pages, and adhered bamboo cord, twine and gold cord in the spine, and added charms for a little interest.

And one more peek… I just LOVE how this turned out! There’s plenty of room for journaling and adding photos. I can’t think of a better way to record those fun Fall memories!

Sharing in the following challenges:
1. Alphabet Challenge Blog: Anything Beginning with M (mini album)
2. International Art & Soul: #93 – Autumn Colors
3. Lemon Shortbread Challenge Blog: #129 – Anything Goes
4. Pammie’s Inky Pinkies Challenges: #2039 – Anything Goes
5. Try It On Tuesday: Autumn Colors
6. Word Art Wednesday: Weeks #458/459 – Anything Goes

Products used:
Cardstock/Paper: Stampin’ Up Crushed Curry, Daffodil Delight, Early Espresso, Garden Green, Lemon Lime Twist, Peekaboo Peach, Soft Sky, Tangerine Tango and Very Vanilla cardstock; CutCardStock Twine cardstock, Stampin’ Up Painted Autumn DSP
Stamps: Stampin’ Up Labeler Alphabet stamp set
Ink: Stampin’ Up Delightful Dijon and Early Espresso ink
Dies/Punches: Memory Box Stitched Oval Layers die, My Favorite Things Stitched Rectangle STAX die; Cottage Cutz Leaf Mini, Maple Leaf Mini and Oak Leaf Mini dies; Stampin’ Up Scallop Tag Topper punch, Stampin’ Up Acorn Builder punch
Accessories:  Bearly Art precision craft glue, We R Memory Keepers Envelope Punch Board and Pocket Punch Board; American Crafts File Tab, Tim Holtz idea-ology Metallic Qutotations, Stampin’ Up Delightful Dijon doily, Hemptique bamboo cord, Studios Blackbird twine, GKD gold cord; Baker’s Twine- brown, yellow and lime green; Ranger Distress Collage Medium, The Funkie Junkie Boutique metal charms, Wild Orchid Crafts leaf charms

I hope you’ve enjoyed seeing this envelope mini album! Thanks so much for stopping by today – we’ll see you next time! ;)

Scrappy hugs,
lesliesig

Happy Birthday Dude

Hi everyone! Well, we are just rockin’ right through September!! It’ll be Christmas before we know it, lol! I’m happy to be back on the Eyelet Outlet blog today with another awesome DT inspiration project! I created a fun birthday card featuring some very cool washi tape, a jukebox and lots of music!

I created a top-folding card base and rounded the left lower corner – I love rounding just one corner for a little interest. I created a narrow vertical panel for the front of the card on which to build my wood floor and brick wall. I applied several strips of Wood Washi Tape and then finished covering the panel with Brick Washi Tape. I stamped the jukebox with sentiments, boomerang, star and jack in brown ink, cut them with the coordinating dies, and arranged them on the panel. I randomly placed five Vinyl Record Album Brads and stamped ‘You Rock!’ on the wall in StazOn ink to complete the panel, and adhered it to the card base.

I embellished the inside panel with a strip of the Wood Washi Tape and a narrow strip of kraft cardstock, stamped the sentiment in brown ink and layered the panel on kraft cardstock.

And one more peek… OMG, this is one of the coolest cards I think I’ve ever created! I’m so smitten!

Sharing in the following challenges:
1. Alphabet Challenge Blog: Anything Beginning with M (music)
2. Di’s Digi Challenge: Make It Masculine
3. Lemon Shortbread Challenge Blog: #129 – Anything Goes
4. Word Art Wednesday: Weeks #458/459 – Anything Goes

Eyelet Outlet products used:
Brick Washi Tape
Wood Washi Tape
Vinyl Record Album Brads

Other products used:
Cardstock/Paper: Neenah Classic Crest Solar White cardstock, CutCardStock Twine cardstock
Stamps: The Project Bin Jukebox Birthday stamp set
Ink: Memento Espresso Truffle ink, Stampin’ Up Real Red ink, StazOn Jet Black ink
Dies/Punches: The Project Bin Jukebox Birthday dies (included with stamp set), Kadomaru Pro corner rounder
Accessories:  Tombo Mono permanent adhesive, Bearly Art precision craft glue, MISTI stamp tool, Gemini Junior

I hope you’ve enjoyed today’s project! Be sure to check out all the fun goodies at Eyelet Outlet! I can already see you drooling, lol! Be sure to ‘like’ and ‘follow’ Eyelet Outlet Facebook Page to keep up with news and sales! Thanks so much for stopping by today – we’ll see you next time! ;)

Scrappy hugs,
lesliesig

I scream-You scream-We all scream

Happy Saturday, friends! Is it any cooler where you are? Our weather is absolutely gorgeous! I’m happy to be back on the Eyelet Outlet blog today with another awesome DT inspiration project! I created a fun birthday card featuring this month’s new brads that you just have to check out! We have you covered whether you love chocolate, strawberry or vanilla!

I cut a square card base and adhered a panel of blue cardstock. I layered strips of Glitter Dot Washi Tape on a piece of white cardstock leaving a very thin margin between the strips, and then cut it with a postage stamp die. I layered the die cut on a blue cardstock panel and then on white. I created the sentiment on the computer and cut it in a strip which I angled across the die cut. I added several Ice Cream Brads and adhered the layered piece to the card base. The final step was adding White Enamel Dots in the corners.

I created the inside sentiment on the computer, printed it, and trimmed it. I embellished the panel with more of the Glitter Dot Washi Tape and narrow strips of blue cardstock.

And one more look… super happy with how this turned out! Now I want an ice cream cone, lol!

Sharing in the following challenges:
1. Creative Inspirations: September Challenge – Spots & Dots or Inky Spats
2. World Wide Open Design Team Monthly Challenge: #09 – Anything Goes

Eyelet Outlet products used:
Glitter Dot Washi Tape
Ice Cream Brads
Enamel Dots White

Other products used:
Cardstock/Paper: Neenah Classic Crest Solar White cardstock, Papertrey Ink Spring Rain cardstock
Dies/Punches: Spellbinders Postage Stamps die
Accessories:  Tombow Mono permanent adhesive, Bearly Art precision craft glue, Gemini Junior

I hope you’ve enjoyed today’s project! Be sure to check out all the fun goodies at Eyelet Outlet! I can already see you drooling, lol! Be sure to ‘like’ and ‘follow’ Eyelet Outlet Facebook Page to keep up with news and sales! Thanks so much for stopping by today – we’ll see you next time! ;)

Scrappy hugs,
lesliesig

if nothing ever changed

Hello again! I hope you’re having an awesome day! I’m back once more today to share another Hochanda sample I created for Prickley Pear Stamps! It has been quite an honor to have been asked to create this huge batch of samples to be showcased on Hochanda, and I’ve thoroughly enjoyed myself! I still have a few more to showcase, so stay tuned!

This card features a Brushos background in yellow, orange and red, drying each layer with my heat tool before applying the next. I stamped the steampunk butterfly on yellow cardstock in black ink and colored it with Nuvo alcohol markers. Then I fussy cut the butterfly, adhered it to black cardstock and trimmed it again leaving a tiny edge of black cardstock around it. I adhered the butterfly just by it’s body so the wings are 3-D, and then layered the panel on yellow cardstock. I finished the front with Crystal Drops.

I embellished the inside panel with yellow and black cardstock, stamped the sentiment, and layered the panel on the yellow cardstock.

One more peek… really loving how this one turned out! I love butterflies and this steampunk version is the best!

When I started sharing Hochanda samples last week, I promised to share the corresponding screenshots I took of Alex holding up my cards on air, so here’s this one! #insertcheesygrin

Sharing in the following challenges:
1. Artsystamper Digitals Challenge: #23 – Anything Goes
2. Crafty Calendar Challenge: September Anything Goes
3. Lemon Shortbread Challenge Blog: #128 – Anything Goes
4. Pammie’s Inky Pinkies Challenges: #2037 – Anything Goes
5. The Creative Crafters: #32 – Anything Goes

Products used:
Cardstock/Paper: Neenah Classic Crest Solar White cardstock, Strathmore Bristol Smooth cardstsock, Colorbok yellow cardstock, GKD Black Onyx cardstock
Stamps: Prickley Pear Stamps Steampunk Gears 3 clear stamp set
Ink: Brusho powders- lemon, scarlet, yelow, orange, brilliant red; Memento Tuxedo Black ink; Nuvo alcohol markers- 375, 377, 374, 391, 453
Accessories:  Tombow Mono permanent adhesive, Bearly Art precision craft glue, Ranger Mini Mister, MISTI stamp tool, Nuvo English Mustard Crystal Drops

I hope you’ve enjoyed this project! Be sure to check out all the awesome stamps and dies at Prickley Pear Stamps! If you’d like to save 10% on anything on the site when you shop at Prickley Pear Stamps, use the coupon code LESLIE10 at checkout! And be sure to ‘like’ and ‘follow’ the Prickley Pear Stamps Facebook page to keep up with news and sales, and join Prickley Pear Pals (the fan group) for lots of fun crafty ideas and to share your creativity! And finally, we’d love to see you visit the Prickley Pear Stamps blog that’s in the process of being revived and become a Follower! Hope to see you there! Thanks so much for stopping by today – we’ll see you next time! ;)

Scrappy hugs,
lesliesig