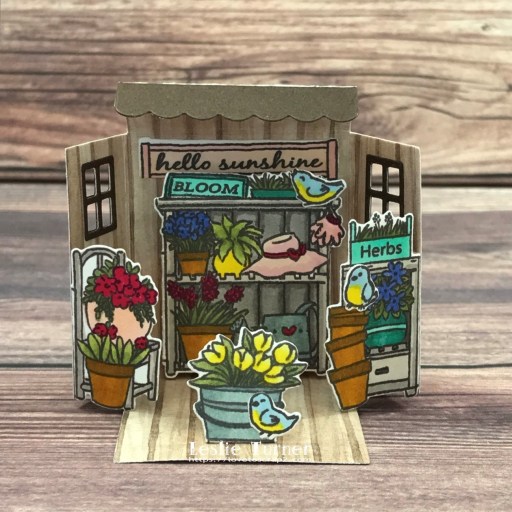
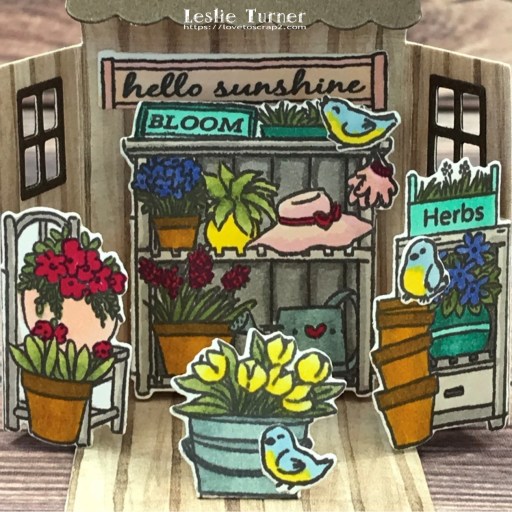
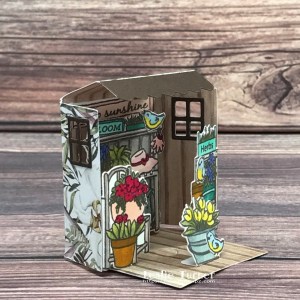
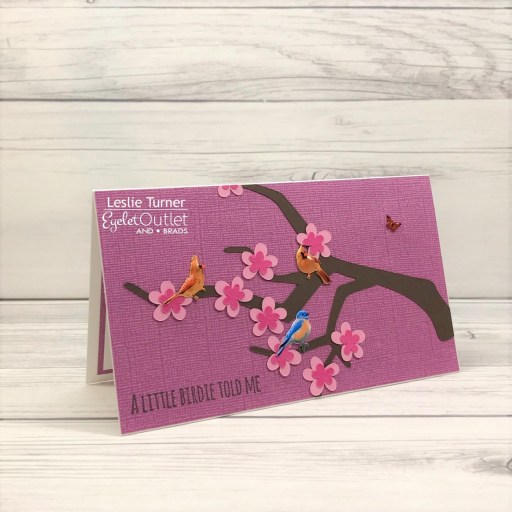
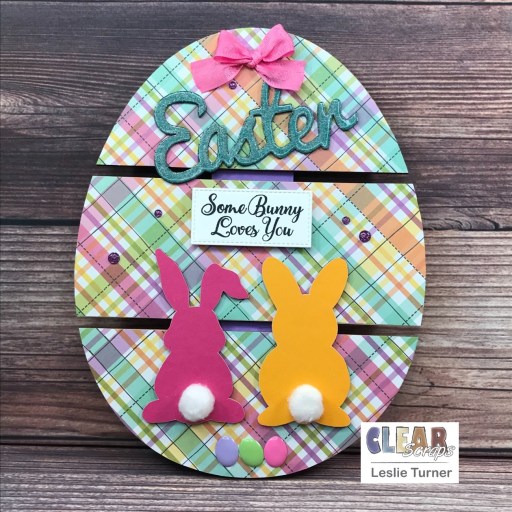
Hi everyone! A very Happy Saturday to you – I hope you’ve had a great week! Affiliate links are used in this post at no cost to you – I really appreciate your support! I’m stoked to be back on the Eyelet Outlet blog today with another awesome DT inspiration project! I created a pretty flower cart box card with my Scan N Cut that could be used for a birthday, encouragement or even Mother’s Day that’s coming up month after next! This card features our Color Daisy Brads, White Daisy Brads and Sunflower Brads, along with our Pink Jewel Bling and Enamel Stars! This was definitely a fun one!
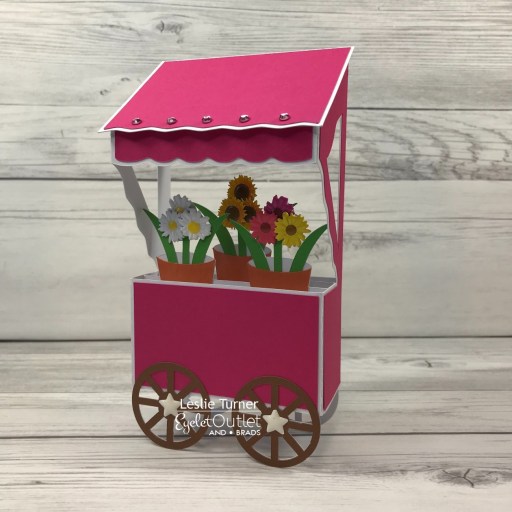
I cut the flower cart card base from American Crafts White cardstock, the cart layering panels from American Crafts Taffy cardstock, the cart wheels from American Crafts Chocolate cardstock, the leaves from American Crafts Grass cardstock, and the flower pots from CutCardStock Stardream Metallic Flame cardstock. Of course, the most fun was assembling it! The Color Daisy Brads, White Daisy Brads and Sunflower Brads made up the little clusters of flowers in the pots. I embellished the canopy with our Pink Jewel Bling and adhered white Enamel Stars to the wheels.

I stamped a sentiment from the STAMPlorations Beautiful You stamp set in Memento Rose Bud ink and adhered the sentiment panel to the back of the cart. I punched several 1/2″ circles and adhered them to the backs of the flower clusters to hide the brad prongs.
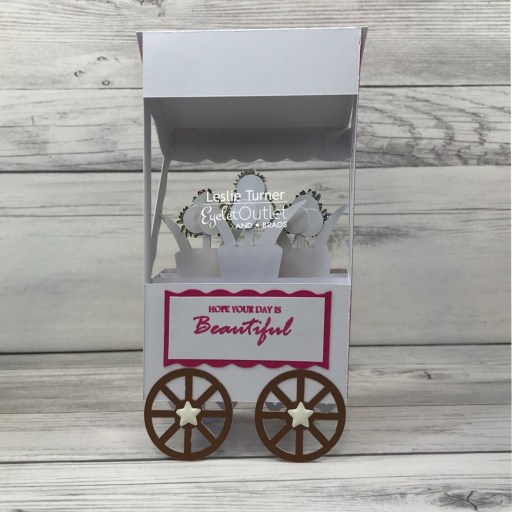
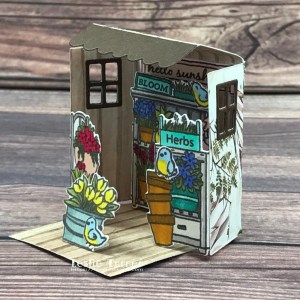
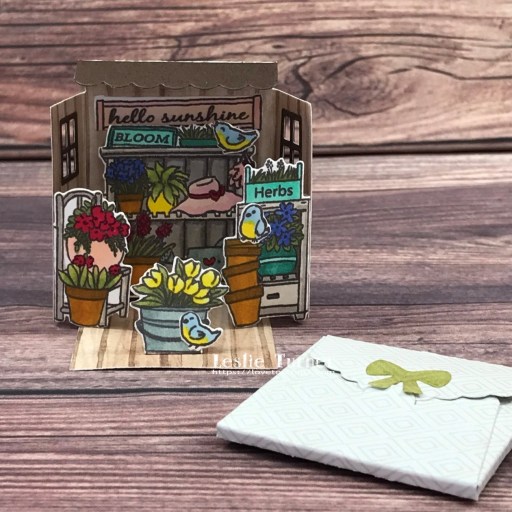
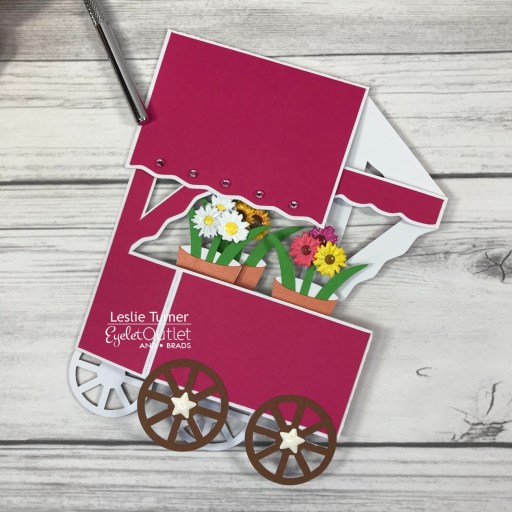
And one more peek of the card folded flat. Love, love, love! These flower brads, bling and enamel stars look awesome on this box card!
Sharing in these additional challenges:
1. A Perfect Place To Craft Open Challenge: #3-2022 – Anything Goes
2. Cardz 4 Galz: #169 – Spring Flowers for Mother’s Day or Spring Flowers
3. Classic Design Challenge: March #3 – Anything Goes
4. Crafting Happiness Challenges: #121 – Anything Goes Always
5. Crafty Catz: #588 – Anything Goes w/ optional Easter
6. Creative Creases Challenges: #28 – Anything Goes with a Fun Fold
7. Try It On Tuesday: Say It With Flowers
8. Wednesday’s Creative Inspirations Challenge Blog: March Challenge – Spring Flowers
Eyelet Outlet products used:
Color Daisy Brads
White Daisy Brads
Sunflower Brads
Pink Jewel Bling
Enamel Stars – Patriotic
Other products used:
Cardstock/Paper: American Crafts White, Taffy, Grass and Chocolate cardstock; CutCardStock Stardream Metallic Flame cardstock
Stamps: STAMPlorations Beautiful You stamp set
Ink: Memento Rose Bud ink
Dies/Punches/Cut Files: My Scrap Chick Flower Cart Box Card cut file, Stampin’ Up 1/2″ Circle Punch
Accessories: Brother Scan N Cut, Bearly Art precision craft glue, MISTI stamp tool
I hope you’ve enjoyed today’s project! Be sure to check out all the fun goodies at Eyelet Outlet! I can already see you drooling, lol! Be sure to ‘like’ and ‘follow’ Eyelet Outlet Facebook Page to keep up with news and sales, and while you’re at it, join the Eyelet Outlet Fans Facebook group for lots of creative inspiration! Thanks so much for stopping by today – we’ll see you next time! ;)
Scrappy hugs,