Hi friends! I hope you’re having a fantastic week! I’m stoked to be back on the CutCardStock blog today with an awesome DT inspiration project featuring more of the Classic Linen and Classic Crest cardstock that was included in our Designer’s Pack – which happens to be on sale this month so be sure to get some! Affiliate links are used in this post at no cost to you. I really appreciate your support! I created an awesome congrats card that looks like quilt blocks!
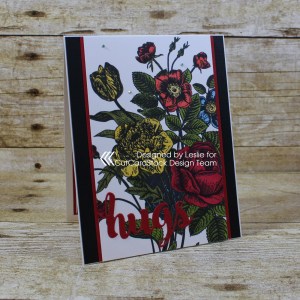
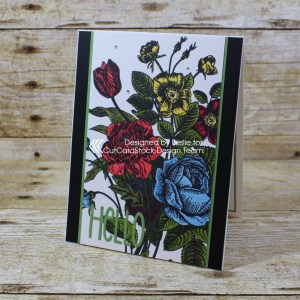
This was such a fun card to make and was really easy. I cut a standard A2 size top-folding card base from Classic Linen Solar White 100# cardstock. I cut 12 1-1/2″ squares of patterned paper and layered them on 1-5/8″ square layers cut from Basis Teal 80# cardstock, then adhered them in an offset fashion on the front of the card base. I trimmed the edges even with the edges of the card base, added a stamped and layered sentiment strip and some iridescent gemstones to the flower centers.
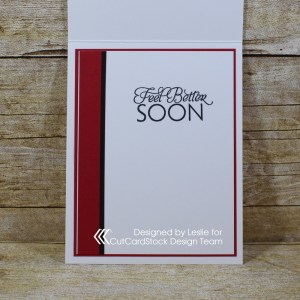
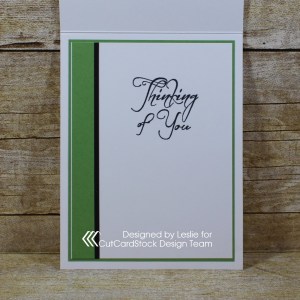
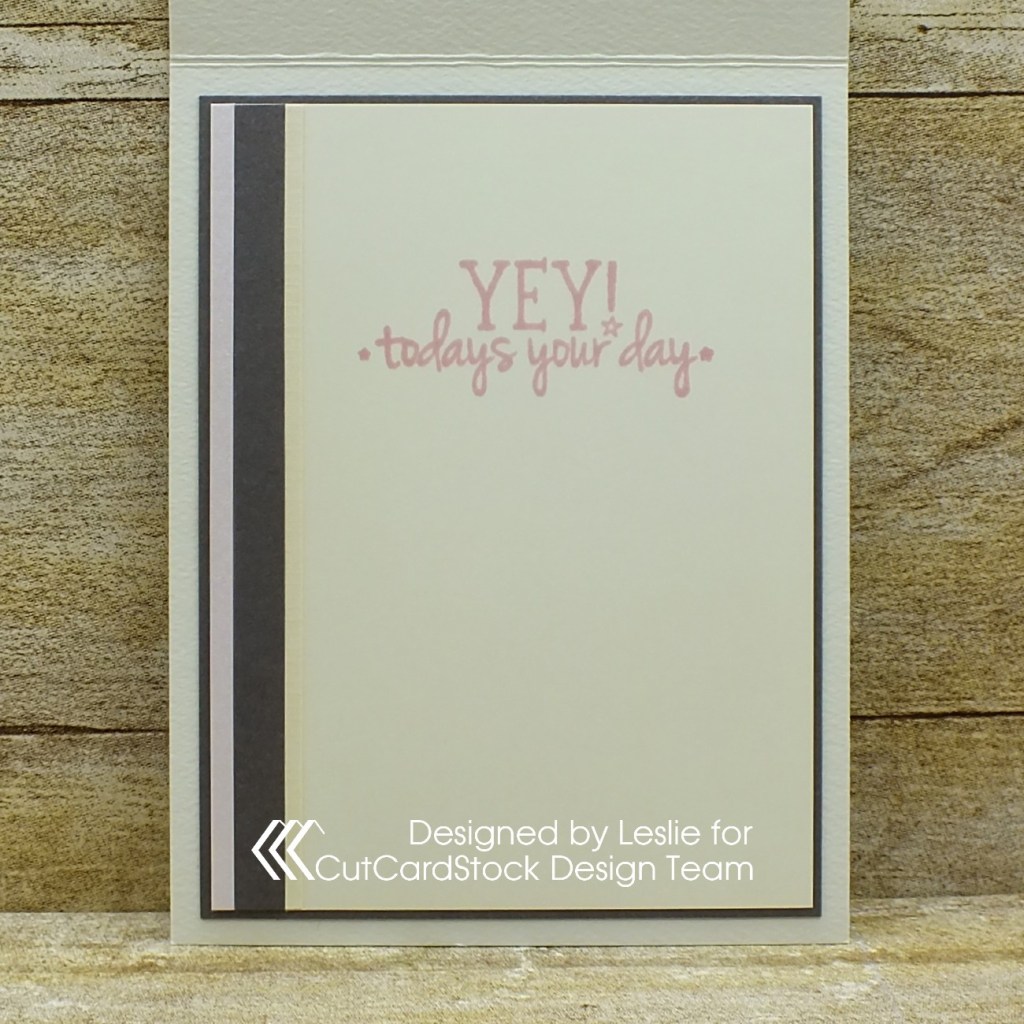
I cut the inside panel from Classic Crest Solar White 80# cardstock, embellished it with a strip of teal cardstock, stamped the sentiment and layered the panel on a teal layer.
And one more peek… so in love with this card! This cardstock is so awesome and makes the most beautiful cards!
Other products used: Paper: Stampin’ Up English Garden DSP Stamps: Pretty Pink Posh Everyday Greetings stamp set Ink: Stampin’ Up Lost Lagoon ink Accessories: Bearly Art precision craft glue, Tombow Mono adhesive, Darice iridescent gemstones
I hope you’ve enjoyed today’s project and you’re inspired to get crafty! Be sure to check out all the awesome cardstock and other goodies at CutCardStock (adhesives, labels, stickers, pens, watercolors and ribbon to name a few). And head on over to the CutCardStock Facebook Page for more inspiration! Thanks so much for stopping by today – we’ll see you next time!
Hi everyone! A very Happy Monday to you! I hope you had a fabulous weekend! I’m stoked to be back on the CutCardStock blog today with an awesome DT inspiration project featuring Classic Crest cardstock that was included in our Designer’s Pack – which happens to be on sale this month so be sure to get some! Affiliate links are used in this post at no cost to you. I really appreciate your support! I created a whimsical ‘missing you’ card is a super simple design that could easily be mass produced so you have several in your stash at any given time. I’m sure you also have family members and/or friends you miss seeing during these crazy times.
I cut a standard A2 size top-folding card base from Classic Crest Solar White 110# cardstock and rounded the bottom left corner, and then cut a patterned paper layer for the front using two coordinating papers. I adhered a narrow strip of Curious Metallic Chestnut cardstock to the seam where the two pattern papers meet. I stamped the sentiment in brown archival ink just beneath the cardstock strip. I stamped, die cut and colored the adorable ostrich with alcohol markers, and adhered it to the bottom right of the card front. I adhered his chest flat to the paper and then added foam tape behind his head for a little dimension to look like he’s coming off the card. I added a few brown enamel dots to finish the front.
And one more peek… so loving this ostrich! And I really love the Classic Crest cardstock – so much so that it has become a staple in my studio and I rarely use any other white cardstock for card bases!
Other products used: Paper: Simple Stories Wood & Gingham Basics 12×12 paper pad Stamps: Whimsy Stamps Hey Ostrich stamp set Ink: Memento Tuxedo Black and Espresso Truffle ink; Nuvo alcohol markers- 466, 479, 404, 449 Dies/Punches: Kadomaru Pro corner rounder, Whimsy Stamps Hey Ostrich die set Accessories: Tombow Mono permanent adhesive, Bearly Art precision craft glue, MISTI stamp tool, Gemini Junior, Scotch 3M foam tape, Eyelet Outlet Brown Enamel Dots
I hope you’ve enjoyed today’s project and you’re inspired to get crafty! Be sure to check out all the awesome cardstock and other goodies at CutCardStock (adhesives, labels, stickers, pens, watercolors and ribbon to name a few). And head on over to the CutCardStock Facebook Page for more inspiration! Thanks so much for stopping by today – we’ll see you next time!
Hi everyone! I’m stoked to be back on the CutCardStock blog today with an awesome DT inspiration project featuring more of the Astrobright cardstock that was included in our Designer’s Pack – which happens to be on sale this month so be sure to get some! Affiliate links are used in this post at no cost to you. I really appreciate your support! I created a super adorable Get Well card – the flower pot is a pocket and the flowers are adhered to a pull-out card that slides into the pocket! OMG, so cute I can’t stand it!
I started by die cutting all the pieces. I cut three large flowers, three small flowers, the pull-out card base and an embellishing strip from Astrobright Solar Yellow cardstock. Then I cut three large flower centers and six large leaves, three small flower centers and six small leaves, and a thin embellishing strip from Pop-Tone Gumdrop Green cardstock. Next I cut the flower pot and three scalloped rims (to layer together) from Pop-Tone Tangy Orange cardstock. And finally I cut the sentiment layer for the pull-out card from Classic Crest Solar White 80# cardstock.
I assembled the flower pot to form a pocket that the pull-out card slides into. I adhered the centers to the six flowers and two leaves to each flower, then adhered the three large flowers to the pull-out card base and adhered the sentiment layer to the pull-out card. I stamped the front sentiment on the flower pot and the inside sentiment on the pull-out card. I affixed the three smaller flowers to the pull-out card using two Double-Sided Adhesive Foam Circles behind each flower. The dimension is needed for the flowers to hang over the rim of the flower pot when the card is inserted into the flower pot. The final touch was the addition of a tiny iridescent gemstone on each scallop on the rim of the flower pot.
And one more peek… totally loving how this turned out! I’ll be making a few more of these for my stash using different colors of cardstock for the flowers!
Other products used: Stamps: The Cat’s Pajamas Simply Stacked sentiments Ink: Stampin’ Up Cajun Craze ink Dies/Punches: Honey Bee Stamps Flower Pot Card die set Accessories: Tombow Mono permanent adhesive, Bearly Art precision craft glue, Gemini Junior, MISTI stamp tool, Darice tiny iridescent gemstones
I hope you’ve enjoyed today’s project and you’re inspired to get crafty! Be sure to check out all the awesome cardstock and other goodies at CutCardStock (adhesives, labels, stickers, pens, watercolors and ribbon to name a few). And head on over to the CutCardStock Facebook Page for more inspiration! Thanks so much for stopping by today – we’ll see you next time!
1/31/21 DT Favorite Winner at A Perfect Time To Craft Open Challenge!
Hi everyone! I hope you had a great weekend and stayed indoors where it’s safe, warm and cozy! I’m stoked to be back on the CutCardStock blog today with an awesome DT inspiration project featuring Astrobrights cardstock that was included in our Designer’s Pack – which happens to be on sale this month so be sure to get some! Affiliate links are used in this post at no cost to you. I really appreciate your support! I created a fun Valentine in non-traditional colors. Valentines are typically pink and/or red, and this one is bright yellow and hot pink!
I cut a 5″ square top-folding card base from Classic Crest Solar White 110# cardstock along with an inside panel from Classic Crest Solar White 80# cardstock. I cut a front background panel from hot pink and white dotted patterned paper. I die cut a large sunburst from Astrobright Solar Yellow cardstock which I adhered to the patterned paper background, and then adhered a die cut stitched heart cut from Raspberry Ice cardstock to the center of the sunburst. I stamped the sentiment in black on one of the sunburst rays. I stamped, colored and die cut a Crazy Bird focal element for the card front, layering the eyes/beak and wing four times for some dimension. The finishing touch was the addition of randomly-spaced Morning Dew Crystal Drops on all the sunburst rays for a little interest.
I embellished the inside panel with a strip of hot pink and white dotted patterned paper and a narrow strip of the bright yellow cardstock along with a small die cut stitched heart, stamped the sentiment in black ink and layered the panel on the yellow cardstock.
And one more peek… totally loving this Valentine in the bright yellow and hot pink color combo! The Astrobrights cardstock is amazing!
Other products used: Paper: Darice Dots & Stripes 6×6 patterned paper Stamps: Stampers Anonymous Crazy Birds stamps, Paper Smooches Word Salad stamp set Ink: Memento Tuxedo Black ink (pad and marker); Nuvo alcohol markers- 401, 393, 450, 452, 454 Dies/Punches: Stampers Anonymous Crazy Birds dies, Stampin’ Up Sunburst thinlit Accessories: Bearly Art precision craft glue, Tombow Mono permanent adhesive, Gemini Junior, MISTI stamp tool, Nuvo Morning Dew Crystal Drops
I hope you’ve enjoyed today’s project and you’re inspired to get crafty! Be sure to check out all the awesome cardstock and other goodies at CutCardStock (adhesives, labels, stickers, pens, watercolors and ribbon to name a few). And head on over to the CutCardStock Facebook Page for more inspiration! Thanks so much for stopping by today – we’ll see you next time!
Happy Hump Day, friends! I’m stoked to be back on the CutCardStock blog today with an awesome DT inspiration project featuring more of the Stardream Metallic cardstock that was included in our Designer’s Pack – which happens to be on sale this month so be sure to get some! Affiliate links are used in this post at no cost to you. I really appreciate your support! I created a pretty ‘all occasion’ congrats card that would be great for just about any occasion calling for a congratulations!
I cut a standard A2 size top-folding card base from Classic Crest Solar White 110# cardstock along with an inside layering panel and a stitched scallop yoke from Classic Crest Solar White 80# cardstock. Then I cut a front layering panel, a medium stitched flag die cut and a 1/4″ embellishing strip for the inside from Stardream Metallic Silver 105# cardstock. And finally I cut a large stitched flag die cut, a congrats die cut, an inside layering panel and a 1/8″ embellishing strip from Stardream Metallic Sapphire 105# cardstock. I adhered the stitched scallop yoke to the top of the silver front layering panel, leaving the bottom center of the yoke free of adhesive. I adhered the medium silver stitched flag to the large blue stitched flag, applied adhesive to the back side of the flags and slid them underneath the very bottom edge of the yoke. I adhered the congrats die cut to the flags and then embellished the yoke with three iridescent gemstones. I’m calling this a yoke because it reminds me of a yoke on a child’s dress. Did you or any of your kids ever have those dresses with the ruffled yokes at the top?!
I embellished the inside panel with the strips of silver and blue cardstock, stamped the sentiment in blue ink and then layered the panel on the blue cardstock.
And one more look… love having cards in my stash that can be used for more than one occasion!
Other products used: Stamps: Stampin’ Up Bravo stamp set Ink: Stampin’ Up Night of Navy ink Dies/Punches: CUTplorations Congrats Word Die, My Favorite Things Stitched Scallop Basic Edges, JustRite Stitched A2 Banners and Rectangles die set Accessories: Bearly Art precision craft glue, Tombow Mono permanent adhesive, MISTI stamp tool, Gemini Junior, Darice large iridescent gemstones
I hope you’ve enjoyed today’s project and you’re inspired to get crafty! Be sure to check out all the awesome cardstock and other goodies at CutCardStock (adhesives, labels, stickers, pens, watercolors and ribbon to name a few). And head on over to the CutCardStock Facebook Page for more inspiration! Thanks so much for stopping by today – we’ll see you next time!
Hi everyone! Oh my goodness – I believe we are going to have a white Christmas out here in Colorado! The snow is SO beautiful! I’m stoked to be back on the CutCardStock blog today with an awesome DT inspiration project featuring Stardream Metallic cardstock that was included in our Designer’s Pack – which happens to be on sale this month so be sure to get some! Affiliate links are used in this post at no cost to you. I really appreciate your support! I created a pretty fairy-themed birthday card which I know a special little girl is going to love! The funny thing is I know a few adults who love fairies too, lol!
I embellished the inside panel with Lagoon, Amethyst and Aquamarine strips along with a strip of washi tape. I stamped the sentiment in black ink, cut it with a stitched oval die and adhered it to the panel, then layered the entire panel on black cardstock.
And one more peek… I’m so smitten with this cardstock! It’s gorgeous! And those little fairies are pretty awesome, too! ;)
Other products used: Stamps: The Project Bin Born Yesterday stamp set Ink: Memento Tuxedo Black ink Dies/Punches: My Favorite Things Swirly Birthday die, Memory Box Stitched Oval Layers die Accessories: Bearly Art precision craft glue, Tombow Mono permanent adhesive, MISTI stamp tool, Gemini Junior, Me & My Big Ideas skinny washi tape, Eyelet Outlet Fairy Brads, Darice tiny iridescent gemstones
I hope you’ve enjoyed today’s project and you’re inspired to get crafty! Be sure to check out all the awesome cardstock and other goodies at CutCardStock (adhesives, labels, stickers, pens, watercolors and ribbon to name a few). And head on over to the CutCardStock Facebook Page for more inspiration! Thanks so much for stopping by today – we’ll see you next time!
Hi everyone! Well, here it is almost Thanksgiving and even though it’s hands-down my favorite time of year, I’m in serious Christmas mode! I’m stoked to be back on the CutCardStock blog today with an awesome DT inspiration project featuring more of the Bonsai Green and Habanero Red cardstock that was included in our Designer’s Pack – which happens to be on sale this month so be sure to get some! Affiliate links are used in this post at no cost to you. I really appreciate your support! I created a cozy Christmas card in my favorite traditional Christmas colors of red, white and green!
I was rummaging through my dies and found this adorable stocking die that I’ve had for AGES (probably 6-7 years) and I’m not even sure I’ve ever used it, so out it came for this project! It’s so stinkin’ cute I can’t stand it, lol! I cut a standard A2 size top-folding card base from Classic Crest Solar White 110# cardstock along with layering panels and 1/4″-ish strips (not measured) from Classic Crest Solar White 80# cardstock, Bonsai Green 80# cardstock and Habanero Red 80# cardstock. As I often love to do, I rounded the bottom right corner of the card base and all the layers. I arranged the strips in a diagonal fashion across the front panel, trimmed the edges and adhered the panel to the red layer, then adhered the piece to the front of the card base. I stamped the sentiment in red ink, then die cut three stockings from Classic Crest Solar White 80# cardstock, Bonsai Green 80# cardstock and Habanero Red 80# cardstock. I assembled the stockings and affixed them to the front of the card with foam squares, then added the flat-back pearls to the stockings and several in the upper left corner.
I embellished the inside panel with leftover red, white and green strips down the left side, stamped the sentiment in red ink, and adhered the panel to the green layer.
Other products used: Stamps: Stampin’ Up Cozy Christmas stamp set Ink: Stampin’ Up Real Red ink Dies/Punches: QuicKutz Stocking die Accessories: Tombow Mono permanent adhesive, Bearly Art precision craft glue, Gemini Junior, MISTI stamp tool, Flourish with a Bling red and green flat-back pearls, Scrapbook Adhesives 3D Foam Squares Variety Pack (small white)
I hope you’ve enjoyed today’s project and you’re inspired to get crafty! Be sure to check out all the awesome cardstock and other goodies at CutCardStock (adhesives, labels, stickers, pens, watercolors and ribbon to name a few). And head on over to the CutCardStock Facebook Page for more inspiration! Thanks so much for stopping by today – we’ll see you next time!
11/25/20 Winner at Lemon Shortbread Challenge Blog! 11/30/20 Top Rocker at 613 Avenue Create! 12/5/20 Top 3 at Let’s Craft and Create!
Hi everyone! Happy Fri-YAY! Well, when you’re retired, every day is like a Friday, lol! I’m stoked to be back on the CutCardStock blog today with an awesome DT inspiration project featuring Bonsai Green and Habanero Red cardstock that was included in our Designer’s Pack – which happens to be on sale this month so be sure to get some! Affiliate links are used in this post at no cost to you. I really appreciate your support! I created a pretty Christmas card in traditional red, green and white with a pop of silvery white!
I cut a standard A2 size side-folding card base and two panels from Classic Crest Solar White cardstock. I also cut layering panels from Habanero Red cardstock, Curious Metallic White-Silver cardstock and Bonsai Green cardstock. I stamped the front image and sentiment in brown ink on one of the white panels and colored the pine boughs with Nuvo alcohol markers. I stamped the cardinal in red ink and cut it with the coordinating die along with two more die cuts which I layered for a little dimension. I added a strip of red glitter washi tape down the right side and adhered all the panels together and then to the card front. The finishing touch was the addition some snowflake bling.
I embellished the inside panel with red glitter washi tape and silver white and green cardstock strips, stamped the sentiment in brown ink, and layered the panel on green cardstock.
And one more peek… so loving how this turned out! Traditional Christmas colors are the best!
Other products used: Stamps: Prickley Pear Stamps Cardinal 2 clear stamp set, CAS-ual Fridays Stamps Snowy Sayings stamp set Ink: Memento Espresso Truffle ink; Nuvo alcohol markers- 420, 466; Stampin’ Up Real Red ink Dies/Punches: Prickley Pear Stamps Cardinal die Accessories: Bearly Art precision craft glue, Scotch ATG, MISTI stamp tool, Gemini Junior, Peachy Cheap Red Glitter Washi Tape, Eyelet Outlet Snowflake Bling
I hope you’ve enjoyed today’s project and you’re inspired to get crafty! Be sure to check out all the awesome cardstock and other goodies at CutCardStock (adhesives, labels, stickers, pens, watercolors and ribbon to name a few). And head on over to the CutCardStock Facebook Page for more inspiration! Thanks so much for stopping by today – we’ll see you next time!
11/1/20 Top 3 at Lil Patch of Crafty Friends Challenge Blog!
Hi everyone! Happy Hump Day! I’m stoked to be back on the CutCardStock blog today with an awesome DT inspiration project featuring more of the Royal Sundance cardstock that was included in our Designer’s Pack – which happens to be on sale this month so be sure to get some! Affiliate links are used in this post at no cost to you. I really appreciate your support! I created a motivational ATC (artist trading CUBE) with a different word on each of the six sides! This will be an awesome addition to my desk showing a different ‘motivational’ side each day! ;)
This is the second artist trading cube I’ve made and they are so much fun! I’m sharing my template with you today so you can make your own! A 2-1/2″ cube fits perfectly on an 8-1/2″ x 11″ sheet of cardstock: On long side score at 1/2″, 3″, 5-1/2″, 8″, and 10-1/2″. Rotate cardstock to short side and score at 1/2″, 2-1/2″ (down to fourth horizontal score line), 3″, 5-1/2″, 6″ (down to fourth horizontal score line) and 8″. Using the photo below as a reference, remove the outer-most sections from cube base. Miter the corners of all tabs. The pencil lines in the photo represent the score lines and the thick black lines represent the cut lines.
I cut my cube base from Royal Sundance Felt Natural cardstock which is nice and sturdy, and an excellent choice of cardstock for an artist trading cube. Each side has three layers, so I die cut six stitched squares from Pop-Tone Razzleberry cardstock, six squares from Curious Metallic Chestnut cardstock, and six stitched floral squares (extra wide Washi Tape on Classic Crest Baronial Ivory cardstock used here) and layered them together so I had one for each side. I typed the motivational words on the computer on Baronial Ivory, trimmed them, and applied one to each layered square.
Let me share a tip – you want to decorate the sides BEFORE assembling the cube with glue. When adhering the layered squares to the six sides of the cube base, be sure to place them in proper orientation (up, down or sideways) so viewing is seamless. It’s easiest to ‘dry assemble’ the cube (without adhering) and mark the orientation prior to adhering each square. I put a small pencil number in the center which was covered up later when adhering the layered squares. When you have everything the way you want it, assemble the cube, tucking in the tabs and adhering one tab at a time. Here are shots of each of the sides:
And one more peek… so loving how this turned out! As with the rest of my ATCs (cards, coins and cube), I won’t trade, lol!
Other products used: Dies/Punches: My Favorite Things Die-namics Stitched Square STAX dies, Spellbinders Classic Squares Large die Accessories: Eyelet Outlet Extra Wide Butterfly & Flowers Washi Tape, Bearly Art precision craft glue
I hope you’ve enjoyed today’s project and you’re inspired to get crafty! Be sure to check out all the awesome cardstock and other goodies at CutCardStock (adhesives, labels, stickers, pens, watercolors and ribbon to name a few). And head on over to the CutCardStock Facebook Page for more inspiration! Thanks so much for stopping by today – we’ll see you next time!
Hi friends! A big giantWELCOMEto the CutCardStock blog‘s Happy Halloween Blog Hop going on October 17th and 18th – starting at 7:00 AM Central Time today and ending at 11:55 PM Central Time tomorrow! Affiliate links are used in this post at no cost to you. I really appreciate your support! SO COME HOP WITH US!
Woot-woot! There is a $40 CutCardStock gift card up for grabs!
The winner will be randomly selected via number generator and announced on Monday, October 19th, on the CutCardstock blog and Facebook page!To be eligible for the $40 gift card, you must comment at each stop along the hop (good for ONE gift card entry) or upload a Halloween-themed project using CutCardStock products (good for TWO gift card entries). We would absolutely LOVE IT if you link up a project with us, PLUS it will increase your chances to win the gift card! ;)
Did you ever have ric rac sewn on your clothes when you were younger?! I sure did – and I still love it! I used several fun dies along with some stamping to create this fun card.
I adhered the ric rac die cuts to the front of the card base at an angle and then trimmed the edges. I adhered the BOO! layered die cuts in the lower right corner and small gemstones in the Halloween colors above the ric rac die cuts. I stamped and die cut a skull (an after-thought and not shown in the photo above) and popped it up on dimensionals on top of the ric rac die cuts.
For the inside, I adhered the remaining ric rac die cut at the same angle as those on the front, and then stamped the sentiment and the spider in black ink.
Other products used: Stamps: Stampin’ Up Howl-o-ween Treat stamp set Ink: Memento Tuxedo Black ink, Copic black multi-liner pen Dies/Punches: My Favorite Things Die-namics Stitched Ric Rac die, Stampin’ Up Boo To You Framelits Accessories: Bearly Art precision craft glue, Big Shot, MISTI stamp tool, Darice orange, black, purple, green and yellow gemstones
= = = = = = = = = = = = = = = =
Okay, let’s get back to the hop! Here is the complete list of stops:
1. CutCardstock blog 2. Teri 3. Raechelle 4. Crystal 5. Judy M 6. Maureen 7. Leslie >>> you’re here! <<< 8. Judy V 9. Janet A 10. CutCardStock blog… C’mon, you know you want to link up! The linky tool is at the end of the post on the CutCardstock blog so that’s where you’ll want to head to link up your project – each upload is worth two entries for the gift card! Two entries per person!
You should have arrived here from Maureen‘s blog and your next stop is Judy V‘s blog! I hope you are enjoying the hop and seeing all the fun Halloween projects! If you get lost along the way or if you landed here in the middle of the hop somehow and want to join in the fun, be sure to head on over to the CutCardstock blog to read all the details and start from the beginning!
In closing, I hope you’ve enjoyed seeing my Halloween card and you’re inspired to get crafty AND hop with us AND link up a Halloween-themed project! Be sure to check out all the awesome cardstock and other goodies at CutCardStock (adhesives, labels, stickers, pens, watercolors and ribbon to name a few). And head on over to the CutCardStock Facebook Page for lots of crafty inspiration! Thanks so much for stopping by today – we’ll see you next time!